Search the Community
Showing results for tags 'Vector'.
-
Hello, I am having a hard time trying to figure out how to save a file to be able to pull up and continue working on it on adobe illustrator. I have been able to save a file from adobe into my Dropbox and pull it to work on affinity designer on iPad but I do not know how to do the same from affinity so that I can continue on illustrator.
-
One of my first vector works in Designer... and what I imagine when I misread "planetarium" (which is often). Your comments, feedback, and most of all, time, are much appreciated!

-
Shy Based on yet another sketch from Inktober 2017 [07:Shy] All Vector! Size in AD 800 x 350mm 300dpi (Uploaded Size:2834x1239px/300dpi/hq jpeg)
-
In Affinity Designer on iPad, is there such a tool that allows one to trim curves to other curves. For example, if I have a Donut Shape with a square shape on top of it and I want to take the tilted square shape out of the donut shape but want to leave the curves of two sides of the square intact while trimming the other two sides to the intersection of the outside and inside curves of the donut, then trim the donuts curves that fall inside the shape to the curves of the two edges of the square. In this example the Donut shape after the Trim would be a closed shape and the two lines of the square would be and open shape. If anyone is familiar to AutoCAD’s Trim tool, exactly that tools functionality but in Affinity Designer for iPad. Your help would be greatly appreciated. Thanks!
-
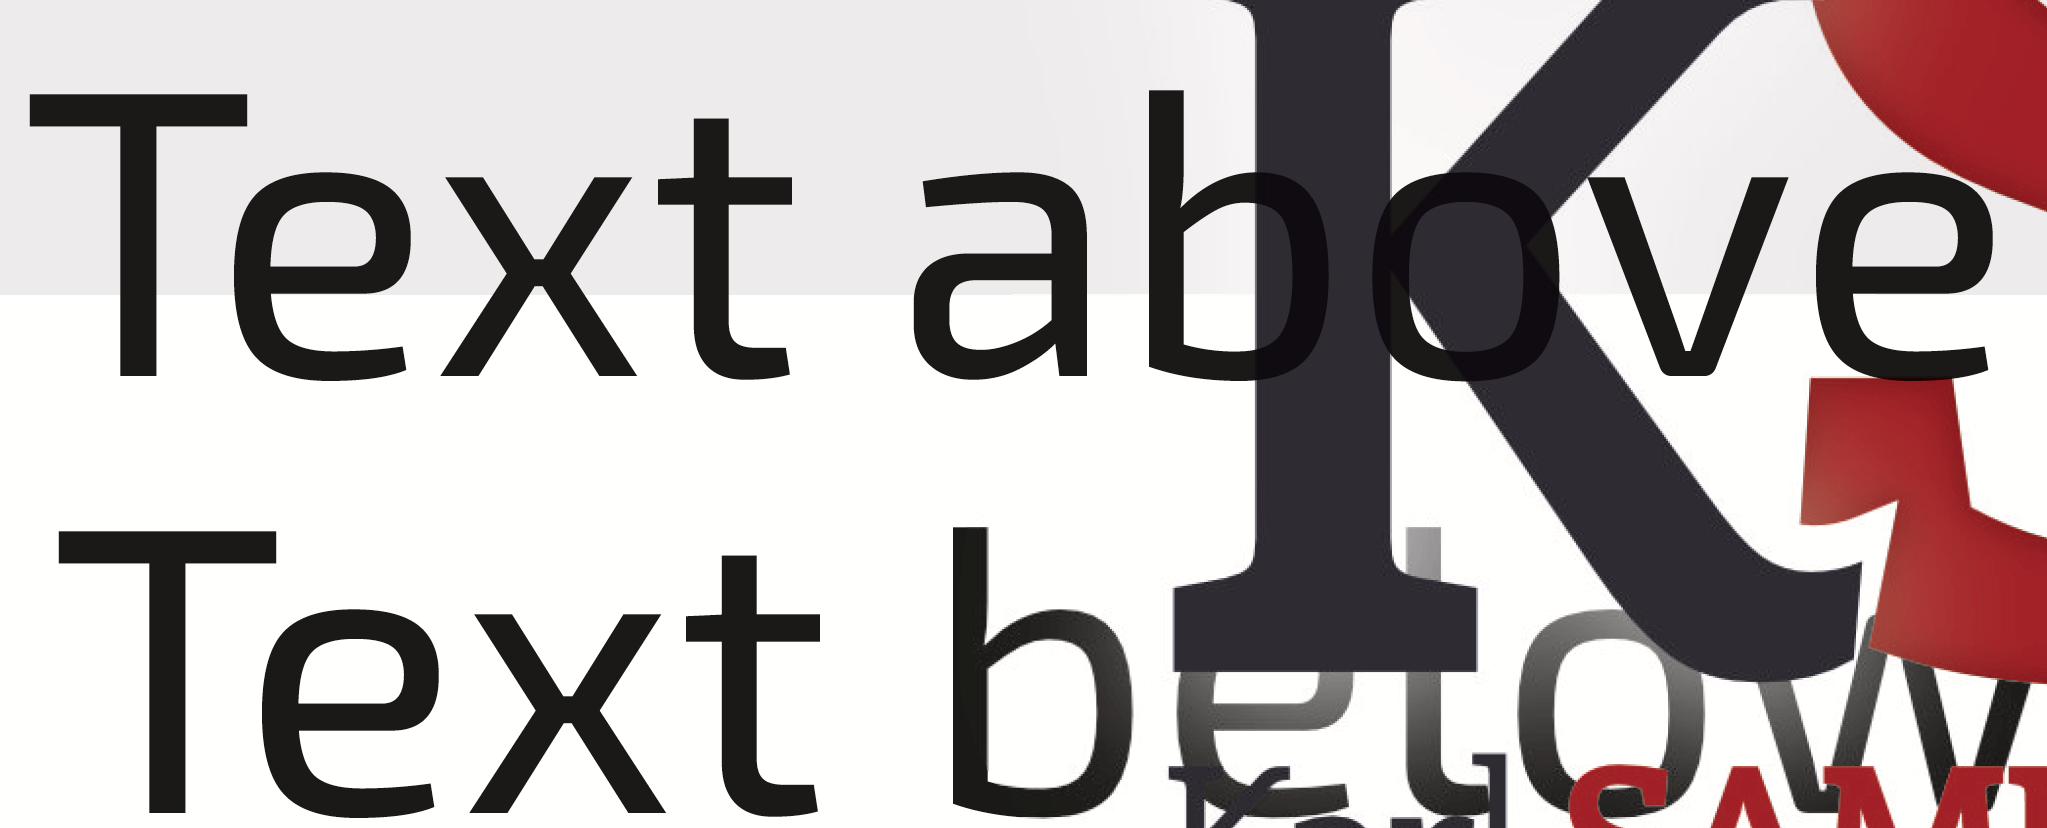
 I exported a sample page as PDFx3 containing: a logo created in Illustrator and exported as PDF (it has some effects, white glow, I know) and a text above and text below the logo so it is affected by the glow effect. Publisher rasterizes the logo's edges, and the text below is also rasterized. to compare i made the same file in Indesign and the pdf is correct: the logos edges remain vector shapes of course inside the logo there are pixels because of the shadow-effects but that's ok. the text underneath has sharp vector edges and a pixel fill - that's also ok. This needs to be addressed before the final release of Publisher to be used in production. Publisher: (pixelated in the output resolution 300dpi which is enough for a photo but not for a vector logo) indesign (vector edges, even in the effects-areas):
-
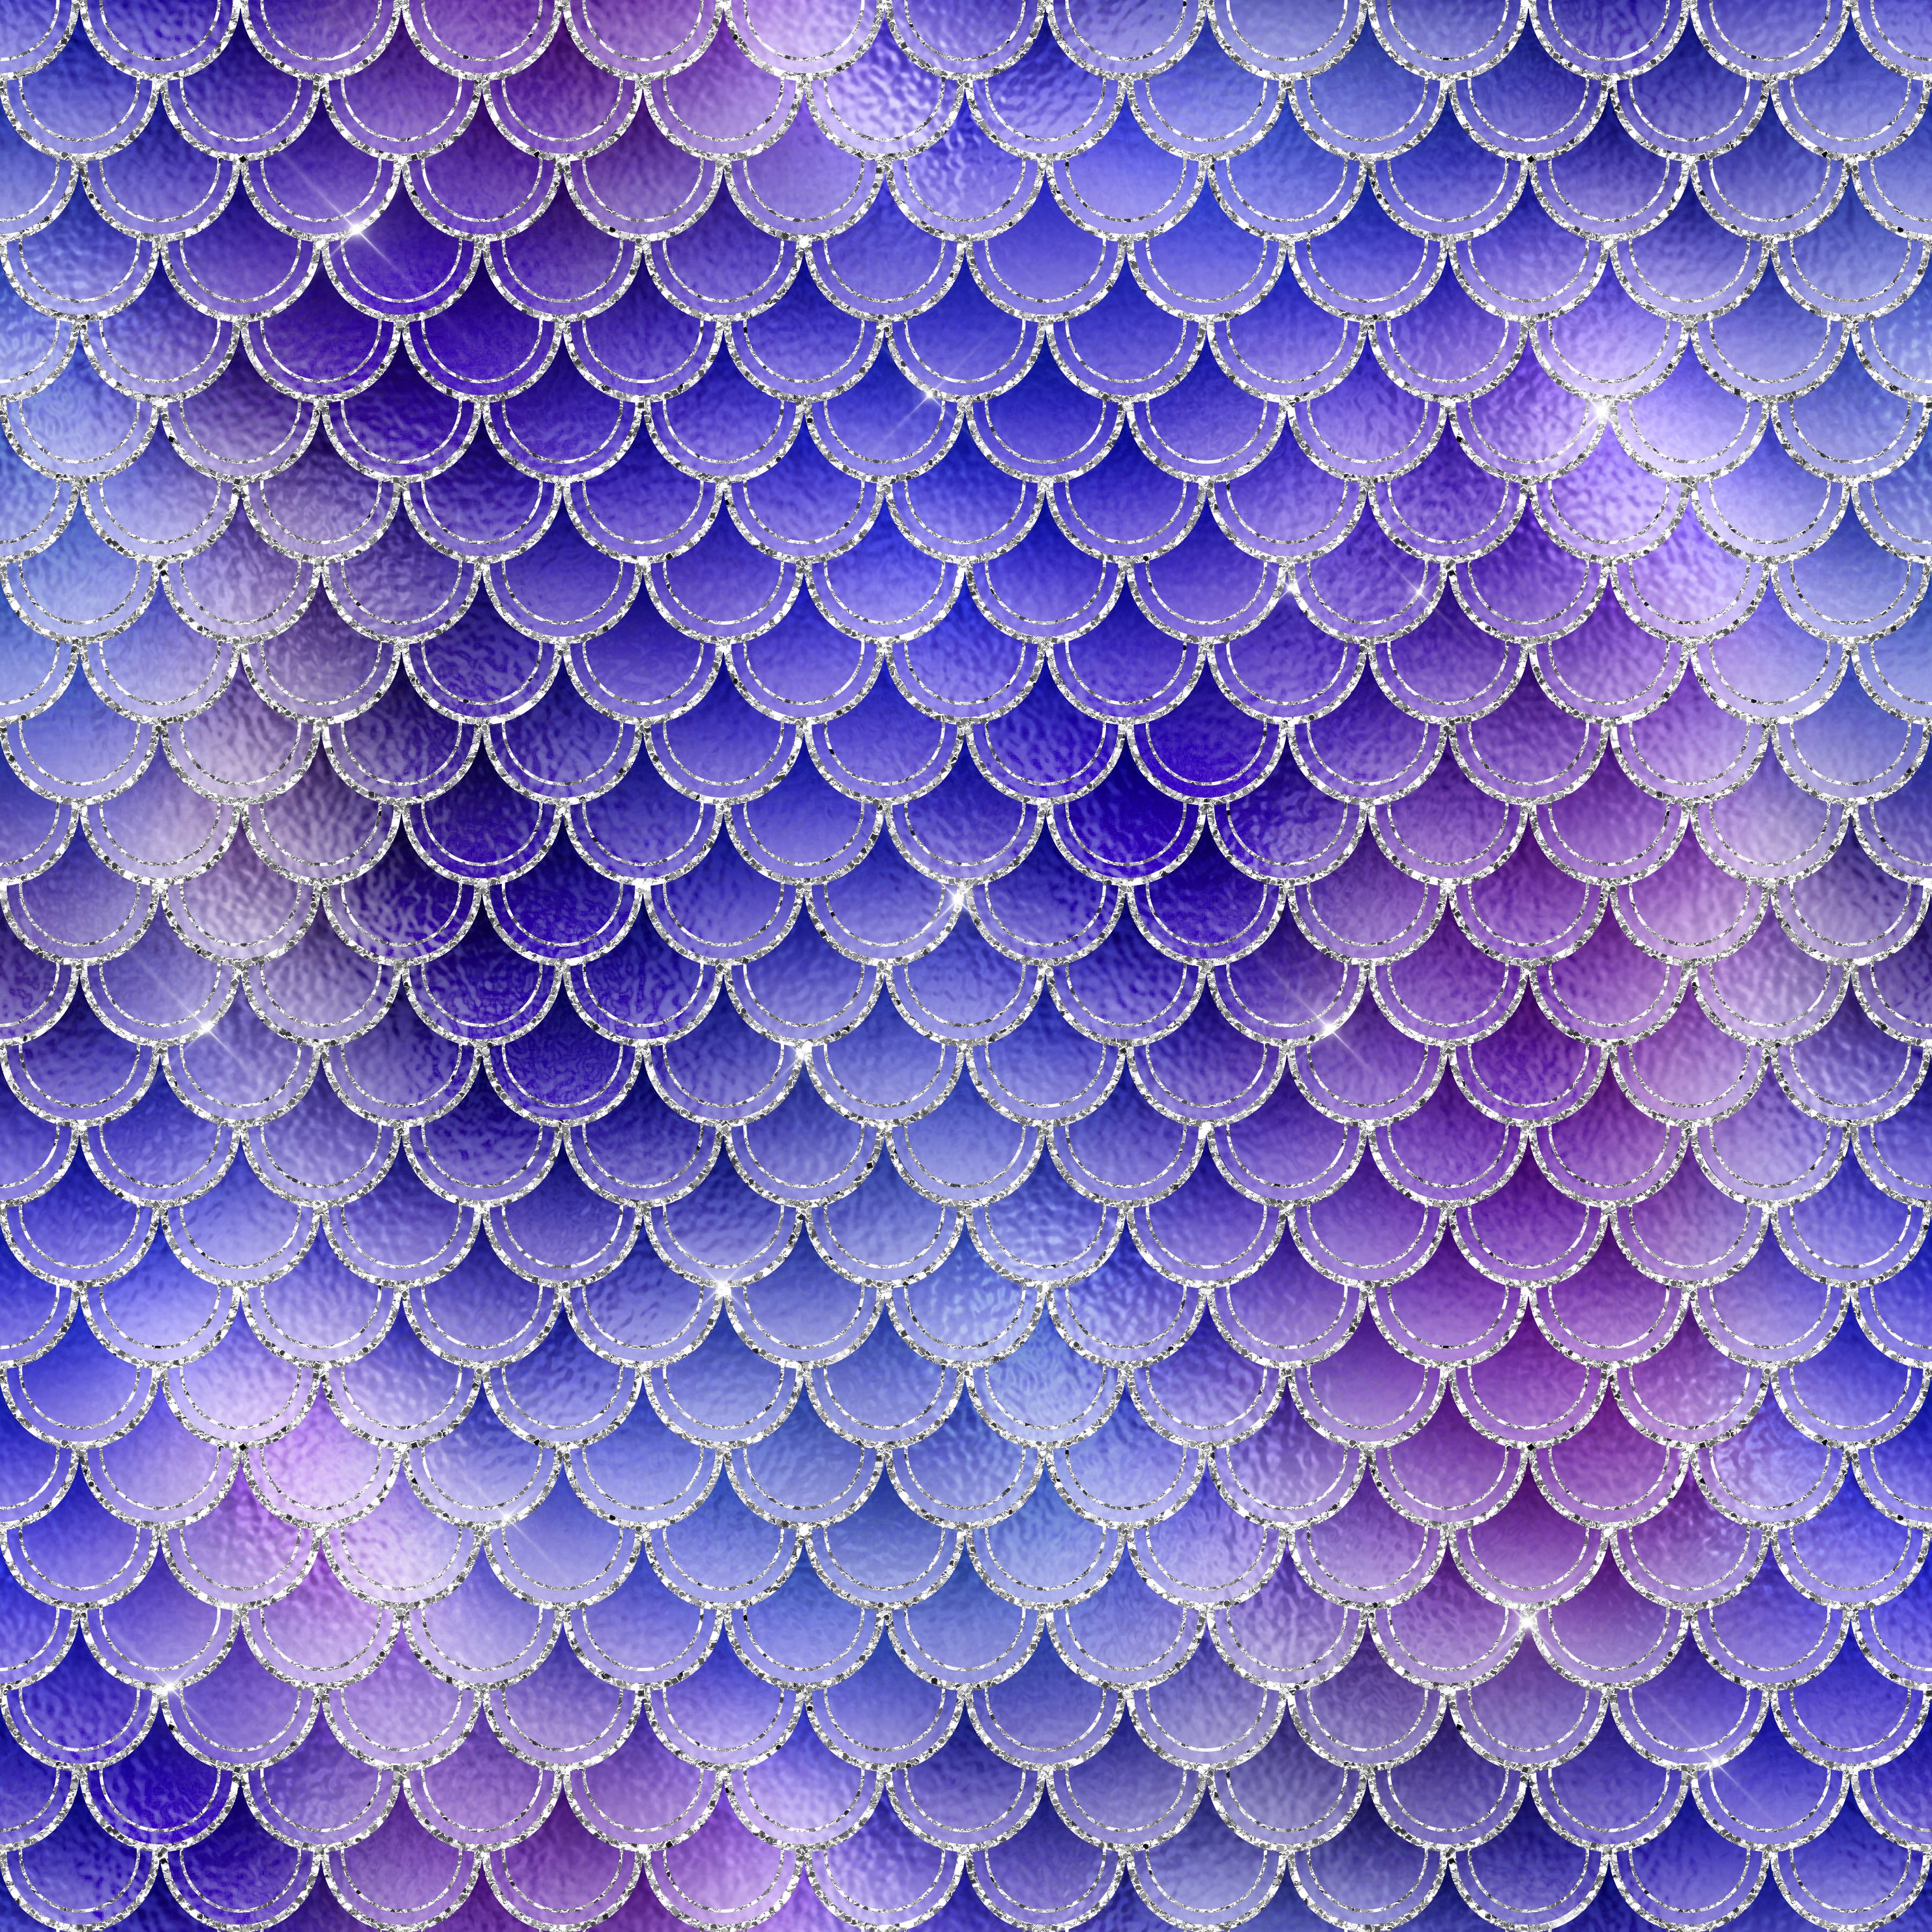
 Hi all,I really like Affinity Designer but the more features arrive, the more complicated is becomes.. There is a new challenge for me and Affinity Designer for which I would need your help and ideas: Creating a mermaid digital paper as a seamless repeating pattern. I got an at least basic version of the attached one (no glitter, no lightning etc.) but due to the shadows it wasn't seamless on the vertical. If seamless isn't possible due to the different lightning effects of my sample picture attached, how could I achieve anyway the digital paper mermaid look of my sample? Important: It definitely has to be scalable vector, no copied images etc.. Thanks a lot in advance. I'm looking so forward to your help and your ideas! Foxi
-
Hy everybody, I'm struggling with a common effect I cannot reproduce in AD up to know (I'm new to AD and didn't find a possibility). Often I have to use some kind of glitter that is scalable -> it has to be vector and (this would be best) a style or whatever so that I can just apply it to other objects. Here is a tutorial I found for Adobe Illustrator - how can we realise exactly this effect in AD? https://design.tutsplus.com/tutorials/how-to-create-a-vector-glitter-text-art-effect--vector-6133 Thank you so much in advance for your help! Best, Foxi
-
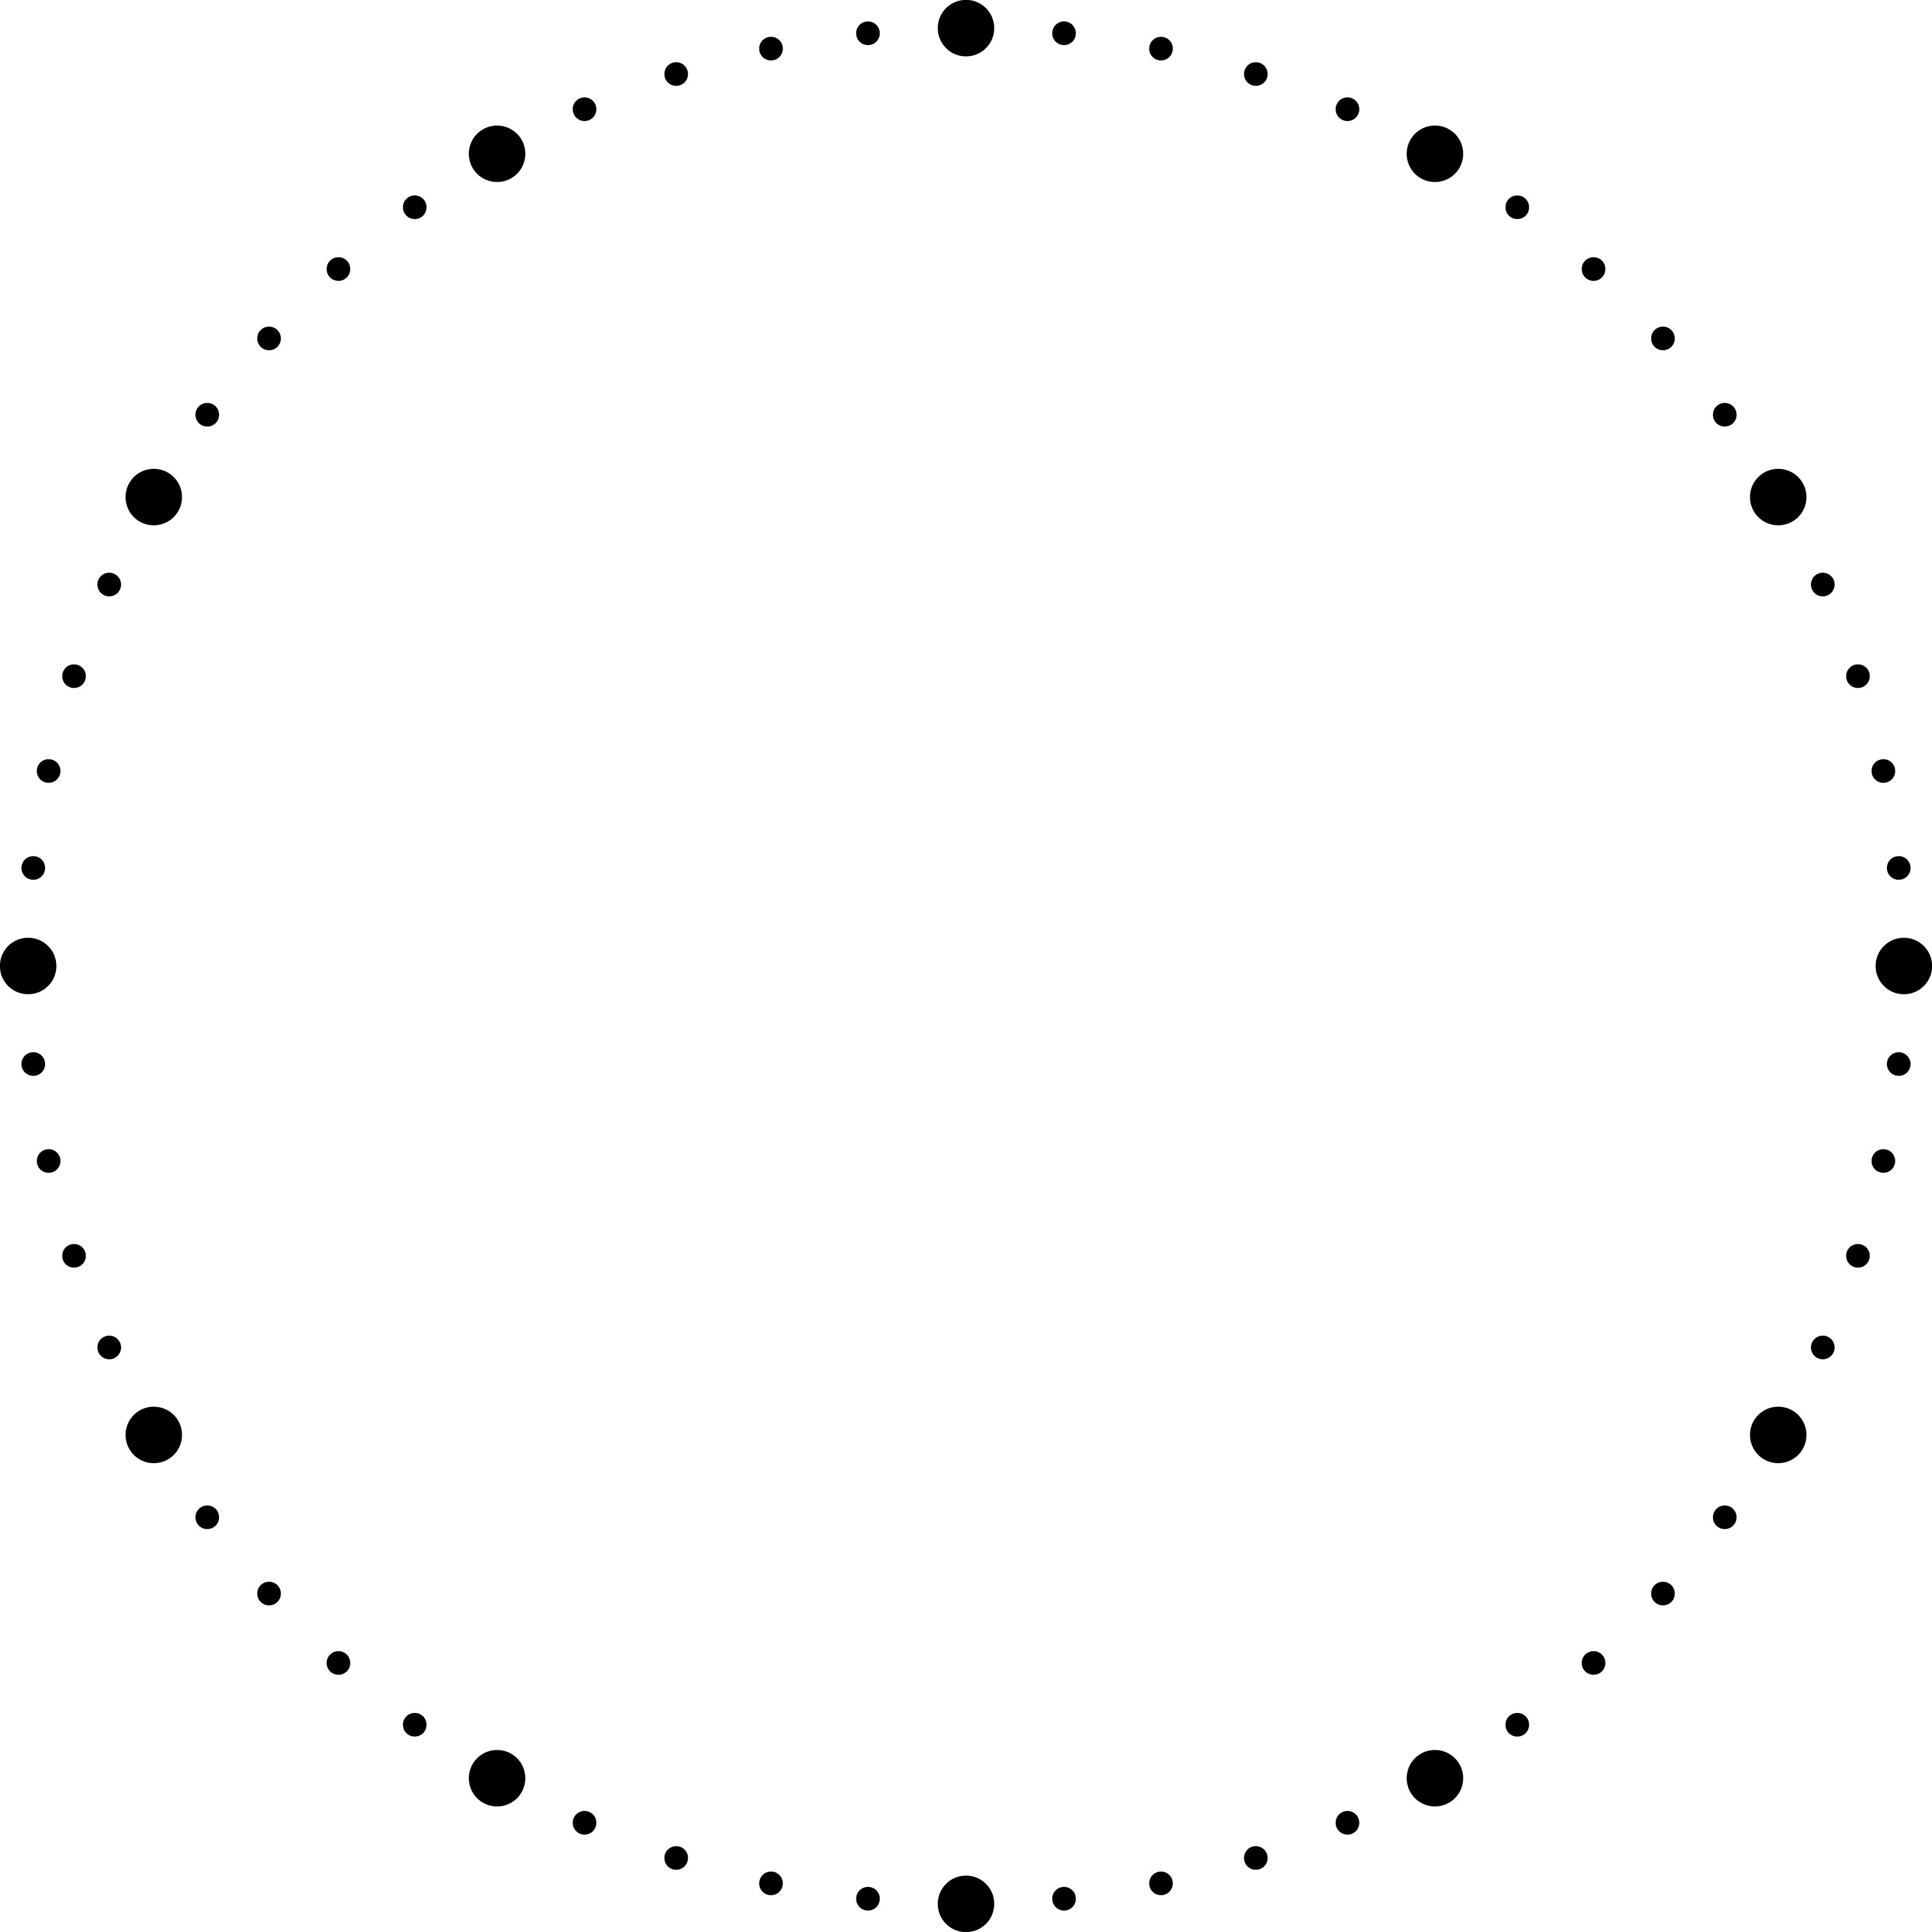
 Hi everyone, I'd like to edit the attached clock dial - can someone please tell me how I could resize all the dots simultaneously? I tried doing it one by one, but that's really tedious Many thanks! Joanna
-
 Hello! So, my question is basically, "what's the big jump/difference between AP and AD?". I know this question has already been asked and the short answer is: "AP for pixel and photo editing and AD for vector-based graphics and illustration." Here's my point: I've been using Photoshop and Illustrator for a while but I'm transitioning to Affinity, 'cause it's lovely. I've been doing social media posts that mix images and graphics (text, shapes, graphic elements, etc) since before the transition, and it was clear to me the point where PS and AI intersected. I could not do "organic" strokes with the pen tool on Photoshop, neither could I edit text as curves. I couldn't work smoothly with gradients, merge shapes with complex operations—like pathfinder—and the list goes on. Photoshop was pretty limited in vector managing, and Illustrator couldn't do pixel work. Fast forward, I open Affinity Photo and it's like I don't need a vector software anymore. Everything I'd need to open Illustrator for is inside Affinity's pixel-based editor. As if it's not enough, AD can handle pixel manipulation—though I didn't use it enough to know its limits. I've tested both AP and AD during the free trial and, after expiration, bought Photo. I'm considering buying Designer now because their workflow together is pretty amazing, but do I really need it? What can Designer do that Photo can't? I feel like I can take the pen tool on Photo and create any shape I'd want, applying colors effortlessly. Can someone enlight me? Thanks!
 -
Audrey Hepburn: Moon River (Vector) Portrait (Affinity Designer/Photo) https://b-bertuleit.de/audrey-hepburn-portrait/
- 3 replies
-
- 5
-

-
- audrey hepburn
- portrait
- (and 5 more)
-
Vector Graphics/Portraits (Works without pixels), Affinity Designer. https://b-bertuleit.de/vektorzeichnungen/
-
 I have this: I create another vector: And I want this: Without using Pixel Persona.
 -
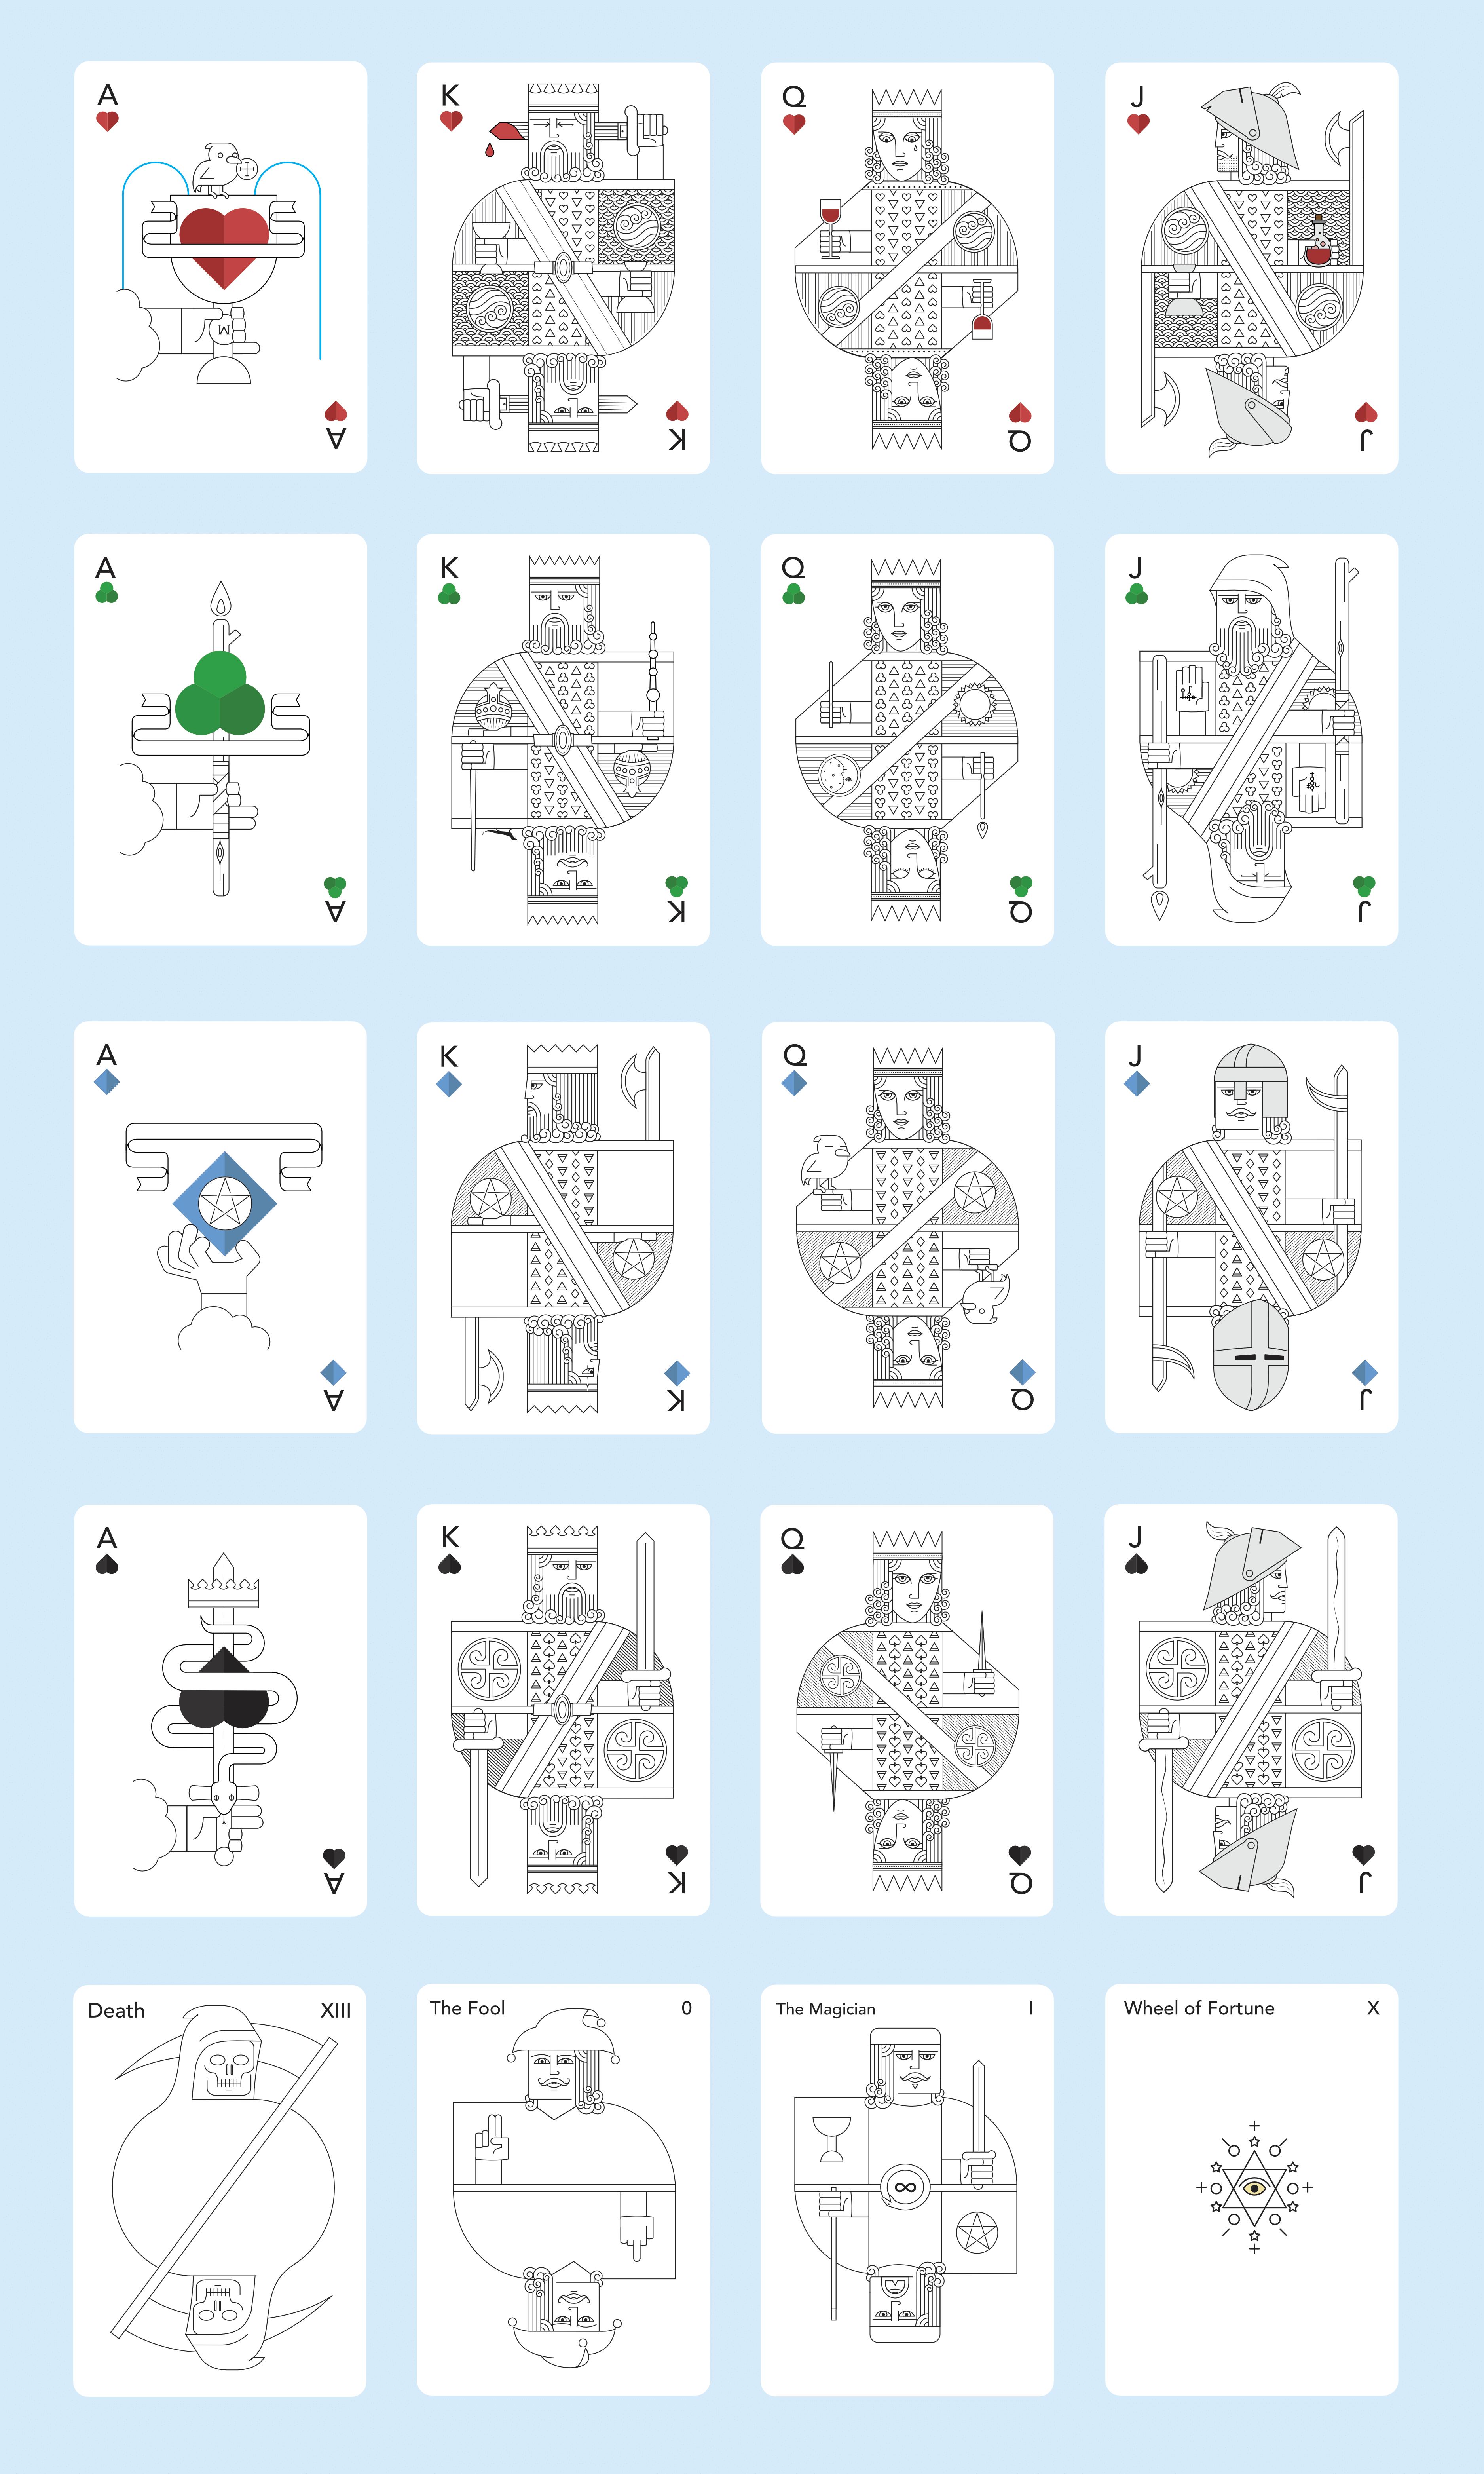
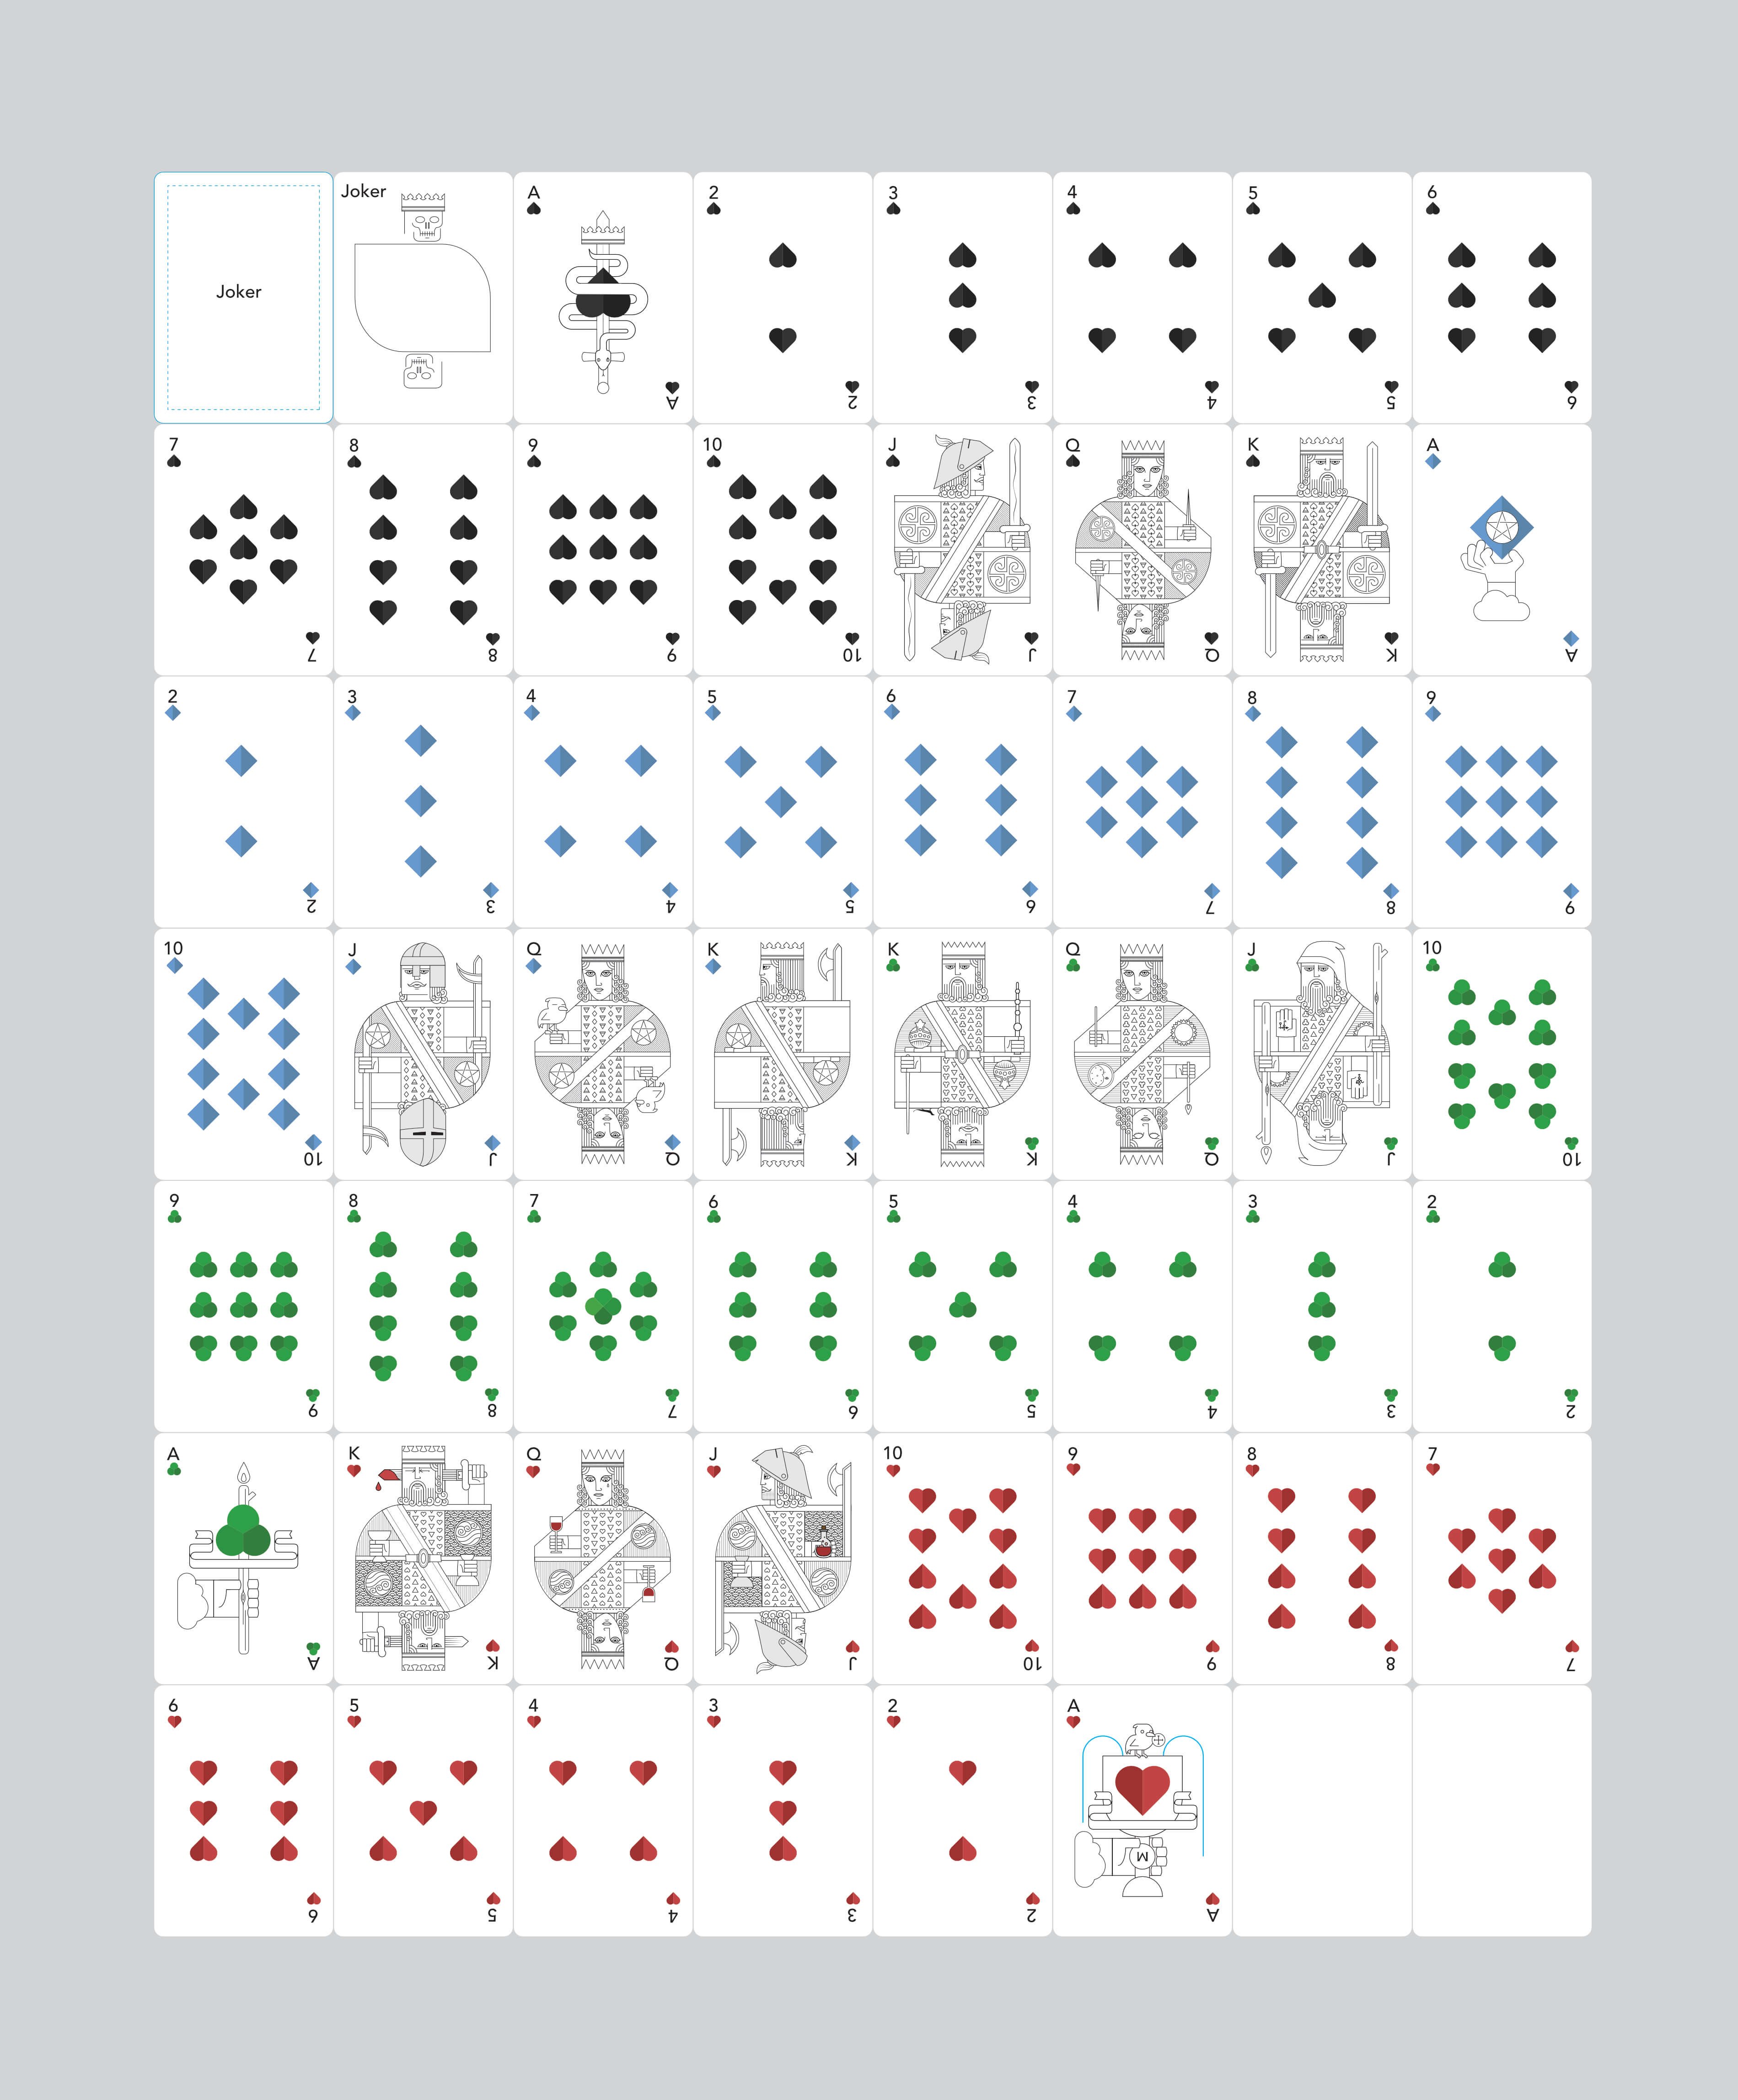
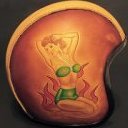
 Hey all, I've been working on a deck of cards. Still trying to flesh out the main theme I want to go for but right now its sort of based on Tarot cards. Spades, Clubs, Hearts, and Diamonds are also Swords, Wands, Cups, and Pentagrams respectively like in a tarot deck. There's also 4 colors instead of 2. The idea is for this deck to also be the minor arcana of a tarot deck and later I can design a "major arcana expansion" deck that when combined with this deck would make it into a full tarot deck. The major arcana card in a tarot deck are the ones with names like "The Magician", "The Fool", "Death", "Justice", etc. The minor arcana are the 4 suits with the Ace, 2-10, and the court cards so that would be this deck. Maybe even will include a couple Major arcana as the Joker cards. Like "The Fool" and "Death" cards since most playing card decks have 2 jokers anyways. I'm also playing around with a duality idea of each of the court cards having slightly different sides. One being normal and the other side being a bit rough or unkempt. This would make them not perfectly symmetrical which would also be good for using them as Tarot cards since a card being upside down means something different than if it is turned right side up. Most number cards can show upside down except for the diamonds so I still need to figure out that for the 2-10 of diamonds cards. Anyways, I'm rambling on now. So what do you think? Any critiques or suggestions on the design? TL;DR - I'm designing a deck of cards. What do you think?
- 48 replies
-
- 11
-
-

-
- vector
- playing cards
- (and 1 more)
-
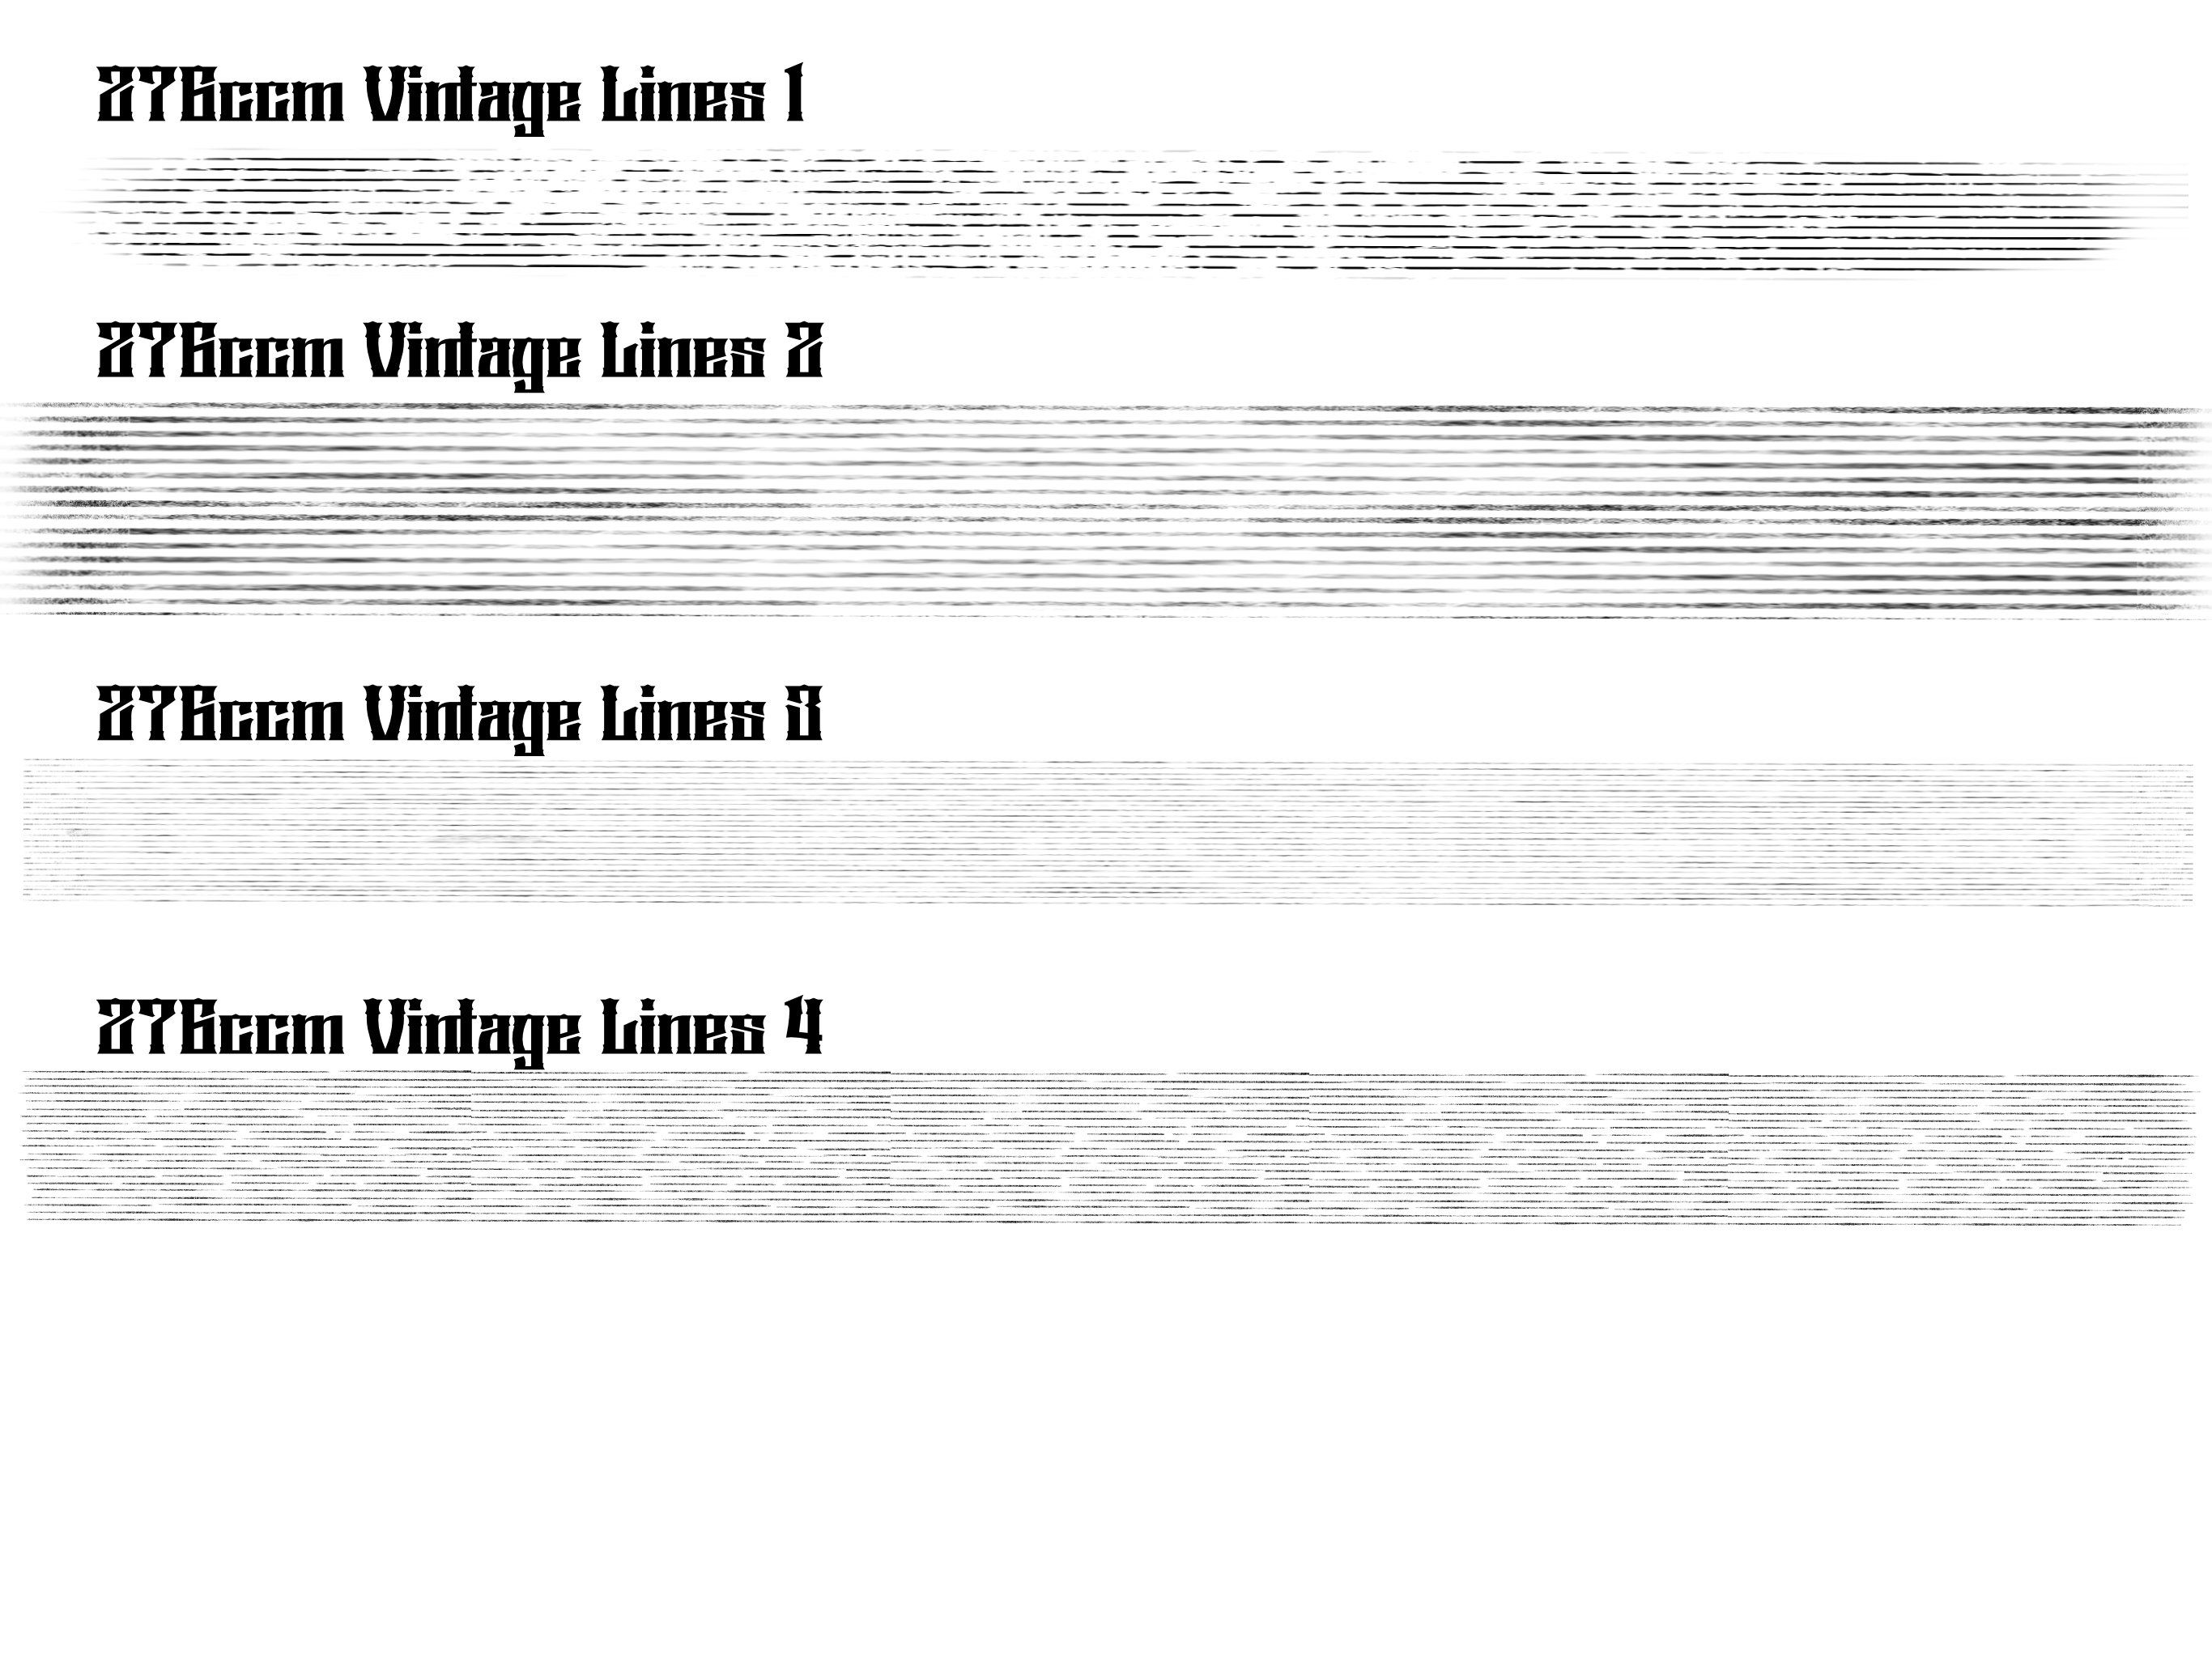
Im not sure how useful or good they are, but I made some vector brushes.. useful for me, and if anyone can use them, here you go :-) i made them for the love of vintage lettering styles, and I use it for backgrounds, like the old Sanborn Maps style.. Anyway, as I’m quite new to brush making, I’m sure they can be improved, and if I do, I’ll update them here :-) hope it it will be useful for some :-) and they can be downloaded from here.. feel free to give feedback.. good or bad is welcome as long as it is constructive:-) 276ccm Vintage Lines.afbrushes
- 21 replies
-
- 18
-
-
-
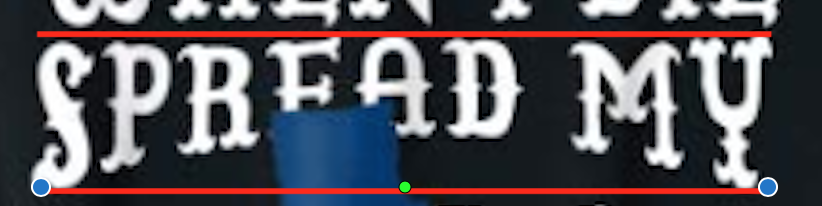
 I attached a screenshot below. My question is - how do I manipulate text like the picture to curve/warp only the bottom or top part of the text? I understand that I would likely have to convert the layer to curves. But after that, what would I do to keep the top of the text on a line, and and curve the bottom of the text as it looks in the picture. The red lines are added to emphasize what I mean. Thanks!
-
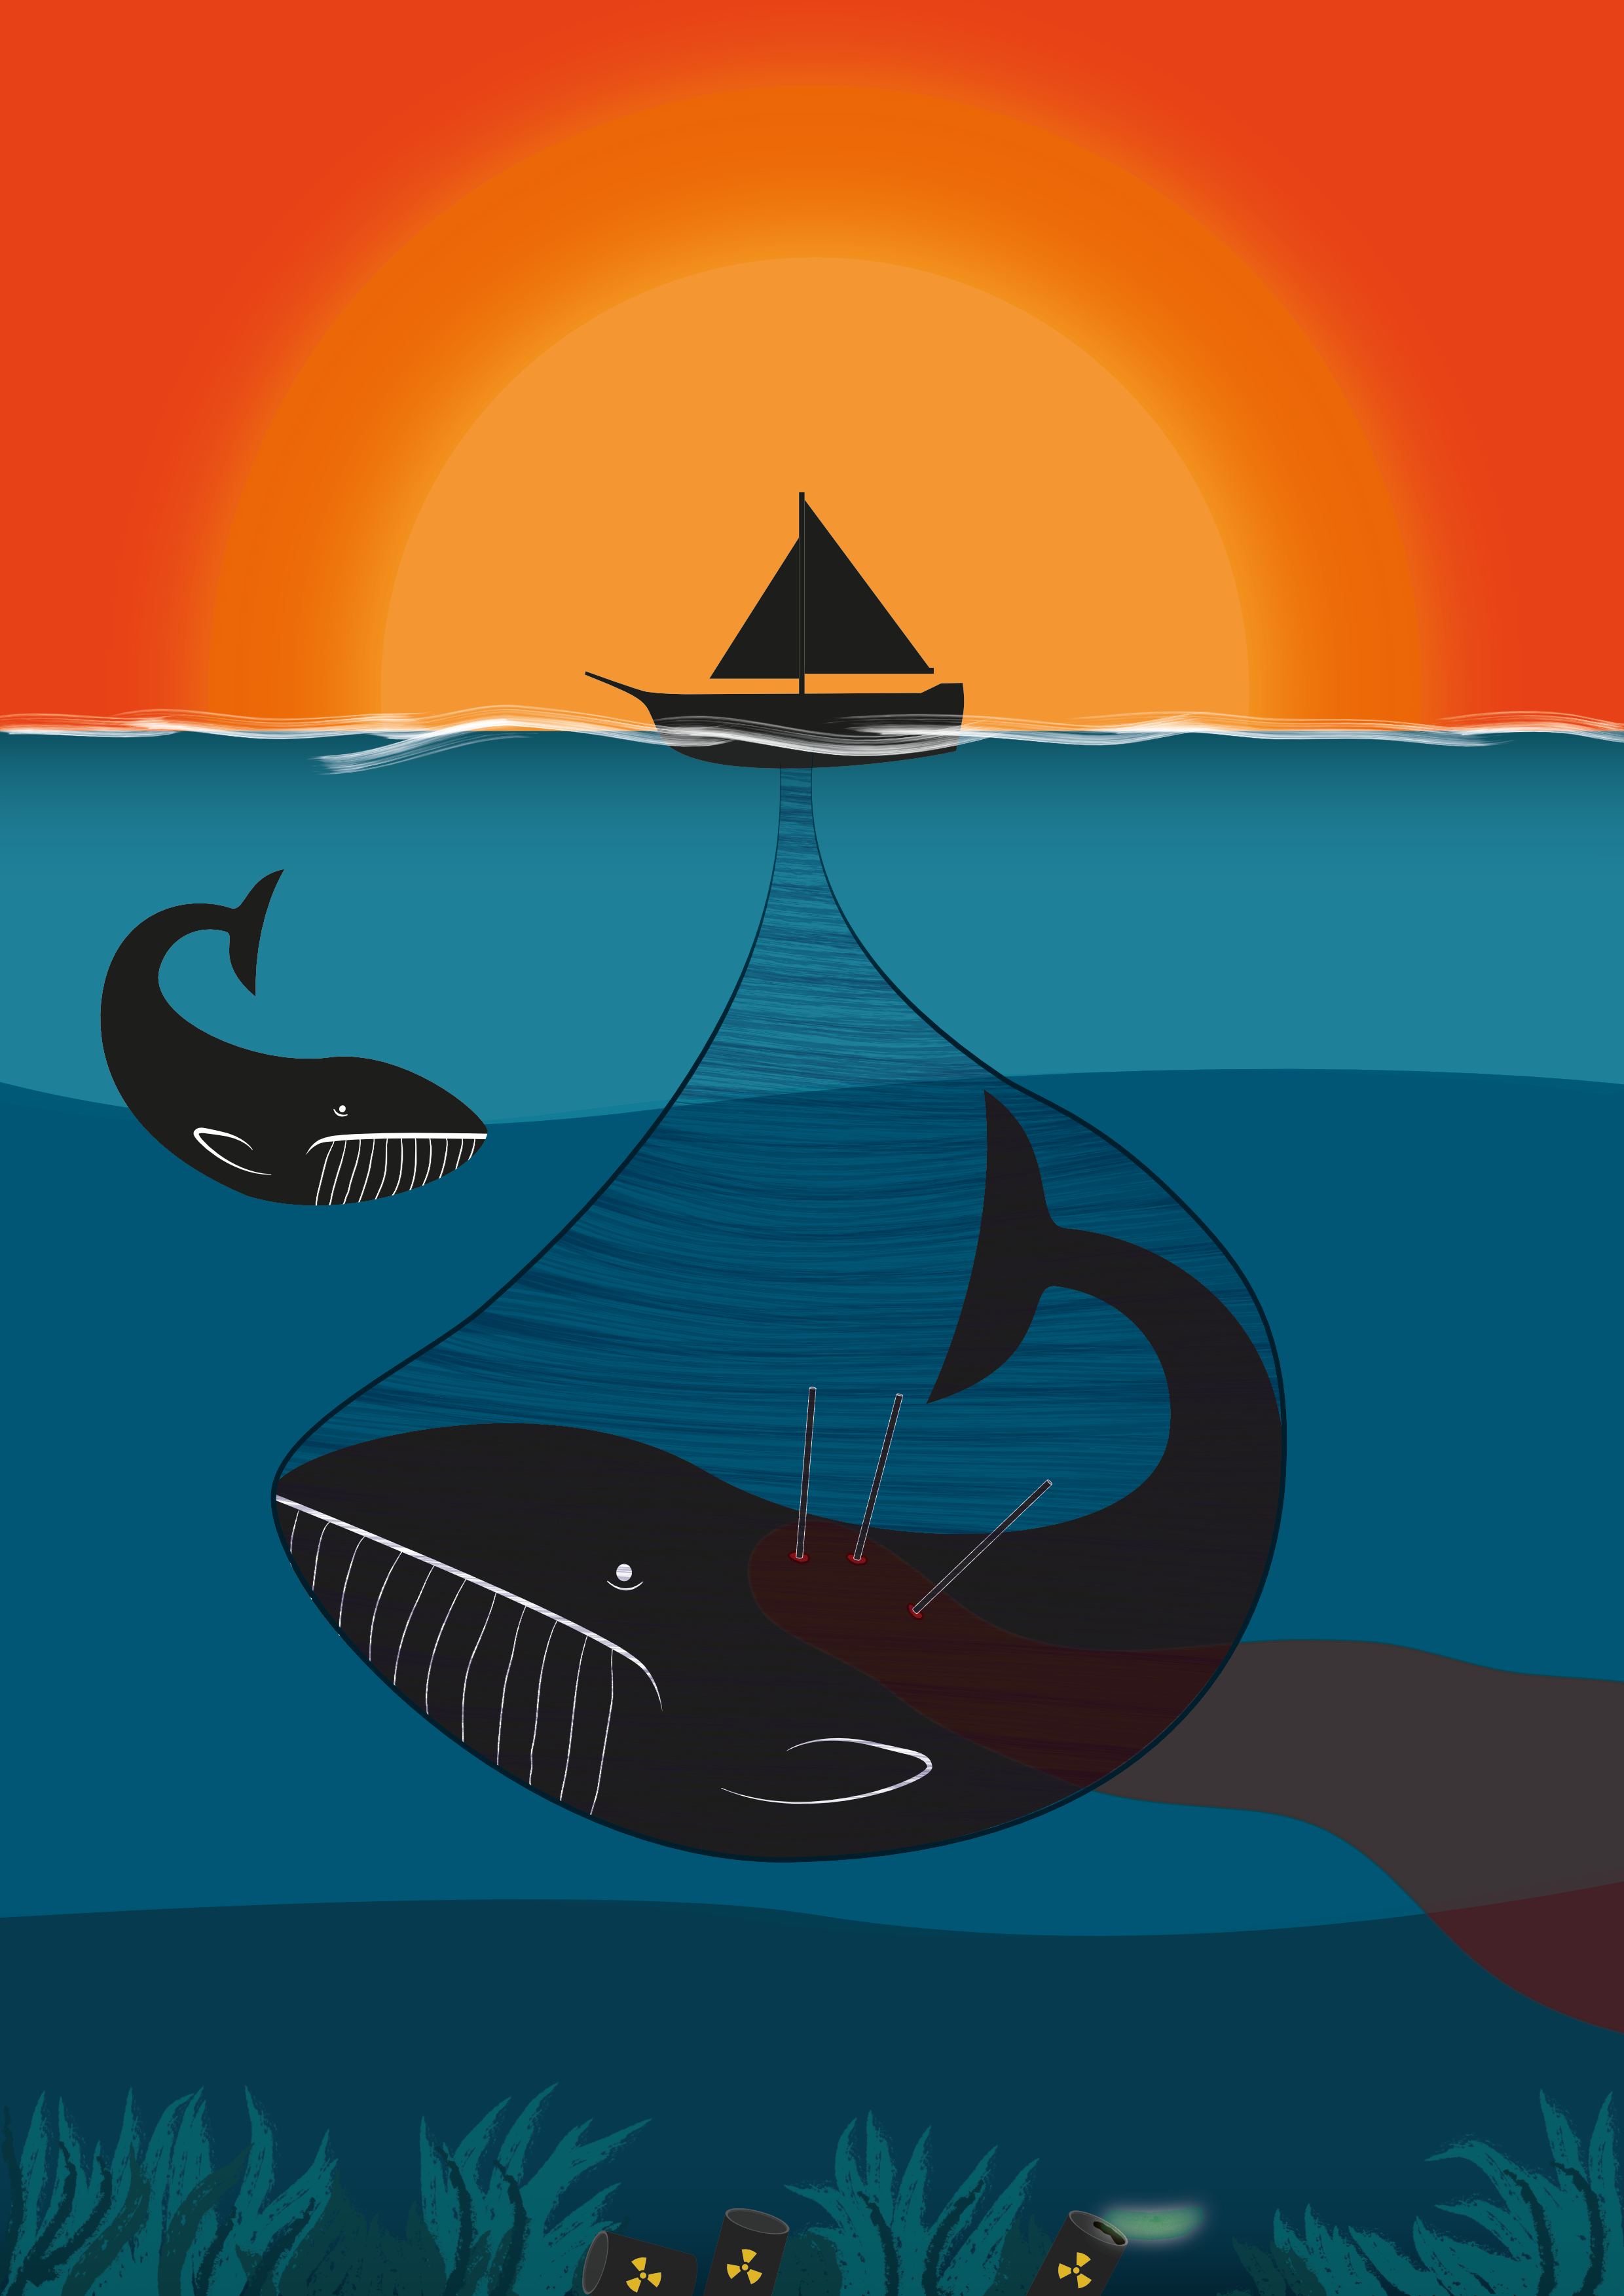
Jut a first attempt using some of your elements…
-
Made a little poster just for fun, but I like it somehow and wanted to share it. Please leave critics here if you have some
-
 Hey everyone! This is the first time I'm using the Affinity forum so I apologise if I have used it incorrectly. I have made a vector shape with a 20pt border around the edge. Is there a way to expand the vector to include the 20pt border? Thanks in advance, Matt
 -
 I was wondering if it's possible (or could be possible in an update) to have vector textures applied to vector brushes? What I mean by that is let's say I create an image of dots (all vector) then output it into a vector format could that then be used as the source texture for a vector brush? Would be great as then you would have all vector throughout a file instead of some bitmap and some vector which obviously then limits how large it can be printed at. I totally appreciate the bitmap brushes and what can be done with them but for some things (for example a halftone pattern) it would be great if they could be vector based so that they could then be output at any size when exporting. Many thanks for any input on this and apologies if it's already possible and I'm missing it somewhere as I seem to be doing that a lot lately. Very probably old age starting to set in!
 -
 *Edit* This tool would have different functionality than the existing sculpt mode of the Pencil tool. My suggestion for the Affinity Designer apps would be to add a tool along the lines of the flash selection tool. Attached below is an example of what it would functionally be able to do: Basically adjust lines/shapes without the need to select them first. It is a quality of life feature missing in almost EVERY vector illustration tool, but flash. It is a shame really. Even illustrator doesn't take advantage of this idea that lives within it's own ecosystem. This tool in Flash feels a lot like sculpting! Key features: -ability to manipulate segments and points of a vector line without selecting the object. (this also means editing separate objects is super fast) -When manipulating line segments, it does not adjust adjacent segments. (allowing the person to free-form manipulate shapes, and adjust points and segments as they see fit.) -context switches to a selection marquee when outside a certain threshold of a point or line segment. This selection marquee would add points where it intersects lines and allow the user to delete the selected segment(s), or keep the additional points in their current vector line. Let me know what you think!
-
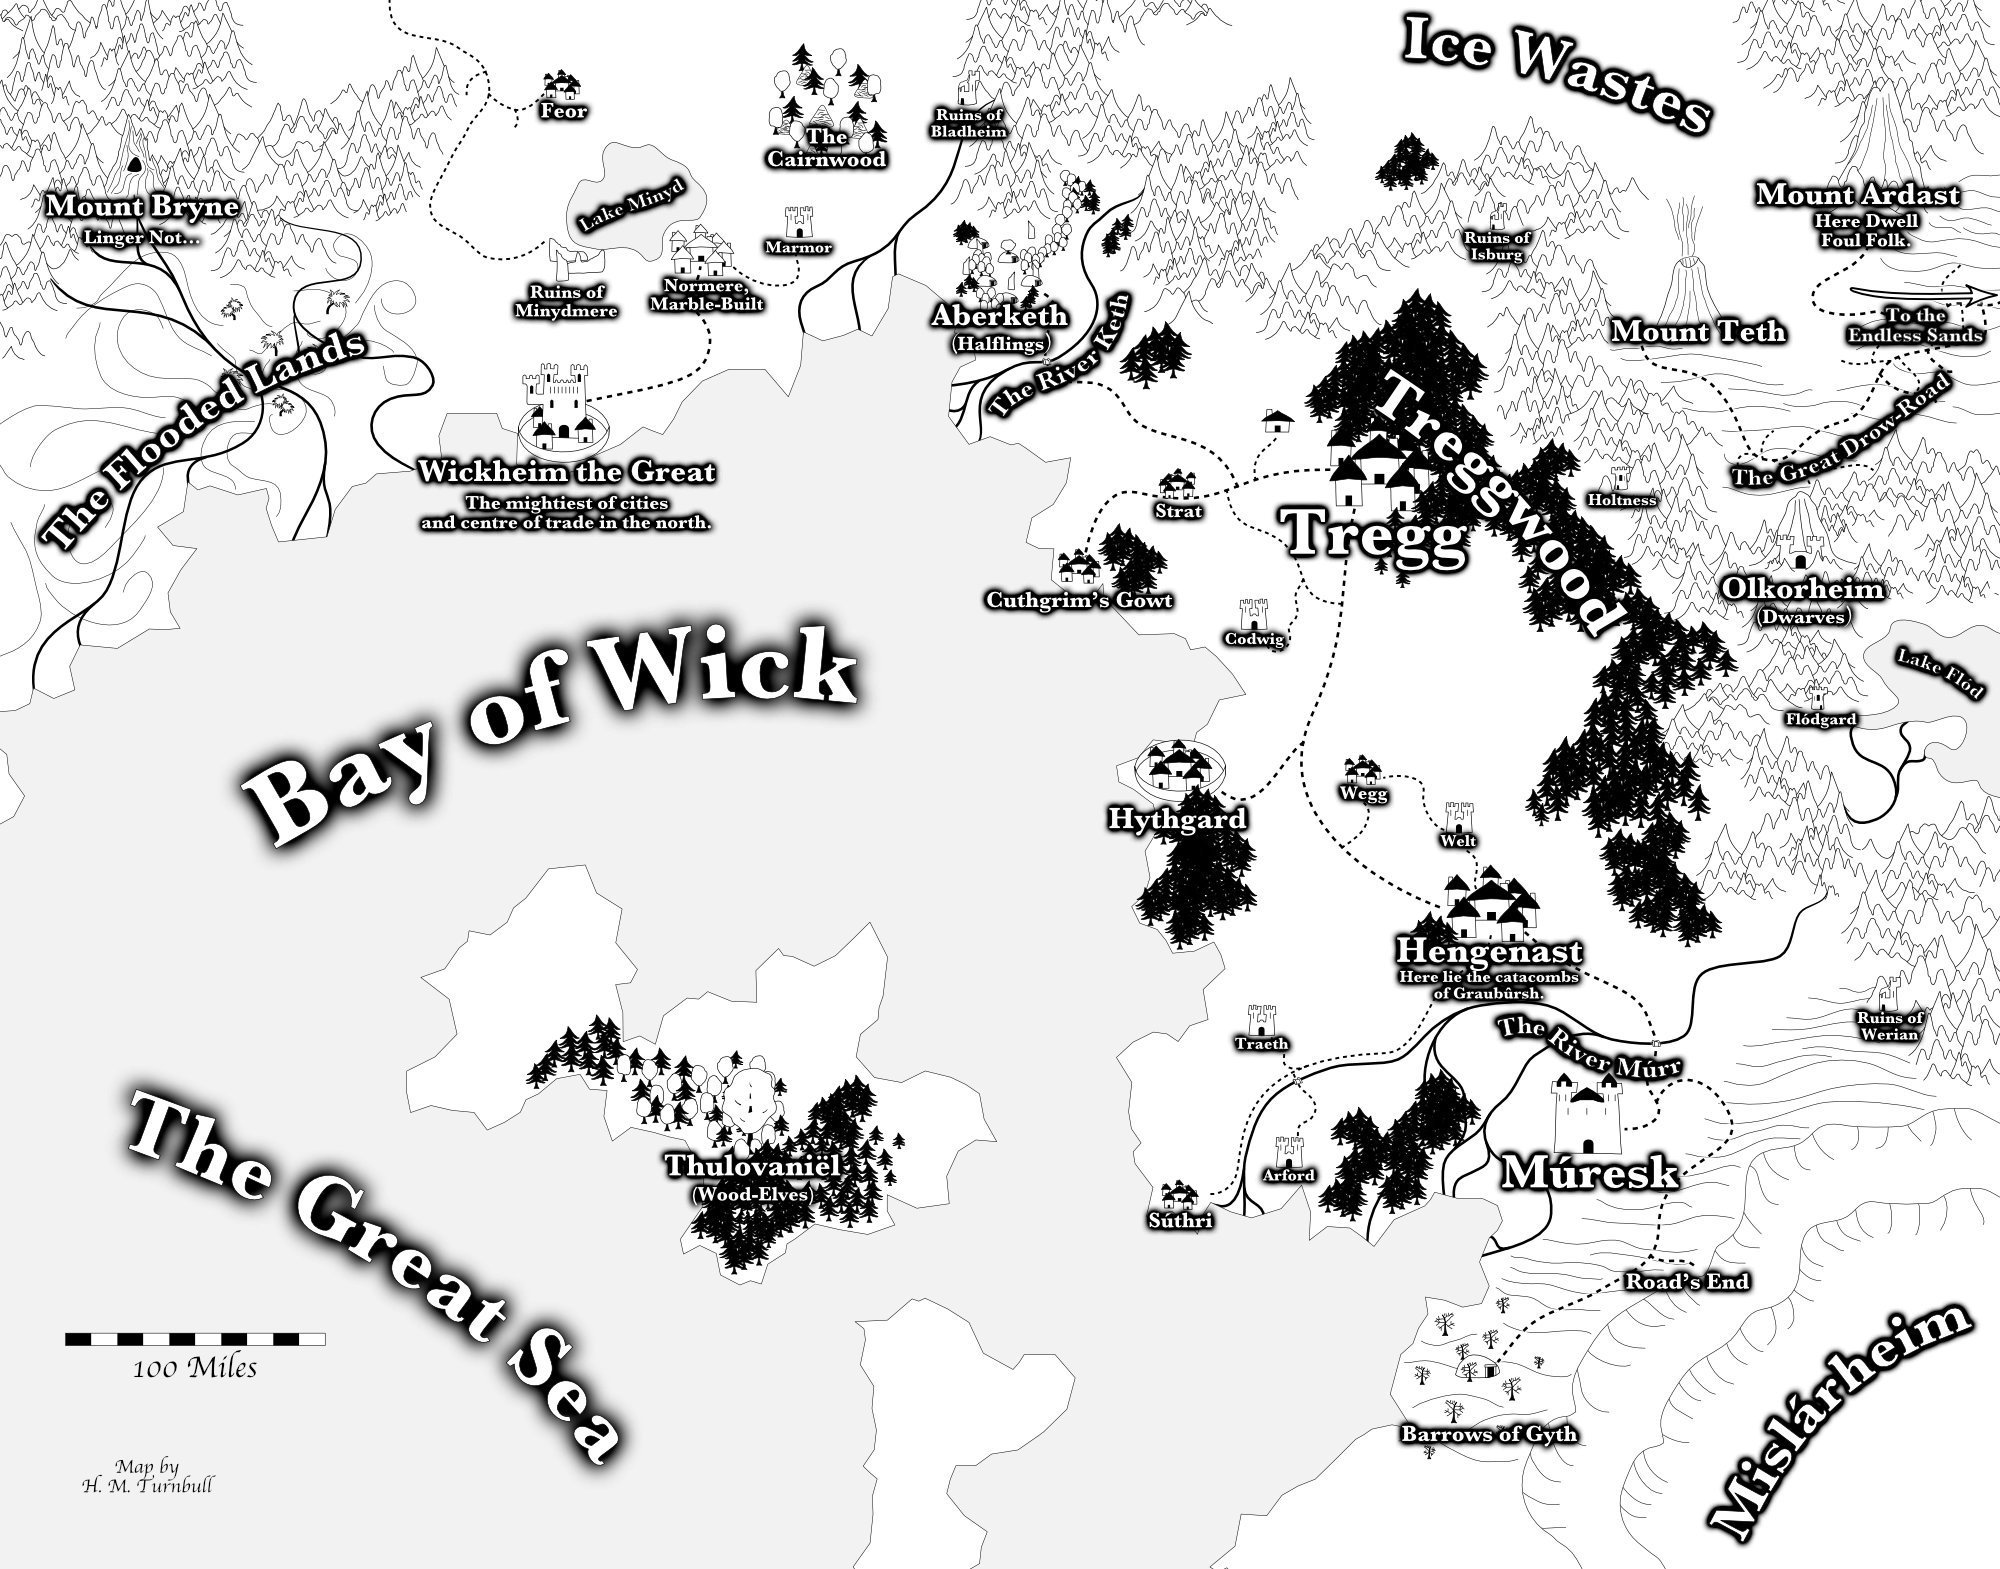
 Link to Tutorial: http://hmturnbull.com/writing/fantasy/map-making/introduction/ Description: On my website I'm writing a series of tutorials on how to create a fantasy map using Affinity Designer. I've seen a lot of tutorials for fantasy cartography, but they all seem to focus on either hand-drawn maps or maps made in raster software. Using my method, one can create a fantasy map that will scale infinitely and is easier to edit throughout the process. In this tutorial, I will teach you how to make a versatile map that you can use for stories or role-playing games.
-
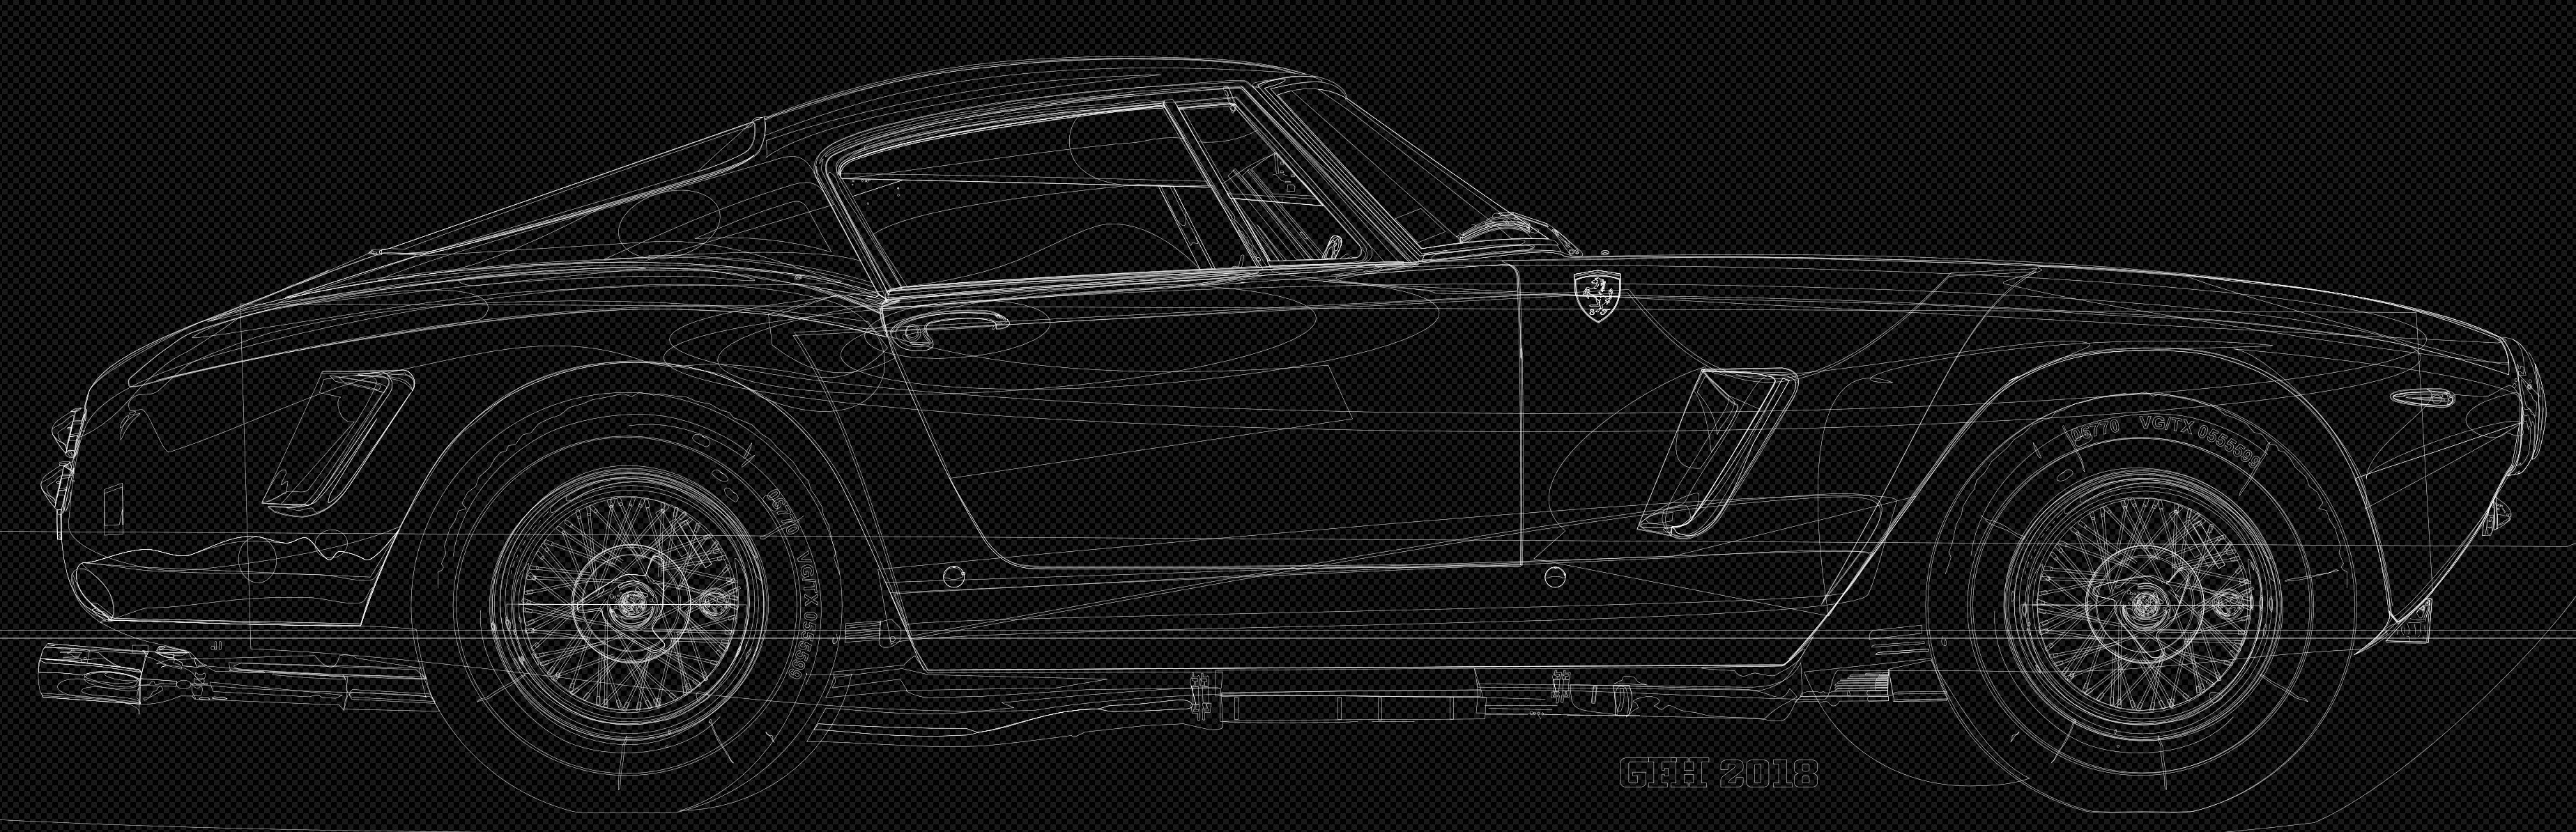
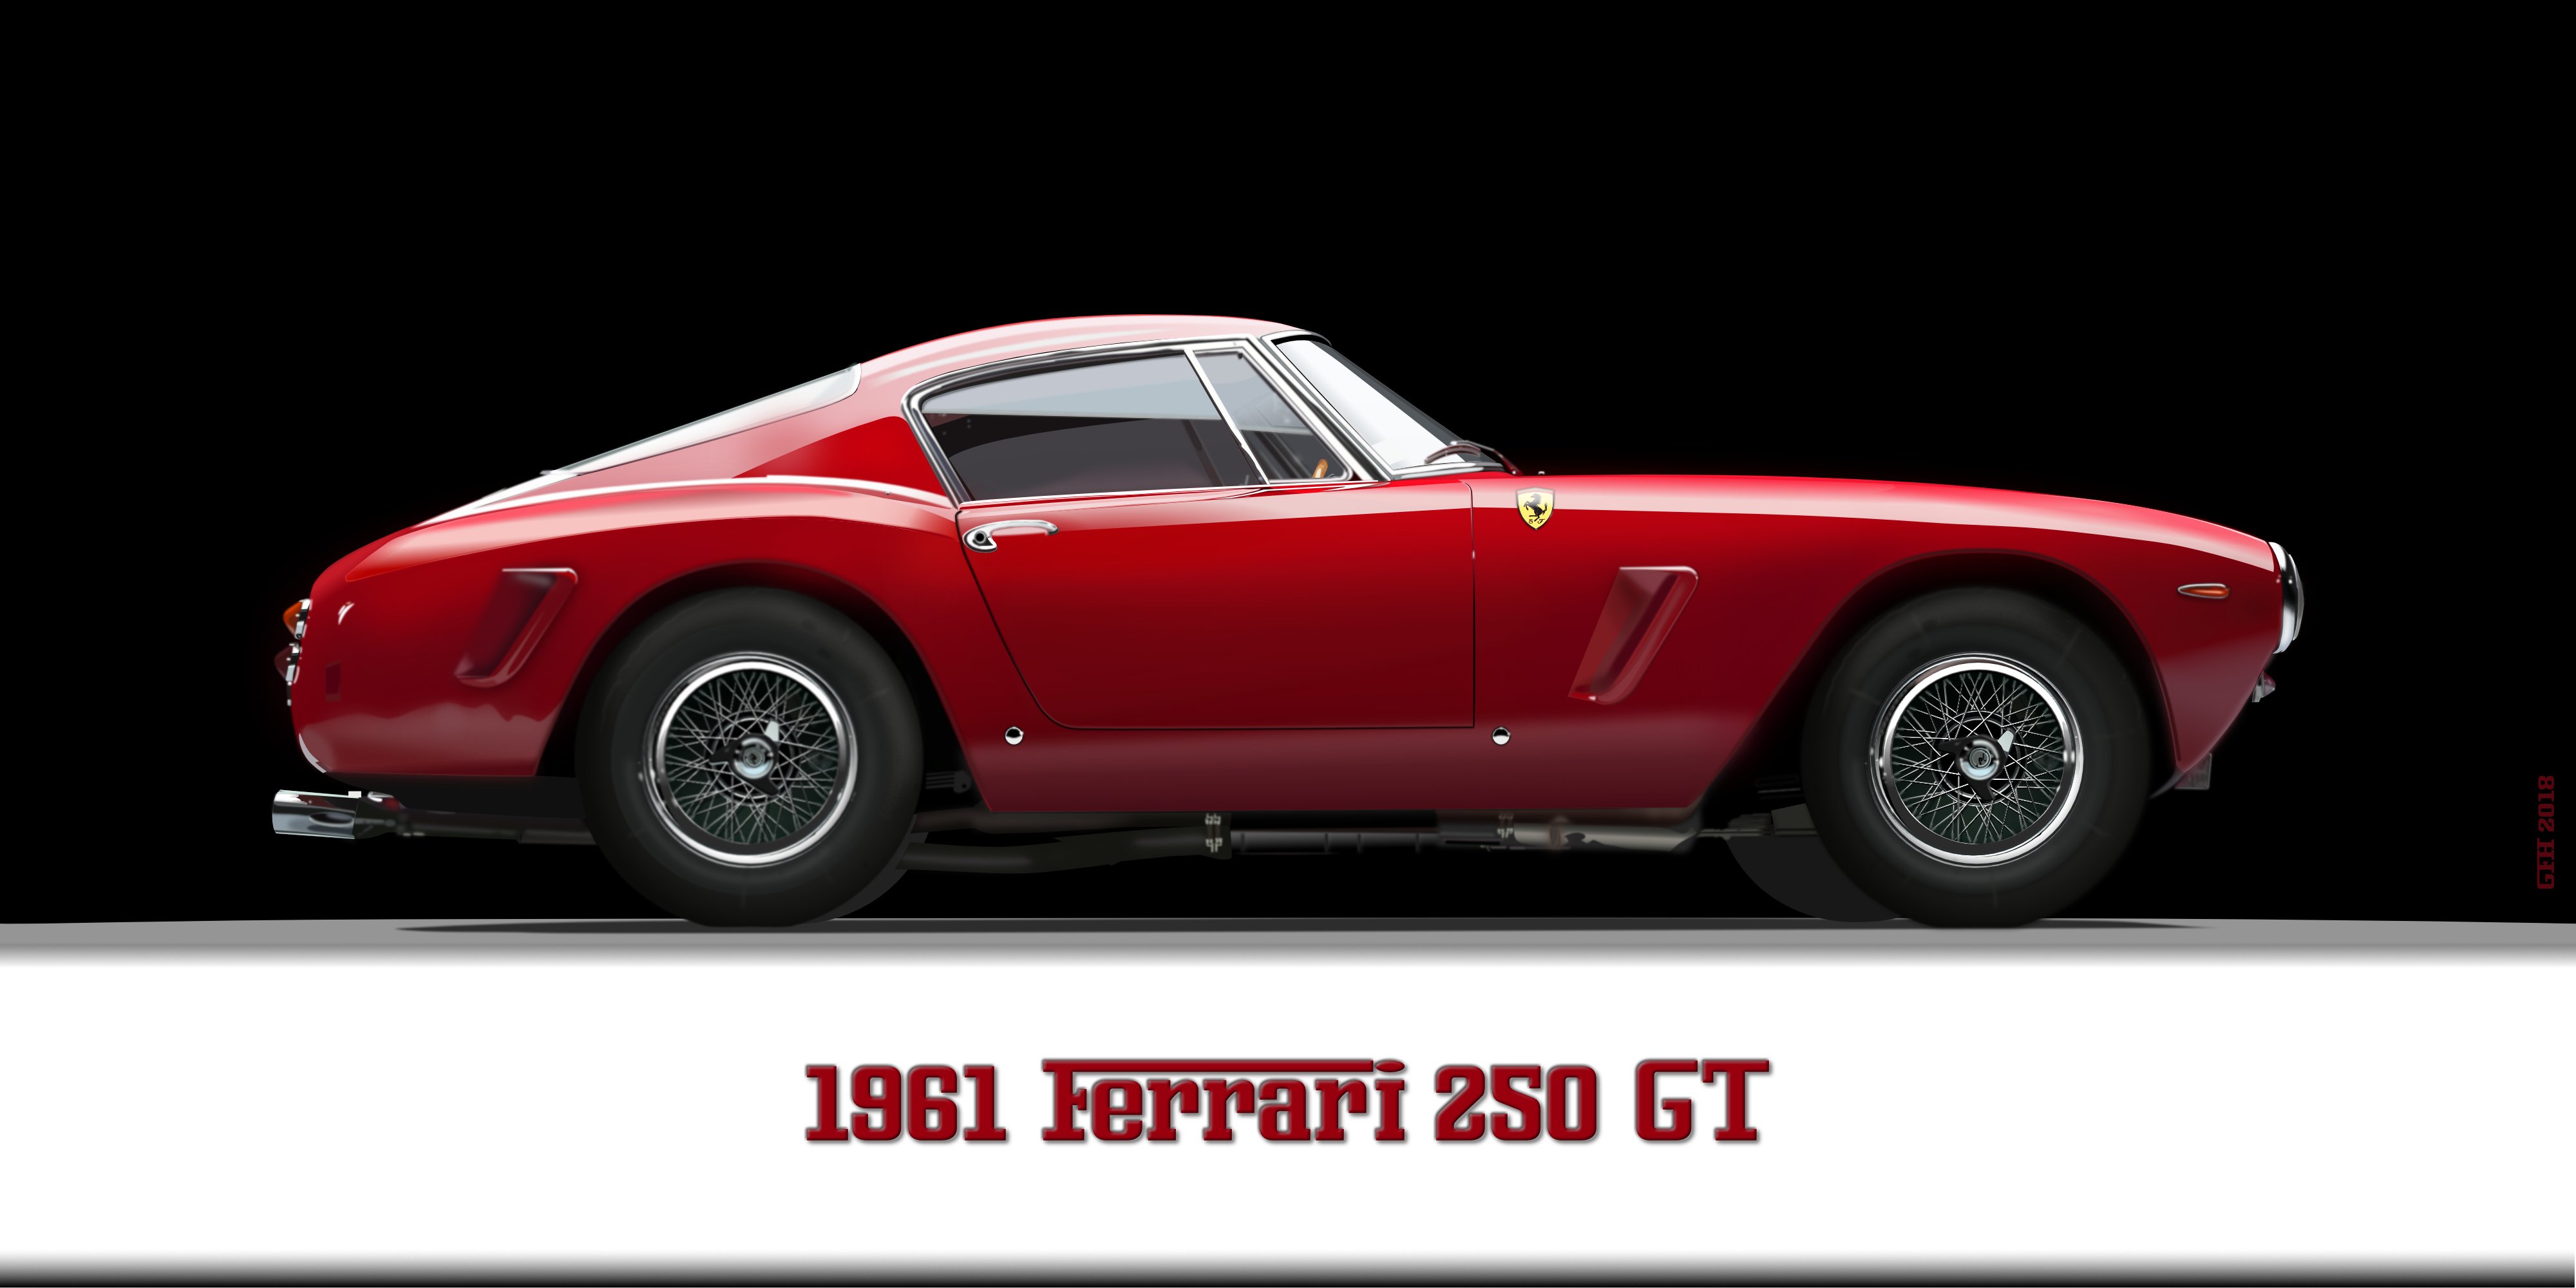
I started this thinking it would be much easier to draw than the Maserati was. It wasn't. LOL
- 8 replies
-
- 19
-
-
- ferrari
- ferrari250gt
- (and 5 more)
-
 In this post, I am sharing some tips and tricks to improve your workflow. I hope it will be helpful to you. Here is the LINK
-
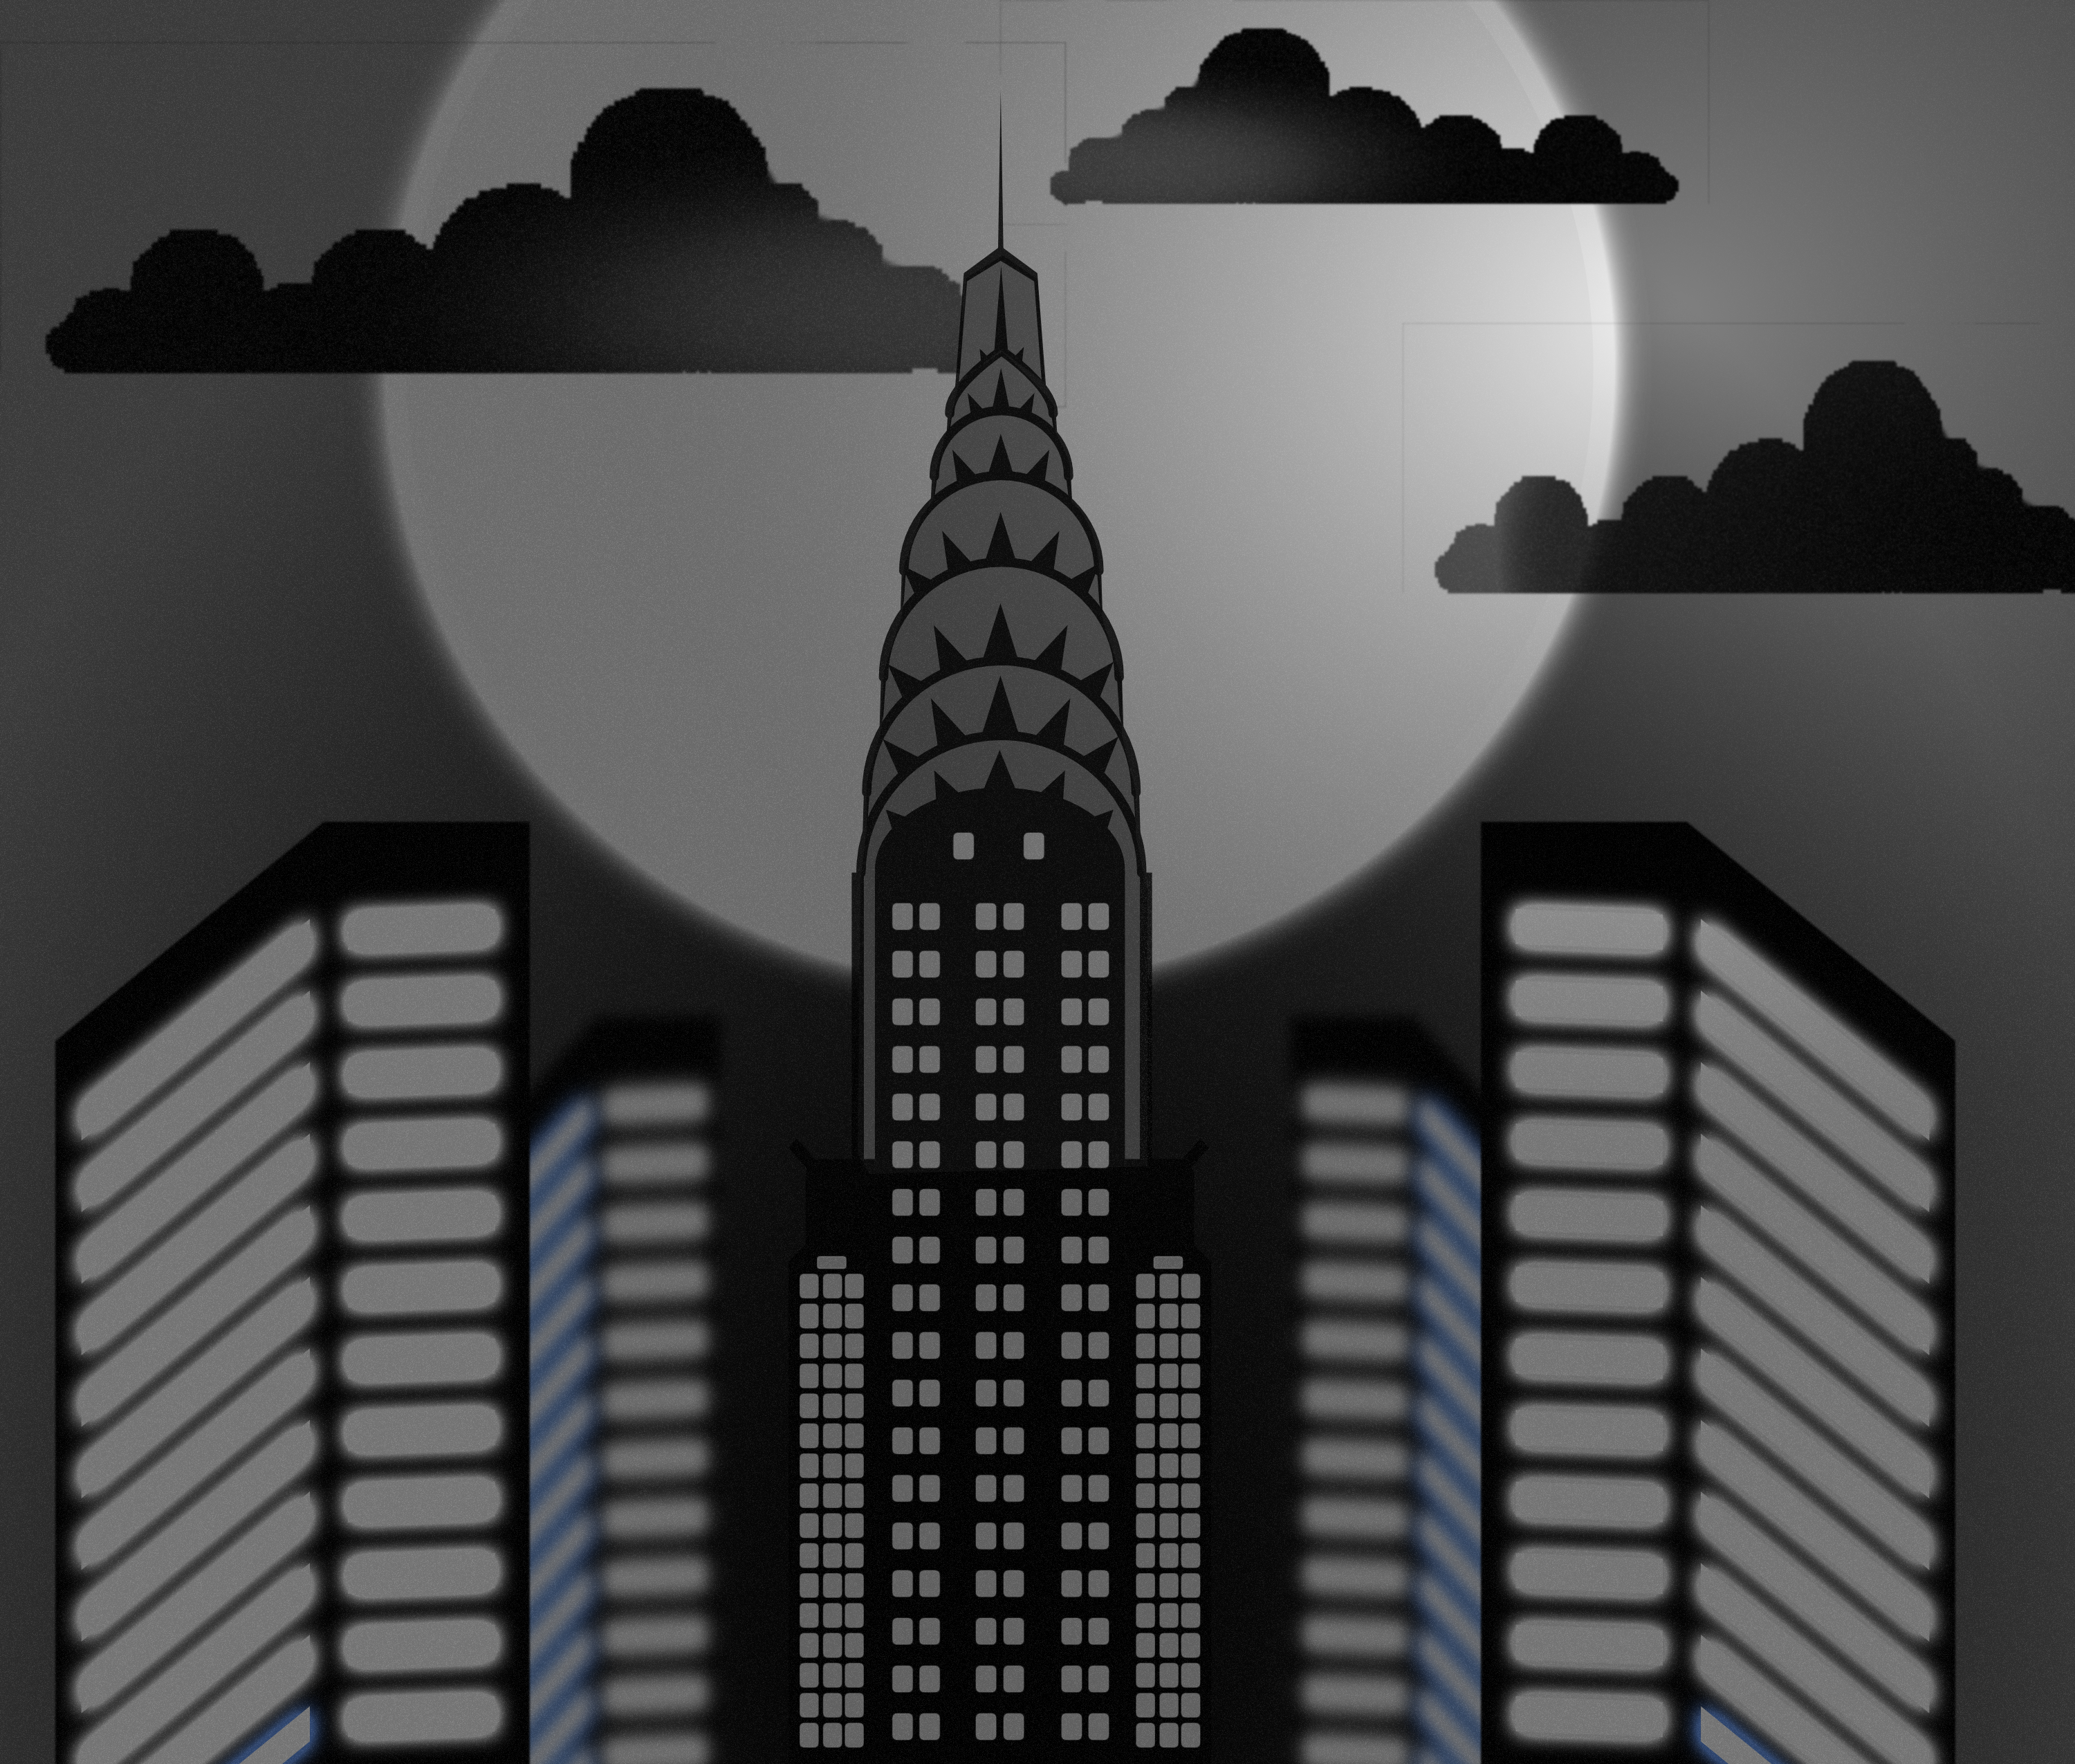
My first piece of work done entirely on iPad. Absolute game changer, thanks for all your efforts Serif. It was worth it. (Hi-res of this will end up on instagram later, once I’ve worked out how to reformat for square on iPad)
- 11 replies
-
- 18
-
-
- digital art
- retro
- (and 7 more)
-
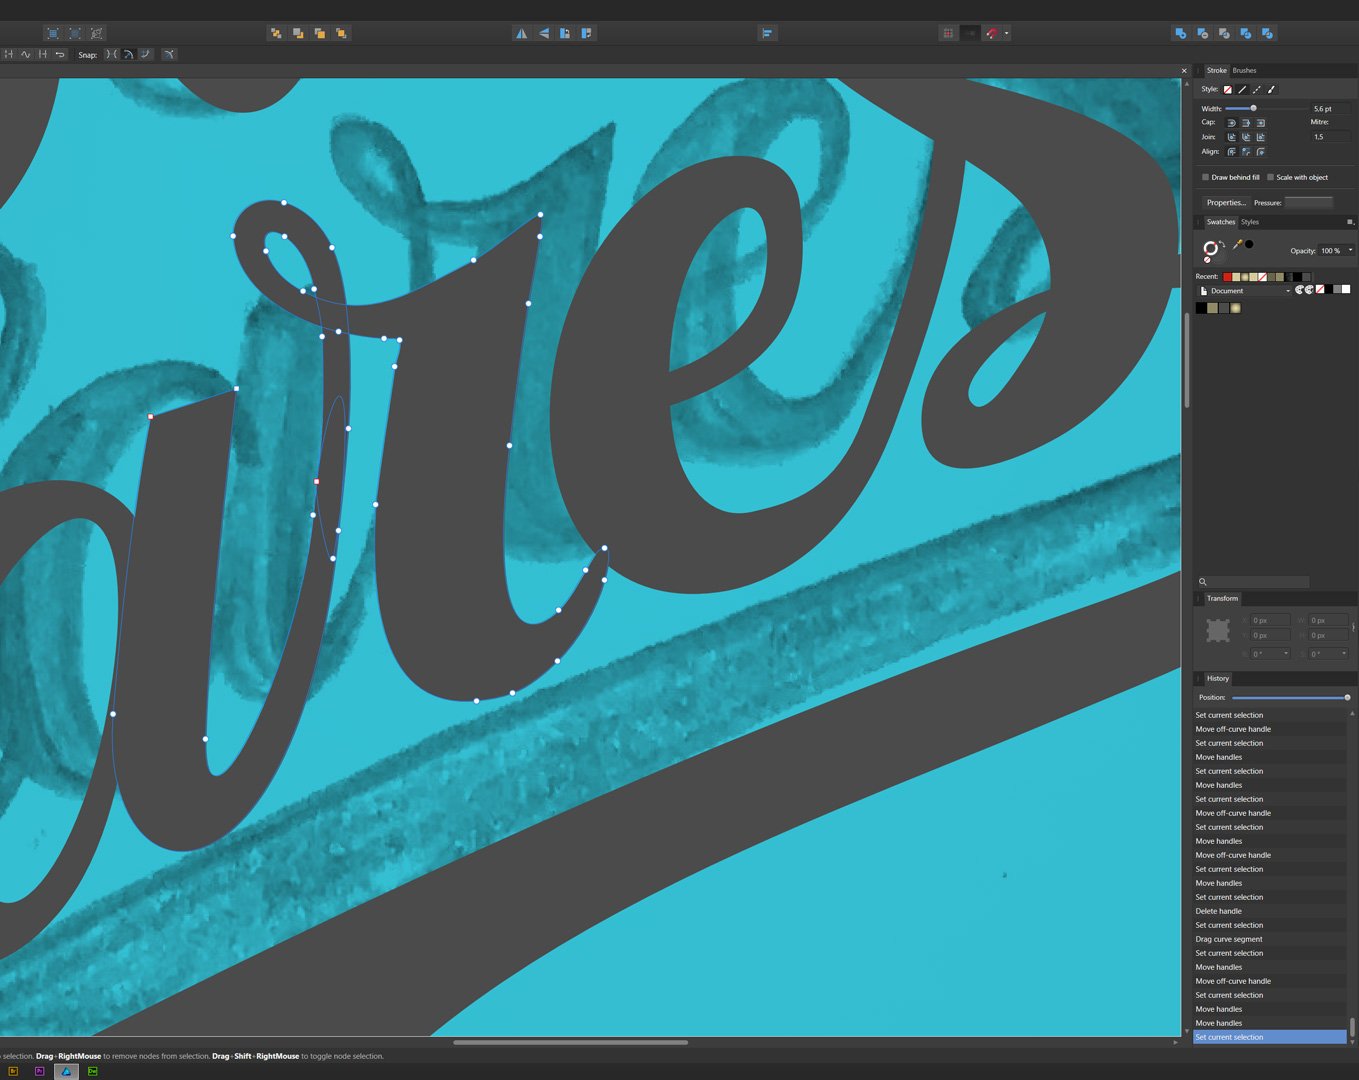
Greetings, I encountered this: I wanted to 'boolean add' those two shapes but was not able to get the right result. The fill mode is set on winding as shown in the first image (add1.jpg) but when I 'add' those two shapes I get the result as shown in second image (add2.jpg) (also same result if I would set fill mode on alternate or if I would press 'boolean divide') So because the letter 'r' in the image is drawn this way, I think, is why I have this issue. I know how I could bypass this but it would be a weird way :p I would've expect from the 'boolean add' button to just merge everything into one shape. I'm starting to use AD more and more, Awesome software! Thank you!