Search the Community
Showing results for 'group text size'.
-
 Whenever I re-install or upgrade Affinity Photo. I always have to re-drag the icons to customize the toolbar. And dragging one by one of these items is not user friendly at all. I hope these type of items would be combined into group item as Affinity Designer did.
-
 Thanks for providing that for me! I've been able to deduce the cause of this issue and have replicated it in a new document, therefore I have logged this with our development team as a bug. I can confirm that you're not doing anything incorrectly - simply if you have the special character (hidden by default) at the end of the text selected when creating a Hyperlink, and that text matches the hyperlink URL meaning the URL is 'auto-filled' in the Hyperlink dialog, that hidden character is included in the Hyperlink, causing the address to be slightly incorrect. There are 2 different ways to workaround this, whilst our team works to fix this issue; When creating the Hyperlink, ensure the hidden character is not selected. You can view hidden characters under Text > Show Special Characters. Selecting the text and the special character will cause the slightly incorrect URL to be auto-filled by the app, but selecting the text only will not. After creating the Hyperlink, manually delete and re-type the last character in the URL editor - this deletes the Special Character also, meaning it is not included in the exported URL 2024-05-10 16-17-55.mp4 Unfortunately as the Special Character does not display in the Hyperlinks dialog, it is very difficult to tell if this character has been included - so for the time being I would recommend option 2 as that should always ensure the special character is not included in the URL. I hope this helps
 -
 In Publisher: When Copying text from a Frame Text layer, or with any ‘raw’ text on the clipboard, and then Pasting that text directly into the document, rather than pasting it into an existing Frame Text layer, the software will create a new Frame Text layer with a height that is half of the spread height and width that is half of the spread width. It then places the text in that layer. The text has to be part of a layer and the software has to ‘guess’ how large to make that layer, so it just makes it a quarter of the size of the spread, leaving it up to the user to resize it as necessary. In Designer: Substitute ‘canvas’ or ‘Artboard’, as appropriate, for the word ‘spread’ in the above text. In Photo: Substitute ‘canvas’ for the word ‘spread’ in the above text.
 -
 Usually the best way is to think about such things before you start creating an image. I would at least keep a backup of your actual version, before you start turning it inside out completely. If you look at the "Stranger Things"-poster, there is a background coloured in red on the left and blue on the right side. And the whole scene is gathered by a black vignette. That could be a solution for your design too. If you don't like the blue/red-scheme, test out if the vignette works without it. For my taste Pennywise looks too much like a sidekick on your poster. He is the character the whole story is based on. He and the "Club of loosers" on the other side. I don't remember who the guy on the left is - the one with the walking cane. Is he important? I could imagine Pennywise's face big, looking evil in the background, and the other figures smaller standing in front of him. The vignette also gives a good background contrast to the text elements.
 -
 Hi Forum, Watched a lot of tutorials, FAQs but can not cure my issue. I opened my saved .afpub document but my text is now split in lines and not anymore placed in a frame text tool as I created my text. What can I do to get my text right again (in one flow) as it now unworkable if you want to change the text...... Thanks for suggestions....
-
 Sorry my english I'm not native and might not know right words, but I have 200 pages book, images and text and want to break text to pages, that text wont flow any more. I tried many thing, but don't find solution. Is there? Page brake mess everything. In indesign there was one command and it brakes texts to pages, so those don't flow any more and you can make edit, so it dont mess other pages. Is there any solution?
 -

Content Scaling Handle improvement
Return replied to MikeTO's topic in Beta Software Program Members Area
No, the character scaling was always an option even in V1. Yes if the font was 12 pt it resets to that size, granted. But see it from the perspective of the user that stretched the text to resize the font size, this will reset to the size when starting out and not the way it looked they expected it should be. The reset button could easily be just reset the horizontal scale and it would retain the preferred size. -
 Select two objects, enable "transform separately" from context toolbar, scale using either the Transform studio or the Move/Duplicate command (press Return on keyboard), with our without Enable Transform Origin toggled. Result: they scale as one group, ignoring Transform Separately toggle.
 -
 Hi, I have made a catalog that I now have to translate into a couple of other languages. There are many tables like that with many, many occurences of "X+AC" that need to be changed to for instance "X+AK". I have selected all cells containing the phrase and thought I could change them all simply by using find&replace, but everything is greyed out and I see no way to do that. Changing all those occurences manually over different languages would be a real pain though. Any ideas how to do this please?
-

Adding Items to Assets Stretches Text
LMLIN replied to Chris Heath's topic in V1 Bugs found on macOS
Was this ever resolved? I am having the same problem with Affinity Designer 2.4.2, two years later. I am using a text frame with the horizontal scale set to 100% when I add it to Assets. When I pull it out of Assets and place it on my artboard, the horizontal scale is 151%. -
I'm quoting here... "In QR Codes, error correction is handled by the Reed-Solomon Error Correction algorithm. Every time a QR Code is created, the original data is converted into a polynomial, the number of unique points required to define that polynomial uniquely is determined, and this point set is added back into the QR Code so that it then also contains the original data expressed as a polynomial. Long story short - the Reed-Solomon algorithm leaves data that enables QR Code scanners to rebuild the entire QR Code, even if a part of it is damaged or missing. You can also say that the QR Code data is “mathematically backed up." To put it simply... "There are four levels of error correction to choose from, depending on the damage you expect your QR Code to sustain. Level L: 7% of data can be restored Level M: 15% of data can be restored Level Q: 25% of data can be restored Level H: 30% of data can be restored While having as much error correction as possible is ideal, higher levels require more modules*. As we have seen, larger module configurations require a larger area/QR Code size for better scannability. If there are severe size constraints, choosing Level L, where only 7% of the data is retrievable, is ideal." *a module is each individual square that makes up the complete QR Code, the more complex the information contained, the more modules required in the QR Code.. Correct, as a general rule of thumb this should be 4 times the size of the smallest module on each side of the QR Code...
-
 I did not rotate anything, there are no hidden elements. Yet, the resulting group is somehow larger than the nesting elements? Why is that? test.afphoto
 -
I think they've qualified it pretty clearly by saying... "The ideal QR code minimum size is equal to the scanning distance divided by 10" and by citing an example... "For example, if the expected scanning distance is 50 inches (127 cm), then the ideal QR code size should be at least 5 inches by 5 inches (12.7 cm by 12.7 cm) or 480 pixels, excluding the quiet zone." I'm pretty sure most people will understand this in the way it is intended and if in doubt refer to other articles for clarification...
-
The QR Code Generator Library provides a 'Border Option' module setting which allows you to specify a 'Quiet Zone' around the QR Code required for effective scanning when placed in a 'busy' environment, i.e., surrounded by text in a magazine. This automatically adds a user-definable 'border' specified in modules (though the value itself doesn't have to be modules, px or pt achieves the same thing) to the QR Code on generation. While 'yes', we can of course scale the QR Code and add a Rectangle on another layer and then group the two, it's perhaps not as neat and seems like an unnecessary step when the feature exists in the library itself. Reducing the size of the QR code doesn't achieve the same thing in as much as you just have a smaller QR code with no border so you still have to add one manually... It's not the end of the world, it just simplifies the QR Code creation process slightly and it seems a shame not to make use of it when it's a feature of the library.
-
 I work both with my MacBook Pro hooked up to my large desktop monitor and in laptop mode. But when I open any Affinity app on my laptop after I've used them on my large monitor the windows are bigger than my laptop screen. Two sides of the window are off screen. Sometimes it's the title bar and contextual menus which are off screen. As such the window re-size edges are off screen so I can't reduce the size of the window. I have to re-open them on my large monitor and manually drag the windows much smaller to have them small enough to use on my laptop.
 -
 The only way I've found to replicate that is by trying to use the Knife Tool when I have a Group selected in the Layers panel. With any kind of single object selected the Knife simply performs a cutting operation.
 -
 I have been trying to warp (perspective) a group of images in AD2. When I try it only wants to move the background of the image. If I rasterize the group it destroys the resolution of the images and it still doesn't work. If I copy and paste to AP2 it pastes rasterizes with the destroyed resolution, but I can change the perspective there. Is there a way to do this without loss in AD2?
-
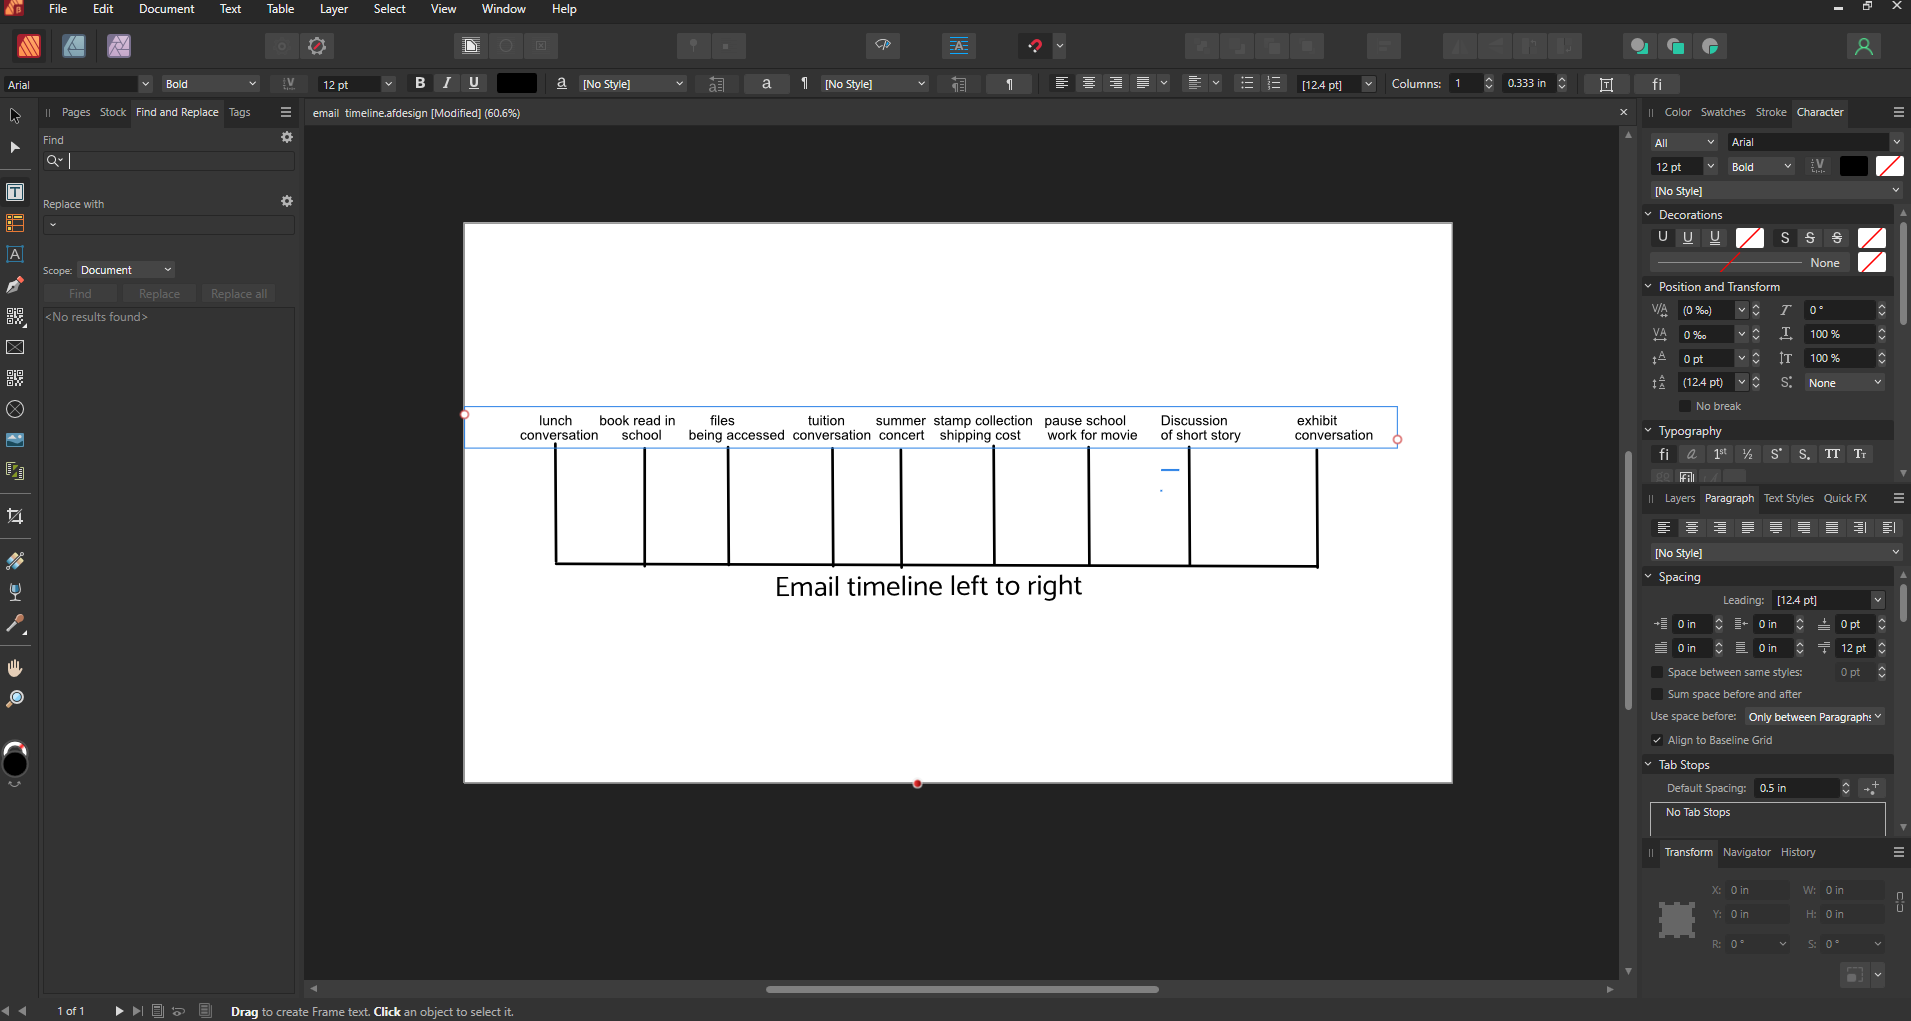
 I am making a timeline, and I have my data in a single frame, and since I will need to move data around, they need to be in seperate frames. Does anyone know how that can be done?
-

Content Scaling Handle improvement
MikeTO replied to MikeTO's topic in Beta Software Program Members Area
It doesn't reset the size to 12 pt, it was always 12 pt - the text in the frame was just scaled larger or smaller without changing its font size or the horizontal and vertical scaling attributes. The only way for users to reset a frame's content scaling factor back to 100% in previous versions was to use Defaults > Revert but now they can just double-click the handle. I would still prefer to see the scaling factor in a text field in the Text Frame panel but I think this is a welcome improvement. -
In InDesign it is possible to precisely define the line thickness ("weight") and the distance from the text ("offset") for underlines. Is this also possible with Affinity or are there just the default values? thank you for help. alfred
-
 This is probably covered somewhere on the forum, but I couldn't find it. A recent forum discussion piqued my curiosity about AP's JPG compression algorithm regarding quality loss, file sizes, etc. So, I took an original image (from an old Canon 40D, 2538 x 3866 pixels) and exported to 8-bit RGB TIFF and 15 separate JPGs of varying quality levels (quality 0 to 100). I have generally used Quality 85% up to now, since it usually retains very acceptable quality with a significant reduction in file size. All the exported files are in the attached ZIP file. I picked an image with some fine details and some smoother areas, as JPG compression works differently in high and low frequency portions of the image. I found that anything below a quality of about 20–30% generally resulted in severe posterization and artifacts. JPG quality of 100% results in huge file sizes and is probably not required, except perhaps for special cases. Even lowering the JPG quality from 100% to 95% or 98% results in a significantly smaller file size. Interestingly, large portions of similar, low frequency color (e.g., skies, gradient backgrounds, smooth walls, etc) probably require higher quality levels to avoid visible posterization and artifacts. Higher frequency images can often get away with more compression (i.e., lower quality and smaller file sizes) without it being as noticeable. Below are the file sizes for the various JPG compression qualities (all files were 2538 x 3866 pixels in size). Different files will compress differently depending on saturation, brightness range, amount of detail, etc. JPG 0% 82KB JPG 5% 104KB JPG 10% 157KB JPG 20% 262KB (ones in red were generally pretty bad and resulted in extremely noticeable artifacts) JPG 30% 379KB JPG 40% 497KB JPG 50% 622KB (Not too bad, at least in this test image, but a little soft) JPG 60% 891KB JPG 70% 1.1MB JPG 80% 1.5MB (Acceptable quality in this test image) JPG 85% 1.9MB (A good compromise for my general needs, unless maximum file size reduction is critical) JPG 90% 2.5MB JPG 95% 3.8MB JPG 98% 5.9MB JPG 100% 9.8MB TIFF 8-BIT 15.5MB (no compression) If smaller file sizes are critical, I'd be inclined to reduce JPG Quality level to 50% or even lower, depending on the image, especially on images that are mostly higher frequency. Where gradients and smooth, similarly colored areas are prominent, you may wish 50% or higher. On size doesn't fit all, so some experimentation is usually in order. JPG Quality-Filesize Comparisons.zip
 -
 Hi, When copying text from Publisher, the text in the clipboard seems to be formatted as RTF text. RTF should support character styles, but it seems Publisher don't export them to the clipboard. I would like character styles were considered when copying text. This would let one export text will all the needed styles. I don't know if this would be possible, but I would also like all the advanced features (xrefs, variables, index marks) were transferred when copying text. Paolo
 -
1. I created a balloon the using a handle dragged it so the shape reversed. I then added text, but the text is reversed. What do I do? 2. How do I control the text in the not reversed Balloon?
-

affinity designer Turntable Mat Slipmat - PINK FLOYD - Wish You Were Here
sansnom replied to sansnom's topic in Share your work
🇬🇧 In fact @ronnyb, I am absolutely not the creator of this visual, of course, it is a well-known original work from the English graphic studio Hipgnosis for a sticker that can be found on the black sealed cover of the album “Wish You Were Here” (1975) by Pink Floyd. Besides, there is a great documentary to watch on Netflix, “Squaring the Circle” (2023) on the whole history of this graphic studio and its members. In 2021, I published on YouTube (https://www.youtube.com/watch?v=Fyy07CFwSD0) a tribute video montage (remained very confidential) of a little over 16 minutes, “Pink Floyd Wish You Were Here Tribute 1975 2021 light”, for this legendary album and this fantastic group. And on this occasion, I had to redesign and edit a lot of visuals with the Affinity suite. Concerning this post, I had not taken into account the visual effect produced with the felt when the platter rotates... since by definition, if the platter rotates, it is because there is a vinyl placed on it which hides the drawing. The idea is just to decorate this platter when the turntable is off, fixed, without a disc with the constraint of framing it in a circle!… Otherwise @Twolane, I was around ten years old in 70!… 😉 🇫🇷 En fait @ronnyb, je ne suis absolument pas le créateur de ce visuel, bien entendu, c'est une œuvre originale bien connue du studio graphique anglais Hipgnosis pour un sticker que l'on trouve sur la pochette scellée noire de l'album “Wish You Were Here” (1975) de Pink Floyd. D'ailleurs, il y a un documentaire génial à voir sur Netflix, “Squaring the Circle” (2023) sur toute l'histoire de ce studio graphique et ces membres. J'ai publié en 2021 sur YouTube (https://www.youtube.com/watch?v=Fyy07CFwSD0) un montage vidéo hommage (resté très confidentiel) d'un peu plus de 16 mn, “Pink Floyd Wish You Were Here Tribute 1975 2021 light”, pour cet album mythique et de ce fantastique groupe. Et à cette occasion, j'ai dû redessiner et monter énormément de visuels avec la suite Affinity. Concernant ce post, je n'avais pas pris en compte l'effet visuel produit avec la feutrine quand le plateau tourne… puisque par définition, si le plateau tourne, c'est qu'il y a un vinyle placé dessus qui masque l'illustration. L'idée est juste de décorer ce plateau quand la platine est éteinte, fixe, sans disque avec la contrainte d'un cadrage dans un cercle !… Sinon @Twolane, j'avais une dizaine d'années en 70 !… 😉 🇬🇧 At this address, other visuals showing illustrations of record covers in the form of wallpapers: 🇫🇷 À cette adresse, d'autres visuels reprenant des illustrations de pochettes de disques sous forme de wallpapers : -
@Sean P You're right, that is fixed, but there's another variation. Using the same document: Click the grey rectangle to see the bounding box of the inline group and then double-click it to select just the rectangle Switch to a shape tool and draw a shape outside of the group's bounding box Choose Undo - the bounding box won't revert to its original size I have a lot of inline groups in my manual and often when I'm editing them I forget that drawing a new object will create it inside the inline group. I deliberately place an image or draw something in the margins of the page thinking that won't be part of the group. But this expands the group's bounding box and causes the text to reflow. There's a performance issue when you have lots of inline images so it takes 16 seconds for me to regain control which gives me plenty of time to bash my head against the wall for doing it again. Then I choose Undo, have to manually fix the bounding box, and wait another 16 seconds to be able to work again. It brings back memories of 1994. 🙂 Seriously though, and I know I'll need to post this as a feature request elsewhere, but while I'm on this topic, I have made the mistake of creating a new layer inside an inline group hundreds of times with Publisher. I like that it adds new layers inside the group but I expect it to add to the group when I draw inside the bounding box and outside the group when I draw outside. While I'd like this for any group, it's especially true for inline groups. If I have an inline group the width of the frame, nobody would draw an object in the page margin and want it to be part of the group because the group will overset the frame and all following frames. I'll go post that as a feature request. Thanks