GarryP
-
Posts
14,682 -
Joined
-
Last visited


-

Affinity PHOTO export to .bmp *HELP*
GarryP replied to Max Mitty's topic in Desktop Questions (macOS and Windows)
It seems like there might be some confusion over what I was suggesting. I was not excusing Serif for anything and I was not suggesting “A or B”, I was suggesting “both A and B”. Both: (A) Serif add BMP exporting, and; (B) other developers add opening/importing of image types other than BMP. Hopefully that makes my position clearer and I don’t need to explain it any further. -
 bbrother reacted to a post in a topic:
Affinity PHOTO export to .bmp *HELP*
bbrother reacted to a post in a topic:
Affinity PHOTO export to .bmp *HELP*
-
bbrother reacted to a post in a topic:
Affinity PHOTO export to .bmp *HELP*
-
bbrother reacted to a post in a topic:
Affinity PHOTO export to .bmp *HELP*
-
 HCl reacted to a post in a topic:
Affinity PHOTO export to .bmp *HELP*
HCl reacted to a post in a topic:
Affinity PHOTO export to .bmp *HELP*
-
Pšenda reacted to a post in a topic:
Affinity PHOTO export to .bmp *HELP*
-
Max Mitty reacted to a post in a topic:
Affinity PHOTO export to .bmp *HELP*
-
Affinity PHOTO export to .bmp *HELP*
GarryP replied to Max Mitty's topic in Desktop Questions (macOS and Windows)
I’ve never said that BMP is an “unknown niche format” but I have said that I think it would be nice if the Affinity applications could export to BMP. I have absolutely nothing against the BMP format or its usage. It’s an absolutely fine image format for what it does, and I wouldn’t have a problem with having one or two around the house, as long as they were house-trained. All I’m saying is that I think other developers should also allow for the usage of image formats other than BMP if they want to give their users more options. Anyway, I’ve ‘said my piece’ so I think I’ll duck out of the conversation at this point as I don’t think I need to say anything else about it. -
Affinity PHOTO export to .bmp *HELP*
GarryP replied to Max Mitty's topic in Desktop Questions (macOS and Windows)
There may be cases, like this perhaps, where there is a genuine need to supply a BMP, because of certain technical considerations, but in a lot of cases in these forums I have seen that the other software that people are importing/opening the image into could import another format if only the developer allowed for it. My point is really: This isn’t just Serif’s ‘problem’. If other developers limit their users’ choices then that’s not Serif’s problem to fix, but it would be nice if they could make things a bit easier. -
Affinity PHOTO export to .bmp *HELP*
GarryP replied to Max Mitty's topic in Desktop Questions (macOS and Windows)
If there’s nothing in the BMP format which cannot be achieved in another format then shouldn’t people be asking to be able to open/import in formats other than BMP? I’m not against being able to export to BMP, I definitely think that it would be useful to many people, I’m just wondering why it has to be Serif who makes the changes to comply with the lack of supported formats elsewhere. If I only allow payment by crypto currency, and my customers want to pay in cash, isn’t that my problem rather than theirs? -
Affinity PHOTO export to .bmp *HELP*
GarryP replied to Max Mitty's topic in Desktop Questions (macOS and Windows)
If the images are the same in each format, why does the ZIP need to include both JPG and BMP? (I don’t have anything to do with Android infotainment systems so I don’t know how they work.) -
Alfred reacted to a post in a topic:
Layers Panel
-
Oops, fixed.
-
Affinity PHOTO export to .bmp *HELP*
GarryP replied to Max Mitty's topic in Desktop Questions (macOS and Windows)
I think it’s interesting to think about this another way. Alongside asking Serif why the Affinity applications can’t export to BMP, it’s also worth asking why the developers of the software that people need to use BMPs in do not allow the user to import/open other image types. Forcing users to only import/open BMPs is just as ‘bad’ as not letting users export to BMPs. Image types such as JPEG, PNG and TIFF have been around since the 90’s so it’s hardly like they have popped up ‘out of the blue’ without any notice. Have people been asking the developers of the other software to support other image types, or are they relying on Serif to do all of the work? Is there something inherent to the BMP format which means that it can contain ‘information’ which cannot be achieved with any other image format? -
In your screen-grab you seem to have only one layer (a Layer layer) which doesn’t seem to have any content, so I’m not sure what you would want to achieve by ungrouping that. How would ungrouping layers make then less “cluttered”? In addition to what was mentioned by Alfred above, the right-click context menu of the Layers Panel has some grouping/ungrouping functionality depending on the layer you right-click on. If you can give us a visual example (and/or a document) which shows the problem more clearly then it might be easier for us to understand what you want.
-
Affinity PHOTO export to .bmp *HELP*
GarryP replied to Max Mitty's topic in Desktop Questions (macOS and Windows)
There wasn’t any need to create another request as it has already been requested: https://forum.affinity.serif.com/index.php?/search/&q=bmp&type=forums_topic&page=1&quick=1&nodes=122&search_and_or=and&sortby=relevancy Adding another request just ‘dilutes’ the request between multiple threads. -
Affinity PHOTO export to .bmp *HELP*
GarryP replied to Max Mitty's topic in Desktop Questions (macOS and Windows)
For some users, yes. It won’t make any difference to users who don’t want/need it, and the development of such could delay the development of other things which more users want/need. Unless the software can export to every possible image type there will be someone who will not be able to export to the type they want. People asked for JPEG XL and we got it. People asked for Webp and we got it. People are asking for BMP, so we might get it, or we might not. If Serif don’t see it as a priority then there’s not much that we can do about it. If it’s never going to happen then asking for it won’t make a difference, but we have no way of knowing if it will never happen because Serif don’t make statements like that. -
albertkinng reacted to a post in a topic:
How to do an Embroidery Photo Effect?
-
How to do an Embroidery Photo Effect?
GarryP replied to albertkinng's topic in Desktop Questions (macOS and Windows)
You’re welcome. That sort of thing has caught quite a few people out. -
GarryP reacted to a post in a topic:
How to do an Embroidery Photo Effect?
-
thomaso reacted to a post in a topic:
How to do an Embroidery Photo Effect?
-
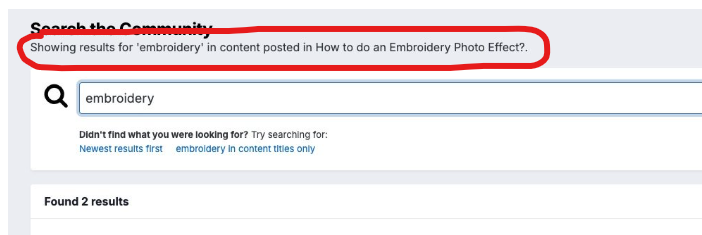
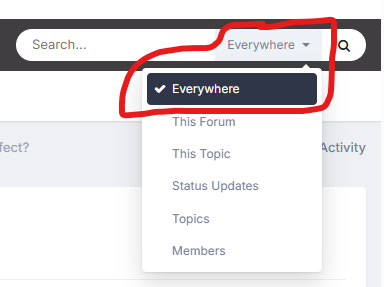
How to do an Embroidery Photo Effect?
GarryP replied to albertkinng's topic in Desktop Questions (macOS and Windows)
When you searched I suspect that you only searched within the thread you were currently reading, hence: To search the whole of the forums you need to make sure that you set the search context to “Everywhere”: If you do that you will find a lot more threads which are relevant to your search.
-
 Oufti reacted to a post in a topic:
Layer Panels| Scroll Bar Hides Layers' Color Codes
Oufti reacted to a post in a topic:
Layer Panels| Scroll Bar Hides Layers' Color Codes
-
GarryP reacted to a post in a topic:
afpub~lock~bestand
-
Edited to be more complete (in case anyone stops reading here) as per information below. A ~lock~ file is created to stop more than one person opening the file at the same time, and to stop you from opening the same file in more than one application at the same time. If you don’t have the related document open, in any Affinity application, then you can delete the ~lock~ file.
-
Publisher V2 Opens Network Drive on Start
GarryP replied to martenf's topic in Desktop Questions (macOS and Windows)
This sounds similar to these reports: https://forum.affinity.serif.com/index.php?/topic/182835-problem-with-open-recent-and-nas/ https://forum.affinity.serif.com/index.php?/topic/177766-apps-not-opening-at-all-because-theyre-trying-to-connect-to-a-now-defunct-server/ Those problems were apparently fixed, so could this be the same problem coming back? -
Layer Panels| Scroll Bar Hides Layers' Color Codes
GarryP replied to Gotchi's topic in Desktop Questions (macOS and Windows)
I think we’ve both been active in the forums enough to know the effectiveness of ‘bumping’ a thread. You can ‘bump’ the other thread if you want to but I have no idea if doing so will make any difference. The same goes for adding a new feature request I suppose. At least there’s a possibility that someone from Serif could be more likely to notice it if it’s not in a Questions or V1 section.