Search the Community
Showing results for 'group text size'.
-

[Beta 6] Problems (Bugs?) with Symbols
MEB replied to R C-R's topic in [ARCHIVE] Designer beta on macOS threads
The Symbols help topic says to create symbol instances, I can either drag a symbol onto the page from the Symbols panel or duplicate an existing 'on page' one. Drag from panel works fine, but duplicating a symbol creates a new group instead of another symbol instance. It doesn't matter if I create the duplicate by option-dragging a symbol on the page, by selecting it & using CMD+J, or from the Layers panel popup > Duplicate command. This seems a bug. I will log this. Manipulating a selected symbol (resize, rotate, whatever) does not affect any other instance of it on the page. For that to work, I have to expand the symbol in the Layers panel & select the 'child' object. This is By Design. Global transforms are not synchronised between symbol objects so you can for example scale one instance of a logo for a webpage on one artboard, while keeping other at the original size for a flyer on another artboard and all still sync. If you want to scale all instances you have to select the objects "contained" inside the symbol and scale them. The Symbols help topic says I can disable sync on the Symbols panel, edit an instance independently of the others, & then reenable sync to sync across all instances again. When I try that, enabling sync again does not sync across all instances any more -- each symbol instance seems to be permanently desynchronized. Seems to be working here, however you may need to zoom in/out to force a refresh. Sometimes the symbols aren't being redrawn correctly. I believe MattP is already aware of this one. Deleting all instances of a symbol on the page causes the symbol in the Symbols panel to lose its icon. From then on, dragging it (by name or where the icon should be) onto the page creates an empty symbol instance. I'm not seeing this here. Mine retains the symbol in the Symbols panel. I will check if i can reproduce this. Renaming a symbol in the Symbols panel does not update the symbol name of any existing symbols in the Layers panel, although new instances I add to the page do get the new name. (Perhaps this is by intent?) I believe this is by design. You should be able to rename layers independently of being symbols or not, so i don't expect the symbols names (from the Symbols panel) to be synchronised with symbols layer's names. I will check this with the devs. Rotating a synced symbol instance on the page causes the symbol icon (in the Symbols panel & the Layers panel) causes the icon to change size in both places. Only at 0° & a few other angles does it have the original size; at most angles it shrinks substantially. Rotating symbols on canvas doesn't rotate the symbol in the Symbols panel for me (neither it should). The "icon" in the Layers panel is a realtime preview so this one should change when you rotate the corresponding symbol on canvas. Renaming a symbol sometimes crashes the app. This is usually preceded by the inability to enter text in the rename field -- the cursor is there & blinking but no typed characters appear in the field. I will try to reproduce this here. Thanks for reporting it. -
 Hey Guys, I am going to make my student portfolio using Designer and Artboards as pages. Are there any limits to a number of art boards or file size in Designer I will probably have about 150 pages of drawings, images and text. Will it work or better to split deferent sections into different files? Is there a way to group Artboard but keep individual Margins? If I group two art boards Designer will unite two margins into one across two art boards. Thank you, P.S. I know I can use InDesigner or Pages or other programs, but I want to make it in Designer and then transfer to Publisher when it is out.
 -
Designer : Layer instance ?
MEB replied to Gep's topic in Pre-V2 Archive of Affinity on Desktop Questions (macOS and Windows)
Here's a similar file. To edit the text select the Artistic Text Tool, click over the text and start typing. You may have adjust the size of the blue rectangle and stars if you add more letters so they fill the new word's width or add new object's to clipped group if you want. There's other ways to approach this. You can use a bitmap fill with stars to continuously fill the blue the rectangle, or other ways to structure the file to get a similar result. stars.afdesign -
Not sure if i should make a new topic for each request so i will just put it here all: REQUESTS / IDEAS Symbols Per layer sync option in Symbols. Currently I have no idea which part is synced in a Symbol. Option to replace text whithout unsyncing attributes. Layers Option to automatically show clicked/edited layers in layers panel. Like "Find in layers Panel" only automatic. Or at least Shortcut for "Find in layers Panel" Selection No way to Marquee select objects inside lcompound objects/clip layers. Isolate objects is indeed VERY MUCH NEEDED. Keyboard and Mouse shortcuts Search option inside shortcuts page (it will be a must have over time) Input boxesKeyboard increments in input boxes (like transform). (shift+10px) Using equation ++25 or - -42 as a quicker way to add orsubstract numbers. It's far faster than writing in +=, -=, when using the numeric keypad. Keyboard resize (1px, 10px)Shortcuts to resize objects by keyboard. I have this in fireworks, and I rarely use the mouse for resizing when fine tuning UI elements. Shortcuts for Select All in Group (children) and Select All inside same Layer Shortcuts for collapse and expand all layers (also with ctrl+ mousr click on arrow in layers panel) Shortcut for putting selected objects in a layer "Promote Selection to Layer" (sort of like grouping and promoting group to layer in one step) Modifier key for toggling mouse selection intersects with marquee (or the other way around) Shortcut for Toggle "Edit all Layers" (could be a good workaround until isolate objects get implemented :D) SHORTCUT OPTION FOR EVERY-SINGLE-THING EVERY-TIME EVERY-WHERE!!!!!!!!! :D If there is a setting, SHORTCUT FOR IT. SHORTCUTS. Even more shortcuts. Color selection method - Eyedropper tool, Swatches, Color, etc… Modifier key to change stroke colour (or the other way around)Explanation: The default "illustrator" toggle way is really annoying. You never know which setting are you on in the heat of designing, and you constantly have to change colours multiple times, cause you accidentally changed the fill colour and you wanted to colour the stroke. (if I can't get used to this after 8 years of usage it’s a fckn bad implementation.) An elegant and often used method would be to use a modifier key to set stroke colour. - left click FILL, ctrl+left STROKE. You get used to it and never want to go back, and you will always 100% know what are you colouring. (or at least an option for it in the Preferences) Misc Program should save the interface and preference changes too regurarly. Can't count how many times I had to make the same settings and window changes after a crash. Constraints object crops stroke size and effects that is larger than the constraint box. At least an option to turn this off? Create palette from selection Create palette from document - keeping global colours Option to convert a color in the palette to global (right click menu) All settings and preferences are lost on a new install.
-
 Hi, I reopen this old topic. I need to reduce size of group, which contains Frame text. I can use an extra handle (as described of Dave), but I need to enter exact dimensions of group with Transform panel. Frame text not scaling in this case :( Is there any solution please?
 -

Document rescale taking text into account.
10on12 replied to rui_mac's topic in Older Feedback & Suggestion Posts
It's a bug I think. Objects group with text behave buggy too. If you select vectors and text > group then > scale it looks fine. If you the > ungroup the text springs back to the original size. It been highlighted. -
Hi BrianHermelijn, Select all the objects (or group) you want to resize then use the lower bottom right corner handle (the one that's detached from the bounding box) to scale all the objects - including text frames. If you need to enlarge them to a specific size/width place a guide in the document as reference, then use snapping to help you resize the bounding box exactly to that guide. You can't use the Transform panel to set the dimensions directly because the text frames will reflow instead of being scaled.
-
 Hello Reda, Modifying studio panels is somewhat awkward. I agree, it would be better to just have a disappear button, instead of going to the studio menu, and deselecting various panels. But it does work. Keyboard shortcuts. Its like a language. Each app will have its own, and they may not be very similar. I know its a pain. Like "B" for bucket, or "F" for flood", or Photoshop "K". What? It is annoying. I doubt it will ever go away. I'm not sure what is happening when you report joining 2 lines increases their stroke. When I join pen or pencil strokes, their point size stays the same. A single group of "artistic text" can just be cut or copied, and pasted into a text box. Or vice versa. You can quickly assign a fill and stroke by defining a style. etc. AD does have limitations, just like Photoshop didn't have grids or guides for eight years. I worked thru that, btw. But many of the probs can be resolved by learning how a program does different things to achieve the same end. FWIW, I tried Inscape back when it was Sodipodi. Nice that it was free, because it was also almost un-useable. Much better now, but still slow w. a less than an obvious layout.
 -
 I am having a lot of trouble understanding how symbols should work in the Mac 1.5.x Betas, & if what I am seeing is the result of bugs or just me expecting them to work differently than intended. The main problems: • The Symbols help topic says to create symbol instances, I can either drag a symbol onto the page from the Symbols panel or duplicate an existing 'on page' one. Drag from panel works fine, but duplicating a symbol creates a new group instead of another symbol instance. It doesn't matter if I create the duplicate by option-dragging a symbol on the page, by selecting it & using CMD+J, or from the Layers panel popup > Duplicate command. • Manipulating a selected symbol (resize, rotate, whatever) does not affect any other instance of it on the page. For that to work, I have to expand the symbol in the Layers panel & select the 'child' object. • The Symbols help topic says I can disable sync on the Symbols panel, edit an instance independently of the others, & then reenable sync to sync across all instances again. When I try that, enabling sync again does not sync across all instances any more -- each symbol instance seems to be permanently desynchronized. • Deleting all instances of a symbol on the page causes the symbol in the Symbols panel to lose its icon. From then on, dragging it (by name or where the icon should be) onto the page creates an empty symbol instance. • Renaming a symbol in the Symbols panel does not update the symbol name of any existing symbols in the Layers panel, although new instances I add to the page do get the new name. (Perhaps this is by intent?) • Rotating a synced symbol instance on the page causes the symbol icon (in the Symbols panel & the Layers panel) causes the icon to change size in both places. Only at 0° & a few other angles does it have the original size; at most angles it shrinks substantially. • Renaming a symbol sometimes crashes the app. This is usually preceded by the inability to enter text in the rename field -- the cursor is there & blinking but no typed characters appear in the field. Any help with what I am misunderstanding or confirmation of buggy behavior would be greatly appreciated.
 -
It is hard to tell from your jpg how many artboards the Affinity Designer document has or what is included in them. Assuming 8 artboards, one for each of the iPhone mockups, none of the other text or arrowed lines included in them, & each of the same size, you could for example select the 4 of them shown in the first row & use the Arrange options to distribute them horizontally (using the "Space Horizontally" button) by a specific number of pixels (by unchecking the "Auto Distribute" option) & aligning their tops, centers, or bottoms vertically. Do the same thing for the other 4, using the same pixel spacing. You could then temporarily group each of the two sets of 4, & do the same thing, reversing the horizontal & vertical alignment options to get the same vertical pixel spacing, but that probably would not be necessary or desirable -- using snapping to drag one selected set of 4 below the other would be much easier & more flexible. Keep in mind that anything not in any of those 8 artboards won't be visible in an export -- an object can be in only one artboard -- so if you want to export the entire layout as above, you will need to do something to provide for that. One way is to create a new, 'super-sized' artboard large enough for all the others plus anything not in any of them, & nest the 8 artboards in that 9th artboard. Everything else can go directly in the 9th one.
-
 Here's something that's bothersome for me with the output to PDF. I have a vector shape, within that shape I have bitmaps and other vector shapes nested. A couple of LUT layers and bitmap comps later and I output to PDF. The bitmap sections itself are cut up pretty well by features, so that's cool. There was pretty much zero waste there. However I lose the vector outline of the base shape that the other stuff was nested in. This increases the file size quite a bit since it introduces an extra alpha to the file. The PDF output should retain the outline and just have PNG portions overlaid on top for transparency. It could be that it's too hard for the app to figure out which outline to retain in a mixed media comp. I'm way out of Illustrator territory here, so I don't really have a comparison. If that's an issue, maybe we could help it along by tagging a shape with 'vector cut' for example. Which then would also carry through to any bitmap format that can carry outlines (to flow text around and make vector knock outs). We can already exclude shapes from snapping, maybe that could be added to the same menu section and be displayed similarly in the layer stack. (Probably something worth having anyway). Edit: Nesting the layer group in another shape retains the outline as vector in the output. But then I have both, the PNG alpha in addition to the new shape which bear the potential of a moiré effect.
 -
jer, just in case you missed it, if you double click on the title text of a Studio panel, it minimizes it to just the title bar (at least on Macs). Click once on the minimized title bar again to expand it to its previous full size. This can be useful when you just need to see something under a floating panel or need more space in the ones docked in the Studio for some other panel group.
-
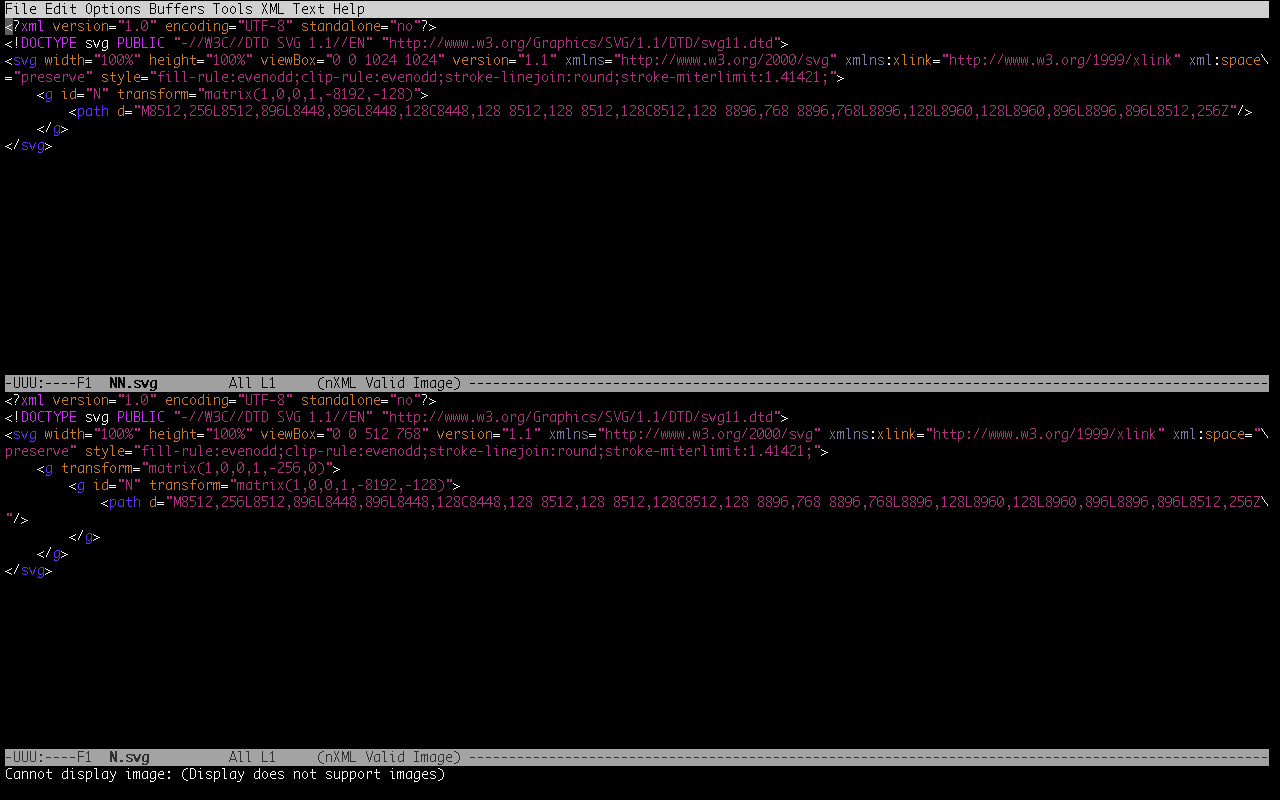
 I thought of that as well, this requires me to group the curve with a rectangle the size of the artboard and remove that rectangle for each individual glyph in FontForge. The reason why I'm using Affinity Designer is to avoid as much vector graphics editing in FontForge because their editor is pretty bad. I've looked at Inkscape, but I try and avoid that one too. Maybe I should try and suggest this as a feature request, exporting individual curves as they are placed in the artboard should be useful for a lot of applications as well, such as web or gui-design. I found one possible solution though. Since SVG is text I found that the two SVG files differ in that the "viewbox" is different, maybe I should write a simple program to iterate through the files in that directory and change the viewbox of every file. Changing the viewbox aligns the curve to the left of the document, but FontForge has a nice "Center in Width" function that can be applied to multiple glyphs at a time.
-

Copying Layer styles
Guest replied to mylittlestudio's topic in Pre-V2 Archive of Affinity on Desktop Questions (macOS and Windows)
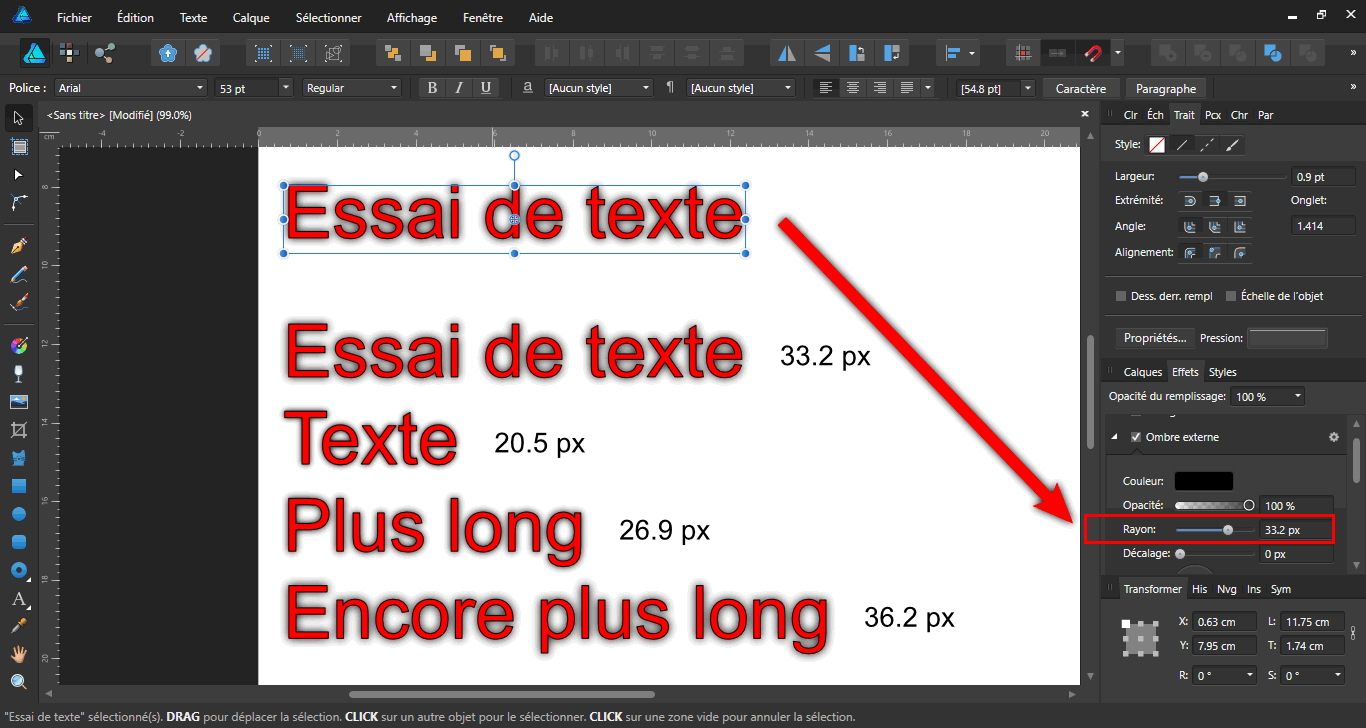
Hi Marcuss, It seems that the radius of the outer shadow varies according to the length of the text, which is not logical, the shadow being applied to each letter and not to the whole group at one time. However, the contour size does not change. I am not on Mac but on Windows and the problem is similar.
-

Transforming Text
carl123 replied to DarkClown's topic in Pre-V2 Archive of Affinity on Desktop Questions (macOS and Windows)
After you scale the group (e.g. x 2.5 ) you can select the text and use its context menu (at the top of screen) to rescale the px size by the same scaling factor (e.g. 50px * 2.5) -
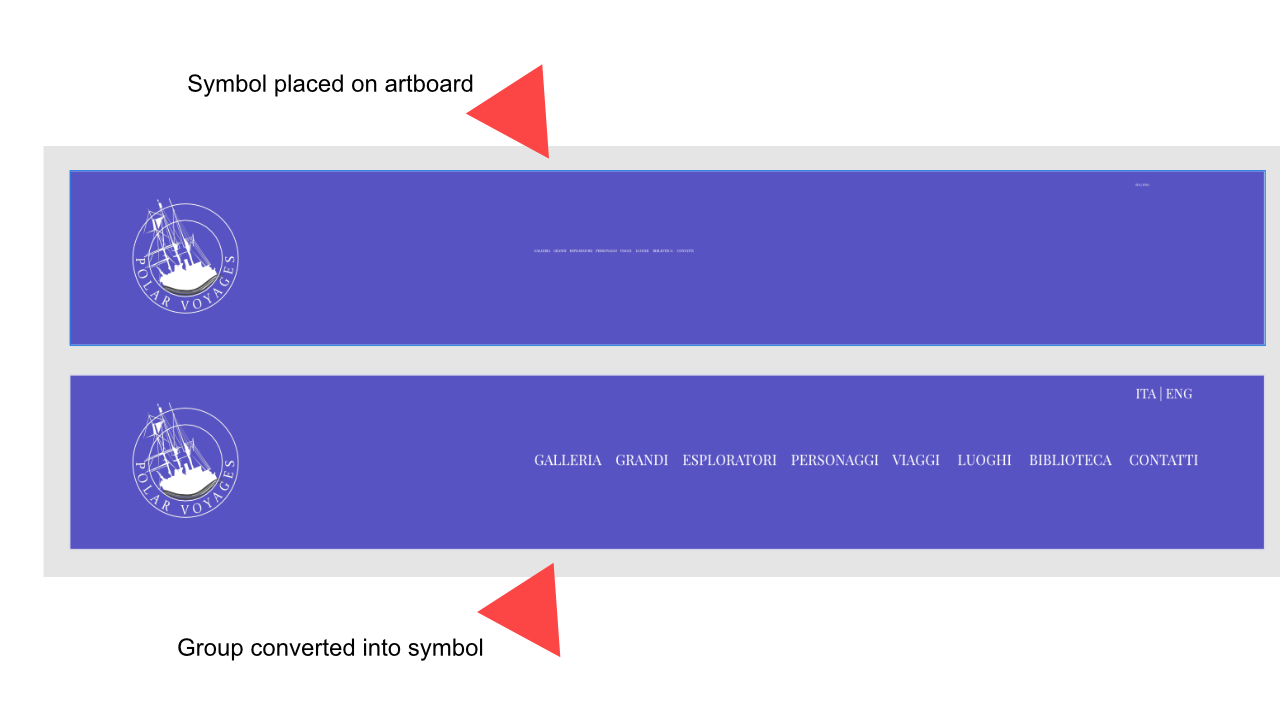
It happens to me that a text converted to symbol, when dragged on the artboard changes the size from like 15pt to 3pt. Also part of a group. In this case i was trying to convert a header of a website containing the menu and the logo. (as attached). Alberto
-
 @MEB Your examples work for individual shapes, but not for multiple selected shapes. There seems to be some fraction element involved, probably based on the size of the group. PS: I'll pass on editing SVG. There does not seem to be an intelligent text editor in affinity and if I took it to an external text editor, I would definitely NOT have a drawing left. Thanks again for educating me.
 -

Affinity Designer for Windows has launched!
iseebadpixels replied to TonyB's topic in News and Information
Three main questions: Does it export correctly text layers to PSD now (not as rasterized layer)? Does it support smart objects? Does it allow to change interface font size? Does it allow to change color of layer/group in layer panel? -

Floating Text?
MikeW replied to MaryLou's topic in Pre-V2 Archive of Affinity on Desktop Questions (macOS and Windows)
It should resize regardless. If you select all the items of a group or individually. Which AD doesn't appear to do. Why would I or anyone else want to size the graphic elements separately from the text on the paths? -

PDF Export file size is very big
TonyB replied to MBP2017's topic in [ARCHIVE] Designer beta on macOS threads
I had a go at editing one of your files and it now exports the PDF at 16.7 MB. I will list the edits I made so you can have a go as well. 1. Change the document DPI to 72 DPI by File->Document setup Change DPI to 72 Object will: Rescale OK. 2. Change the Outline layer effects to a vector Stroke Find the text objects with the Outline layer effect Turn the Outline effect off Go to the Stroke panel in the top panel group on the right Use 'Draw behind fill' to produce a similar effect to the outline effect Apply a stroke size that is similar to the Outline layer effect Make sure the stroke is set to white in the colour panel 3. Make sure your shadow effects does not cause rasterisation of the text Find objects with shadows and uncheck 'Fill knocks out shadow' The above should produce a much smaller but still high quality PDF. The raster elements will be 72dpi but all the vector items will be reproduced at 300 DPI by your RIP software. You should have the same issues in Corel Draw if you output at 300 DPI. TonyB. -
Got that to scale as a group BUT when un-grouped again the text springs back to its original size!