Search the Community
Showing results for 'group text size'.
-
 Text styles are automatically generated for table of contents (TOC). If a custom text style (created by user) is applied to the TOC, it will be replaced with the auto-generated text style when the TOC is updated. TOC text styles only show in the Text Styles panel when the cursor is placed in a generated TOC. If you use the auto-generated TOC text styles, does that fix the issue?
 -
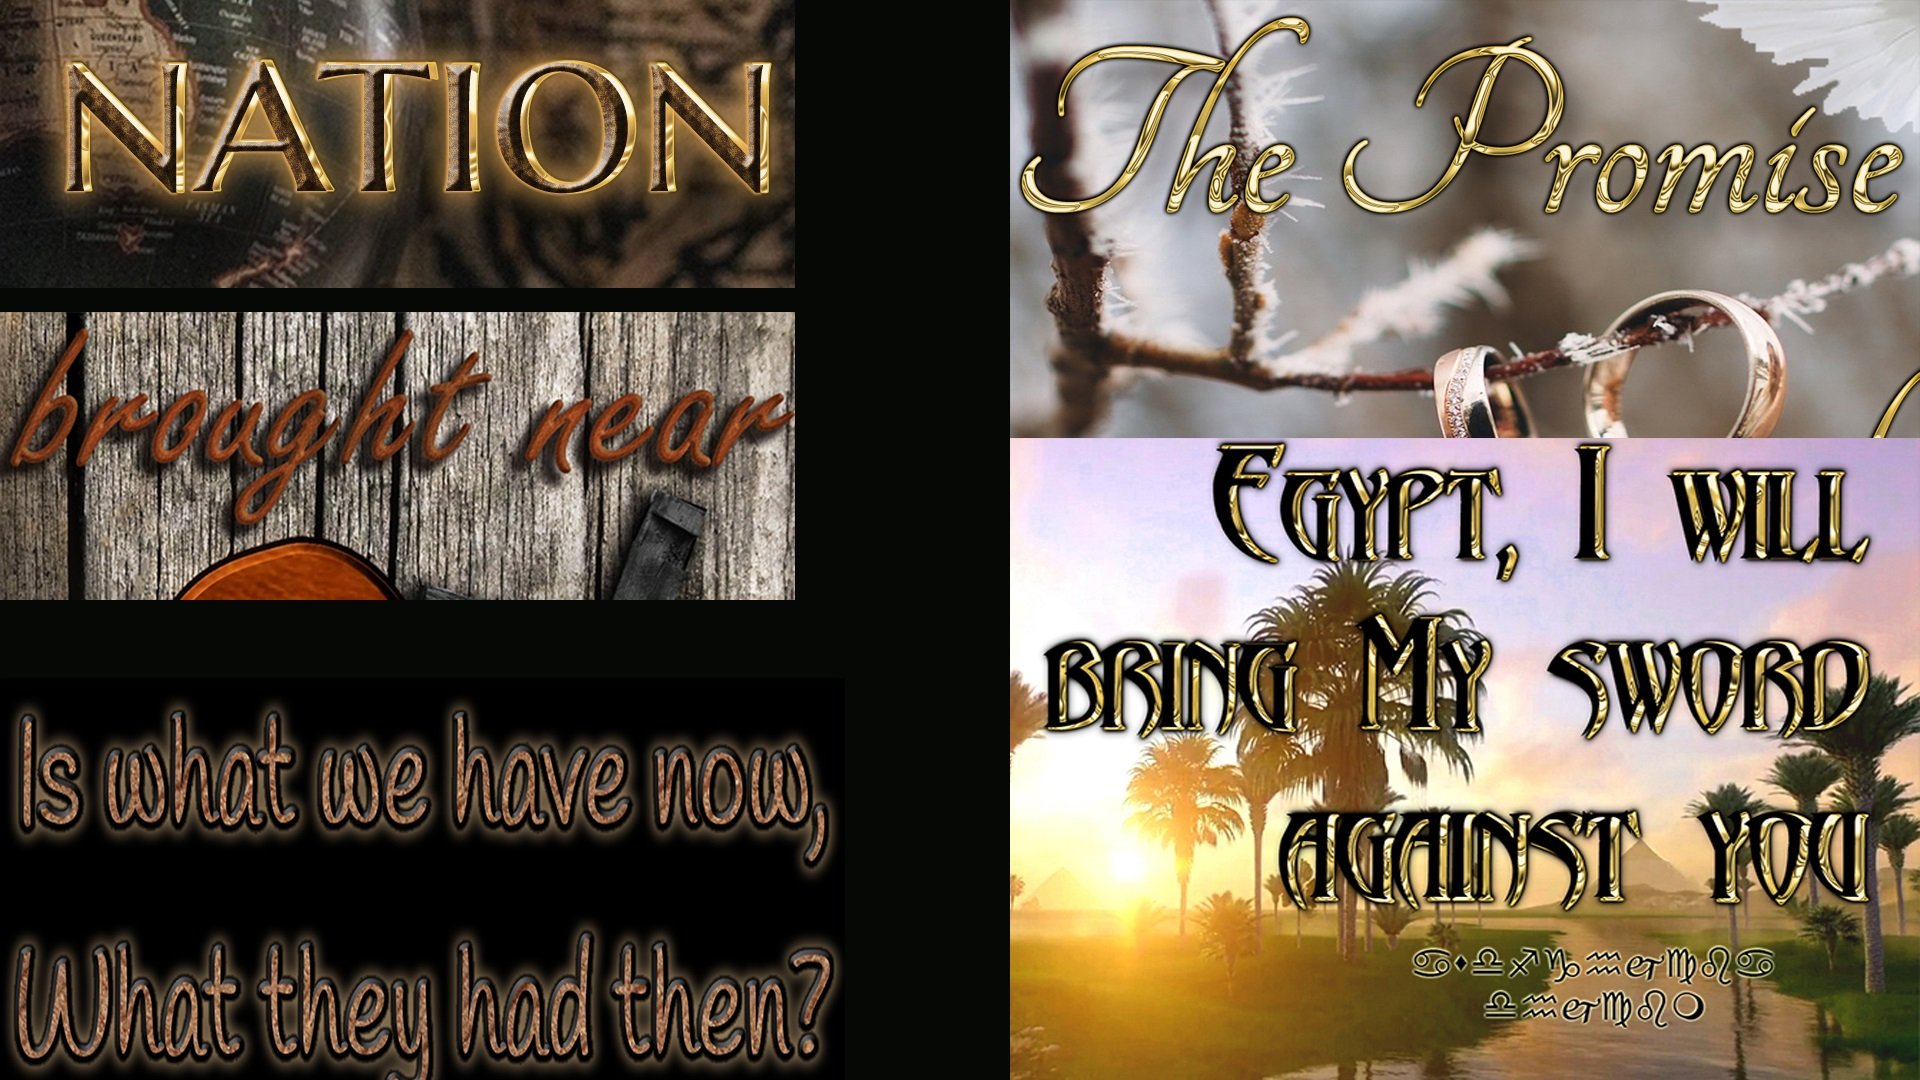
 I am immediately new to Affinity and have searched for this answer and can find no help regarding it. When I was using Adobe I would frequently add text to photos and had a huge library of styles I could pull from to apply to text and then tweak if needed. Nearly all of these styles had some texture associated with it - even the gold text for the appearance of fluidity. I will attach picture with a few examples to clarify my meaning. My questions are: 1. Can you add texture to a style (and if so how)? 2. Can you "create" or "save" that style so you don't have to recreate it each time you want that effect (and if so how)? My thanks to anyone who can help me.
-
 By this I had in mind picture like it is opened in Photoshop without smart object option. To show only portion of it you must use masks. You can't crop it because you will change the document size. Sadly, Affinity Photo works the same way. Crop tool should work the same way as in Designer and Publisher. It would be even better if we can crop pictures as in InDesign -- just with resing the picture frame, without crop tool.
 -

Box around text. For some reason every time type text, in Affinity Designer 2.4.2.2371, using frame Text Tool or Artistic Text Tool there is a frame around and touching the typed text. How can I stop this occurring, and/or remove the frame? The frame pri
Old Bruce replied to Stuart Frisken's topic in Affinity on Desktop Questions (macOS and Windows)
Welcome to the forums @Stuart Frisken, This "box" is the container for the text. It is how Designer, Photo and Publisher work. There are two types of text frames. The first is called the Art Text text frame and it will be the size of the text you type, no larger, no smaller than the text you type. The second is a Frame Text text frame, it can be whatever size you want it and will hold several paragraphs worth of text. Depending of course on the size of the font you have chosen. -

Cropping Bug
GarryP replied to wolfnowl's topic in Affinity on Desktop Questions (macOS and Windows)
I’m not seeing the same thing as you. In my attached video I have a document which is 7680×2160 pixels. I select the Crop Tool, then select the 16:9 Custom Ratio from the Presets. The crop size is 3840×2160 as expected, and the resultant image after cropping is also 3840×2160. (I tired the same thing with a 72dpi document and a 96dpi document and got the same result.) While using the tool I notice that the ratio in your image (3840×2160) doesn’t tally with that in my video (16×9). I wonder what’s happening there. Would you be able to share the original image so we can experiment with it? 2024-05-07 09-25-26.mp4 -
 That's right, the character style applied in Bullets and Numbering is applied to the "Text" field contents - it defaults to #.\t but you could enter \t.#, Publisher has to apply the style to the entire string of text. To work around this, remove the tab from the "Text" field for your numbering style and manually enter a tab for each numbered paragraph. Be careful when pressing Tab, it will change the indent level. You can enter a Tab with the Text > Insert >Spaces and Tabs > Tab command, just assign a keyboard shortcut to it.
- 1 reply
-
- 1
-

-
- apublisher v2
- 2.4
- (and 1 more)
-
I have created a rectangular field. This is on a pointed corner by default. But I want it to be on the straight edge. I have therefore rotated it by 30 degrees. How do I now get the text to be aligned horizontally? I would like to use it as a direct text frame.
-
[EDIT - see revised steps further below] This is a regression from 2.4.2. Create a document in 2.4 with inline images in . It doesn't matter whether the images are embedded or linked or whether they are inline on their own or part of an inline group. Save the document and close it. Open the document in 2.5. Select and copy the text containing the inline images. Create a new document in 2.5 and frame and paste the text - the images will be there but invisible, the low res preview is missing. The Resource Manager will show that the images are there and okay. Toggling link/embed won't fix it. Saving, closing, and re-opening the document won't fix it. The only way to make it appear is to modify the linked image or to replace the image.
-

text in shape backwards?
Ldina replied to kat's topic in Affinity on Desktop Questions (macOS and Windows)
@kat If you place your text inside the bubble as a child layer, when you flip horizontal (or move the handles to reverse the orientation), both bubble and text will be reversed. You can do at least one of two things. Keep the text as a separate layer (not as a child layer) so that when you reverse the bubble, you don't reverse the text. Or, if text is already reversed, highlight just the text with the Move tool and flip just the text horizontal. -
In an existing file (41 pages) I am unable to select or edit text frames. This action results in either nothing, or a spinning beachball. Trying to change the options for View > Text Flow this does nothing whereas I would expect it to outline text frames. In a new document I can create and edit text frames successfully. I have reverted to version 2.3.1 and the problem goes away immediately. I am unable to provide the document, I'm sorry. Mainly this is an invitation to test, and a message to other users to try downgrading if they experience this problem.
-
The image below is what I get when I open that document which shows that the Background layer is not affected by the Recolour Adjustment, because there are ‘proper’ layers inside the Group below the adjustment. This just seems to be restating what I said earlier.
-
 Is it possible to create such construction, using initial words? Text: Text, text: Text text text text text.
 -
I am annotating a book that already has some footnotes. Not many, I think 9, but I want to differentiate them from my own footnotes (of which there are over 1200). In the book, the 9 footnotes use an *, and then have the note at the bottom of the page, but there's no simple way to add those and my numbered footnotes. One solution I came up with was to have a different master page for pages with footnotes, and make the text block a bit smaller, with a separate text block on the bottom to put the original footnote. My footnotes then appear automatically and the original one shows up below it. The problem with this is that the original footnote is now below my footnotes, so it's separated from the original text. That's kind of backwards. It would make it harder for the reader to understand that those note were written by the original author. Another solution would be to stop and start the numbering of the footnotes, and insert an * in between the numbered footnotes. This, however, would mean the * is in the middle of my footnotes, and it's a very complicated way to do it, and would likely break if any changes needed to be made. I'd really like to find a simple solution that allowed me to insert the footnote below the text, didn't mess up the flow, and allowed my footnotes to be shown below the original footnote. Anyone have any ideas?
-

Spellin Mistake (alettiin) how to fix?
lacerto replied to KMA's topic in Affinity on Desktop Questions (macOS and Windows)
It seems that you did not watch the video clip I posted above where copy pasting from macOS Word to Affinity Publisher 2 results in incorrect language assignment, while copy pasting from Windows Word to Affinity Publisher behaves as expected. On both OSs I have US English as display language and Finnish regional settings. I can reproduce this consistently. I cannot see how changing the default language settings in Affinity Publisher could correct this in a situation the source text has multiple language assignments, because the receiving container gets a single language assignment, so basically max one language could even theoretically get correctly assigned. If you cannot experience anything like this, your deduction seems to be that errors other people are experiencing are results of their poor understanding of how Affinity apps operate, or the odd combination they have between their computer or app display language and their native language (implied by regional settings they have active in their OS). My deduction is that this is yet another glitch and inconsistency in Affinity apps and something that requires workarounds and specific user attention until it gets fixed (and it seems, fixed by Apple since at the moment I cannot get Pages work properly, either, in context of such dictionaries as sv-FI). Our disagreement seems to based already on different staring points since you appear to cherish ability of a user to define any arbitrary language-country combination for text, disregarding whether there is a matching language dictionary installed (or whether such dictionary actually even exists anywhere in the universe). I see no point in such virtual computing and would rather have computer programs be able to use something that actually exists and is installed and which other apps designed for similar purposes already can utilize. -
De marges in Publisher zijn visuele hulplijnen. Ze oefenen nergens invloed op uit. Wat ik doe is een masterpagina gebruiken om mijn tekstkaders op te zetten en als ik dan de grootte van de "marges" wil veranderen, verander ik gewoon de grootte van de tekstkaders op de masterpagina. Het belangrijke concept om te begrijpen is dat je tekst wordt vastgehouden in de tekstkaders, je kunt de knipselkandidaten zo instellen dat ze de marges respecteren, zodat je tekstkaders precies de grootte van de marges hebben, maar als je dan de grootte van de marges verandert, moet je de grootte van de tekstkaders aanpassen. Vandaar mijn gebruik van tekstkaders op de masterpagina('s). Tip: Maak er een gewoonte van om alles op je masterpagina's unieke beschrijvende namen te geven, bijv. Linker tekstkader, Rechter tekstkader, Linker paginanummer, enz. Het zal je veel tijd besparen om dingen te herstellen. Vertaald met DeepL.com (gratis versie) ============= The Margins in Publisher are visual guides. They exert no influence on anything. What I do is use a Master Page to hold my Text Frames and then if I want to change the size of the "margins" I will simply change the size of the Text Frames on the Master Page. The important concept to understand is that your text will be held in the Text Frames, you can set the snapping candidates to honour the margins so your Text Frames will be the exact size of the margins but then if you change the size of the margins you will have to resize the Text Frames. Hence my use of Text Frames on the Master Page(s). Tip: Please get into the habit of naming everything on your Master Pages with unique descriptive names. e.g. Left Text Frame, Right Text Frame, Left Page Number, etc. It will pay off with saved time fixing things.
-
 Hi I don't know if this is a bug or if I'm doing something wrong but would really appreciate help. When I export my file, the text frame boxes are showing/printing. I've opened the Text Frame Panel and the stroke is definitely at 0pt. Any ideas?
 -
 Hello there, So I'm a website designer, and I would like to design in Affinity Designer more. I found a problem though that is preventing me from doing that full-time...When I export my files to PSD (for handing over to developers) and open them in Photoshop, the text layers appear as image/raster layers and aren't editable. Please help. This is a very important issue for me to resolve. I cannot proceed with using Affinity Designer if our dev team can't edit the texts. Other than this, I am really loving this software. Please help. Thanks, Eli
 -
 When I try to change the fill color opacity of a text frame in Apub, the color changes from white to black. When I get to zero opacity it finally shows zero opacity. Affinity Publisher version: 2.4.2 macOS version: Ventura 13.6.6 | 3.5 GHz Quad-Core Intel Core i5 | Radeon Pro 575 4 GB | 40 GB 2400 MHz DDR4 Publisher Text Frame Fill Opacity.mov ADC Celtic Celebration Flyer 2024 v2.afdesign
 -
I'd suggest creating the specific design with border and text that you would like to reuse over and over again as an asset in the Assets panel, with a dummy QR code inside. Then instead of adding a QR code with the tool from the toolbar, you would just drag your asset into your document and edit the placeholder QR code. It wouldn't be slower to use than the QR code tool, but it would avoid complicating the tool with a hundred options for all the different border and text combinations people could possibly want to create. But one thing that might be nice would be an integration with the text variables in Publisher so the target URL of a QR code could be placed somewhere as plain text in a way that it auto updates when the QR code is modified. This is a common use case to cater to peolpe who have trouble scanning a QR code for whatever reason. For example, a "Copy Target URL as Text Variable" context menu command that would then allow to paste it into any text object in the document.
-

How do I create this text effect?
Komatös replied to jakzx's topic in Affinity on Desktop Questions (macOS and Windows)
Hello @jakzx and welcome to the forums. You need three Artistic Text layers. The top and bottom layers have the same font and the same size. The middle layer gets a different font and a different color. Now the top layer needs a mask. To do this, hold down the CTRL key and click on the (preview) icon for the upper text layer. You now have a selection. At the bottom of the Studio Layers panel, you will find the icon for creating a masking layer. Now you can use the brush tool and a white brush on the mask to mask out the areas that should show through from the middle layer.
-

text in shape backwards?
KarinC replied to kat's topic in Affinity on Desktop Questions (macOS and Windows)
If you group them you just move the group. -
Publisher text style problem
anto replied to anto's topic in Affinity on Desktop Questions (macOS and Windows)
How can I customize a group when I can't select text and can't see what's going on? How do I transfer all paragraph settings to a group? -
 My quick and dirty - if you absolutely positively need "BY" or "WRITTEN BY", but it eats up space for the author name and looks amateurish, in my opinion of course. I left the COVER BY off because you aren't selling cover designs, you're selling the story behind the cover. The logline text could be taller, but like I said, quick and dirty. Your cover background and title format are excellent. You've obviously put a lot of thought and work into getting it just right.
-
 Hello, can you increase the font size and the size of the icons in the dashboard? I have tried all the options under Edit- Settings. light/dark, contrasts etc. I am a bit older, my eyesight is deteriorating and the program is difficult for me to use because everything is much too small. I use Affnity Publisher on my desktop device. best regards, Birgit
 -
When attempting to enter text, Affinity will not include spaces i.e. "The fact" appears as "Thefact" Attempting to add a space does not work either.