Peter Werner
-
Posts
305 -
Joined


.thumb.jpg.2ac1b0424a6896c349d3d16eea40c7f3.jpg)
-
 Peter Werner reacted to a post in a topic:
Scripting
Peter Werner reacted to a post in a topic:
Scripting
-
Peter Werner reacted to a post in a topic:
Unexpected Feature: Vectorize a Bitmap Image Directly in Publisher
-
 Peter Werner reacted to a post in a topic:
Machine Learning: Object Selection Tool
Peter Werner reacted to a post in a topic:
Machine Learning: Object Selection Tool
-
I fully concur with respect to the privacy and security concerns, but there is also another point to consider: None of these free tools (online or local) can be trusted to reliably output press ready and properly colour managed PDFs, as this is not the audience they primarily cater to. As for the main topic, I agree that outputting pages or artboards as individual files is something many users will be confronted at some point. Data Merge workflows may also be worth considering when designing such a feature.
-
Snapseed reacted to a post in a topic:
Linux user base keep growing !
-
Snapseed reacted to a post in a topic:
Linux user base keep growing !
-
Chills reacted to a post in a topic:
Linux user base keep growing !
-
Wanesty reacted to a post in a topic:
Linux user base keep growing !
-
Linux user base keep growing !
Peter Werner replied to Wanesty's topic in Feedback for the Affinity V2 Suite of Products
I can't produce sources right now, but this is referring to interviews with Serif staff and leadership that were published before the iPad proof of concept versions were shown. The near infinite zoom and tiled rendering feature from their floating point precision rendering system in Designer seems to have come from this project. As far as I remember, the decision to develop an Adobe competitor on top of that engine was made then, and that was the start of Designer for Mac. But I'm sure someone from the dev team could give you a much more comprehensive answer. The Windows versions use mainly .NET for the system specific parts whereas the Plus range used C++. What you describe might just be as simple as some component of .NET Framework relying on a different DirectX version than for example the Affinity renderer. Unlike the Plus range, the Affinity apps use a shared core and everything was developed on top of that, most likely from scratch, judging from all the stack traces I have seen after something crashed. Also keep in mind that modern DirectX, Vulkan, Metal etc. wasn't even around or at least not used when the Plus range was in active development. Again I cannot provide specific links off the top of my head, and I don't know how up to date that information is, but this has been what Adobe has communicated in the past about their overall user base. It might also vary quite a bit from region to region. As I mentioned in this thread before, Photoshop product manager John Nack has on his blog also stated that the reason for Adobe not to go to Linux was not a lack of a market or user demand, but that it would only shift part of their existing user base to Linux instead of generating new sales and expanding their market, which seems to have been their strategy for quite some time now ("Photoshop Extended" was probably the first overt attempt at this even before subscriptions). Which makes sense – you just have to keep subscribers happy enough to not cancel, but if you want to grow the profits, you need to instead invest your resources into features that attract new customers or sell additional products (more cloud storage, stock photos, …). -
Wanesty reacted to a post in a topic:
Linux user base keep growing !
-
Alfred reacted to a post in a topic:
Linux user base keep growing !
-
HCl reacted to a post in a topic:
Linux user base keep growing !
-
Linux user base keep growing !
Peter Werner replied to Wanesty's topic in Feedback for the Affinity V2 Suite of Products
This is not correct. An entirely new codebase, intended initially for an iPad product, was used as the basis of the Mac versions. The core part is mostly platform independent and the user interface and the renderers are written more or less from scratch for each supported platform. As for everybody else's points: Market share figures are misleading. The creative market traditionally has a 50:50 split between Mac and Windows, which does not reflect overall market share. Linux overall market share is completely irrelevant to the discussion since the vast majority of potential Affinity Linux buyers can't even use Linux day to day until Affinity (or the Adobe Suite) becomes available. There is no question that the potential market is there (all the VFX studios and web developers alone would likely be enough). It remains entirely a matter of what the priorities of the Serif team are. No amount of repeating the same discussions in circles in this thread will change that. -
Check out my earlier post about it in this thread – TLDR is that I was able to get around it by running the dotnet install winetricks command multiple times without --quiet but with --force. First choose "Repair", then run it again and do "Uninstall", then a third time with "Install". My tests were on Linux Mint.
-
Peter Werner reacted to a post in a topic:
Why won't Serif listen to customer needs and create a Lightroom alternative for us?
-
Affinity Photo can already write PSD files as of today. And as soon as we get scripting, no doubt IDML export will soon appear as a third party add-on if Serif doesn't add it themselves. Still, I agree Serif could be doing a bit more to make data exchange easier and support more open standards. IDML export isn't the only example. For instance, I don't think swatches can currently be exported to anything but their proprietary format. And having OFX plugin support would also help with creating a more open ecosystem with respect to third party effects. I'm sure there are more examples. The .cdr format has been reverse engineered and documented. Open source libraries are available (at least for reading, not sure if they can write too). Most software companies don't document their working file formats because they pretty much change with every release. But I think there should be a legal requirement to publicly document the format when a software product is discontinued, its licensing terms change significantly, or when the format is replaced.
-
Reverse engineering the Affinity file format(s) has already mostly been done by this project on github. The code hasn't been updated in a while, but enough is covered that updating it for the newest versions would likely not be too difficult. I haven't looked into the code in detail, but part of the interfaces also seem to be auto-generated based on document files.
-
Peter Werner reacted to a post in a topic:
Affinity Suite V2 on Linux [ Wine ]
-
Wanesty reacted to a post in a topic:
Affinity Suite V2 on Linux [ Wine ]
-
In case anyone is wondering, I just tested running the 2.5.5 update on Affinity Photo on Mint and I haven't run into any issues. Still working fine. But I noticed another bug to be aware of: There is no prompt to save an open document with unsaved changes (also exists in 2.5.3). So don't rely on this prompt to save your documents, always save explicitly.
-
Peter Werner reacted to a post in a topic:
Affinity Suite V2 on Linux [ Wine ]
-
Wanesty reacted to a post in a topic:
Affinity Suite V2 on Linux [ Wine ]
-
I was referring to the other parts of the system like working off of shared storage, not the installation process itself. The installation itself can no doubt be streamlined in several ways (for example, ultimately there will be no need to clone a git repository, build Wine etc. since we could just distribute the binaries and a Wine prefix with the software pre-installed in trial mode once the solution matures a bit, assuming that is legally possible). But for now, the probability of something going wrong during the installation to the point where manual intervention is needed is still very high unfortunately, and sadly that part can't be automated by a script. Tested here on Mint 21.3 with graphics set to Vulcan. Tables work flawlessly in Publisher for me. I also added a text frame to see if that would trigger a problem, but it's working well. I did get Photo to crash when exporting the attached screenshot to PNG though 😄 Just disappeared without a stack trace, but as you can see the file got exported just fine. Might be the msvcrt thing.

-
That's a cool idea – about 450 a day isn't bad at all for traffic coming from a niche forum topic. More than 67% Firefox is also interesting. Of course – my worry is that a standard user expecting Linux to be an alternative to Windows or Mac will try to connect to the server using the GUI and assume for it to just work. But there is not much we can do here, it's one of the many points that Linux distributions still have to improve if they want to be ready for the influx of less technical users coming from Windows. I'll give this a try later today if I can find the time and then report back if I can reproduce it.
-
It is expected that no GUI or similar will appear. In simple terms, this is basically just setting up the folder that contains your virtual Windows environment. The "Same or higher version of .NET Framework 4 has been installed on this computer" is exactly what I was getting as well. Once I clicked "Close" and waited some time, an installer popped up where I think I had the option to repair the installation. I did that, then ran the command (see below) again and got an uninstall option, and I did that as well. After that I ran the installer again (with the --unattended) and it installed just fine. The "Windows Module Installer Service is not available" message is not something that I encountered. But one thing I might have done differently I did is I kept resetting the windows version setting to Windows 11 using winecfg before running the dotnet installation. But based on the screenshot, it's just a warning and the "Continue" button is available, so it might be worth just giving it a try. I just used this (skipping corefonts/allfonts package because it takes forever and I just wanted to get dotnet48 working. You can install the fonts package after you get Affinity working, it will just not do nice font Antialiasing without it): rum affinity-photo3-wine9.13-part3 $HOME/.wineAffinity winetricks --force dotnet48
-
Some graphics libraries support drawing Bézier splines directly (i.e. without the application breaking them up in line segments first), such as using the evaluators feature in OpenGL. So my first instinct would be to test with OpenGL vs Vulcan to see if either of them draws them correctly. If so, it might be a simple typo somewhere in one of the graphics libraries being used. Like passing x0 twice instead of x0 and x1 or something like that. Great idea, I'll give that a try! Though I guess we'll need an easier solution eventually if we want the average graphic design person migrating to Linux from Mac or Windows to be able to use this. A lot of small design studios probably use a NAS for their data. I haven't had a single crash yet (other than trying to run the app by double clicking a document in the file manager), but the freezes I observed seemed to be related to snapping. You could try disabling snapping and if the freezes disappear, switch it on again and try disabling the individual snapping options on by one to see which one is the main culprit.
-
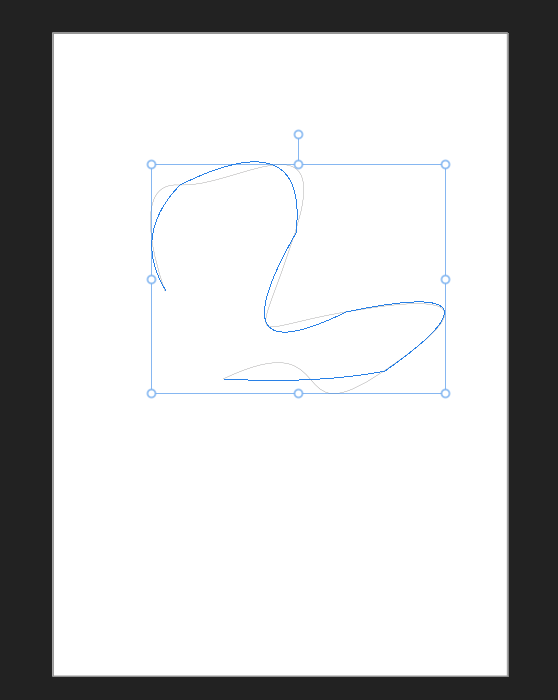
Good point. Let's see if others with the same problem can reproduce my fix first. I was under the assumption that winetricks checks the version of wine and then universally refuses to install the package and that therefore, it wouldn't work on any system without --force. I tried to confirm this by looking at the log in this youtube video, but it seems that dotnet40 is being used instead of dotnet48. Apparently, for dotnet40, the warning does not appear and the installation goes through without --force. For those here who used the dotnet48 package, did the .NET Framework installation actually happen without using --force ? --- After some more experimenting, I discovered a few other quirks. Most notable is the tool overlay drawing of Bézier splines. It takes shortcuts and doesn't match the (correct) curve drawn by the document renderer. Not a big issue in practice, but nevertheless interesting. I also found that Wine doesn't like SMB mounts for loading and saving files. You can't easily select them from the file dialogs, and if you navigate to /run/user/1000/gvfs/(smb share folder)/, Affinity will complain that the path contains invalid characters. This applies to documents as well as other resources such as swatches, Resource Manager relinking and also includes drag and drop operations. It's probably possible to work around this by mapping the shares to a drive in Wine. This might also allow keeping paths of linked files consistent across Windows and Linux so Publisher files could be shared without having to re-link all assets every time. For now, the Studio Link feature in Publisher is also not working. I wasn't asked for my license in any of the three apps (likely due to the extended trial thing going on), but I can't imagine using the trials would leave that feature deactivated. But other than that, it really works surprisingly well.
-
Haha, no worries. Thanks so much for the guide, no way I could have done it without. By the way, feel free to copy and paste the hack for retrieving the application icon from the Publisher executable for the .desktop file to the "Desktop Shortcuts" section if you want. When the installation of the dotnet48 package using winetricks fails (or when it doesn't even try to install it, which seems to consistently be the case unless you use --force), it seems to fall back on some sort of built-in Mono that causes the crash in the Affinity installer. The Affinity installer runs almost all the way through before it crashes, so I tried running the Publisher.exe that gets installed to see if it would work, and it crashed, too. Hence extracting the .msix manually most likely wouldn't fix the problem. It really seems to need the dotnet48 package. But running the dotnet48 installation with the GUI (omitting the --unattended flag for winetricks) and chosing the "Repair" option, then running it again and choosing "Uninstall", then running it again using the --unattended flag seems to fix the "mscoree.dll not found" issue. I think that might be useful to include as a troubleshooting tip in the guide (as well as the point about including the --force option for installing dontnet48 using winetricks), as several people including @JCristina seem to have run into the same problem. Yeah, but I'll have to check if this persists across launches, since any changes to other kinds of preferences do not seem to get saved for me. For now, I'll probably work around that by copying preferences files from a Windows installation so I don't get SWOP colors every time I create a new document.
-
I finally gave it a try under Linux Mint, without success at first, but now it works. The installer crashed reproducably at some point during the installation. So I made a second attempt, starting from scratch, and then another with a clean Wine prefix. First I thought I might have a conflict with the system Wine (which I didn't remember installing, but turns out installing the winetricks package using the system package manager as recommended in the guide pulls the distribution's wine in as a dependency). Running "./wine --version" in the "wine-install" directory spits out "wine-7.9-15231-ga7c9b19e1a2", whereas I would have expected version 9.13 after running "git switch affinity-photo3-wine9.13-part3". However, it turns out running "wine --version" for the system Wine gives me "wine-6.0.3 (Ubuntu 6.0.3~repack-1)", so the wrong version number can't be the system Wine interfering. I assume that the new branch just misreports its version information. So this doesn't seem to be the cause of the problems. Then I thought maybe setting Wine to Windows 11 and using a WinMetadata folder from a Windows 10 installation might be the cause of the issues. But alas, setting the prefix to Windows 10 didn't help either. The first actual error I always encountered during the installation process when following the guide was when running rum to initialize the prefix, which gave me this error rum affinity-photo3-wine9.13-part3 $HOME/.wineAffinity wineboot --init Error! Path to wine version doesn't exist! Wine versions available: So rum somehow couldn't find Wine in that wine-install folder in the Documents directory. Hence I manually created the /opt/wines/ folder, moved the wine-install folder into it and renamed it to affinity-photo3-wine9.13-part3. After some digging, I found that this part (and also the one for creating a link to wine named wine64 in the bin directory, which doesn't seem to be necessary) seems to erroneously have disappeared in the new fancy guide compared to the older codeberg guide. This let me run rum and proceed. However, in my second attempt, when installing dotnet48 using winetricks, I realized the installation didn't actually succeed. Instead it gave me this warning: warning: This package (dotnet48) is broken in wine-7.9-15231-ga7c9b19e1a2. Broken since 5.18. See https://bugs.winehq.org/show_bug.cgi?id=49897 for more info. Use --force to try anyway. So I ran the command again using --force, assuming that the issue isn't relevant for our purposes, as this seems to have worked fine for others. Alas, when trying to run the installer, I ran into the "mscoree.dll not found, IL-only binary (installer file name) cannot be loaded" problem. So I ran the dotnet installation again and set the wine prefix to Windows 11 again. Multiple times. No change. I also tried changing the library overrides for mscoree.dll in winecfg, but to no avail. Without the dotnet48 package, the installer launches and crashes during installation, but with the dotnet48 package installed, it gives the mscoree.dll not found error and doesn't launch. So I left out the --unattended flag to see what the installer GUI might tell me. Turns out that it complains that the same or a higher version of .NET Framework 4 has already been installed on this computer. After dismissing this dialog, suddenly an installer popped up that offered me to repair the .NET Framework installation. After going through that, the same "IL-only binary" error remained. I also tried this tip here and renamed the "/windows/mono" folder. This didn't help either, so I reverted it to its original name. Then I tried uninstalling .NET Framework using the installer GUI (i.e. without the --unattended flag) and re-installing it using the commandline again. This let me launch the Affinity installer, offering to repair the Publisher installation (which was incomplete from the test run without dotnet48 installed). The install ran until the end without crashing. With this, Publisher launched successfully. Overall, it took about 4 hours of tinkering, so the process is nowhere near end user ready yet. Tip for the Icon: Under Linux Mint, if you open the Publisher.exe file, it will load the PE executable inside the Gnome Archive Manager application. This shows different parts and sections of the PE as files and folders, so you can go and extract the file Publisher.exe/.rsrc/ICON/7 as .wineAffinity/drive_c/Program Files/Affinity/Publisher 2/Publisher.png and then specify the path to that in your .desktop file under Icon=... . The icon seems to get extracted in PNG format, so no need to convert from ICO, just give it a .png extension. First impressions: Works great with only a few glitches. With the GL renderer canvas disappears when a menu pops open, when typing into a text field in the transform panel, or briefly when changing tools, but activating the Vulkan renderer fixes these issues (HP Z620 workstation with 32 cores, graphics card should be an ATI Radeon RX570 I believe) If a panel or document window is ever detached to floating state, it can never be reattached ever again. The "Reset Studio" command in the Window menu is your friend. Alt+dragging an object to duplicated drags the window as this is captured by the window manager, so I'll probably just have to deactivate that feature in the system. Changing the UI language always reverts to the system default, even after a relaunch of the application, and changing the default CMYK color space also doesn't seem to persist across launches, so likely preferences cannot be saved Fonts are not anti-aliased, but I still need to install the corefonts/allfonts package and there seem to be some registry hacks to enable font smoothing I'll also have to see if color management and screen calibration works reliably with the rest of the system Saving .afpub files does not in fact cause a crash I can even drag files from the Linux file manager into the Publisher window So far, no crashes at all. I experienced one 3-second lag once, that's it. Even typing Japanese with Mozc works (it pops up an input field and then inserts the text). The spacebar no longer temporarily activates the hand tool as long the Mozc IME is active, but that's not a big deal Show in Explorer opens the Wine Windows Explorer, not the native file manager After quitting the application, the .afpub~lock~ file remains The application cannot be launched by double-clicking an .af* file in the file manager. It seems like it tries to launch it, but there are errors. Big thanks to all who got us this far! Aside from the rather bumpy installation process, this seems very close to being very usable!
-
Peter Werner reacted to a post in a topic:
Please consider Linux as a viable platform - Microsoft is bleeding users to Linux because of their choices.
-
It's any time someone from Serif makes a forum post saying "We currently have no plans for a Linux version of Affinity." 😆 But seriously, let's maybe keep this thread focused on troubleshooting Wine, as there are plenty of other threads already discussing Linux market share.