

h_d
-
Posts
1,611 -
Joined
-
Last visited
Reputation Activity
-

 h_d got a reaction from KUK in Parallelogramm
Hi @KUK and welcome!
Here's one way:
Draw a rectangle, and in the Transform panel set the Shear value to -81º (or 81º to slant left):
You can confirm this by setting up a two-axis custom grid with a secondary axis of 9º
:
The angles of the parallelogram match precisely to the grid.
And this grid can also be used for creating similar angles.
-

 h_d got a reaction from DelN in Importing LUT's into Affinity Photo
As I understand it, it doesn't matter where you put your LUT files, as Affinity Photo looks for them wherever you tell it you have kept them. (This is on a Mac, but I've no reason to suppose it works differently on a PC.)
For example, you have a folder full of LUTs, somewhere (anywhere) on your computer.
With an file open in the Photo persona, you add an LUT adjustment layer:
You click Load LUT...
Navigate to the folder where you're keeping your LUTs:
Select the one you want to use...
And it will be applied to the image, with its name in the LUT Adjustment panel, as above.
You can save it as a preset by clicking Add Preset, and then re-use it from the selection of presets in the Adjustments pane, which I've dragged out and made a bit larger to display it clearly:
:
But as far as I can see, it doesn't matter where you keep the LUTs.
The downside is that this means adding each LUT and creating presets one at a time.
The upside (on a Mac at least) is that it doesn't seem to matter if you move the folder full of LUTs after you've created the presets.
Hope this helps.
-
 h_d got a reaction from walt.farrell in Automatic Copyright info in Metadata
Hi @fishbloodstiffs and welcome!
There's a Metadata panel under the Window menu in the Photo Persona which isn't open by default. If you open it, you can add IPTC, rights information and more.
You can then use the 'burger' drop-down in the same panel to export the metadata:
Next time you open an image, choose Import from XMP, navigate to your saved XMP file and choose to Open it, and the same rights information will appear in the Metadata panel. Save the new file, rinse and repeat.
Similar arrangement in Develop Persona.
Add: for more info search the Help for 'Metadata'
-
 h_d reacted to Jonopen in Insect week! (ladybird/bug photo)
She's a beauty. That's a great shot.
I think to really capture the fine detail of the eyes you need a good lens and focus merge multiple shots to increase the depth of field. I've not tried it yet but there are details in the Photo help file:
https://affinity.help/photo/English.lproj/index.html?page=pages/FocusMerging/focusmerging.html&title=Focus merging images
Just for interest, Isabel Acacama has also drawn some amazing insect images including a chaser dragonfly:
https://www.isabelaracama.com
-
h_d reacted to Alfred in Publisher, decimal tab: use character other than period (".")?
Also worth mentioning that the 7-day trial clock for each app starts at first launch and runs continuously, so you need to make sure that you have a suitable block of time available for any testing that you want to do.
-
 h_d got a reaction from Alfred in Publisher, decimal tab: use character other than period (".")?
Also worth mentioning that you can get a free trial of all the Affinity apps here.
-
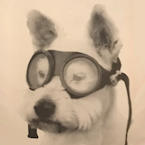
h_d got a reaction from Alfred in Insect week! (ladybird/bug photo)
Wide-bodied darter dragonfly spotted in my garden, 10 May 2024. Slightly tweaked with Affinity Photo.
Shot with my Panasonic TZ-200. Like you @Jonopen I didn't quite get the eyes in focus.
-
 h_d got a reaction from MrsHedgyhog1966 in Applying White balance in developer - pre-set not working.
Hi @MrsHedgyhog1966 and welcome!
I see exactly the same thing (with Panasonic RW2 files). If I apply a WB preset, the sliders move to the correct positions, but the changes are not applied to the image itself until I click on one of the sliders.
macOS 14.5, Affinity Photo 2.5.3
I would say that's a bug.
-
 h_d got a reaction from Benwiggy2 in Make line thicker in the middle?
Alternatively you can modify the Pressure setting in the Stroke dialog:
-
h_d reacted to pioneer in Booklet
Firstly I wrote Affinity designer and that should of read Affinity Publisher so apologies for that. I also apologise for not looking at the family history program in greater depth. I think I have found the solution. On revisiting the family tree program I found that I can set a page size size to A5 and export as an RTF file, so I am getting somewhere, Thank you everybody for answering my query I will now get back to the drawing board. Once again heart felt apologies for taking up peoples time.. Cheers John
-
-
 h_d got a reaction from Hangman in Publisher, decimal tab: use character other than period (".")?
Also worth mentioning that you can get a free trial of all the Affinity apps here.
-
h_d reacted to R C-R in Can't open Raw files from Nikon Z8
@h_d, I think your sig might need updating....
-
h_d reacted to R C-R in Can't open Raw files from Nikon Z8
I had not noticed that file yesterday but I downloaded it today. On my Mac running Catalina, it opens in AP's Develop persona & the metadata shows it is a compressed image, but it just shows as an all black image, so no usable content.
-
 h_d got a reaction from pillarboxcottage in No camera or maker in EXIF info
You might want to read this blog post by a former Apple developer which has a whole section about some of the reasons not to use Image>Edit With in Apple Photos.
It's a few years old but I think the basic information remains valid. His advice is to open the image in Apple Photos' own image editor, and then use the Edit In Affinity Photo extension from the three-dot dropdown:
As I understand it, if you go down the Image>Edit With route, Apple Photos exports a duplicate of the RAW file as a TIFF and passes that to the outside editor (that's probably why Affinity Photo opens it in Photo Persona, not in Develop Persona).
Like you, I don't see the camera model if I use Image>Edit with on a RAW image. I'm speculating here, but I think it's possible that Apple Photos just doesn't write the camera make and model metadata to the exported TIFF.
But if I use the extension in Apple Photos' editing window, my true RAW image opens in Develop Persona. I can see the camera make and model there, and when I Develop the image and automatically switch into Photo Persona, the camera make and model are still there in the EXIF metadata panel.
That may not be the whole answer, but I suspect it's down the quirks of Apple Photos rather than a flaw in Affinity Photo.
ADD: I've just run a manual File>Export>Export 1 Photo as TIFF from a RAW image in Apple Photos. I then read the metadata from the TIFF using ExifTool. No camera make or model... I'd say that was a bug in Apple Photos.
-
h_d reacted to pillarboxcottage in No camera or maker in EXIF info
Thank you so much, h_d, that's very helpful. I've read the blog post and agree with you that it looks like an Apple Photos bug. I appreciate the time you took to explain that all to me.
-
 h_d got a reaction from loukash in No camera or maker in EXIF info
You might want to read this blog post by a former Apple developer which has a whole section about some of the reasons not to use Image>Edit With in Apple Photos.
It's a few years old but I think the basic information remains valid. His advice is to open the image in Apple Photos' own image editor, and then use the Edit In Affinity Photo extension from the three-dot dropdown:
As I understand it, if you go down the Image>Edit With route, Apple Photos exports a duplicate of the RAW file as a TIFF and passes that to the outside editor (that's probably why Affinity Photo opens it in Photo Persona, not in Develop Persona).
Like you, I don't see the camera model if I use Image>Edit with on a RAW image. I'm speculating here, but I think it's possible that Apple Photos just doesn't write the camera make and model metadata to the exported TIFF.
But if I use the extension in Apple Photos' editing window, my true RAW image opens in Develop Persona. I can see the camera make and model there, and when I Develop the image and automatically switch into Photo Persona, the camera make and model are still there in the EXIF metadata panel.
That may not be the whole answer, but I suspect it's down the quirks of Apple Photos rather than a flaw in Affinity Photo.
ADD: I've just run a manual File>Export>Export 1 Photo as TIFF from a RAW image in Apple Photos. I then read the metadata from the TIFF using ExifTool. No camera make or model... I'd say that was a bug in Apple Photos.
-
 h_d got a reaction from cje in unintentional rotation of artboard
View - Reset Rotation should do the trick.
If you want to turn it off, go to Preferences - Tools - Enable canvas rotation with trackpad and uncheck it.
Cheers,
H
-
 h_d got a reaction from nschutten in Affinity 2 photo Ivan Weiss Lut's where to find in Affinity
You may need to go to Window - Adjustment and import and categorise via the cogwheel in the LUT area there:
The LUT Adjustment in the Layers Panel doesn't offer any options to import or export new LUTs.
ADD: if that doesn't work, go to File-New, click the Account button and download and install from there.
Helpful hints here.
-
 h_d got a reaction from Humbucker in Where is the Document Menu?
In Affinity Publisher v1, Font Manager is indeed in the Document menu:
But in Affinity Publisher v2, Font Manager is in the Window menu:
This is from the v2 help file:
Sounds like you're reading instructions for Affinity Publisher v1 and applying them to Affinity Publisher (or Designer?) v2.
-
h_d reacted to v_kyr in fill vector object with image in designer v.2 ?
Doesn't play any role here for clipping, thus doesn't need to have an empty fll at all!
Clipping vs Masking (... it's the same procedure in ADe & APh) -
h_d reacted to lepr in Preview Image Icons not showing for Affinity Photo v 2.1 on MacBook Pro M2 Max
All view modes of Finder can have preview icons - see View Options.
-
 h_d got a reaction from Old Bruce in Paragraph spacing
Character panel - Size 12pt
Paragraph panel - Leading 12pt
Paragraph panel - Space After Paragraph: 8pt
I have displayed the paragraph end characters for clarity.
Save these settings as a style with your chose font.
-
 h_d got a reaction from R C-R in Paragraph spacing
Character panel - Size 12pt
Paragraph panel - Leading 12pt
Paragraph panel - Space After Paragraph: 8pt
I have displayed the paragraph end characters for clarity.
Save these settings as a style with your chose font.
-
h_d got a reaction from walt.farrell in No histogram with curves channel
I don't have an answer, just some observations.
When you create a new Adjustment Layer you get this:
If you then invert it, you get this:
If you invert the Adjustment Layer a second time, you get this:
This arrangement is only temporary, though - as soon as you make any change to settings in the Layers panel (eg Opacity or Blend Mode), the white thumbnail disappears and the Adjustment Layer reverts to its original state.
What @CogPsyence has seems similar to my third screen grab (no nesting indicator, the Adjustment icon to the left of the Layer thumbnail), but with an apparently permanent, transparent thumbnail. I don't think there's an additional pixel layer, just a mask.
Which doesn't make a lot of sense, as an adjustment mask should range between white and black. I've tried quite a few ways of making the thumbnail/adjustment layer transparent, without any success.
It may well be a bug, but I'm not sure if it's readily repeatable. Perhaps the easiest solution for @CogPsyence would be to delete the original adjustment layer and try again. (Or alternatively upload the .afphoto file to the Forum so others can investigate more fully.)