Search the Community
Showing results for tags 'affinity photo'.
-
Strangely A-Photo for MacOS (versions inc. 1.5.2) change the Byte Order of TIFF files from Macintosh to IBM. Not very cool. Side note, wish export panels and personas would somehow highlight when a property (e.g., 16-bit sampling DOWN to 8-bit or 80% JPEG compression UP to 100%) has been changed in a way that will result in (perhaps unexpected) data loss. Love A-Photo!
-
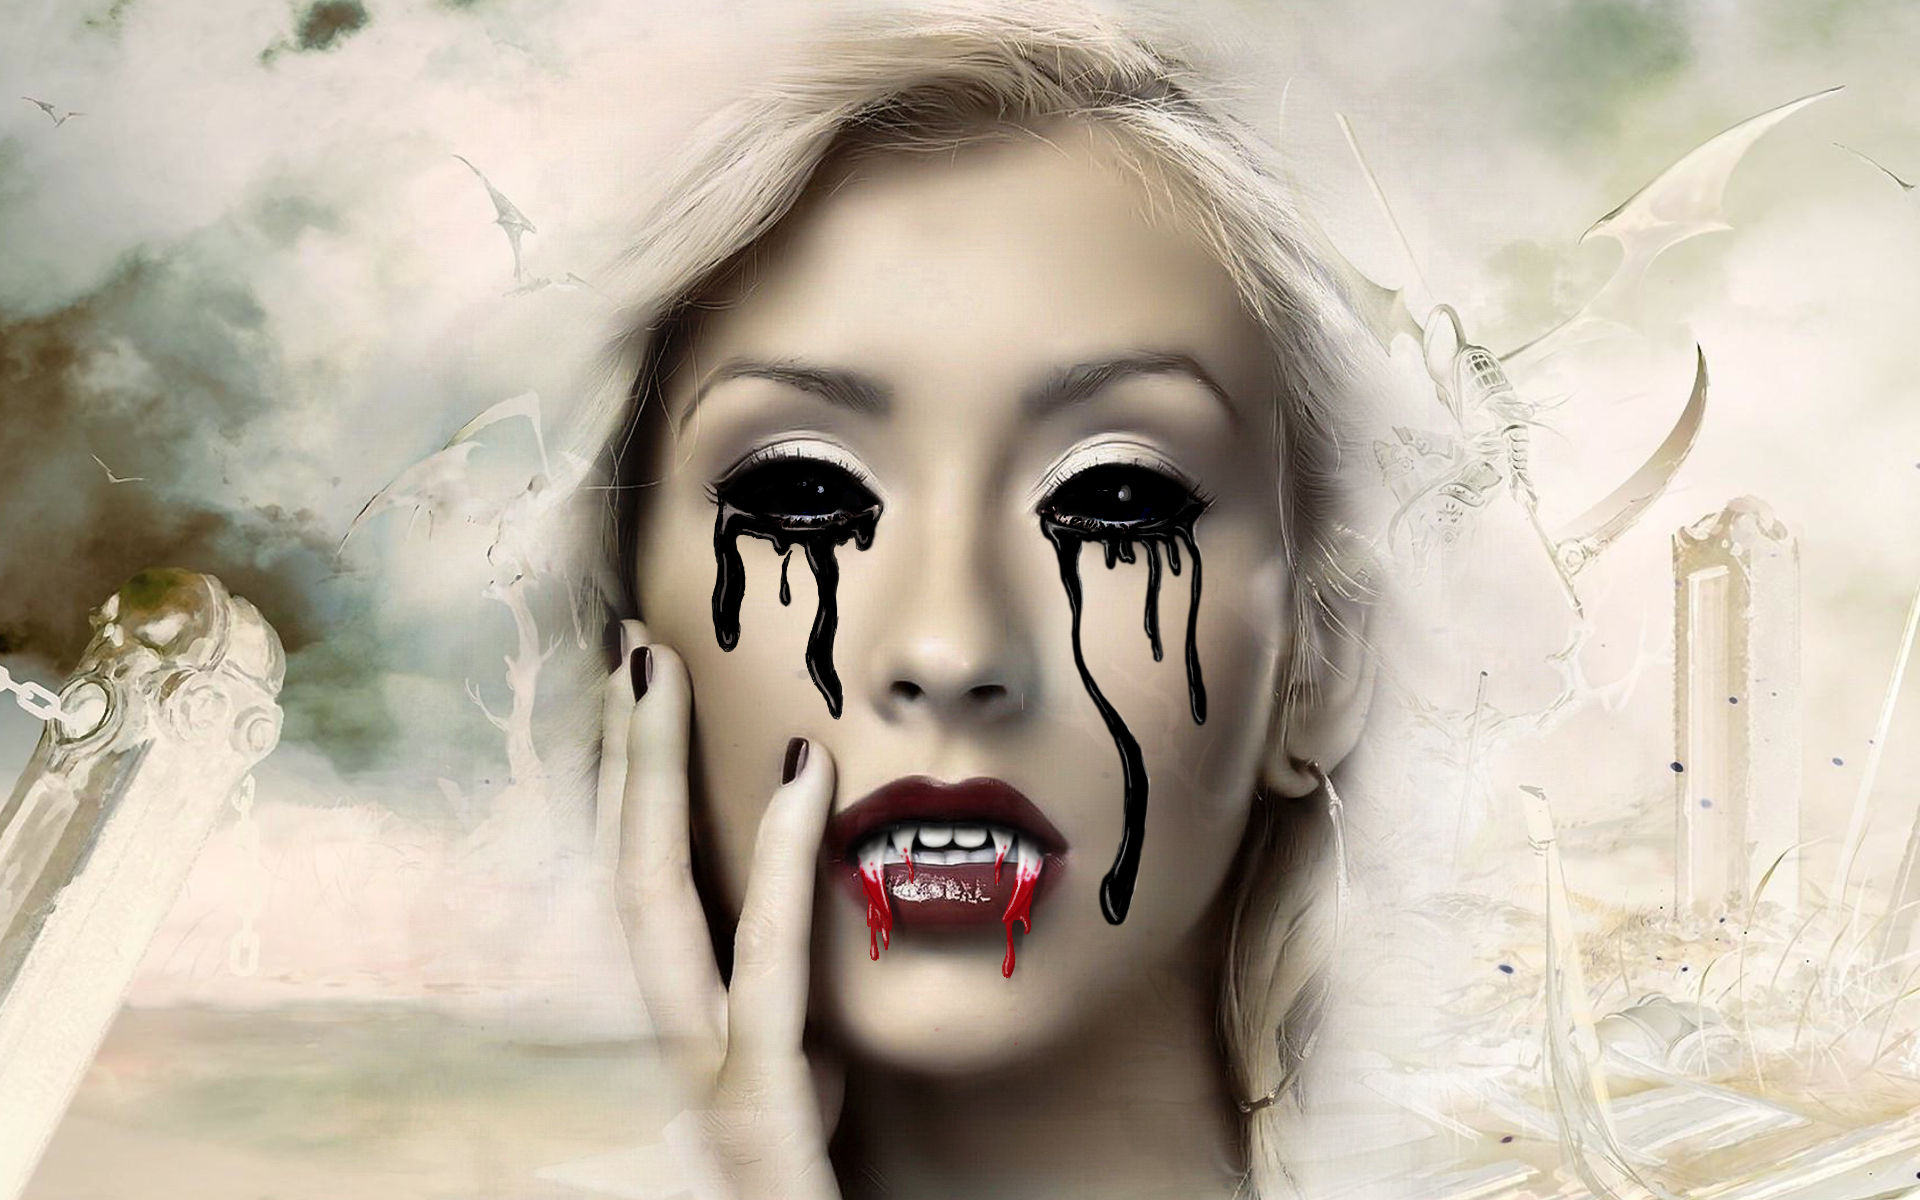
SO DARK THE NIGHT: pretty dark, halloween. For those who like it (FHD Wallpaper 1920 x 1080 px) http://b-bertuleit.de/halloween-wallpaper/
-
Greetings! I had to do a bit of study and homework in order to wrap my head around the clipping and masking operations in Designer and Photo. In the process, I developed a one-page infographic (attached), and it apparently has already helped some folks on the Affinity Designer and Photo Group in FaceBook: https://www.facebook.com/groups/AffinityDesignerPhotoPublisher/. I will be updating it shortly, but wanted share the first version here for comments and suggestions. Enjoy! Clipping vs Masking.pdf
-
 I have installed Affinity Photo 1.6.2 on my home PC with Windows 10 recently and cant work without pain in my eyes. Fonts are pixelated, thick. The look ugly. My display is LG 22MP65 with 1080p resolution hooked up to ASUS N73SV laptop. I have no problem with any other software but Affinity Photo. How to fix Affinity Photo UI fonts on Windows 10?
-
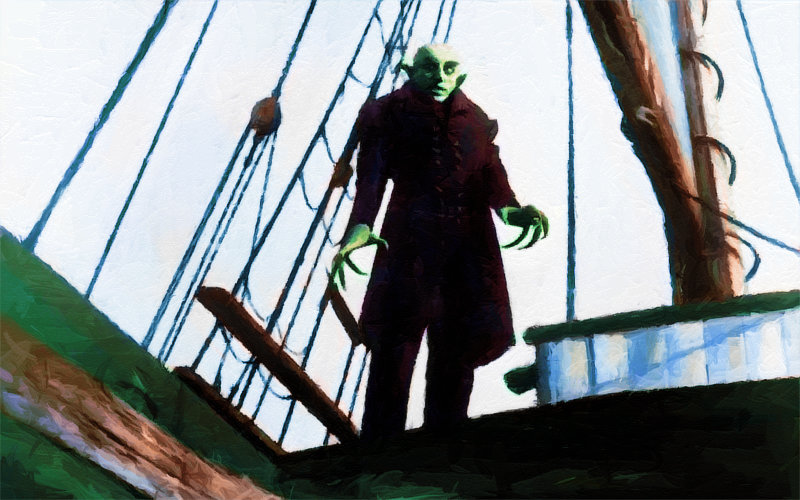
 Hello, here my Workflow for faking acrylic paintings in Affinity Photo using FotoSketcher(Freeware). I'm using FotoSketcher(.com) for the brushstroke effects. (PhotoArtist, AutoFX AutoMagic or Topaz Impression should work too, but not tested) Form the source image i generate 4 images with different minimal brush sizes, normaly 40, 20, 10 and 5. FotoSketcher settings: Painting 7(Gemälde 7). Have a look at the attached afphoto file. (It's simple, but complicated to explain) The images with thick brush strokes(40, 20) are used for the background and the remaining two images(10, 5) are for the subject und fine details. In Affinity Photo (or Designer) the image with bigest strokes gets loaded and used as main background and the others used as layers on top. My next step is adding layer masks and inverting (strg + i) them. A white brush on the mask is used to paint back the details. The Layer with fines strokes is only used for the face/eyes and other important details. Affinity Photo only: Now i combine the layers to a new layer for a paint effect. Dublicate the layer and apply "find edges" filter. Invert it (strg+i) and use curves to intens the borders. These two layers are needed for Lighting-Live-Effect and texture settings and notice the layer blending settings. Because i used a bw image as sample, i added some colour with extra layer ("Basecolour"). The last three layers adding some artistic feel to image. Colour variation layer: Colour variation are often used in paintings to fake details and add more life to a images. Warm layer: Add a warm orange colour tint to sun lit surfaces. Cold layer: To add a blueish ambient tint to some shadows. ps. You can use load you own brush as image in FotoSketcher. In Brush.zip are my test brushes. Brushes.zip Max_Schreck.afphoto
-
- 1
-

-
- affinity photo
- martinb78
- (and 2 more)
-
 When I use affinity Designer, the menu "edit in photo(File->edit in Photo)" is not active. So, I can't run affinity Photo from affinity Designer. (and I can't run Designer from Photo, also.) Are there any settings which I have to do.? I bought affinity Photo and Designer. *affinity Designer... windows version 1.5.3 *affinity Photo... windows version 1.5.2 (I use both soft in Japanese)
-
 Hi there, I would like to create text following a curved line. I have found a tutorial to do it on affinity DESIGNER but cannot follow it. I have affinity PHOTO. Am i able to write text on a curved line and if so how do i do this? Thank you, Kate
 -
This is just an idea for later versions of Affinity Photo; I was thinking it would be really nice to have Lightroom Presets compatible with later versions of affinity photo. Although they are different applications, they are still similar so maybe Lightroom Presets could become usable in Affinity photo! (Just an idea but would be very useful) Kind regards! Hanan
-
Here’s some of my photo manipulation done in my love: affinity photo for iPad dont challenge me here, because I care less if your work is better than mine, rather I care if you yourself like your work as well as mine to share with me and all who feel the same describe your techniques, how long it took, anything original about your workflow... leave SE your raw assets if you want, let’s create a discussion about improving how we use affinity
-
 - Launch Resize Canvas dialog box - Change the canvas to any size - Launch Export dialog box Bug: The Export Settings is still showing the original canvas size (resolution) - Export (save) the file as JPEG (it also happen to other file formats) Bug: The file will be saved in original resolution, with: i) If the revised canvas size is smaller than the original, the saved file will be cropped and enlarged. ii) If the revised canvas size is larger than the original, the saved file will be shrunk down leaving transparent pixels at sides. iii) If the ratio is not fixed when revising the canvas size, the saved file will be stretched/compressed in one direction. The file will be correctly saved only if both Canvas and Export dialogs are manually set to same resolution values. My guessing is the revised resolution values from Canvas dialog box is not passed to the Export dialog box. System info: Windows 10 home 64-bit ver. 1703 Acer Aspire S7-392-74508G25tws
 -
Hi, Just recently discovered Affinity Photo and so glad I have. Been working in Photoshop for many, many years and was wanting a change. i.e., a desire to move away from Adobe's subscription based business model. Digitally hand crafting a painting with AP is pure Magic! This image started as a graphite/pencil drawing which I scanned into AP. As you can see, I flipped the image and made some anatomical and perspective corrections to the head with the liquify persona and then went to town hand painting the image. Initially, I used some of my favorite PS brushes which I imported but soon began to discover that the Default brushes that come with AP are far superior to my PS collection of brushes that I collected over the last 15+ years. So I completed the painting primarily with the default brush selections. Here are two images. 1. the final painting 2. the image as it developed. Let me know what you think. All the best
- 6 replies
-
- 5
-
-
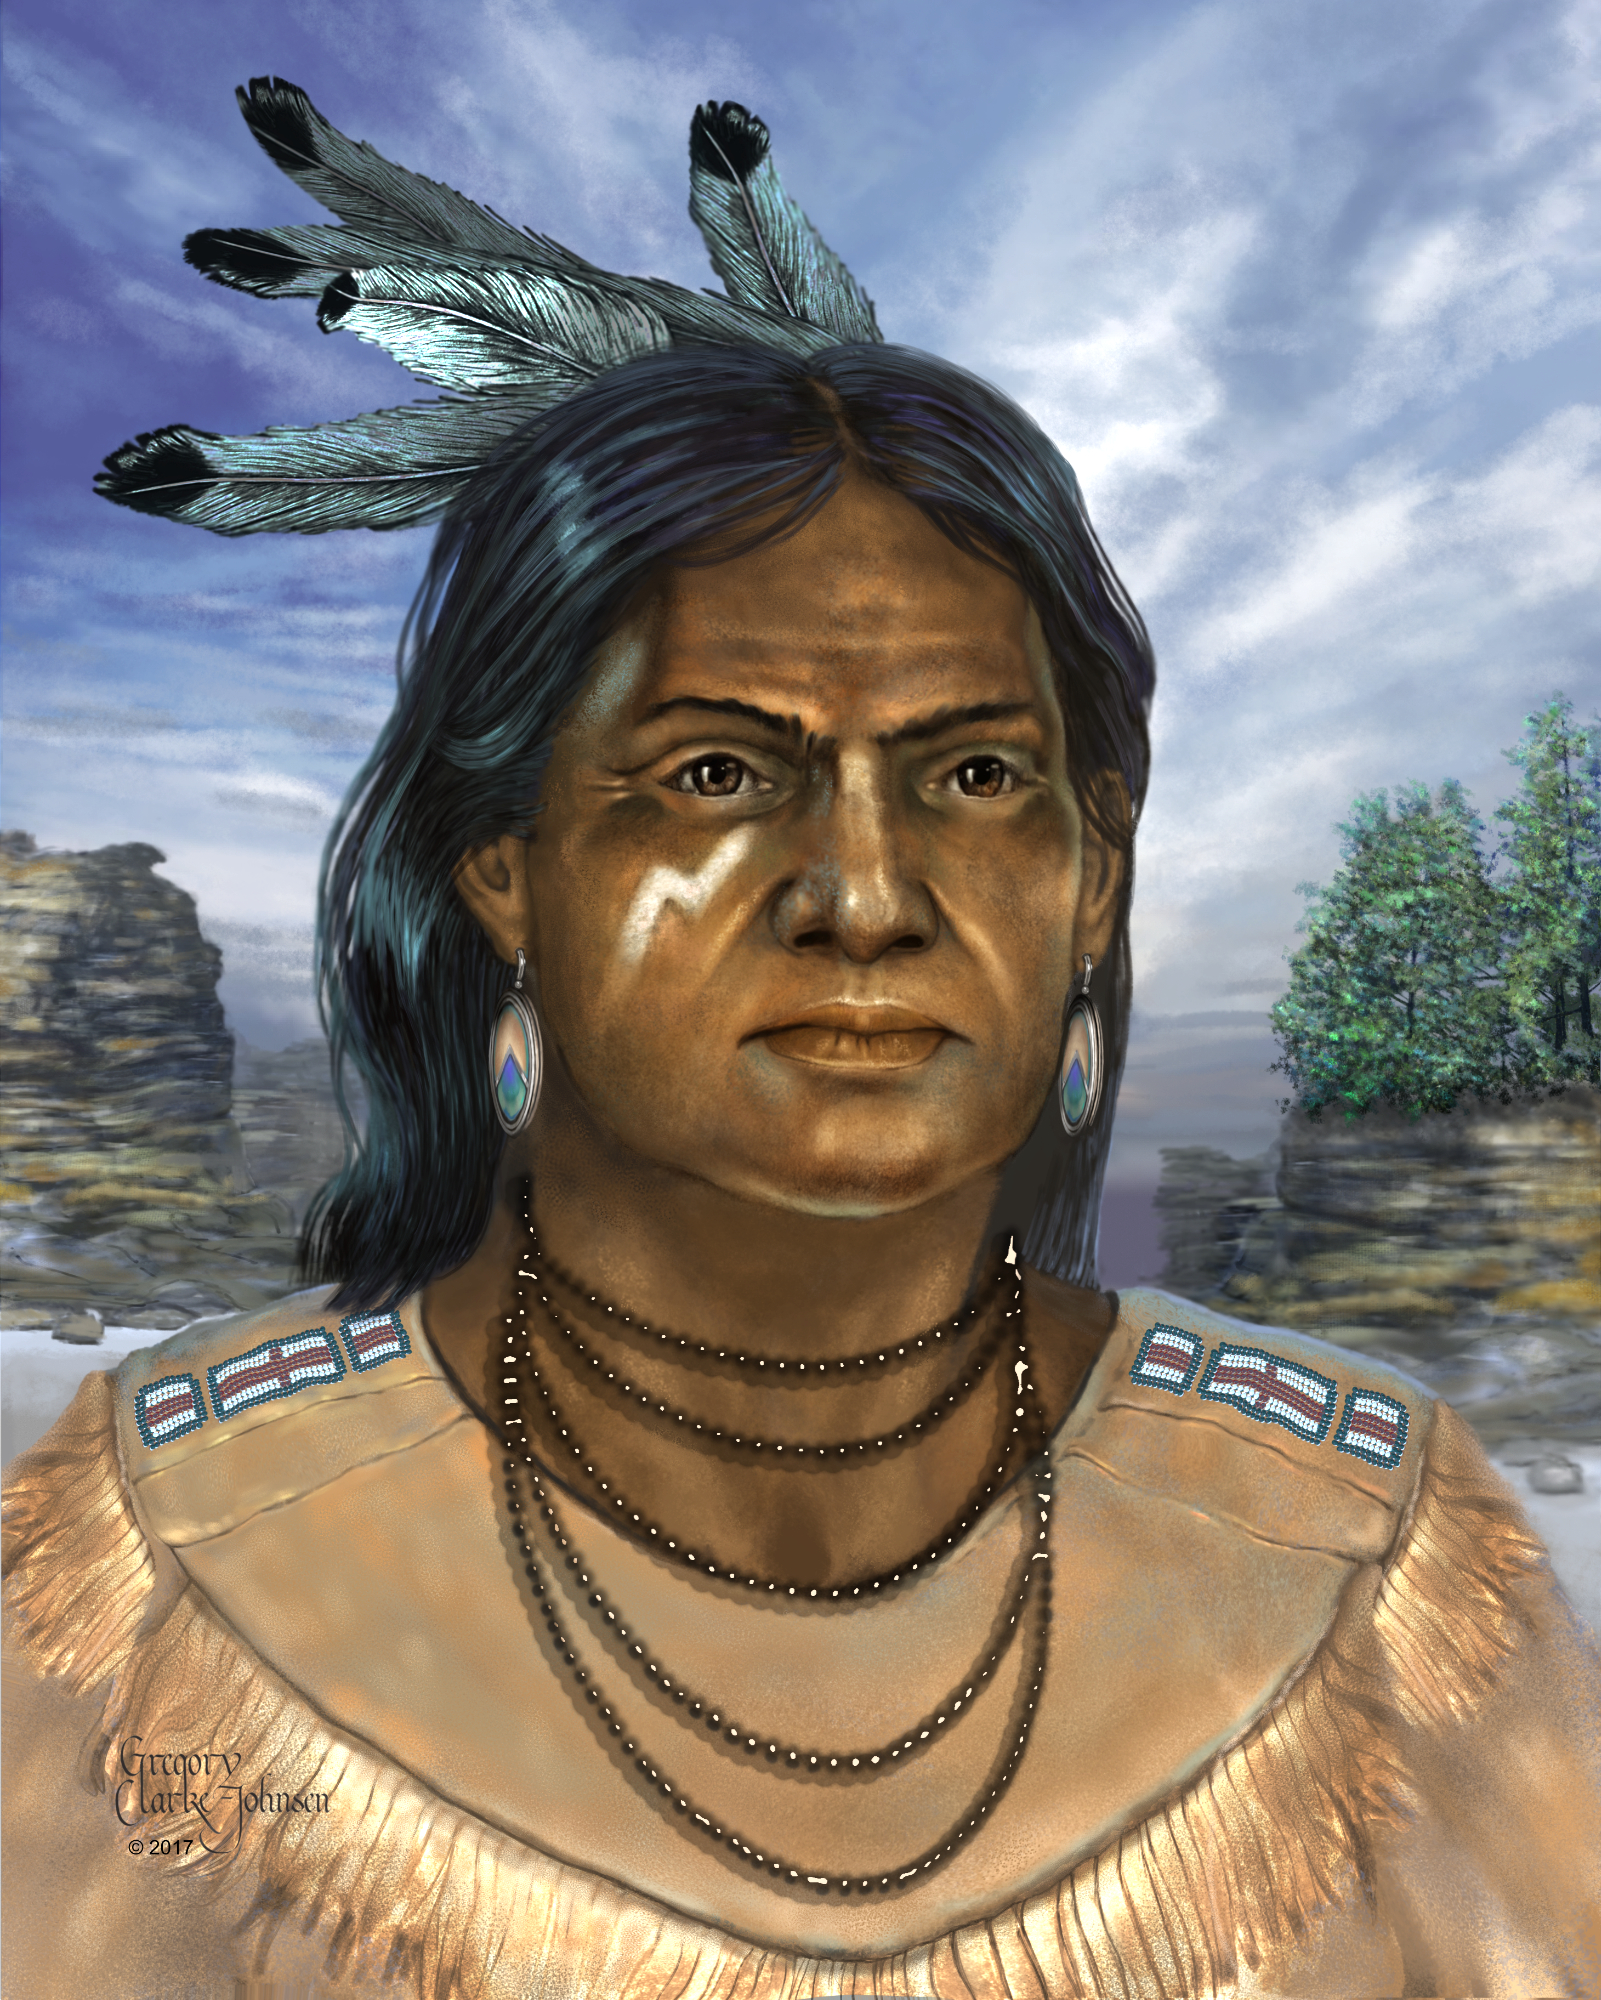
- gregory clarke-johnsen digital artwork
- first nations man
- (and 3 more)
-

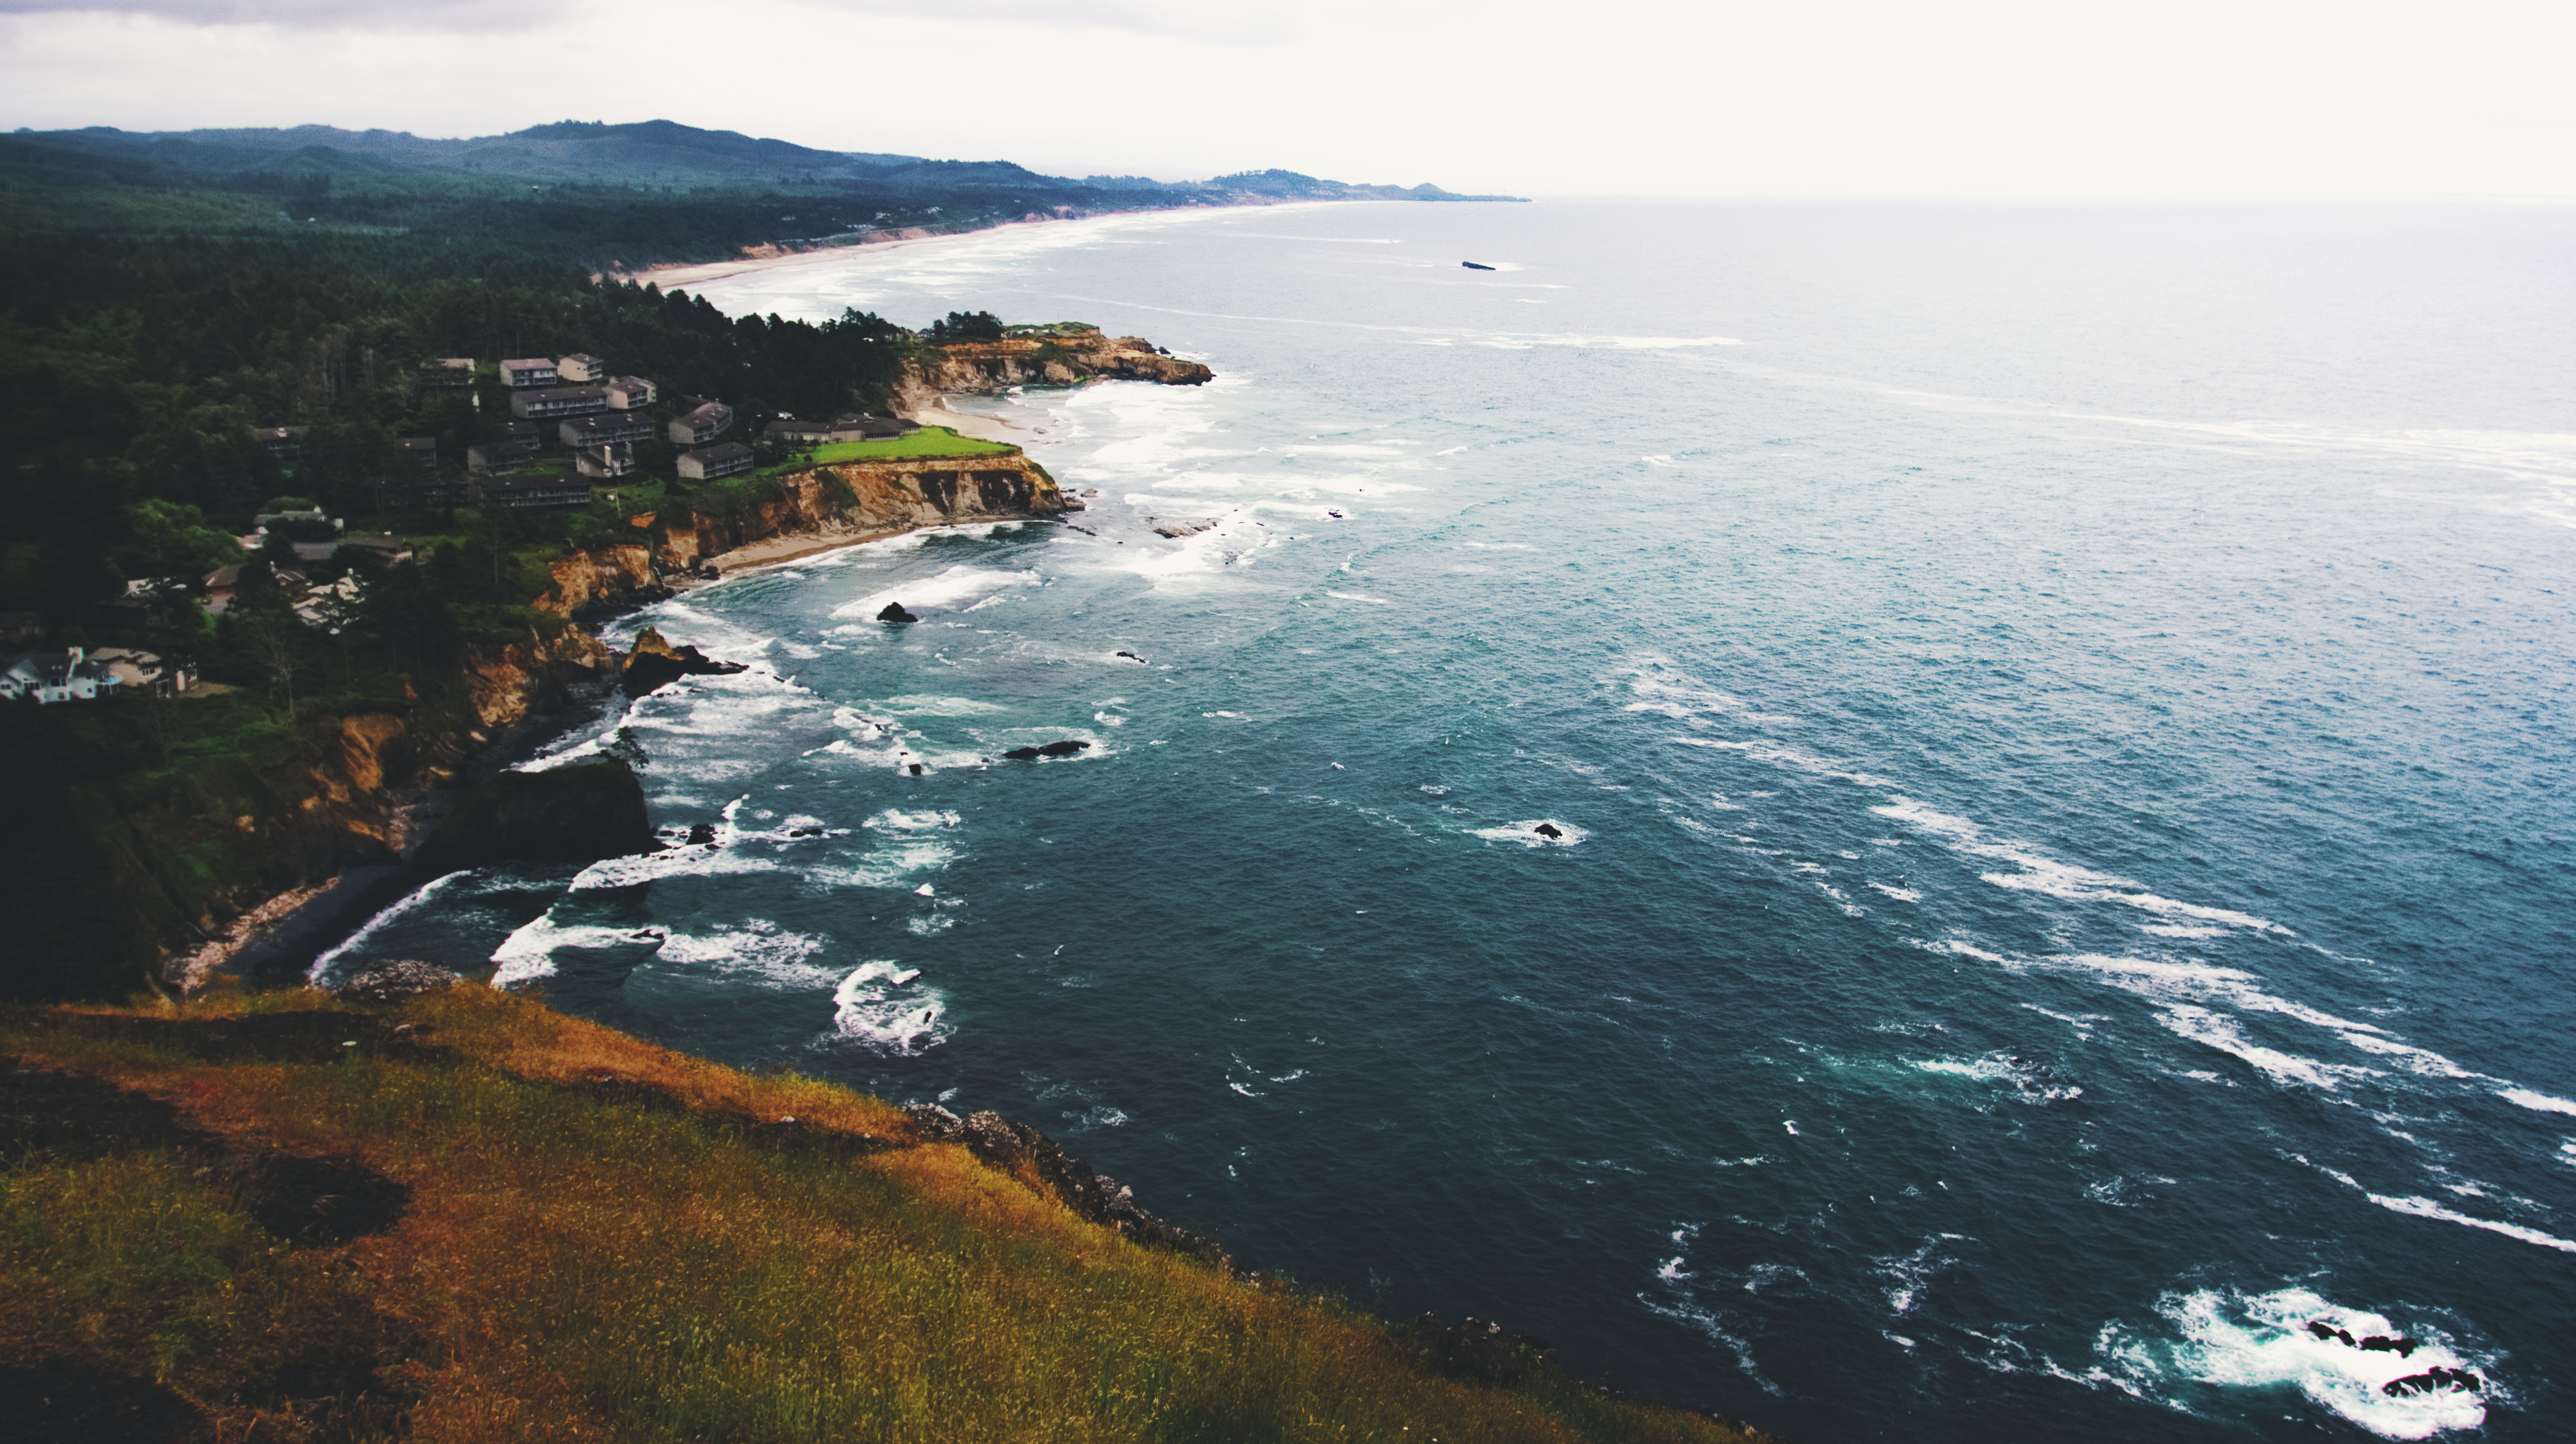
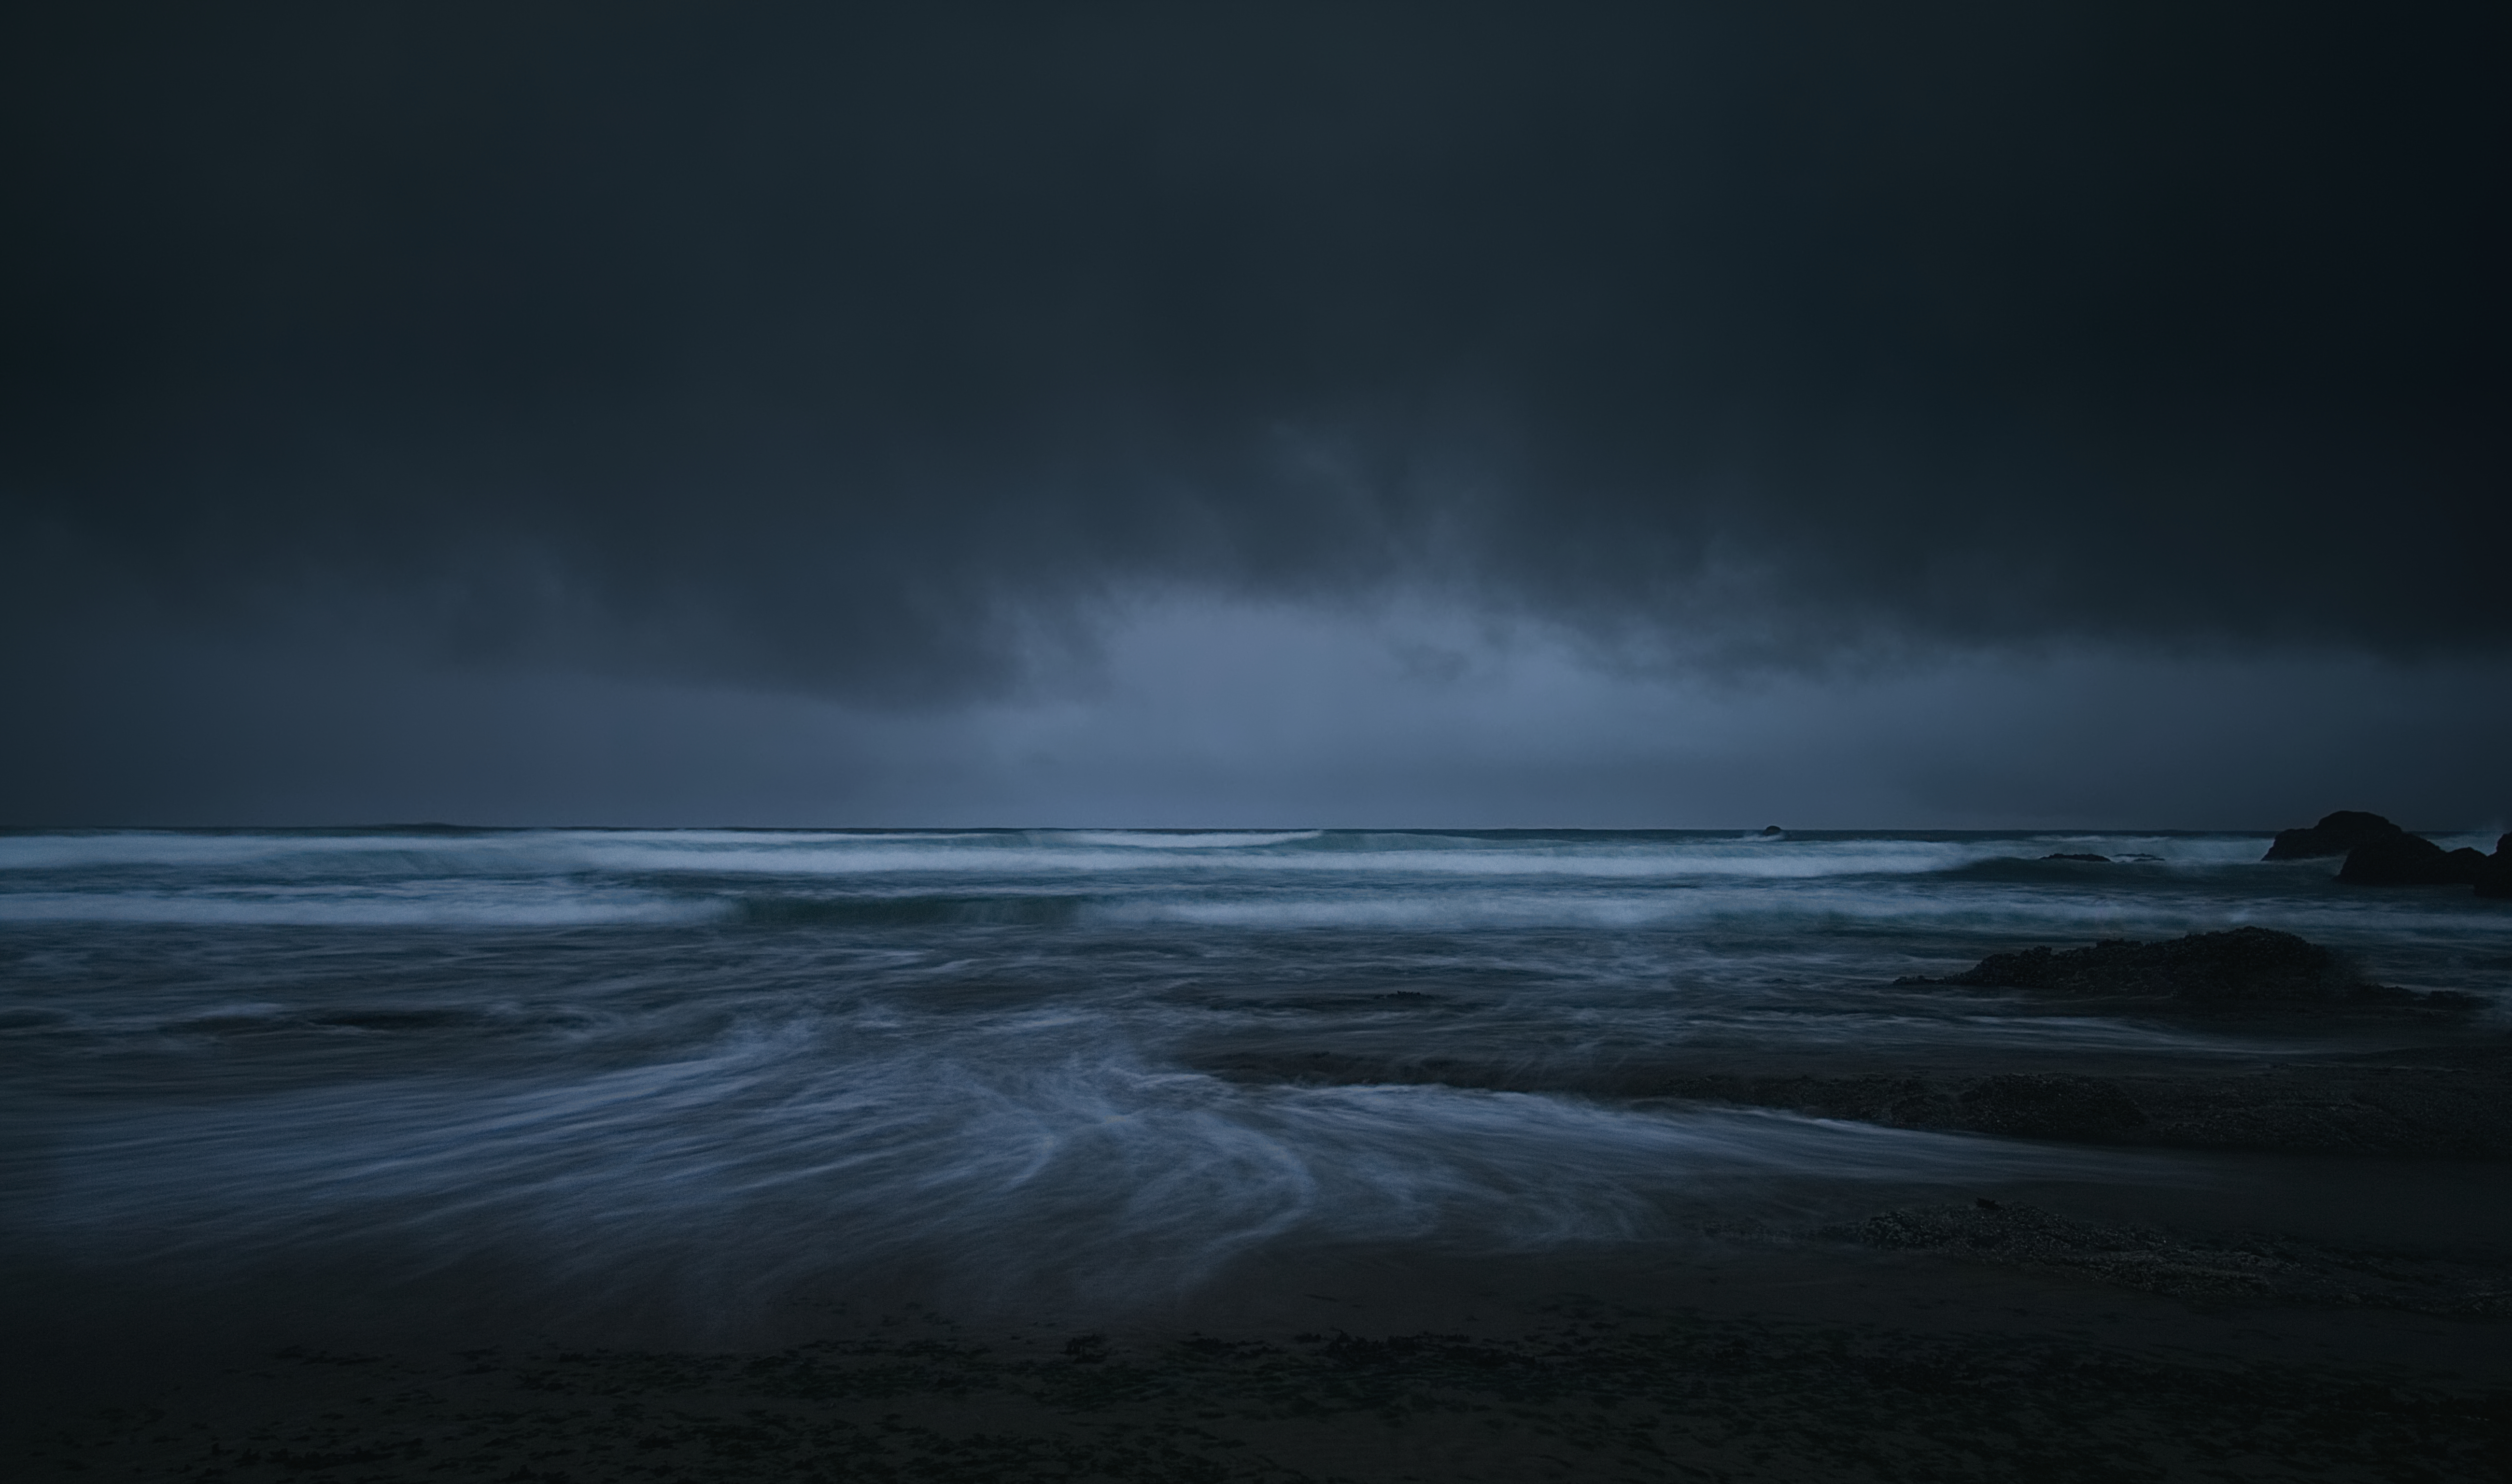
affinity photo Could you give some feedback on my seascape photos?
jef. posted a topic in Share your work
All edited with Affinity Photo.
-
Here’s some of my photo manipulation done in my love: affinity photo for iPad dont challenge me here, because I care less if your work is better than mine, rather I care if you yourself like your work as well as mine to share with me and all who feel the same describe your techniques, how long it took, anything original about your workflow... leave SE your raw assets if you want, let’s create a discussion about improving how we use affinity
-
- 2
-
-
- layers
- photo manipulation
- (and 6 more)
-
I saw this today and it would seem a great idea for Affinity Photo. Possibly in the develop persona where it's more about interpretation of greyscale data than RGB data.
-
With many of the tools in Affinity Photo, the assistant will automatically switch the layer to rasterized for the tool to work. Could this be done for the inpainting tool? Twice now I've sat there thinking, why doesn't this work? I'll switch to the clone brush and the assistant changes the layer to rasterized and then the inpainting tool works. I've now learned my lesson, but others might not be so quick to catch on that the layer needs to be converted first.
-
 Hey guys, Some months ago I saw a redesigned Apple Music, I liked the idea, so made my own. To check out all the story behinds it, I made a huge publication on medium, with images and screens all made on Affinity Designer and Photo. would love to you guys check it out! https://medium.com/@gustavoantoniogonalves/i-saw-a-redesigned-apple-music-so-i-kinda-redesigned-it-again-8b3dfb5c5abf?source=linkShare-92ff1568a988-1507110699
 -
 I've searched here, but don't see anything on how best to go about dealing with grainy old photos. Does anyone have suggestions on how to clean up those old grainy photos in AF Photo?
 -
 Hello everyone, I want to print a picture, but I don't know how to get rid of the color flare around the top of the gate. I would like to know how this is call, if possible what cause it and could it be repair? It has been work on Lightroom and Affinity photo and the original seems to have disappeared in all the process. At the time I was new to Lightroom and Affinity . I now always make a virtual copy of my work . Thank you for your help and time. Italie.tif
-
 I have always had affinity photo on both my laptop and iMac. The iMac has been updated but my MacBook Pro doesn't show an update is pending for the program to the latest version. Both of my computers have had the previous updates coming in without a problem but for some reason my MacBook Pro is not showing an update waiting on the store to download. Both of my computers are current with their latest OS updates. Can someone help me obtain the update for my laptop. It has always been available up till now. Thanks Lee
 -
 Hello, These links contain the supported RAW camera lists for Affinity Photo for iPad. on iOS 15 (and macOS Monterey) on iOS 14 (and macOS Big Sur) on iPadOS 13 (and macOS Catalina) on iOS 12 (and macOS Mojave) on iOS 11 (and macOS High Sierra) on iOS 10 (and macOS Sierra) The list of supported cameras and the algorithms used depend on Apple's implementation. New cameras will be added by Apple in iOS updates. On the iPad build you will be using either system level Apple (core image raw) engine, OR Serif's Raw Engine. If you are using SerifLabs Raw Engine please refer instead to this article to see if your camera is supported:
 -
 Dear team, I am using DrawPlus X8 (14.0.1.21) to create printed materials like flyers. Now I am working on a new flyer, which must be exported do PDF X:3 format without transparences in CMYK color space. But, I want to create „look like“ transparent. For that purpose I drew a rectangle and set it as a background with CMYK (0-0-0-25) color. At the same time, using Affinity Photo, I created one picture with the same CMYK (0-0-0-25) background color, added some other lines into it and exported to TIFF. However, if I insert TIFF into DrawPlus, both CMYK (0-0-0-25) are not the same! Please help!
 -
 I have a lot of photos form a shooting. I am now editing them and finally want to export sections (details) of the images for use in a webshop and on facebook. So I need to export a square image, and one in the h:w ratio that facebook requires. Obviously, I want to define the location and size of the slices for each photo individually (because I need to decide on the detail I want to show), but all the slices should have the same aspect ratio (and export pixel size) for all photos. I thought the export persona is great for this, but it appears quite clumsy to 1) create a slice in exactly 476x714px, then 2) scale the slice frame to fit my desired detail, then to 3) define the export width as actually 714w so that the exported image results as 476x714px. I thought there must be smarter way to do this for each photo. Can't I create some kind of template that has a 476 : 714 aspect ration slice associated with a 714w export? I noticed a menu called "create template for export settings" (translated from german), but it is grayed out. How would you tackle this?
 -
 When editing a document on 2 machines, it would be nice to have an option to embed all used fonts into the document or a function which collects all related files into a single folder to give them along with the document. -- Harald
- 3 replies
-
- 1
-
-
- fonts
- affinity designer
- (and 1 more)
-
Hi folks, Sorry if this has already been requested, I couldn't find a thread showing that it had so hopefully I am not duplicating. Are there any plans to introduce a feature to Affinity Photo (Or even create a stand alone app) that would offer the same workflow management that Lightroom (Sorry I know it's a swear word) has? I would love to use Affinity Photo as my go to software for all my photo edit work but it would be handy if I could arrange and sort all of my shots from a shoot within Affinity Photo and not have to use a third party app to manage them such as the Macs native photos app etc. It would also be VERY handy to be able to apply edits across multiple photos at the same time. Cheers folks Mark