Search the Community
Showing results for tags 'tiff'.
-
 Hello, I am a new user. Working on my first photo and when I export a jpeg using the "Best Quality" preset, my image has these strange large pixelations that are not present in the original. It is also happening when I export a Tiff. However, pdf export correctly. Files are attached. I am working from a RAW photo taken on Sony A7s. Help would be greatly appreciated. I am thrilled with the app so far aside from this hiccup. Hanalei Pier.tiff Hanalei_Pier.pdf
-
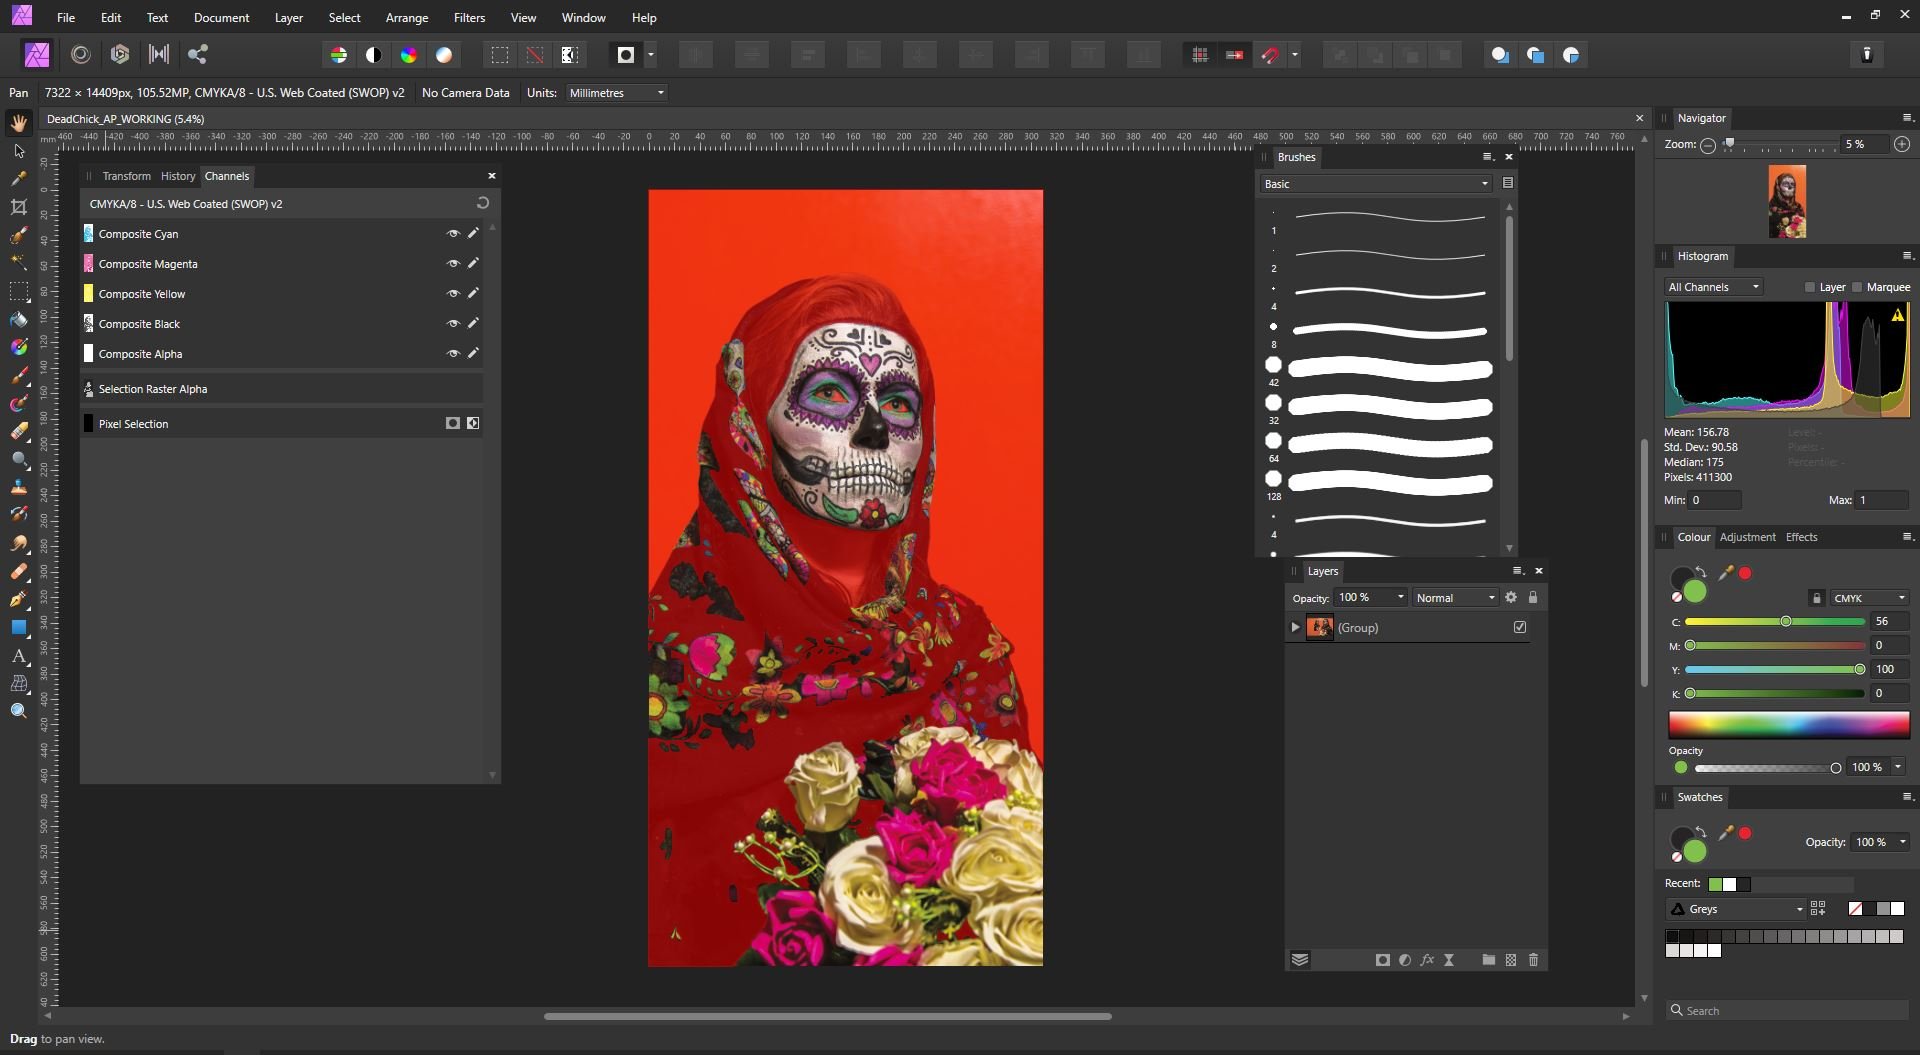
 Hey all, I'm struggling to create and export an Alpha Channel from Affinity Photo (v1.7.1.404) to a CMYK .TIFF image. The image has been masked out and I'm trying to make a named Alpha Channel to be used as a Spot Colour for digital print in an Onyx RIP (To be names 'Spot 1' which refers to a Spot White Ink). Please see the attached screenshot for the masked out area which I'm talking about. I've followed several other posts and YouTube/Vimeo video's and it's just not clicking for me. The image will export as a .TIFF but it won't export an Alpha Channel no matter what I try. Methods I have tried: 1. Mask out areas, on the 'Selection raster Alpha' channel, right click, and 'Create Spare Channel' and name it 'Spot 1' 2. In the layers under Adjustments, create and Channel Mixer and pull up the Alpha slider. What am I doing wrong? Thanks for your help!
-
 Hello, I'm unable to open tiff files saved with layers. So far I have lost two photos after processing. I tried opening in other software like GIMP and ImageMagik, one files reports invalid tag, and the other does not open at all. For now, I'm now saving all files to .afphoto instead of tiff, but would like to store layers in tiff (one color and one monochrome layer). Thanks for your consideration advance. Sudi _CAP9448_DxO-4.tif
 -
 Hello, First a disclaimer. I am using PS CS6 as a raster editing software in my workflow. It's working well.. Unfortunately, due to Adobe's policy it has to be replaced in a new feature. Moreover, it may not work on upcoming MacOs. I've been looking at Affinity Photo since version 1.0... it looked really great on paper. However, each version just massively disappointed me. It's missing the basics... Please remember, I'm speaking about my needs, which may not be yours.. I'm aware the software may work for some... However it does not for me. Many of my colleagues works the same way. Let's list some issues: Missing proper Tiff support. To get integrated in my work flow, the software needs to open and save tiff seamlessly. Affinity can not "Save as... (tiff)". Sure, it can export.. but this is not the same thing Now.. if one open a Tiff, do the editing and "Save": After some warning requester it works. However, if I do the same but quit the app, Affinity will offer me to "Save" the file, but it will actually want to save it as afphoto and not tiff.. The icon "New Group" does not work if no layers is selected. However, the same command, new Group, work from the menu. (Do you test your software ?) Mask feather: About 50 times slower as PS and limited to 100 px. It's so slow that you can not get any preview.. Mask... Well. I tried yesterday about one hour. I could not understand how they works. I could not create any Group mask. Most of the time I do NOT see the mask in the layers panel. and if it does, it's very difficult to see I created a curve layer with simple mask (with a selection). Then I painted using the brush in white to extend the mask -> this action actually removes part of the mask .. (????). Well, it's also bout 5 times slower as PS Level tool still does not work. In order to get the clipping preview (press alt), pro channel one need to set the master level at least at 1%.. Changing the brush size and hardness is not practical (it only shows a few circles but not the gradient of the actual brush..) and it's super laggy That's it... I did not tried yet path.. Affinity: I think this are basic features which photographers (imo) needs every day.. Without Affinity is jus useless.. Thanks for your understandings
 -
Uncompressed tiff (16 bit grayscale), is the first really compatible format by Affinity. Please do not change it in the future. (Other tiff versions are less compatible.) Thanks, for effort to Affinity improve. Good job! (It would be great to add the default file extension settings TIF / TIFF)
-
 I'm fairly new to using Affinity Photo and I keep running into to this problem so I thought I would ask what I'm doing wrong. My file is a tiff file saved with layers, I'm using Mac OS 14 Mojave. I have tried saving both with the keyboard shortcut command S as well as going to the file drop down menu and choosing Save. The problem I continually seem to have is after I save I will keyboard shortcut command W to close (I have not done any additional work to the image) after I do a Save and I get stuck in a loop of having a new dialog box appear telling me there have been changes do I want to Save, Don't Save, or Cancel. I Save, try and close the file and that dialog box pops back up. Any insights what I am doing wrong? thanks, jeff
 -
 2019-03-29 18-35-58.mp4
 -
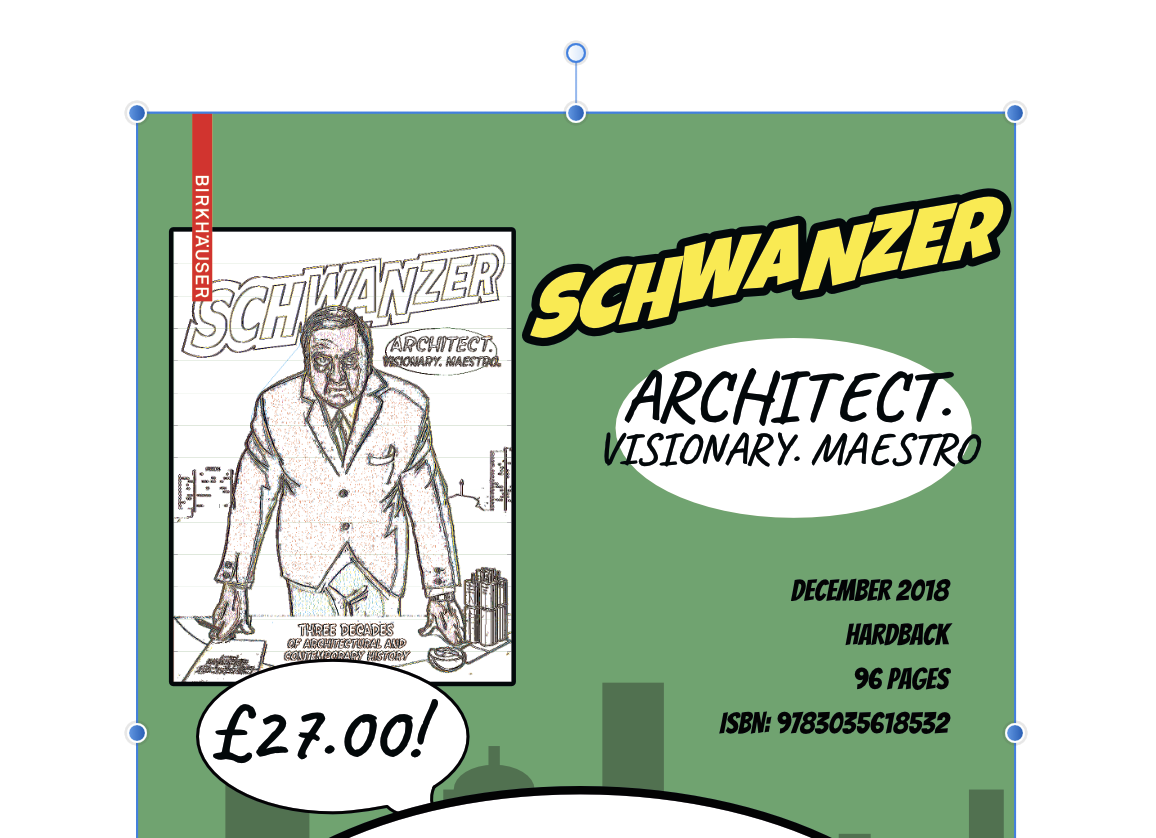
 I created a PDF flyer on Publisher, exported is as a PDF, and want to place that PDF in a new Publisher document. The PDF flyer contains a TIFF image of the book cover. If I place that PDF into a Publisher document, the TIFF image goes all weird and black and white (see screenshot). I have other PDFs in that include TIFF images, and they seem to place OK, so not sure why this particular PDF / image is causing issues. Screenshot and PDF attached. Thoughts? Schwanzer AI.pdf
-
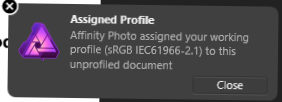
 I use VueScan to scan lots of black-and-white images. Within VueScan, I set the input as B/W and the output to 1-bit Tiff. After saving the image, it automatically opens in Affinity Photo with the message that the default profile is automatically being applied. This means I get an 8-bit RGB image. Now I know that Affinity does not (yet?) support 1-bit images, but it is annoying to have to set the image to Greyscale every time. I tried to look up this Colour Profiling, but it seems that it is a global setup that will affect any unprofiled images that it loads. VueScan says that the saved tiff file will be 'profiled' whatever that means. I find that Corel Photo-Paint does not do this. It loads the tiff as a 1-bit image. Is it possible to prevent this happening? If I am about to scan a batch of black-and-white images, would it be possible to prevent this default profile being applied? I posted a similar query to VueScan support and got the following reply from Ed Hamrick: Profiles only work for scans that are in color. They don't make any sense for 1 bit per pixel, so I don't store a profile. John
-
 I've searched the support forums and found a variation of this problem going back to 2016. I make extensive use of the metadata fields (both native Mac and the standard EXIF/IPTC fields) in cataloging photos. My workflow is to shoot RAW and develop those raws in a separate application (DXO), generating a TIFF file. I then catalog those TIFFS, add metadata (using NeoFile) and keep them until such time as I need to work on them in AP. When I open the TIFF in AP and edit it, I always choose to save it as a TIFF with AP layers. This gives me compatibility with other apps that I may use later. When I save that edited TIFF, however, all of the metadata I've added is stripped from the file. (Yes, I've tried "embed metadata" both on and off.) After much experimenting I have failed to find a combination which allows me to save as a layered TIFF and retain the data. Problem persists even in the 1.70 Beta. This seems like a basic functionality issue, so I can't believe it would be unresolved for several years. Am I missing something in my workflow?
 -
 I have been using Affinity photo Beta test version 1.7.0.209, when I export finished files to TIFF, the thumbnail image is corrupted , looks like something from a Hi Pass filter mid process screen, or some weird blend mode result. When I try to open the TIFF in AF Photo or ant thing else I get a weird pink rectangle, same shape as the photo canvass. AF Photo tries to open as a Raw File. I have flattened the image and even rasterized it to no avail. This is on around 90% of my work, occasionally I get one that works. I want to archive all my processed images as TIFF to save on disc space.
 -
 Well i'm a bit surprised that some issues are coming back to the surface but maybe it's on my side ! 1- Have noticed my exports get blurry every time : tried to design in A3 then export in A4 then A5 size (PNG: is my mostly used - TIFF or PDF) which was working like a charm in previous release but now they get blurry 2- Went to my Affinity Preferences and now i see : Display (OpenGL, OpenGL Basic, Software) .... Never touched this before so i would like to know if changing one of this would fix the issue and what each one is or supposed to do. 3- What is Dither gradient ? Would it help ? in what conditions ? Just remember that the blurriness disappeared with one of the updates (can't recall which one) but now it's back ! So, Your help and support would be appreciated helping me fix this and get back on the road.
 -
 I've been scanning my old 35mm negatives with a Minolta Minolta Dimage Scan Dual IV so that I can put them up on my website. The negatives and all black and white and in need of a bit of attention, so my plan was to run them all through Affinity Photo to remove any dust and scratches and tweak the levels. I did this a few years ago with an old copy of Photoshop CS2 with no issues, so assumed the latest version of Affinity Photo should have no trouble. As I did the last time I scanned a batch of negatives, I have been scanning them with Vuescan as 16bit greyscale TIFF files. When I open the resulting TIFFs in Affinity Photo however, they are opened in the Develop persona with the picture completely blown out. On some occasions they fail to open at all and leave either a blank window reading 0x0 pixels, or crash the app completely. I'm happy to provide a copy of the error log if you think that would be helpful. I can kind of fix the blown out image (for the ones that do actually open) but it really shouldn't be necessary. The files which fail to open at all open fine in Preview, Photoshop CS2 and pretty much anything else I try to open them in. As it is, I am getting better results out of the almost 15 year old Photoshop CS2 than I am out of Affinity Photo. I know I could just use Photoshop, but my copy won't run on my current Mac so I have to open my TIFF files on an old Windows 7 machine. I would much rather however use Affinity Photo as I otherwise find it works very well for my needs. Is there any way in which I can open these TIFF files normally in the photo persona? Is this a bug or the intended behaviour for 16 bit TIFF files? Any help would be much appreciated. Thanks
 -
 I am looking for a way to change a batch of Tiff files to JPEG. Help please?!
 -
 When I open a raw file in affinity it is shown as a .tiff even in develop persona. Is it actually opened as a raw or is it converted to a .tiff when it is brought into affinity?
 -
 There are 4 groups in this .afdesign file, made to fill a 4K cinema screen (4096 x 2160) with alternating black lines, color space 2020. The two horizontal groups and two vertical groups are identical (I think), except that one is shifted point 5 pixels on the x or y axis. The horizontal files export with identical file sizes. But the vertical centered file exports to a similar size (all less than a megabyte). But the 'offset' file is over 3 megabytes large. When the tiff files are opened in Designer they look identical (with all the layers intact.) But in Preview they look dissimilar. (The horizontal files look different as well.) I have tried all sorts of variations with similar results. (I also erased the final un-needed line recently in an attempt to change the result.) Does this Export happen similar for others? Does the Tiff file look identical on your screen? Many thanks. I am using iMac 5K, 27, 4.2 OSX 10.13.6 horizontal_vertical_lines_4k_.afdesign OffCenteredTest.tiff CenteredTest.tiff
 -
 Hi Team, I noticed the following issues while opening TIFF files. I could only get the top Layer but I cannot get all the layers. I noticed this issue for the files which were created from Photoshop. I switch from photoshop to Affinity Photo and I wanted to rework these files, but I could not open them now. Below some screenshots. If I opened them in Photoshop elements I see all the layers. I used to have full version of photoshop I no longer have the same. They used to open in Photoshop just fine. When I was switching to Affinity from Photoshop, I thought that I can use all the existing files. This is a big issue for me as I cannot use existing processed files. Is this a know issue ? Thanks Krishna Affinity Issue01.tiff Affinity Issue02.tiff
 -
 This is a very basic request that should in theory be very easy to implement, but I would like the ability to export a completely uncompressed tiff file from Affinity Photo. I am aware that the data compression used in tiff files in Photo mathematically lossless, however, there are scenarios in which even this lossless reduction in redundancy can be undesirable, in cpu processing demands of doing this compression for when the file is intermediary or storage constraints are neglidgeable, preserving backwards compatibility with very old programs, or in my specific case, using images as a source for wavetable synthesis, or general image data sonification effects. Yes, there are workarounds, like file converter utilities, but giving user control on whether or not lossless tiff compression is used would be so much simpler, something I've encountered in pretty much all raw / raster image editors I've used.
 -
 I had a issue when exporting TIFF file with multiple layers in Affinity Photo. After exporting, the tiff file has multiple layers in Affinity Photo, but only one layer in photoshop at the same one (attached photos). My customer complained me about issue because they edited tiff file with photoshop. There were somethings wrong from me?
-
 Hello. I was looking for photoshop alternatives since Adobe refuses to sell lifetime license stuff until I found this. unfortunately, my camera AKA Canon 200D is not supported. My only available OS is windows so I can't rely on Apple core to take care of my RAW files. So I want to know when will my camera be added to the supported list and if I can use TIFF (8-bit, 16-bit or 32-bit float) format instead of RAW until my camera is added. Thanks in advance YAR Oracool
 -
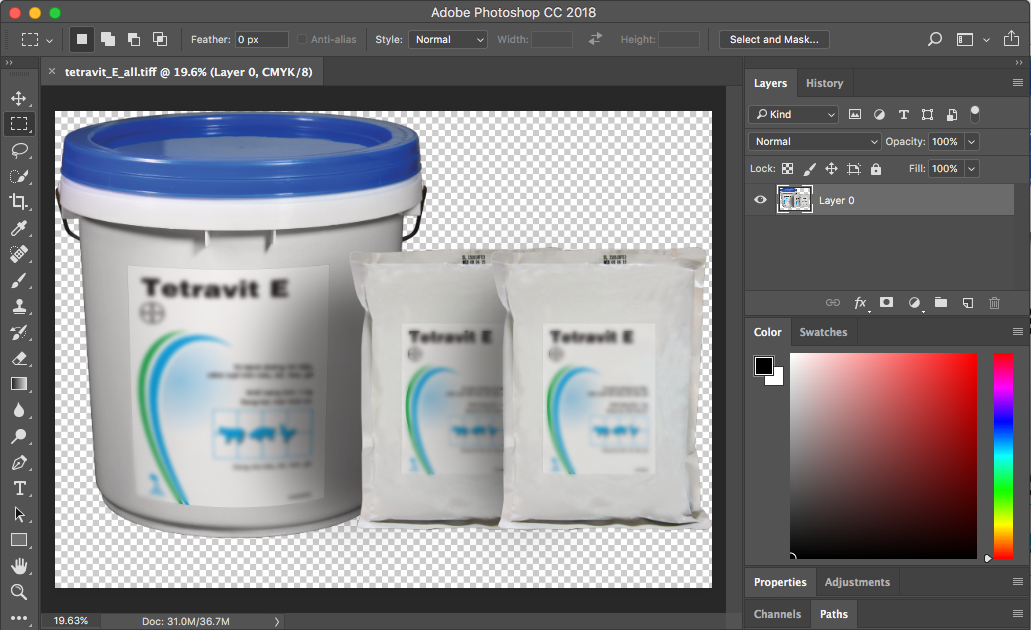
 Hello everybody! Greetings from Athens! I recently received some very large tiff images (product photography) with clipping paths. Subject images created in photoshop. As I am trying to work on them on my affinity photo, I cannot figure out the selections that made with photoshop. I cannot find any similar "path tab" as in photoshop. Affinity photo opens the image plain, no any further info, details, nothing! Do i miss something? if someone can assist me on this, it will be highly appreciated. The scope of editing such images is to change the background color. Thank you
 -
How do I simply see what file type I’m working with? I import a raw image from Lightroom mobile. I want to make sure it’s not importing a jpeg copy but the original raw file. Should be very easy in the metadata but it’s not there.
-
 I want to deliver uncompressed 16-bit TIFF files to a client (unfortunately, I don't know the specifics on how they will be printed, like size, paper stock, etc..,) so I would like to give them the best image I can, then they can do what they need to on their end to meet their print needs. So I'm trying to work out the best workflow. There are 12 images I need to deliver, so I was going to batch process them into 16-bit TIFF files (from the RAW files), then open them in Affinity Photo to edit. Keeping in mind that AP can't export uncompressed TIFFs, what's the best workflow from this point? Open in AP, edit, save as TIFF with layers, then flatten, and deliver as is? Assuming that the TIFF I'm working with is uncompressed. Or , edit, save as TIFF with layers, then open in Preview and save as an uncompressed TIFF? Is there anyway to work with the photo in AP's file format, then get it back to an uncompressed TIFF? Not sure if I'm over complicating things, but all I really want to do is Take my RAW file, edit in Affinity Photo, and deliver an uncompressed TIFF. (The client actually requested a EPS file, because they will use Illustrator at some point, but that's not my problem lol.) Thanks for the help.
 -
 Hi, Can really do with some help here. Just got a Sony A7R3 not too long back. I use Mac Photos for my photo management. From Photos, I tried to edit my .ARW raw files using Affinity. However, when the file's opened in Affinity, it is converted to TIFF. When I export the RAW file out and open it directly with Affinity, it opens as RAW. Not sure if it's a bug, or I have some settings done wrongly. I had no problems with my previous camera, OMD-EM1. Thanks!
 -
 I'd appreciate some feedback on the process I'm using to convert image files for print (book). I've recently come over from Photoshop and am sure that Affinity Photo/QuarkXPress2017 are the right combination to produce the result I want, but I need reassurance - or suggestion of a better way ... This is what I do: Open the file (usually a .jpg) in Affinity Photo Change colour format to CMYK (8 bit) Using Resize document, change DPI to 300, uncheck Resample and click resize Then using Resize document again, change units to Millimetres (is there a way to make this the default unit) and then change the width to slightly over the finished size of the image in the book, choosing Resample at this stage. Then save as ... Then Export as TIFF CMYK (making no other changes on that dialogue box) However, I then always seem to have to resize the image (sometimes to less than 10%) once I've imported it into QuarkXPress2017 ... and the image file produced is rather large. Can anyone suggest what I'm doing wrong? Help would be much appreciated!