Search the Community
Showing results for tags 'mask '.
-
 Hello, can you help me with setting masks. I do someting wrong, but I can´t see it. I choose Curves, than put it in the Group. Press Alt and click on the mask. Now I can paint with white brush into the mask layer. Does not paint. Does nothing. There is a printscreen, left side -> what I want, right side -> what I have. What do I do wrong? Thanks a lot.
-
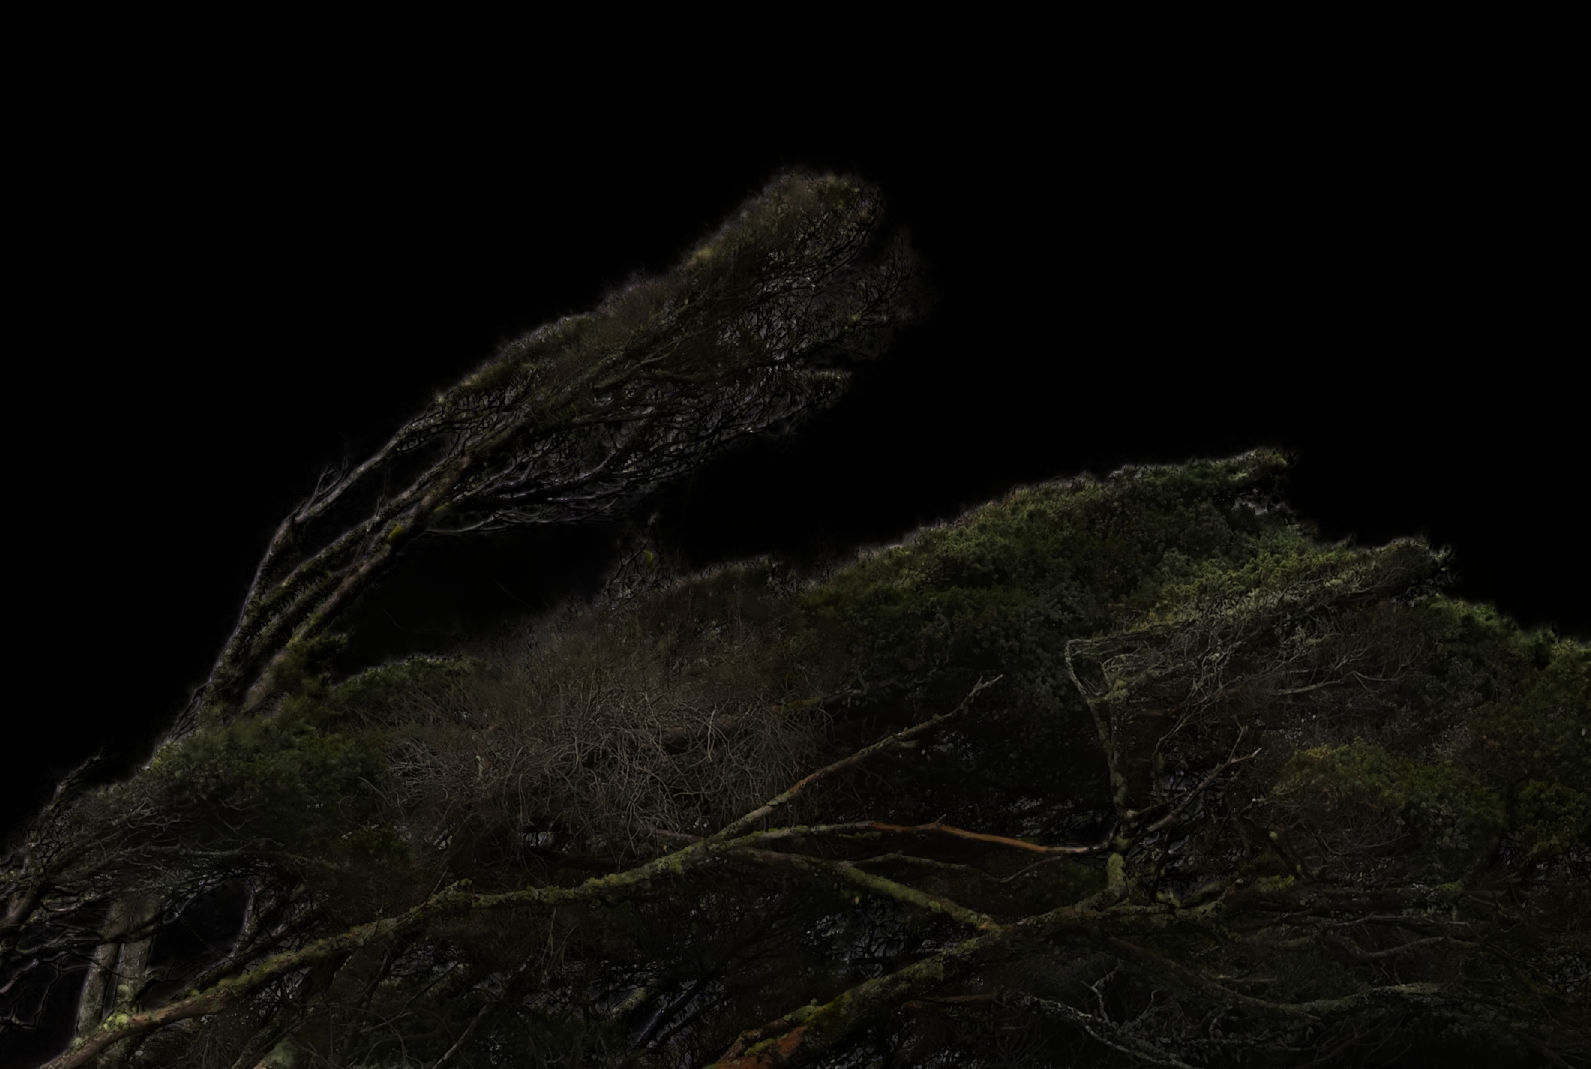
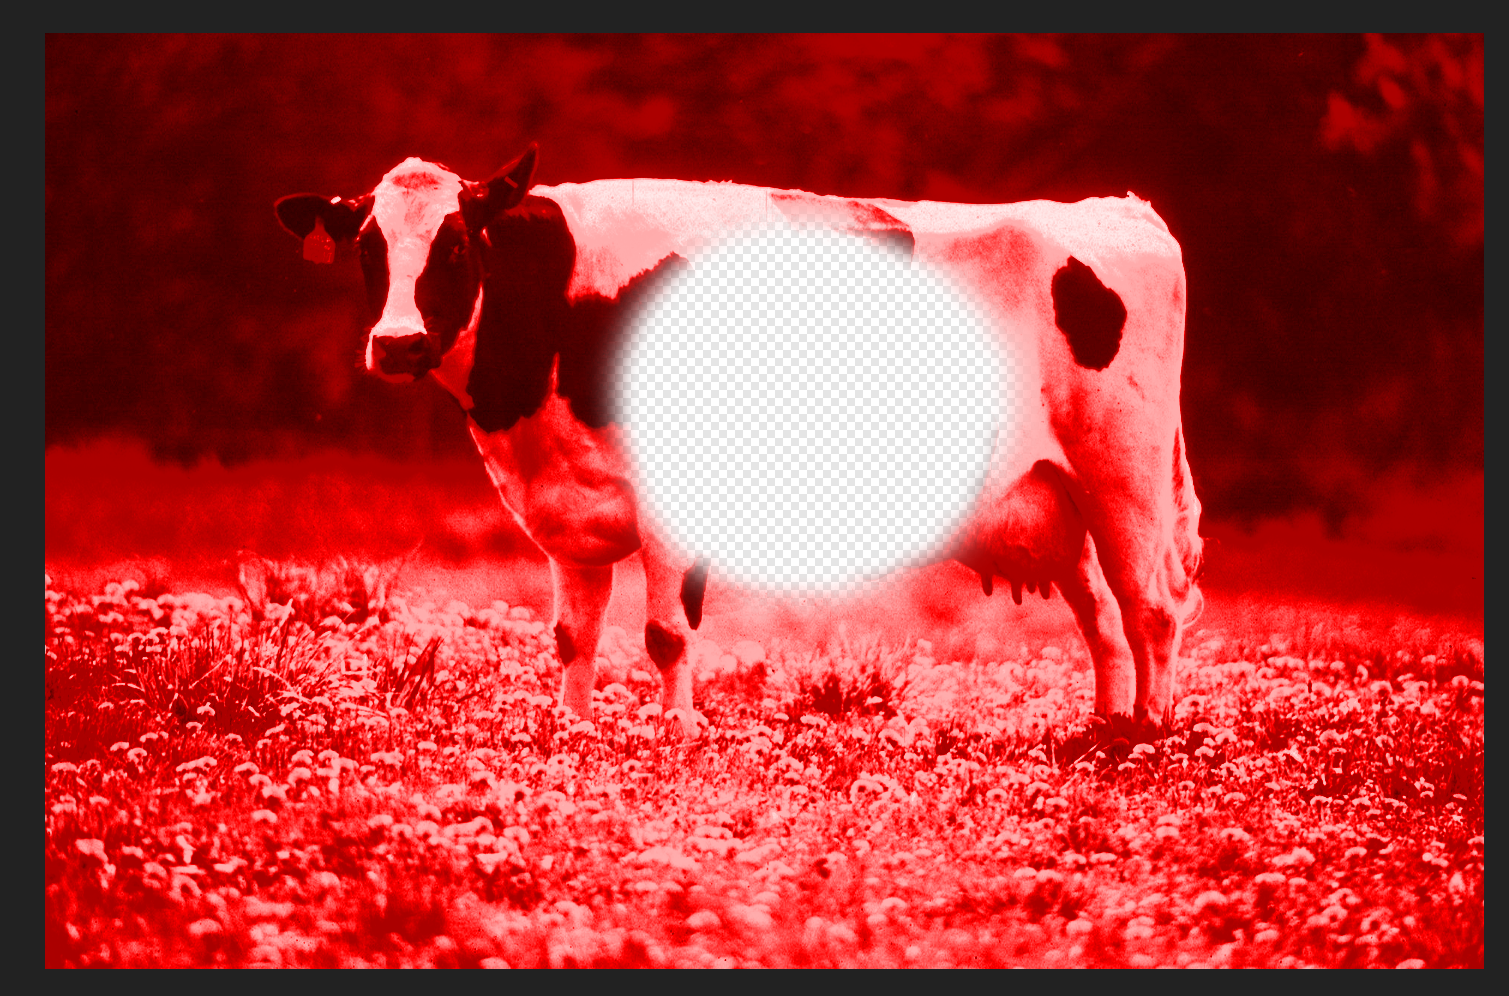
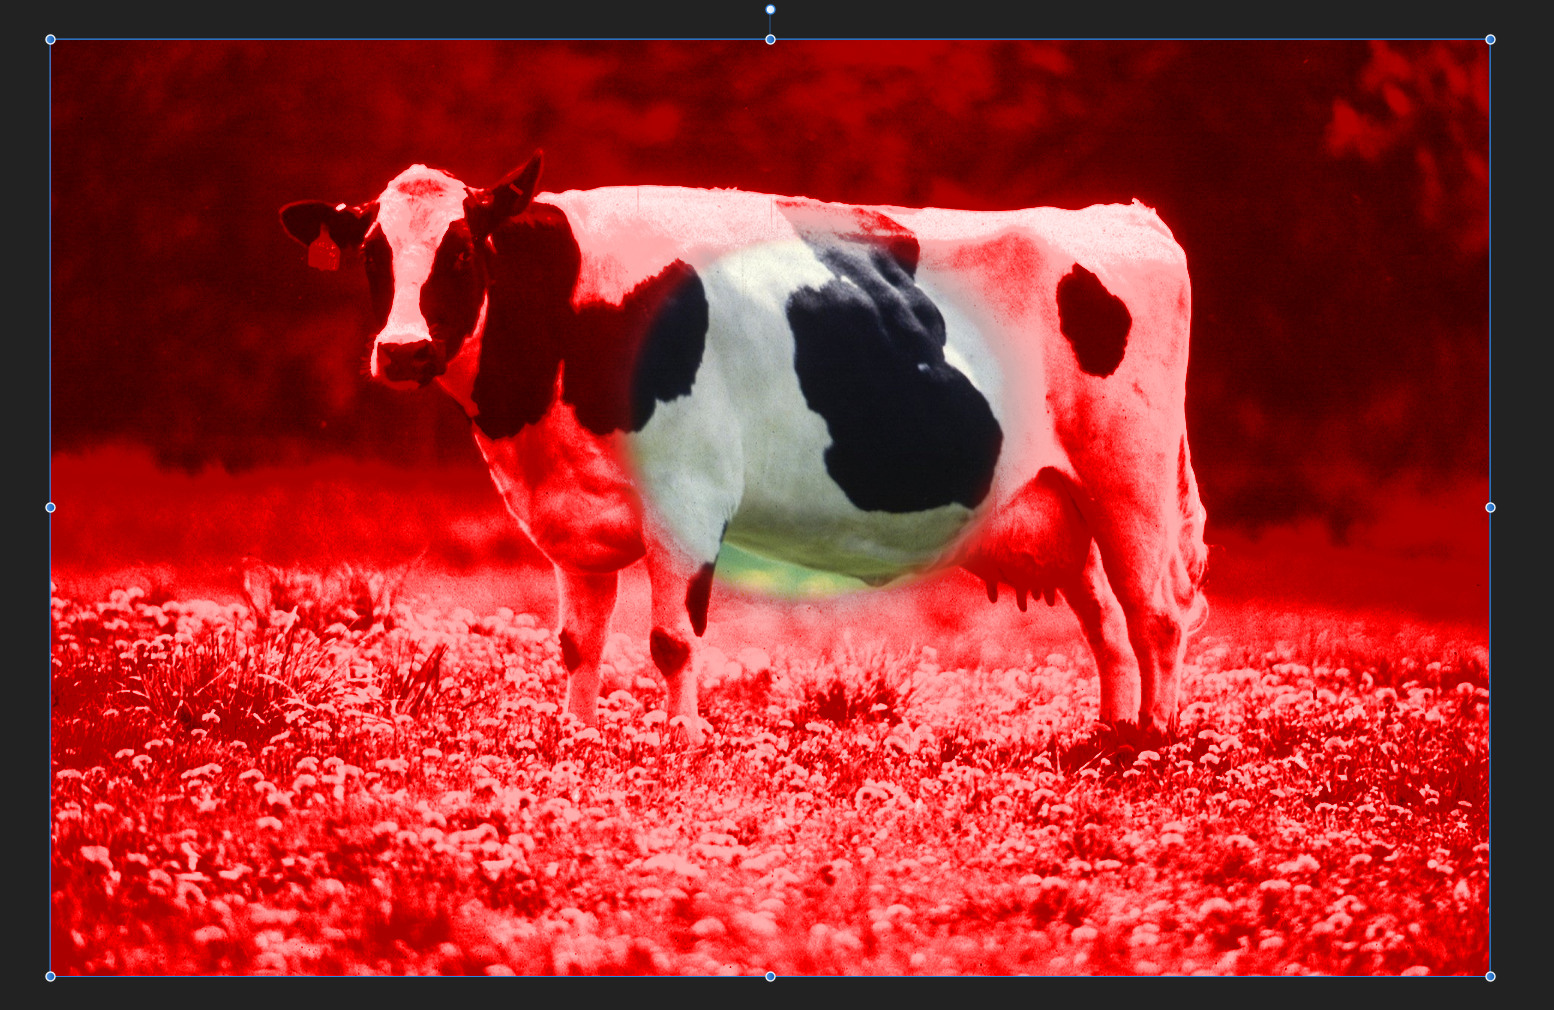
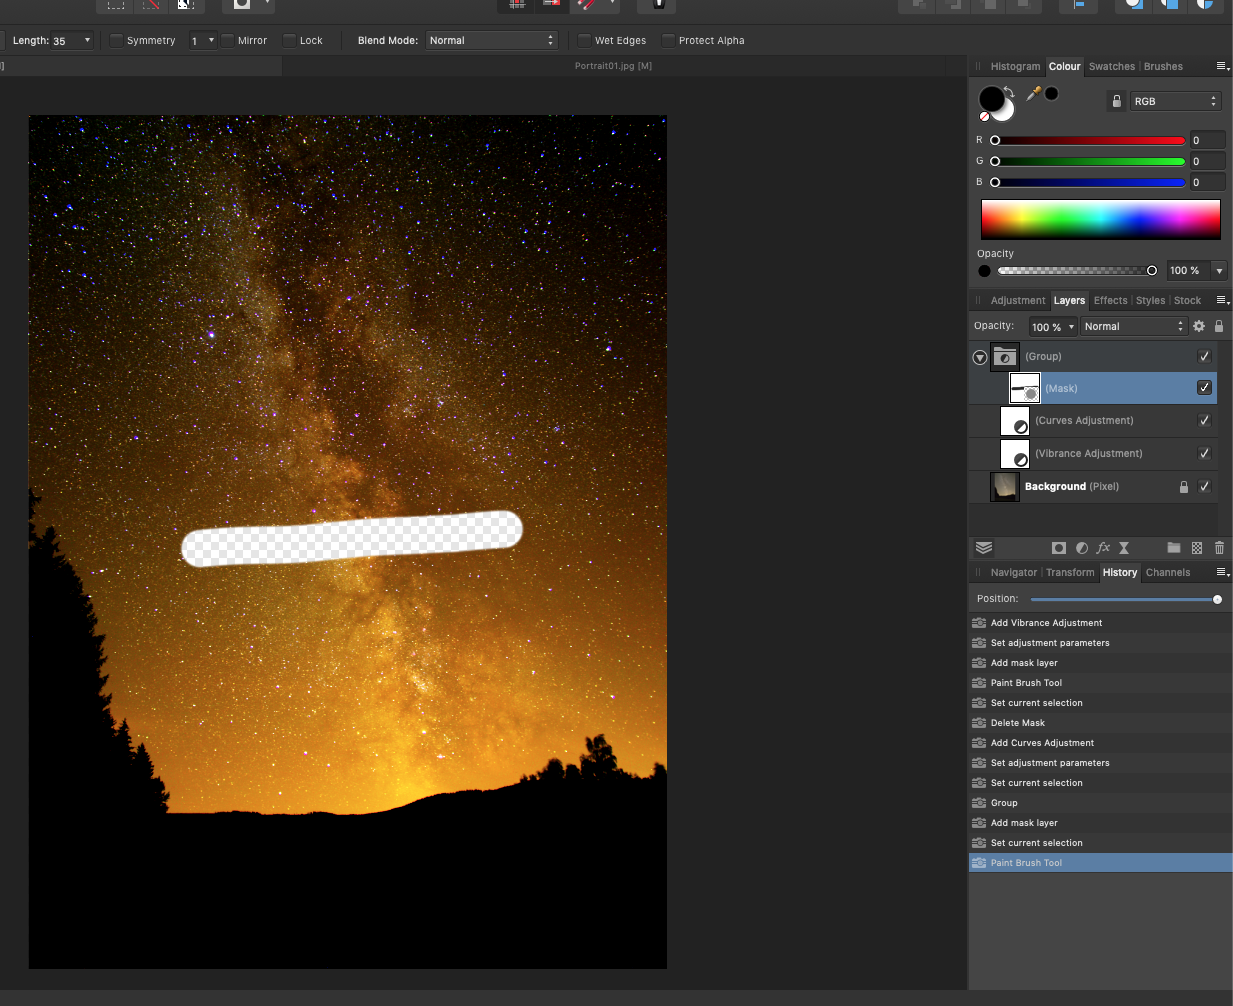
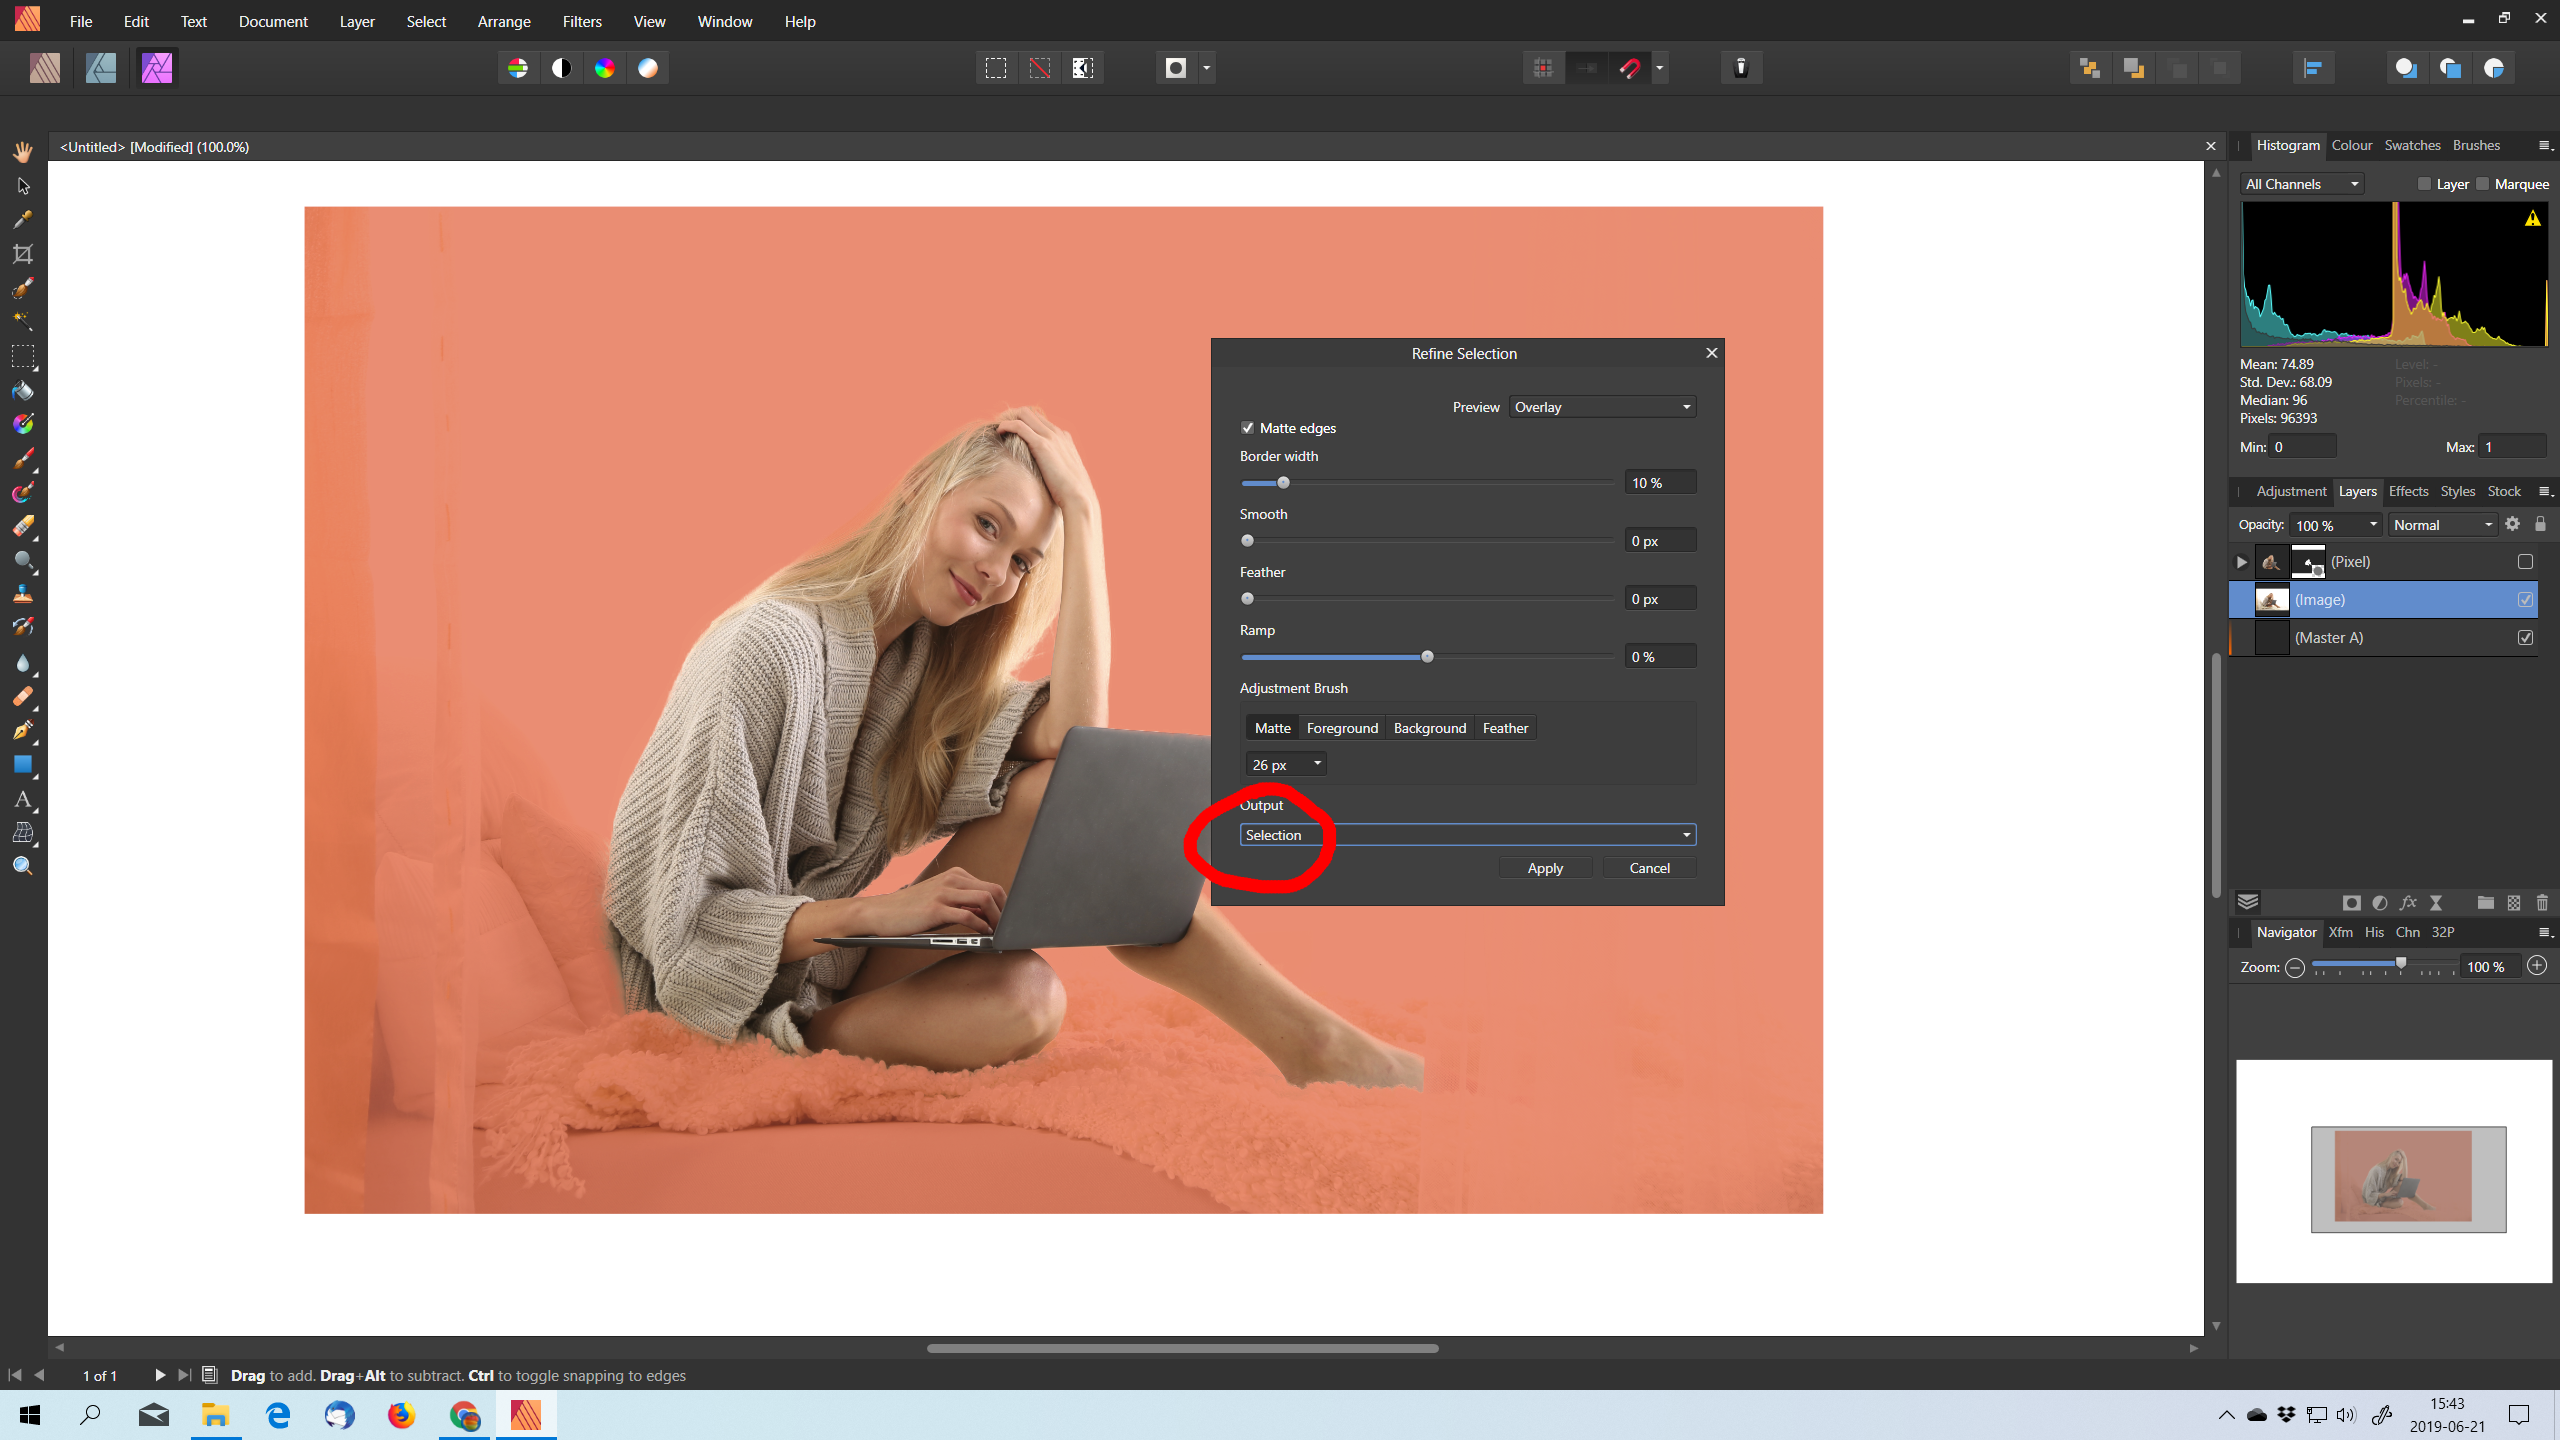
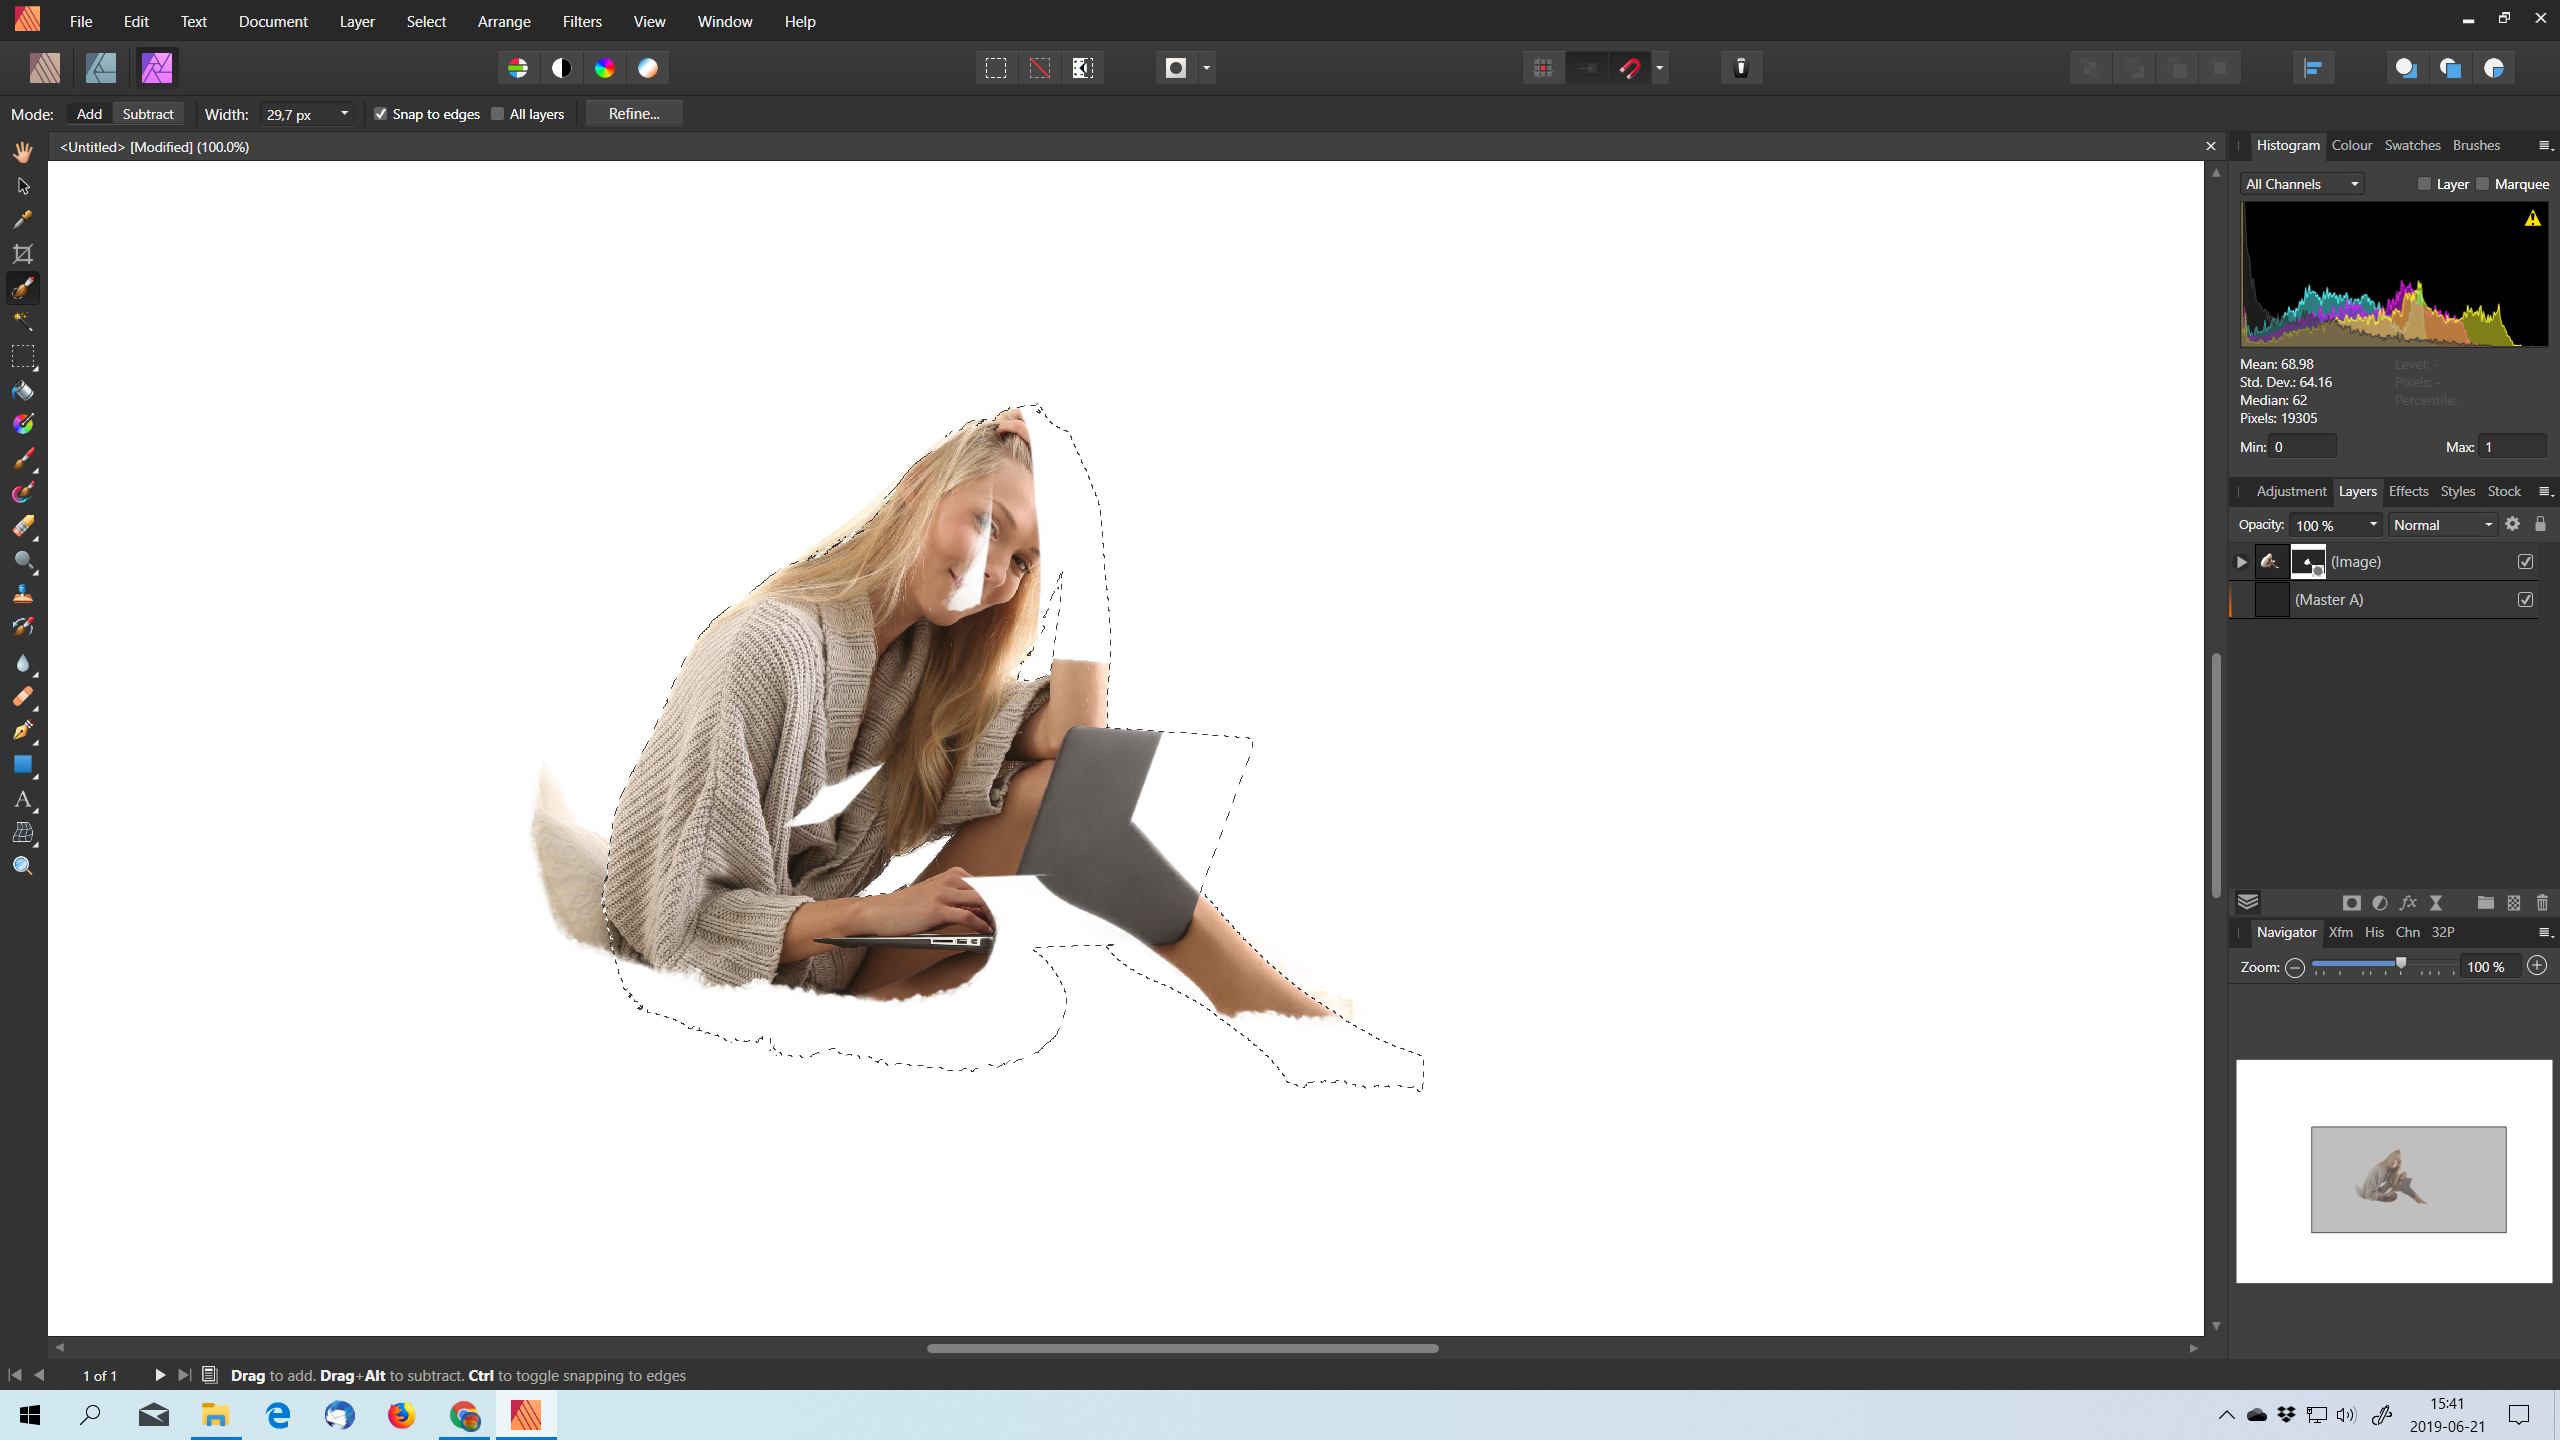
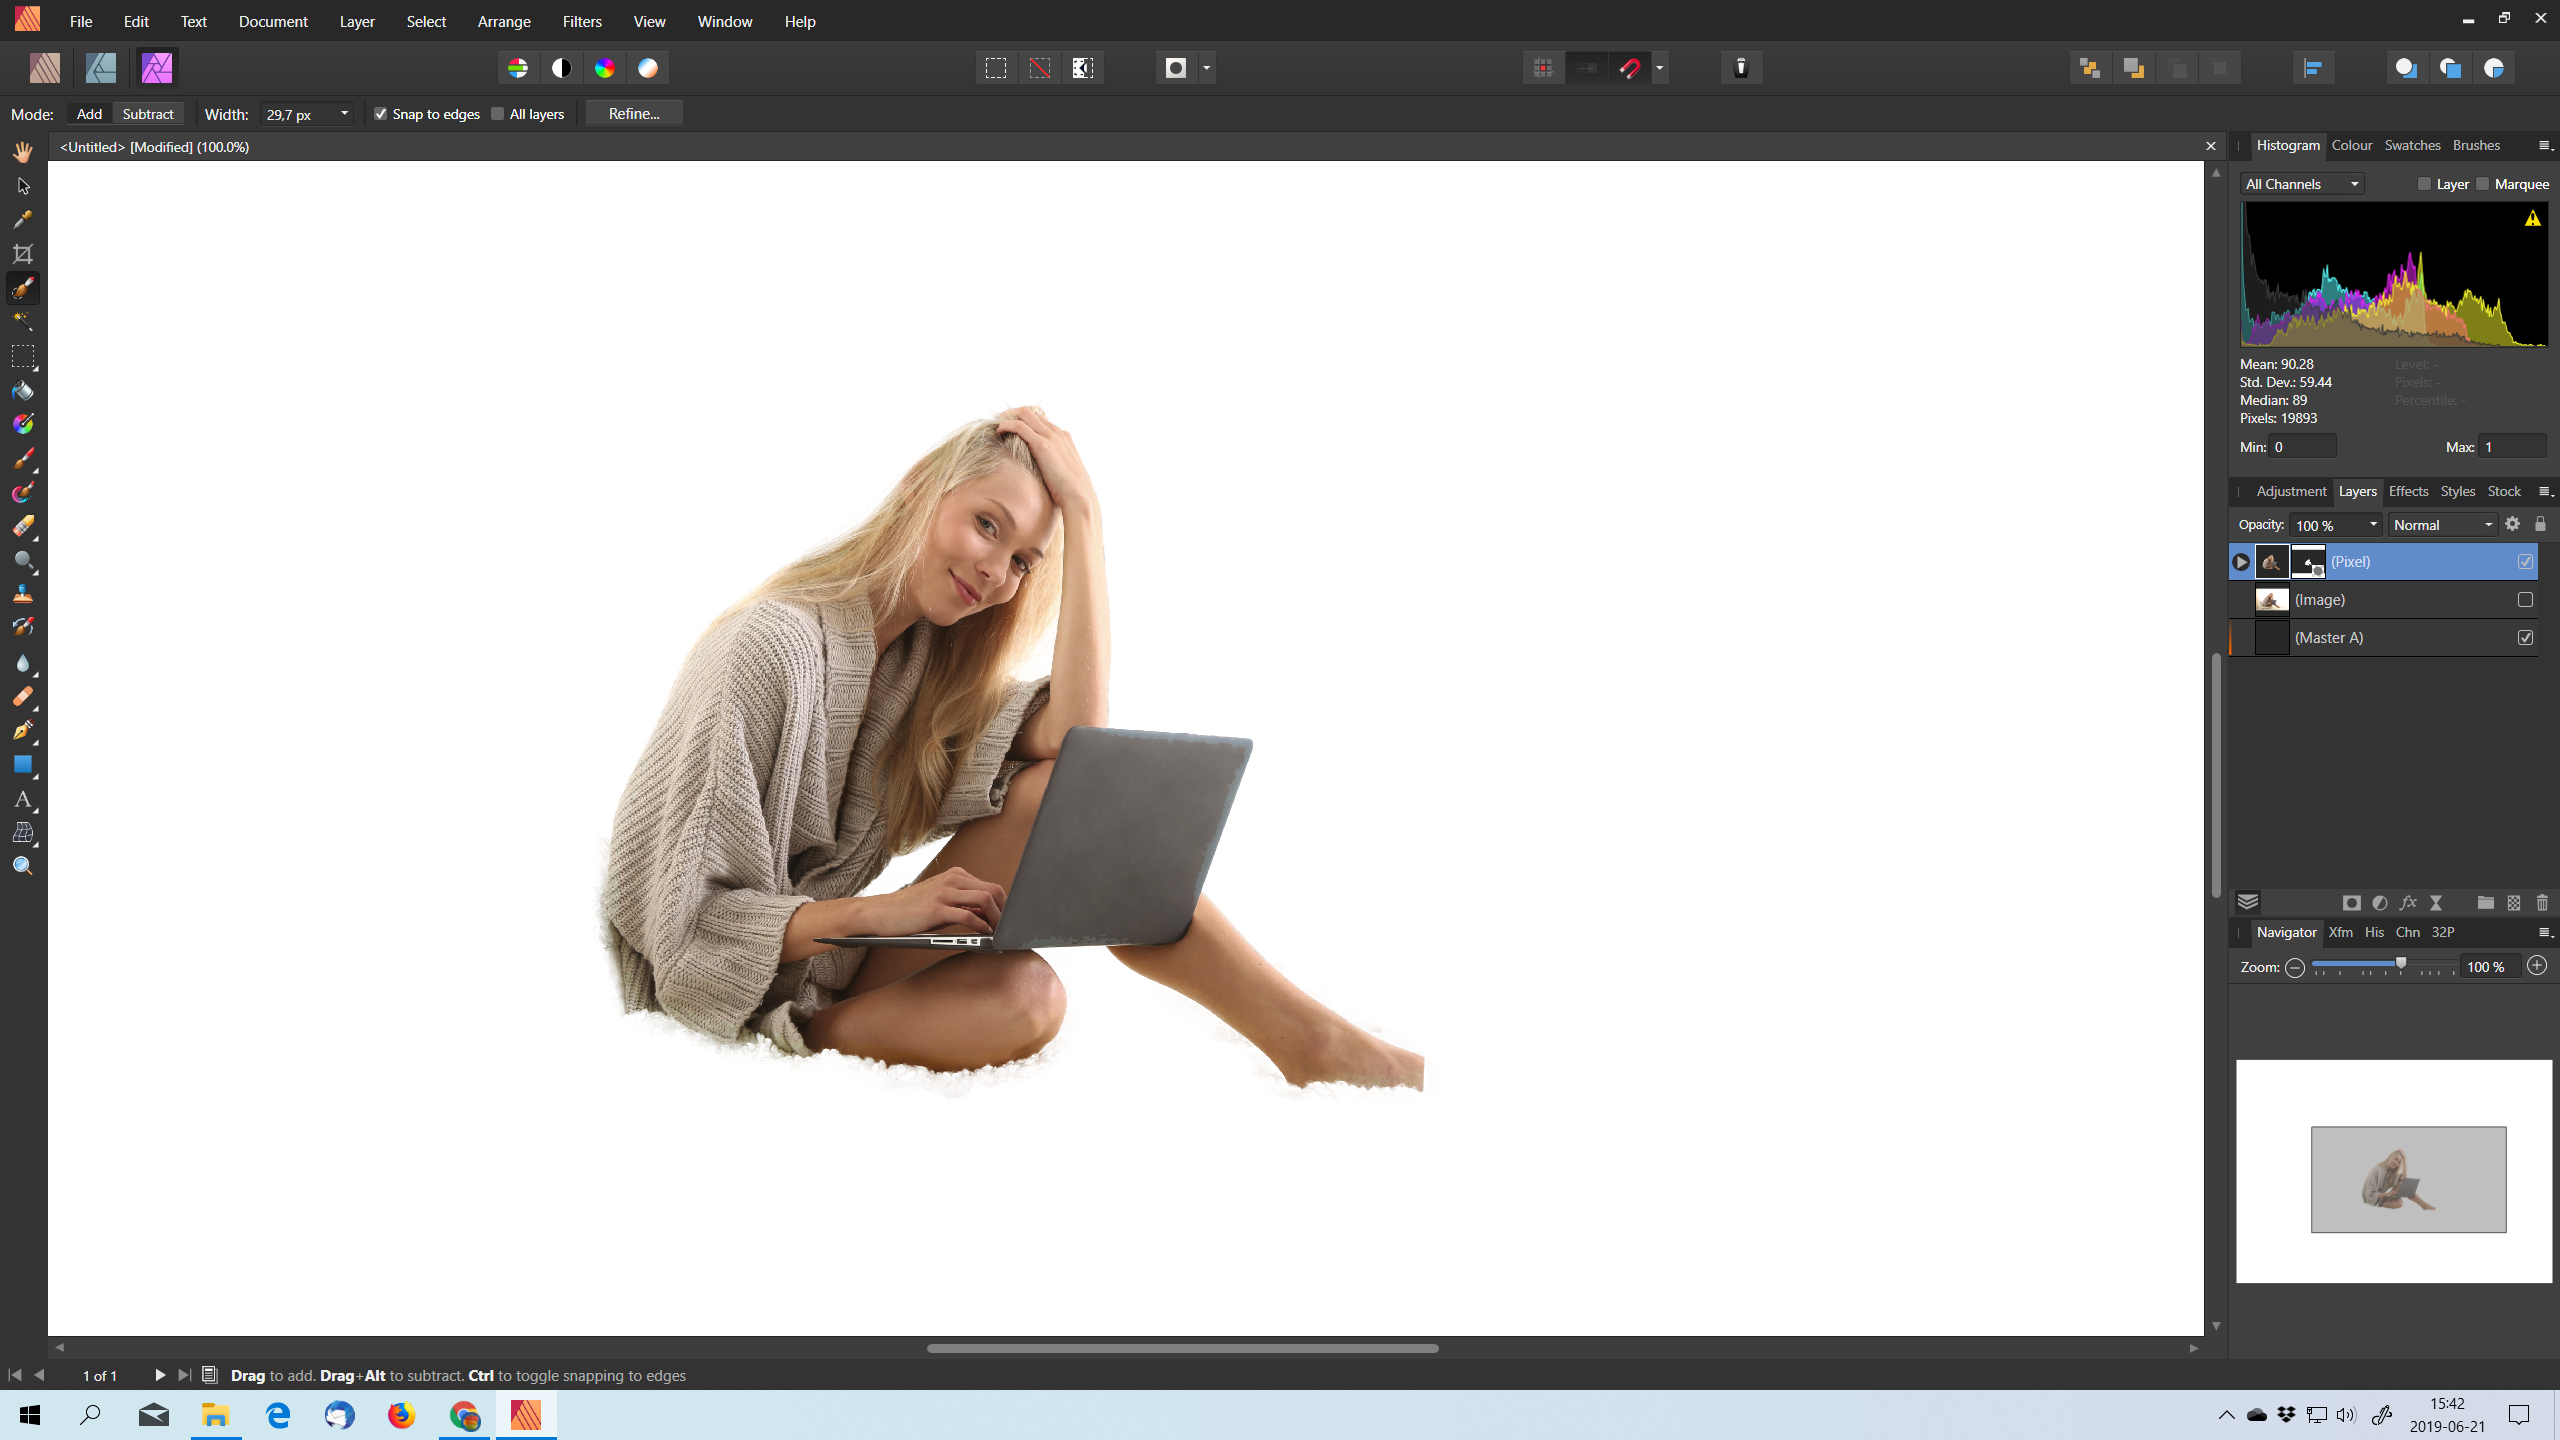
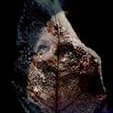
I have been looking at ways to effectively mask things like trees and then adjust the background so you can increase contrast, gamma etc in the sky without affecting the foreground. I have tried Remask from Topaz which is pretty good but thought I would try Affinity which is my core image editor. MY METHOD Using the selection brush I make a loose selection of the sky around the trees I then invert the selection I then hit Refine Using the Matt brushes and foreground and background modes I then tidy up the selection so only the tree is selected Using a black background in the Refine tool the trees look pretty good (see attached) In fact a better result than I can achieve using Topaz Remask and faster. MY PROBLEM So now I have the really good selection I need to transfer that into my final image so I... Hit apply Now I have a selection of just the trees To test how good this is and recreate the result of using the black background in the Refine tool I convert the selection to a mask. In my mind this shoud duplicate the effect of the selection including transparency Then I load a pure black pixel layer beneath the masked layer The result is attached As you can see the selection as a mask appears quite a bit different from the refine preview window with lots of bleed coming through. Am I doing something wrong? Am I wrong to expect the mask to replicate the preview window in Refine? It seems if the preview can do it why can't I replicate in the final image? I really enjoyed selecting a tricky subject like this in Affinity and would really like to get this right. What am I doing wrong? or Is there a deficiency in Affinity? Many thanks Andrew Busst
-
 1. Create a group of several layers of any kind 2. Add a mask layer to the group 3. Ungroup the layers 4. The mask layer has been deleted This only happens to mask layers subsequently added to existing groups. Mask layers that exist before creating the group are not being removed when ungrouping the layers. AP 1.7.3.481
 -
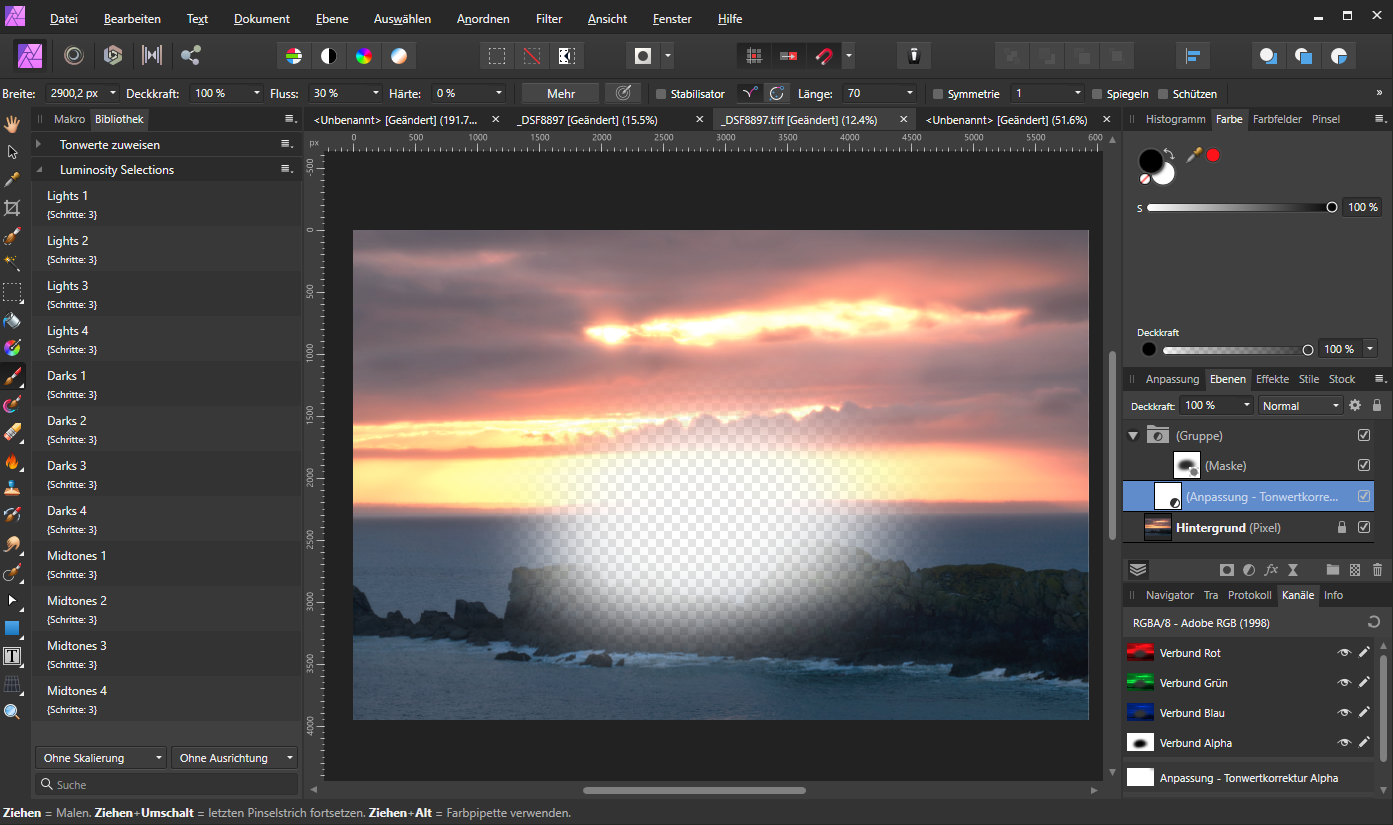
Hello, I have many projects made with older than current 1.7.2 version, and now when I open them I'm facing a problem related with mask in groups and my files are all messed up. The issue is that when you group layer adjustments and then apply a mask on the group, the mask is applied to everything underneath and not only to group contents. I attached an example file, the mask applied to the group should be applied to Curves adjustment and Recolour adjustment, instead it's applied to the layer underneath. I made a mockup image of the actual result vs what should be. Thanks example.afphoto
-
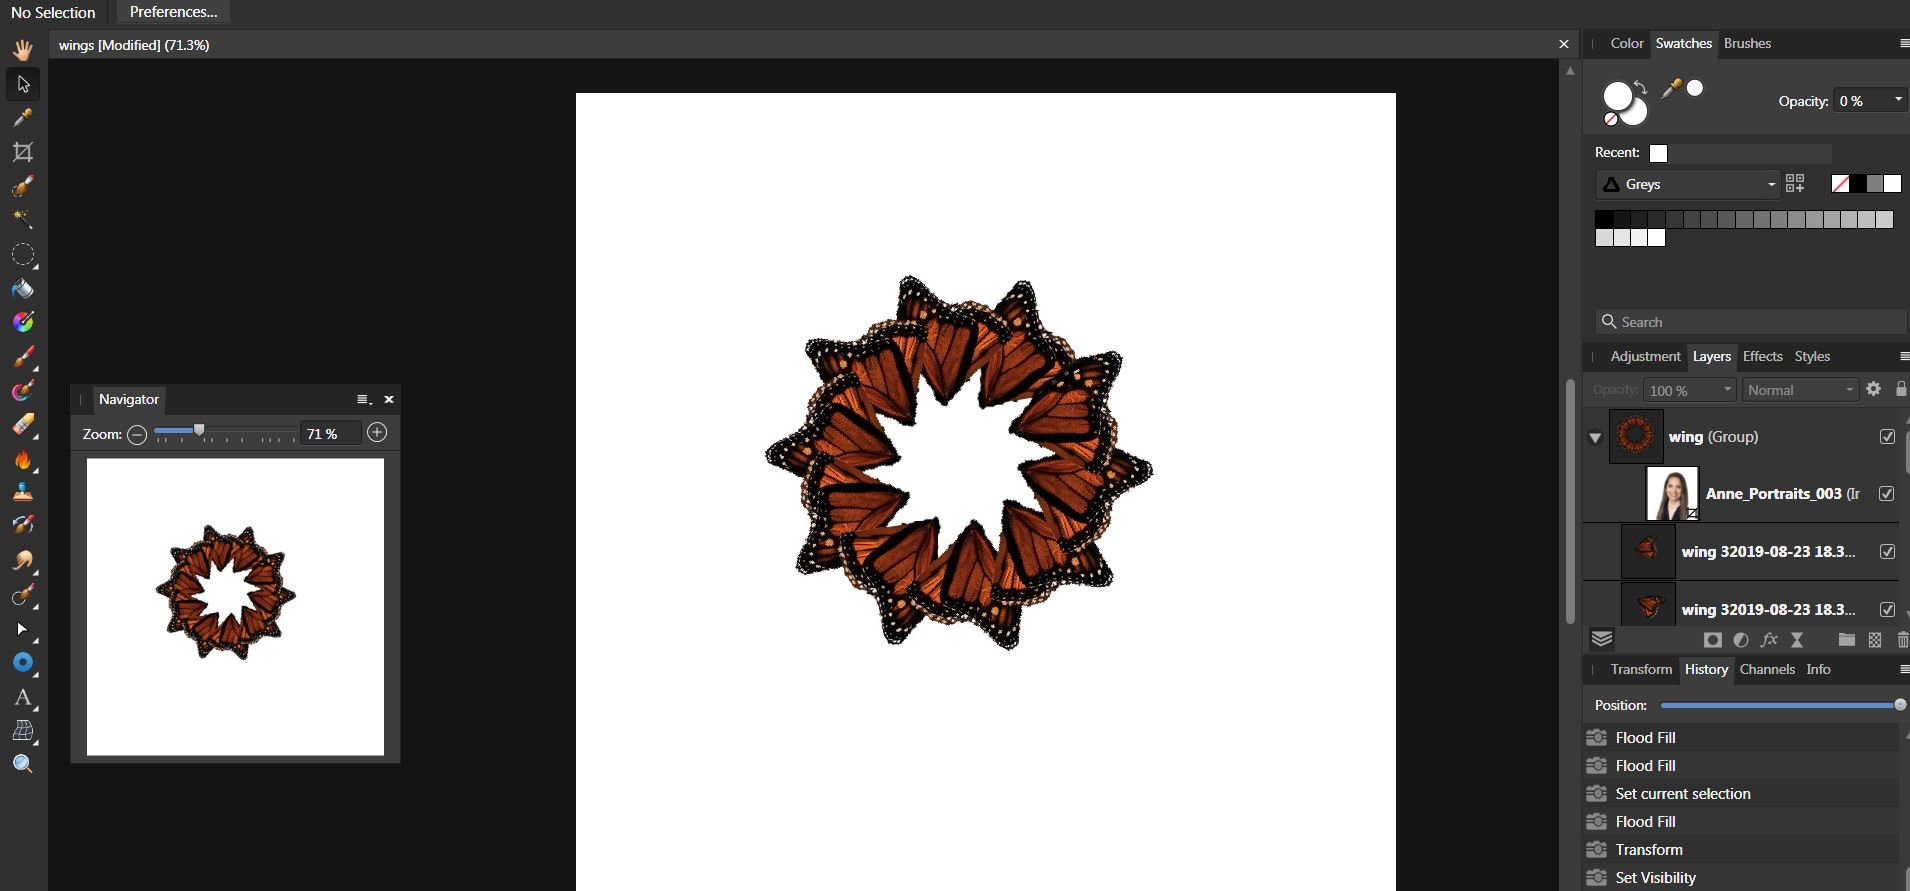
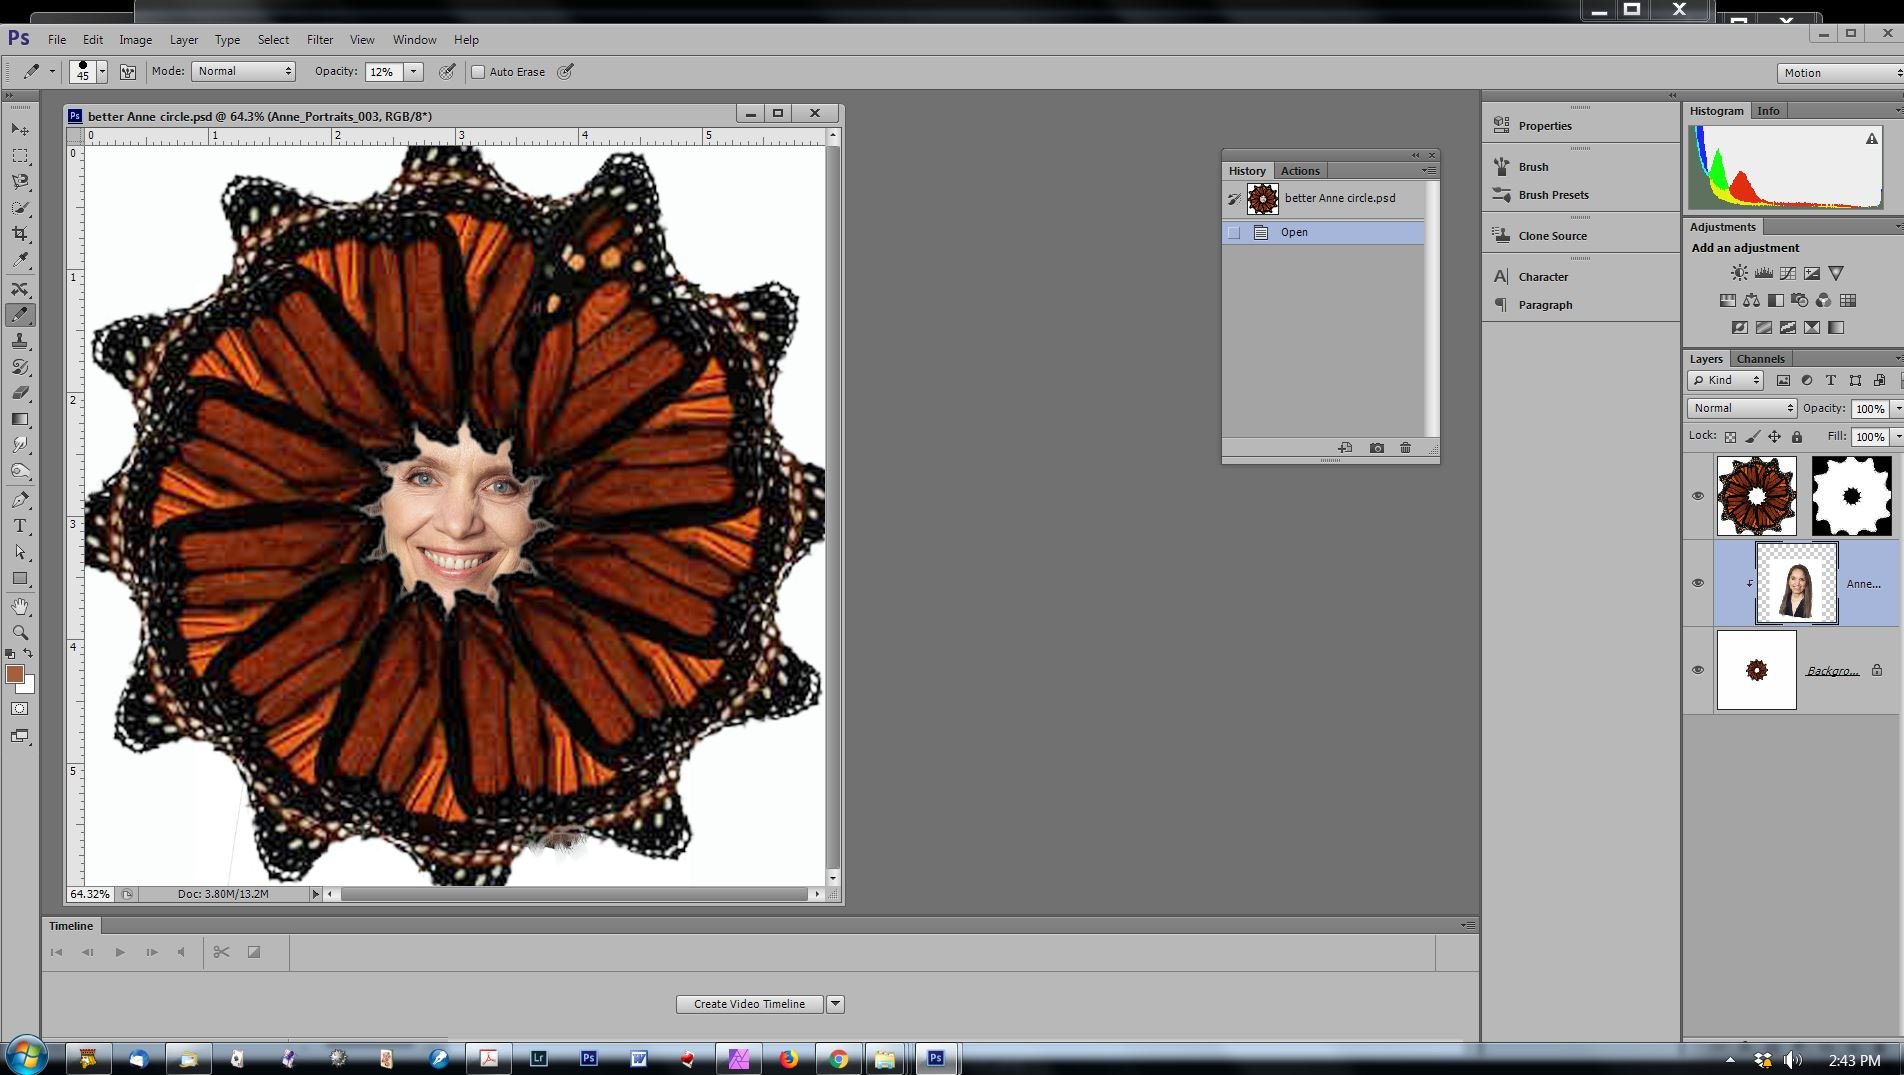
 I have used clipping mask function in past but I up-dated to v. 1.7.3.479 and now the clipped image is not visible. If I place it on the layer below--hanging out from behind--I see the image but as soon as I clip it, it vanishes. I repeated a butterfly wing around a circle and in the hole in the center, I want to clip a face (I tried it in PS CS 6 and it worked. The portrait was a smart object and I rasterized it. ) The portrait is of my daughter and is copyrighted to my grandson Will Ross. I drag the portrait icon up to the wings group icon and get the blue line and it is inset as a child layer.
-
 Hello! I'm new to Affinity Photo and am surprised with the following: If I group two adjustment layers and associate a mask layer with that group, it seems that the mask layer will be affecting the underlying pixel layer rather than the group of adjustment layers. See A.png. It works as I expected if I associate the mask layer only with one adjustment layer. See B.png. I'd like to have a mask layer affecting the group of adjustment layers. What am I doing wrong? Thanks!
-
Hello Affinities! First, I have to say: I really enjoy using Affinity Photo for "finishing" my landscape photos. Thanks for such a great product. Yesterday, on my Windows 10 desktop computer, I updated to Affinity Photo 1.7.2.471. I opened a rather complex file and instantly noticed different rendering of the photo. I used an levels adjustment layer and a gaussian blur live filter in a group to create an orton effect. I reduced opacity and I put a masked on the group. While painting with a black brush on the white mask, a checkerboard pattern occured. I simplified that. A loaded a photo, created an empty pixel above put it in a group and masked the group. Paining the mask leads to the same effect. There seems to be an bug in masking a group or is this a rendering option I can disable in the preferences? Thanks and best regards, Jens
-
I have installed the new 1.7.2. and have opened the last file working on..... did see only grey place until I have unchecked all layers with MASKs! Mask totally do not work! Please how can I quickly return to previous version, this is a TOTAL SHOW STOPPER! Thanks Jindra
-
Hi! I have a black and white vector layer which I would like to use as a mask for another. However, Designer always sets it as a clipping path, instead of using black und white for masking. Is there any way to change that behavior, or at least to make all black parts of the layer transparent so can work as a clipping path? The reason behind this is that I‘m trying to rasterize a gradient for a monochrome print. I‘ve prepared a B/W mask using the Halftone Filter: Demo file for the above image: vector mask.afdesign
-
 I have attached a mask layer to a Gaussian blur live filter layer. After inverting the layer I begin painting over objects to be blurred. Some parts of those objects display "tiled", e. g. in you can see a vertical line under the period of the previous sentence. Look more closely and you'll see the tiles. I'm running Affinity Photo 1.7.1 on a 2018 MacBook Pro 15" and macOS 10.13.6. Turning Metal computing off and restarting didn't alleviate the problem.
-
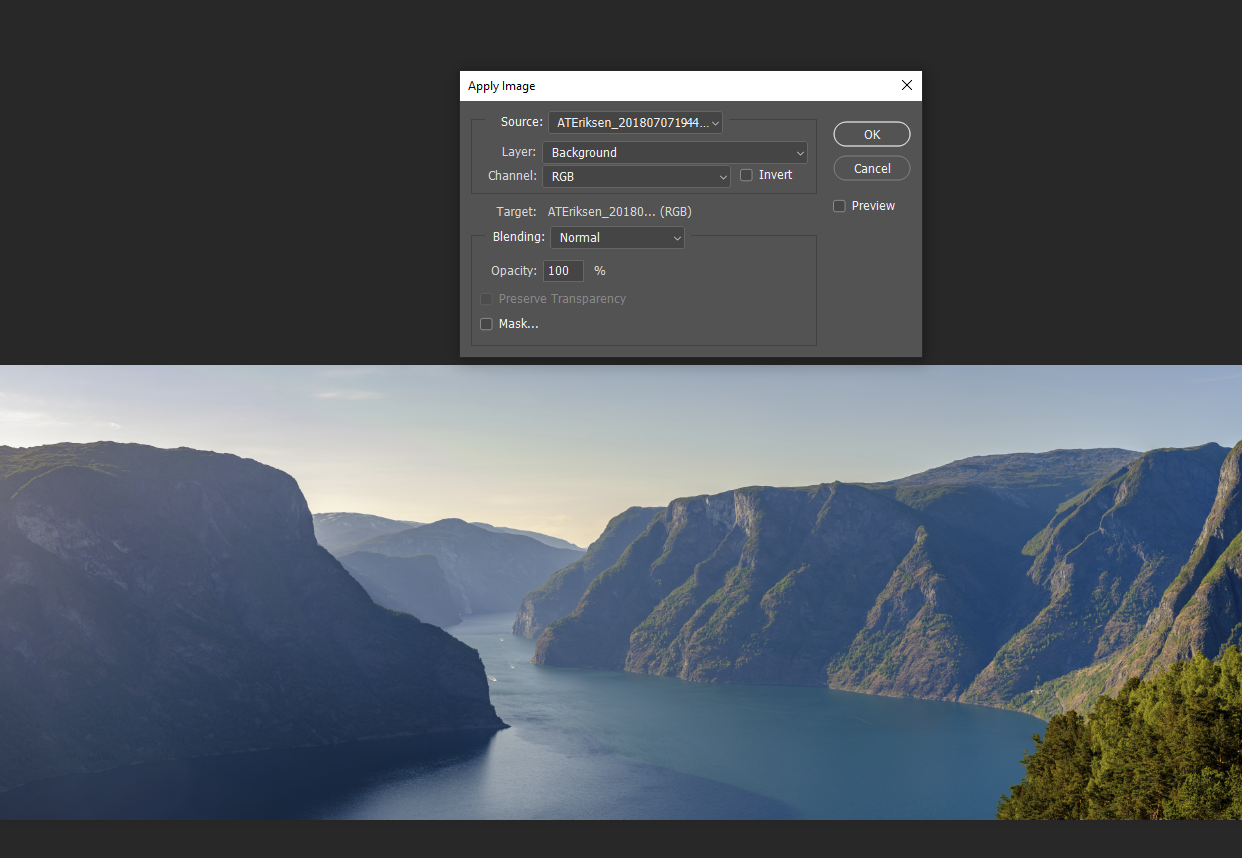
 Hello. Is there any "apply image" function in AP similar to PS CC's own "apply image"? I want to use it for "apply one channel of N layer to current selected mask", or "apply one channel to another channel for RGB mixing - with different opacity and blend modes", etc. It's one of my most used functions in PS CC. I use it almost daily in the winter when it's dark outside, just to give blue channel better SNR by replacing whole or part of the noisy blue channel. Thanks Aleksander
-
In Photo Persona, the mask added to the layer is moved (screen-02). Added as "New layer with mask" is good (screen-03).
- 2 replies
-
- 1
-

-
- photo persona
- mask
- (and 1 more)
-
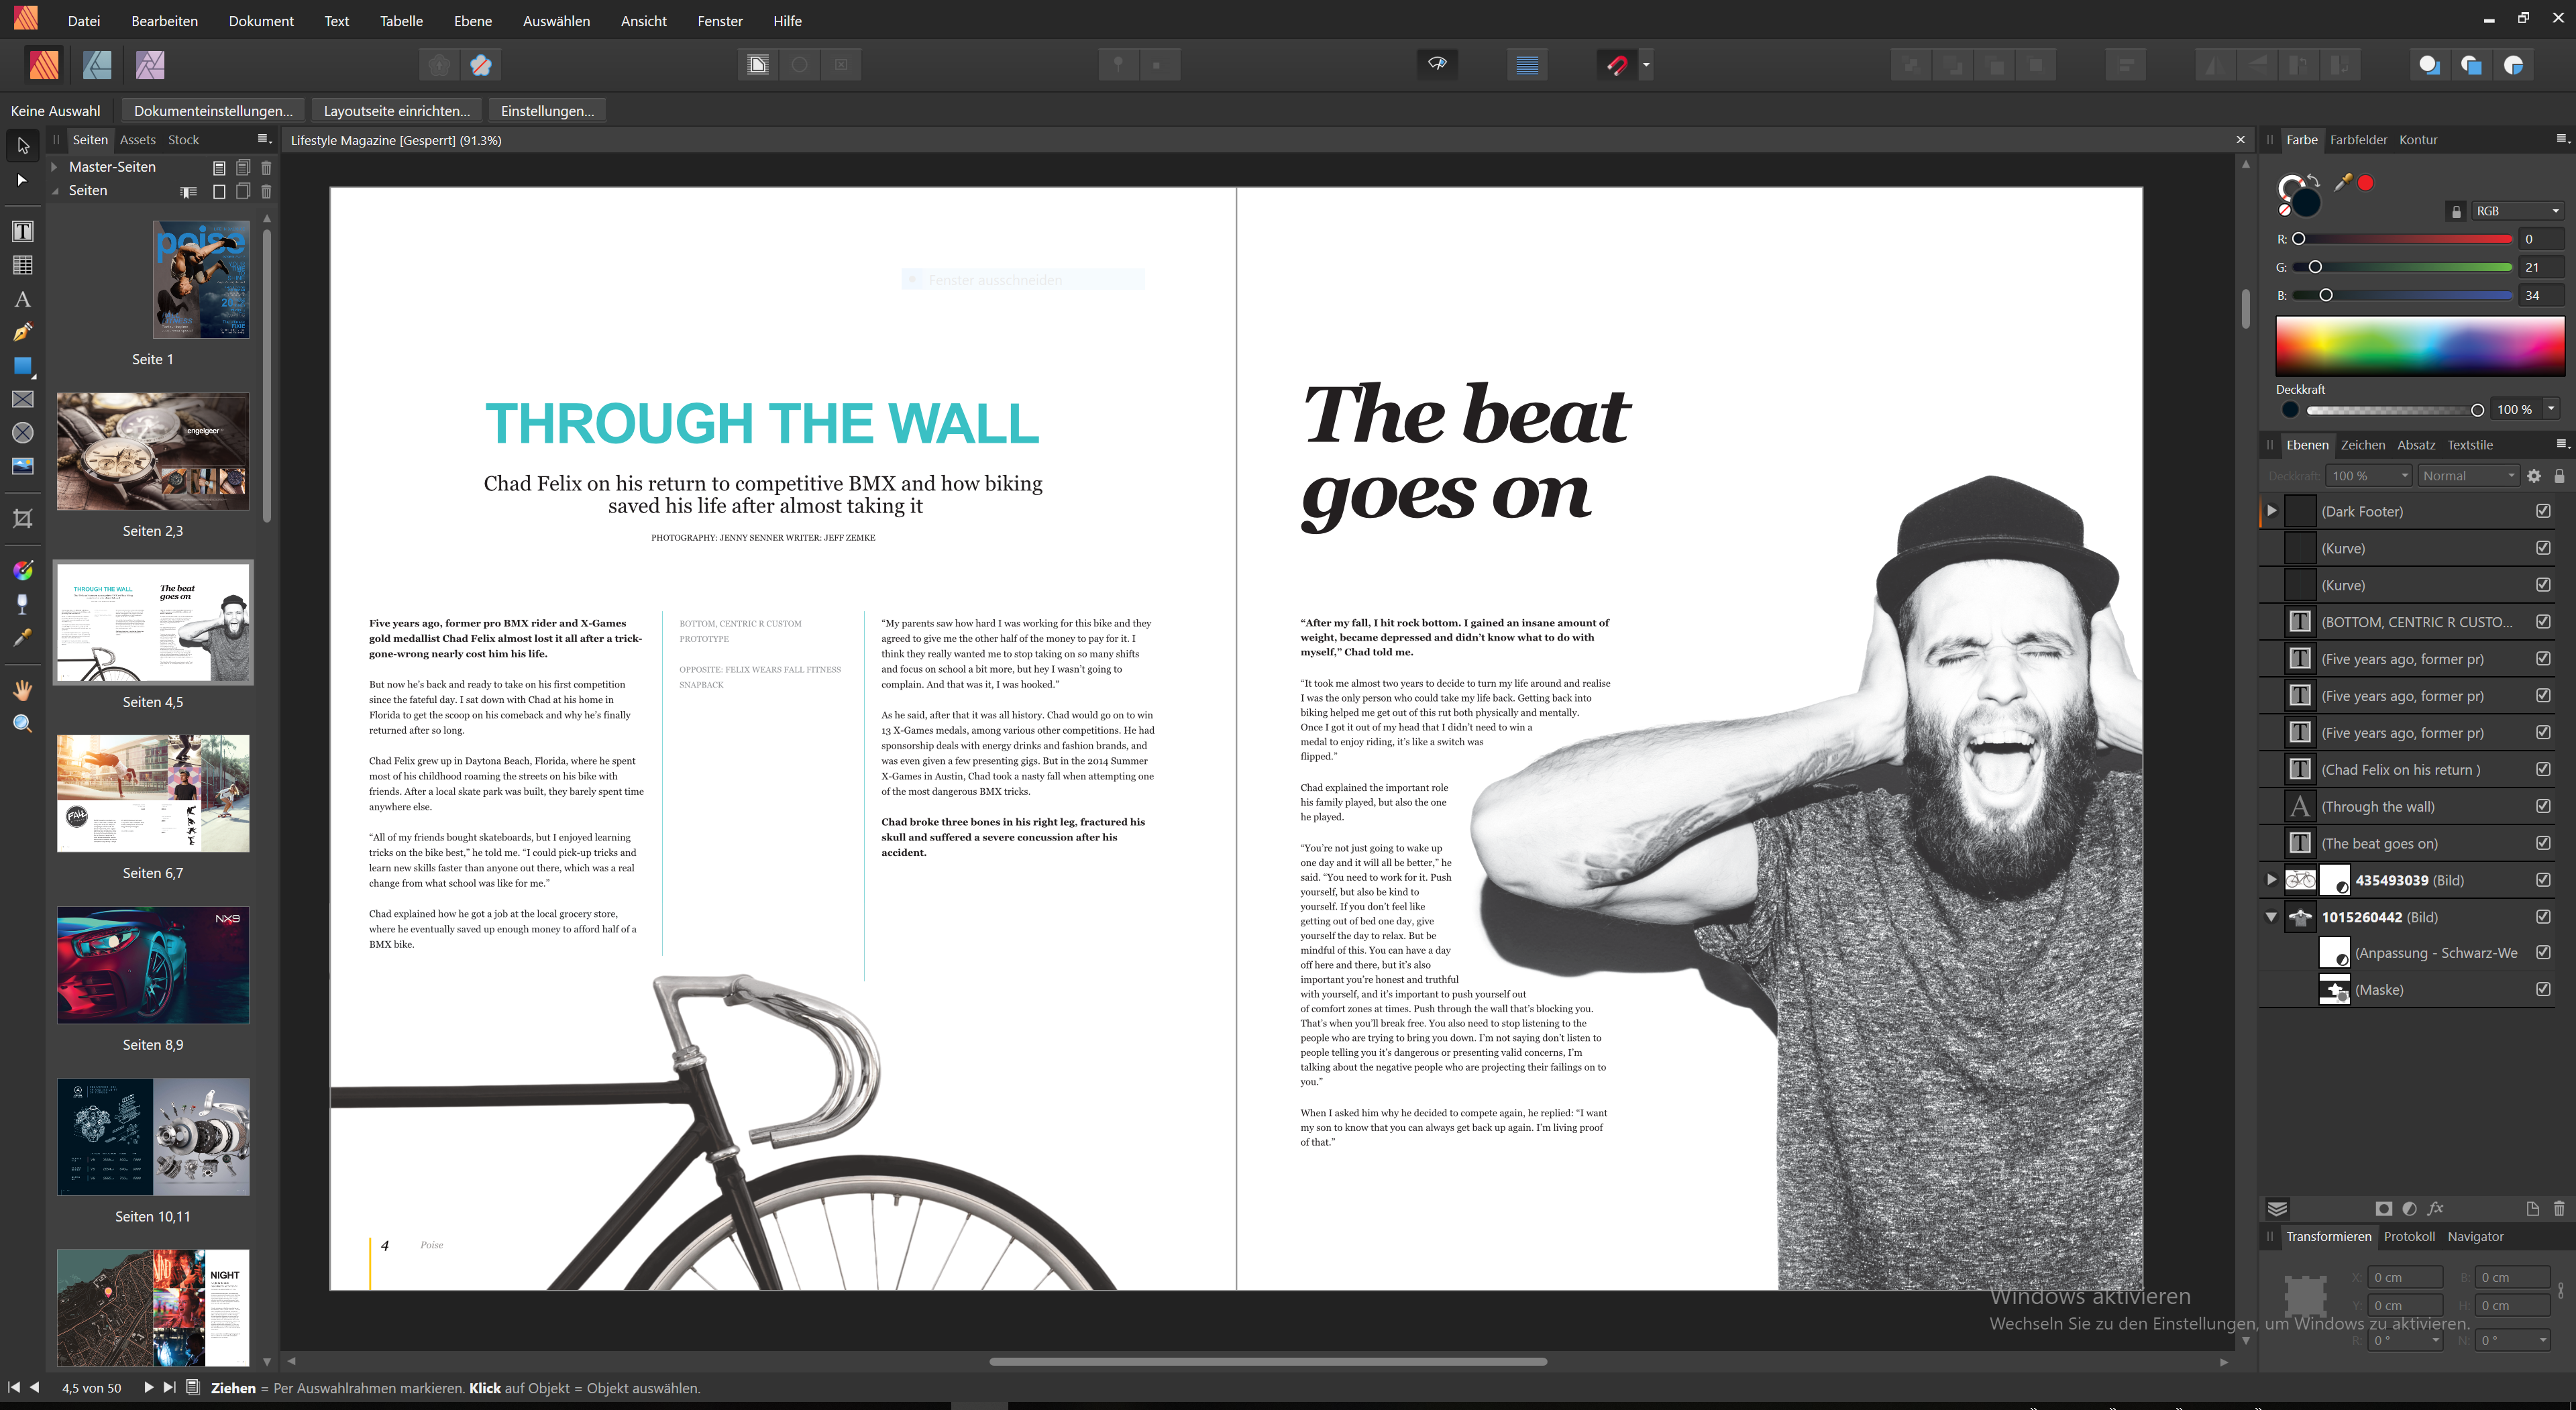
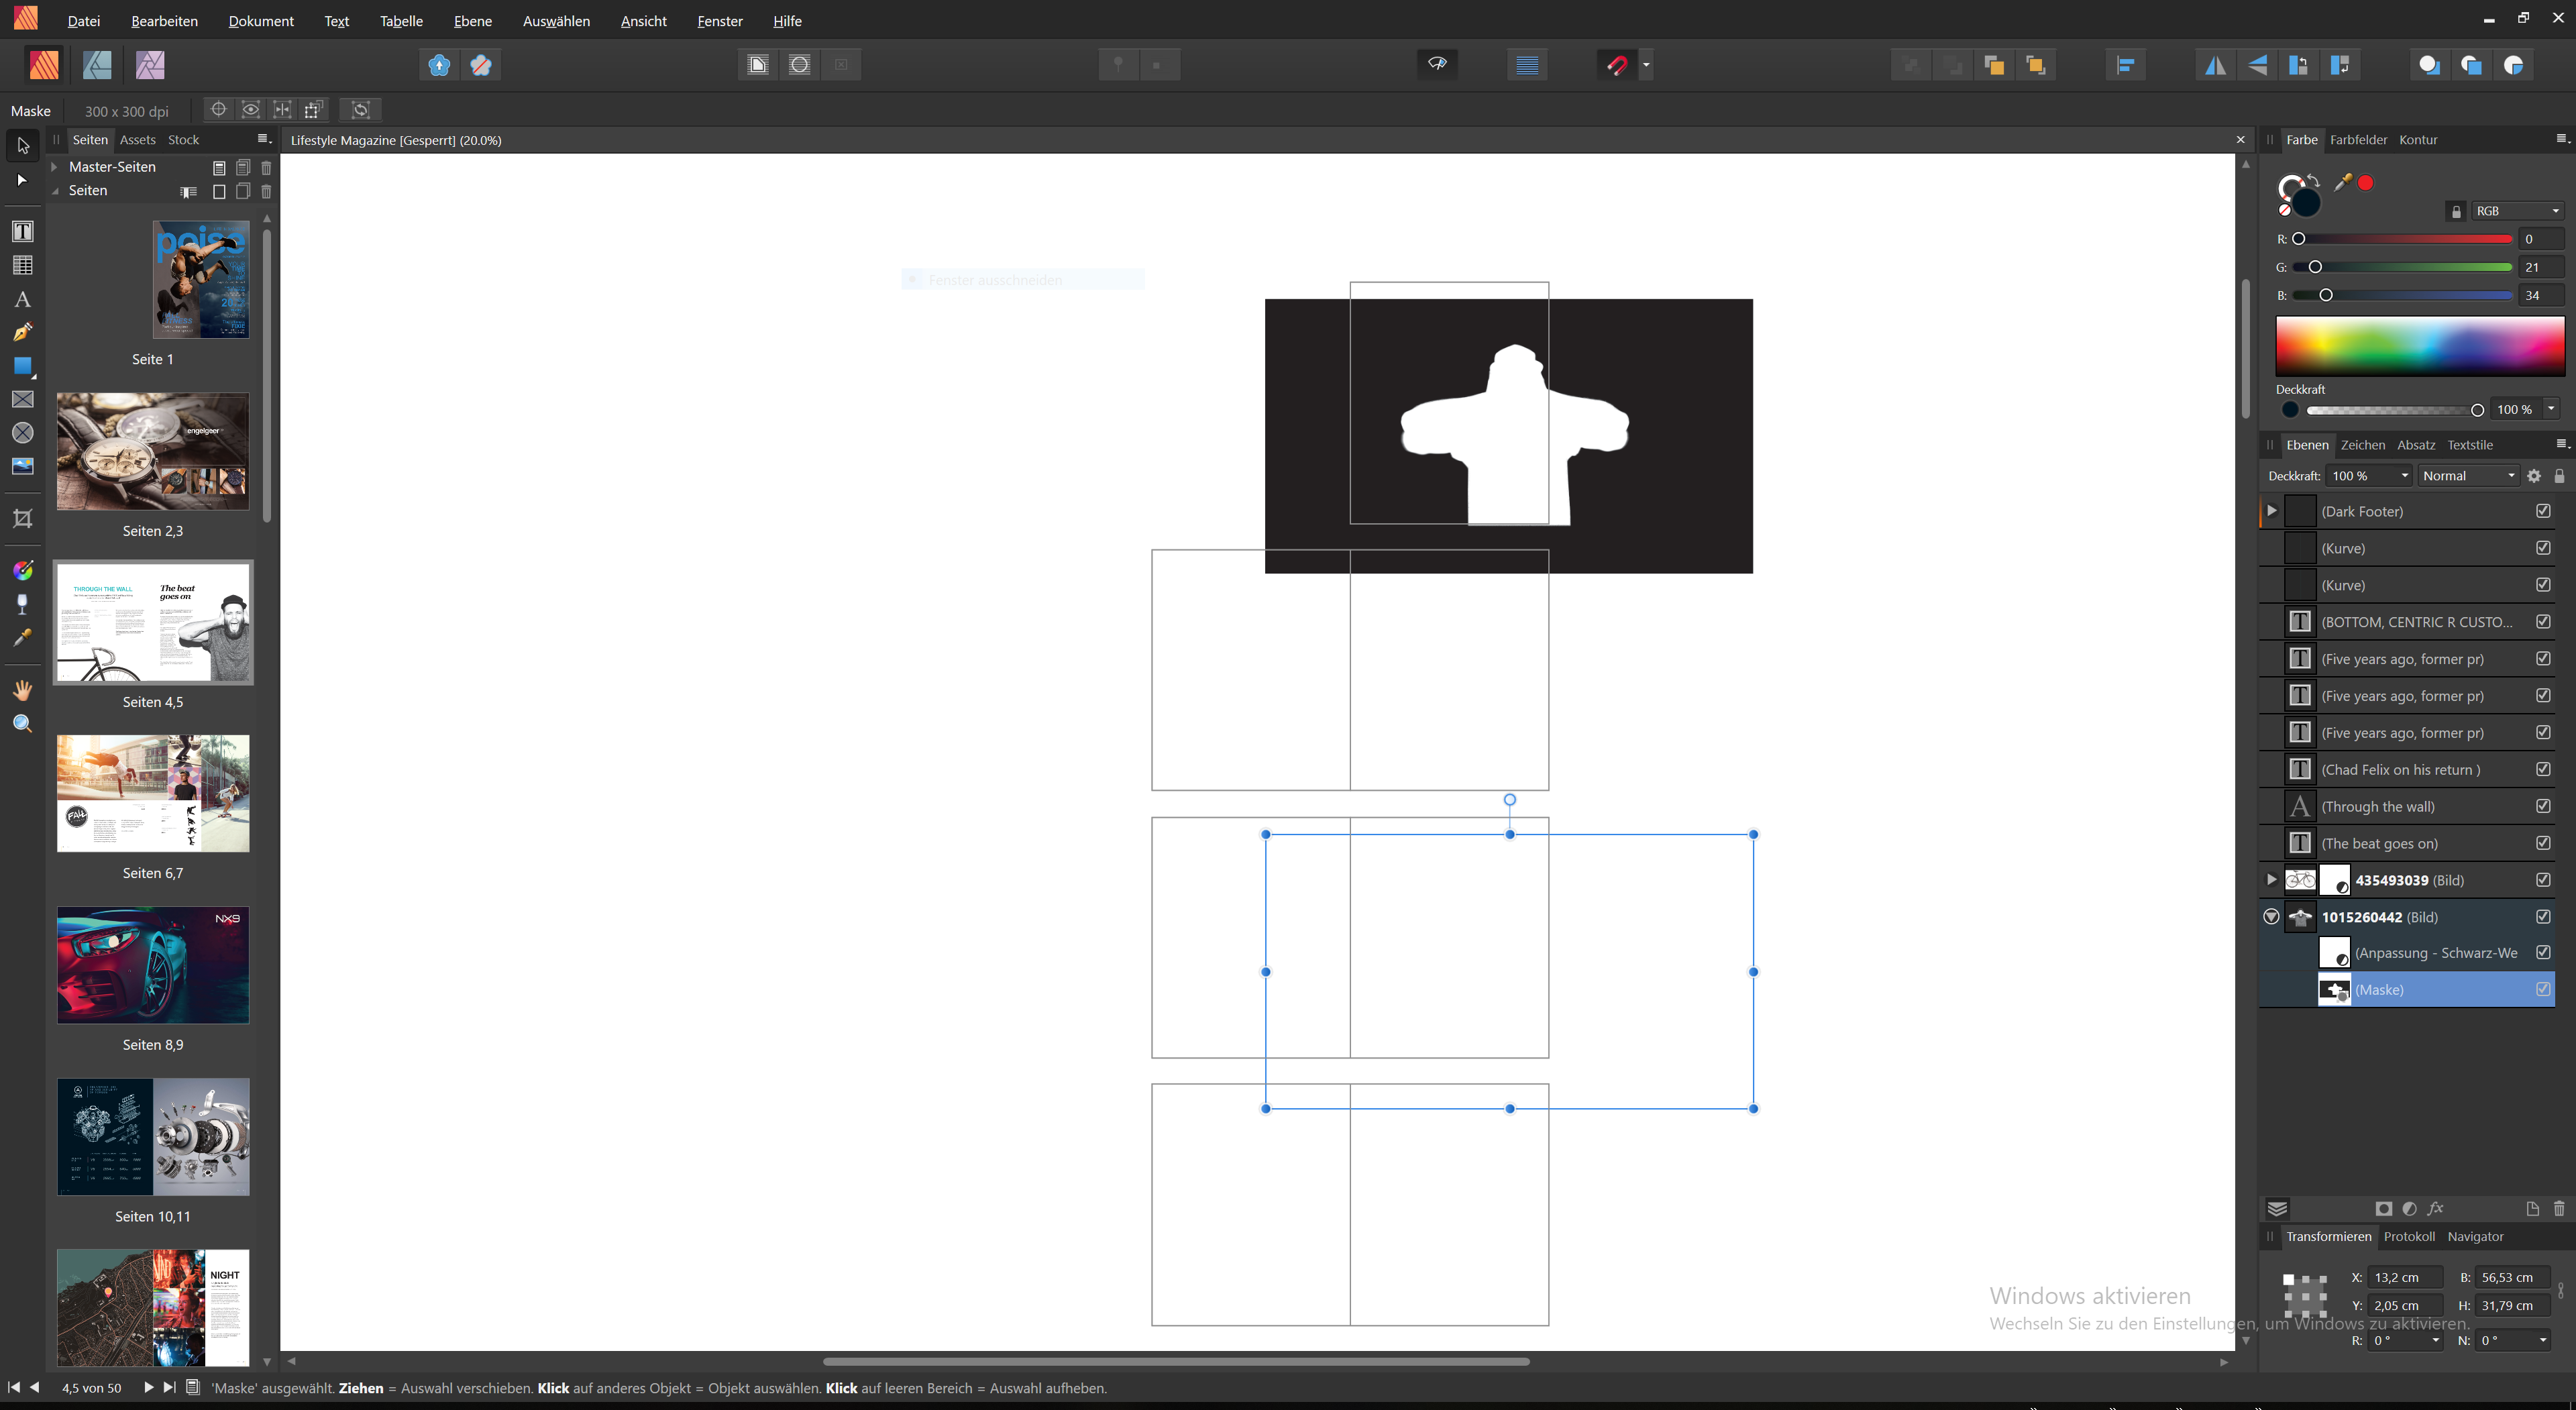
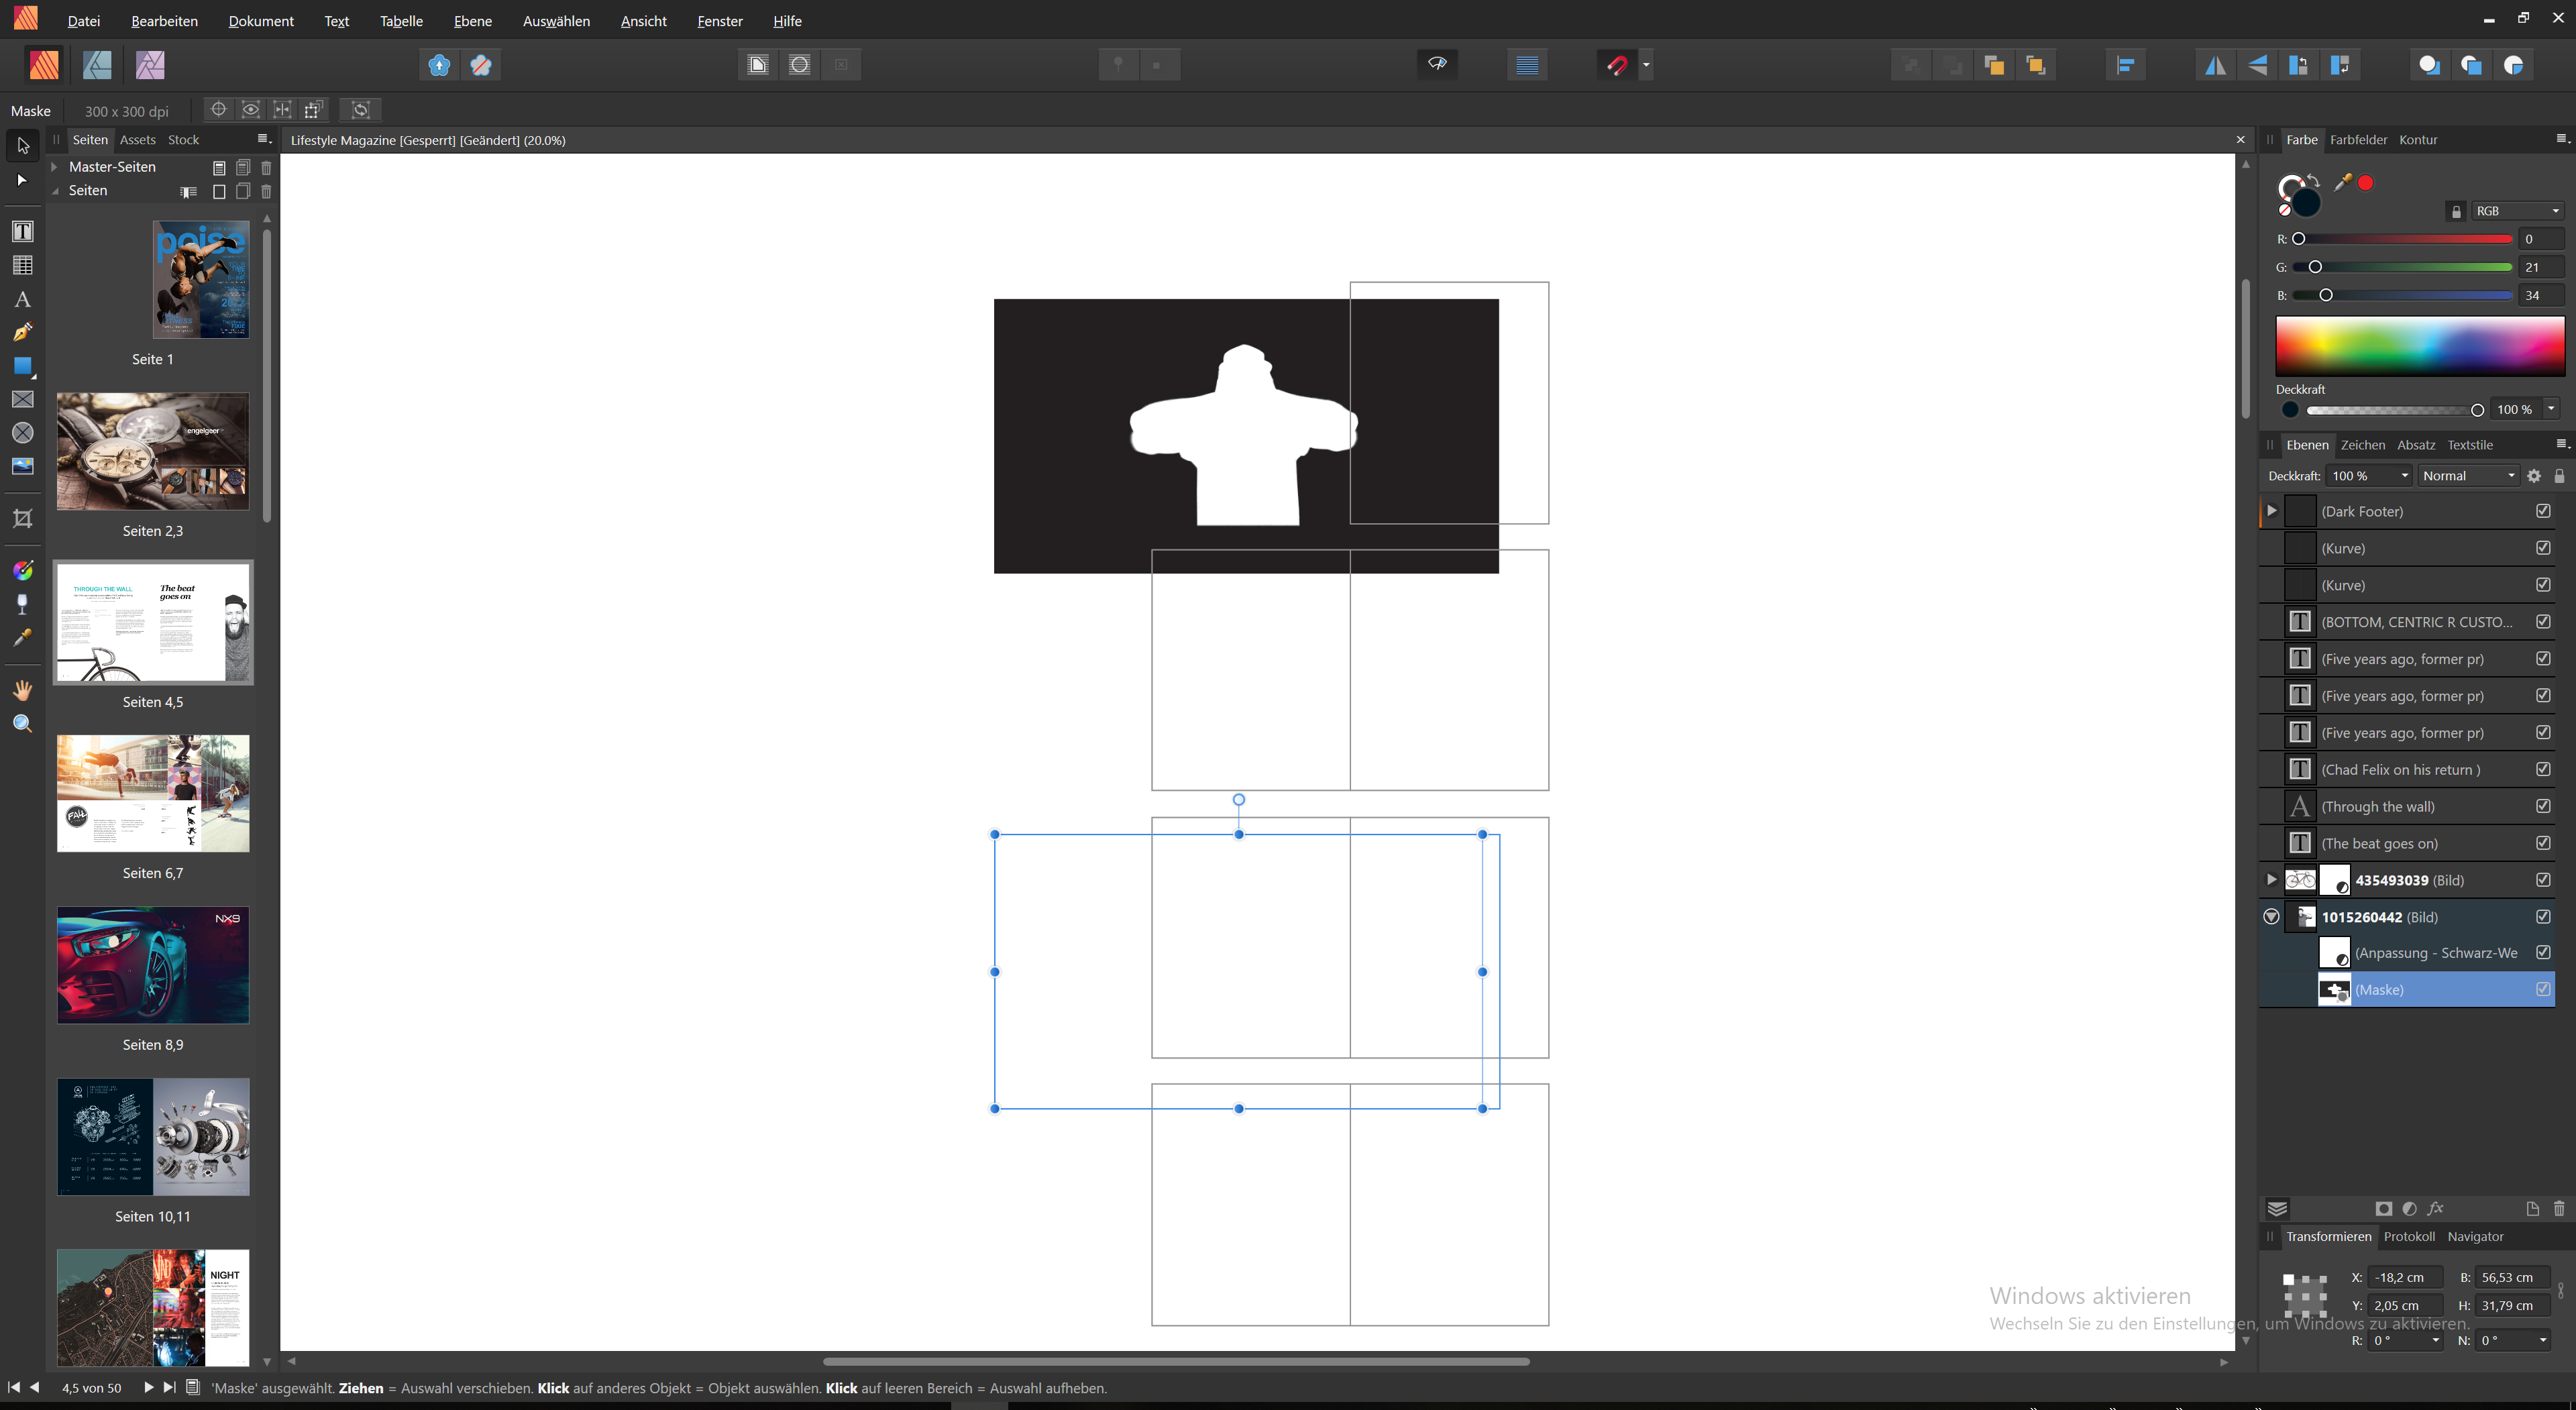
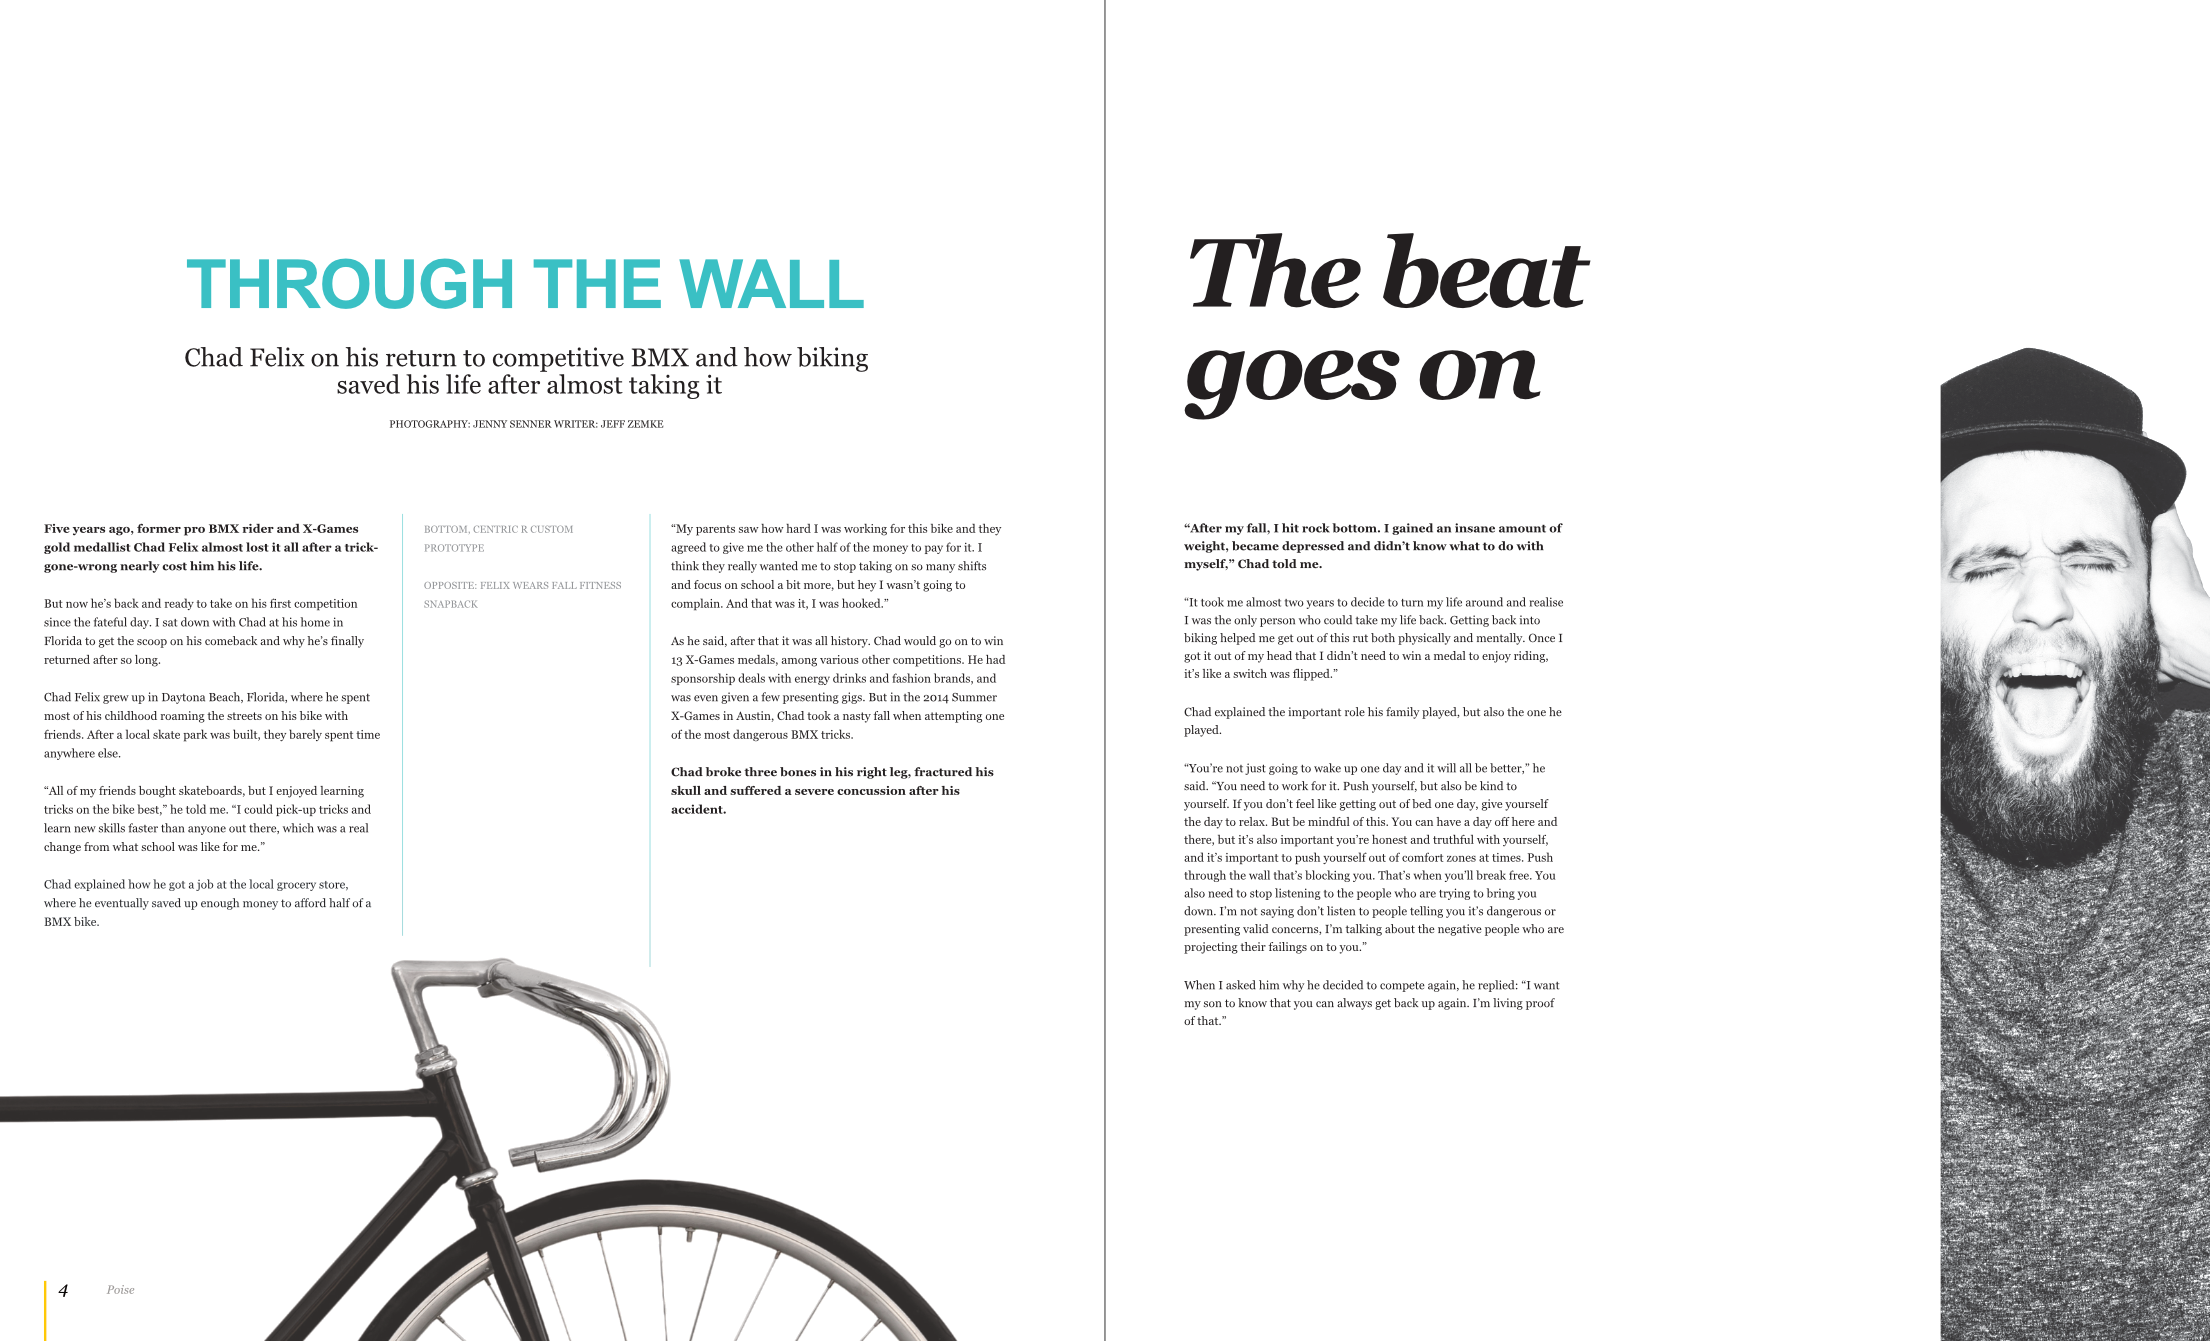
 Dear Affinity Team, I found a weird bug in the example project "Lifestyle Magazine". I use Win 10 + German Version + 1.7.1.404 As I was discovering the new features I stumbled upon a bug in the Mask edit functionality. It seems the Mask is very much out of place. I attached some screenshots to illustrate. 01) Downloaded the example project > Had a look at the guy on page 5 > pressed right click on the thumbnail of the mask layer > "Edit Mask" 02) When I clicked the "Edit Mask" > the pages went blank & only the contour/frame of the mask was visible > thought that was a bit strange, where is the mask shown in the layer thumbnail? 03) As I zoomed out I saw that the mask was out of place and was positioned on page 1. 04) However when I move the mask - for example - to the left, the guy gets cropped accordingly to the new position of the mask: 05) Here a larger screenshot of the new positioned mask in the layout: _ I hope you can reproduce the bug and make Publisher more awesome than it already is :D Cheers, chillahc
-
 Working with Masks is greater than in any other application I have worked with so far, the ease of having child layers and being able to stack a mask over the other truly is amazing. However... One thing that I have found disorienting is that when I use the colour picker tool, rather than picking a value of black an white from the mask that I am working on, Afphoto decides to pick a colour from the Parent Layer (Even when the Source is set to "Current Layer" while having the mask selected). Even though working a mask will only paint with the luminosity value of the sample taken, as you may well know, the values on the Parent Layer are part of a whole and having the Colour Picker Tool to take a sample from the Parent Layer and not the Mask you are working on results in picking an unwanted value when I am actually trying to pick a shade of gray that has already been used on said mask In the long run this means that for me to be able to take the desired sample, I must go to the colour wheel / sliders manually and try to guess what that value was or take my attention away from the whole and having to isolate the mask to get the value that I want. If the colour picker could be adjusted in a way that it picks the shades of gray FROM the mask while working INSIDE the mask it could certainly enhance workflow speed and consistency. Thanks for the attention and time to read this request. Cheers!
- 10 replies
-
- 6
-
-
- feature request
- colour picker
- (and 1 more)
-
 Hello, I recently purchased Serif Affinity Photo. I noticed that the layer mask is not working properly. Whenever I try to paint with black, no effect is seen. When I invert the mask and try to paint with white, nothing happens. I have NOT ticked " protect alpha" in the context bar, and there seems to be some effect only when mask is revealed by pressing 'alt' and blending mode is changed to 'soft light'. Obviously the image is not seen and mask cannot be accurate. Please help. I am using widows 10 home eddition and latest version of Affinity Photo, 1.7
 -
 I have installed 1.7 but straight away I have hit an issue - With just the background pixel layer I add a brightness and contrast adjustment layer, I then highlight the adjustment in the layers panel and select a brush to paint out the effect using the paintbrush set to black and nothing happens. I have tried it on the last beta version an it works. This also used to work on 1.6 which has been overwritten I have reinstalled 1.7 from a fresh download but the same thing happens! Windows 10 Version 1809
 -
Hi, the treatment on a mask is well done, but the display of its thumbnail is not updated Similarly, the masking display is no longer visible on the beta version 1.7.0.331 beta while it was OK on the file generated on version 1.6.5.123 charte_gris.afphoto
-
Quick mask (Q) (don't exit) New Mask Layer boom (crashes)
- 3 replies
-
- 4
-

-
- quick mask
- mask
- (and 1 more)
-
 Hello Team, Want to know if the add of Luminosity mask (Live) is planned for AfPhoto ? actually in beta cycle. Yes Luminosity masks will make life even better and easier for a lot of people, i've learned to use it and it makes a lot of things possible. I know people have said it is possible to mimic it but i'm actually asking about a native one and if it is planned to be implemented. Blessings !
 -
 Hi all, Is there a way to revert a layer that has been converted to mask using Rasterize to Mask into a normal layer? Cheers, Juan
 -
Live Filter: Skin Tone Feature
Uncle Mez posted a topic in Feedback for Affinity Photo V1 on Desktop
Hello everyone ! Hello Team ! Well, i just want to make this request/suggestion that i believe will be of great interest for many in this community. We love affinity Photo a lot but still there are point we often disagree with and tends to make use of other tools but we end up lose a lot of time and some time lose it all. Among those so much wanted features i notice the precious Skin Tone Fine tuning. Well, there are tons of methods that we can use to fine tune our skin tone but when looking closely they are intended for Pro or peoples who have considerable experience with Photo software, but when it comes to newbie ... they just lose it all. So i propose a New Skin Tone Fine Tune - Live filter to be implemented; that live filter must allow us to work fast on skin tone applying quick and auto mask to the subject skin so we can work on it. A bit more ? Well, I suggest this : - an Auto detection of skin tone to be implemented the second we select that filter then a quick mask applied, allowing us to fine tune the mask because skin also share the same color as background and environment. - After mask is okay then we can play with the sliders few of them can be : Smoothing, Brilliance, Vibrance, clarity, sharpening, blemish correction and maybe Hue (for those playing the Hulk stuff) ... do not forget to add a color/picking tool to allow average color picking (kind of manual method for those wanting to select precise areas or ranges) - All this should happen in live mode so we see in real-time what we do and how is the output - When all necessary tuning are done, just click apply Making this a Live filter is a plus that will enable us to come back to it tuning again and again thus increasing the interest Newbie and learners (and even Pro) may have about Affinity Photo. Believe this: the day you will offers us such quick way of working a lot of people will be at peace. Please do not remove or delete the actual way of doing the same job as many people like to do things manually so they have to be satisfied. May another one in this forum fine tune this suggestion for the good. Blessings until this is implemented for the Good of Photography.-
- 1
-
-
- skin
- correction
- (and 7 more)
-
It would be great if Affinity apps introduced Layer Effects (FX) masks, initially only one master mask for all effects, and perhaps even better, individual masks also available for each effect. Thanks for your consideration and all you do. Affinity apps are awesome!
-
Like the title say it is simple. I applied a vignette live filter and started to erase excess using brush tool with black color but APhoto crashed, it did happened twice on a normal JPEG file. Maybe it is a known bug for this beta, would be great to have it fixed. Blessings
-
 I'm having this recurring issue, where if I clip something to a shape/curve at an angle the original shape/curve fill bleeds into the edge, which is particularly obvious when clipping a light color to a dark color as shown here: Can anybody help? Much appreciated clipping mask error.afdesign
-
 How can I turn my curve into a selection so that I can continue working with it? Or is this function not yet available?