gdenby
-
Posts
1,887 -
Joined
Everything posted by gdenby
-
 D'oh! Reset selection box. Forgot that widget.
 -
Whenever I try to scale down, When I use the handle at the corner, I get a smaller rotated square. When I use a H or W transform, I get a squashed rectangle along the original vert/horiz angle. What am I missing?
-
I wasn't able to come up w. anything that does exactly what it appears you want. It is easy to place an image into a square or rectangle as a child. It will then rotate, scale and transform conforming to the parent shape. However, I tried various ways to rotate and shear squares, and I could not get a perfect horizontal diamond. What I made were stacks of isometric perspective squares.. If I converted the shapes to curves, I could then turn them to diamonds. But then the image shape no longer conformed to the outline. By carefully manipulating the image bounding box, I was able to only approximate a fit w. an isometric deform. There was some cropping and scaling. Here is an example.

-
Remarkable! Finest work. Subtle and accurate.
-
I messed around a little with boolean additions/subtractions, etc. Tried breaking curves, and joining the pieces to others. What was simpler was laying out some guidelines. Didn't bother making them perfectly spaced, just eye-balled it. W. snapping on,used the pen tool set to polygon mode. Drew a triangle. Drew the "snow" over it. Used a trapeziod shape at the bottom. Pretty easy and quick. Laying the guides more precisely would not be hard.
-
Shortly after getting AD a few months ago, I bought a Huion graphics tablet. Its large, larger than I need, wireless, comes w. pen. It has fine response, and does fine detail. I've been quite happy w. it. Quite a bit less expensive than a comparable sized Wacom.
-
Nice selection of colors. Remember, cactus flowers are very beautiful. Maybe think of it in blossom.
-
Good work. A favorite movie for me and my family. I am supposing your niece was happy w. uncle's offering.
-
A good photo to start, and a subtle manipulation after. Double plus. I worked w. a couple of photographers. They went to great lengths when shooting reflective objects to avoid glare and hot spots. Curiously, one was bald, the other balding. After watching them work, I supposed it might be that they sometimes tore their own hair out.
-
Thanks, I haven't had to do a parameter RAM reset for years, and had quite forgotten it as a possible solution for probems.
-
1st. A5 dimensions in mm are 210 x 148. I don't think there can ever be a bunch of circles 5mm apart that will evenly fill the layout. Maybe in some small fraction of a mm. But, try this. Create the document and go into the grid and axis manager dialogue. Show grid, and then select "basic." Make the grid unit 5mm, only 1 division. With snapping to grid turned on, draw a circle to the size you would like. Use the duplicate command, and slide the circle horiz or vert. just to the next grid position, 5mm. Continue w. the duplicate command till the circles fill the column or row. Select all, and do the same in the other axis. After that, the circles can all be grouped, and scaled proportionally. If you are trying to make huge numbers of very small circles, the spinning ball is probably showing that there is a huge amount of processing going on trying to define the curves way down into maybe millionth of divisions.
-
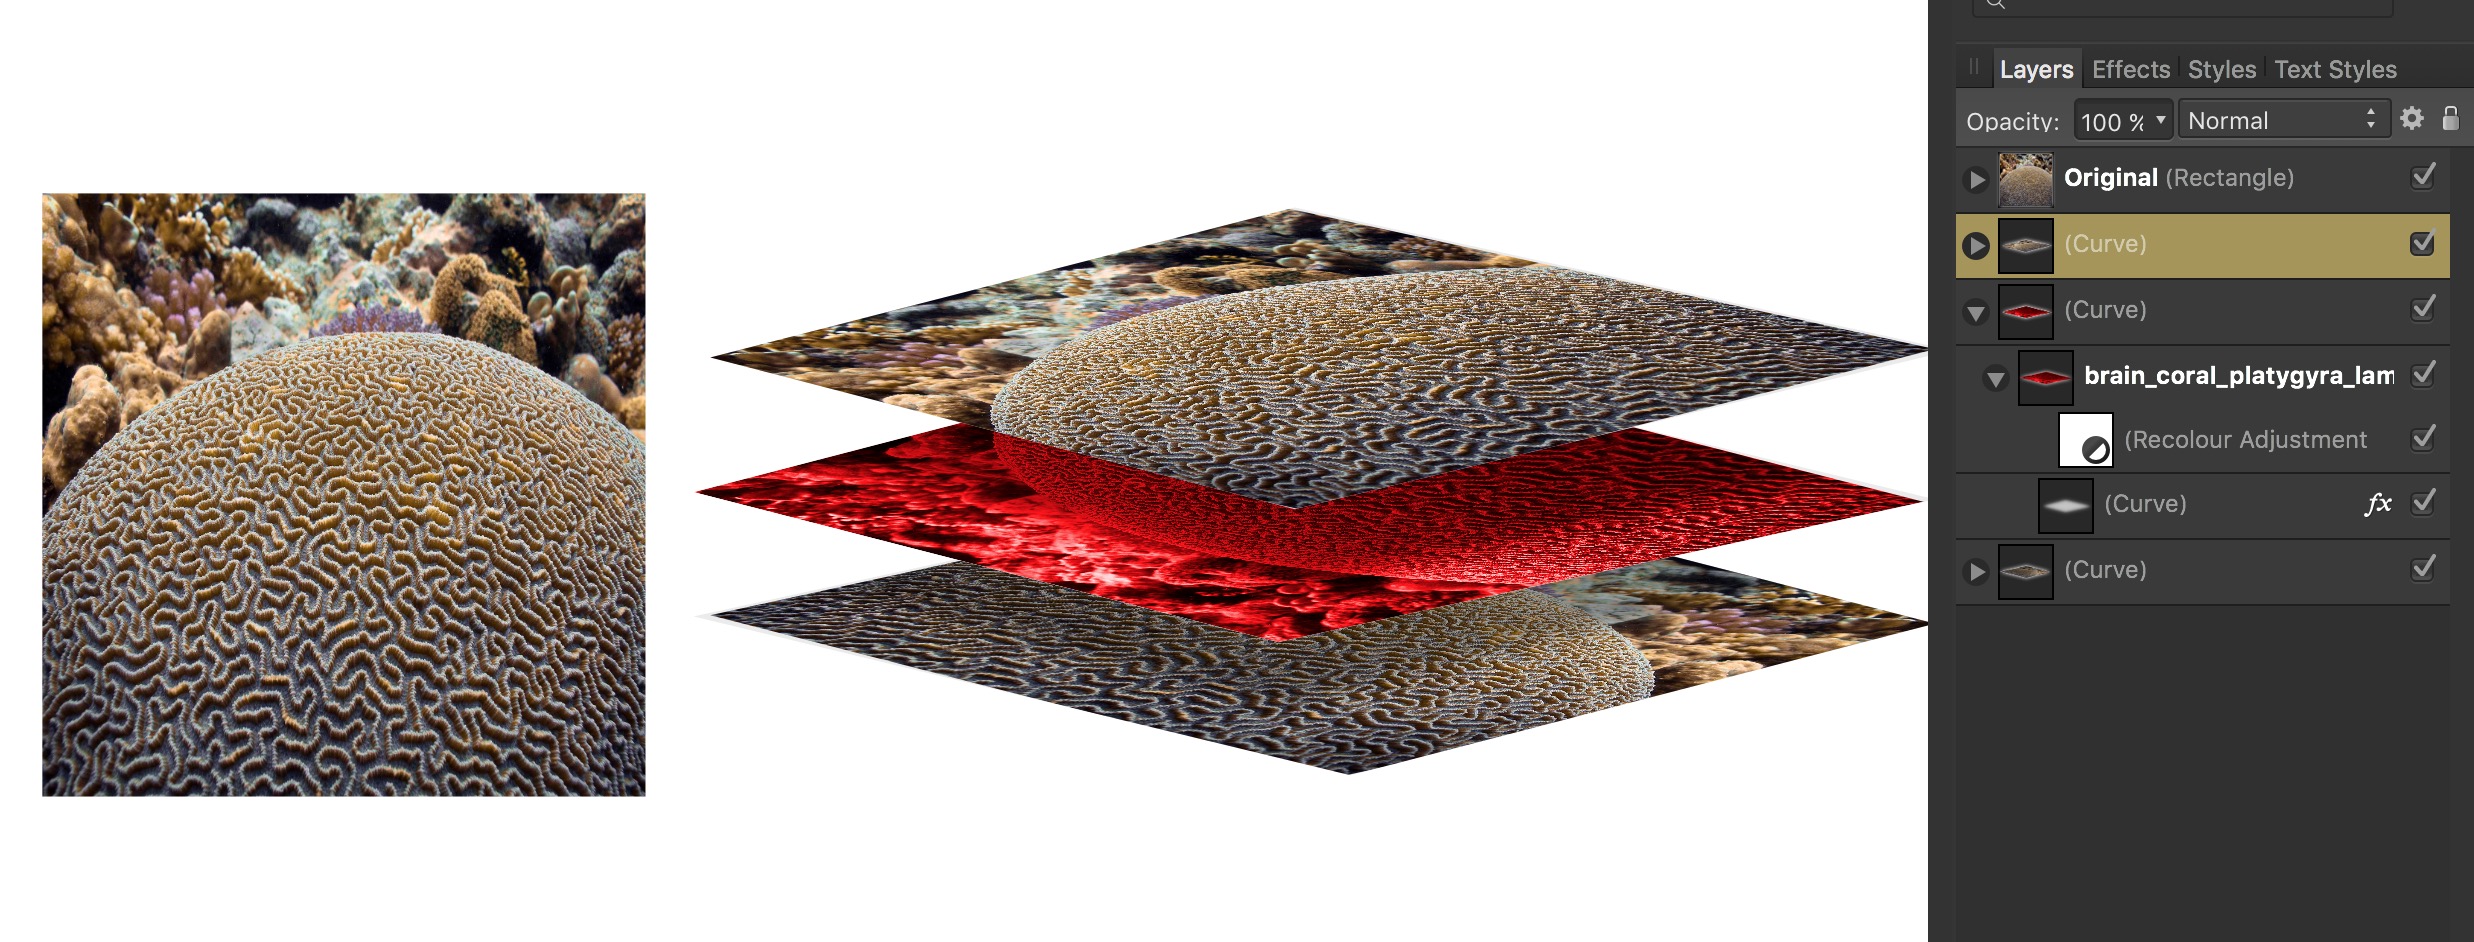
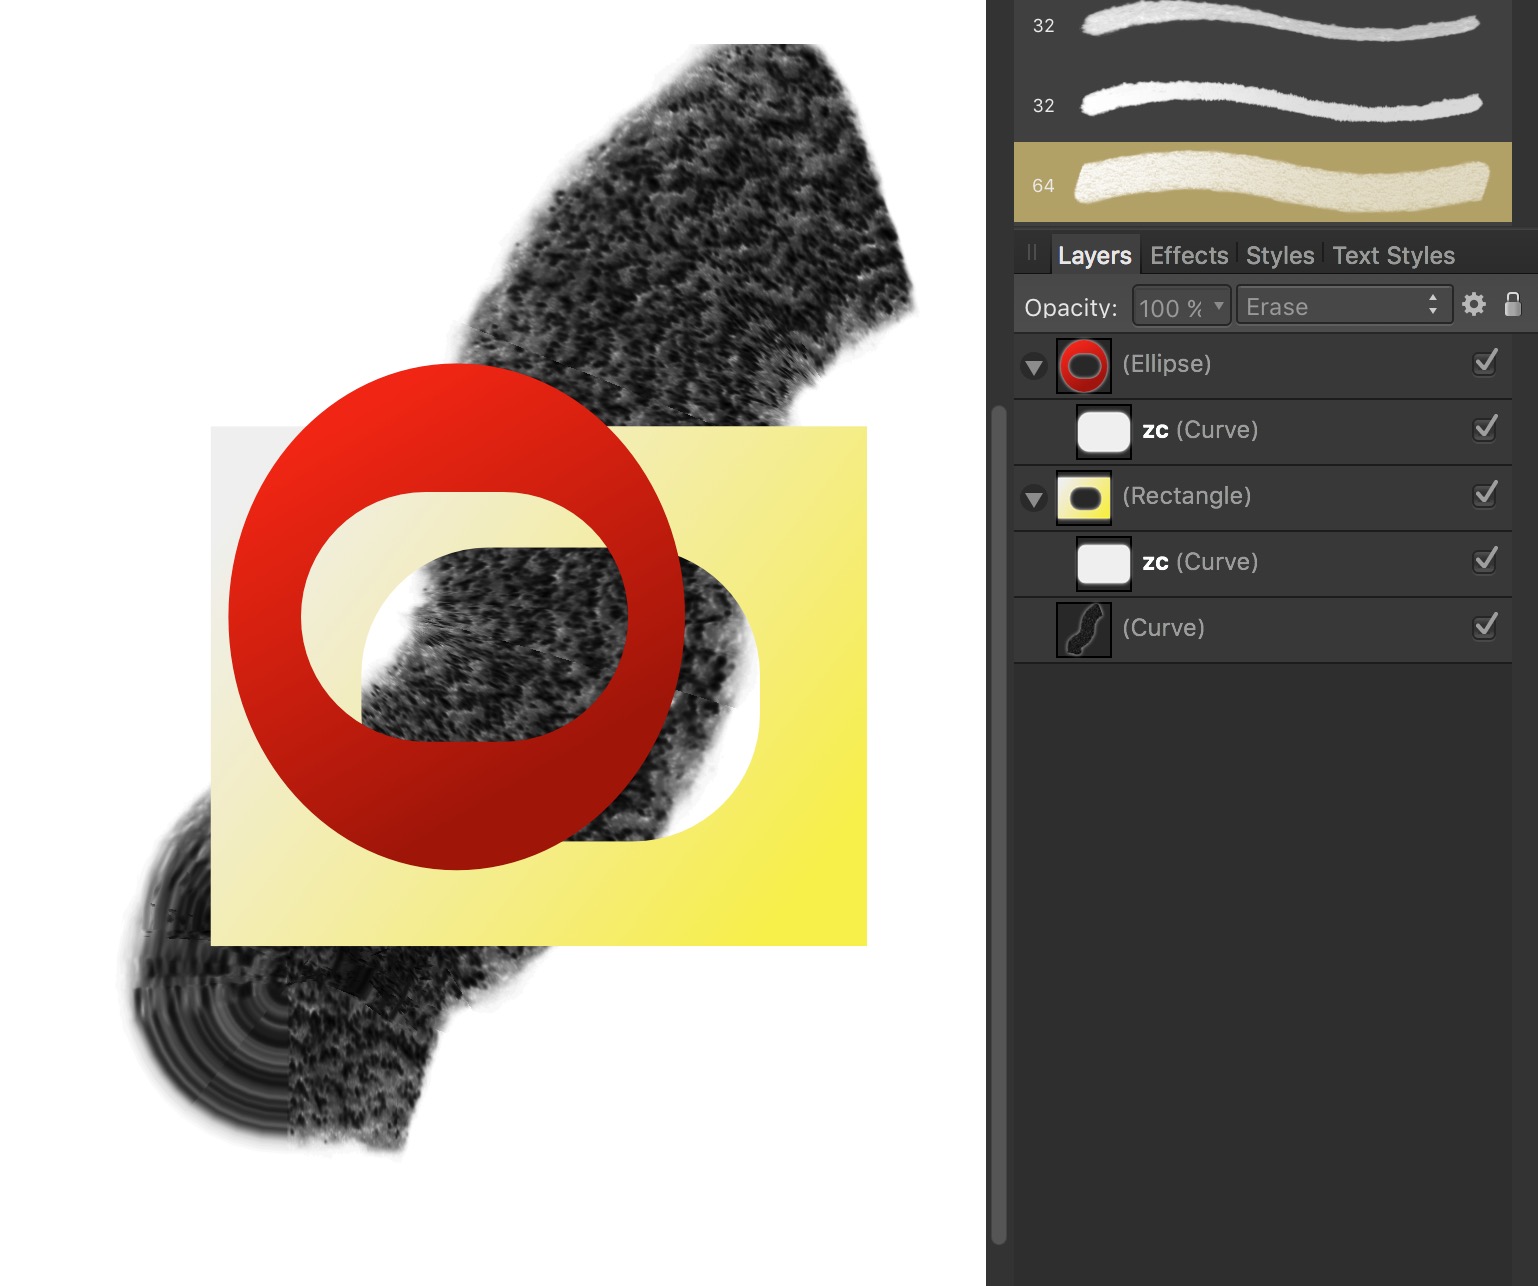
There is another way that is not as straight forward as what bleduc described. Shapes that have been set to blend mode "erase" can be placed within other objects. With proper layering, the erased shapes show what is below, and erased portions below that show objects farther down in the layers. See the example.
-
Double Outline?
gdenby replied to zachleeyoder's topic in Pre-V2 Archive of Affinity on Desktop Questions (macOS and Windows)
A way I know. Type the text, define stroke. Convert to curves. Use the "outline" layer fx. To me, it does not appear the outline is like another outside stroke, but a colored area dependent of the characters' stroke. -
Nice. Certainly looks like fun. I suddenly recall weeks spent every year when I was a kid drawing haunted house silhouettes, w. as many moaning ghosts as possible flying out the windows... Thanks for jogging the memory.
-
JPEG to vector image
gdenby replied to dwing9's topic in Pre-V2 Archive of Affinity on Desktop Questions (macOS and Windows)
As Lee D said, Image Vectorizer is handy, and inexpensive. Inkscape, free, also will also auto-trace, tho' it is somewhat complicated to use. There's been mention of adding the capability to AD sometime in the future. -
Brush px vs pt
gdenby replied to j_illustrator's topic in Pre-V2 Archive of Affinity on Desktop Questions (macOS and Windows)
Thanks for the note. I worked thru the math on the display info, and get a 26.7" diagonal ay 220 ppi, which is pretty close to the specified 27". I was going by the info I was seeing from the Preview screen captures, which is reads 144. The app prefs say 1 pt = 1 pixel. -
Brush px vs pt
gdenby replied to j_illustrator's topic in Pre-V2 Archive of Affinity on Desktop Questions (macOS and Windows)
A small by the way. A point is a unit of typographic measurement. The size is usually 1/72nd of an inch. My recollection is that when Apple began developing the Mac as a desktop publishing and graphics platform, the display was 72 square pixels per inch, for greater compatibility with page layout. As far as I can tell, the new retina display doubles that. -
I worked on a heart shape made of 2 copies of a curve, 1 flipped and moved till it snapped. I tried several times. 1st time, the nodes were not quite on top of each other. The next few times they were very close. I tried adding a few times. Typically, I would get 1 node just right, but at the opposite end, 2 nodes slightly mis-aligned. If I deleted a spare, the curve form would warp. I tried in node mode a standard join curves, close curve command sequence. Similar results. Finally, I selected 2 overlapping nodes, used join curves. Selected the others, used close curve. It appeared that I lost 1 handle on each. But they reappeared when I selected the adjoining node on the side where the handles had disappeared. No curve shape info was lost, as far as I could see. In this case, the heart shape tool is probably a lot more convenient.
-
Not knowing the shape, I can only guess what is going on. Each pen line can have a stroke and/or a fill. Even a straight line can have a fill, it just doesn't show up because the line doesn't enclose any space. The shape does not have to be closed to have a fill. A series of lines, even if they overlap, will each have a different fill. To create a single object, select the various curves. Switch to the node tool, and use the "action" widget to "join curves," and then use the "close curve" button. You may end up with a rather odd shape depending on where the ends of the various initial lines were. More work w. the nod tool will fix that. You can then apply a gradient to the whole shape, or paint in it. You can also use boolean operations to add, interset, combine, etc various lines, but those operations may give some very peculiar shapes. If you want a hole in a shape. Draw a closed shape. Draw another on top of it. Select both, and use the "subtract" boolean operation. The upper layer will cut out the bottom Hope this helped some.
-
If the document is set up to be measured in pixels, then the transform panel shows the pixel position number of any bounding box selected corner in move mode, or any node when using the node tool. In the current version of AD, when objects are moved while snapping is on, there will be a small number displayed at the center the snapping lines. That can help getting within a pixel or so w/o using the transform panel controls. W/o using a grid, you can draw object and give them the exact proportion you may need by changing their sizes w. the transform panel tool.
-
Hi, Caroline, You didn't say if you were using Affinity Designer or Photo. I just have AD, but I think both have the same set of shape tools. I spent my 1st week w. AD just exploring the shape tools, and their variations. My recollection is that there are in excess of 400 shape variants. I'm uncertain if Photo has the corner tool, which can modify shapes even farther. Here is a quick example. Dragged a seabed image onto an AD document. Cropped it w a diamond shape. Duplicated, and formed a set of tiles. Dropped those into a cog shape w. no fill. Same can be done w. shapes created by the pen and pencil tools.
-
So much info in one small space. Quite an achievement. Dazzling, actually. And, I see there are some runes, too. Hat is off to you, sir.
-
This is an interesting thing you have noticed. I worked thru every variation I could think of in the grid manager. None ever allowed changing the up option, same as you experienced. I did some reading around, and it appears there are no kinds of axonometric grids where the up axis is anything but 90. I can only speculate. Perhaps there is a plan to allow the 3rd axis to be variable in future developments.
-
Layer meaning
gdenby replied to vishal's topic in Pre-V2 Archive of Affinity on Desktop Questions (macOS and Windows)
Start reading the help files. View the in-house tutes. AD terms have specific meanings within the app. As @VIPStephan says, a layer is an organizational term. The layers have precedence depending on how they arranged in a stack. It may contain various objects. Some shapes may have specific names, such as "rectangle." Others will be more generic, just "curve," unless you give it a specific name. There will also be adjustment layers, masks, sub-groups. -
My understanding from the Affinity video is similar. One point of confusion I had was that I didn't realize that changes to a symbol content object's shape, rotation, and skewing were different from changes in size, rotation, etc with instances on the page.