houseofdeadleg
-
Posts
89 -
Joined
-
Last visited
Recent Profile Visitors
1,388 profile views


-
 Hey Alfred, I don't see any 'tablet input method' options in preferences, assuming that's where they'd be?
 -
I'm having the same issue with some of the Inksy Street Art brushes from Serif, work fine with a mouse but not with a tablet. I'm on a Mac, I couldn't see teh above options anywhere so I'm assuming that's PC only. Any fix for this on Mac? It's AD/AP version 2.4.2.
-
 Dan C reacted to a post in a topic:
Corrupted AD file
Dan C reacted to a post in a topic:
Corrupted AD file
-
Hangman reacted to a post in a topic:
Corrupted AD file
-
Corrupted AD file
houseofdeadleg replied to houseofdeadleg's topic in Affinity on Desktop Questions (macOS and Windows)
I think I've sorted it, following a tip in this thread – In Publisher V1 (doesn't seem to work in V2, maybe because it's a Designer V1 file?) Document > Add Pages From File > Corrupted file imported teh corrupted artwork, then copied and pasted it to a new AD file. It's lost some of the adjustment layers, but all the artwork's there that I can see. -
Corrupted AD file
houseofdeadleg replied to houseofdeadleg's topic in Affinity on Desktop Questions (macOS and Windows)
Hi @Dan C, any news on this? -
Corrupted AD file
houseofdeadleg replied to houseofdeadleg's topic in Affinity on Desktop Questions (macOS and Windows)
I've seen this mentioned a few times recently when I was looking for a solution, but I've never seen it previously. Working from a shared online space seems like a pretty standard thing to be able to do to me, not being able to do that because of the risk of work randomly corrupting seems like it could be a bit of a deal-breaker. As for the file in question, I tried opening a different version in AD1 and it opened briefly, then gave this error and closed – "Access to the file was lost during initial loading".
-
houseofdeadleg reacted to a post in a topic:
Corrupted AD file
-
Corrupted AD file
houseofdeadleg replied to houseofdeadleg's topic in Affinity on Desktop Questions (macOS and Windows)
Hi @Dan C, thats been uploaded. -
Corrupted AD file
houseofdeadleg replied to houseofdeadleg's topic in Affinity on Desktop Questions (macOS and Windows)
Hi @Dan C, private link would be great if you could. I've managed to get an older version of the file to open with a beta build, but not the latest version. -
Corrupted AD file
houseofdeadleg posted a topic in Affinity on Desktop Questions (macOS and Windows)
I've just tried to open an old V1 file in AD V2 and it says the file is corrupted and can't be opened. Which Operating System are you using? Mac 12.6.3 Which version of Affinity did the file last get saved in? V1 What drive type was the file last saved to (select more than one if needed)? Dropbox folder (I think) -
houseofdeadleg changed their profile photo
-
Hi @Silver-Cygnus, On desktop, while using the pen tool, if you hold the Command key you can swap to the node tool so you can change the point handles – if you also hold the option (alt) key you can change just one side to make a sharp corner. Also, try holding the alt key while creating the points to change between sharps and curves as you're drawing. Hope that makes sense. Not sure what the keys/finger combinations, etc are on the iPad version off the top of my head.
-
houseofdeadleg reacted to a post in a topic:
A "Blob Brush" would be welcome.
-
houseofdeadleg reacted to a post in a topic:
A "Blob Brush" would be welcome.
-
IvanDoganov reacted to a post in a topic:
Appearance panel
-
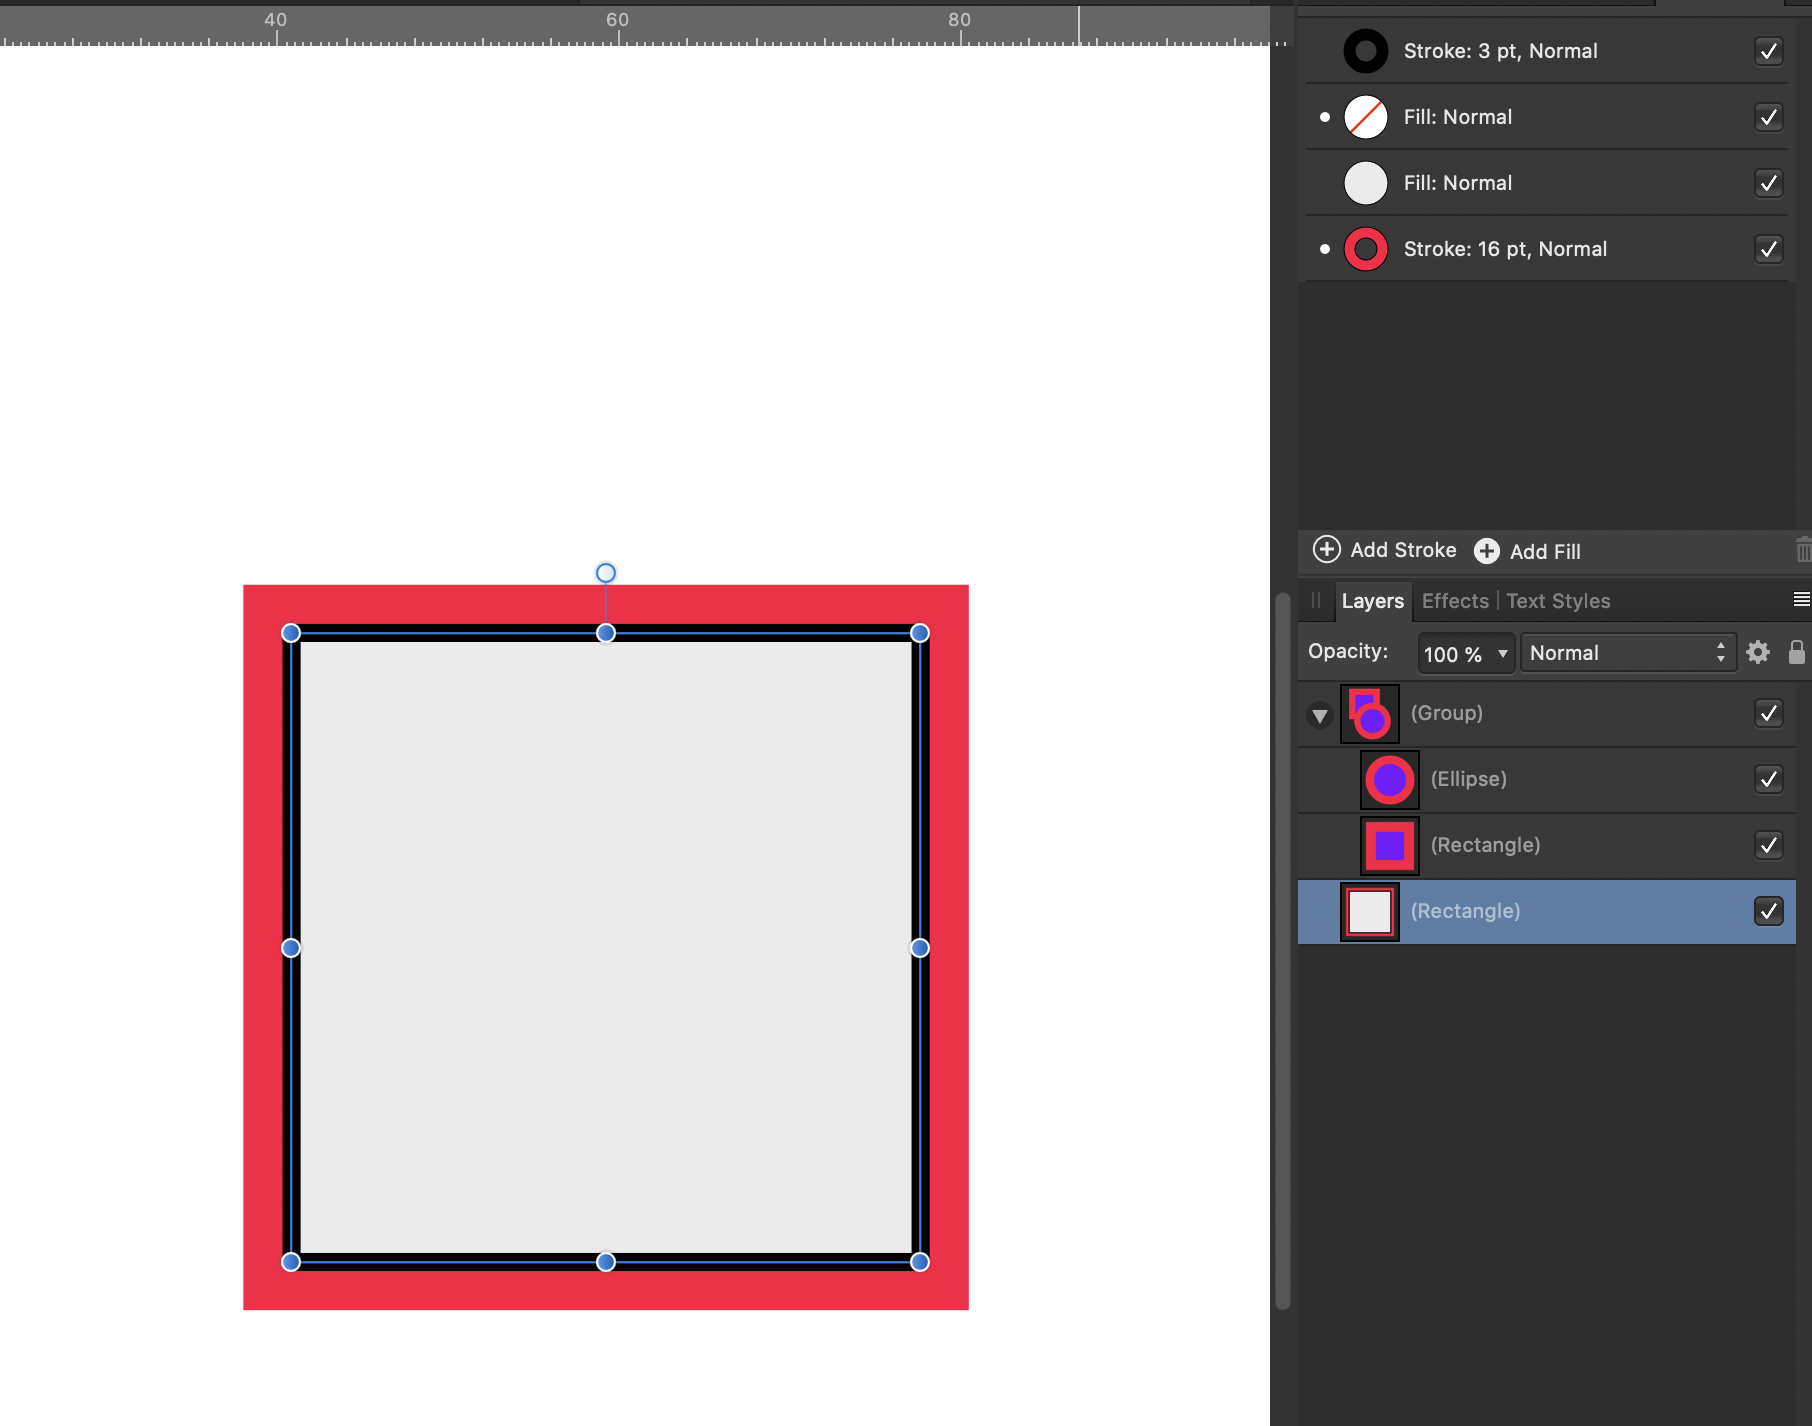
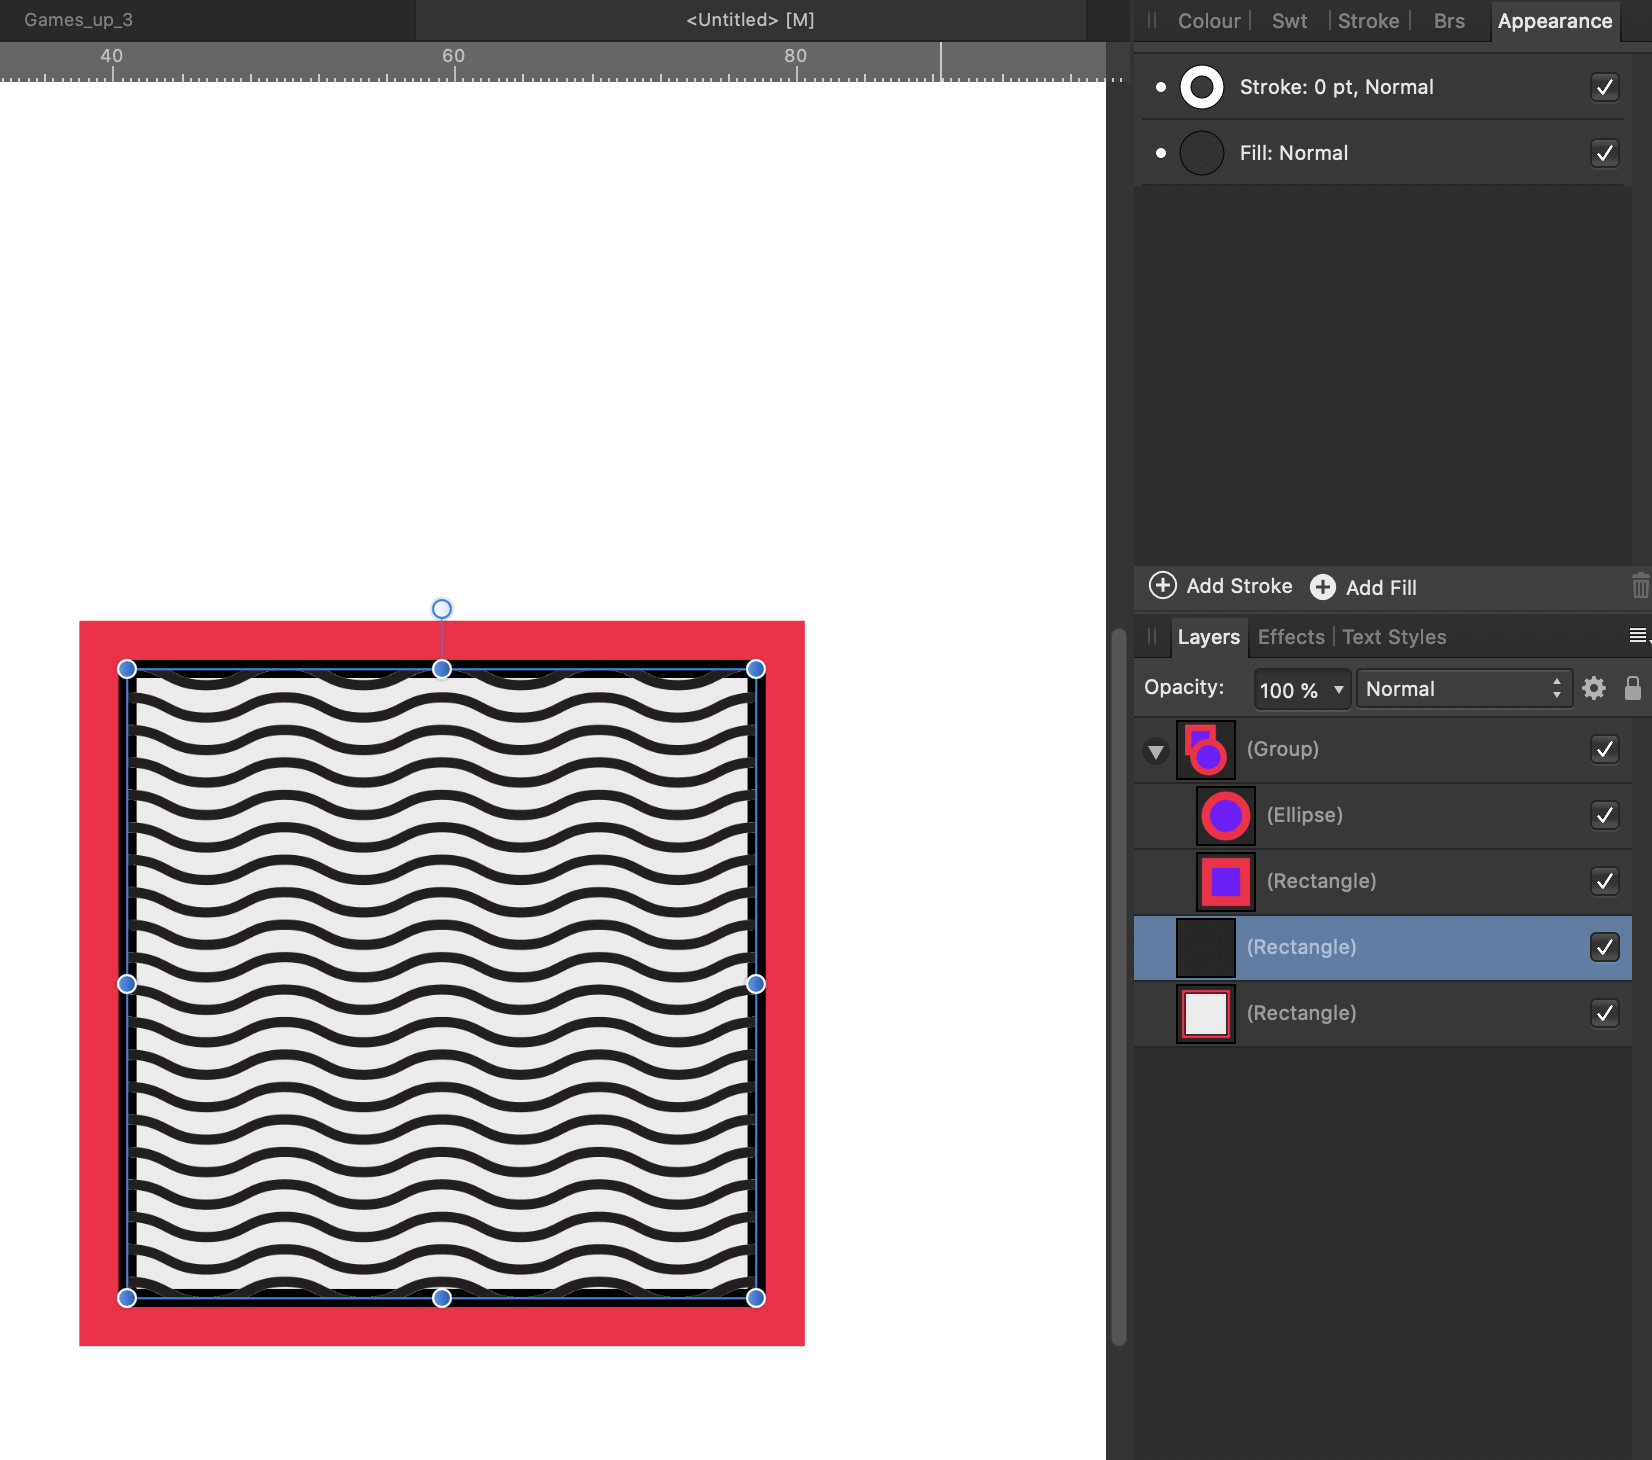
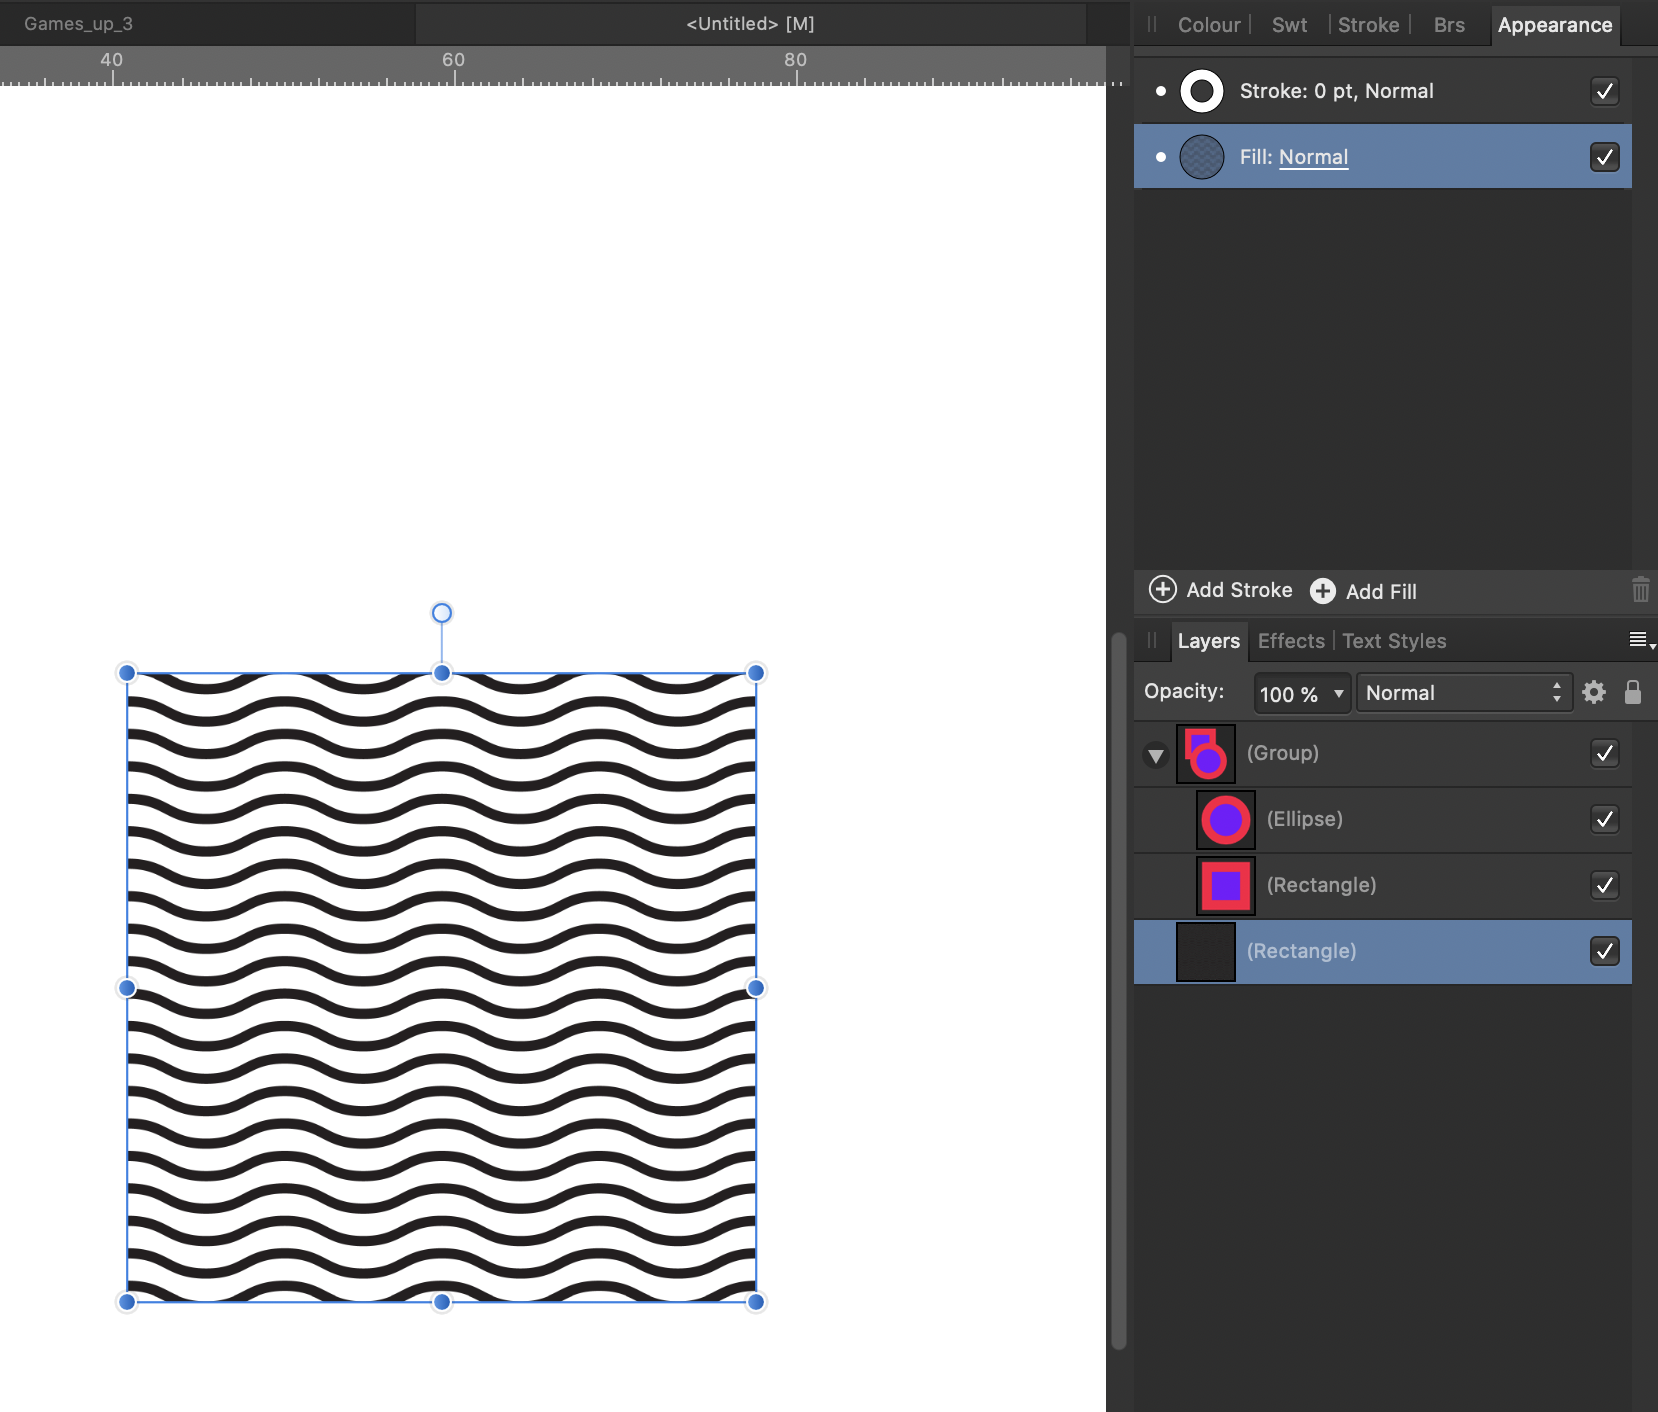
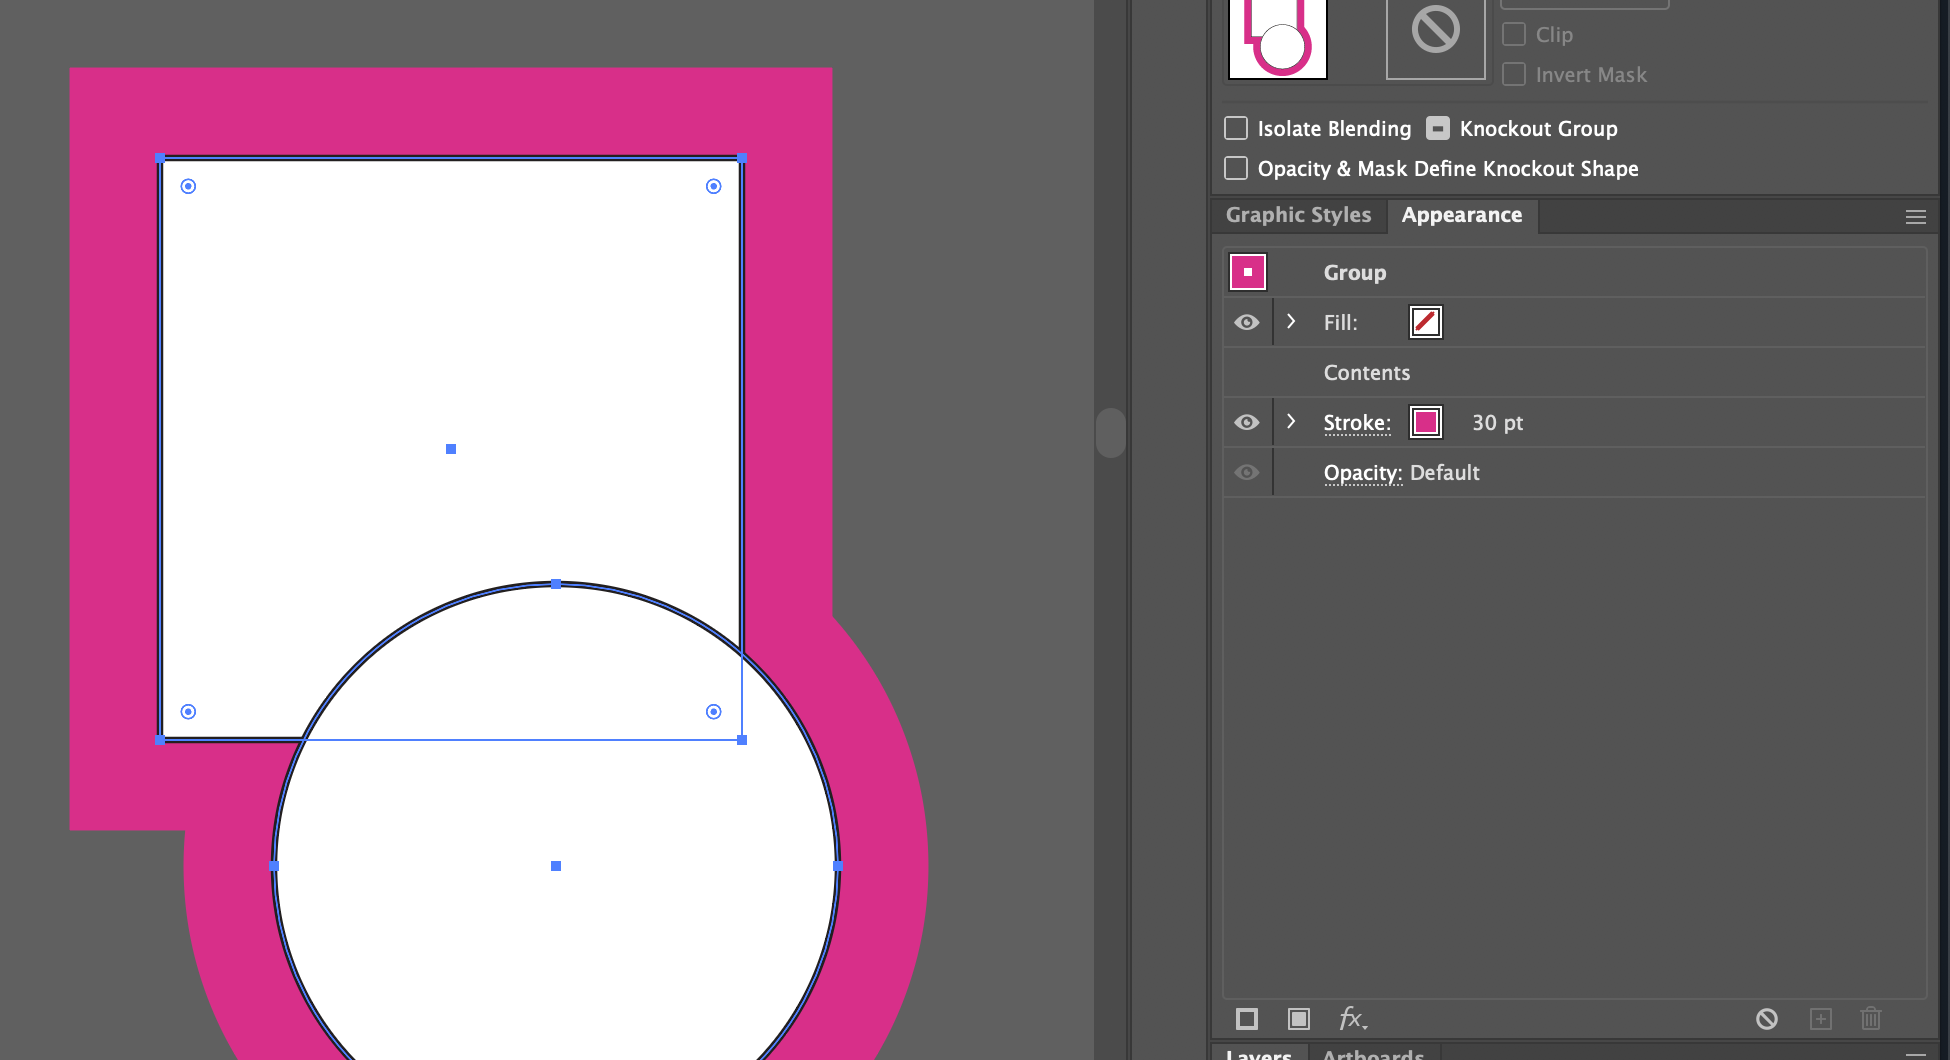
A couple of things I've noticed when using the appearance panel, these might have been noted before – I have a collection of styles I use to add textures, but if I have a object with multiple strokes/fills etc, it's not possible to add the style to a new fill layer without it removing all the other fills/strokes. So if i want to add the texture style I need to duplicate the object and apply the style to the topmost one. Is there a better way to do this, eg. can you save the pattern fill as a swatch? It doesn't seem to be possible to add new strokes to grouped objects. In illustrator for example, objects can have their own fill/stroke, and then be grouped and have new fills/strokes applied on the group level, all of which can be edited separately.
-
houseofdeadleg reacted to a post in a topic:
Real Vector Brushes
-
Has there been any updates with this? I'm on a mac and version 1.8.3 and this is still an issue. The workaround above doesn't work. In fact, the issue is worse than the post above. If I click in the last row of the table it starts increasing in size. If I type in a row above it starts increasing in size. It's making tables unusable.
-
Fruitbasket reacted to a post in a topic:
Line Textures
-
Currently using a tablet. App store purchase.
-
I'm getting the same, trying to use the pencil tool, after a couple of strokes the whole thing freezes and has to be restarted.
-
Hmm, that all seems rather counter-intuitive. Even after creating my own swatch set using only black, and applying that to the document copy, after exporting the text is all a rich black, not just 100% K. I've tried various export settings, but can't get the expected output. I've made quite a few documents in Publisher recently, but unless I can resolve this I'm going to have to go back to InDesign for the foreseeable future, I can't afford to spend time working out workarounds and getting unpredictable outputs. Which is a shame, as using Publisher is largely much more fun then InDesign.
-
In a CMYK document, if I go to the Greys palette and select Black, when I double click the swatch it shows the colour sliders with CMYK values 0 0 0 100 as I'd expect. But if I then switch to the colour tab it shows the values as 72 68 67 88. If I then uncheck the "Lock Colourspace" icon and do the same thing, it shows RGB sliders with 0 0 0. If I apply the Black swatch, why does it show differently in the Colour tab? Edit – I've just tried creating a new global K only black swatch and applying it to some text, but after export the text in the PDF is showing 72 68 67 88.