Bri-Toon
-
Posts
2,156 -
Joined
-
Last visited
Reputation Activity
-

 Bri-Toon reacted to Glicky in Setting Up Animation Frames in Affinity Designer
Very Nice tutorial Bri-Toon
Animation design is my hobby... i hope AD will have animation features soon.
Thanks!
-
 Bri-Toon got a reaction from kevinmcsherry in Designer: Expand stroke is completely broken
A few bad apples don't necessarily ruin the whole basket. Besides, Rome wasn't built in a day, and that's why it's so beautiful. Good progress takes time.
-
Bri-Toon reacted to Glicky in Smart fill tool
The Smart Fill in CorelDRAW creates a new separate object, it's not linked to any other object or stroke.
-
 Bri-Toon reacted to Patrick Connor in Does it make sense to buy the workbooks now?
The book has already been reviewed in relation to 1.7 and the Workbooks being sold are 100% suitable to be followed despite the minor changes. No new editions are planned.
-
Bri-Toon reacted to MEB in Designer: Expand stroke is completely broken
Hi raglet,
This hasn't been ignored. The dev team is well aware of this issue however they have been extremely busy with all changes required to ensure compatibility with the upcoming Affinity Publisher and with the Publisher's development itself. As soon as Publisher is released, eventual/initial issues resolved and the app stabilised we should get back to our usual pace and focus on fixing bugs like these which are not easy and require some effort and time to get right. Please bear with us.
-
 Bri-Toon got a reaction from Alfred in Sneak peeks for 1.7
Hi there. It will still be a while until version 2 comes out, because the features on the roadmap are for the 1.x range. And that's a good thing, because if you already paid for a previous retail version, then all of the 1.x updates are free. Affinity 2.0 will be the first paid update, and that won't happen until all the roadmap features are cleared.
-

-

-
Bri-Toon reacted to MattP in Stroke drags after deletion
Sorry about this - its definitely always been like this though - but we have a plan that can make it all better - hopefully will implement that very soon!
-
Bri-Toon got a reaction from MattP in Stroke drags after deletion
Hi everyone,
First of all, congrats on the first release candidate of Affinity Designer. Secondly, I've been facing a bug, and I think I finally identified the cause of it. The bug was that newly created strokes made with the Pencil Tool would drag, and it would take a long time for the stroke to match the mouse action. This is caused on complex files after a stroke is deleted. Then the next stroke made with the Pencil Tool will drag. Here is a video example.
Drag on Stroke.mp4 -
Bri-Toon reacted to Sean P in Stroke drags after deletion
Hi Bri-Toon,
Thanks for letting us know, I've been able to reproduce this so will get it passed on to development.
-
Bri-Toon reacted to Old Bruce in Affinity Designer Customer Beta (1.7.0.14 - RC1)
As my father used to say "In order to climb the ladder of success you must have both feet firmly planted on the ground."
-
Bri-Toon reacted to MattP in Affinity Designer Customer Beta (1.7.0.14 - RC1)
Just to remind anyone asking 'how can this be RC1 when 'insert feature here' is still broken?!?' ... well, the reality is that the rest of the product is greatly improved and those specific things were also present in the last version - which was itself a released product - so it's not a blocker... it's admittedly not what we'd hope for, but as I said, the rest of the product it vastly improved and is very stable, so why would we not want to release at this point? It's not like we're now going to all give up or something, and it's also not like there isn't going to be a 1.7.1 version along shortly after release, so all these things will get sorted out along the road. They're a priority and I feel bad they're not right yet, but all things will be sorted in time...
-
Bri-Toon reacted to MattP in Affinity Designer Customer Beta (1.7.0.14 - RC1)
This beta has been superseded by the release of 1.7.1.1. Please use the release build instead.
Status: Release Candidate
Purpose: Features, Improvements, Fixes
Requirements: Purchased Affinity Designer
Mac App Store: Not submitted
Download: Here
Hello,
We are pleased to announce the immediate availability of the beta of Affinity Designer 1.7 for macOS.
Designer 1.7 is a significant change to the currently shipping 1.6 version. Files edited in this version will not be backwards-compatible with the shipping 1.6 version. We are now very happy with the 1.7 version and are moving to the final stages but would still urge some caution with respect to using this version for critical work as it is still possible we may have missed something that may cause you issues.
If this is your first time using a customer beta of an Affinity app, it’s worth noting that the beta will install as a separate app - alongside your store version. They will not interfere with each other at all and you can continue to use the store version for critical work without worry.
Many thanks,
Matt
Please refer to previous beta 1.7.0.4 post where there's a list of major changes since 1.6. This latest update builds on the 1.7.0.12 changes and also includes the following changes:
New samples Selected text characters can now be dragged into a new position within a text object Fix for embedded documents and copy/paste issues (sorry) PDF export improvements (image colourspace conversion control) Fix for creating object styles which use multiple line/fill attributes Miscellaneous small fixes
To be notified about all future macOS beta updates, please follow this notification thread
To be notified when this Designer update comes out of beta and is fully released to all Affinity Designer on macOS customers, please follow this thread
-
 Bri-Toon got a reaction from MauricioC in Magic Wand Tool for Pixel Persona
I agree that a Magic Wand Tool is easier to use. I just can't get a solid selection with the Brush Selection Tool no matter how I use it. I've been wanting it for a while now; a Magic Wand Tool that can select "All Layers" like the Brush Selection Tool does.
To be fair, the program's purpose is vector drawing, but the Pixel Persona, in my opinion, is good for mockup. Before drawing something complex with vector, it benefits to sketch out the mechanics first, and selections are just something that completes that mockup.
There is the plan to eventually have pixel selections convert to vector objects for tracing purposes, so I do wonder what is yet to come on the road.
-
 Bri-Toon got a reaction from PAULRFONTENOT in Stop Frame Animation
I think what matters is what you use to preview the GIF afterwards. Two programs that come with Mac, Preview and Photos, do not preview animated GIFs. However, you can select the file in the Finder window and press Spacebar to get an animated preview. I really wish that there could be more photo viewers for Mac that can pan through images like a flipbook and view animated GIFs. I use ViewPic for panning, but it doesn't yet view animated GIFs.
-
Bri-Toon got a reaction from MattP in Affinity Designer Customer Beta (1.7.0.11)
I like this update. I see that the new functionalities are kind of like collaborating with each other. The selection of additional curves for the Pen Tool works in the benefit of the Node Tool's Transform mode. I see what you did there.
-
 Bri-Toon got a reaction from Uncle Mez in Affinity Designer Customer Beta (1.7.0.11)
I like this update. I see that the new functionalities are kind of like collaborating with each other. The selection of additional curves for the Pen Tool works in the benefit of the Node Tool's Transform mode. I see what you did there.
-
Bri-Toon reacted to MattP in Affinity Designer Customer Beta (1.7.0.11)
Status: Beta
Purpose: Features, Improvements, Fixes
Requirements: Purchased Affinity Designer
Mac App Store: Not submitted
Download: Here
Hello,
We are pleased to announce the immediate availability of the beta of Affinity Designer 1.7 for macOS.
Designer 1.7 is a significant change to the currently shipping 1.6 version. Files edited in this version will not be backwards-compatible with the shipping 1.6 version. As such, we would not recommend using this 1.7 version for critical or production work at this stage. It is inevitable that there were will be a number of issues with 1.7 but we hope these will be minor and aim to resolve any issues very quickly, so please use it and explore the new features, but also do keep in mind that you may find snags and we would appreciate your help with finding and reporting these to us.
If this is your first time using a customer beta of an Affinity app, it’s worth noting that the beta will install as a separate app - alongside your store version. They will not interfere with each other at all and you can continue to use the store version for critical work without worry.
It’s also worth noting that we aren’t done yet - we are still working through reported bugs from previous releases and hope to fix as many as possible before the final release of 1.7. To be notified when there is a new beta please press follow on this announcment thread
With all that said, we hope that you will enjoy the new capabilities introduced in this initial release and we look forward to any and all feedback you give to us.
Many thanks,
Matt
Please refer to previous beta 1.7.0.4 post where there's a list of major changes since 1.6. This latest update builds on the 1.7.0.10 changes and also includes the following changes:
Fix for issues saving after applying a 'none' arrowhead! Miscellaneous PDF import improvements. Artboard positions are now show relative to the whole spread, rather than showing as 0,0 at all times. Pen Tool now has an extra option to allow for the selection to be retained while adding new curves/extending existing ones. This is useful for allowing you to make use of snapping to other object geometry while creating/editing curves. It is on by default. 'Rotation centre' is now 'Transform origin' to better reflect what it does. Added a user-definable transform origin to the Node Tool's transform mode. Inserting a fill colour stop now correctly interpolates intensity (useful for 32bit documents). -
Bri-Toon reacted to MattP in Strokes should not auto smooth as default
I've mentioned this before but it's worth re-iterating (the forum's search doesn't always produce great results for me!) that the only difference between what you see while you're dragging and what you get when you let go is simply that pressure data has been smoothed to produce a minimal set of points that 'generally' captured what you intended. The only reason for this is that if you don't smooth the pressure input you'll find that your 'pressure' curve editor is a mess of thousands of points and you have no hope of being able to manage it nicely... It works well for some people and terribly for others. Clearly you are in the latter camp! ;) I've said earlier that I intend to add the ability to allow the user to decide how close to the original pressure input they would like to maintain. I think this will resolve the problem :)
Thanks,
Matt
-
-
Bri-Toon reacted to iamscotty in Isometric Studio?
Hey @Ben, thanks for the reply.
I really need to have a go myself as it's difficult to explain and understand via a forum but I think by looking at the work through that @GarryP did and what you've said the isometric function and edit in plane look great if it has the option to expand the SSR effect.
I understand that Designer has a different approach to handling the SSR formula but SSR has only one task and it's super simple.
To take an existing shape and convert it to an isometric/axonometric projection. Either top, right or bottom.
The reason of this is that the original shape, dimensions and scale may be very important to the end (isometric) result.
All the important making and doing is done in the flat elevation and then converted not the other way around.
It's kind of the fundaments of working in isometrics.
That could have it's use but it's like putting the horse behind the cart if you get my drift.
You make flat, then convert and then build.
That shape is then the basis for building whatever you want to make and you've left SSR behind at that point.
Creating in the isometric plane is okay but you're already in a distorted view so it can't be accurate from the start.
I've been working making isometric designs and illustrations for 32 years now so I can see it from a practitioners view point and although these tools look great they do seem to be missing the point a little from what I see but enough to render it almost useless to build complex shapes and designs that are faithful and accurate to the original.
I started off doing isometrics on a drawing board using pens, iso guides and rulers and then Mac Classic's came out and someone worked out the SSR formula in Freehand.
That was the big transformation but the rule has stayed the same: Make your flat shape. Apply SSR. Build your isometric object.
To show you how I work and use SSR to build isometrics I wanted to take something that's original (flat) appearance is very important so I chose the Affinity Designer icon/logo.
I made a flat, paths version of it, converted it to iso using SSR and only then started to build the 3D.
All the information I needed is in step 1.
All the conversion is done in step 2.
Everything after that is just embellishment, faffing about and building using the same principles as the "cube with a punched out corner" I did above.
I can't imagine recreating the Affinity Designer logo using "edit in plane" with any degree of accuracy.
Please don't get me wrong here.
I have HUGE respect for you guys that put these packages together and I'm telling you this with the very best intentions (I want to use Designer for isometrics) but when it comes to this area I do feel you may be missing the point a little and that would be a great pity.
-
Bri-Toon reacted to firstdefence in Metadata in Affinity Photo for Mac
There is an EXIF Panel View > Studio > EXIF Within this Panel you have the options to view information as a Summary, All, RAW Data
You can add information into a Description section but I don't think that's what you want is it?
-
 Bri-Toon got a reaction from Allen Horn in Cartoon Drawing in Affinity Designer
Thank you for your interest and support, Jer.
That is just explaining different ways to add fills to open shaped objects. It wasn't implied for shading as well, but the first and second method can be used for that as well if the objects are clipped. If you have a small region to fill up, you can use the brush. If you have a long region but close to horizontal, you can use the pen. In large or complex regions, you can use the node operations.
Once the feature to convert pixel selections to vector objects comes around, that will mark a fourth technique. That may work out better than all others, but the Selection Brush Tool can be a bit too sensitive at times.
I've been working on a children's comic book called Angie and the Knuckleheads for quite some time now. She is a babysitter who takes kids on a trip but she then gets lost. I'm taking a rest from it actually since I've been spending too long of time on it. I'm working on a coloring book instead now, but I'll try to finish the Angie comic afterwards. I plan for it to be at least 50 pages with 8 or more panels on each page. After completion, I want to sell both the comic and coloring book on Lulu.com.
Here is a sneak peek of the Angie cast.
-
 Bri-Toon got a reaction from Affinity-Inspiration in Cartoon Drawing in Affinity Designer
I have been using Affinity Designer for a little over a year now, so I will teach my style to the people on the forum. There are of course many ways to draw, but this will cover a cartoon style. I will teach the style I used originally, and I will teach the style I use now. With the new brush stabilisers implemented in Designer 1.6, I decided to begin a brand new approach, but I will explain what I did for my original style first.
Original Style
For all of the line work, I used the Pen Tool, because curves created by the Pencil Tool and Brush Tool were too jagged and could not continue lines. However, the Pen Tool does not allow free control, so creating a character entirely from scratch is certainly a challenge. You will need to start smaller.
Above is a long but particulate example. You are probably aware that there are both vector and pixel tools in the program, so I decided to first start off with pixel tools. (In the Brushes tab in the Pixel Persona, I used "Size 2" under the "Assorted" category and with the "Force Pressure" button toggled on.) Before starting the actual character design, Angie, I wanted to have a pose thought out, because drawing a character from scratch in an particular pose may not always be accurate. Therefor, I started out with a figure, then I traced it with a rough sketch, then I used the Pen Tool for the line work but I had to figure how to close each path, and then finally I added coloring.
Figure
Creating the figure is the same as just creating basic shapes for a simple guideline, but you still have to be accurate. You cannot make the head larger than the body or have arms rotated in a position that does not make sense. Even though you are just making basic shapes, you are still bound to mess up, so rather than create each shape in one stroke, do so in several sketchy strokes. To make a simple circle, for example, sketch lightly in a round motion. If you mess up, sketch a little darker right over the messed up region.
Rough Sketch
Now that there is a main figure, you can use it as a main guideline for drawing your character design. It is okay to draw out of figure's boundaries. Just don't make things too simplistic. While it is not necessarily the case here, a good character has different features on each part of the body. With female hair, for example, there can be the front bang, side bang, and upper hair. If you can figure out a way to divide these three features, then you are on the right track. Also, as you sketch over your figure, you may think to add a little more details than regular shapes. For the Angie's shirt, there are two lines below the breasts which crisscross to indicate a fold in the fabric. Rather than having the shirt in a regular square shape, it sticks out towards the bottom. Other lines were added to indicate the fold.
Line Work
Now we will trace the rough sketch exactly with the Pen Tool, but we have to do so in closed regions. This time, we cannot leave the boundaries. While you don't have to do it this way, I divided each body part in its own layer (from top to bottom: Glasses, Top Hair, Head, Shirt, Shorts, Arms, Legs, Back Hair). The reason I did it this way is in case I wanted to change something. Maybe I wasn't happy with the shirt design, and I wanted to replace another shirt on her. If she were wearing long sleeves originally and I wanted to give her short sleeves instead, then that would mean I would have to extend her arms since they would have originally ended at the palms of her hands.
Coloring
As long as the paths are closed, then coloring is very easy. Just select each path you want to add color to, and add color to the fill. There are also different shading features such as clipping other objects or pixel layers. For this, I used gradients and a 3D effect. If you do use gradients and if you divided each body part in separate layers, then just be careful. The "Top Hair" layer is not actually closed because there is an open region on the bottom with the "Back Hair" layer behind it. If you use the gradients, make sure they smooth out.
Working with basic shapes first and then getting into the character designs do really help.
It is also okay to go and change change your finished design. Such features here like the hair and legs have been slightly modified.
New Style
The above style, although is very particulate, does take a really long time, and that can delay production. With the new brush stabilisers, I feel very confident to draw with the Pencil Tool now. While it does not continue paths like with the Pen Tool, we can work around that. We will also never be expanding our line work for in case we need to make adjustments such as change the shape or size. We will also be drawing with more free control (open paths). If you feel you need to create a sketch figure before jumping into the vector tools, that is okay, but you will not need to create a rough sketch this time unless it helps you.
Vector Eraser Alternative
I did say that we won't be expanding our line work, so we cannot use the boolean operations. And it wouldn't make sense to use the Pixel eraser, so how the heck will we be able to erase our lines? The answer is, with the node operations. We have three powerful options when the Node Tool or Pen Tool is selected in the "Action" category, and those options are Break Curve, Close Curve, and Join Curves. These three things can really go toward our advantage, especially since joining curves will take the ends of the multiples curves and close the ends which are closest to each other. I forgot that when I used Illustrator, I never actually used the Eraser Tool on the line work because it always deformed the shape. If I could've, I would've.
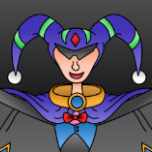
Here is an example. King Dino's tomahawk has a squiggly line that needs to be removed, but it is part of a closed shaped. To do that, add a node where the squiggly line starts and click "Break Curve," then add another node where the squiggly line ends and click "Break Curve," again. The squiggly line is now its own shape, so you can go on and delete it. Now, you can select the remaining part of the object and select "Close Curve." Now let's say that the stick to the tomahawk was originally an open path. That means breaking the curve would convert it to two different shapes. So rather than closing it with the "Close Curve" button, you will use the "Join Paths" option. Do not forget just how important those node operations are.
Coloring
Since the new style was done in open paths, the coloring technique will have to be different than the way explained above. First organize your artwork in two separate layers, Line Work and Color. The Line Work layer must be above the Color layer. Now there are several ways to color in your artwork.
A) Pen Tool
This is probably the most common way to do it, but it may not always be the fastest way depending on the example. This means to draw a path around the closed region of your drawing to create a closed path.
B) Brush Tool
Depending on how small the close region is, use the Brush Tool to color in your artwork. It helps to brush around the edges first and then fill in the remaining area. After you fill in the region, select all of those brush strokes either on the canvas or in the Layers panel, and expand them in the "Layer" menu. Then click the first option in the boolean operations to add them as one object.
C) Node Operations
Depending on how large the drawing is, some times both the Pen Tool and Brush Tool will not work well for coloring. Select each curve that makes up a closed region (holding shift to select multiple curves), and copy them to your Color layer. Hide the Line Work layer. For the torn up cape in the second drawing of King Dino, imagine what the closed fill would have to look like and what nodes would need to be added and removed. Again, use the "Break Curve, Add Curve, and Join Curves" options. At the end, be sure to remove your stroke and just keep the fill. For the torn holes in the cape, you will need to copy and paste those curves separately, break, add, and join paths as appropriately, and then subtract them from the main cape object.
I hope this tutorial has been helpful for you.
NEW: Fast Shading
There are multiple ways to add shading such as clipping vectors, adding gradients, and using pixel brushes. However, these techniques require you to add shading to each object individually. If you would rather add shading to multiple objects all at once, a new technique is to use a mask. This video will show an example.