

kirkt
-
Posts
440 -
Joined
-
Last visited
Reputation Activity
-
 kirkt reacted to NatCLK in Paste images into RGB channels (Channel packing)
Thanks a lot! The JR Channels Macros look really useful indeed.
-
kirkt reacted to NatCLK in Paste images into RGB channels (Channel packing)
THANK YOU! I wouldn't have figured that out by myself. Anyways, goodbye photoshop. 😁
-
 kirkt got a reaction from telemax in Paste images into RGB channels (Channel packing)
Channel packing in PS, GIMP and AP.
kirk
-
 kirkt got a reaction from Steev in Gradient Banding in HDR
I would guess you are working on an 8bit image - there is no need to have the display adjust for HDR content. Leave that OS-level box unchecked unless you are viewing HDR content.
kirk
-

 kirkt got a reaction from user_0815 in Use an image as mask layer
@CésarVas with most image editing software, there are multiple ways to achieve the task. This video will demonstrate 3 ways.
kirk
-
kirkt reacted to 3DJ in Editing a mask?
I got it working, really odd, I have tried and tried walked away and it is now working - logically at that too.
-
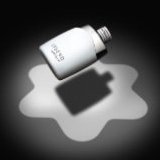
 kirkt got a reaction from Old Bruce in Straighten a specific object
Here is the afphoto file I generated essentially doing what @Old Bruce suggested.
kirk
lamp.afphoto
-
 kirkt got a reaction from h_d in Straighten a specific object
Here is the afphoto file I generated essentially doing what @Old Bruce suggested.
kirk
lamp.afphoto
-
kirkt reacted to Mehal in Where can I find the stroke tool in Affinity Photo?
Hi Kirk
Well I have at last managed to create my template as I want it, and the macro that I have created to reproduce my template each time seems to be working fine, I have experimented with a number of images and so far so good, thank you again for the time you have taken and also the detailed step by step guides, I have for insurance copied and pasted them into a document for future reference, just in case anything should go wrong! Best regards
-
 kirkt got a reaction from NotMyFault in FujiFilm New Lens Support
I have made my own profiles for the lensfun/AP lens correction. I guess it is time for me to buckle down and write a tutorial. See this thread for a similar discussion, where I posted an example of a homemade lens profile for a Leica R mount perspective control lens:
-
kirkt reacted to lepr in Where can I find the stroke tool in Affinity Photo?
In the current Affinity software, a macro stores the result of an arithmetic expression rather than the expression, and Affinity's internal unit of measure is the pixel, therefore a Resize Canvas step of a macro specifies a particular quantity of pixels in width and height for the canvas to become instead of an amount by which to expand/reduce a canvas.
-
kirkt reacted to R C-R in Where can I find the stroke tool in Affinity Photo?
The same thing applies if you use a rectangle to create the black outline: set its stroke alignment to inside (middle icon in the "Align:" area of the context stroke dropdown) so you can see it. If the photo itself does not have a white border, you can fill the rectangle with white & move it to the bottom of the layer stack. Then place & (re)size your photo however you want it.
Note that this is totally non-destructive -- you can change the thickness or color of the black outline or the border color to whatever you want at any time.
-
kirkt reacted to Old Bruce in Macro does not load in Affinity Photo:
You may need to have the Left Studio showing. Make sure it is checked in the View > Studio > Show Left Studio section down at the bottom.
-
 kirkt got a reaction from lepr in Lens Profile for Sigma 35mm F/2 DG DN Contemporary not available
I went through the process of creating a custom lens profile for one of my lenses, a perspective correction lens (the Leica PC-Super-Angulon-R 1:2.8/28). It is actually pretty straightforward. In my case, because the lens does not communicate with the camera body (it is an R mount lens on a Leica SL2 via a Novoflex R to L mount adapter) I had to inject some lens and aperture metadata into the DNG file to get the right stuff in place for AP to recognize the lens and apply the custom profile.
The basic idea is this - for a prime lens (fixed focal length) you need to shoot one image that has well-defined horizontal (and vertical if you want) lines in the image. They need to be coplanar and they need to go across the entire image field. You want the lines to make the lens distortion obvious and you want them at the edges of the image (top and bottom) as well as across the middle. An ideal image is a grid like you might see on a modern building - you also need to make sure that the lines are truly straight, so older buildings may not be the best candidate. The lines need to be in the same plane (coplanar) across the entire image field, again making a modern building a good candidate.
Once you have your image, you open it in Hugin or similar application that is typically used to stitch panoramic images. These applications all use optimization parameters that include the lens distortion model used by LensFun (the ptlens model - the "pt" is an abbreviation for panotools or Panorama Tools, the granddaddy of pano stitching tools). If you are familiar with making an panoramic image with Hugin, or PTGui or any of these applications, you typically import a set of images, set up a bunch of "control points" across the image set that tells the stitcher how the images should fit together, and then let the application correct for distortion, alignment, etc. and stitch and blend a panorama as the final output. In our case, we are going to abuse Hugin to get the information we need to make our own LensFun library entry.
The LensFun ptlens model requires knowledge of three parameters, known as "a," "b," and "c." Hugin will give us these parameters if we ask nicely. Once you bring your single image into Hugin, you will place control points along lines that span the image, and then ask Hugin to optimize the image so that those lines become straight lines in the final output. You are basically asking Hugin to determine the a, b and c values that remove the distortion that the lens is causing to make those straight lines not so straight (like pincushion or barrel distortion, mustache distortion, etc). Once Hugin does the optimization, you can enter those a, b and c values into the LensFun database xml file that you are customizing for use with AP. After you place that customized LensFun xml file in the proper directory (the AP Preferences will open the directory for you as shown in a previous post above) and restart AP, if the EXIF data in your image matches the customized database entry properly, you should be able to apply your custom profile. What is even better is that you can use a raw converter outside of AP (if you prefer not to use the AP Develop persona to convert your raw images) and bring the resulting RGB image into AP - then, use the Develop persona to apply the lens correction to the RGB file! Sweet.
I will try to put together a detailed tutorial here to go through the whole process, including writing EXIF data to a DNG file for lenses that do not do so automatically.
Have fun rolling your own lens profiles!
Kirk
I did not use the attached image as my reference image - this is an old building with a non-coplanar facade. However, I used this image as an example to evaluate the correction.
-
 kirkt got a reaction from walt.farrell in Lens Profile for Sigma 35mm F/2 DG DN Contemporary not available
FYI - the free pano stitcher called Hugin comes with a Lens Calibration utility that essentially automates the manual process of finding horizontal lines and using Hugin to determine the a, b and c coefficients of the lensfun lens correction model.
http://hugin.sourceforge.net
Kirk
-
kirkt reacted to lexvo in how to change canvas size on Mac
@kirkt
thank you, but I now realize that I didn't mention my question is about Affinity Designer. Sorry for that!
(I edited my OP)
-
kirkt reacted to Chip J. in Masking does not work
You are welcome, don't give up on Affinity Photo. As I have found many times myself, it's usually user error. 🙂 This forum is a great place to get answers quickly.
-
kirkt reacted to Pedro ghsfhfghfhs_a2 in Masking does not work
Hi Mesquito, your advice resolved my issue!! Thank you so much! It was indeed the accumulation, I had it at zero (not sure why that happened?!). Thanks for taking the trouble to make the reference video. also many thanks to all members who have helped on this thread.
-
kirkt reacted to Chip J. in Masking does not work
Pedro, check your brush settings. I was able to recreate your scenario by lowering the accumulation to 0. Try raising the the value to 100 and see what happens. See attached vid.
MaskBug.mp4 -
-

-
kirkt got a reaction from RichardMH in Cinematic crop?
@RichardMH
The Crop tool, by default, preserves the pixel information that you crop away - that is why, after you crop in at 2.35:1 and then try to expand the crop area to 16:9, the pixels that would normally be revealed as a black letterbox just reappear.
1) crop to 2.35:1 using the crop tool with the preset (Crop tool > gear icon - cinematic ratios). Reposition the crop area to get the composition you want. Hit "Apply" to apply the crop.
2) right-click on the newly cropped layer in the layers panel and select "Rasterize and trim..." - this will commit the crop and actually remove the pixels from the image that are outside the crop border.
3) using the crop tool, select the 16:9 preset and drag the handles on the vertical edges of the crop area horizontally outward (NOT THE CORNER HANDLES!) - this will keep the crop area centered on the image and expand the area horizontally to the edge, also expanding the top and bottom to generate the letterbox area (assuming a landscape oriented image).
4) make a new pixel layer under the image and fill it with black to create the letterbox.
Try recording a macro to see if this process can be automated with a single click (you may have to rasterize and trim from the menus when recording the macro).
Kirk
-
kirkt reacted to R C-R in Masking does not work
It is easy to overlook that setting, particularly on narrower displays where it may be hidden in the ">>" popup menu at the right edge of the workspace window.
-
 kirkt got a reaction from aslusers in Masking does not work
On the brush toolbar across the top of the application window, make sure "Protect Alpha" is not checked when painting on the mask. Also, you can Option-click (ALT-click) on the mask layer so that it becomes visible when you paint - this is an easier way to see the precise effect of the brush on the mask compared to the composite result painting on the mask should produce.
kirk
-
kirkt reacted to MEB in How to get a full black and white picture?
@h_d Thanks for the file. It does display a bit more pixelated for me. This is how it appears on my screen on canvas (more or less at the same size as your screenshot seen in full screen in the browser):
Maybe I've messed some setting on my system. Have to take a deeper look. The image you posted is a screen capture of the file in-app as well?
Thanks for your support. Much appreciated.