Search the Community
Showing results for tags 'Affinity designer'.
-
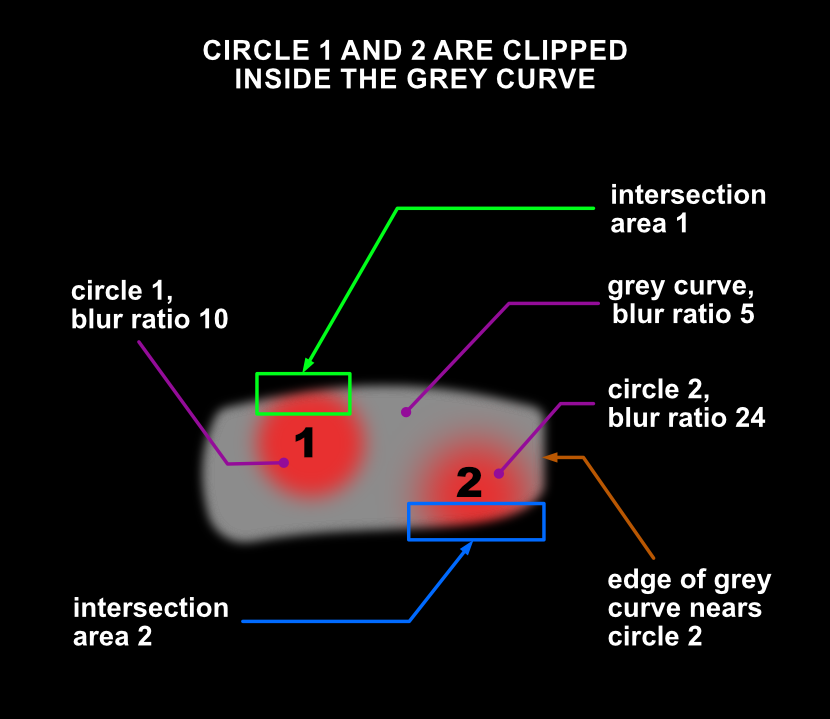
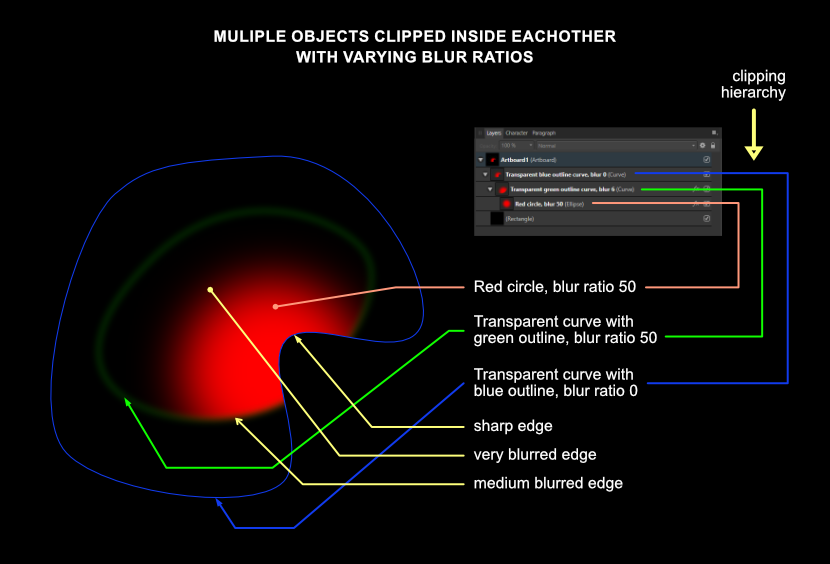
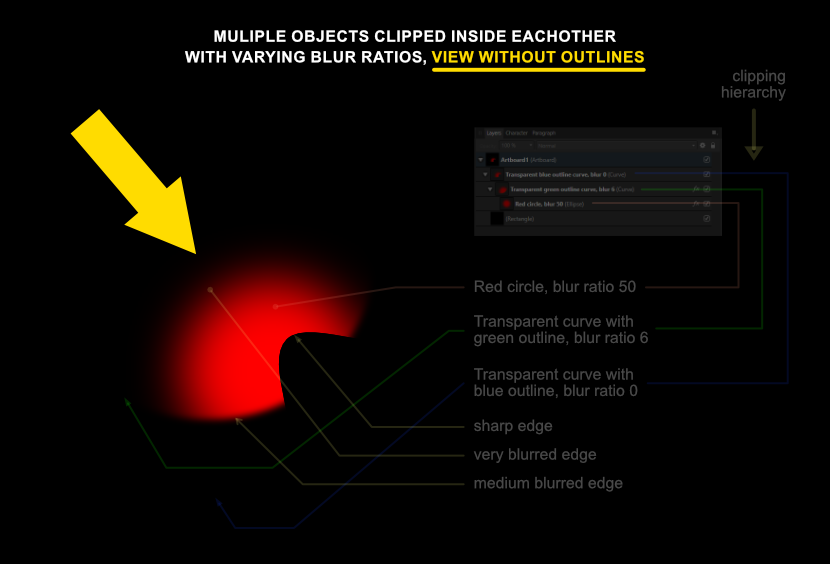
 For those prepared to dive deep into the functionality of Affinity Designer offers, I wrote a tutorial on how to create objects that have edges with a varied level of blurredness along their circumference, which is particularly useful when drawing realistic vector portraits or realistic (parts of) objects. This tutorial explains how vector objects are drawn, that have a variety of blur levels along their edges. This technique is useful when drawing realistic images in Affinity Designer, because hard edged objects rarely look realistic. This technique involves clipping of objects - placing one object inside an other - and gaussian blurring, which is applying a controlled blur ratio to objects. In addition gradient colour fills and gradient opacity can be applied to the objects to attain an appearance that makes objects look realistic. Apart from being useful in drawing realistic vector portraits, this technique has many other applications for artists who need to give their artwork a convincing realistic appearance. First some basics. In the image below this paragraph I placed an image in which the basic principle is shown. After that I will go into more complex techniques that are nonetheless based on the same principle. To give an object a blurred edge, click the fx button at the bottom of the Layers panel. In the dialog that pops up after clicking it, at the top of the dialog, the blur ratio can be set in rounded numbers and can even be set as precisely in decimal values. That is rather basic, but in reality most objects have edges that have a level of blur in their circumference that varies in a non-linear way. Circle 1 has a blur ratio of 10 (roughly medium blurry) and is clipped inside a grey curve that has a blur ratio of 5 (less blurry). Where the objects intersect, at the top of circle 1, the intersecting area inherits the blur ratio of the grey curve - blur ratio 5, while the rest of the circumference of circle 1 maintains its blur ratio of 10. So at the top of circle 1, the edge is less blurry than in the rest of the circle. Circle 2 that has a blur ratio of 24, which is more blurry than that of circle 1. Where circle 2 and the grey curve intersect, circle 2 will inherit the blur ratio of the grey curve, so the blurriness at the bottom of circle 2 is far less than in the rest of the circumference of circle 2; there is a greater contrast of blurriness along the edge of circle 2 than there is in circle 1. By moving the right edge of the grey curve, by selecting the nodes at the top and bottom of its edge with the Node tool, closer to or further away from circle 2, the level of blurredness at the right side of circle 2 can be set quite precisely. Basically, the further away the edge of the parent curve is from that of the clipped child curve, the less its blurriness affects the edge of the child curve. When the edge of the parent curve overlaps the edge of the clipped child curve, the latter inherits the level of blur of the parent curve in the area where the overlapping is defined. Below this paragraph I placed an image with a transparent curve with a blue outline (for clarity) that has no blurred edge, in which a transparent curve with a green outline is clipped that has a blur ratio of 6, in which a red circle is clipped that has a blur ratio of 50. The crux is that the parent object in a clip always determines the blurriness of edges. Parent objects can both be given a higher or lower blur ratio than the objects clipped inside of them. If the clipping parent objects have no outline - which is the practical way to work with such a technique - the image shown above would look like the image below this paragraph, indicated by the yellow arrow. The resulting appearance of the clipped red circle becomes clear and this is how clipping and blurring would be used by graphic artists and designers that aim to create realistic objects or parts of objects. In the reality that most people experience, areas that have different ratios of blurriness along their edges, are the majority of what occurs / appears in this dimension. Also objects rarely have one equal colour throughout their shape, which is what in addition to the above, can be applied to the mix by giving objects a gradient colour fill or even clip differently coloured child objects clipped into parent objects to mimic reality even closer. Although what I described in this blog entry is not always an obvious intuitive mode of operation, Affinity Designer is very capable of coming a long way in 2D design. Programs of Designer's competition may have Mesh Fill options, but creating those requires much more time and editing them afterwards even more. In the Vector page of my website you find examples that are created with the techniques described above: https://vectorwhiz.com/Vector.html This tutorial can also be viewed in my portfolio blog: https://communicats.blogspot.com/2022/01/varying-blurred-object-edges-in.html
-
 In Affinity Designer it seems there is no way to change the opacity of global colors. This is becoming frustrating when designing UIs. Opacity is an integral part of color schemes in Google's Material Design; it completely depends on opacity to create visual hierarchy. From Google's Material Design Guidelines: "Using opacity instead of shifting colors often creates better contrast and relative luminance. For example, gray text (#727272) becomes hard to read if the background color changes to magenta." Is this feature on your road map?
- 12 replies
-
- 7
-

-
- affinity designer
- global colors
- (and 1 more)
-
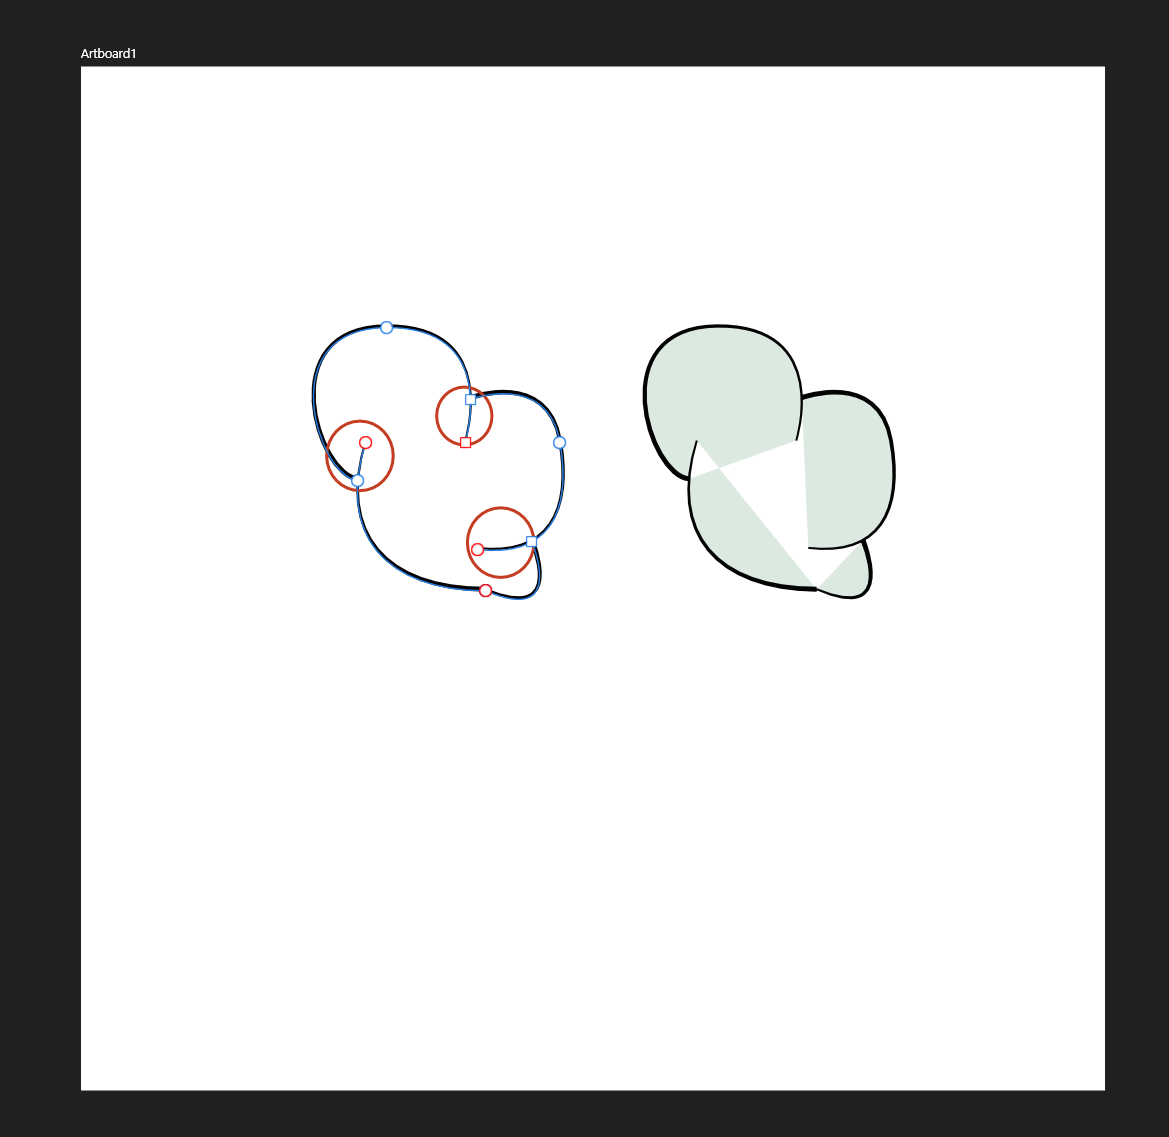
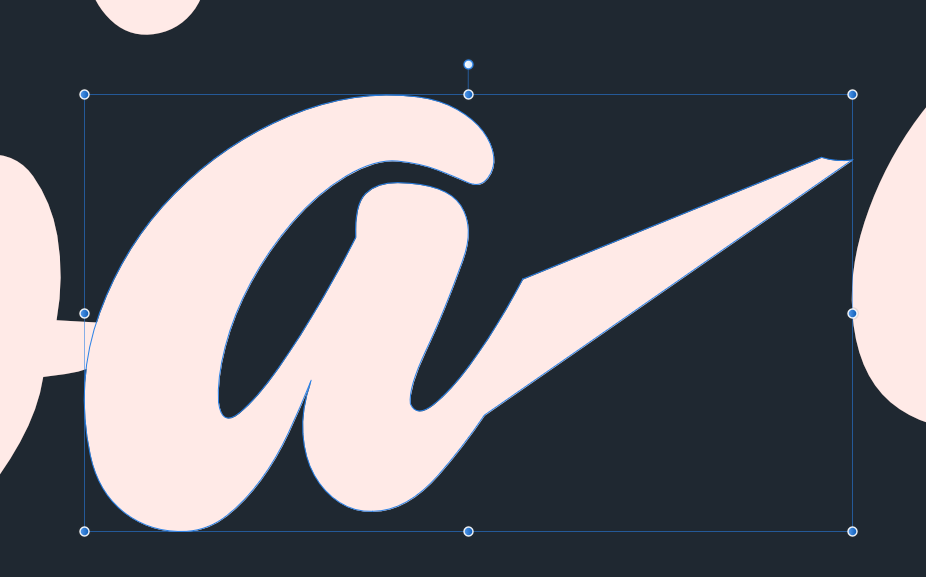
 I want to make use of the Add new curve to selected curve object method when doing linework as a way of adding detail while keeping the number of curves limited. Furthermore, I want to use this method as seen in the examples because the "offshoots" as I call them (circled in red) have smoother and more correct curves than the method I am currently using (adding extra curves on top of the shape and adjusting by eye). The problem arises when the shape needs to be filled, this is all one curve but when the fill is used it has errors. I can of course imagine that this is technically "correct" due to the way the fill works with open/closed shapes. But I want to ask, is there a way for this to be fixed, or a simple workaround. The one I am using right now is very tedious, not guaranteed to be correct. Image to illustrate my point, with Node Tool activated to confirm it is one curve. The steps are like this: Make curve with pen tool Click ESC Go back along curve path and start another curve from it with Add new curve to selected curve object Repeat
-
Here Hare Here. A combination of Black PTT pens, Vectorizer and Affinity Designer. I created several of these designs a few years ago for my web site here: https://www.mcsherrystudio.com/product-category/limited-edition-prints/into-the-wild-collection/ The idea was to get as close as possible to the natural feel of a linocut, so I drew out three separate 'plates' in black on tracing paper. That was a bit of a palaver but it did help to get a more handmade look. You get brownie points if you can guess where the title of this one came from...Happy new year Affinizens. Kevin
-
 Hello there 🤗! If you don't go to the mountain, the mountain will come to you! Learn how to create 2D artwork from scratch, similar to this example! 🏔️ Learn more by visiting the link https://www.vectorizeclub.com! cheers 🤘 10_Mountain.mov
 -
Hello Vectorizers 😊! Today I'm showing you this beautiful 2D treasure chest art 😆! Come see the tutorial in full by accessing the link https://www.vectorizeclub.com and let me know if you liked it! enjoy 😚 9_Treasure.mov
-
 When in affinity photo, and I need to find a file, and I have many files, I goto the folder I think the file will be in, and as I select a pdf or jpg file, even a png or ai file, i can see a file preview in my window, but if I select a native .afdesign file, there is no preview....this doesn't sound right. Is this an oversight or a bug or is there a setting to turn this on? right now I have to open each file to check, this is time consuming...many files... windows 10 thanks! Rob
 -
William
-
 Hello! When attempting to combine these two curves together, the result is a completely different shape. The "r" is being warped in such a weird way and I'm not sure why this might be happening. Before the add: After the add: Any help is appreciated! Please be patient, I'm decently new to this.
-
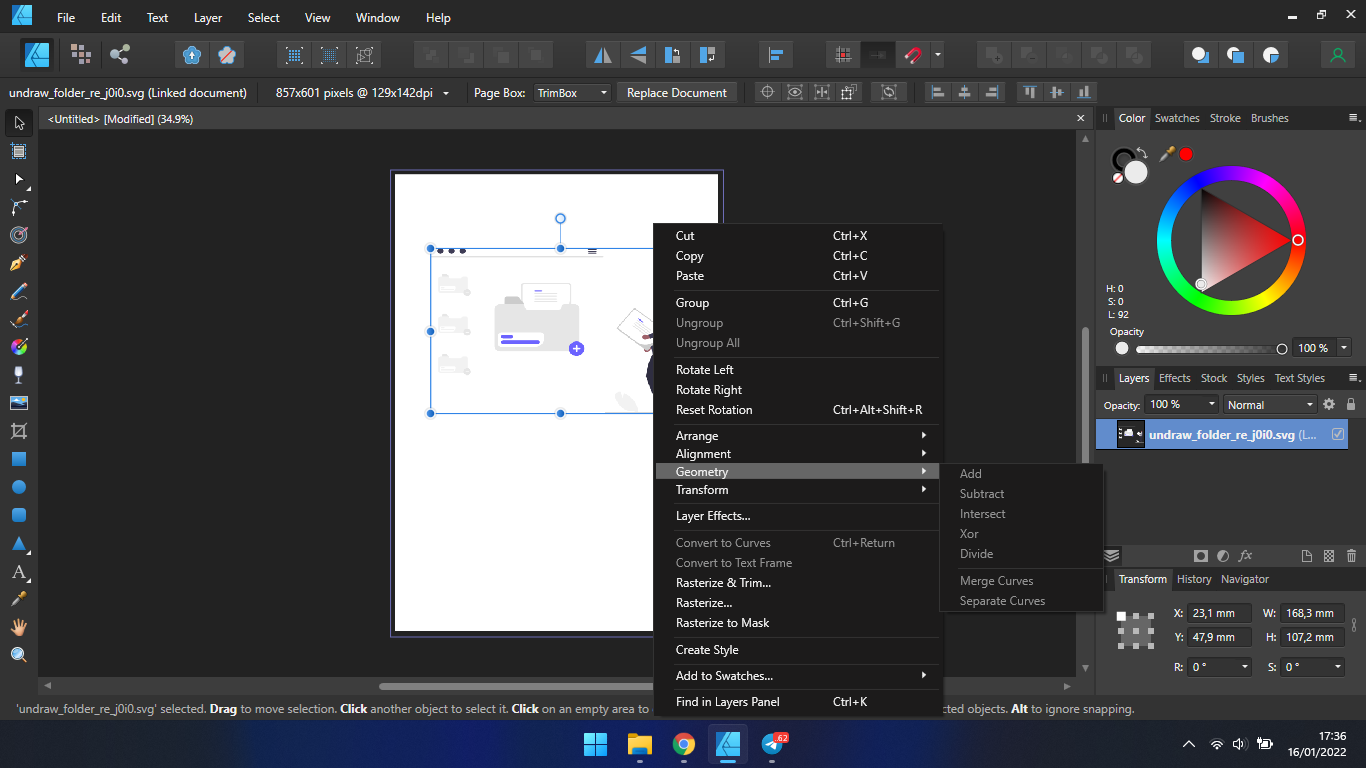
 hello, i'm new user, who trying editing svg file's. i was search a tutor on youtube about ungroup svg file in affinity designer, but isn't work, because feature like editing document or paste special, is doesn't appear, cant u help me guys, to fix the problem, thanks . by the way my affinity version v 1.10.4.... (newest version) windows.
-
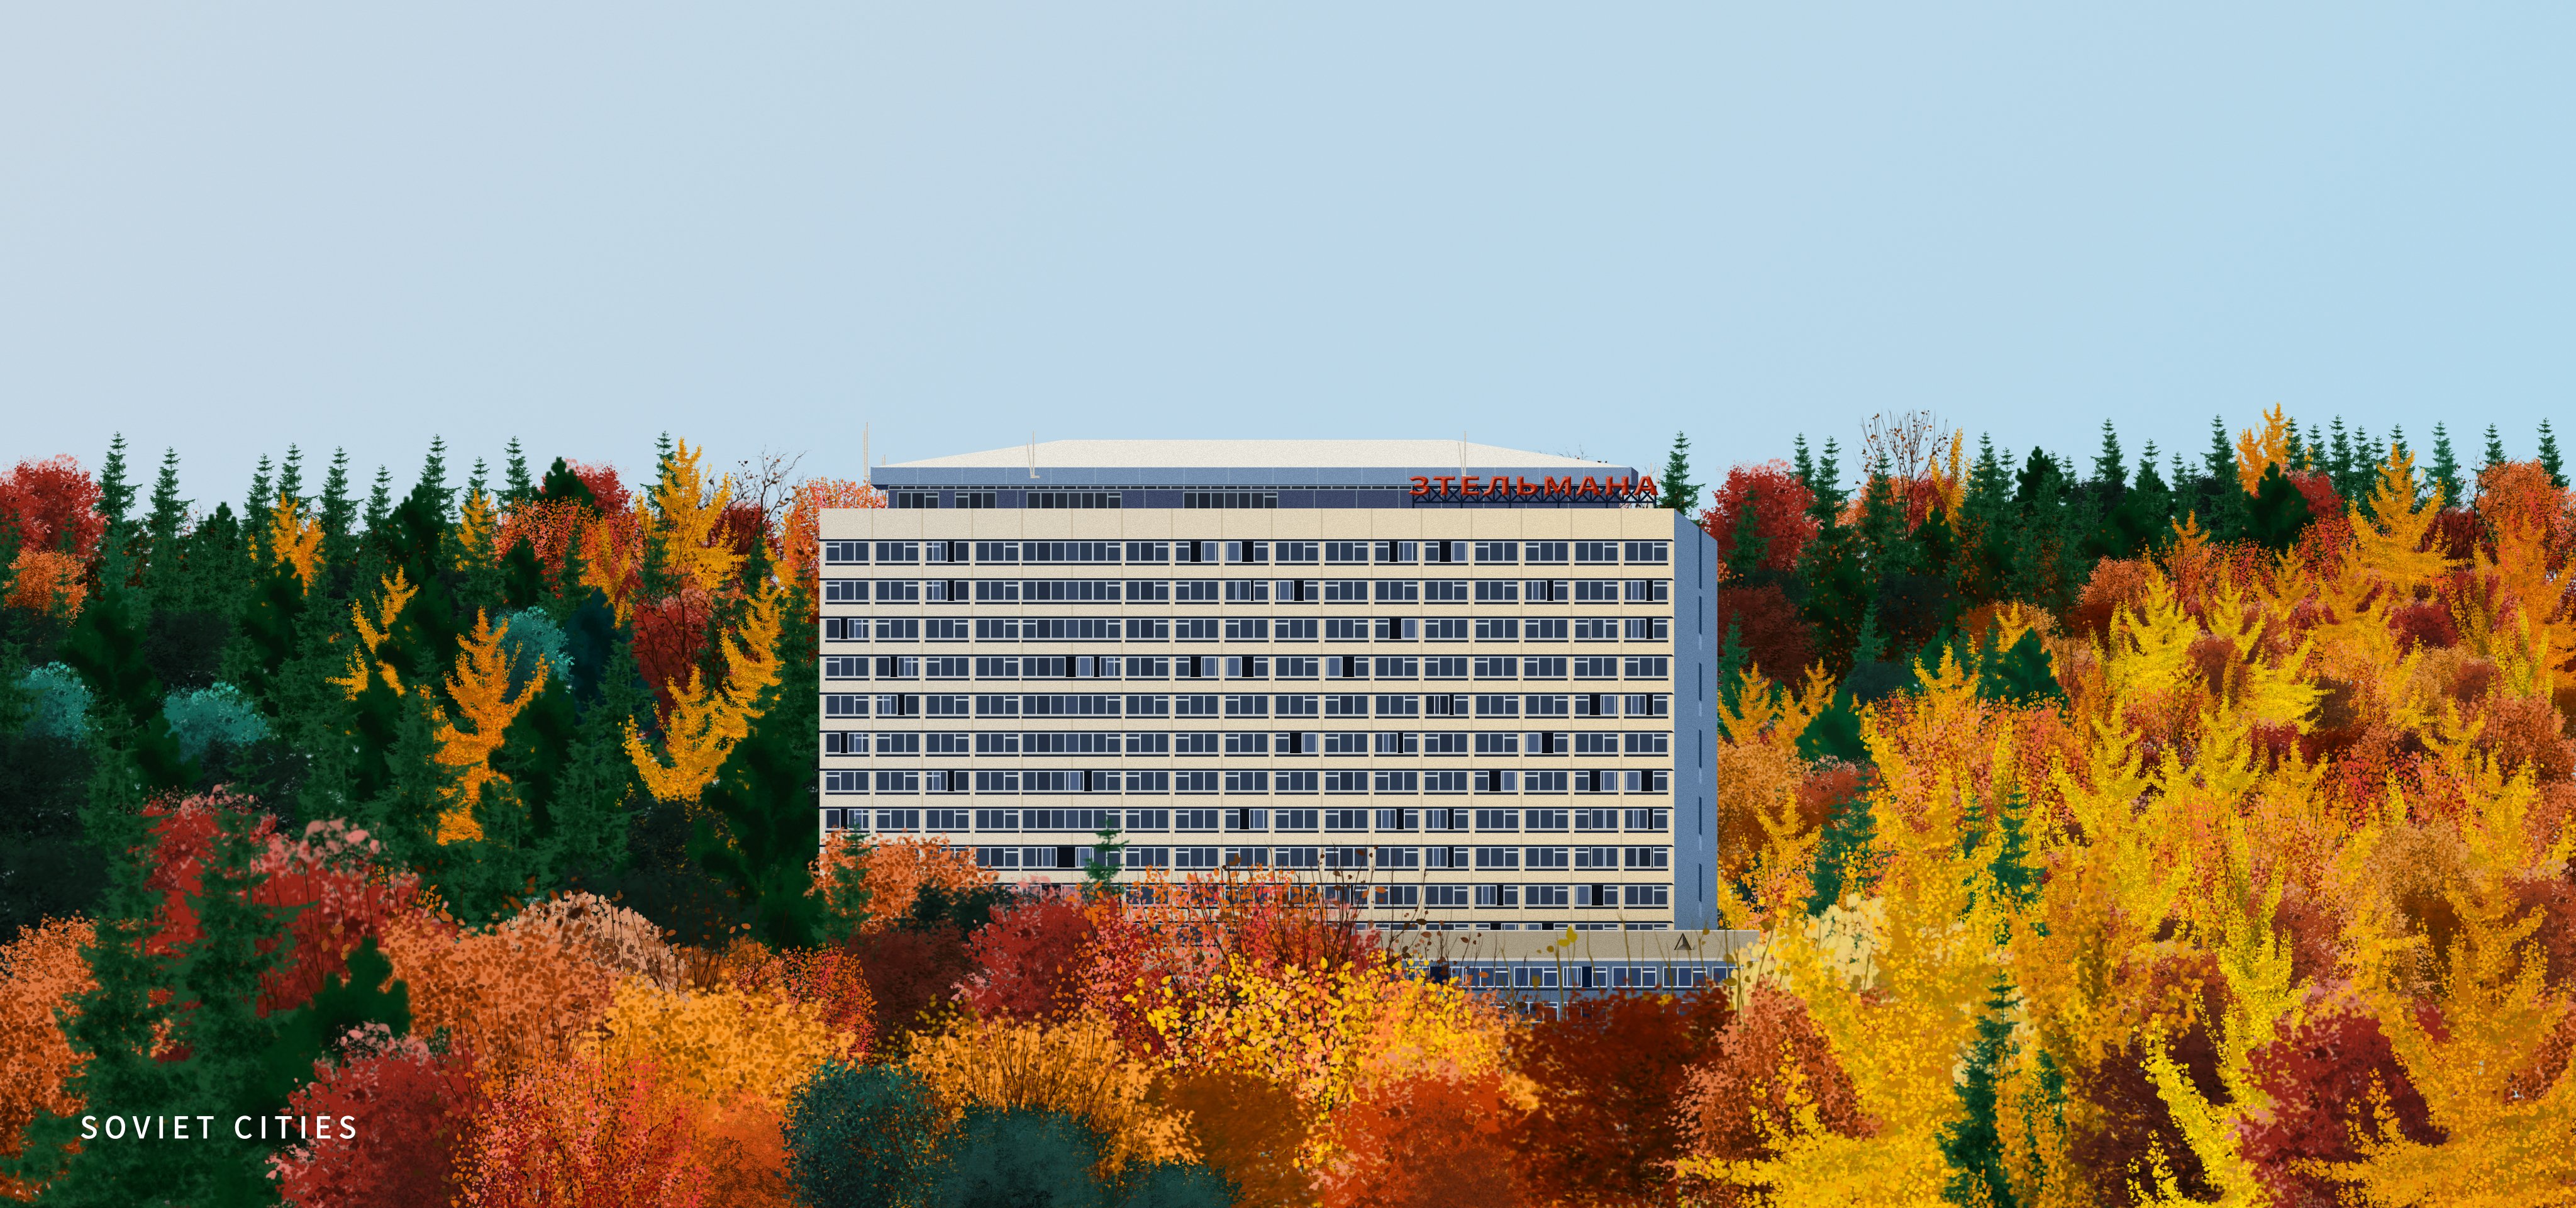
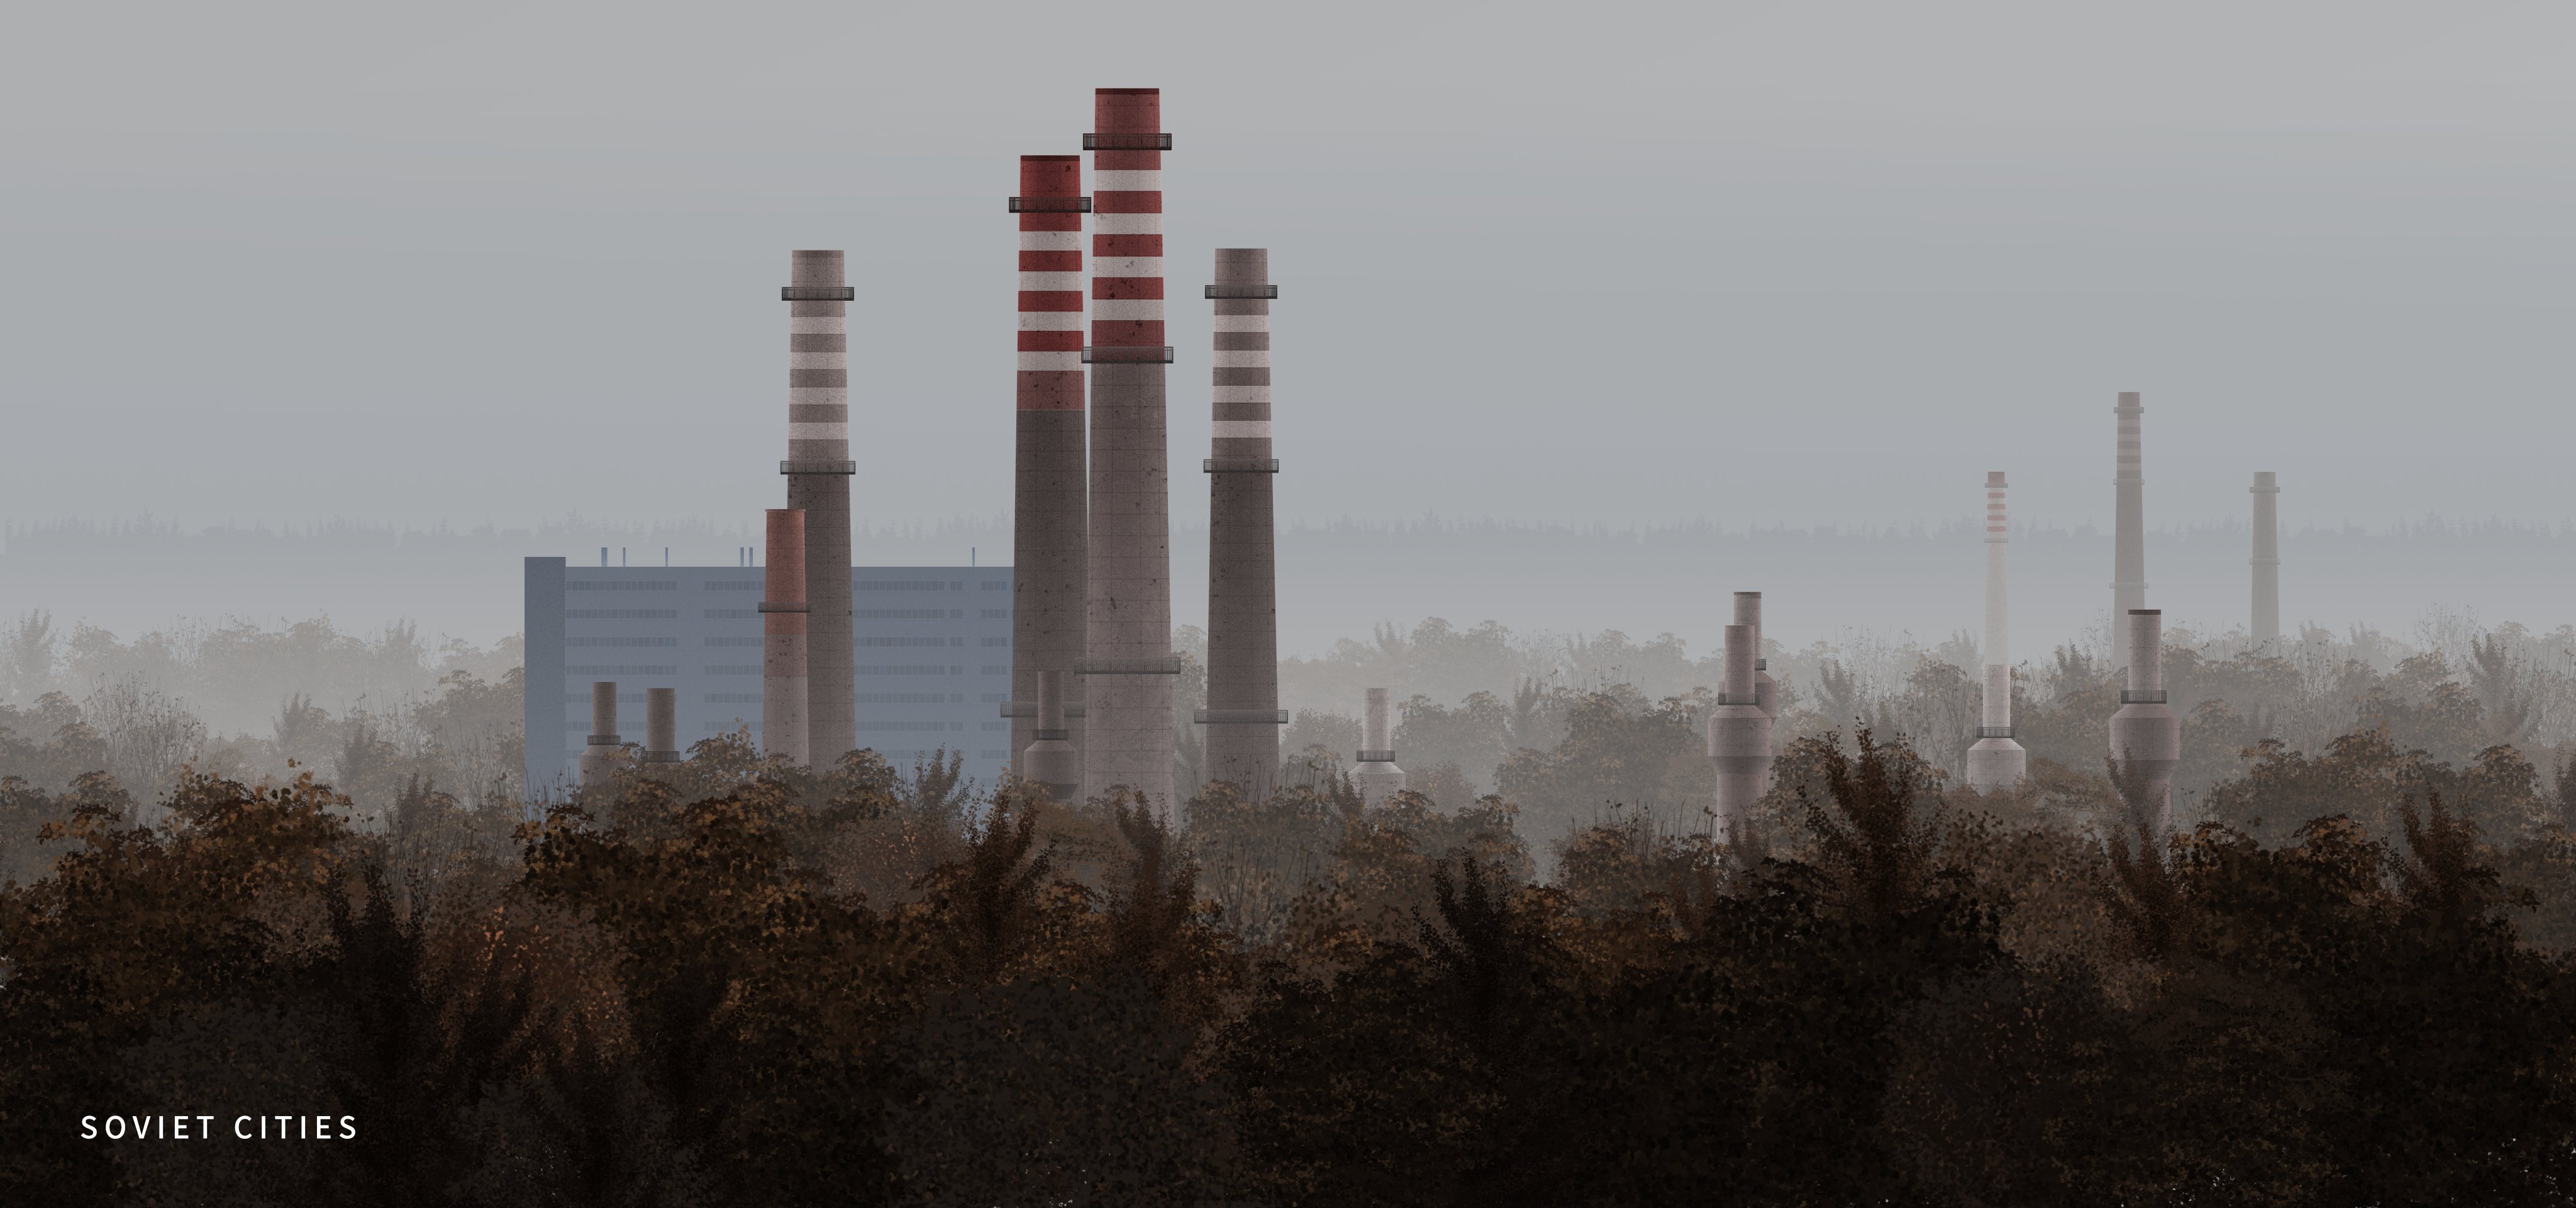
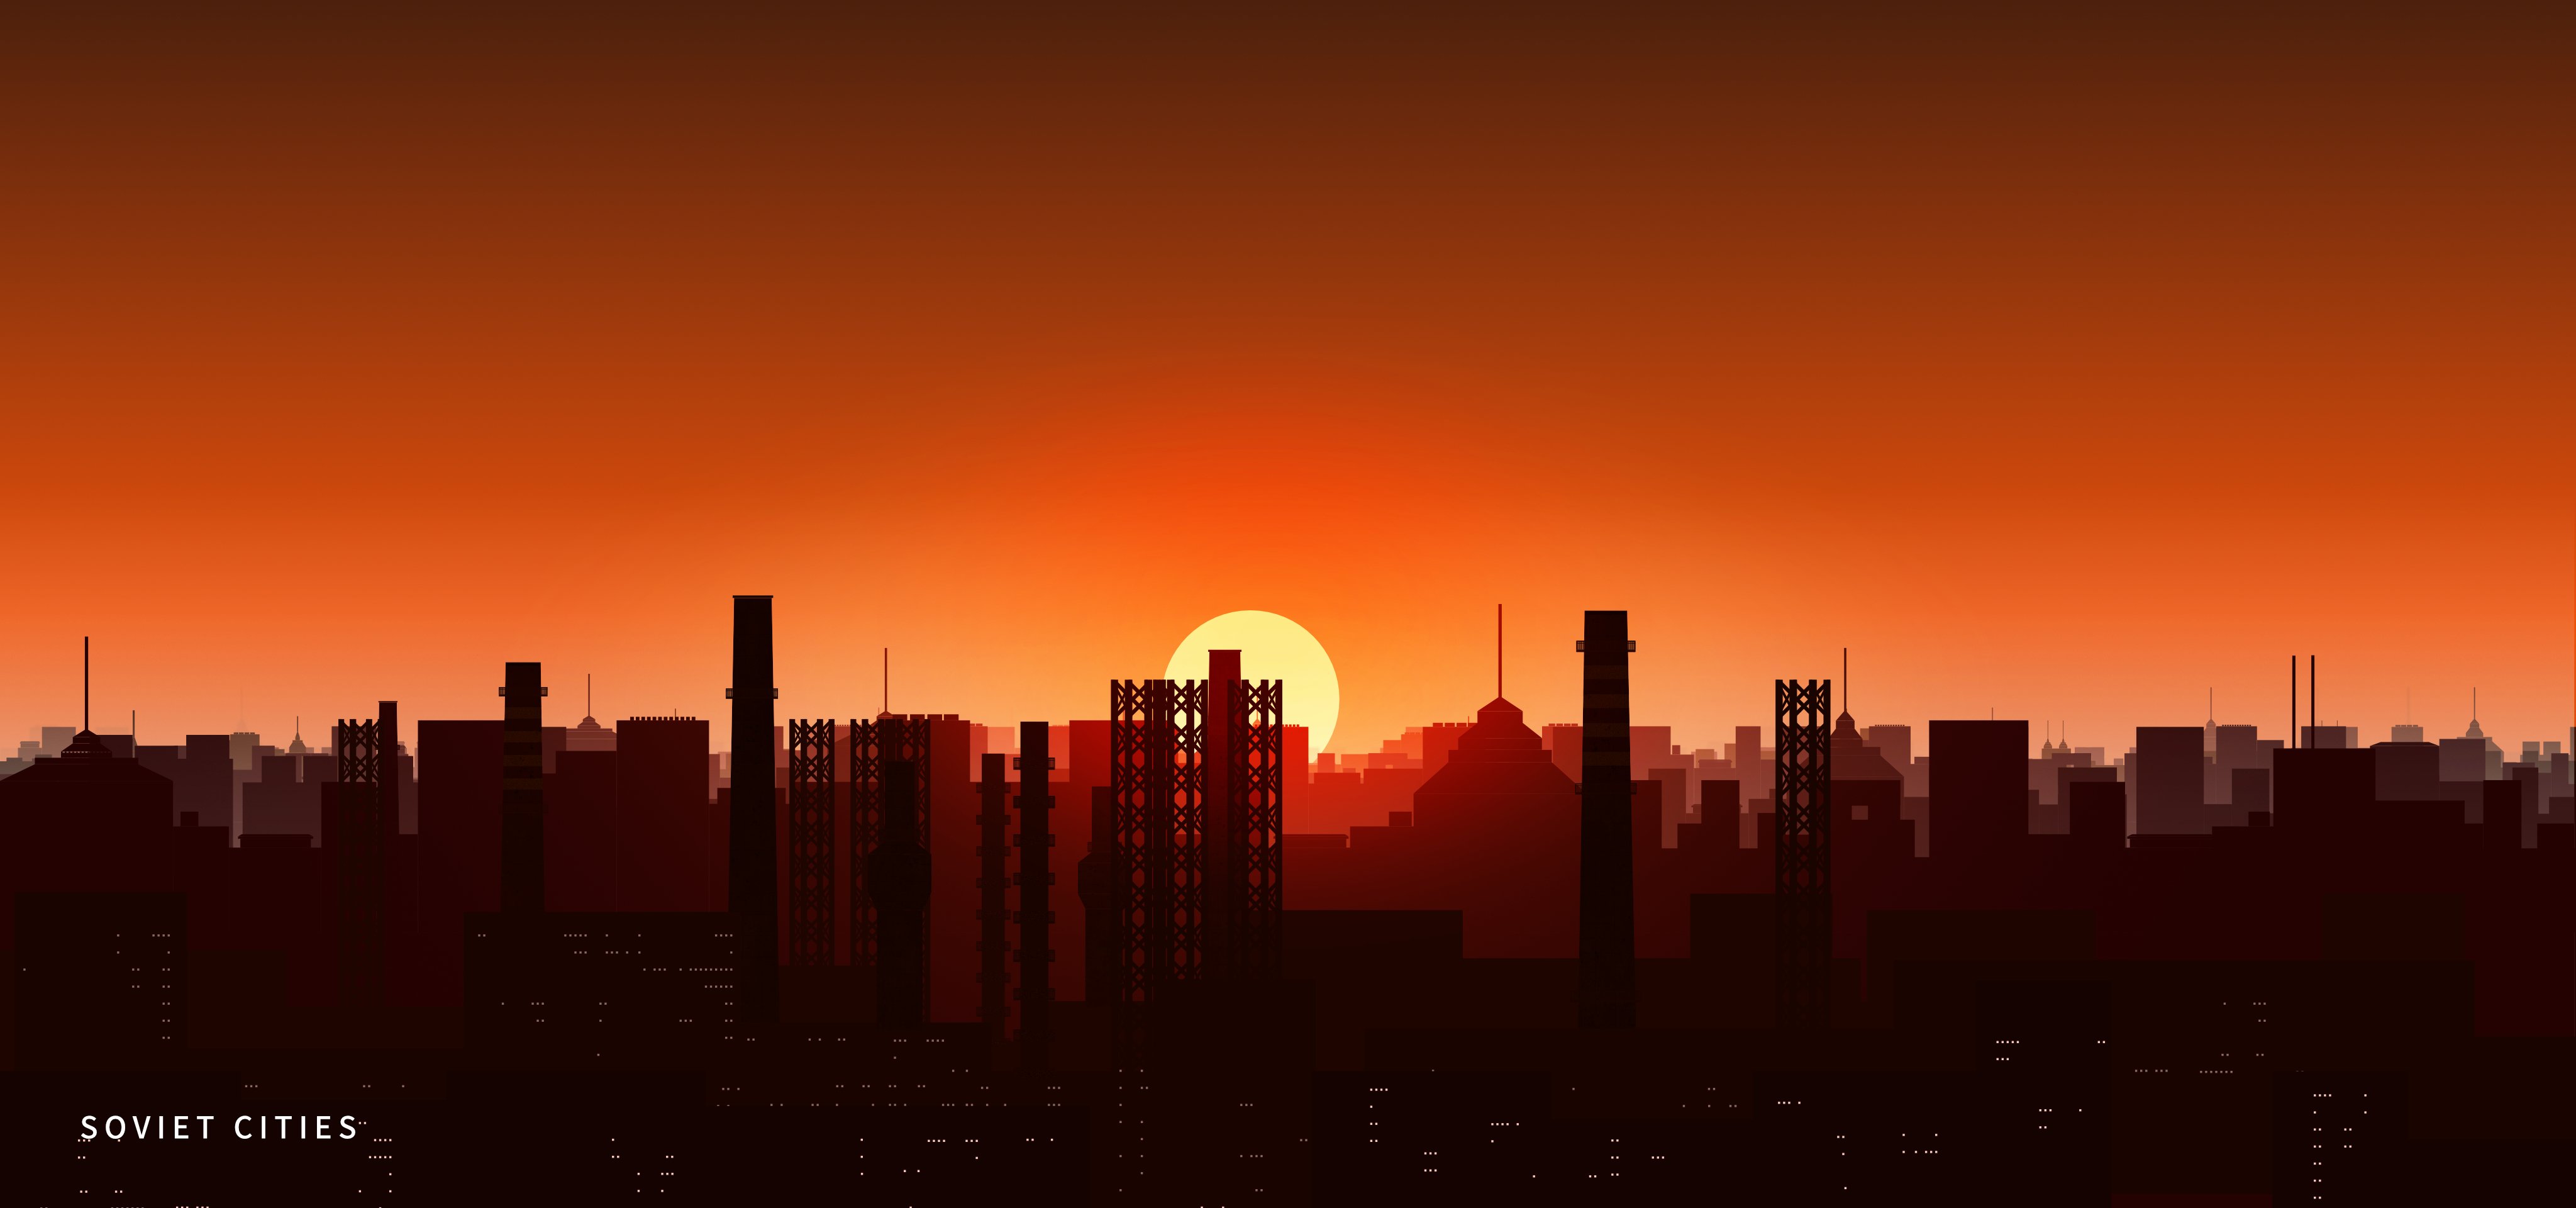
These are part two of my Soviet Cities series illustration.
- 8 replies
-
- 10
-
-
Hi there! How about learning to create a crystal from scratch 😲? Meet the Vectorize Club school and come from improving your art to learning to vectorize from scratch! 🚀Join the design school! https://www.vectorizeclub.com cheers 😆 7_Crystal.mov
-
 I know this has been discussed a lot in previous posts but I'm asking for advice here rather than complaining about the shortcomings of this "feature". I've drafted the basic shapes for a design and used strokes with thickness and varying alignments (inside, centre and outside). Several elements start life as an ellipse. In removing the strokes that I don't require in the final design I often have to break the curves at intersection points. Doing so reverts the alignment to centre. This changes the design and the alignment of the graphic elements. I realise that this isn't going to be fixed so I was wondering if anyone has any advice about a workflow that avoids this issue. Clearly not using the alignment option on any curves used in a design that might be broken seems to me to be the only option. Any thoughts?
 -
 I want to export my results with grid or guide line. Are you under development or already having that functions? In detail, In Affinity designer, grid and guideline managers exist. Therefore, I want my illustration export png or other file with grid and guideline. So, this maximizes my client's understanding of the design configuration of my illustrations.
-
Hello my friends! What do you think of this cute little bat 🦇? It was created as a tutorial for Vectorize Club students! If you're interested, come learn more about Vectorize, just access the link https://www.vectorizeclub.com! Enjoy 🤗 6_Bat.mov
-
 Hi! First things, first: Your applications are wonderful and awesome. They are a must for me and lots of people. Getting better and better every day, so keep the good way, team! 🙂 I would like you to create a new tool that will be able to make a shape or figure that requires a little time to get done by hand (manually). I do not know what to be its name. Maybe umbrella. I make and use it every now and then to use it as a sunset or sunrise or whatever. Maybe the tool will have some parameters (you know: the interactive little red points to change them): Number of sectors or parts, some of them larger than the others alternativelly, the external part of the sector if it is concave, hollow or convex and so on... I think that with the image attached is good to understand the meaning of the new “umbrella tool”. I know that Designer has similar tools, but the key of the “umbrella tool” is that have “divided sectors”. Thank you - - - - - - - - - - - In Spanish: Petición o sugerencia de una nueva herramienta llamada paguas o sombrilla que sirve para muchos propósitos como simular un amanacer, atardecer, sombrilla, paraguas u objetos parecidos. Lo interesante aquí es que no sería como otras herramientas parecidas ya que habría sectores (partes del objeto total) separados. Además se podría hacer que hubiese manejadores interactivas como en este tipo de herramientas que permitiesen que el perímetro exterior del objeto pudiera tener segmentos, cócavos, convexos o desiguales, etc. Gracias por vuestro tiempo y dedicación.
-
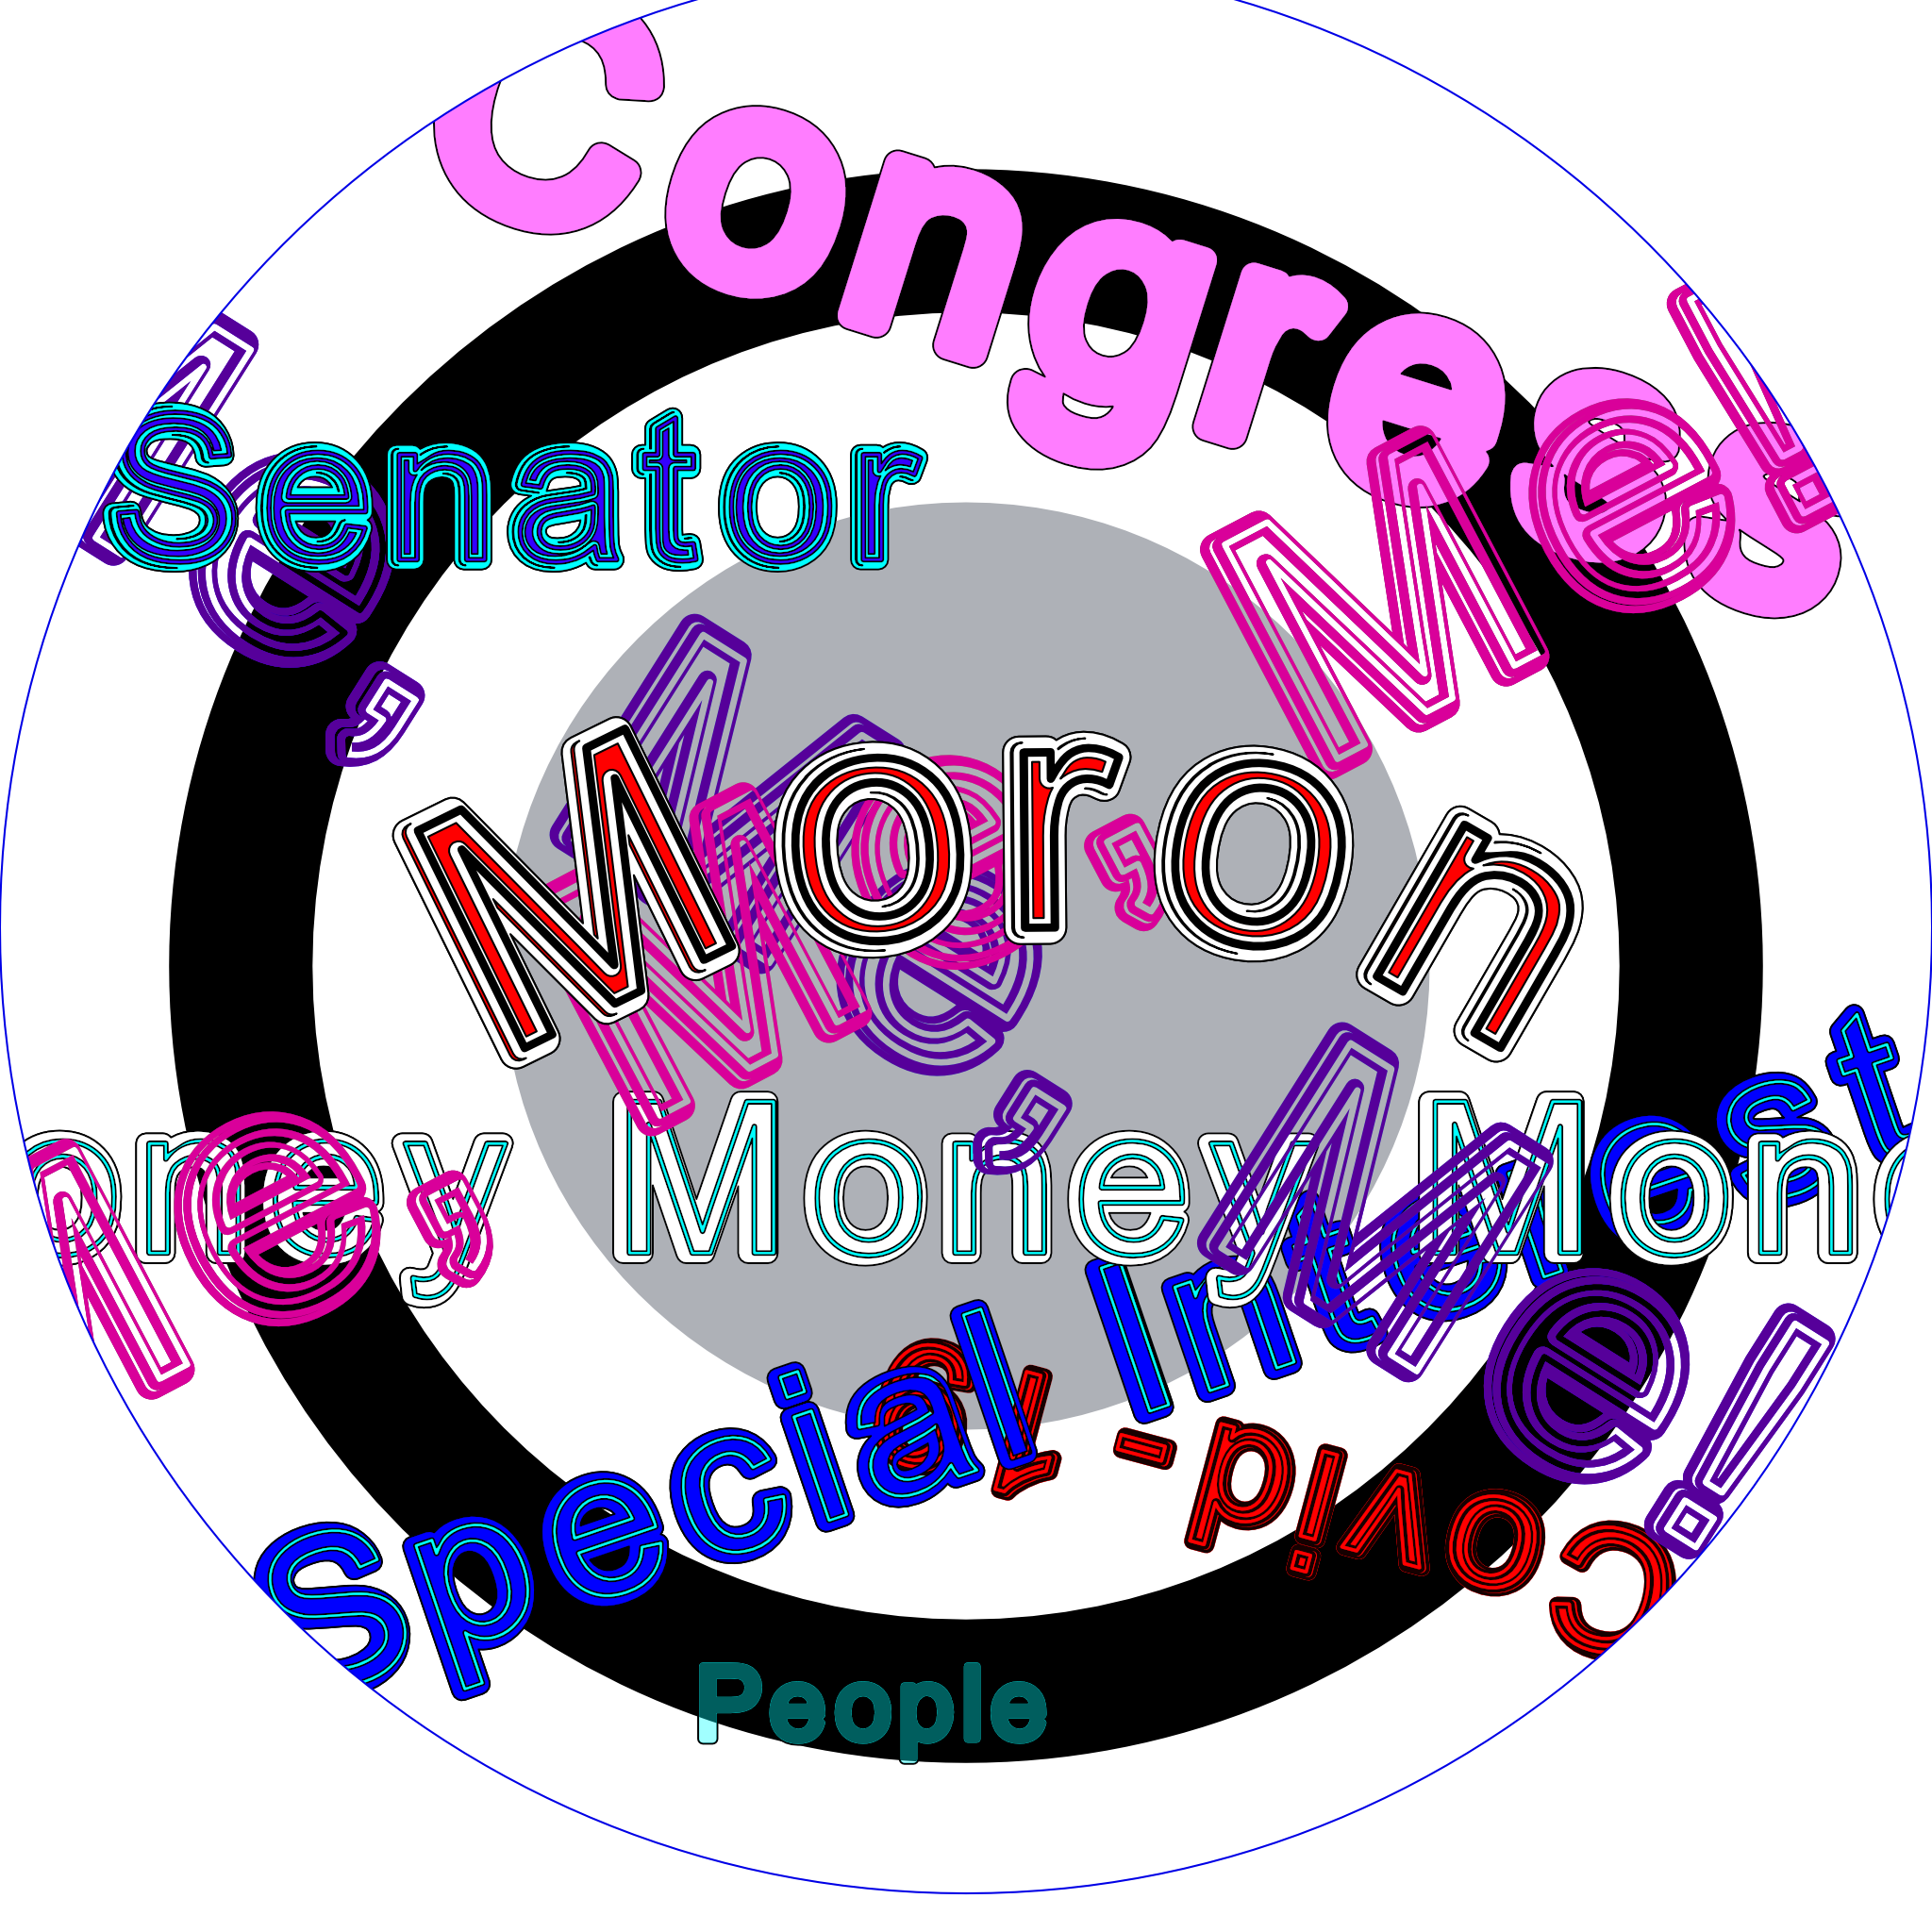
This is what, in my humble view, the US Congress (and the rest of Washigton) has devolved to by now (January 2022). Reminds me of the ancient Chinese curse, May you live in interesting times! Anyway, created in Affinity Designer.
-
- 1
-
-
- washington dc
- congress
- (and 1 more)
-
 I have tried importing some PDF documents that contain a Barcode into both Designer and Publisher. Both apps load the PDFs but make a mess of the Barcodes. In fact the PDF Barcodes are rendered automatically into the Barcode's text by both Designer and Publisher. How can I persuade Designer and Publisher to load the actual Barcodes without auto conversation. Please see attached images from Publisher. Many thanks Allan
-
Hey guys 😆! look how creepy this dungeon is! And the best thing is that you are also able to perform one similar to this one! 🚀Did you like it? so come learn more about the Vectorize Club by visiting the link https://www.vectorizeclub.com! kisses 😘 5_Dungeon.mov
-
Hello there 🤗! In this tutorial I teach you how to create a backpack from scratch! Check out this and other tutorials by accessing the link https://www.vectorizeclub.com! cheers 😊 4_Backpack.mov
-
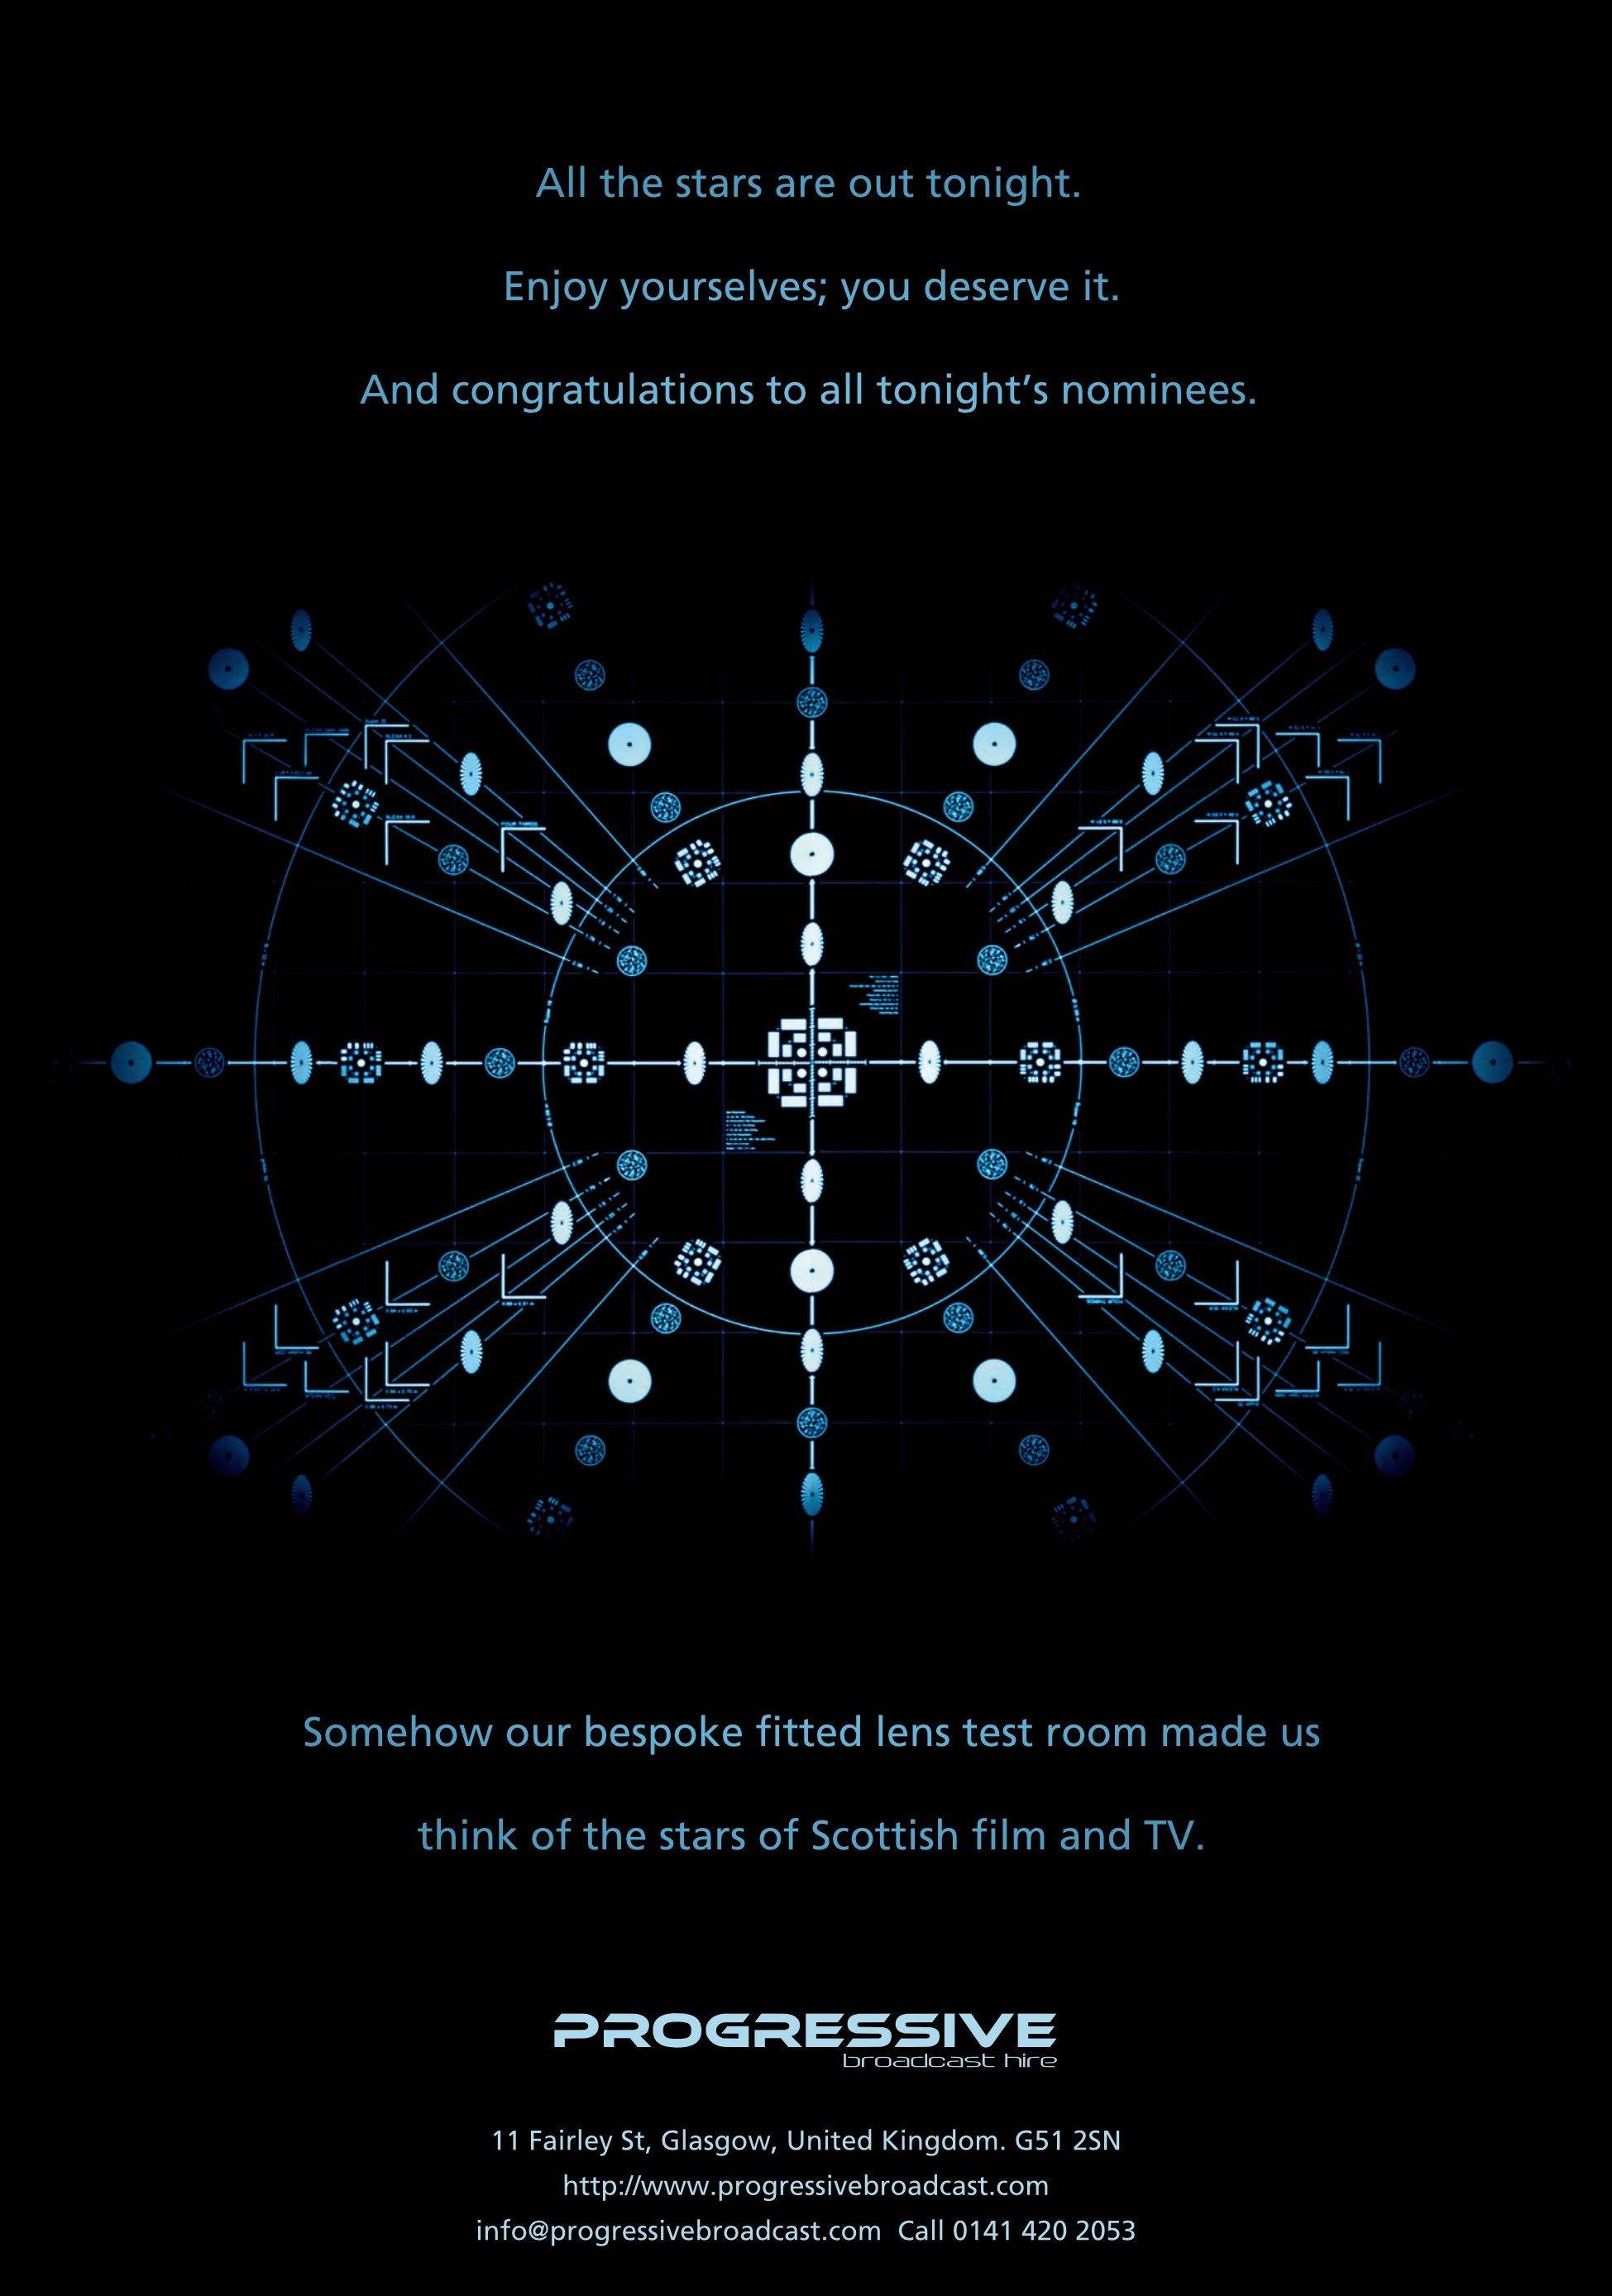
Progressive Broadcast Hire commissioned me to do a full-page ad in the Scottish Bafta 2021 Awards programme. The image is from their newly installed lens test room. The primary purpose of the ad was to celebrate the talent in Scottish film and TV and congratulate the evening's nominees. Then suggest how Progressive can help them achieve even better results.
- 1 reply
-
- 4
-
-

-
- affinity designer
- affinity photo
- (and 2 more)
-
 I think I ask this question every year and I don't give up hope. Since the beginning of Affinity programs there is a desire for a tidy user interface. Arranging palettes / windows. And exactly since then, it still doesn't work. Combine palettes in a user friendly block, move them together and dock them to the main window accordingly .... ? No way. How can you help the Affinity team with this? With examples? They should know them, right? Since I am again lost in the maze of palettes and have lost so much time, I will write my document (in publisher) using the Office functions of Google. Almost a blessing Stay safe!
 -
 Hi, Please could someone explain how to join coincident points in Designer? I understand how to use the Join tool with non-coincident points: shift-select the two end points with the node tool, select Join and hey presto! you get a new line which joins the two selected points. However, what about if I don't want a new line? How do I select the two coincident points such that they then join to create a single point which joins the two lines together? In Illustrator, this is not tricky - click and drag over the two coincident points > select join (decide if you want a sharp corner or a curving corner) and it's done. I'm sure I'm missing something in Designer... could someone spill the beans please? Thank you! Edward
 -
Hello Vectorizers! 😆 Today I come to show you the warrior art I created at the Vectober event that takes place every year in October! Interested? Then find out more by clicking the link https://www.vectorizeclub.com! enjoy 😊 3_Warrior.mov