Search the Community
Showing results for tags 'Affinity Designer'.
-
 Hello designers, sorry for not posting lately, I was working on a more complex project and I'm glad that I finish it and also I'm happy that I can share it with you. Let me know what you think:
 -
 Hi, Can anyone please help me with these mitres. I want all corners to be pointed and no matter what I do I can't find consistency. There are three examples in the attached files. The top example, when I zoom out changes to a flat edge for some reason. What are the best settings to get a sharp point every time? Thanks in advance, Martigny Mitres.afdesign
 -
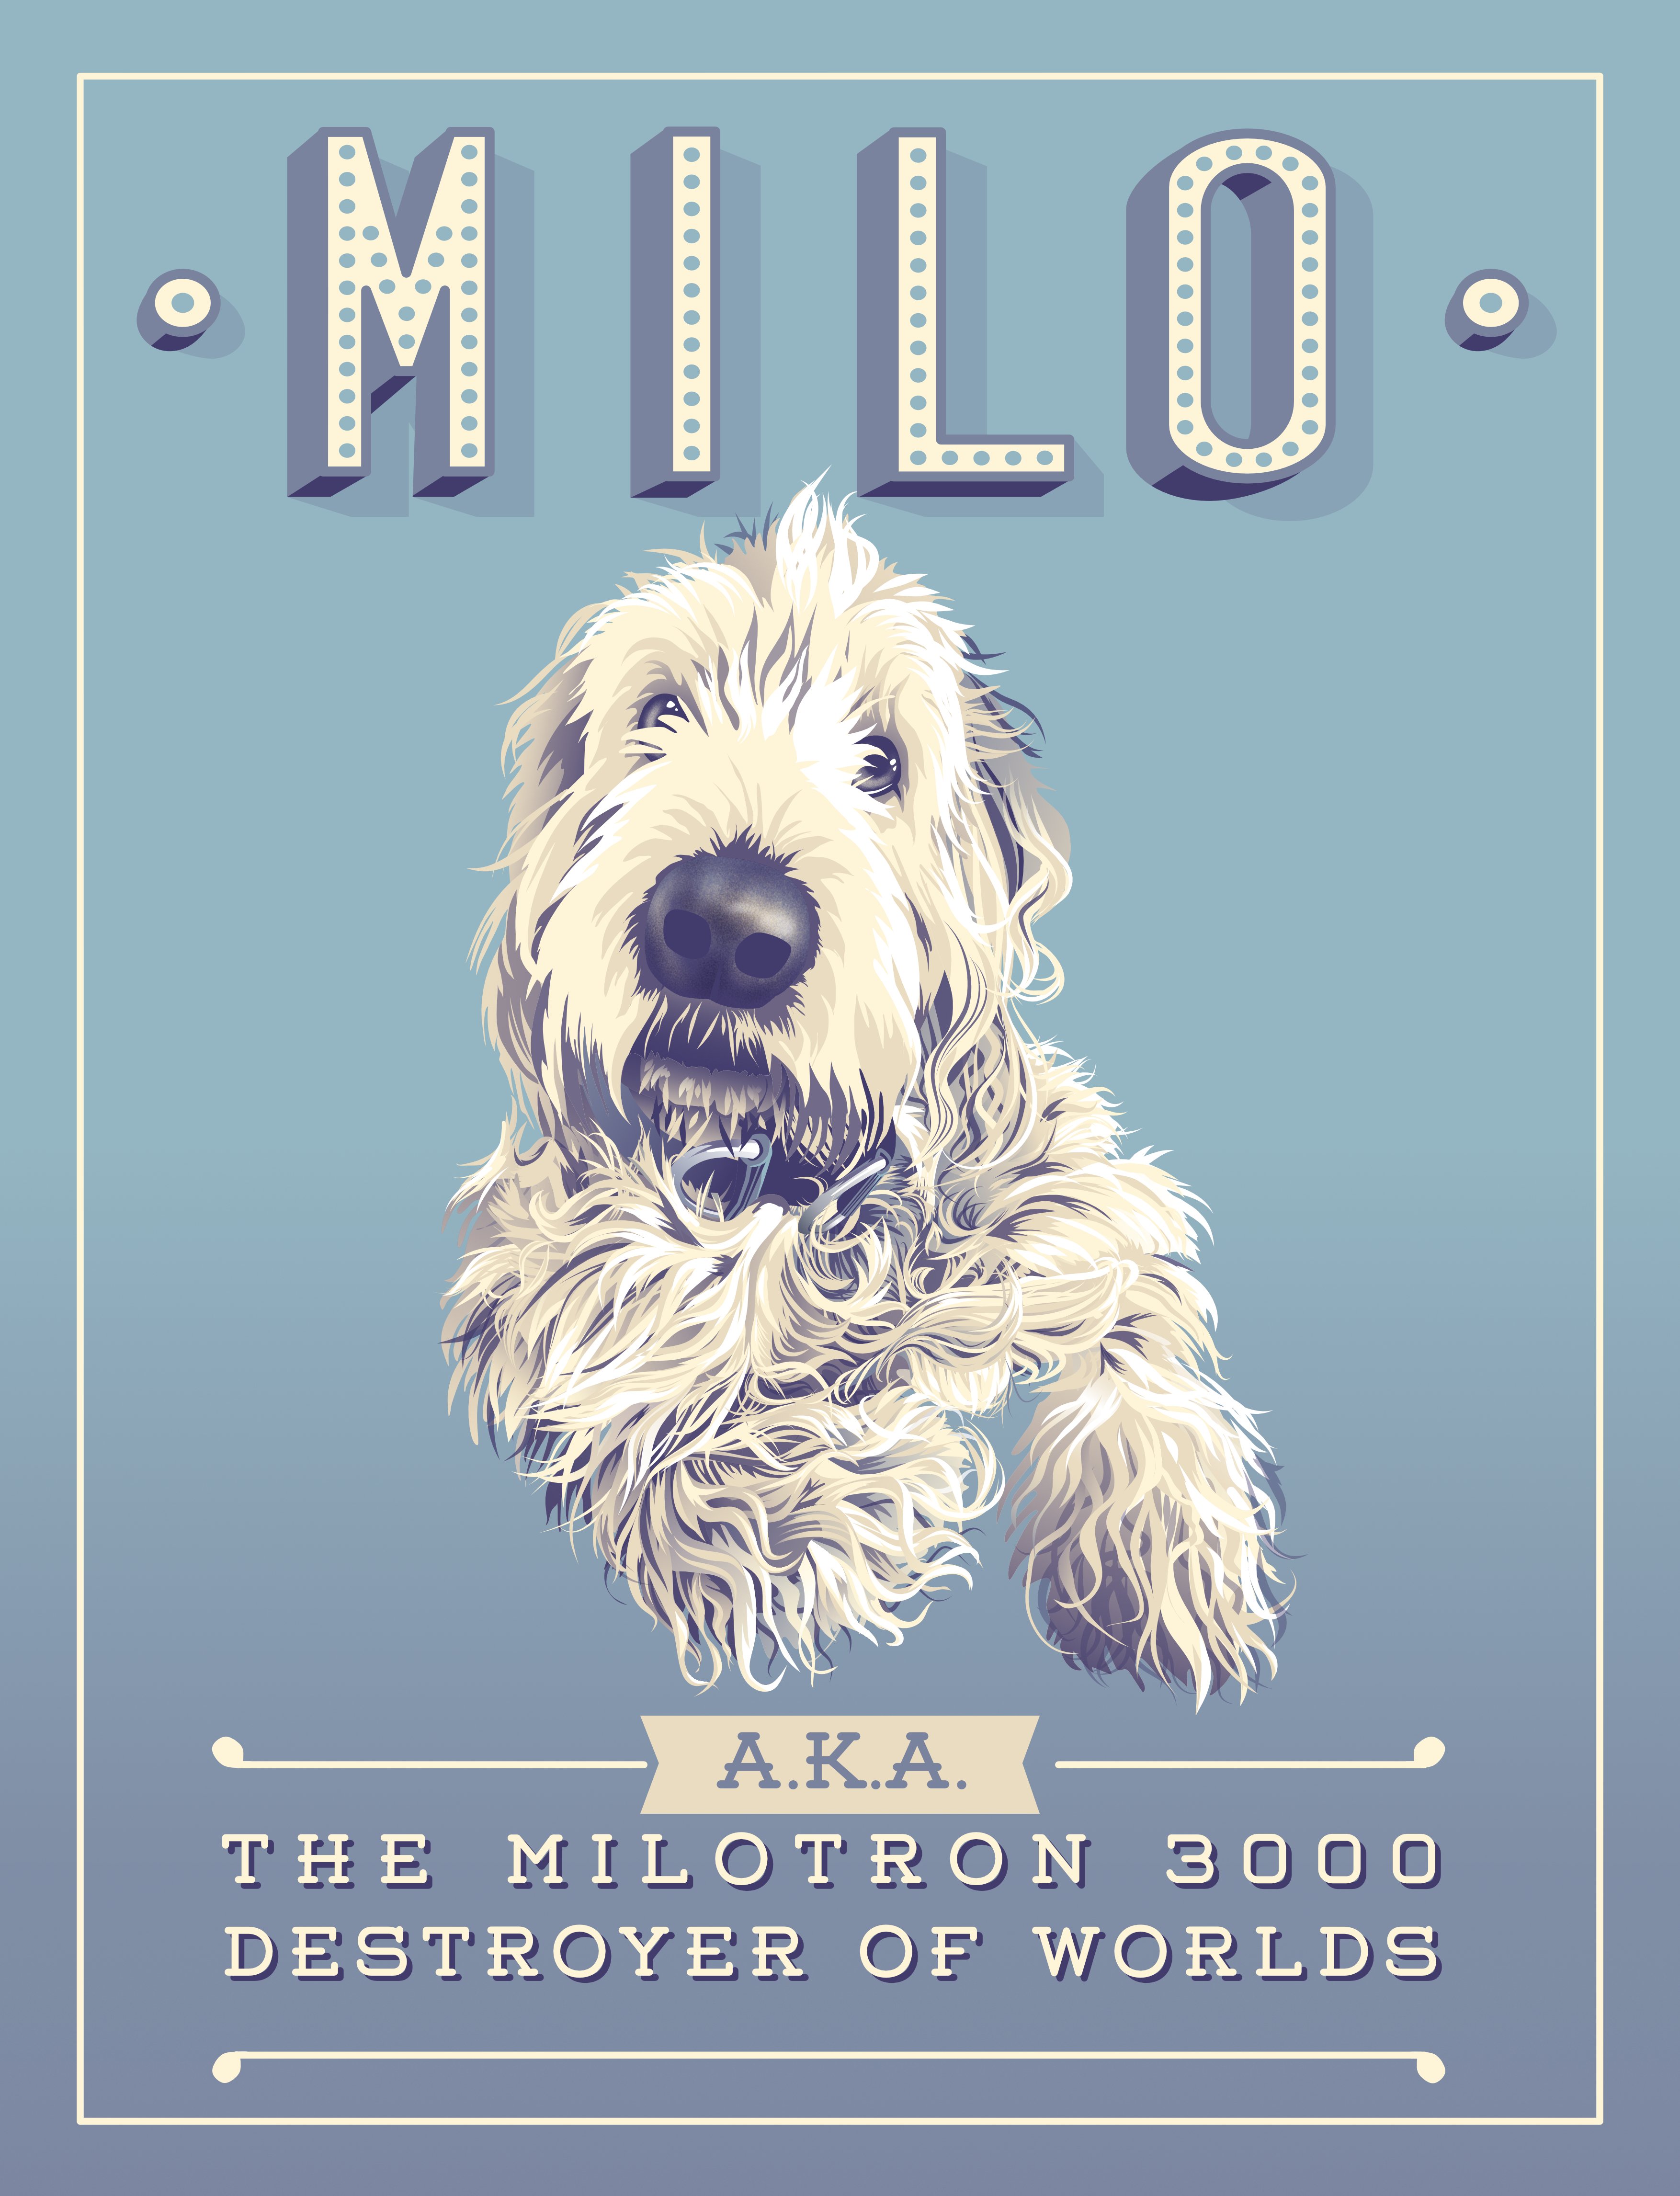
Portrait of my magnificent hound - vintage poster style... This is my first ever post, and I’m a complete amateur, so all (constructive) comments gratefully received!

-
Drawing with AD is just pure fun!
-
 Hi, Affinity Designer is very slow on Mac OS 10.15. (I use a 2016 MacBook Pro) The launch is fast, but it takes more than one minute for the interface to display. Is this slowness specific to me? Otherwise, do you plan to release an update soon?
 -
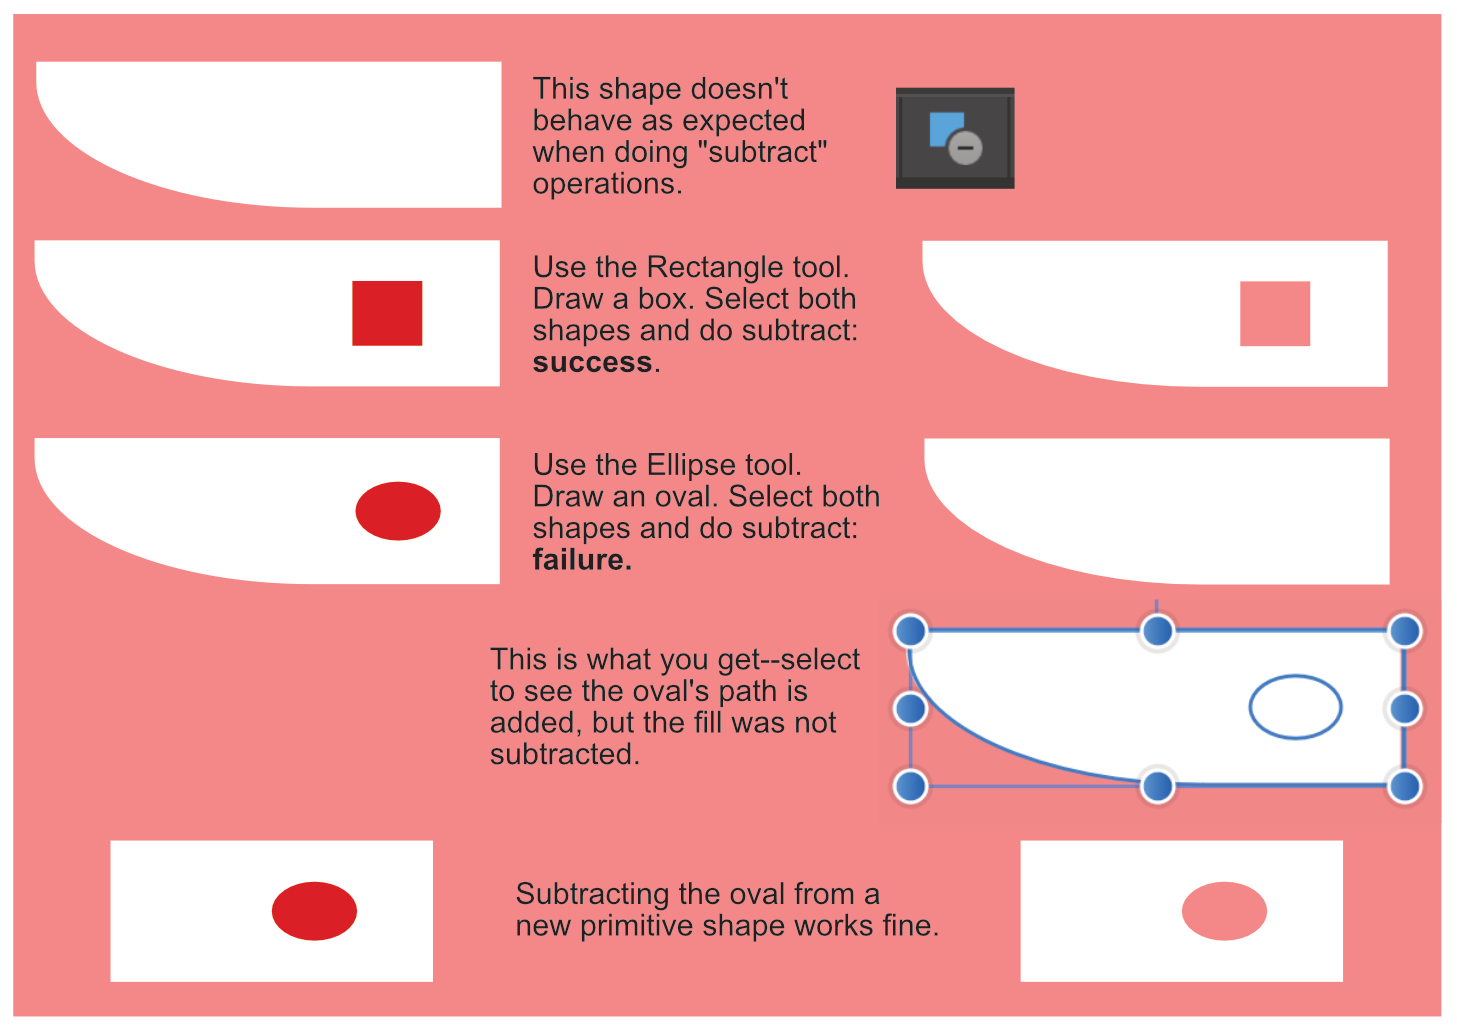
 I was trying to punch holes out of a shape, and noticed that I was able to subtract shapes made with the Rectangle tool, but not the Oval tool. The problem happens 100% of the time if I am trying to subtract from the specific shape in my sample file. (That particular base shape was the product of a random SVG download and then a handful of other binary operations.) If I draw a new primitive shape, then I can subtract ovals from it just fine. This is happening in Designer for Windows version 1.7.3.481. binary ops bug.afdesign
-
Hey there, this is the character done using affinity designer, video recorded for my youtube channel using Affinity designer on ipad, enjoy!
-
 character design 100% Vector for those that want to give it a little try, there is a Free vector brush with texture that you can download, thanks for watching
 -
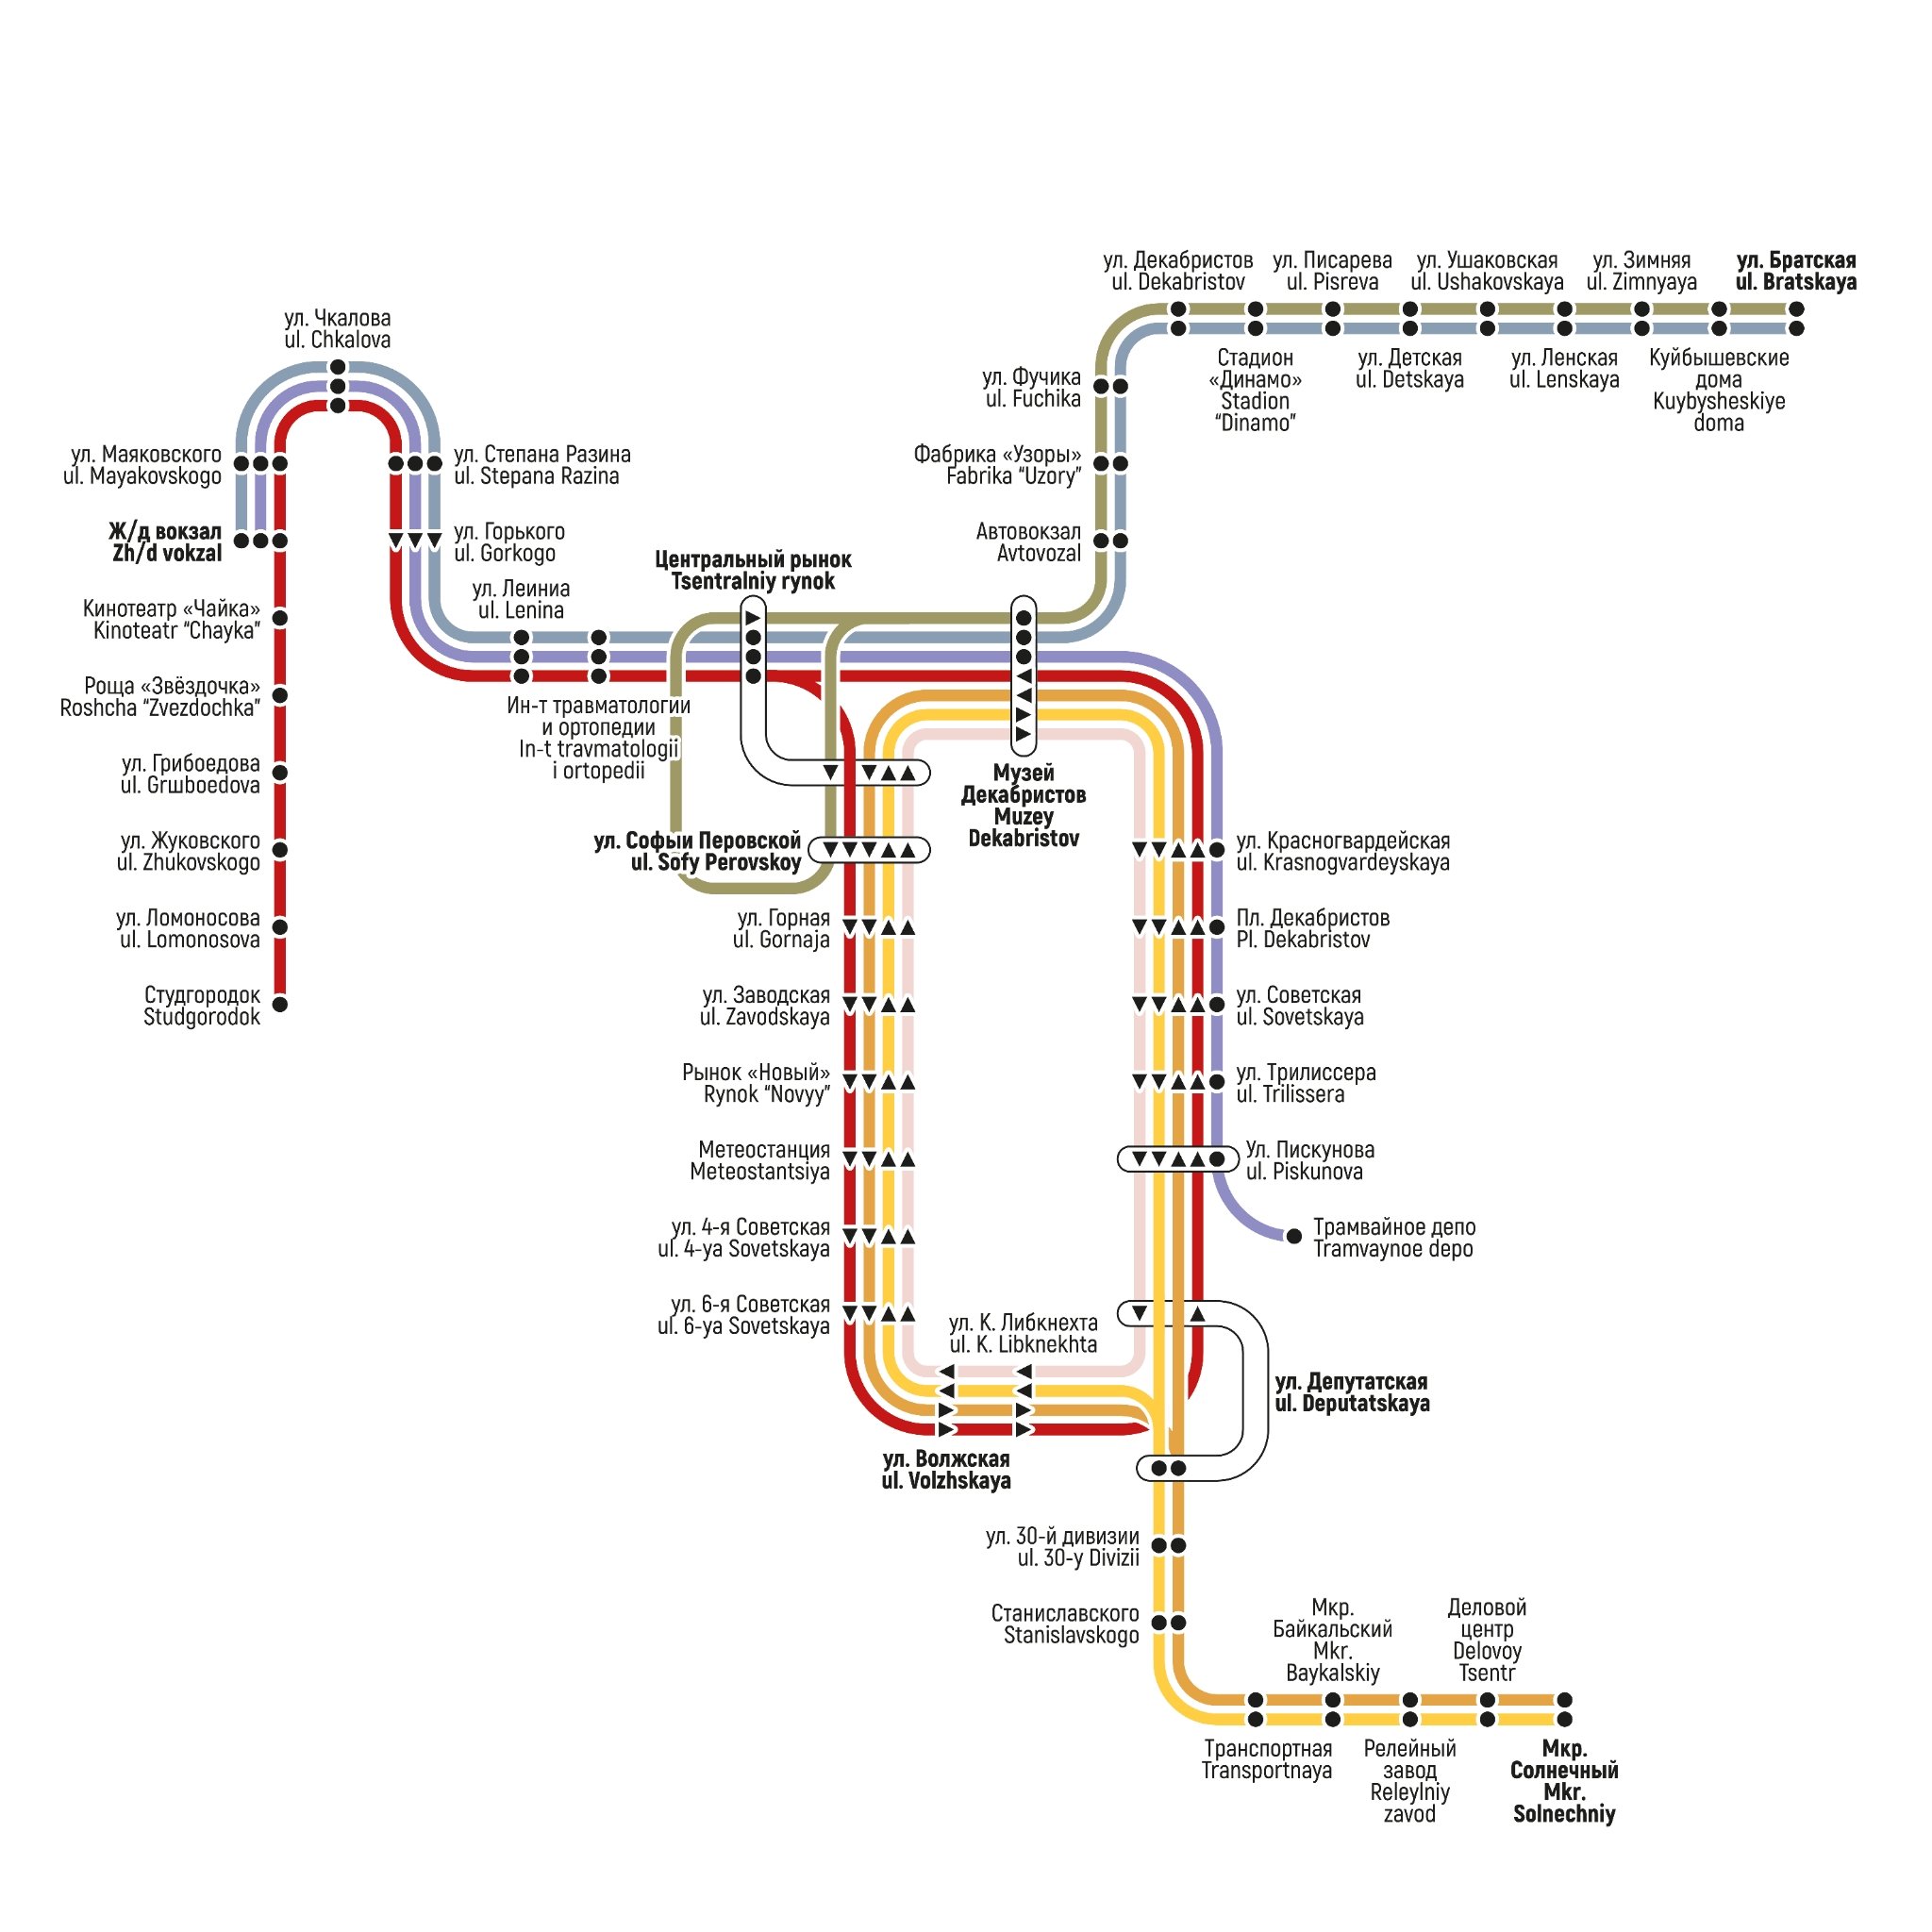
 Hey :-) This time kind of an open transit diagram design Just throw in your ideas, suggestions, corrections (transliteration)! I'll try to incorporate them as much as possible. My tiny side project of the trams in irkutsk I appreciate any feedback! Have a nice day, Chris
- 7 replies
-
- 2
-

-
- work in progress
- irkutsk
- (and 1 more)
-
I am looking for designers who use either Affinity Designer or Photo to learn and create with in the Washington, DC. This may not be the best platform to say this, but wanted to start somewhere. Hope to hear from someone soon.
-

Scaling to a reference object?
jimklo posted a topic in Pre-V2 Archive of Affinity on iPad Questions
I have a scanned image that I’m trying to edit that I’ll eventually export for cutting on a Cricut. Trying to figure out if Photo (or Design) on iPad has the ability to scale/resize a layer or object based upon a reference object? eg: I’ve got a photo of ruler that I imported, I now want to scale and deskew the photo so the objects in the image are actual size and proportionally correct. For scaling, I could create a 1” square and then try to scale the imported image to align with the 1” square, but this is complicated as there doesn’t seem to be a way to designate an arbitrary point as the anchor point for the scale operation. Is there a simpler way? I’m used to this sort of technique in CAD (And even Photoshop) where you select an object, define an anchor point, a reference point, and then the third point moves the reference point to the new location scaling the whole object proportionally. Similarly I would also need to deskew the image (remove any keystone effects from perspectives) but can’t seem to figure out how this is done within Affinity. I don’t see how I would do arbitrary transform of an image at all (other than in the limited transform studio on the right side). Is there a way to do this or something similar in Affinity? -
A post on Facebook prompted me to make this image. Tutorialmeister Carl Surry posted a link to this tutorial by Michael Wilson: Here's my effort: and the figure I started off in AP with a couple of stock images, the background by J C Gellidon from Unsplash and the figure by Radu Florin from Pexels. The 'portal' began as an ellipse; actually a circle which I deformed with the Perspective Tool to make it appear parallel to the shop fronts. The flare is a trapezium rotated onto its side. Some clipping, masking, gradients, transparency (in Designer) produced the lighting effect, and I added a pixel layer to paint a few highlights on the right-hand side. Here's the aphoto file: AlleyPortal-000bSMALL.afphoto
-
- 1
-
-
- stock photo
- composite
- (and 2 more)
-
 In this tutorial, I'm going to show you an easy way to draw Tech-circles, you can then use them to create your own HUD or they can be use in any Si-Fi composition. I hope you enjoy it!!
 -
Cool, I created a doc frame with a leaf theme to it. Leaf Frame.afdesign
-
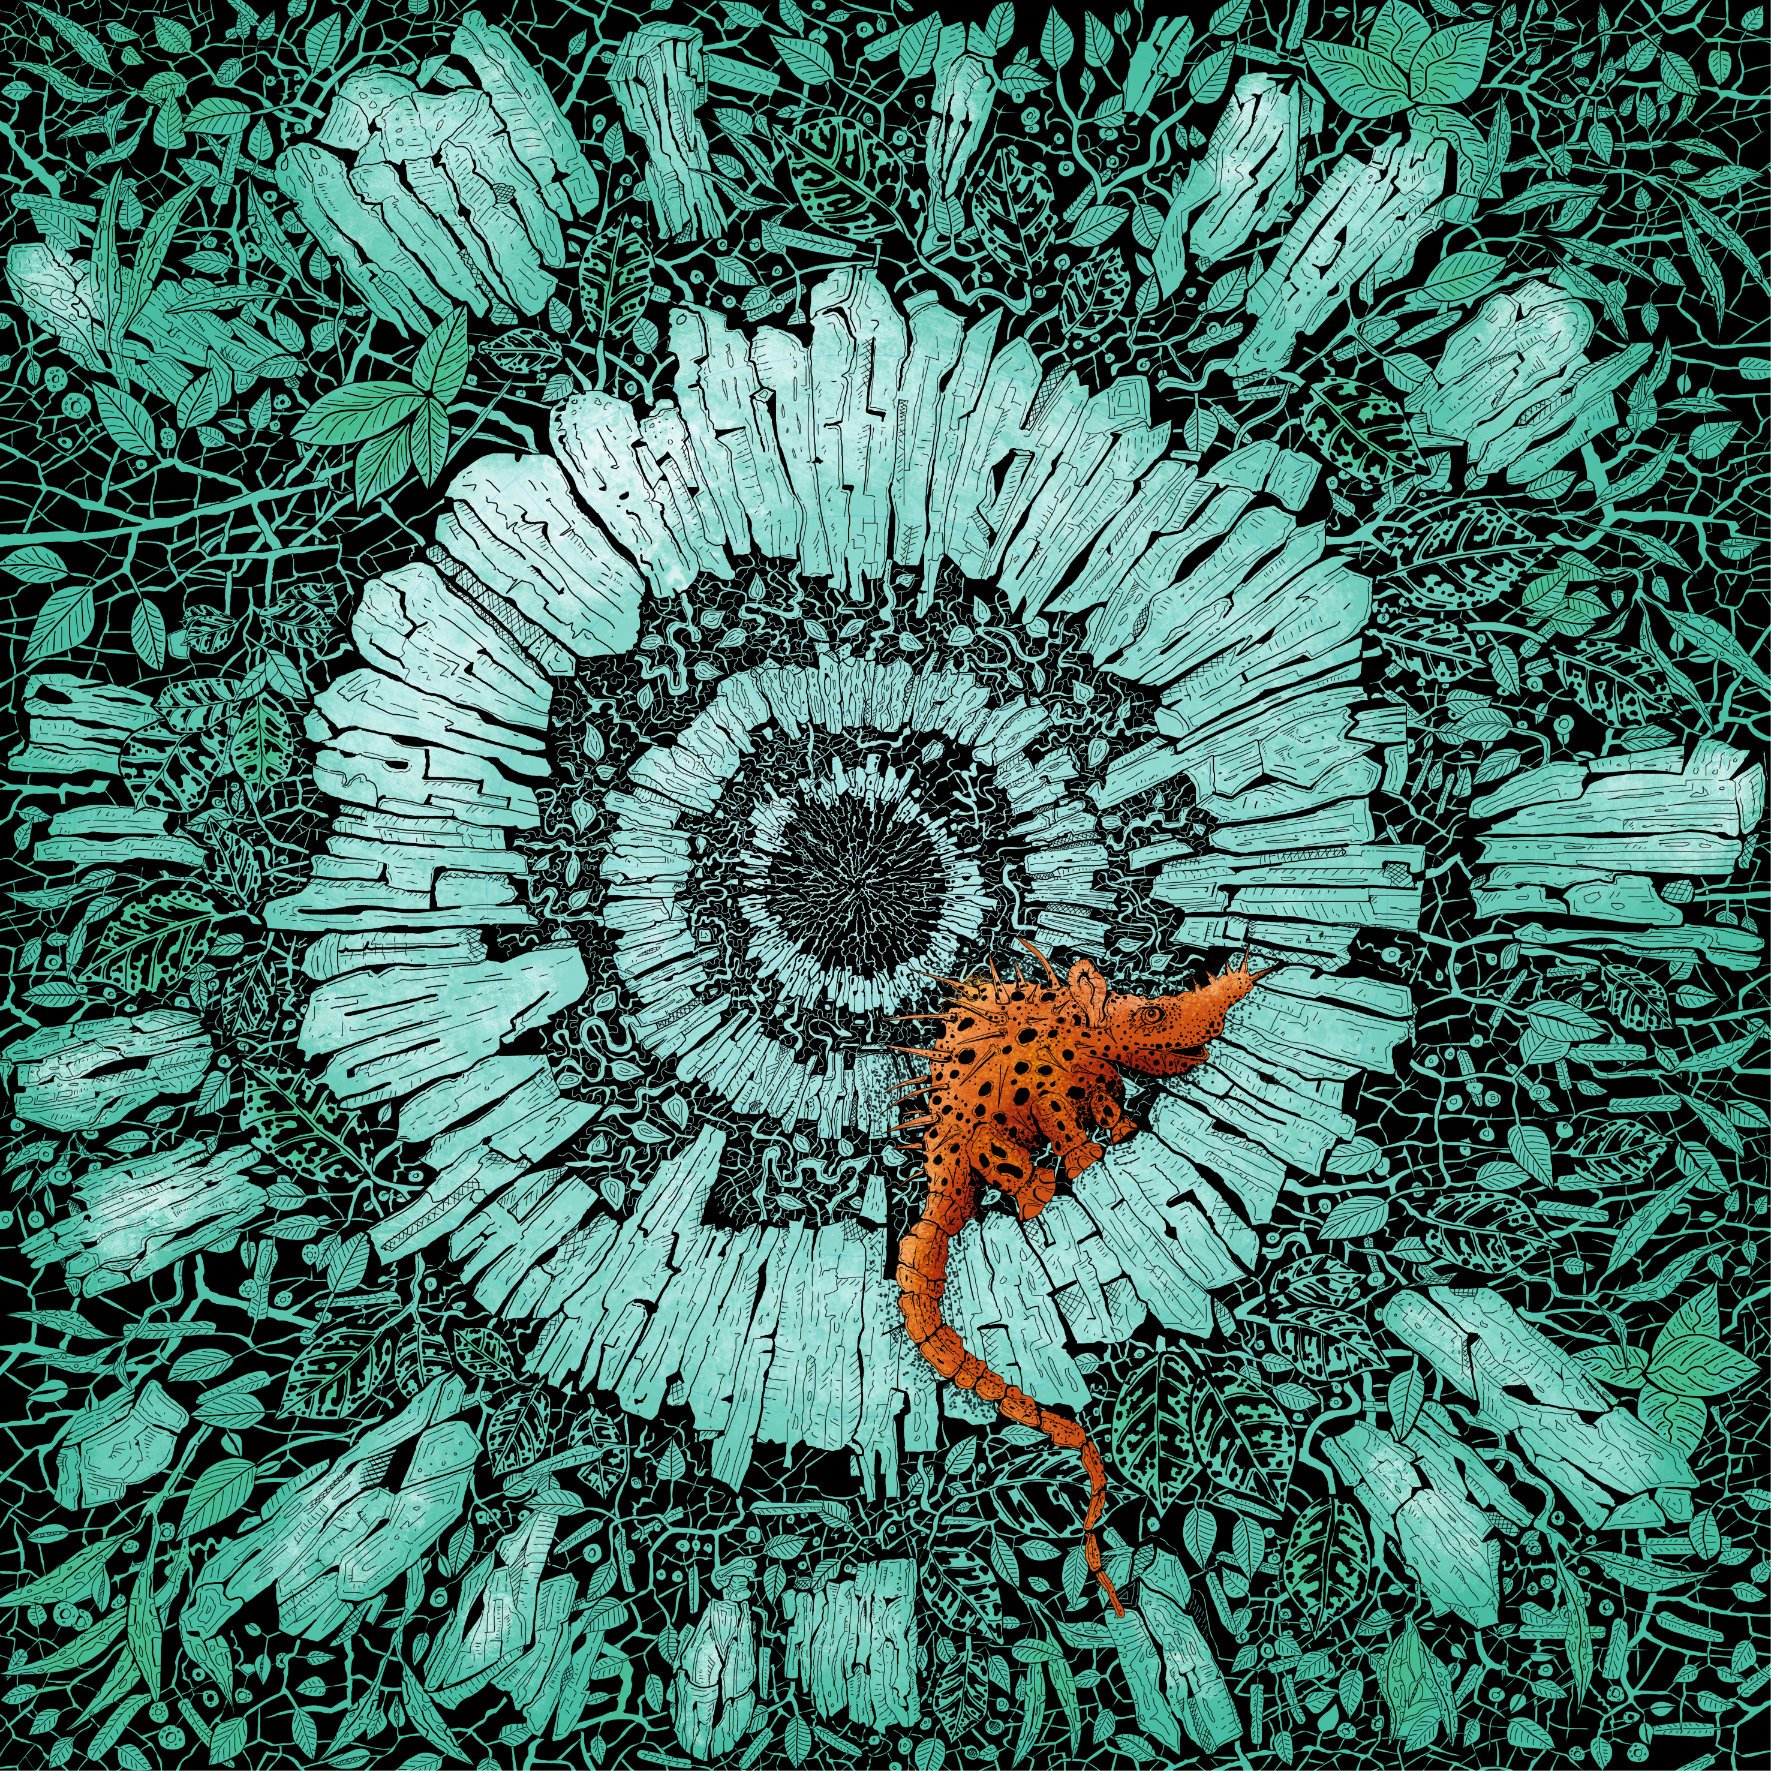
Started work on Inktober 2019 Challenge.. Day 01 Prompt:Ring Completed in Affinity Designer Original Size 500mm x 500mm 300 dpi Upload size 1771 x 1771 HQ and jpg
- 33 replies
-
- 29
-
-
Hello designers, it's halloween month so it seems the ghosts are cooking something:
-
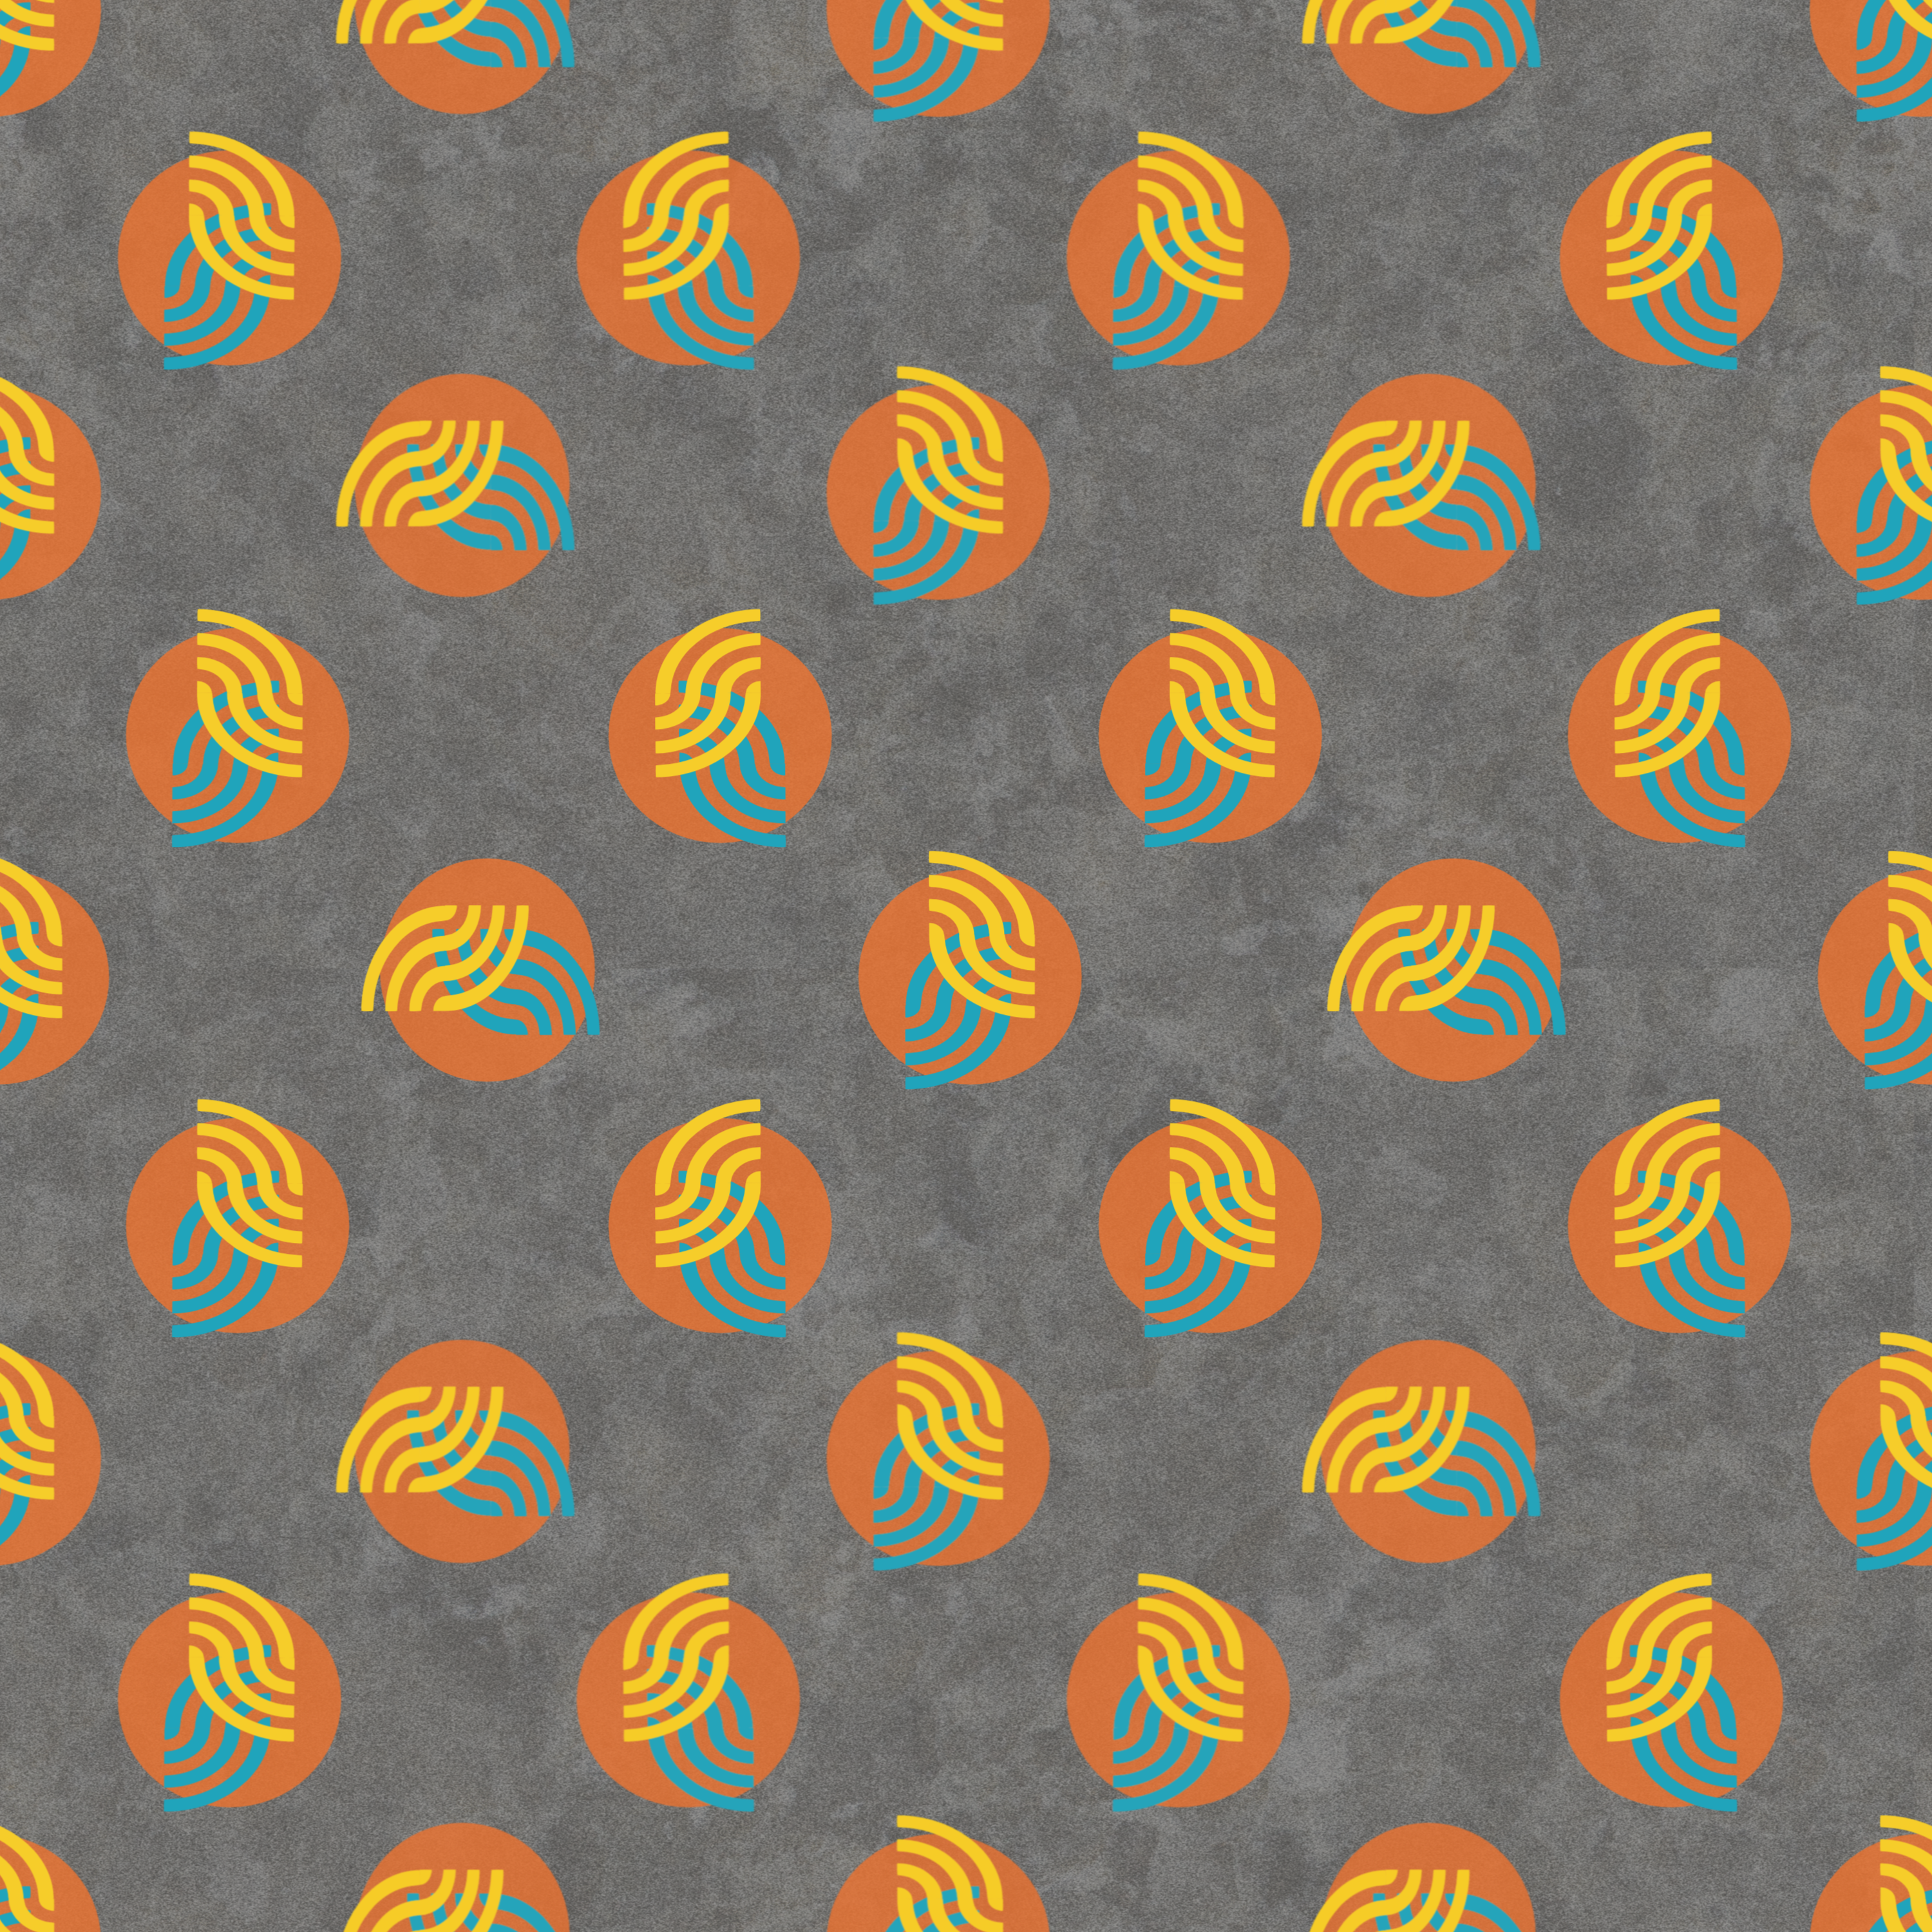
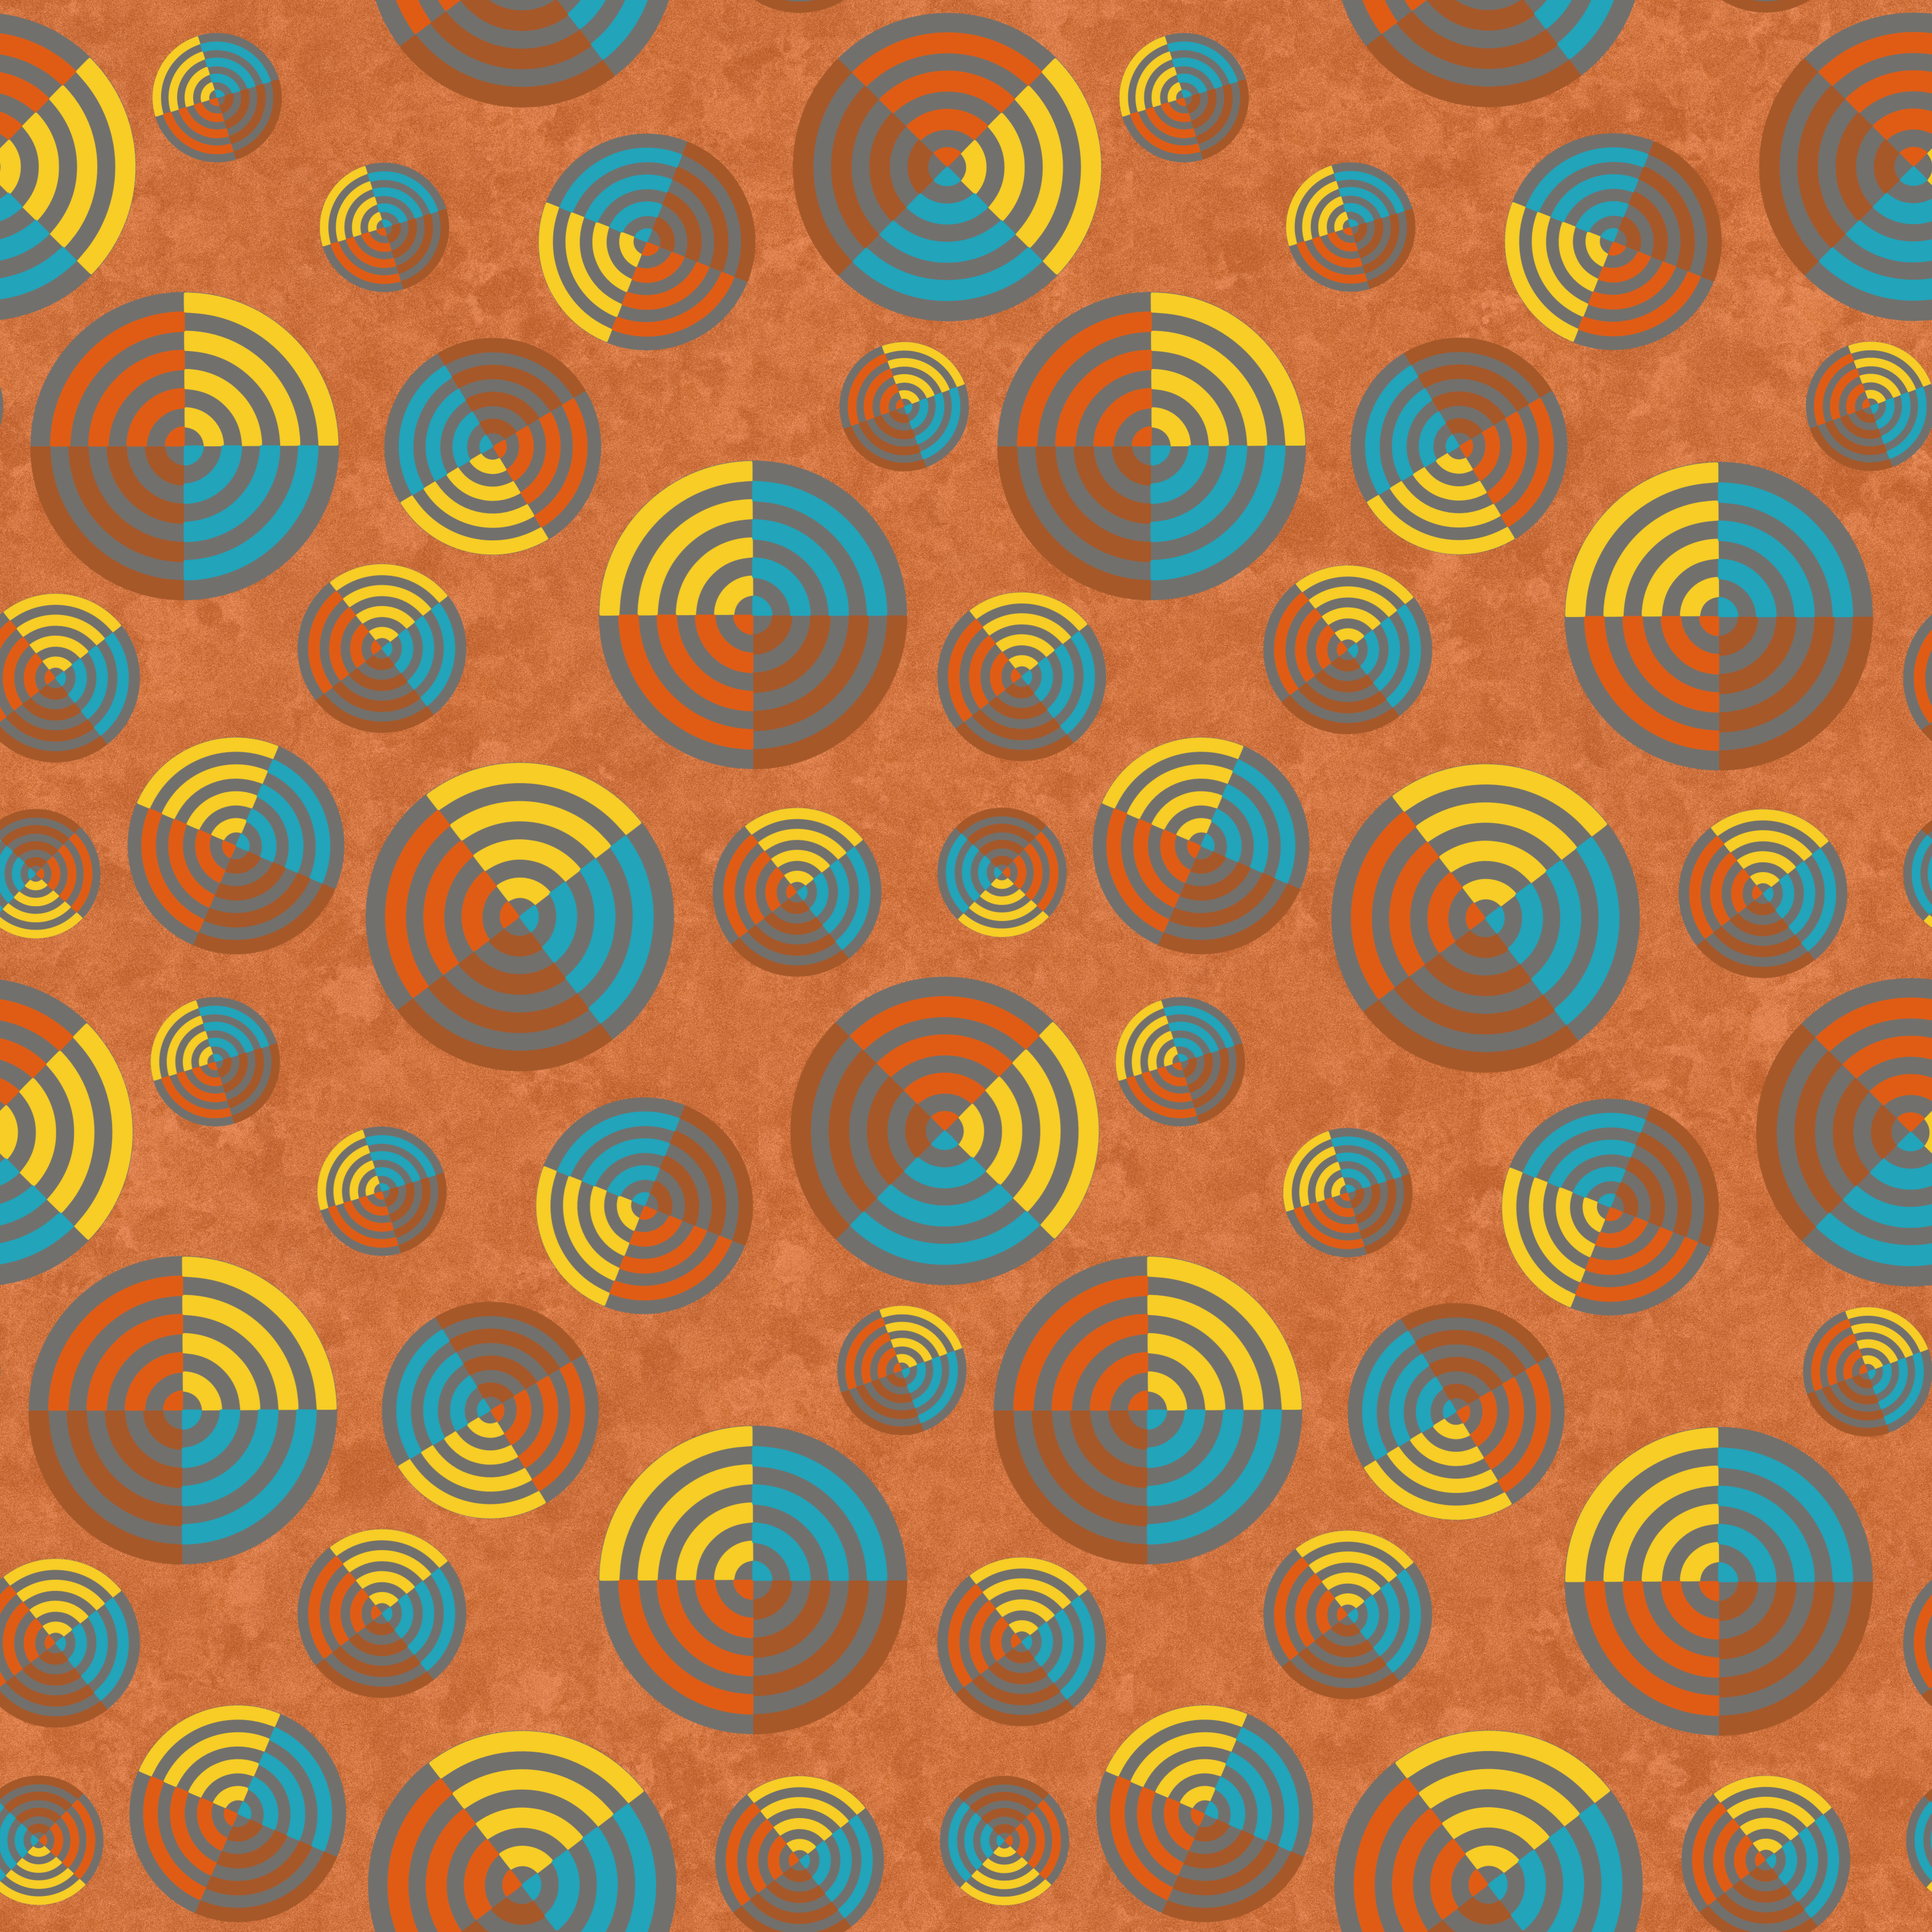
 As a surface pattern designer I have historically used Adobe photoshop to create stand-alone repeating patterns with or without backgrounds that are also designed to incorporate texture and/or pattern. The resulting designs were saved as "defined patterns" and applied to artboards of any size using the following steps: edit——define pattern—-ok Open new document e.g. 10,000x10,000px edit—-fill—-contents (select pattern option as opposed to foreground or background fill) ——select required pattern from a list—-ok While I am very happy at the switch to Affinity I am struggling to figure out how to visually proof my designs this way (which are often designed using 2000px square artboards to create the repeat) when I need to be able to show that the repeat is working and simultaneously put the size it was created at into perspective. Also, some websites require large areas of repeat (up to 15,000px square) to enable on demand printing of fabric in the specific design. I have attached a couple of examples below to demonstrate the kind of work that I am discussing here. As a designer who is relatively new to digital systems I am focused on the creative aspect of my work and not especially tech savvy, so would appreciate an “idiots guide” approach to this if anyone has the time to respond. Any support with this would be much appreciated. Kind regards
- 9 replies
-
- 1
-
-
- patterns
- seamless repeat
- (and 3 more)
-
 Please add a note "(this will stop switching to previously used tool after pressing a hotkey twice)" or something along those lines to the option in preferences called "Use shift key to cycle tool groups" It's not clear at all, I was actively looking for this solution (turning off the double hotkey press), I was staring at this option and I just didn't think it would have anything to do with it. It just isn't something predictable that when we toggle an option with a specified effect that it has a hidden disabling effect.
 -
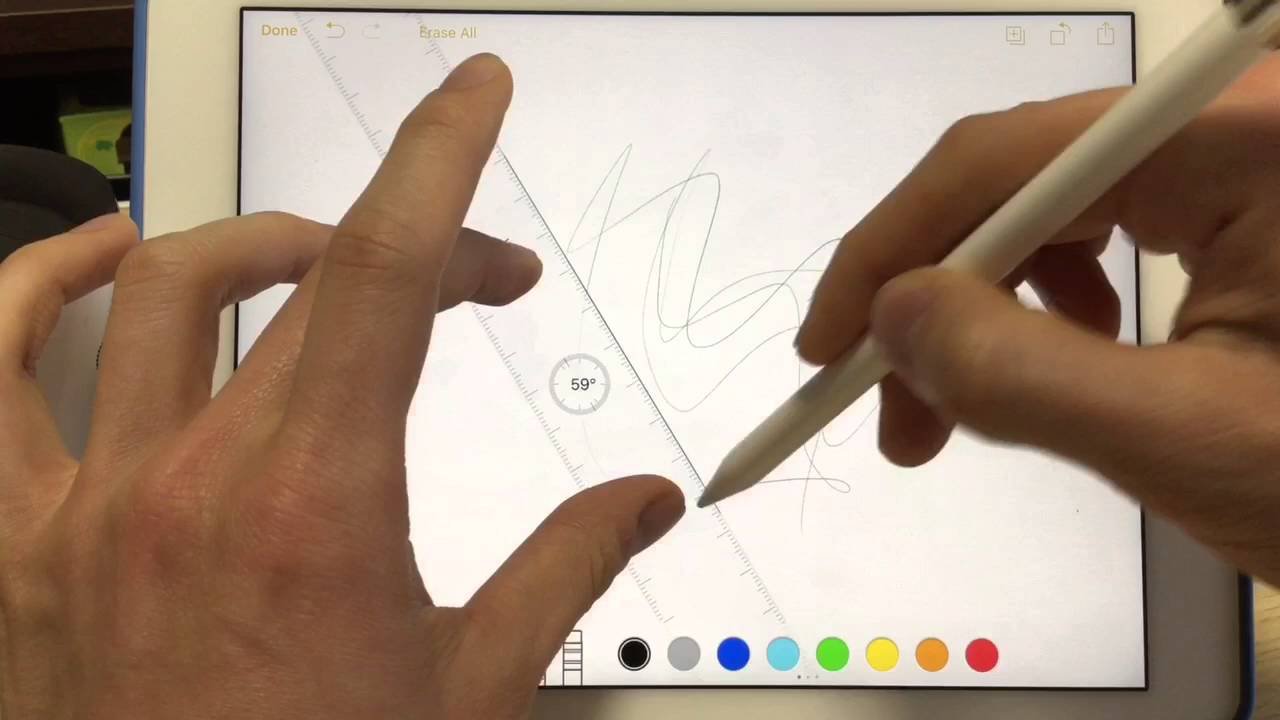
 Please add a ruler feature for Affinity Designer. Like Apples Notes app.
- 2 replies
-
- 2
-
-
- ruler
- affinity designer
- (and 3 more)
-
My latest work is Affinity Designer and Procreate. I hope you will like it. If you want to watch the entire production process, you can visit my youtube channel.
-
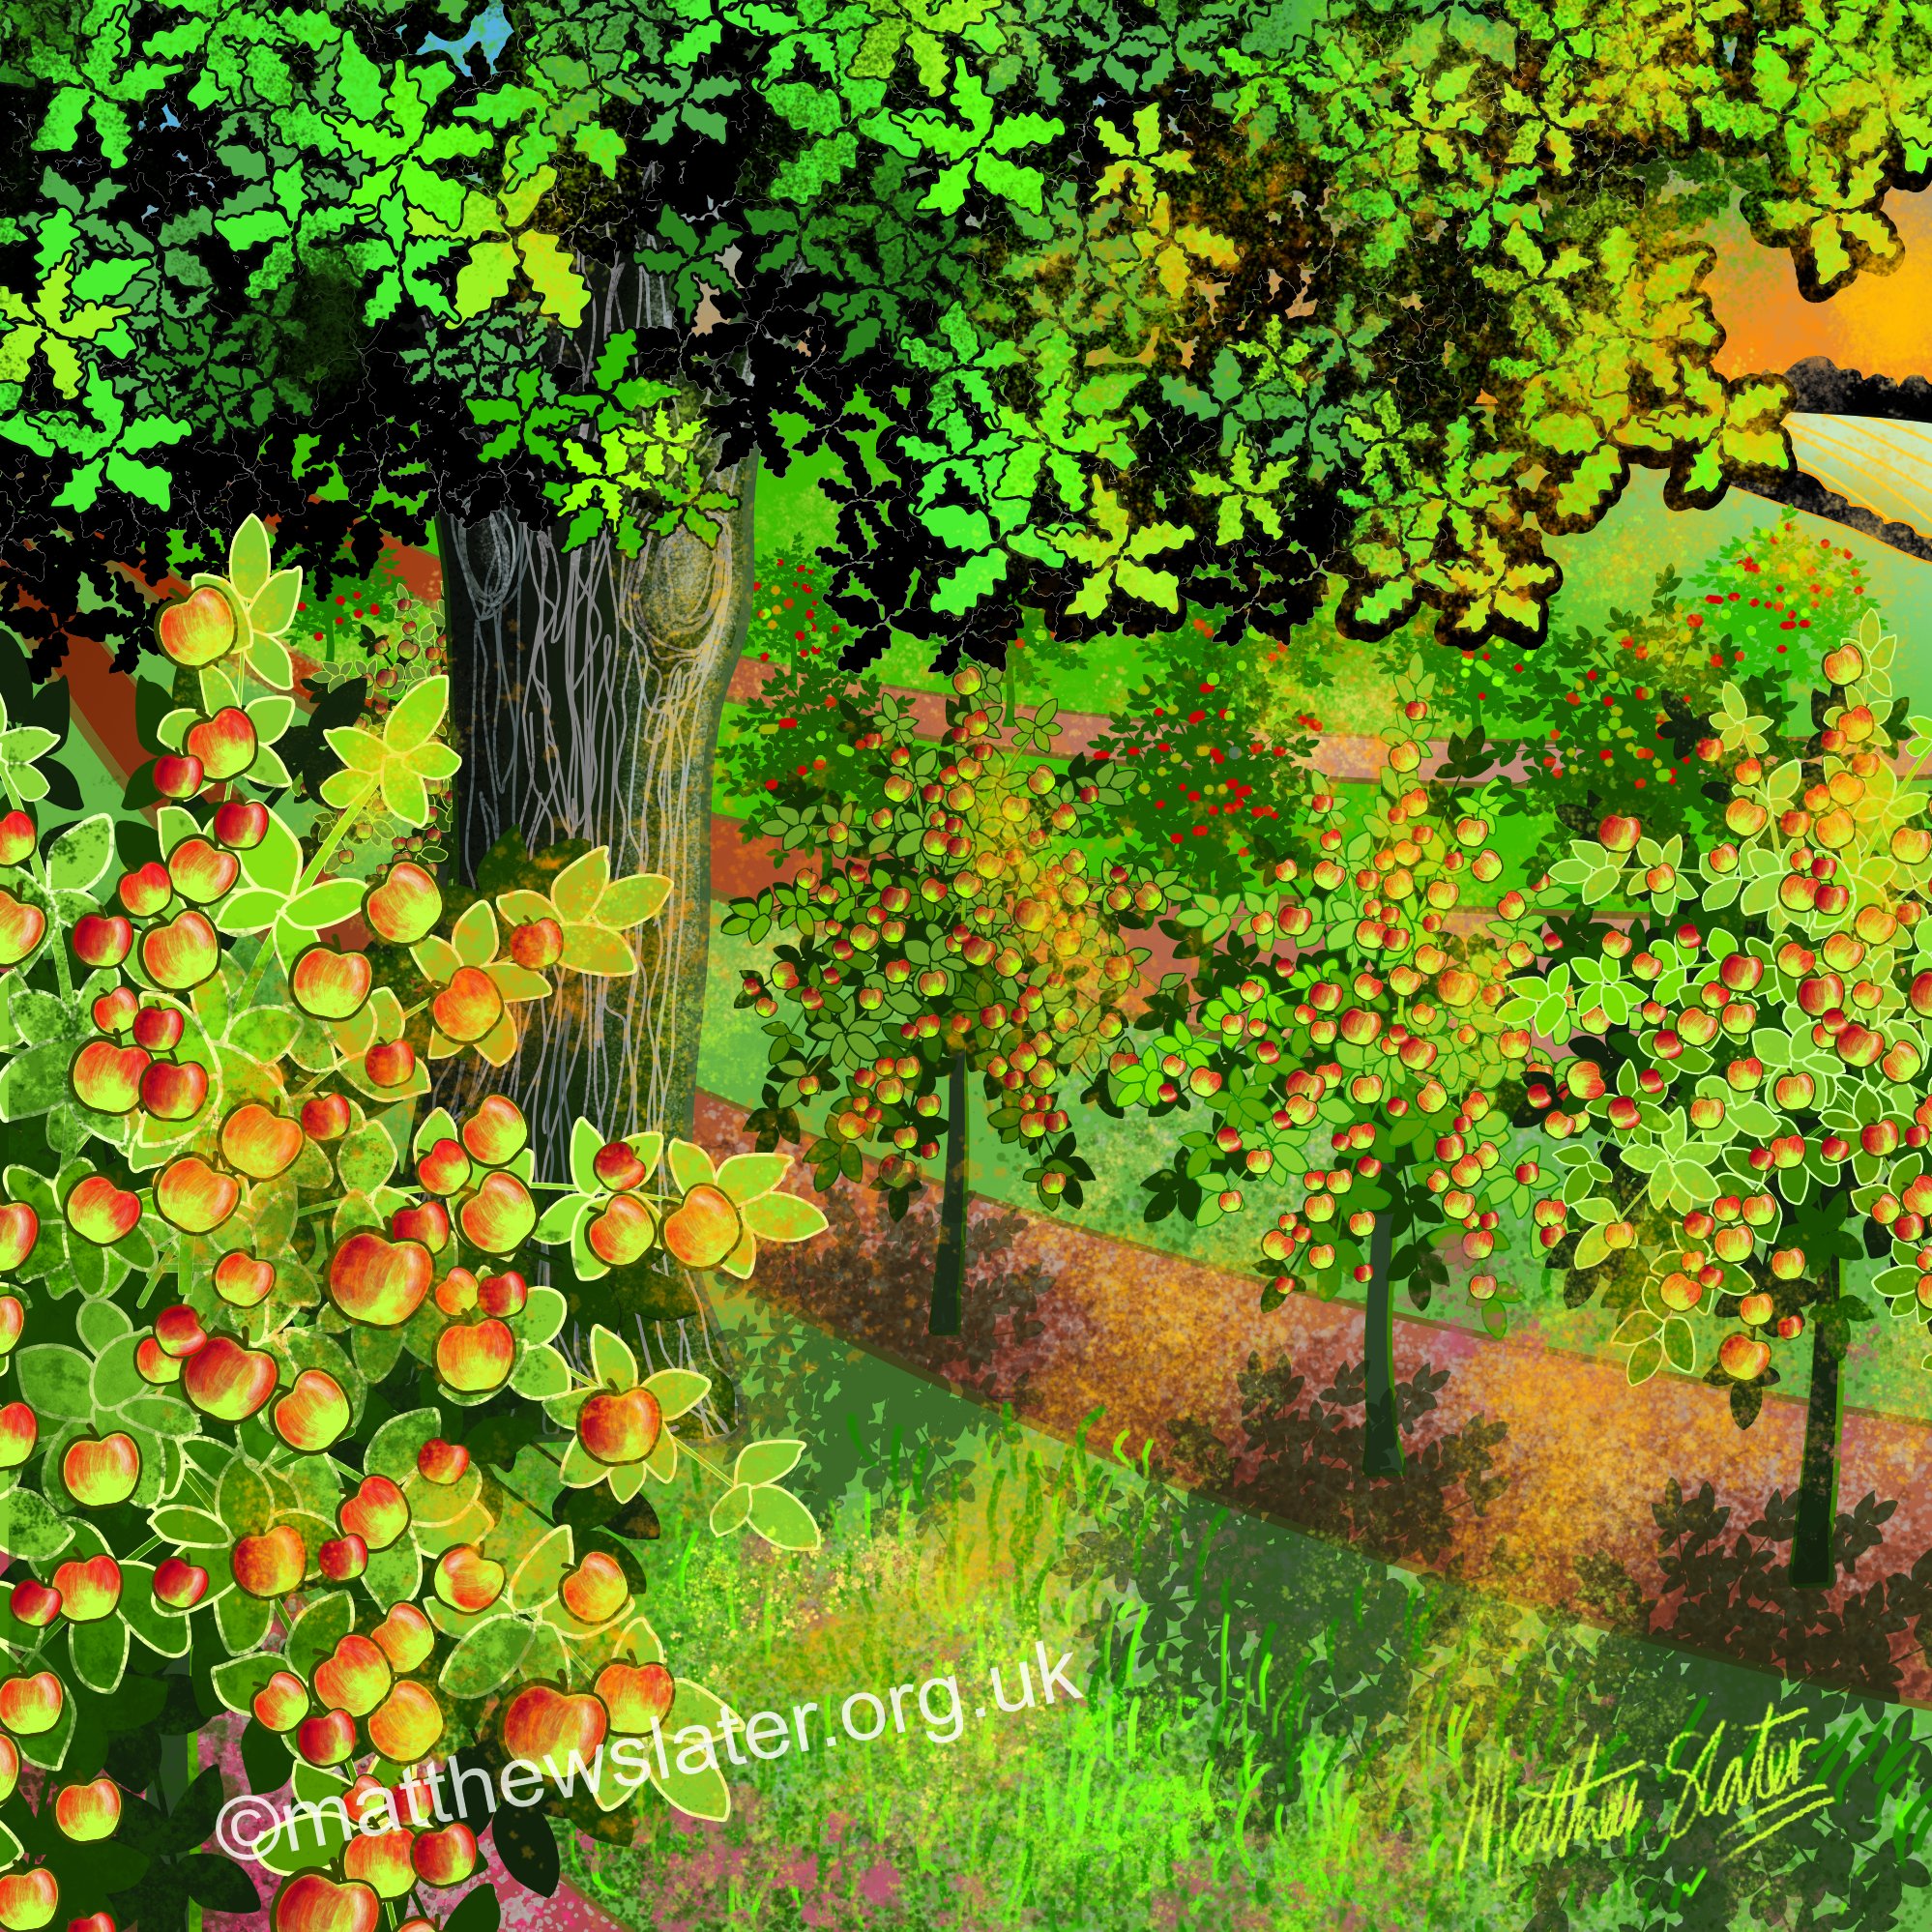
This image of an oak tree amongst cider apple trees at sunset was used to illustrate some writing at matthewslater.org.uk. It worked quite well, though I had no idea how the finished image would look. My iPad struggled hugely with the complexity of the trees and I had to expand and merge elements to reduce the number of paths and points. In the end it still became painfully slow to edit which was a pity as I could have tightened it up more. I tend to work in cmyk so this might look a little odd when posted as rgb.
-
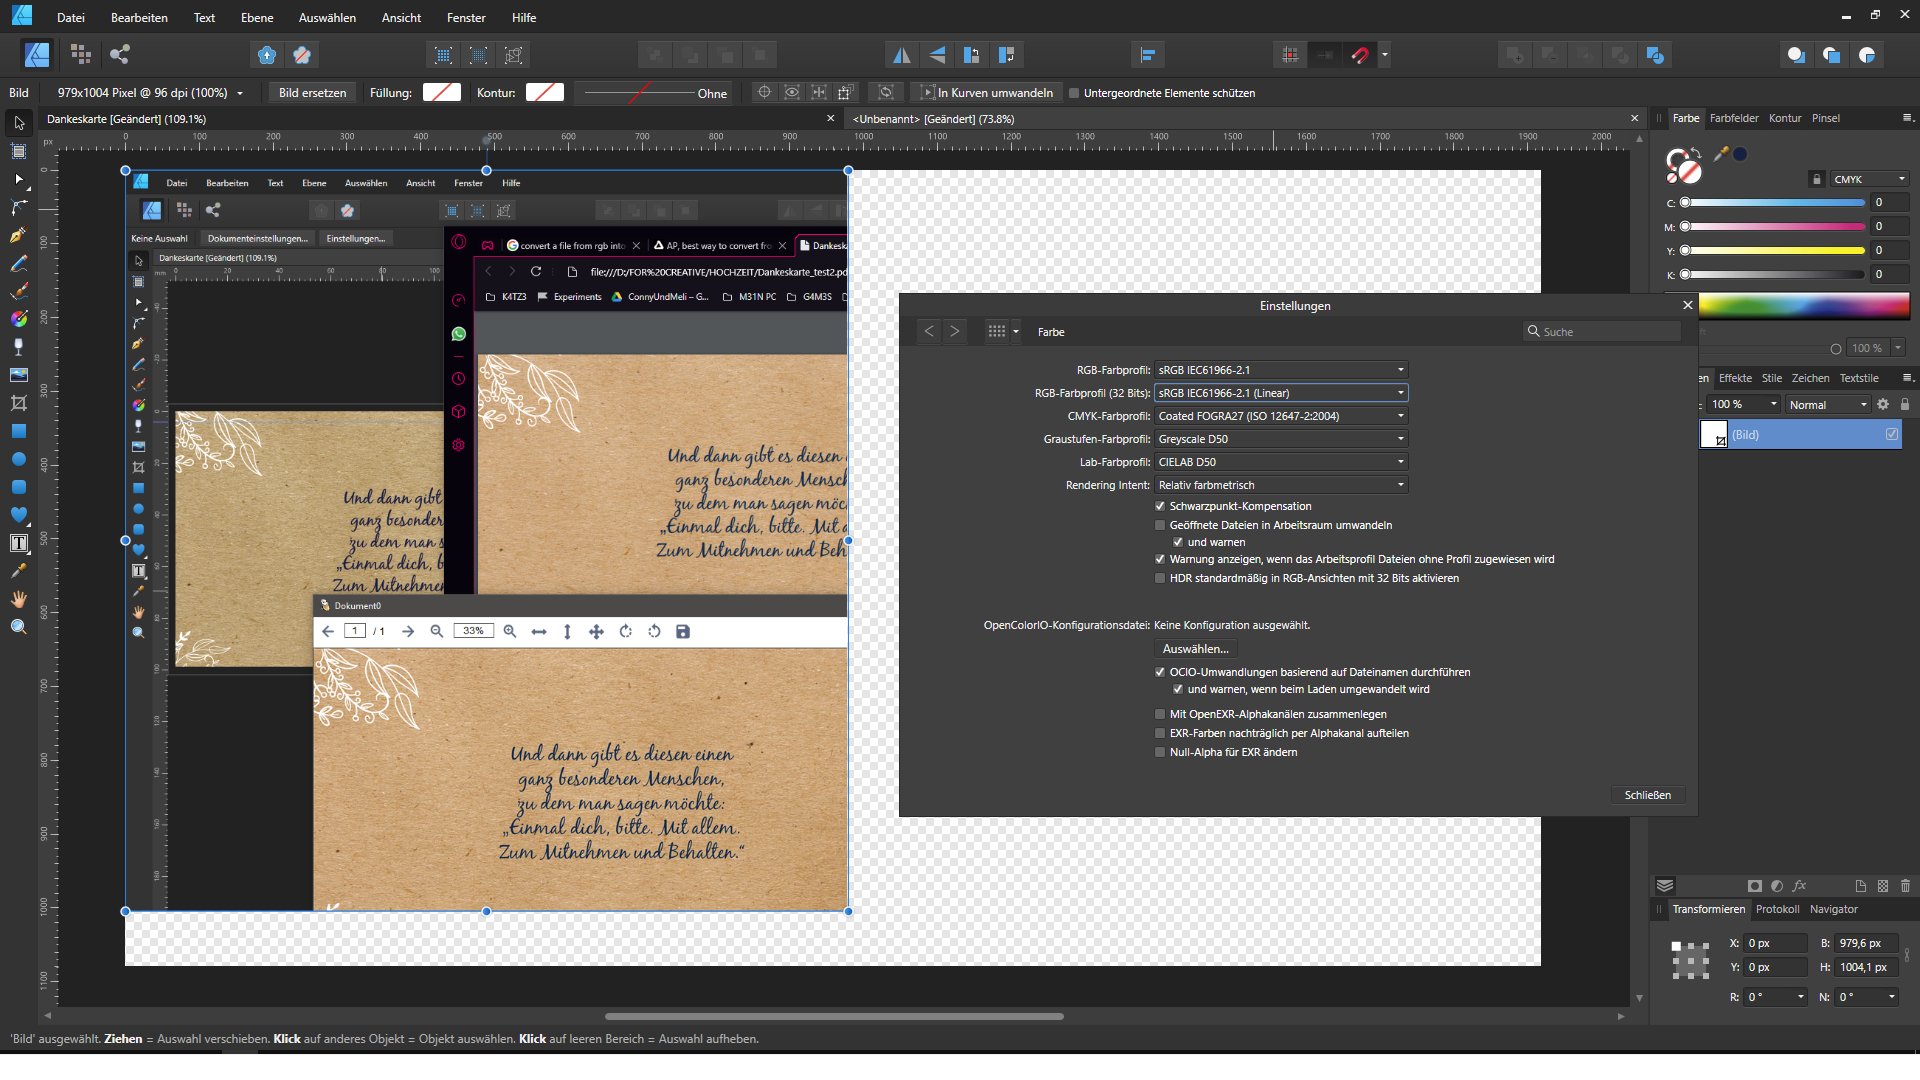
 Greetings, and good evening ... after searching for about four hours now for a solution for my problem ... I've come here, really hpoing, someone can help me with this. So ... I made a flyer for print, with all three programs, Affinity Photo (for picture editing and converting them into CYMK, after the original try to export the PDF directly from RGB into a CMYK file), Affinity Designer (first try to design the flyer, with the result of a "red tinted" pdf) and Affinity Publisher (same result). I can't seem to get the right result after exporting the file into a printable pdf. Always got that red tint, and frankly, after trying for about four hours, I'm done ... with this *PEEP* programs. I searched the internet for a solution of that problem. The screenshot shows the difference between the look of the file in Affinity Designer and in browser or pdf viewer. The file looks more "yellowish" in AD. I've also opened the settings, with which I run the program. As I wrote, I'm really done with this ... *peep* ... really. I've had the same problems when exporting to jpg files ore other files as well. Colours seem way off sometimes and I've read every topic about this as I could. There seem to be others, with the same problems. Maybe someone out there knows whats off? Best Regards Mel
-
Hi Everybody ! this is my first post in this forum, can you tell me what you think about this work ?
-
My new series is on the way, I am trying sci-fi style illustration in this series. October is little bit busy. So sad.
-
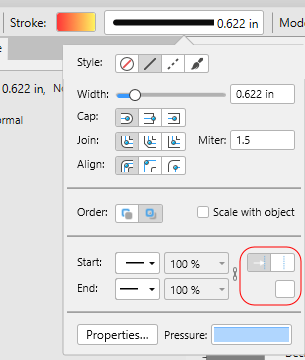
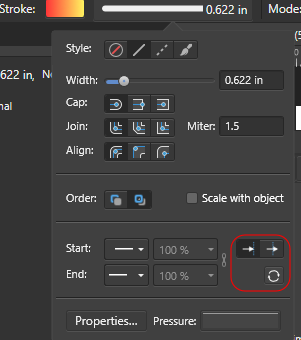
 When setting Stroke options, the dialog has a contrast problem for the arrowhead options. They're impossible to see in the Light UI, and although they're better in the Dark UI they should still be improved. Light UI: The rightmost and bottom arrowhead options are not visible: Dark UI: Though they're visible, the vertical lines in the left- and rightmost options are too faint: