Mark Daniel
-
Posts
68 -
Joined
-
Last visited
6 Followers


About Mark Daniel

-
 AlanPickup reacted to a post in a topic:
Switching from Single page to facing pages view
AlanPickup reacted to a post in a topic:
Switching from Single page to facing pages view
-
Mark Daniel reacted to a post in a topic:
TOC Option Request: "Include Hidden Text Objects" Toggle
-
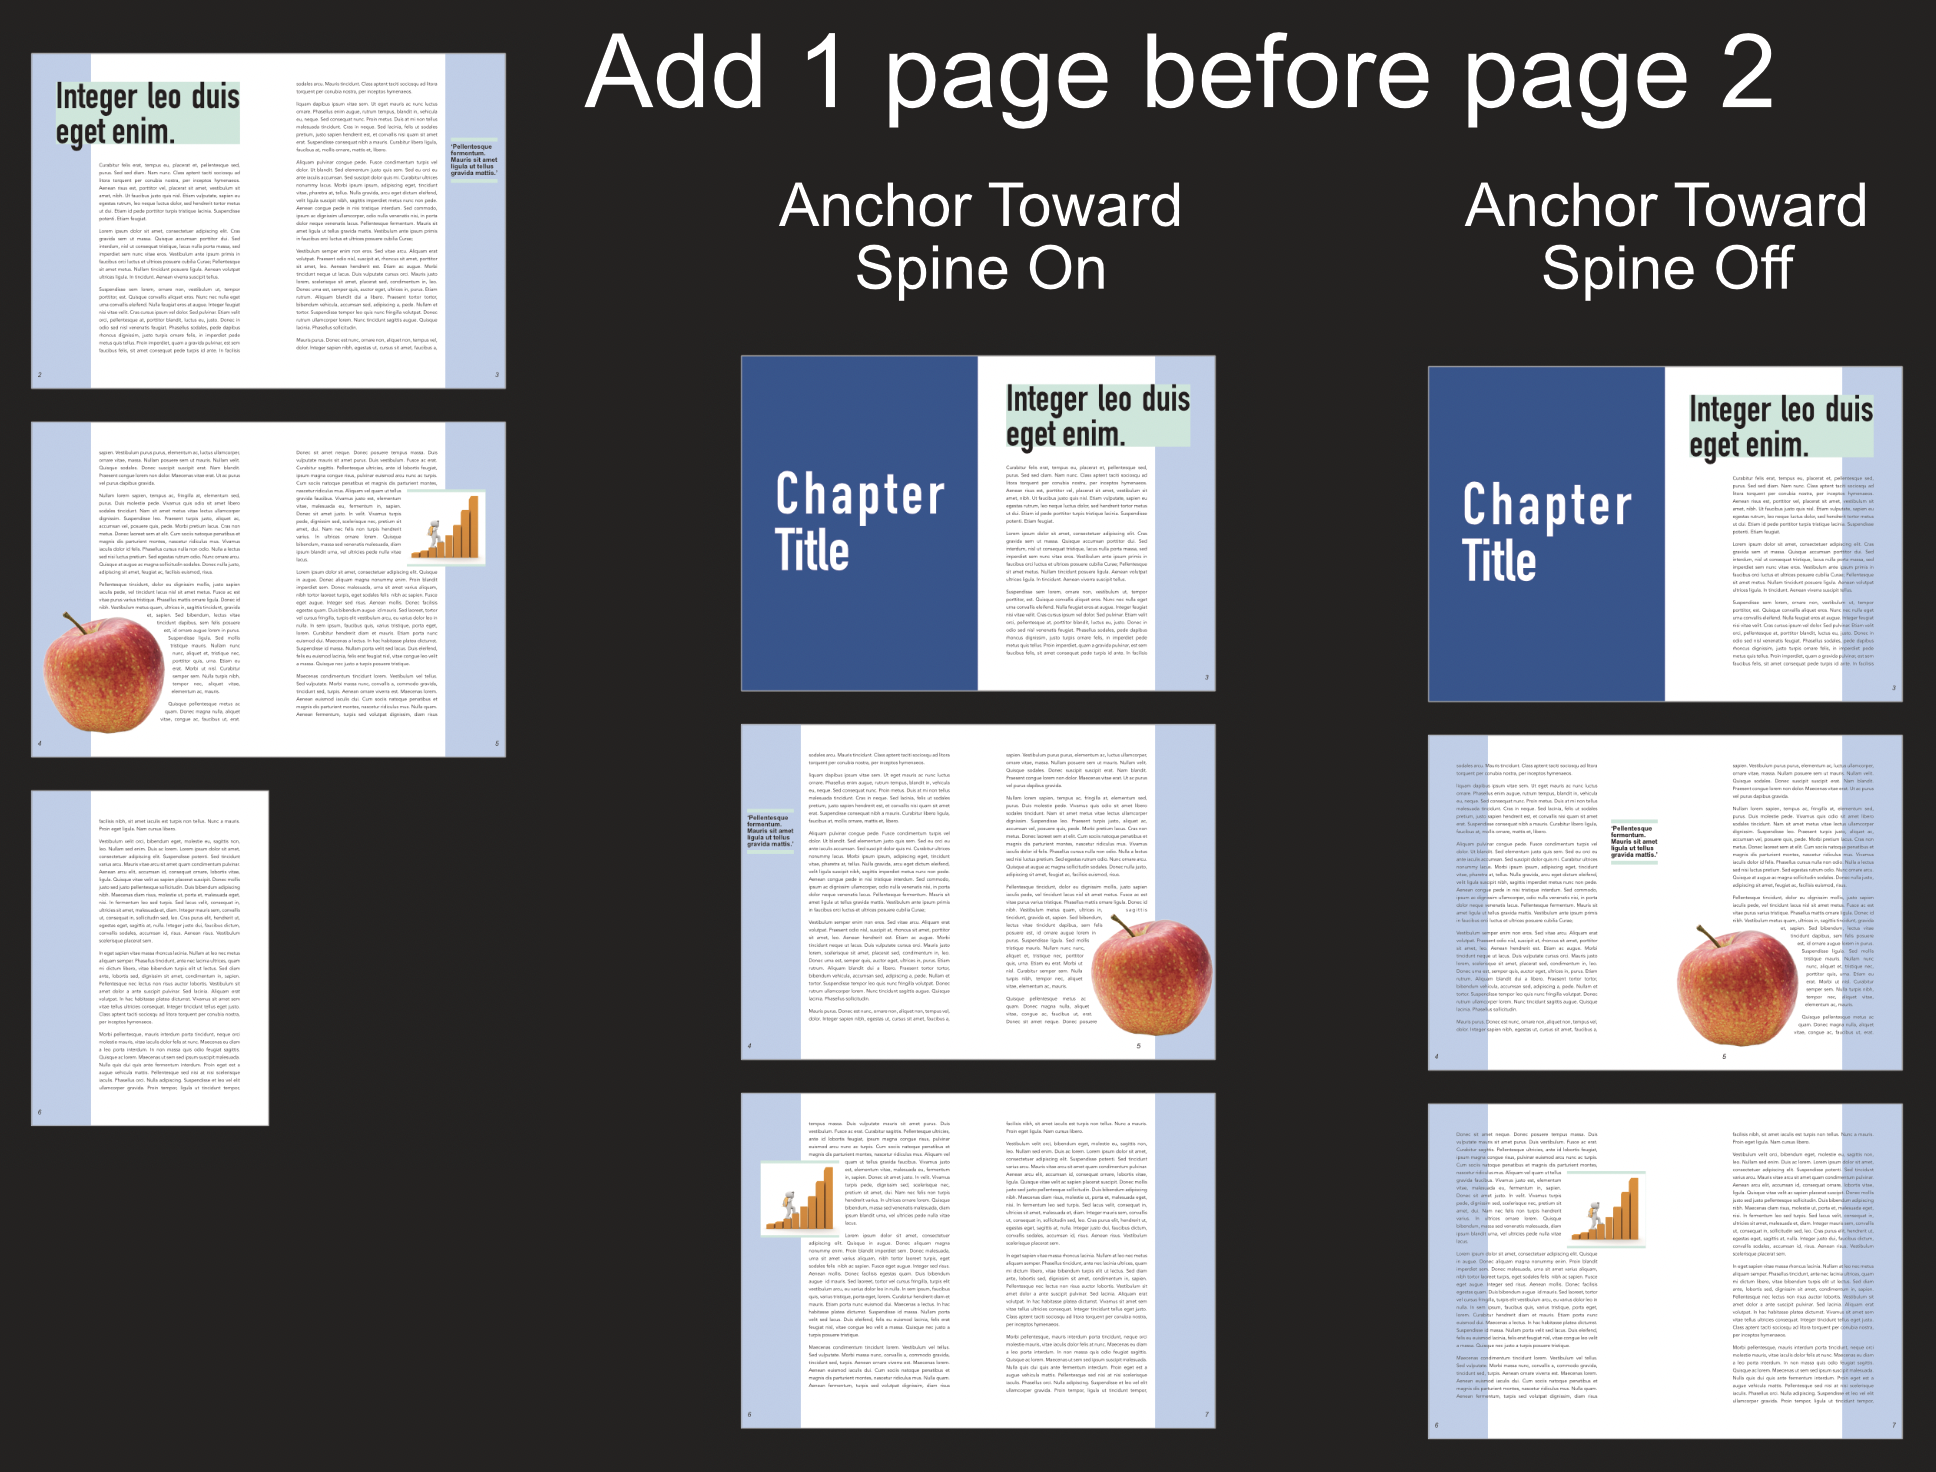
I think the option you're looking for is `Anchor Toward Spine` in the Page Move Options section of the Pages Panel burger menu. You want it off.
-
Data merge for two double-sided label
Mark Daniel replied to shunkaha's topic in Desktop Questions (macOS and Windows)
It's hard to say without the file, from the screenshot it looks like you've done a lot of things right. My best guess is you've forgotten to rewind the data source so the second page does each batch of 16 records again for the reverse side. You need to select the layout on page 2 and set the record offset to -16. You probably also don't want a facing page document. If that's not it you probably need to upload a document for us to look at Mark -
Mark Daniel reacted to a post in a topic:
Are you guys ok?
-
I'll get it fixed but it's also worth pointing out that a raster fill layer will be slower to export and produce a much bigger PDF as it's essentially a bitmap image the size of the whole spread. Rectangle is better in a lot of ways. Mark
-
 Patrick Connor reacted to a post in a topic:
ALREADY IMPLEMENTED [Publisher][Add "Story" to TOC Scope]
Patrick Connor reacted to a post in a topic:
ALREADY IMPLEMENTED [Publisher][Add "Story" to TOC Scope]
-
Franz Rogar reacted to a post in a topic:
ALREADY IMPLEMENTED [Publisher][Add "Story" to TOC Scope]
-
If you set the 'Look in' setting to 'Text Flow' and the Scope to 'Document' it will do what you want. Mark
-
Pšenda reacted to a post in a topic:
Can you add a note to a 'meta' note to a file
-
It may or may not be what you want but you can right click any object in the layers panel and set a preflight comment. Once set it will appear in the preflight panel. By default comments are Errors (ie interrupt export) but you can change the profile for 'User Comment' to make them warnings.
-
It seems to work for me, he's what I did * Made a new 2 page facing page master * In spread properties moved page 2 Y origin down by 6 mm (2 x bleed) * Added a guide between the pages * Applied the master to all document pages and conformed the layout * Tweaked the black rectangle to match the guide * Data Merge * Export with 'Include Bleed' and 'All Pages' Or have I not understood what you're trying to do? Double A4 calendar merge master beta testing inner bleed.afpubtest.pdf
-
@Satta, @DiZastor The possibility to add a gap between the pages on a facing page spread has been added in the current 2.6 Beta. You might like to try it out and check that it addresses your needs. Yours, Mark
-
Mark Daniel reacted to a post in a topic:
Coming soon to a nice newsagent near you...
-
loukash reacted to a post in a topic:
Advanced Page Management: Page Migration Improvements
-
Oufti reacted to a post in a topic:
Advanced Page Management: Page Migration Improvements
-
Oh, I've just realised what it is - You have single page masters so they just get moved onto the 'wrong' side with the bars on them. Try with a facing page master.
-
I think you're going to have to send me the file. It works fine here with my test file. Example.afpub Mark
-
Which Master Migration option have you got set? Looks it might be 'Split Masters'? Try 'Move Master Content' Mark
-
Jon P reacted to a post in a topic:
Advanced Page Management: Page Migration Improvements
-
bbrother reacted to a post in a topic:
Advanced Page Management: Page Migration Improvements
-
I see a lot of documents that look something like this Whilst I would advise to try and avoid adding a single page sometimes you have to and to my mind Anchor Toward Spine has done a much better job of making pages that just need a bit of tweaking.

-
Screen Recording 2024-10-23 at 4.52.19 PM.mov Works for me? Mark
-
My advice is always to create a master with the spread page layout you want first then create whole spreads using that master. (Drag from the top of the panel to the bottom). That approach will generally give the cleanest results.
-
This will only happen if your base TOC Entry style doesn't assert a value for the relevant text property. By default it inherits from 'Base' which defines everything so you shouldn't get this unless you've changed the inheritance or deliberately knocked things out. Make sure your TOC Entry style defines everything or in based on a style that does.
-
AFpub 2.6 Bleed is on wrong page
Mark Daniel replied to Andreas S's topic in Other New Bugs and Issues in the Betas
* Create a new document, facing pages, default master, default 3mm bleed * Right click on Master A in the pages panel - select 'Spread Properties' * Select 'Master A Page 2' (Top right) * In the X: box type '+6 [ENTER]' - For two 3 mm bleeds * Ensure Resize linked Pages is All or matching * OK You now have facing spreads with a gap in the middle where you can put dedicated bleed content NB: I've just noticed a bug with drawing the first page - It's drawing everything too far out to the left when the origin of the leftmost page isn't 0 - I'll get that sorted.