Mark Daniel
-
Posts
49 -
Joined
-
Last visited
Everything posted by Mark Daniel
-
TOC & styles logic
Mark Daniel replied to Gianni Becattini's topic in Affinity on Desktop Questions (macOS and Windows)
Yes, 'Base' is missing. I'm not sure what happened to it as 'Delete unused styles' won't delete it but if you define the indents in 'TOC 1: Section title' rather than leaving them as 'No Change' it will stop doing strange things. Mark PS That looks like a very cool book 🙂
-
TOC & styles logic
Mark Daniel replied to Gianni Becattini's topic in Affinity on Desktop Questions (macOS and Windows)
It's hard to be 100% sure without the full original document but I think it's because you've deleted the 'Base' style that all the TOC styles are ultimately based on. Without that style (which defines everything) they end up being based on 'No Style' which defines nothing. That means when going from 'TOC 1: Subsection title' which defines 'Left indent: 8' and 'TOC 1: Section title' which doesn't define left indent at all (and inherits no definition) there is nothing to force the value back to 0. Mark -
Some languages need a wider window than others to fit all the labels in. Allowing it to be adjusted lets the user adjust it for the option and language they are looking at without having to make it excessively wide for everyone.
-
Ellipsis are used if the action starts a modal journey of one or more dialogs in order to complete the action described. If the action described will be immediately completed (eg opening a window or changing the document) or is open ended (eg a non modal window that you can keep around) the option doesn't warrant an ellipsis. On that basis I don't think 'Edit profile' should have ellipsis although I suppose technically it should be called 'Open Profile Editor'. I'm also not convinced 'Manage Presets' needs ellipsis, even though it's modal it's not starting a journey to a definitive action c.f. Bookmarks > Edit Bookmarks in Safari.
-
Index - group page range min threshold ignored
Mark Daniel replied to MikeTO's topic in V2 Bugs found on macOS
I haven't double checked but if my recollection is correct the documentation describes what the code did originally and then at some point there was a request to change the behaviour and it looks like the documentation was never updated. Mark -
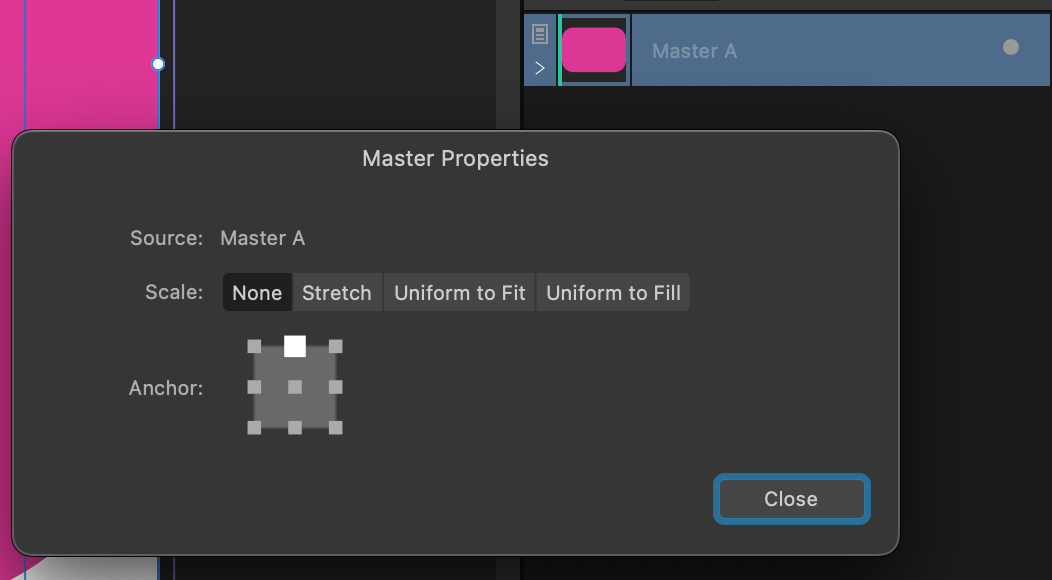
What you've done is on Page 1 overridden the margin colour for that one spread. You might need to do this if, for example, that page has a coloured background that makes the margin colour hard to see. Other spreads using Master A will continue to use Master A's margin colour. If you change Master A's margin colour it will change all the spreads that use that Master unless you've overridden it. If you reapply Master A it will revert to Master A's margin colour and be linked again. In Document Setup you can change the margin colour for the whole document.
-
Specifically the data comes from the Unicode CLDR data set as described here https://www.unicode.org/reports/tr35/tr35-dates.html#Date_Field_Symbol_Table
-
If you create a paragraph with these options It will get sequentially numbered throughout your document. You can create an empty paragraph in that style and it will give you the numbers. If you have Designer and StudioLink enabled I would create your ticket in a Symbol and paste it multiple times on the page, alternatively just copy and paste. Use a master to create a full page of tickets. Make as many pages as you need and apply the master to all of them. If you need to make extra tickets either add more pages and just print the pages starting after the ones you already printed or change the value of 'Start numbering at' Hope that helps, Mark
-
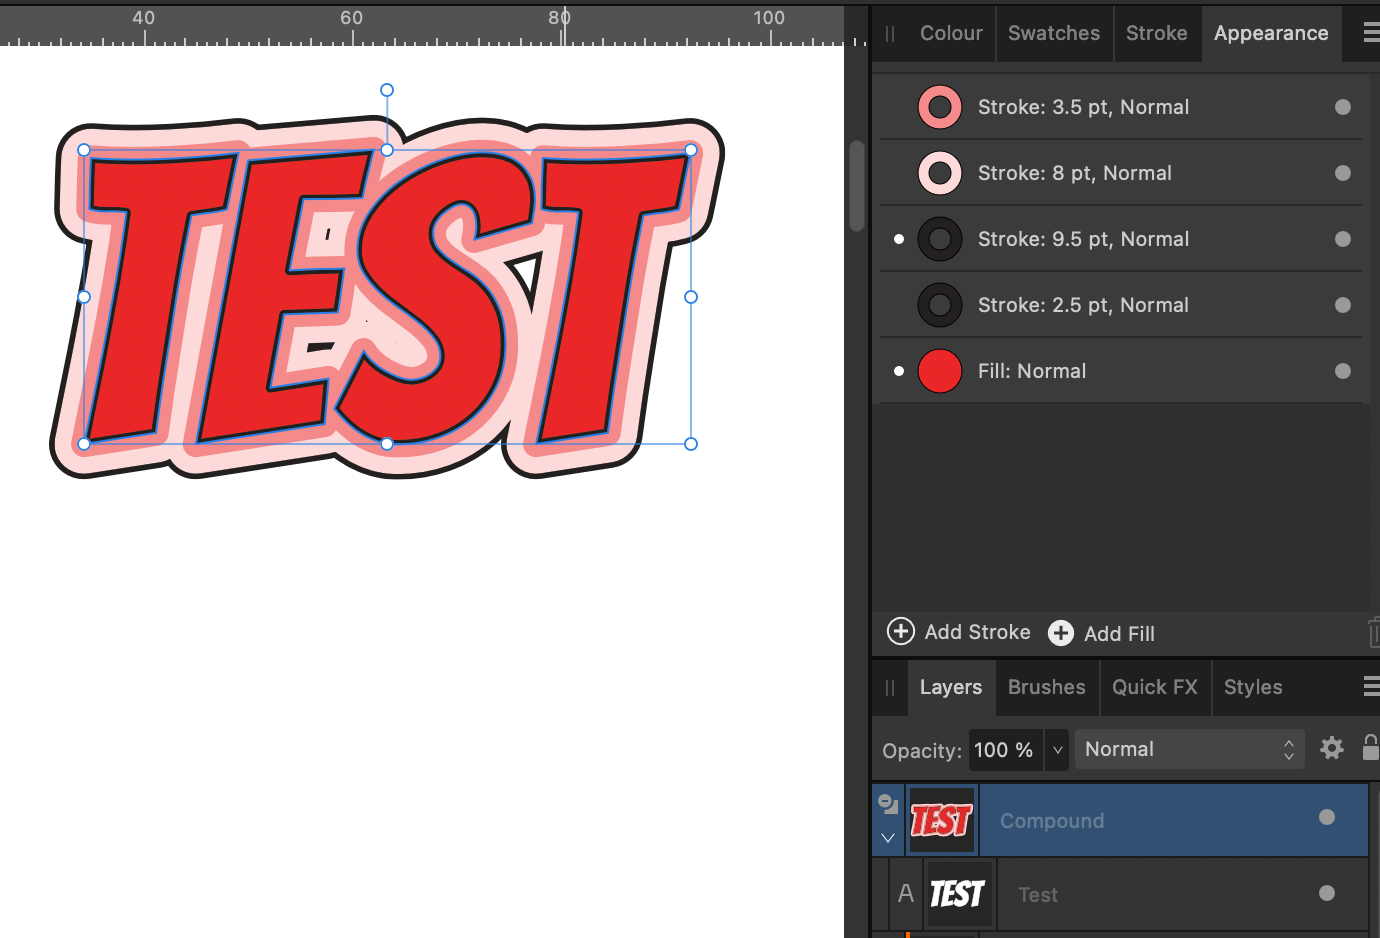
For what it's worth, by combining Compound Groups and Symbols you can have editable text with multiple outer contours. You can also do a similar thing using the appearance panel, again still retaining the edibility of the text. I appreciate that we could make this easier in the long run but hopefully these ideas might be useful in the meantime. Mark Test.mov
-
Creating and Index for a Book
Mark Daniel replied to Rufusbadger's topic in Affinity on Desktop Questions (macOS and Windows)
If I've understood the question correctly I think you need to tell Publisher about the sections in your book. * Right Click on Page 13 in the Pages Panel and select 'Start new Section' * In the section manager select 'Restart page numbering at' - it should default to 1 * You may also want to select section 1 and change the numbering style to Roman, that way your page number fields will format correctly and the Pages panel will show the right format page numbers. Hope that helps, Mark
-
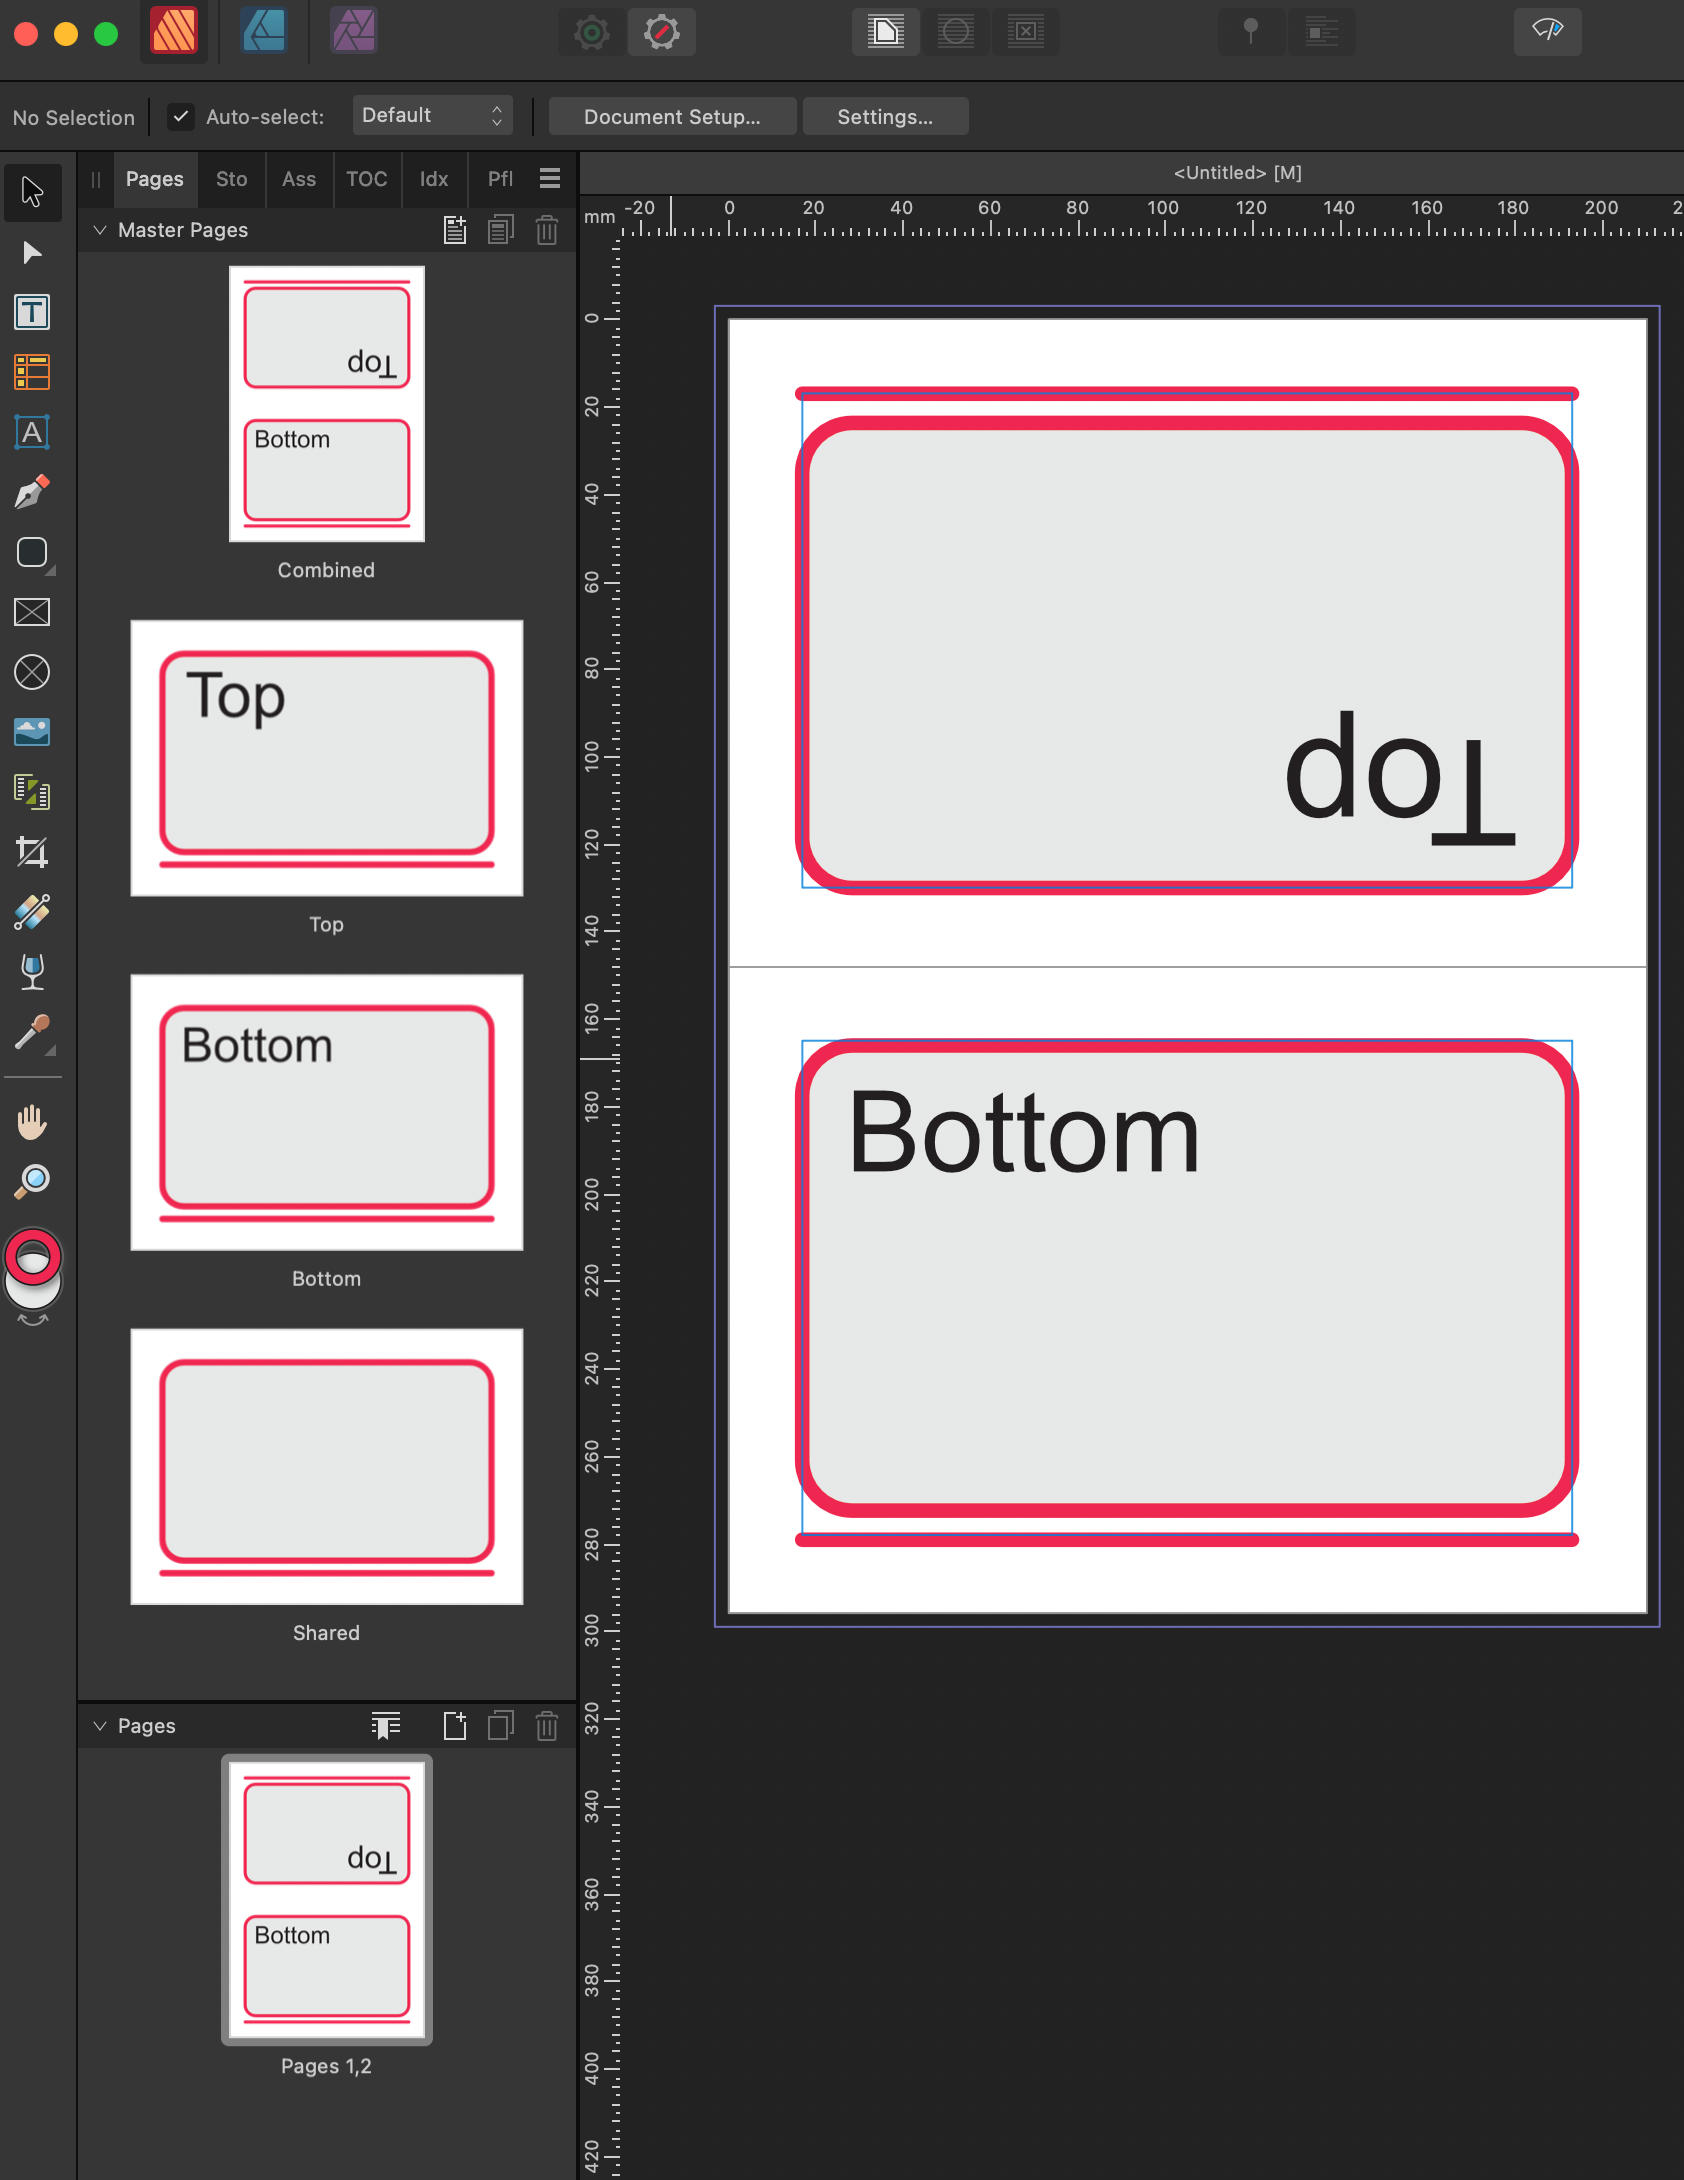
I think the 'proper' way to do this would be just to design individual 8.5x5.5" pages, output them to PDF then have the printer do the imposition but if you're doing it yourself here are a couple of ideas I've thought of If it's only a couple of designs I'd be tempted to abuse masters and do it like this * New document - Facing pages, Arrange Vertically, Start at Top, 2 Pages * Create a double page master called 'Combined' * Create two single masters called 'Top' and 'Bottom' * (Optionally create a third called 'Shared' and apply it to both Top and Bottom) * Apply Top and Bottom to the respective halves of Combined. * Switch to 'Combined' Select 'Top' in the layers panel and rotate it 180 degrees using the buttons or transform page * Apply 'Combined' to document pages 1 and 2 * Do all your design work directly on the Top and Bottom master pages which are the right way up * Export or Print the document pages * Create a new document or new pairs of masters for each design This could potentially be combined with Data Merge to merge in the body text for the cards An alternative approach if you're doing many designs might be * Create document with single (non facing) landscape pages for all your fronts and backs on alternate pages - Save it as 'Faces'. * Create another document, with a single portrait page for the full paper size make sure it's 'Prefer Linked' * Add a picture frame to the top and bottom halves of the document page * Rotate the top picture frame by 180 degrees * File -> Place and select your first document * In the place panel expand the file and select all the individual pages (Select the first, Command A) * Click in the first picture frame - It will place consecutive pages in consecutive frames creating new pages automatically. * Save as 'Imposition', Print/Export from this file. If you make changes to the original faces, just make sure you update the linked file in Resource Manager * Just watch out as the number of pages in your imposition document won't grow automatically if you add pages to the Faces document. Hope some of those ideas help, Mark
-
Hi @SebaDB We've now reproduced your problem and we will look at fixing this in a future version. I think it might be related to Google Drive but I'm still investigating. For now you can work around the crash by moving the text focus out of the box labelled 'URL' before deleting the datasource, eg by clicking in the Preview index selector first. Hope that helps, Mark
-
I'm not sure I fully follow what you want but here's a few suggestions - I think you should let the section page numbering continue through the whole book. This is the only way you will get meaningful page numbers both on the page and in the TOC - You can create numbered recipe headings with named global numbered lists (https://affinity.help/publisher2/English.lproj/pages/Text/text_bulletsAndNumbering.html). Use the 'Restart numbering now' option when you move to a new section - Toc can copy and list numbering from the page headings into the TOC - If the exact text you want in the TOC doesn't appear on the page try creating an extra frame on the pasteboard with it in. This technique can also be used to create section dividing headings in the TOC. It can be helpful to put these extra frames on a master that you can just drop onto pages that use it. (Remember you can have more than one master per page)
-
I think if you right click on the master in the layers page, go to Properties... and set the Anchor to the top middle square it will do what you want.
-
Cannot name or rename text styles
Mark Daniel replied to KenJeffery's topic in V2 Bugs found on iPad
For now it will stick if you press Enter or dismiss the virtual keyboard before pressing 'Ok' on the dialog but it is a bug that you can't just press Ok. -
I'm afraid this is a case of the same name for more than one thing. That part of the feature list is specifically referring to referencing within the index where one topic has an entry referring the reader to another eg Apples See Fruit That is separate from the feature a lot of people mean by cross-referencing which is where parts of the body text refer to paragraphs, headings or figure elsewhere in the document and show the relevant page number.
-
Please feel free to stick with V1 until we get to a point you see as a worthwhile upgrade. There's no compulsion to pay again right away. V1 will keep working, we'll keep working, upgrade only when you see fit. Mark
-
If you use your finger to go back to the Move tool then double tap with your finger to restart text edit mode the full keyboard should come up. It doesn't seem like there's a way to do it just with the pencil - that's an operating system limitation - but you don't have to restart the whole app. Mark
-
[Implemented] Data merge
Mark Daniel replied to CusumanoCasper's topic in Feedback for Affinity Publisher V1 on Desktop
Thanks for your detailed reply. I think it's fair to say this is a long way from the use cases we were trying to cover with the initial version of this feature. I'm afraid Publisher can't do what you've asked for at this time. Amongst other things the most fundamental problem you're probably going to hit is that fields can't contain breaks and we don't have any way to link or merge tables. I'm glad to hear you've got a system that works using LaTeX. I hope to visit more advanced data-driven documents at some point in the future but I'm afraid we have to focus on features that have the broadest applications first. -
[Implemented] Data merge
Mark Daniel replied to CusumanoCasper's topic in Feedback for Affinity Publisher V1 on Desktop
The multiple sources feature is designed for switching between alternatives (eg a small test and larger production data source) or for merging different page ranges in a document with different data sources (eg a catalog where each chapter has a different template page and a different data source file). It's not currently possible to use more than one data source to merge a single output page, I'm not convinced that's desirable, it certainly would create a lot of complications regarding advancing the merge index and running out of records. @jdo if you could explain your use-case more fully perhaps I can suggest a way to make it work. -
I might have missed the point here but Preflight checks for Missing Glyphs and if you double click the error in the preflight window it will select the glyph in question. If it's not doing that then it's probably a bug.
-
Data Merge Fehler?
Mark Daniel replied to blackstone's topic in [ARCHIVE] Publisher beta on Windows threads
Hard to say without seeing the document but my hunch is you've accidentally put the text boxes on top of the Data Merge Layout rather than inside it. Schwer zu sagen, ohne das Dokument zu sehen, aber meine Vermutung ist, dass Sie die Textfelder versehentlich über dem Datenzusammenführungslayout und nicht darin platziert haben. -
Data Merge GENERATE Created Blank Page
Mark Daniel replied to nisiwi's topic in [ARCHIVE] Publisher beta on Windows threads
I'm looking into this, I can't say exactly when it will be fixed but there are a couple of work-arounds for now; either don't use facing pages or don't use master pages. -
[Implemented] Data merge
Mark Daniel replied to CusumanoCasper's topic in Feedback for Affinity Publisher V1 on Desktop
So firstly I should say this is absolutely not what this feature is for and it's obscene to see it abused in this way but I, like the rest of you, can't resist a challenge! So here's my solution. The main advantage here is I've nested the DM nodes so you only have to create the row table once. Nesting works fine but you have to be careful with the Record Advance. In this case the outer one has a record advance of 0 since the inner one is doing all the advancing. I've done the row shading with a rectangle behind the table. Now I should do some proper work, Mark
-
Data Merge - Generate bug (DM Node tool)
Mark Daniel replied to Rondem's topic in [ARCHIVE] Publisher beta on Windows threads
I can see from the screenshot you have Record offset 8 and Record Advance 4 so when it merges it starts by moving forward from 1 to 9 (+8) then it moves on by 4 which takes it past the end so it stops.