

NathanC
-
Posts
4,437 -
Joined
Posts posted by NathanC
-
-
Thanks for the attached details and recording, To be candid it's not entirely clear from your recording that there is present brush lag as you didn't set a healing brush source (Alt/OPT), so nothing would visually happen on the canvas anyway. Further to this, the Healing brush is an incredibly hardware resource intensive process, particularly at large brush sizes (~400PX) it can lag whilst using this tool during the rendering, I also observe this on my Mac on larger brush sizes.
For comparison, if you use just the standard brush tool, select a basic round brush and then set the size to 400px and record it, could you confirm if you experience this lag, and if so send us a recording?
Many thanks!
-
On 8/26/2023 at 11:56 PM, dLucky said:
Here is a file that is giving this problem, being that the same is saved on the computer itself, the problem of this file is that when trying to save in PDF it closes out of nowhere.
Thanks for following up with the file, I've managed to export the document (All pages/artboards) to PDF using the default 'For Export' preset without any problems, in my scenario the file and the export location are both on the internal hard drive, i've attached the doc for reference. The only difference is in my example two fonts used in the document are missing on my PC so they were not included in the final PDF, so maybe that's a factor if the issue is caused by the fonts? Or, could it perhaps be a problem with the location you're exporting to, if you export to an internal location (Such as my documents/desktop) does it make any difference?
You also mentioned the program is closing, to clarify is the program outright crashing or is it just going to a frozen screen during the export? If it's crashing could you confirm if there are any recent crash reports and provide them? The FAQ below details how to find these.
-
Hi @wim,
I've just tested the Luminosity mask preview setting with it nested into a compound mask and this has all worked as expected, with the preview correctly reflecting the areas the adjustment is masking on my image, similar to what is demonstrated on the video you linked in the thread. Could you perhaps provide me with a copy of your .afphoto file which has this issue so I can examine it further? If you could also provide a screenshot of your performance settings (Edit > Preferences > Performance) that would also be helpful.
If you don't wish to share the file publicly feel free to upload it to the private dropbox link below.
https://www.dropbox.com/request/KzL369Abv7tpw8omXvXC
Many thanks!
-
3 minutes ago, Return said:
It doesn't matter as it will convert to bitmap anyway.
You can drag/drop ,even vectors, from assetspanel or stockpanel to the fill wells and it is a bitmap fill.
One can also use external dam and drop on the fill wells.It's more for the fact that the vector formats can be used as bitmap fills via file explorer, but can't be selected without using a wildcard search in the file name field, since they do work as bitmap fills it would make more sense if they were selectable from the file explorer from the start when the search filter was set to 'All Documents'.
-
29 minutes ago, walt.farrell said:
You won't be able to on Mac, Nathan. But on Windows the File Explorer dialog that Affinity utilizes will allow you to type *.SVG into the filename field and then press enter, which will regenerate the file list restricting it to just files with the SVG extension, and you can then select them. The Search bar in that dialog may also work for this.
Thanks for the tip! I didn't realise this wildcard would work in the file name field, I'll get this logged.
Edit: Looks like it works for other supposedly unsupported file formats too, such as .EPS
-
Hi @earl_grey,
I've just tested this on both Windows and MacOS to be sure using the Gradient tool (G) and changing the fill type to 'Bitmap', neither allowed me to select .SVG extension files to be used as the bitmap fill.
Are you certain that the file you selected after changing your explorer search scope to 'All Documents' was a file with the .SVG file extension, and wasn't one of the bitmap formats which just happened to have SVG in the file name? If you haven't already turning on 'Show file name extensions' in Windows explorer helps confirm the file's actual extension.
-
I think this is a by-product result of the App's PDF interpretation when opening Placed Embedded PDF files not including the 'Group Lines of text into text frames' option and as a result the TOC text is converted to individual art text frames and the majority of the original TOC formatting is lost in the process. Before double clicking to edit the PDF in a new tab, if you switch your PDF setting from 'Passthrough' to 'Interpret' this can be observed without the need to edit the PDF in a new tab.
Instead of opening the PDF via 'Edit Document'/ Double clicking after placing, I would instead recommend opening the PDF file directly via File > Open, this will prompt you with the PDF import options dialog, allowing you to enable the 'Group lines of text into text frames' setting, which is then preserving the TOC tabstop formatting correctly with the TOC text combined into a singular, manageable text frame which can then be copied back into your working document if required.
There is an outstanding improvement logged with the developers for the PDF Import options dialog to be added to placed PDFs which would prevent the need for the aforementioned workaround, so I'll bump it with your report.
-
Hi @Limey,
For Publisher V1's StudioLink to function it's not a requirement that your Apps be signed in to the Affinity store, rather that all three apps have been installed and each launched once for the activation process to complete (Entering in your Product key and Email). After that point you should be able to freely switch between the Designer/Photo/Publisher Personas from within Affinity Publisher so long as you own the relevant apps, if you only own Publisher and one other app (E.G Photo and Publisher only) then you'll only be able to switch between the Publisher and Photo persona since you don't own Designer.
You'll also need to make sure that the apps are all updated to the latest version (1.10.6).
-
-
Welcome to the forums @BTB001,
Many thanks for the detailed report and screenshots, I can confirm I've replicated the problem and it has now been logged with the developers.
-
Hi @netera,
I'm also able to copy and paste table type layers into Designer with no problem, but as Carl's mentioned you are quite limited when editing tables in Designer due to the lack of the table tool and panels, I've checked in V1 and this is essentially the same limitations. Tables and editing tables are intentionally exclusive feature of Publisher.
-
8 minutes ago, PeterB. said:
@NathanC Is there any news about this bug? I know you all at serif are very busy, but this bug is terribly annoying. Selecting an Deselecting the frames again and again while working...
No news I'm afraid, the thread is tagged with the relevant bug report, so when there is any updates on a fix version Serif Info Bot will automatically update the thread.
-
Hi @Seneca,
It looks like you've posted in the regular bug forums while you're post is in regards to a regression affecting Beta builds not present in the release builds, I've now moved the thread for you to the beta bug section. 🙂
-
-
Hi @Pseudolus welcome to the forums,
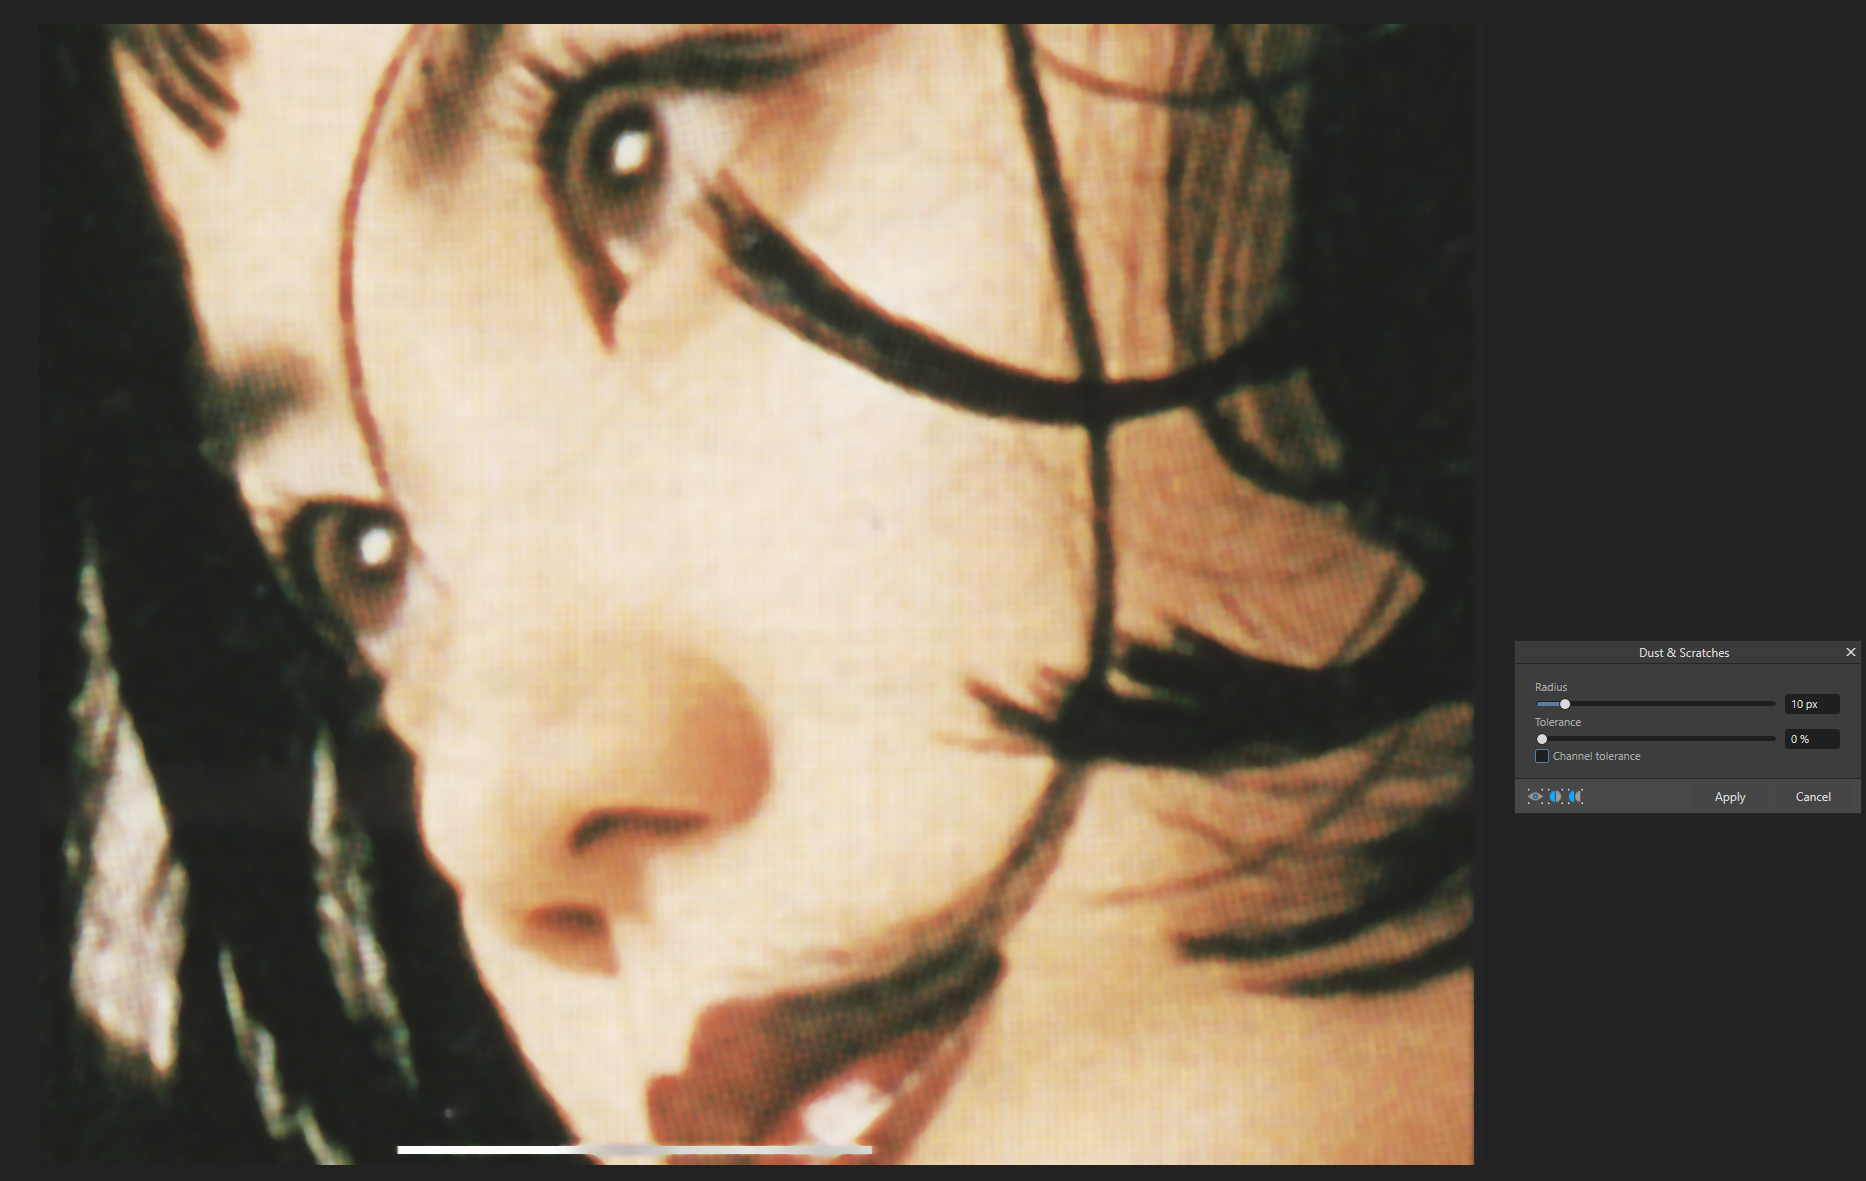
It is unfortunate that FFT Denoise isn't currently available on iPad as the filter exists for this very purpose with effective results (The lack of this filter on iPad is logged internally). You could use the 'Dust and Scratches' filter as an alternative which does a reasonable job, but the image does lose detail as a result, and at lower radius values the halftone pattern is still somewhat visible.
Example Dust and Scratches Filter Desktop Screenshot (it is also on iPad):

-
Hi @Asterix00,
In Afphoto, why not try a Recolour adjustment instead of HSL for the Sepia tone effect?
https://affinity.help/photo2/English.lproj/pages/Adjustments/adjustment_reclr.html
-
Hi @PB5,
Unfortunately it doesn't look like your file can be recovered by any standard means and is corrupted to the point of it no longer being recognised as an affinity file by the app. You file will be logged with the developers for further investigation into what caused the corruption along with the environment details, but it's not guaranteed as to whether or not they can recover your file and it's not something we can provide a timescale for when you might receive it, so if possible I would recommend reverting to a backup copy if one is available.
Apologies for the inconvenience!
-
Hi @Stolzy,
Apologies on the late reply and thanks for the screenshot, I did see earlier that you mentioned that it doesn't happen on a different MacOS user, this could indicate to their being a problem with a 3rd party app/high hardware usage or an issue with your local user settings, So I would also suggest limiting the number of other apps you have opened at the time at which you're using the brush, and also trying a full factory reset of your local settings by following the below (Note: this will reset all custom brushes, user settings, assets etc. so these will need to be re-imported and configured after):
- Close all Affinity apps
- Hold down CTRL and launch Photo 2 whilst still holding CTRL
- A 'Clear user data' menu will appear, check all boxes excluding 'De-activate affinity 2 apps' at the bottom
- Press 'Clear' and the app will now launch, try using the brush again.
If it still continues, we would really benefit if you could provide us with the other information mentioned in my previous post, particularly the screen recording demonstrating the problem (This is very easy to do with Quicktime player on Mac).
On 7/14/2023 at 12:04 PM, NathanC said:- Which OS version are you using?
- Do you have a screen recording which demonstrates the problem with the lag on larger brush sizes?
- Which affinity app(s) are you using and are you using a pixel brush? If it is a pixel brush, are you testing this with the default round brush or a custom brush?
- Are you running the latest app version (2.1.1)?
Many thanks
-
Hi @dizeyner,
To clarify, are you looking to batch export/save your individual layer components within your file into their own, separate native .afphoto files instead of a final format to maintain the layer structure/integrity instead of using a interchange file formats that the export persona only offers?
As far as I'm aware this would have to be done manually by placing layers into their own separate documents, since the export persona does not offer the ability to export layer slices to the native file format, and macros cannot record export/save as actions. The Batch Job function does allow you to output your files to .afphoto files, but this tool works off of individual existing source files rather than document layers.
Perhaps another user might have a better idea/method to achieve this.
-
Hi @GeirSol,
You can control which section(s) of your open document you would like to export via the section manager (Right click a Page in the pages panel > Edit Section) and then check/uncheck 'Include on Export'. I don't believe this can be controlled from the export dialog however.
The latter would more likely be a feature request to do this from multiple files simultaneously.
-
Welcome to the forums @Mason M,
Currently, restarting your app session or closing and re-opening your file will not retain the 'Continuous' checkbox, this is intentional (Regardless of if the file is flagged as modified when altering the setting). This is because the dynamic link between your exported slice(s) path and the app is not retained within the document, which then forces the 'Export Slices' to be actioned again before 'Continuous' can be enabled, so a new file path and link is established.
This will likely be due there being many variables to consider when a document is opened/closed, such as the document file path (or file) no longer being available, differences between the file path between OS platforms, removable storage location no longer available etc.
For the current functionality with continuous export to be changed this would be more of a feature request. 🙂
-
Welcome to the forums @PB5,
Drop your file in the dropbox link below and I'll see if it can be recovered by any standard means.
In addition, I can see that you're opening the file from the F: drive, is this an internal drive or a network/external drive? Could you also confirm which Operating system you're using?
https://www.dropbox.com/request/eXueEiKT4ENLv13OUE77
Many thanks!
-
Hi @Mr. Doodlezz,
I've just been experimenting with this in the Beta app, the only solid way i've found to delete previously imported custom ICC profiles is to remove and re-download the app which then clears the profile, not really ideal. I had initially thought that it may be possible to remove this via a Clear user data full reset (AKA CTRL Run-up) or by deleting the original location that the ICC profile was stored, but unfortunately neither worked. The profile is downloaded into the app files and there doesn't appear to be any way to manage/edit custom profiles on a surface level.
I'll log this an improvement so that ICC profiles can be better managed/deleted within the app, similar to the Install Fonts interface.
-
Hi @Mainecoon364,
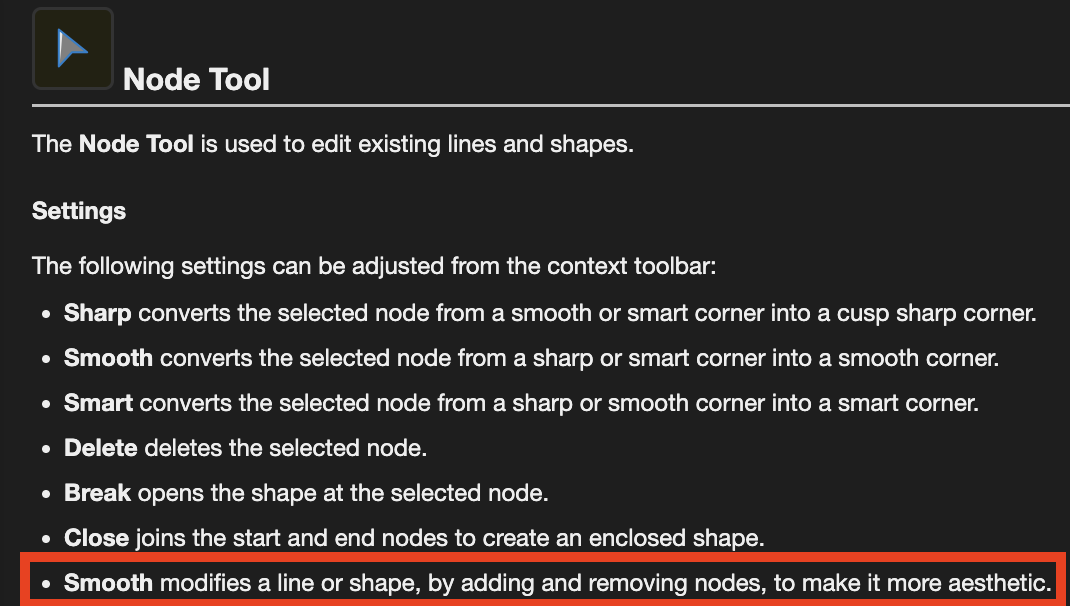
3 hours ago, Mainecoon364 said:Question 1) How can I apply Smooth only the selected Nodes?
The 'Smooth Curves' action modifies the entire selected curve(s) to create a more rounded object, as far as i'm aware there isn't a method for the action to affect the specific node selection.
https://affinity.help/designeripad/English.lproj/pages/Tools/tools_node.html
3 hours ago, Mainecoon364 said:Question 2) Can I select multiple nodes by clicking on them? How?
On Desktop this is done by using the Shift modifier and then selecting additional nodes, if you have a magic keyboard connected to your iPad it should also be possible to use this modifier for a multi-node selection by tapping them. If you don't have access to a magic/external keyboard as far as i'm aware this can only be done by drawing a selection marquee.
V2 resolves this problem with the introduction of the Command Controller allowing you to use modifier keys (such as shift) to alter the selected tool's behaviour, but this isn't available in V1 unfortunately.
https://affinity.help/designer2ipad/English.lproj/pages/Workspace/wheel.html


Field nits
in V2 Bugs found on macOS
Posted
Hi @MikeTO,
I agree that the casing is inconsistent within the panel and a likely oversight so i'll get this logged.
For Running Headers and Date fields this will be intentional, if you don't have a running header field actively selected with the text tool then you're editing the defaults for that particular field whilst working in the document, as such the dialog's name changes to 'Running Header Defaults' to reflect what you're editing. On the Flip side, if you have a running header text field actively selected with a text tool and you go to change the settings from the ellipse menu in the text field you'll be prompted with the 'Running Header Settings' dialog as you're editing an active field in your document rather than the defaults, similar to the CTRL + Click settings menu.
These are some good suggestions and points raised, but are better directed towards the feedback section rather than bugs.