Search the Community
Showing results for tags 'exposure'.
Found 22 results
-
 Hey All, I am trying to apply an effect from the eye candy plug in to a layer in my project. The plug in opens perfectly, I can see a preview of what the effect is doing, however when I want to apply the effect the Affinity Photo crashes and I have to restart the program.\ Luckily, I haven't lost any progress, because i saved before using eye candy. However, I really need to apply the effect for this project, so I hope that anyone can help me solving this issue. Thanks in advance and if more information is needed I will be happy to provide it.
 -
 Hello, I took a photo on a friends event with bounce flash bouncing up to the ceiling. The photo got screwed up with the top half of the photo exposed to flash while the bottom half is full dark, Can someone help me recover this and suggest how I can adjust the flash to be even throughout the photo ? I have the raw file for the same, but do not know how to fix this
-
 Possibly these are stupid questions, but even the help file have not helped me: - Why can we change the black point in the basic settings in the develop persona, but not the white point? - A the same position in the Develop Persona: what is the difference between Exposure and Brightness? Playing around with both sliders show identical changes in the histogram and photo. Best regards BlauerClaus
 -
 ’Allo again, mes amis … today the Big Question is: ‘How Come It Don't Do It Like Dis?’ … You've heard of and seen the excellent series of tutes produced by Olivio Sarikas, yes? He does an excellent job. In this particular tute, he examines Affinity Photo's built-in quirk that automatically applies a series of pre-sets to the RAW image(-s) opened in Developer persona. Note that, in his vid, he selects the ‘Exposure’ tab and clicks the ‘Undo’ Swirly Arrow to remove the presets and display the image in its as-shot state. I have tried and tried and tried yet again to have Affinity Photo duplicate on my Mac this same behavior. Nuh-unh, Charlie. It don't be playin' dat. The picture brought remains as unchanged after clicking the Reset circular arrow as if it had never been clicked. The same applies to every other ‘undo’ arrow for the rest of the settings in that panel. Here’s the link to the tute if you want to see it for yourself … undoing the preset(-s) is the very first thing he covers, so it's not a long wait. All feedback as to how to make this work outside of the vid is appreciated. Please advise if this ‘sauce’ works for you on your machine, too. Thanks.
 -
 Hi volks, why do I'm missing a complete control of exposure in Affinity Photo Persona? I'm coming from darktable in there do I have every time these control?
 -
 I have just got a Sony alpha 6600 with the kit lens 18-135. When I open the raw files in Affinity, the pictures are extremely dark. If I increase the exposure, the highlights are completely blown out. If I open the file in other viewers, the exposure is fine. Since I am new to Affinity, maybe I missing a setting or something? I don't see the lens in the list of supported lenses. Is that the problem? I am attaching a file. DSC00221.ARW
 -
When setting exposure, blackpoint, brightness and more.. If i then click the Rotate Counter-clockwise button the brightness changes, if i then go 1 step back and 1 step forward again in history the brightness is then correct. Rotate.pdf
- 1 reply
-
- 1
-

-
- rotate button
- exposure
- (and 2 more)
-
 When I open raw files from Nikon capture NX-D into affinity photo, the files are darker as compared to ones in capture NX-D meaning exposure down by almost 1-2 stops. Does any one knows what is the reason behind it and how one can fix this issue. Thanks
 -
 Hello, I'm a Affinity beginner, so I need some assistance please. Is there any way to do median or mean filtering as I could before in Photoshop with stacked layers in a smart object? I'm talking about doing things like this: https://theuijunkie.com/delete-tourists-photos/ I have a project coming up and I need to shoot a busy street, but I want to apply same technique as above. Is it possible to make a "long exposure" using series of images with same exposure, almost like some iOS apps do now utilizing movie clips to blur between frames to make one single long exposure image. Thanks Aleksander
 -
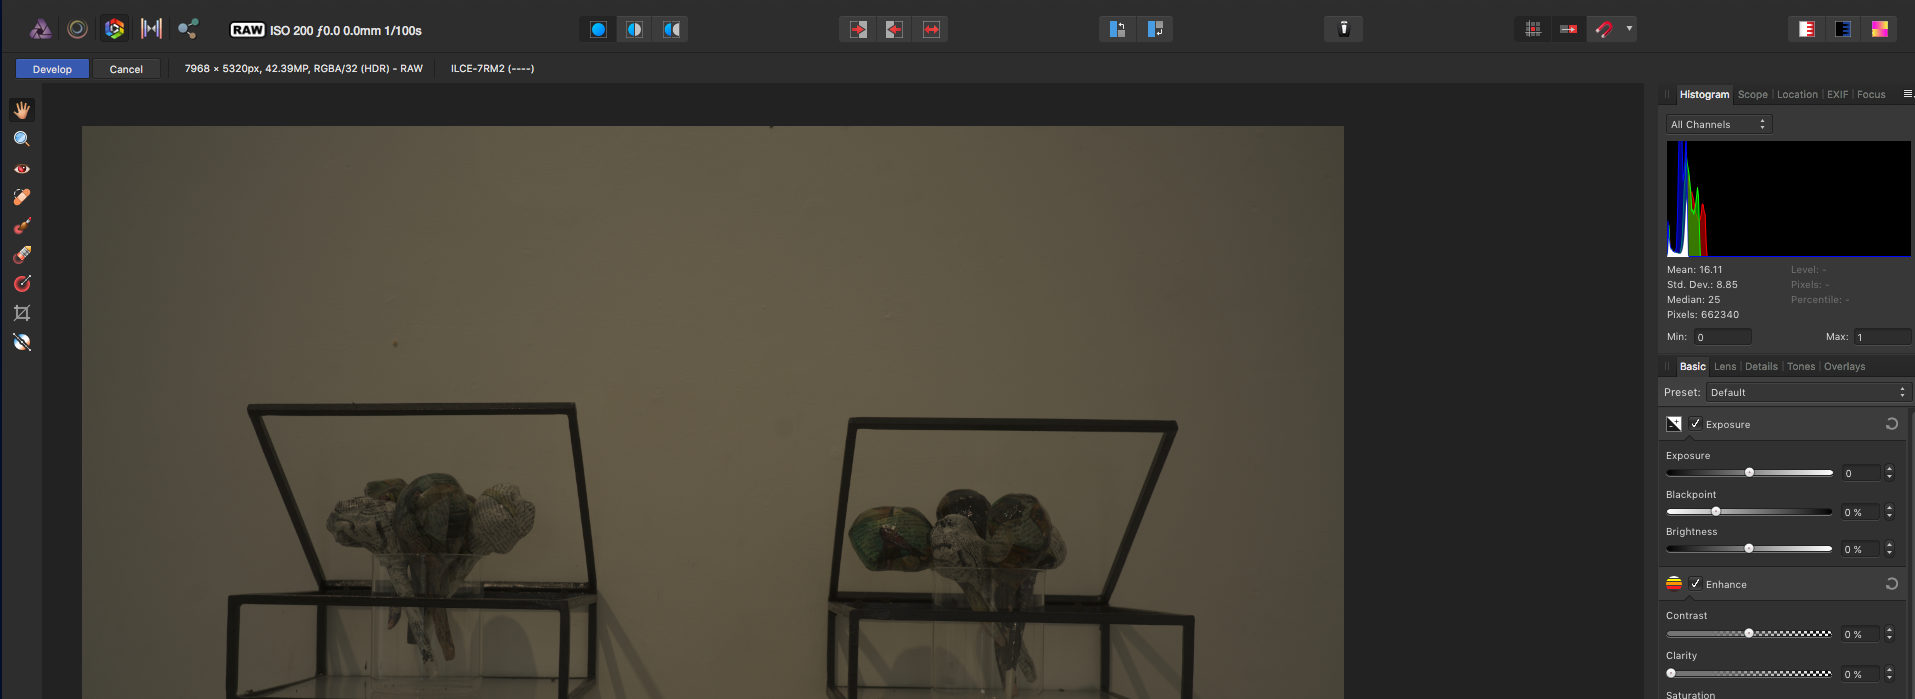
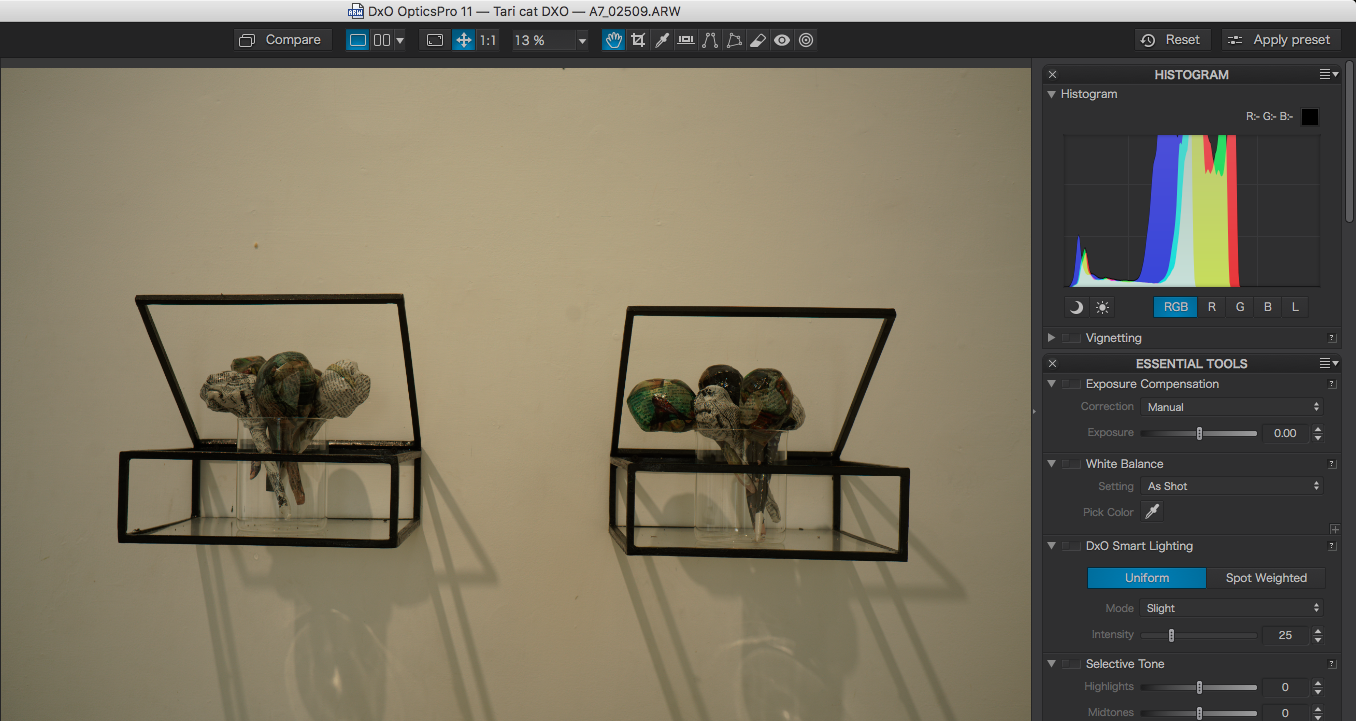
 Hi there, I had my first professional project that I wanted to edit etc with Affinity Photo. I exposed in my camera Sony A7RII all photos with an average of -.03 to -.07 with a close look on highlights (zebra display). - To my big dismay ALL shots appear massively underexposed in Affinity photo, the large majority of the images required a 2 stops exposure gain, the white balance was _totally_ off. So after spending a frustrating long evening on it. After seeing the impossible results this morning I quickly returned to the photo application that I used before, DxO Optics Pro. And there the images look ok, the colors look correct ands the expose is slightly under as expected. Was is happening? From the online tutorials for Affinity photo I disabled all "automatic" corrections for raw files, I do exactly the same in DxO by the way. As an illustration I attach 2 screenshots of the same image opened in the software, one Affinity Photo the other in DxO Optics. Any help would be largely appreciated! Best regards Jurgen
-
 It would be nice if there was a little checkbox on exposure compensation that said something like 'Protect detail'. When this is checked, as you slide the histogram up or down then instead of falling off the end, the histogram is compressed, protecting detail and avoiding white burn or blackout. Thank you and please do have a very excellent 2018 (my journey with you in 2017 has been splendid, btw!)
 -
Affinity Photo includes an awesome "Blend Ranges" feature that I use to accomplish exposure blending with my photographs. It takes a little practice, but this tool is more flexible than Photoshop's "Blend If" sliders (because it supports customizable and non-linear luminosity feathering), and more efficient than Luminosity masks (smaller file size). I would love to see the efficiency of this feature further improved by the addition of presets within the blend ranges panel to create common blending curves, which would save me the trouble of frequently recreating similar curves over and over again. Presets such as "highlights only", "midtones only", "shadows only" or combinations of these would be a real time saver. It would also be great to see the histograms of the current layer, and composite histogram of the layers below, drawn behind the respective curve graphs in this panel. Without histograms it's hard to visualize how the luminosity information is distributed across the current layer and the layers below, and creating the blend curves becomes a bit more of a trial-and-error process to find the right spots in the X-axis to start or end your curve. Photoshop users have plugins like Raya Pro and Lumenzia that make exposure blending easier, although they suffer from poor UI and other issues. It would be great if Affinity Photo put some more effort into fleshing out the Blend Ranges feature for photographers who want to do manual exposure blending.
- 2 replies
-
- 5
-

-
- feature request
- blend ranges
- (and 3 more)
-
 How do I use the paint brush to adjust exposure on a small area of the photo?
 -

Exposure bias and develop assistant
c_moon posted a topic in [ARCHIVE] Photo beta on Windows threads
I'm a great fan of James' video tutorials (thanks, James!) but the video on exposure bias and the develop assistant settings has me flummoxed - either I am totally missing what these settings are for, or they are not working as they should. James explains that AP does not apply EB (based on the setting in exif) by default - which is where I started to get lost. After all, the exposure compensation setting causes a "physical" change in the camera settings to achieve the desired result - so how can AP not apply these, I wondered - after all, that would mean AP ignoring what I told the camera to do. To test, I took two RAW images based on -1/3 and plus 2 EVs, with aperture and ISO fixed so the variable was shutter speed. The develop assistant setting was "do nothing" and on loading into AP, the images looked about what I was expecting - and compared near enough to Lightroom. "So far, so good" as someone one said... I then tried the "initial state" and "default" options and in both cases the exposure bias was applied yet again, so doubled up - so effectively -2/3 and +4 based on what the camera "wanted" to do and -1/3 and +2 on what I had told it to do. In summary, the results were: No action - images as expected/wanted - slider setting 0 Initial state - image effects "applied again" up so darker or lighter than expected/wanted - slider setting being the EB/EV value Default - image effects "applied again" so darker or lighter than expected/wanted - slider setting 0 I'm getting the results I want using "do nothing" so I'm leaving develop assistant on that - but why would I want to apply the EB/EV already applied to an image again so it doubles up? If, as in James' video, I know that my camera consistently over/under exposes then I guess that might warrant a standard user setting to apply to all images from that camera, but even that must be inconsistent depending in the scene, I would have thought, and wouldn't be based on the exif data as this adjustment would aim to effectively override camera settings. What am I missing? Cheers -
 I want to apply an exposure adjustment to a portion of my photo (Affinity Photo on a PC). I'm able to do this using a paint brush to define the area for correction as explained here: However, I'm not able to figure out how to do the same thing using the pen to make a closed path to define the area for correction, rather than use a freehand paintbrush. Is this possible? If so, is it possible to edit the path later?
 -
 I took a lot of photos over the weekend in an indoor setting I didn't have speedlights or good internal lighting so a lot of the photos have light coming in from the windows as well as from the tungsten lights overhead I've tried playing around with the exposure, blackpoint, brightness, shadows and highlights settings in the develop persona but I am unable to balance out the exposure of the whole photo so that I can preserve the detail of thw windows as well as the interior How can I achieve this? I can't share the actual photos since it was a private function I'm working with RAW files
 -
 I'm using AP with RAW files from Canon & Nikon. Exposure correction range is limited to either -2 or +2 stops only. Forum user MBd offered a work-around but it would be great to have a range like -5 or -6 to +5 or +6 stops like Lightroom or Capture One offer. This would simplify my life a lot.
-
 When using the up and down arrow keys for fine tuning exposure the increments are Full Stops of exposure. For fine tuning it would be great to add more control and make the increments a 1/3rd of a stop or smaller. Using the scrubby control works great but having keyboard control would be a great addition. The other controls in the Develop Persona have really fine increments when using the up and down arrow keys - just not exposure :( Thanks for listening.. MK
 -
 Hi, In Adobe Camera Raw you could hold down Alt (I think) when adjusting exposure etc and it would show in blue and red if any part of the image was getting over exposed. Can you do that in Affinity Photo?
 -
alanthompson.co.nzHi, i'm taking some time to write this so please consider it. 1) There is an opportunity with the axing of Aperture to get a whole lot of clients. Most use it as the RAW developer is just so good. i do. Good exposure limits tonal quality, hence ETTR. Aperture recovers the highlight detail the best via winding back the exposure. This gives better tonal detail in shadows. So the really have a look at how Affinity does this. A recovery slider like Adobe etc really is a joke as it just turns the brightness down. True detail is recovered with the exposure slider. 2) Don't pre adjust our RAWs when opening. Adobe RAW 2012 pre adjusts your images and especially ETTR when opening them. You cane even undo what they have done. This is incredibly arrogant, just stunningly stupid. It neglects the fact that correct exposure in digital limits tonal range. it's just physics. 3) Don't allow computer nerds to dictate. Ask some photographers, not amateurs, actually people that understand the physics. 4) Make you software able to record and play actions like Photoshop does. It's one thing i miss in Aperture. 5) Its very unlikely you will be able to complete head to head with Lightroom & Photoshop in the sort term, even though the Lightroom RAW uses the 2012 Adobe version which pre-adjusts your RAWs. So make your RAW developer able to be used as a plugin, I would use it if it works as well as Aperture RAW engine, even the Capture 1 version. 6) get some Photographers on your side, if you do, we tell everyone and give you free promotion as we are passionate about our art and the quality of how software treats our work. lastly, here's some links I would recommend, probably begs you to have a look at as it will help, also what the guygowan.com videos. As said, you have an opportunity to take the market in RAW development as Adobe and Apple seem to have no interest in real photography. https://luminous-landscape.com/expose-right/ http://www.guygowan.com/focus https://alangraemethompson.wordpress.com/2015/01/17/the-disaster-of-adobe-raw-2012-developer/
- 4 replies
-
- 1
-
-
- Photography
- ETTR
- (and 2 more)
-
 When opening CR2 RAW files from my Canon Rebel TSi, the the exposure is dramatically altered. The photos are much darker once pulled into Affinity. Photos that are overexposed look extremely underexposed once opened. Does Affinity do automatic editing when opening files? And if so, is there a way to opt out of that feature? I have attached a screenshot as an example. The original is on the right and the file opened in Affinity Photo is on the left. Any help would be appreciated!
-
I'm currently trying out the Develop persona with a Lightroom-converted DNG from a Canon 6D. So far, I've noticed that: White Balance and Exposure sliders in Basic sidebar panel are expressed in percentage, as opposed to Kelvins and Stops, respectively, which would be more intuitive for photographers. The Navigator, EXIF and Focus tabs seem to be collapsed by default; when I click on any of them, it doesn't do the expected result of opening the corresponding panel, and instead moves the image (as if using the Navigator panel to drag the viewport). I tried closing the panel above, but no dice. When I click on Cancel (in my case, to try to switch to the Photo Persona), the image closes without any prompt or explanation. I'm aware that the Develop persona is still "under construction", but I hope it helps to jot down these issues for reference.
-
- 1
-
-
- exposure
- white balance
- (and 4 more)