Search the Community
Showing results for tags 'stroke'.
-
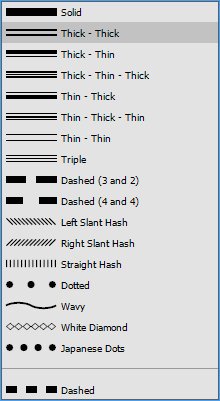
 Does AF offer the ability to create a multiple stroke with variations of thick/thin? InDesign panel example attached.
-
Hello: I have found an error that occurs on edges of a brush stroke in pixel persona. What it should be: The stroke has the same colour in the inner part and in the outline. What I get following the steps: The colour of the outline is different from the inner part. The steps are: 1. Change to pixel persona. 2. Use brush tool. 3. Select a pen brush and paint (the second one of the list below). 4. Change the brush to a hard basic one, change hardness to 0% and paint (I´ve used the 8th). Please, let me know if there already is a solution. For the moment to fix it, what I need to do is to change to draw persona and get back to pixel persona. Thank you very much.
-
 Hi All, I am looking for a solution for this specific issue but have been unable to find a reference. I am designing a simple logo made of overlapping artistic text letters but find that there are artifacts, (stroke lines), left over when I export the document. These lines are visible in the .afdesign file even when no layer is selected. The process I was following is: 1. Create and overlap individual text elements. 2. Added outer glow and 3D effects to the letters. 3. Select convert to curves for all elements. 4. Select the divide function. 5. Color individual curves to my liking. 6. Export as png or jpg - same result. See the png file I have included. I am on a Mac running version of 1.7.3 of AD. Dan
-
 Hey guys, I'm not quite sure how to achieve this. I'd like an objects fill to be transparent, but remove all the intersecting paths/lines behind where the fill of the front objects would otherwise cover up. You can see below (attached image), the desired outcome is on the left, but when I make the fill transparent, you get the result on the right. This is probably simple but I can't think of the right tool or technique to use. So I'd like to keep the strokes shown on the left but have the fill transparent without any strokes behind appearing. Any help is much appreciated!
- 6 replies
-
- 1
-

-
- affinity designer
- fill
- (and 1 more)
-
 I made an arrow curve in Design and continued editing it in Photo. I am trying to get a stroke that looks like fire, so I went to the stroke settings and set it to textured line style. In the brush panel, I selected the one that kinda looks like a fire(it doesn't). It will not apply to the curve's stroke. I tried using a different brush but none of them are being applied. What is the problem here? I will attach a screenshot and the file, but be warned. There is some NSFW things in the project I've hidden. Please don't tamper with them if not necessary. Bfurs_LevelUP_H.afphoto
-
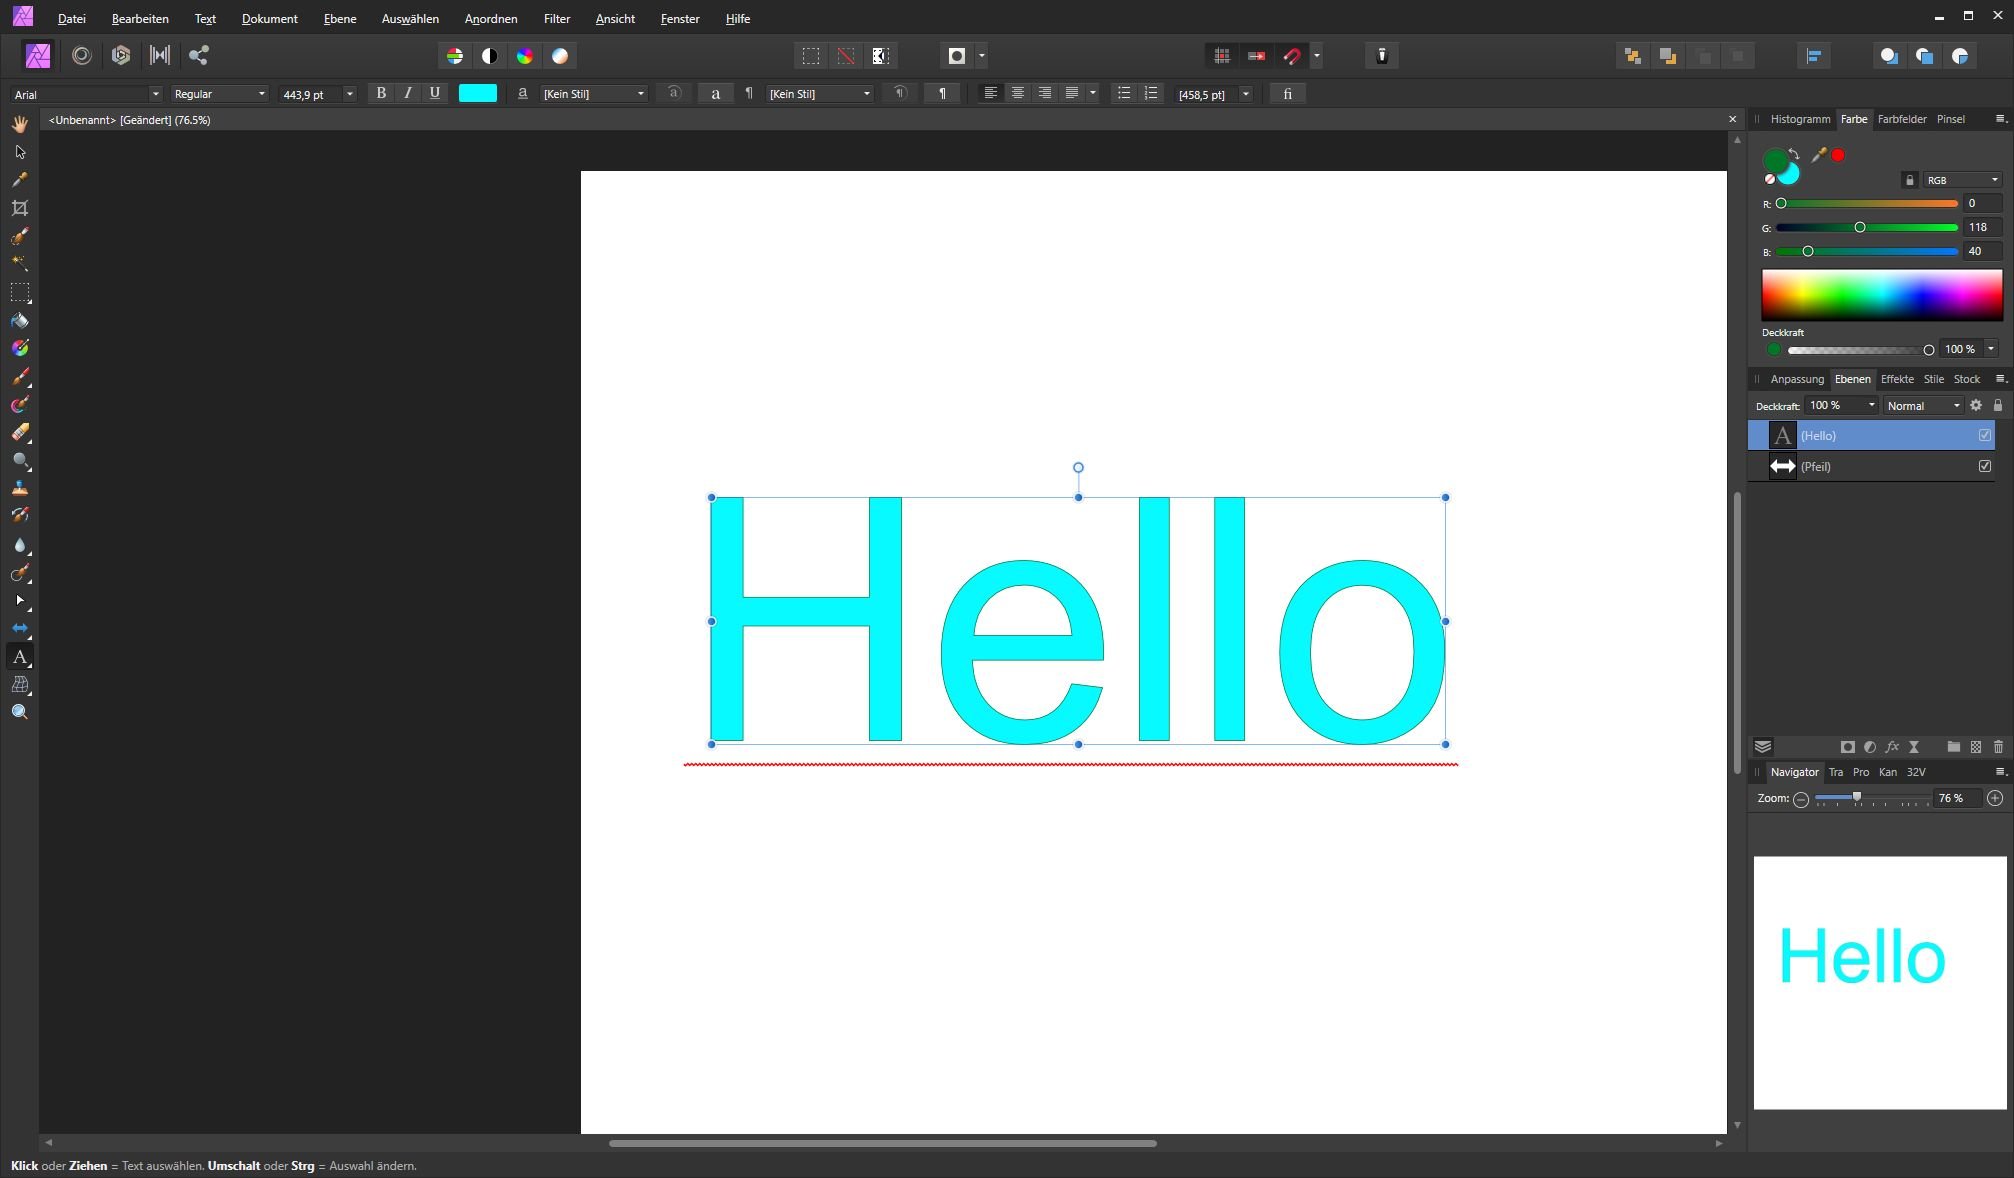
 Hi, 1st post here, sorry if it's a stupid question. Using latest version of Designer on a 2017 MacBook Pro (on Catalina). Here's the problem: When I add a brush stroke as an outline to text, I can change the brush stroke colour - as you would expect. But, when I set the stroke to be behind the text (99% of the time), the stroke changes to black - not in the colour picker, but on the actual page. If I change it back to be in front of the text, the colour returns. If I change the stroke from a brush to a solid line, it works fine. I also don't have this problem with shapes - only text. Thanks for a great app, hope you can help me with this little niggle. Meredudd
 -
 First off, Affinity is a stellar piece of kit. I am a very satisfied customer. However there is a small oversight that is really strange and I think should be fixed. So, I checked the help section, which was incredibly useful and very well designed, lovely experience. and I couldn't find any way to add strokes to selections. This seems like a really weird oversight. Krita and Medibang can do this, photoshop can, and so can gimp, but Affinity can't and that does sour the experience in an otherwise fantastic piece of software. I hope this feature is added to affinity photo in the near future. the selection tools available are nothing short of spectacular, so it seems strange that there is no option to add a stroke with a pixel line or a current brush when everything else is really good. I am doing this on 2 fold: 1 I wanna help affinity as much as I am able, especially since its a reasonably priced 1 off payment. 2 I don't want myself or those who have similar opposition to adobe as i do, come crawling back to photoshop. I will continue to explore this app and report my findings and thoughts here to help the devs keep this tool awesome for everyone who uses it. Will also be down in the future to keep buying software from you guys should you continue to take a stab at adobe. I'll be happy to give money and feedback. Photo is such an incredible piece of kit, and I want to help make sure that everyone who needs it doesn't have to crawl back to adobe over some silly trifles. I will gladly give some of my time to the devs of photo if they want me to test the implementation of this. Have a nice day everyone.
 -
 I cannot find a way to add a 2points stroke (in red i.e.) around a shape I have selected (with one of the selections tools - free hand or others) fibonacci_gris.afphoto
 -
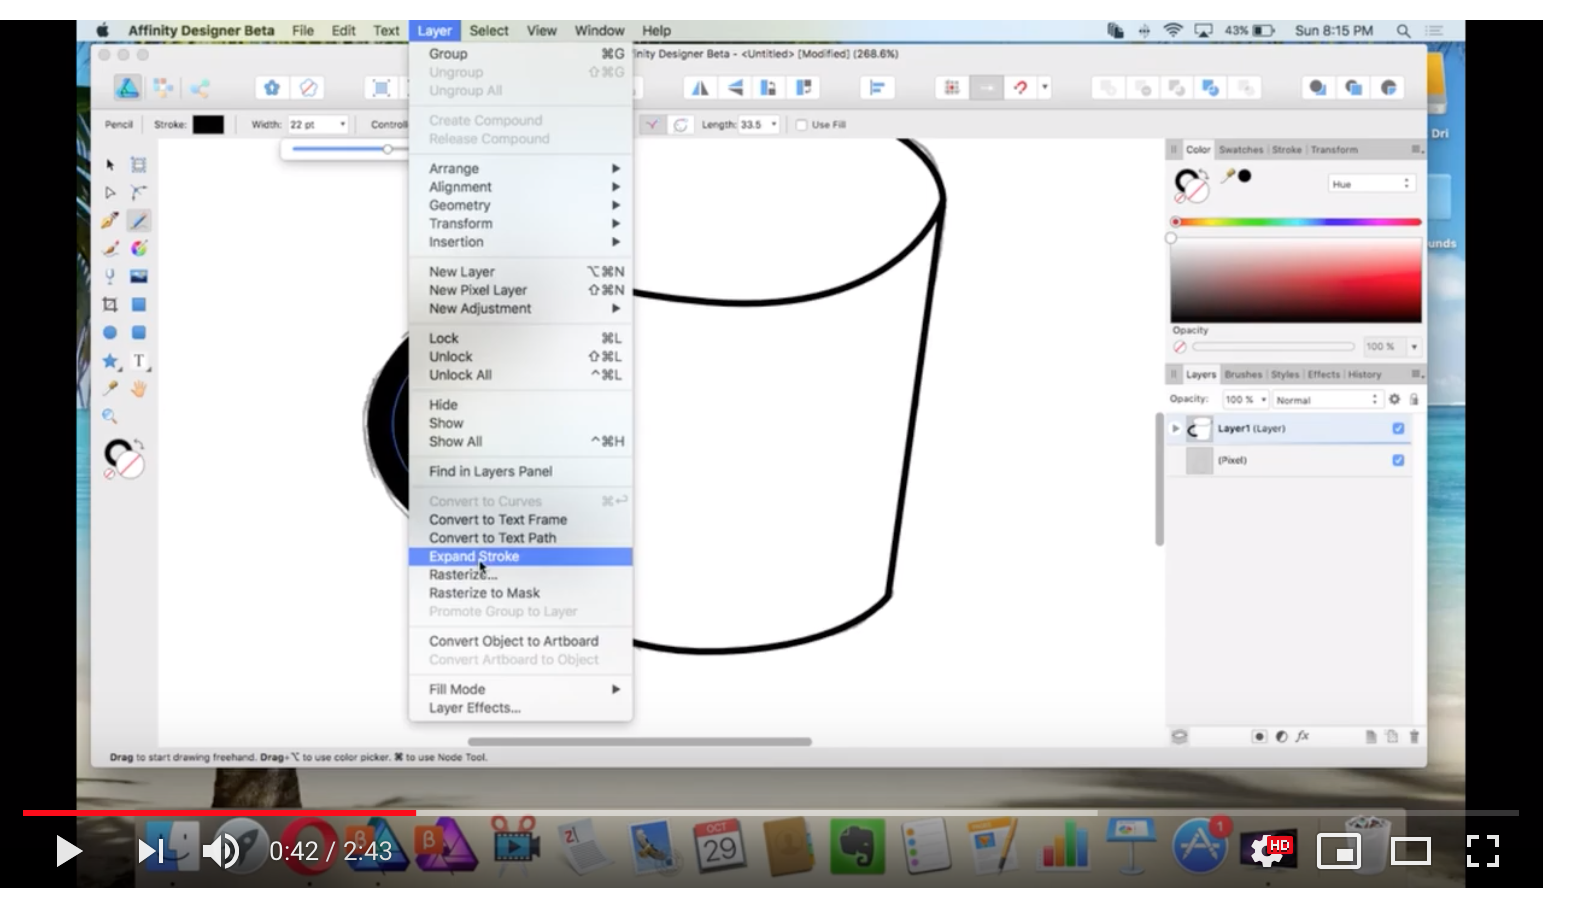
Hello, I was working on a project and I had to retrace some icons. As it can be seen in the video, As I expand the stroke the shape acts in a weird way. The shape gets deformed for no reason. The nodes move to another position. I have also attached the file I was working on, you can download it and expand the stroke. Thank you expand stroke.mp4 expand-stroke.afdesign
-
 I am transitioning from InDesign to Affinity Publisher. I have an InDesign document that has text with a black stroke and green fill. The letters really pop! (I'm attaching a sample.) Is there any way to achieve this effect in Publisher?
-
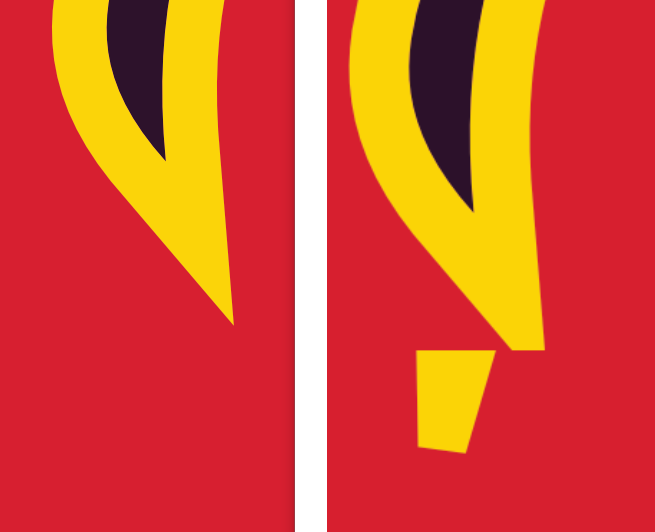
 Hello, when I draw a line with as a stroke, I cannot cut the shape! As it can be seen in the video, I would want to cut the right-hand shape, like the shape on the left side but I cannot cut the shape with strokes ? I found another solution digging deep and I realized that I have "expand" the stroke then I would be able to execute the operation. However, with regular stroke, I would not be able to cut the shape? cut shape with stroke.mp4
 -
 Hi, I'm new to Affinity, however, I've been using Adobe creative suite for years. I am having trouble with tapering brush ends. I've tried using the preset brushes, I've also tried altering the pressure, etc with no success. What am I doing wrong? I'm also experiencing problems expanding strokes, it doesn't seem to be doing anything. Any suggestions or good tutorials?
 -
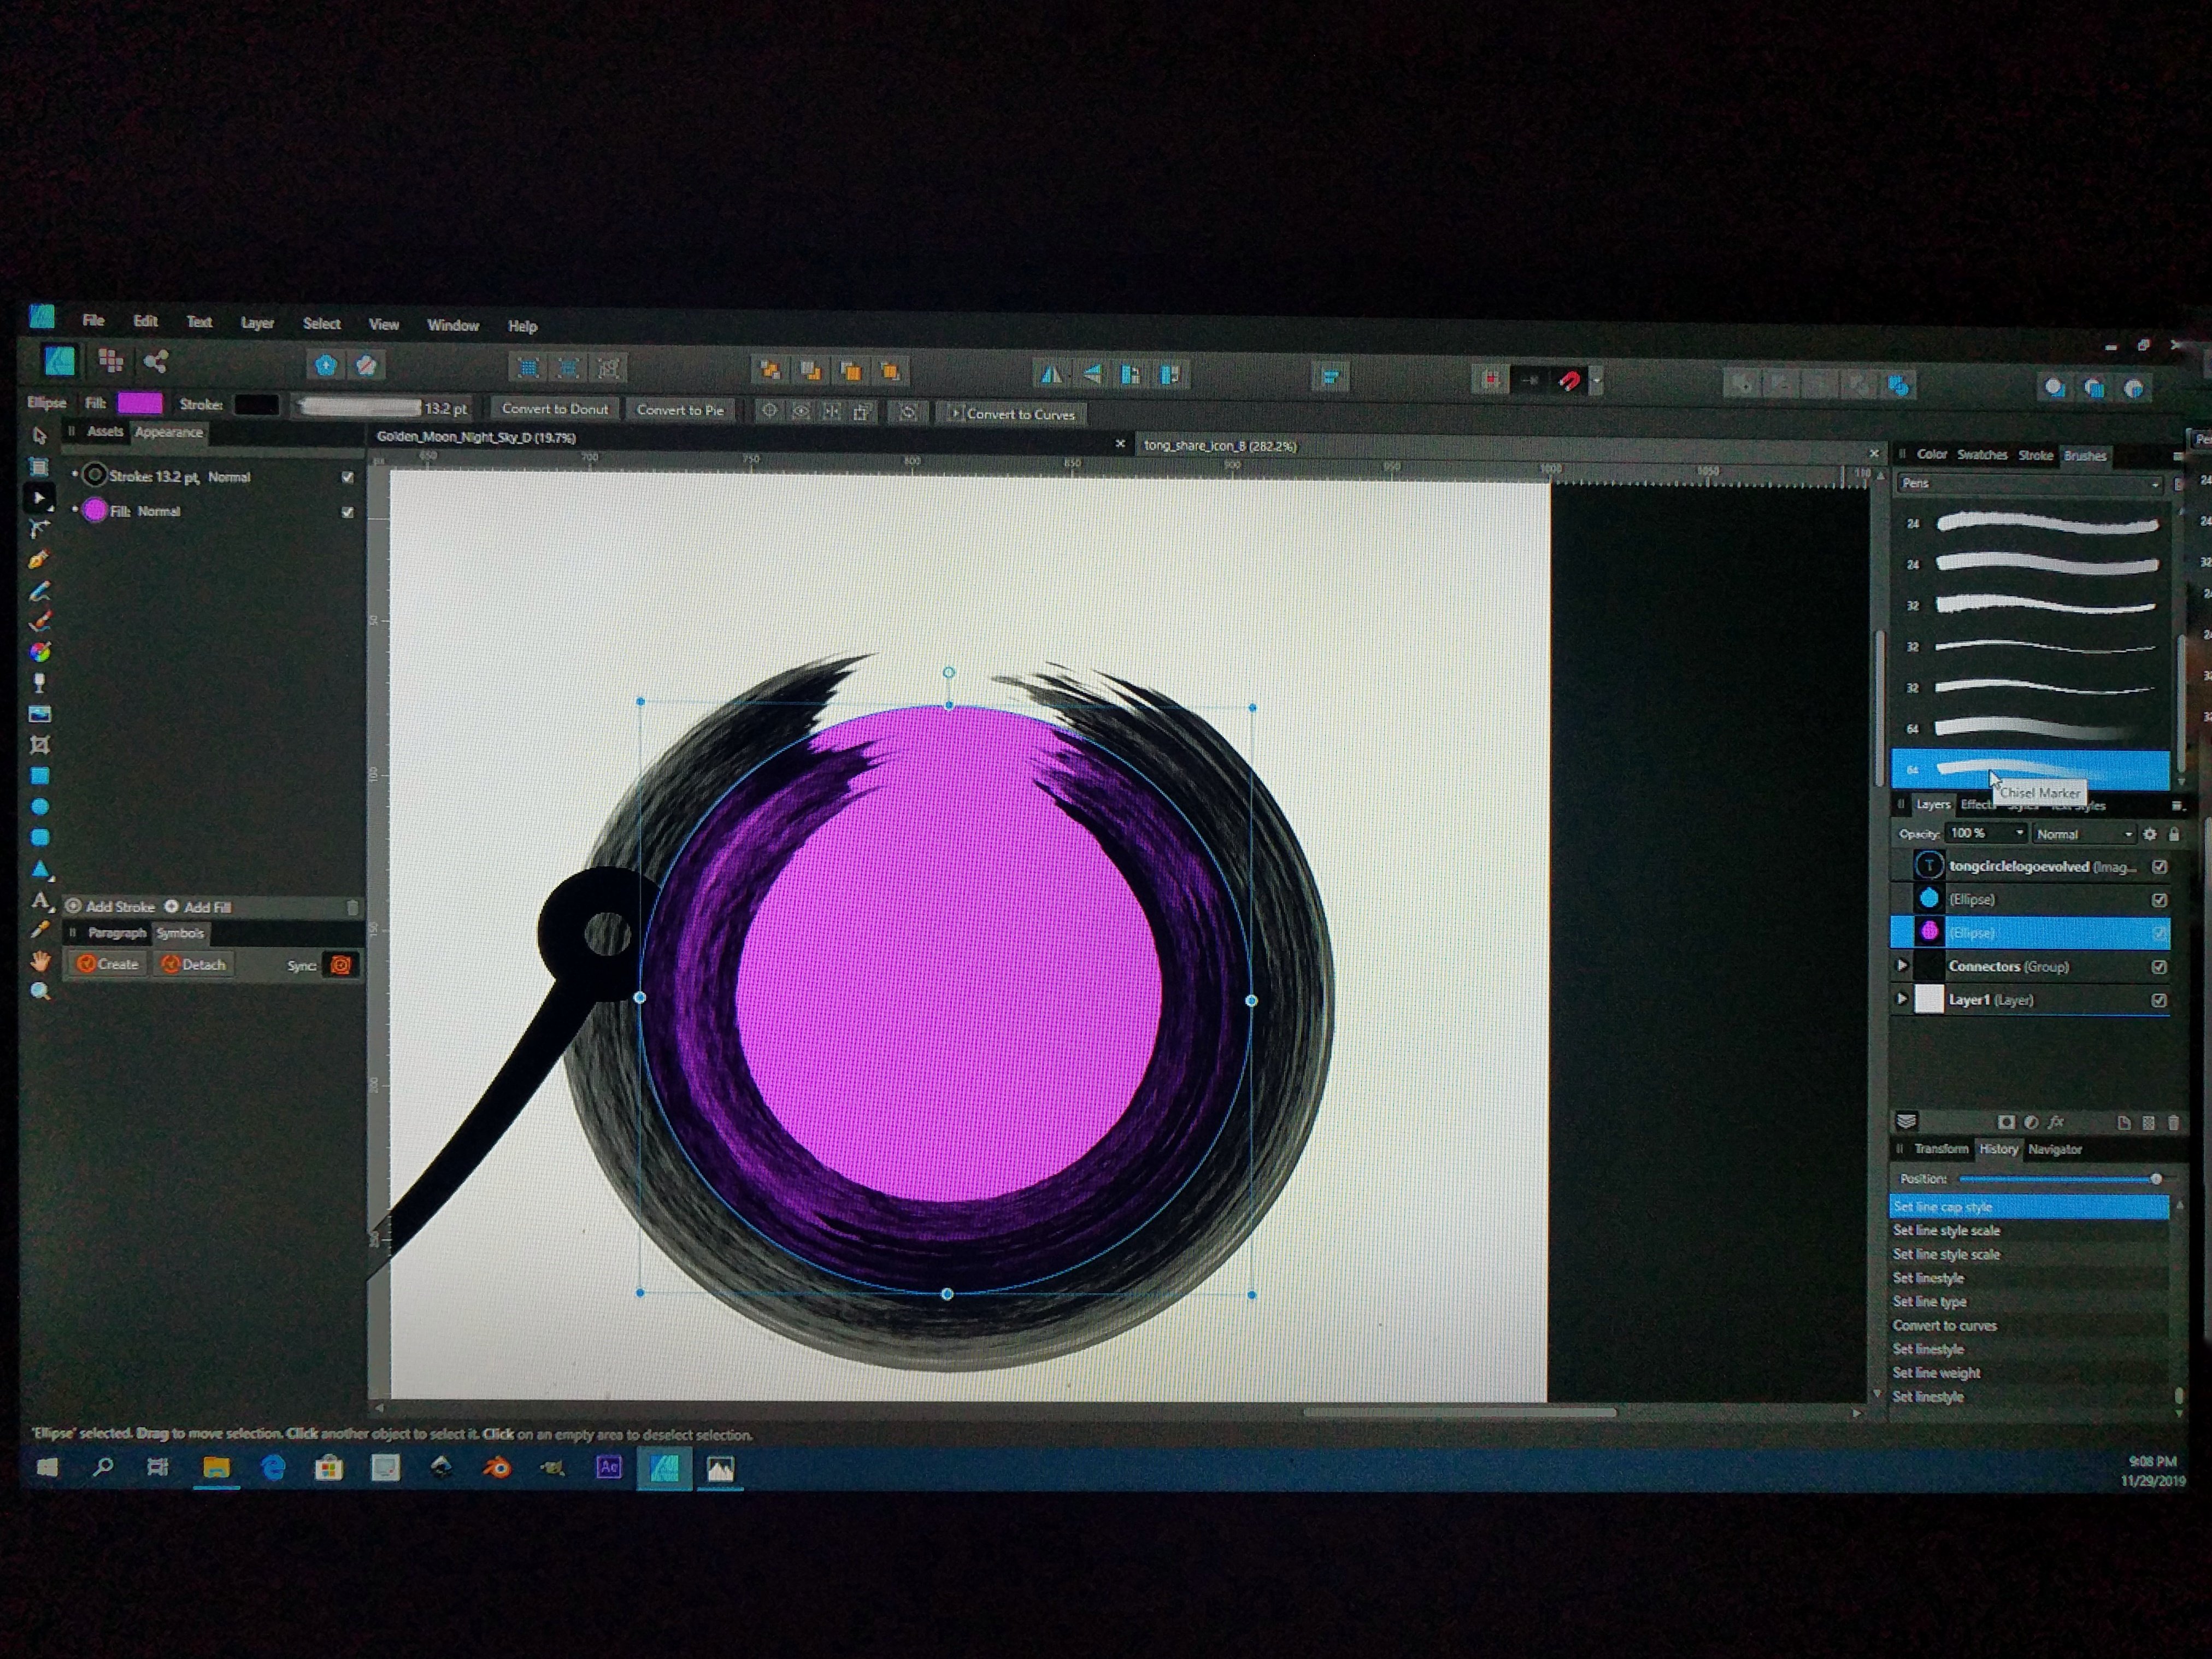
When I try and add a stroke to a circle with a brush texture instead of a simple line, I always have this issue where it does not connect properly. I tried converting the ellipse to curves and I've tried many different brushes, none of this worked. It only works when a use a simple line as a stroke. I am having this issue in Affinity Design. I'm not sure if it is a problem in Affinity Photo. You can see at the top of the circle where this happens.
-
 Hey there, the context toolbar of the artistic text function in Affinity Photo is suddenly lacking the stroke options. I can't find an according option in the view / studio settings and there are no hidden elements on right of the context toolbar (no double arrow). Where is it gone and, even more important, how can I get it back? Kind regards
-
 There have been similar posts earlier, but as it seems like nothing much has happened, perhaps the topic needs a push? Anyway, it seems to be two general kind of illustrators when regard to having strokes and lines scaling with objects; the first kind is the methodical one, who prefers to build up the drawing first and adding brushes afterwards, which I guess is a natural technique developed from the early days of vector based illustration. Then you have illustrators like me, who are newer to the game and who finally learn vector through programmes like Affinity Designer on an iPad, using Pencil. It’s fast and smooth and intuitive and you can easily swap between vector and raster. That makes it very easy to draw almost like you would draw on paper. You thrown down a quick sketch in raster and continue in vector, adding quick brush strokes, varying the brushes etc. Finally, you add colours and might do some shading in raster as well. But then we have the problem with scaling with objects. For the first kind of illustrator it’s preferable that this is not on by default. For the second kind, it would be great if one could have it on by default. I think that vector illustration has developed a lot since the beginning and is still developing, thanks to the development of software and hardware. Therefore I think lots of people would have welcomed such an option in the preferences. It would have been enormously time saving.
 -
 Hello, My wife and I are new to Affinity Designer, so please bear with me as I certainly haven't learned the "correct" terminology, or the names of the menu items, their locations or their options! Some background: We are attempting to take my wife's pencil and paper drawings and convert them into closed-shapes in Fusion 360 (an Autodesk CAD program). Those shapes will then be extruded into bodies and used to "engrave" or develop 3D models that can be either 3D printed or more recently CNC carved into wood. We purchased Designer, because it can export into SVG, which Fusion will accept (but not always very elegantly!). We've done some test drawings, and if I draw with the pencil, pen or ellipse tool, I only get a single line in the SVG when imported into Fusion (what I would call a pure path, and NOT a stroke--but that may be terminology from other programs). After several experiments, it appears that the best workflow is to scan the paper image into PNG, do a bit of cleanup/brightness/contrast modification in a photo editor, and then bring the resulting cleaner PNG into Designer as a reference layer. We then tried tracing out the main features from the drawing using an Apple Pencil on an iPad Pro, and can only get reasonbly good results using the pencil or the pen. Unfortunately, when these are imported into fusion, they can't be extruded or used as cut bodies, as they are a single line, and not a closed path-as-if-it were a line. (I hope that makes some sense!). I'd really like to find a clean workflow that isn't too time consuming. My wife is a traditional fine artist, so working on the iPad for her is a challenge. I'm an engineer and certainly no artist! Is there an easy way to convert the pencil/pen paths into brush strokes on iPad? I saw that a similar question to this was answsered on the Windows forum, but it's solution doesn't seem to work on iPad. I've tried a LOT of different software packages to make this a reasonable process, but haven't found one yet (I don't have Adobe Illustrator, which might be a way, but I was hoping Designer would be a better solution)--things I've played with: Photoshop, Inkscape, various environments in Fusion 360. I'd even take a completely better workflow if someone has already solved this in a different way. Thanks! -- Phil
 -
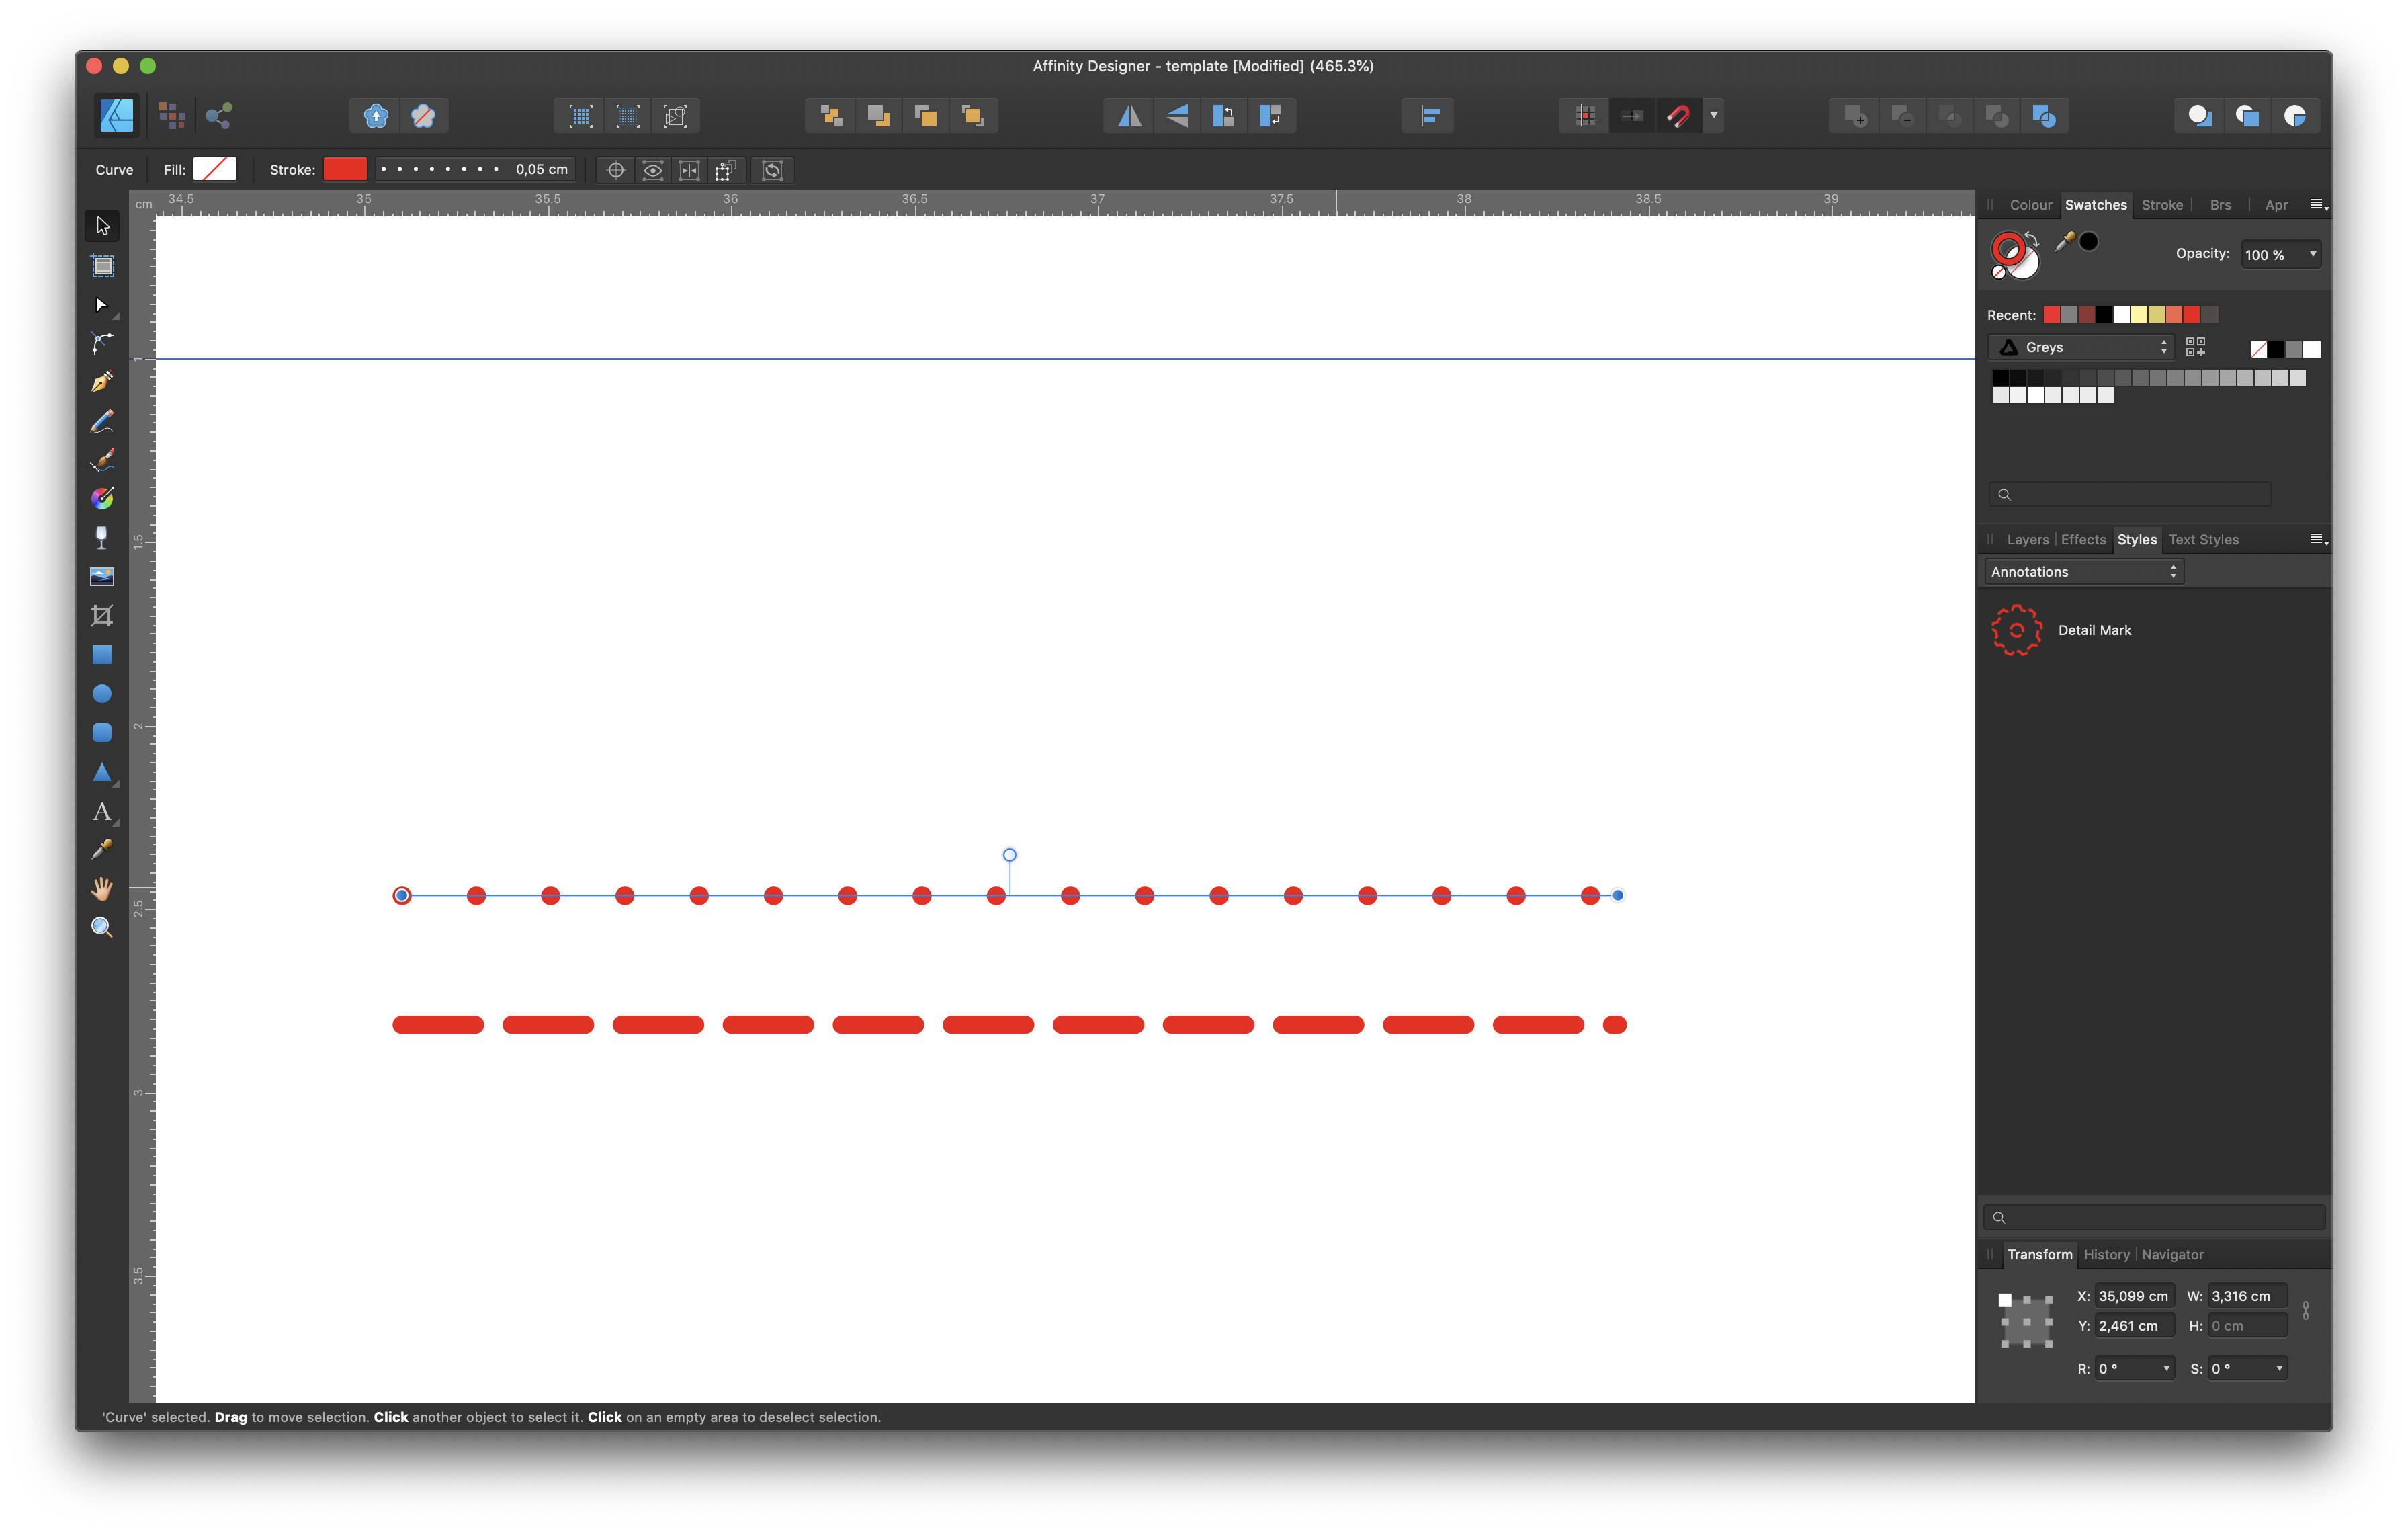
 Hi, I cannot add a second style with the same fill and stroke colour to the 'styles'. I'm trying to save some styles to the styles menu. They have the same fill and stroke colours but they have a different dash length/pattern. So when I try to add a second one to the styles menu, it doesn't let me do that. I think AD sees this as a duplicate and therefor doesn't let me add it. Only when I change the the colour of it. Anyone out there who can help me out? Thanks
-
 Hi, I'm experiencing this issue: I have an image clipped inside a rectangle (mask), and the rectangle also have a stroke set. When exporting, or rasterizing the layer artifacts appear on the image edge, it looks like there is some computation error in the subdivision. To reproduce just open the attached Test.affinity and export in Tiff with default settings. Additional info, the issue happens when the clipping mask stroke is set to be inside, see stroke setting pic. Affinity Photo version 1.7.2 release, issue reproduces both on macOS and iPadOS Test.afdesign Test.tiff
-
On designer v1.7.2 I have noticed when opening eps files, the shapes are opening incorrectly (seems to open smaller). The illustration looks like there is a stroke around the shapes. In previous versions of designer, I did not see this issue. Please see template example. Shirttestfile.afdesign
-
 Stroke width goes by increments of 0.1 pt, which is very coarse (also degrees when rotating and shearing an object). This means I can't even go by quarters in AD because it requires 2 decimal places (if using decimals). I'd like to see this changed to maybe 5 decimal places or just using fractions (for things like exact thirds). Gradient controls only go in increments of 1%. I'd like to see this drop to maybe 0.0001% and maybe add different gradient interpolation modes (like easing, cubic, hold, 1-bit dithering, etc.) and more cool stuff. Please give us more control than what Illustrator gives!
 -
 Happens occasionally. Seemingly at random. This is how a 1 pt stroke prints. Using latest verion of Designer on Windows 10. Vector file attached. print error.afdesign
-
 If you drag an object underneath another one (subordinating it), it will be used as a fill layer to the the parent. My question is: why can't this also be applied to the stroke? Or am I missing something here? Helmar
 -
Is it a bug or intentional? Every time to select a different brush, your storke with gets reset, making it a pain to check the look of individual brushes, as they mess up the object you're trying to apply the brush to. This just in... Helmar
-
I'm having a strange export issue. The polygon and its border look perfect in Designer, but when I export to PNG, the corner gets messed up. I've tried changing the corner's angle, but since I can't duplicate the effect in Designer, I never know if I fixed it or not and need to re-export and look at the PNG to see if anything changed. Left: Designer, Right: Exported PNG
-
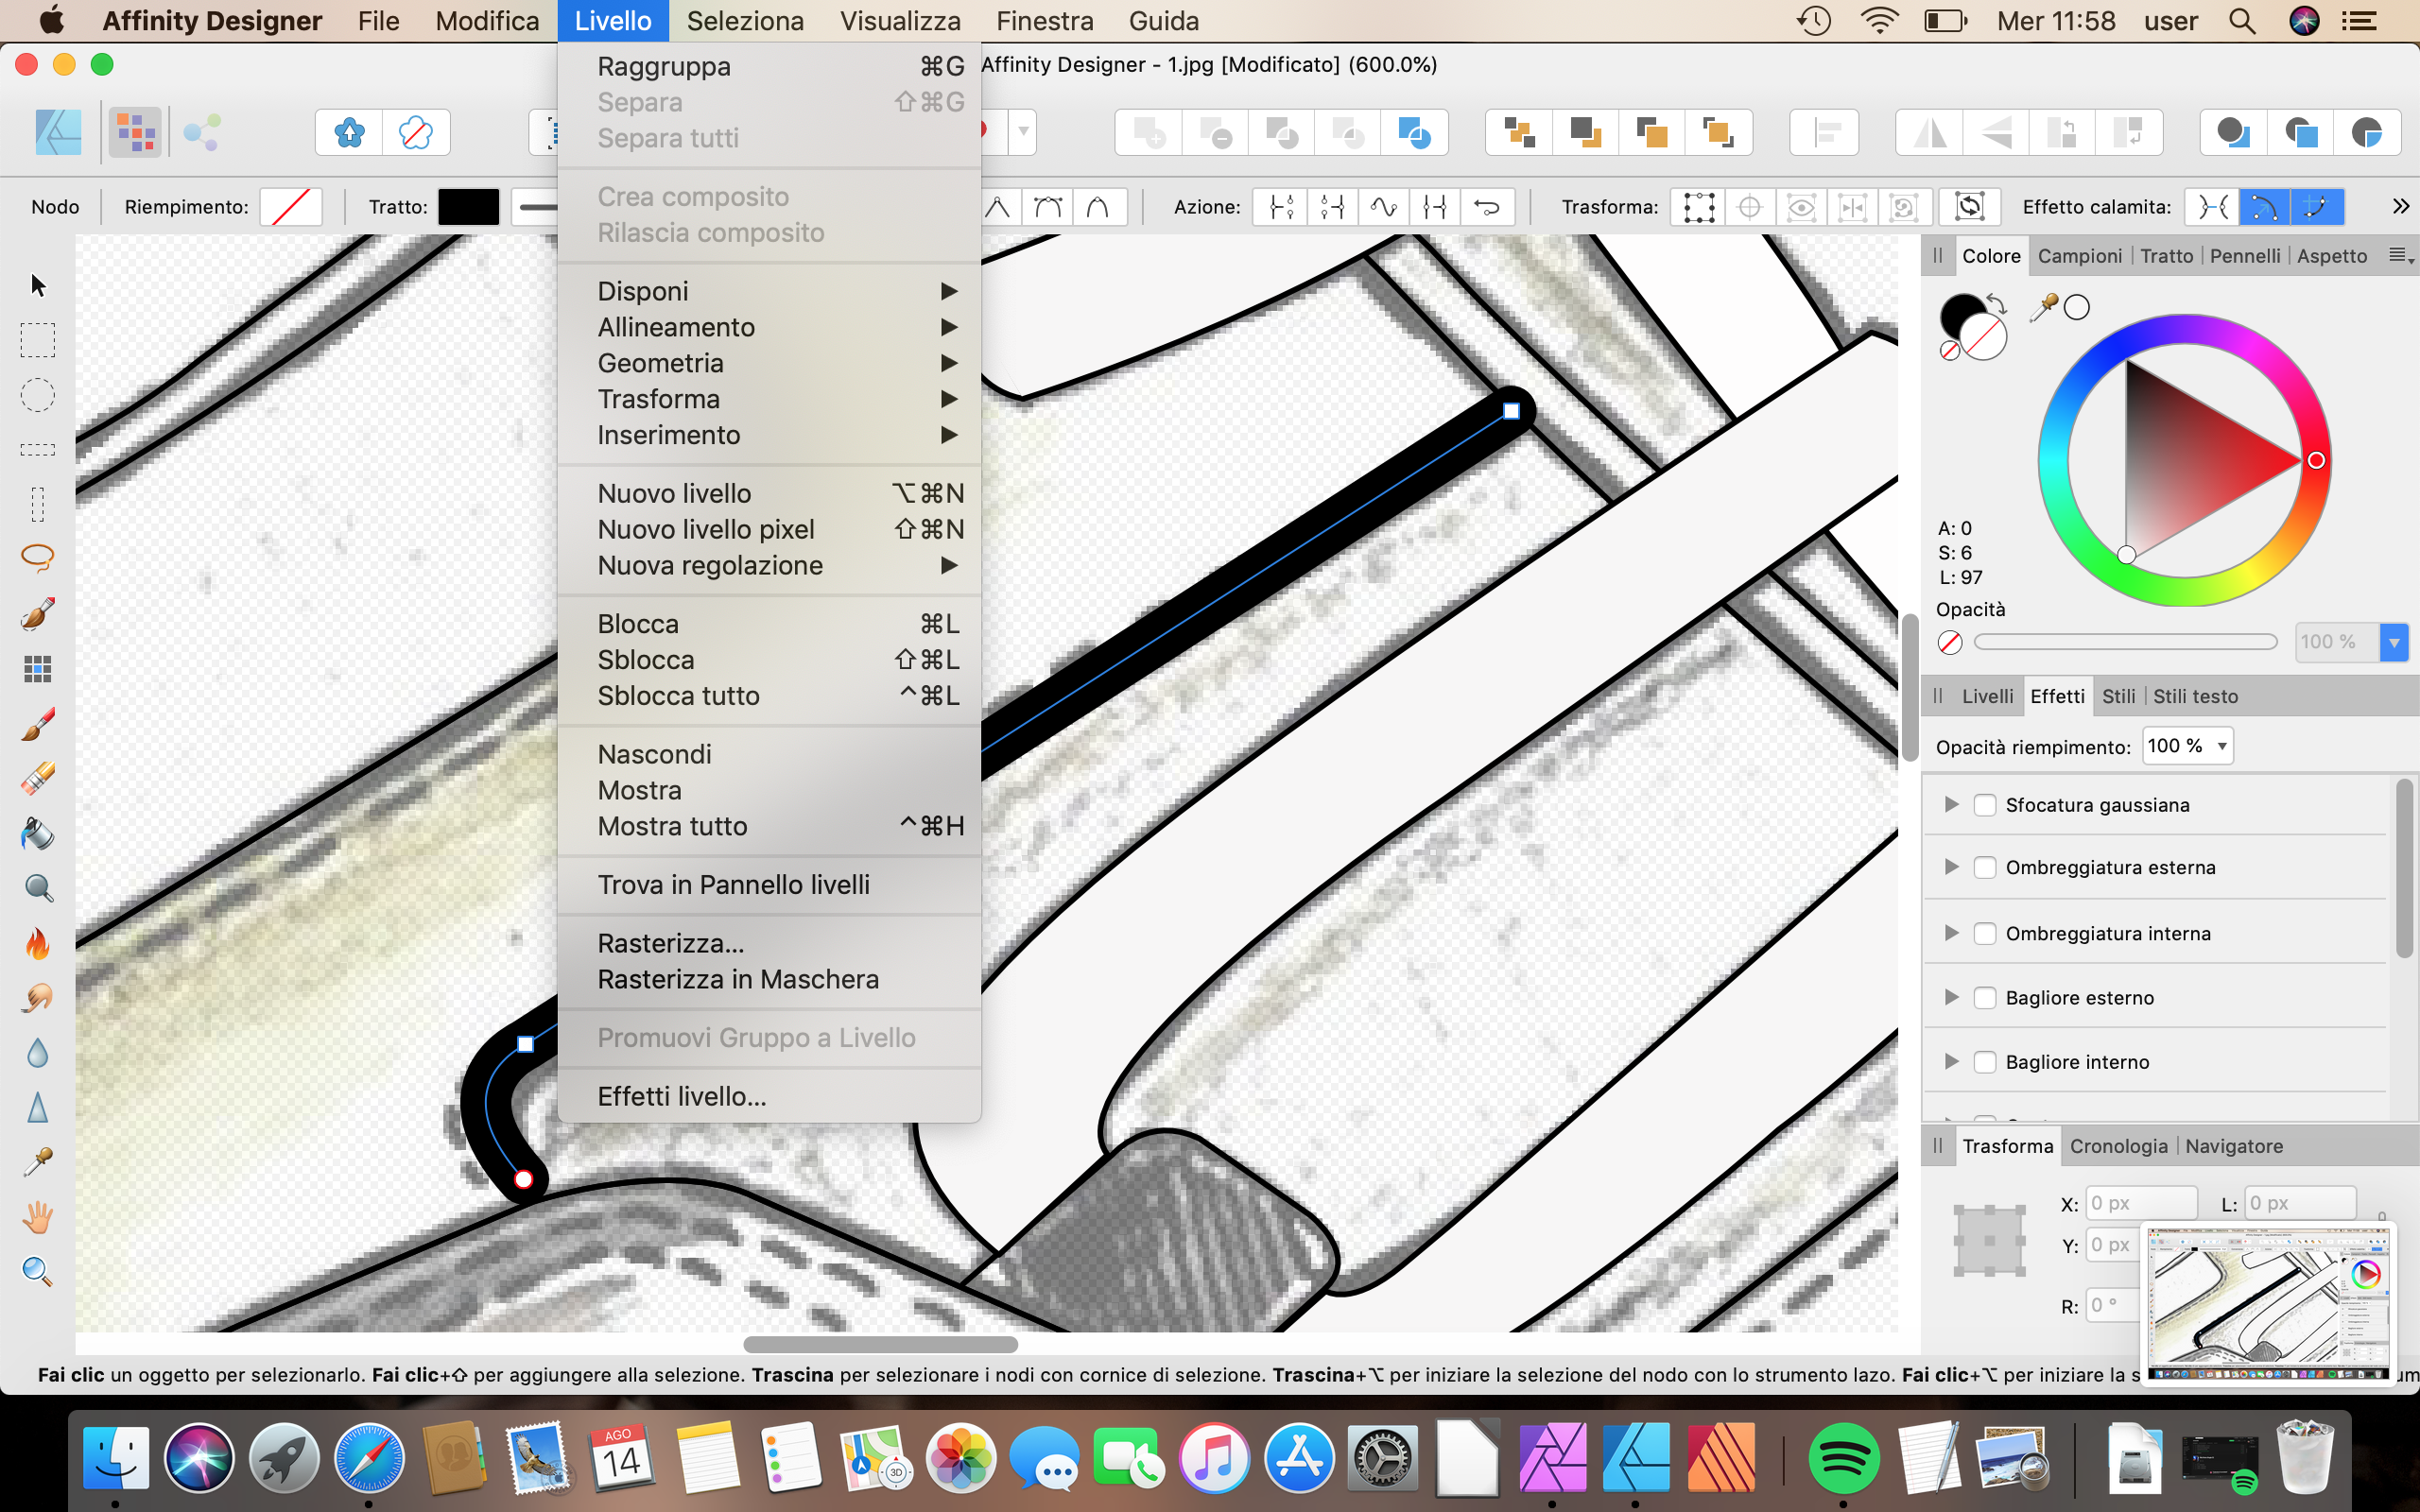
 Hi, i am just trying to use Affinity Designer from the 1st time. I have seen from different tutorials that there is the function EXPAND STROKE (in english version), but i can't find it in my italian version. Can you help me to find it? thanks, Regards Eleonora