Search the Community
Showing results for tags 'pixel persona'.
-
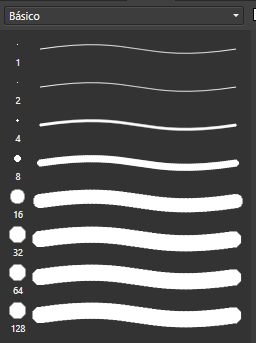
Hello: I have found an error that occurs on edges of a brush stroke in pixel persona. What it should be: The stroke has the same colour in the inner part and in the outline. What I get following the steps: The colour of the outline is different from the inner part. The steps are: 1. Change to pixel persona. 2. Use brush tool. 3. Select a pen brush and paint (the second one of the list below). 4. Change the brush to a hard basic one, change hardness to 0% and paint (I´ve used the 8th). Please, let me know if there already is a solution. For the moment to fix it, what I need to do is to change to draw persona and get back to pixel persona. Thank you very much.

-
 Hi! Drawing using symmetry and mirroring works fine, there's a tiny bit of slow down sometimes, but nothing too serious. But drawing using only symmetry is a lot slower, to the point is almost unusable. I find it odd since I'd presume both functions would work the same. See the attached video for a visual sample of the issue. Happens on an iPad Pro 9.7" (2016) with the latest iPadOS (13.3.1) and latest Affinity Designer (1.7.3). Thanks! RPReplay_Final1580374739.mp4
 -
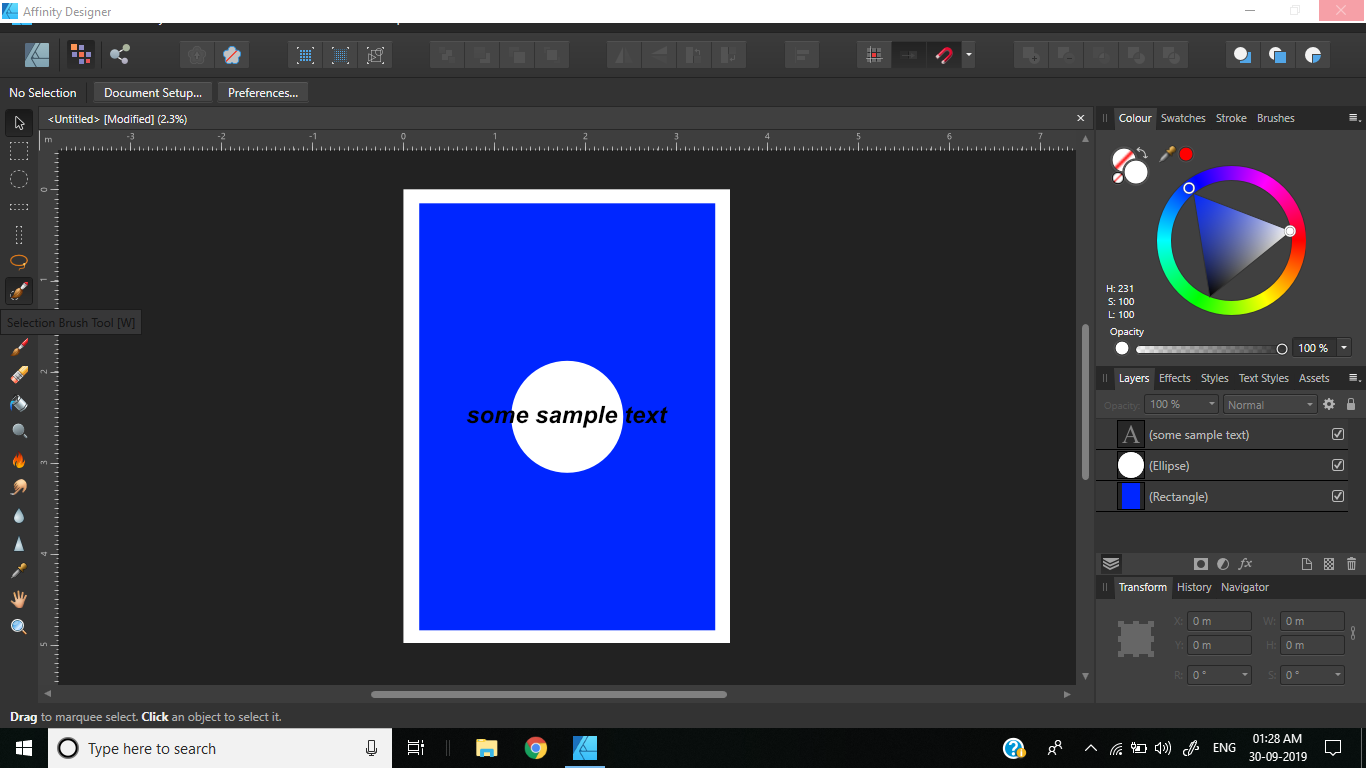
 While working on 3.5 m x 5 m sized document with 300 DPI, I tried to select the Selection Brush Tool in Pixel Persona. AD immediately crashed! No issues while working on documents with small dimensions. Also, tried opening the file in AP and issue exist there too!
-
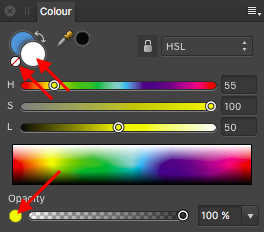
Hi, I'd like to ask you what is the purpose of showing the "none" colour the way of white colour when the Brush tool in Pixel Persona is selected. It is often confusing when I'm gonig to draw something hith white colour but the brush is not painting at all. Then I see, by comparing the colour selector and colour sliders, that there is difference and not consistancy, what means I had to sellect "none" colour before (often repeated when comming from Designer Persona to Pixel Persona with none colour in selector). I guess it would be better to indicate the none statement with red diagonal line as usual. The same for Affinity Photo.
-
What is the possibility of a "Reference Layer" in the Pixel Persona? For those artists that draw cartoon etc., a Reference Layer is a great non-destructive way of adding colors to an outline drawing.
-
It's what the topic title says, the further you zoom in, the slower the brushes becomes. If you're zoomed way out brushes perform between well to acceptable, depending on their complexity. As you keep zooming in, the performance drops further and further until they're unusable. This is true even for basic round brushes, but it's more noticeable in complex brushes, such as Frankentoon's. I've also noticed it's worse if you're drawing over vector shapes, which is the whole point of these brushes. See the video for a visual reference. iPad Pro 9.7" with latest version of iOS 12.4 and Affinity Designer 1.7.1. I've tested and this also happens on Windows, the more you zoom the worse the brushes perform. But on Windows, especially on a desktop machine, the sheer processor power masks the issue. Thanks! RPReplay_Final1565346075.mp4
-
 The brush is not behaving as it was in a previous version. I could count on a very smooth line while drawing in pixel mode and an even smoother line when using the stabilizer tool. All I can manage now is a choppy, staccato line with angular curves. I've labeled the image to give you a better sense of the problem, showing the results with and without the stabilizers. All other programs on this computer and tablet combination are working properly. Thanks
-
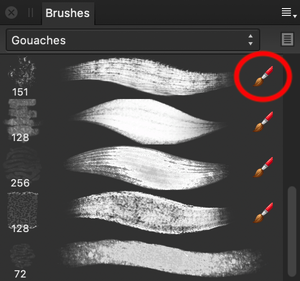
 Hi, I'm trying to select a brush with Erase Tool turned on. but when I select a brush at the Brush Panel.. it's selecting Paint Brush Tool automatically, I know there is this Icon like this image as example, but how can I get rid of this? in this video I can demonstrate this issue, because some others brushes with this Brush Icon works with Erase Tool selected, please help me... I just want to Erase with the same Brush that I paint Bug-brush.mov
-
 I make a lot of isometric illustrations, so I the isometric pane makes my life so much easier (thanks for that!). But It would be even better if the isometric window could also be shown in the pixel persona so you could switch planes and lock drawing angles to the isometric grid while making the sketch for a vector drawing.
-
- 2
-

-
- isometric
- pixel persona
- (and 1 more)
-
Hi, I have already posted this issue on a different forum I guess but noone could help me with it. The Pixel persona lags on my iPad and doesn’t help me with my projects at all. Sometimes, the app just shuts down when I click on pixel persona. This has been happening since I started using Affinity designer and I thought it will get better with updates. But it is still the same. I tried uninstalling the app and downloading it again, but it is still the same. I have attached a video for your reference. Thank you. Quinzy IMG_1217.MOV
-
 I'm a bit confused with the behaviour of the "none" colour while brush painting in pixel persona. I can set the colour of foreground and background to "none", what is also indicated by the red diagonal line. This is fine until I choose the Paint Brush Tool and start to paint something. The colour of the foreground changes automatically to white indicated by the white circle, but the brush is painting nothing. Because before the sellection of it the colour was set to "none". But why is than the circle indicating white colour? Either it should stay indicating "none" (red diagonal) or it should paint with white colour. This would by logical, am I right?
 -
 Hello All, Im having a difficult time with brush selection. How can I copy pixel brush styles to the vector brush styles? Additionally, when editing between vector brushes and pixel brushes. It is inherently impossible to figure out as the user that vector and pixel brushes carry the same functionality. Since navigating between vector and pixel personas, do carry some functionally with the same tools. It would help if the assistant or some message displays that there is some limitations when trying to make a change to a shape with the wrong brush option. I mean, color, stroke and fill all seem to work across personas and do not require an additional gui to display to change properties. Thanks,
 -
 Hello here , firstly a huge thank you to the app creators, I am enjoying it ! 2 youtubers make tutorials about affinity designer on IPad. They give free brushs sets in it and I want to use it but I cant because it imports them in the wrong persona. I mean : they are invisible in the pixel persona where I can properly use it BUT I can see it in the vector persona brushs where it’s useless for me. Someone has a trick for this ? Thank you
 -
 I would like to see some improvements to the brush engine in the affinity programs. I have been using the latest beta, but was disappointed that there seems to be hardly any improvement in this area. The most prominent bug has to do with the custom wet edges setting. Many lovely dynamic brushes have these, but these properties do not work when erasing: so when I want to use the same brush to erase (which is my normal workflow, paint/erase with the same brush) the brush is completely different, soft and blurry. I find this to be very annoying when trying to use AD or APh for drawing and painting. I have to create a workaround with masks or switch to a hard normal eraser, which does not look as nice. A related bug is that when I switch back from eraser to brush, the wet edges setting of the brush does not work, and I get a soft blurry brush. I have to switch back and forth between brushes for the real brush look. I really hope you can improve this, as it is pretty groundwork stuff when using these apps for raster illustration. The brush engine has potential, but this is holding it back. I use an iMac 2011 with 12 GB ram, el Capitan (no Metal) and and iPad Pro 12.9 PS I posted this in the normal suggestions section, but got no response, so I hope someone from Serif can respond here....
 -
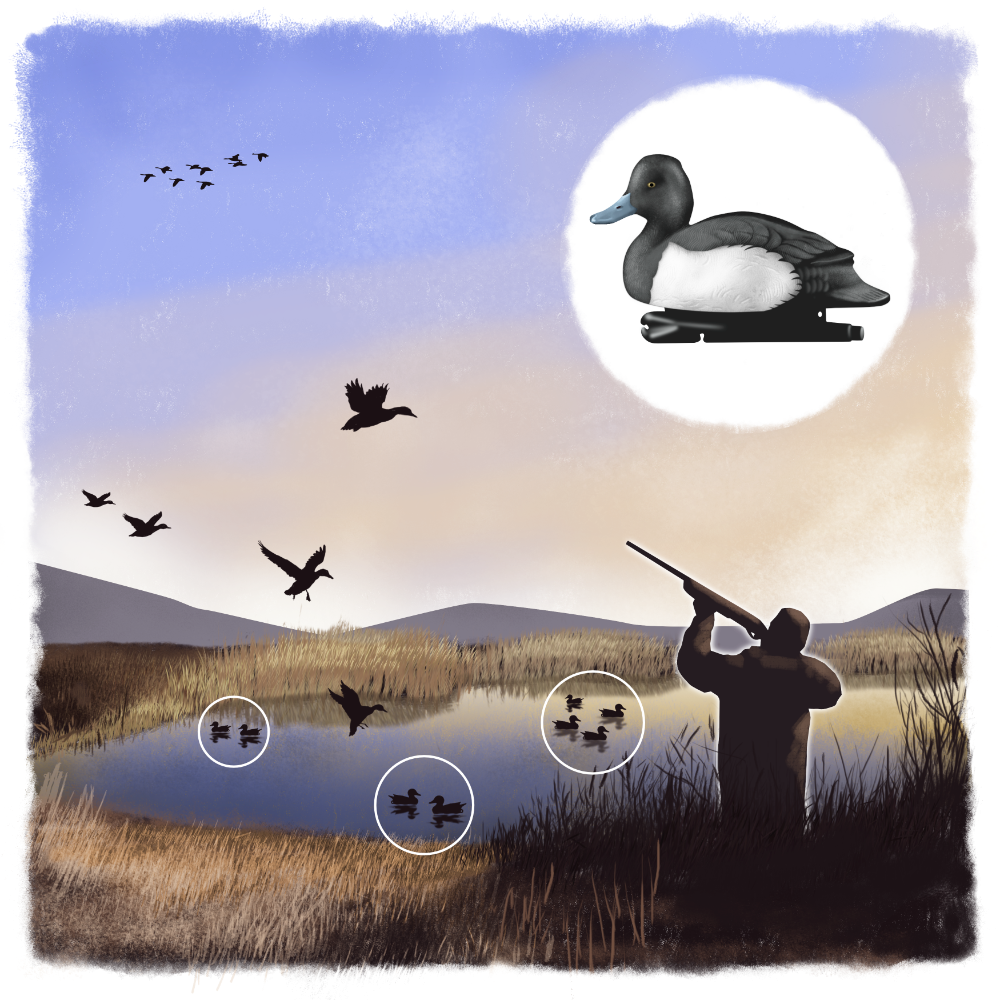
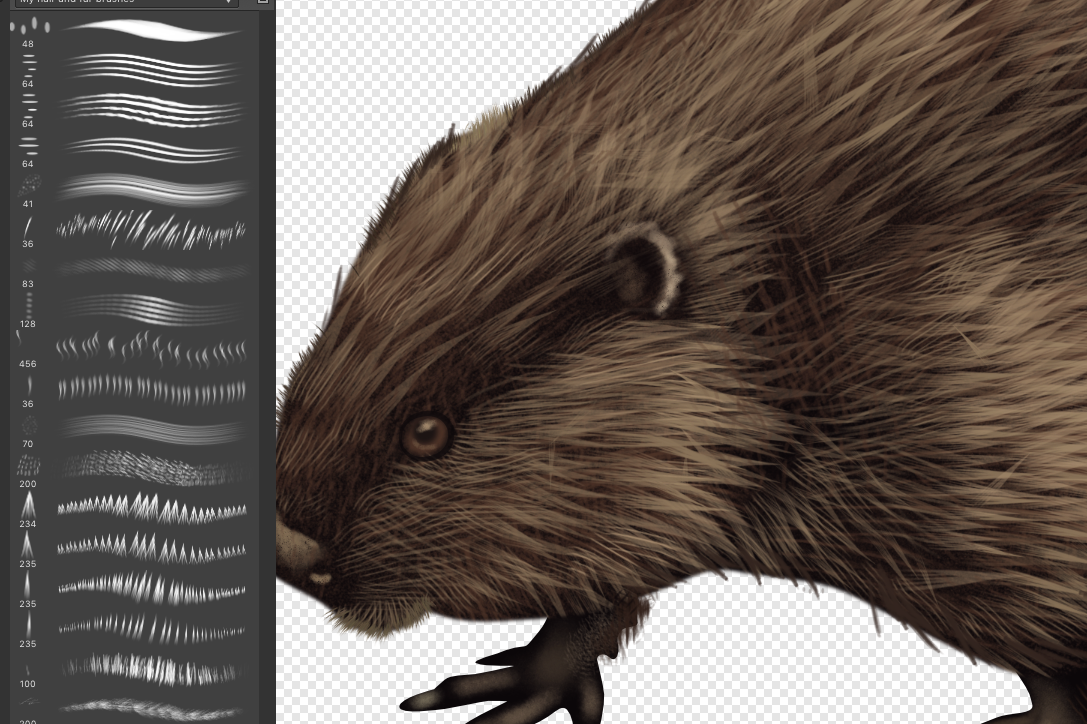
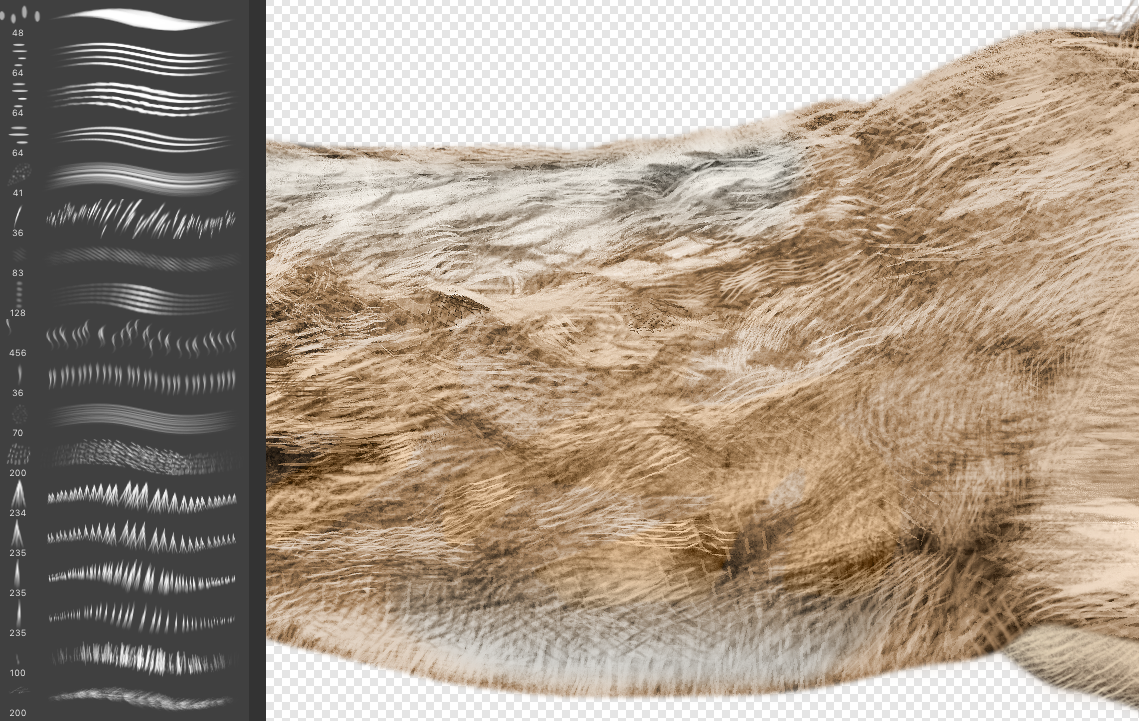
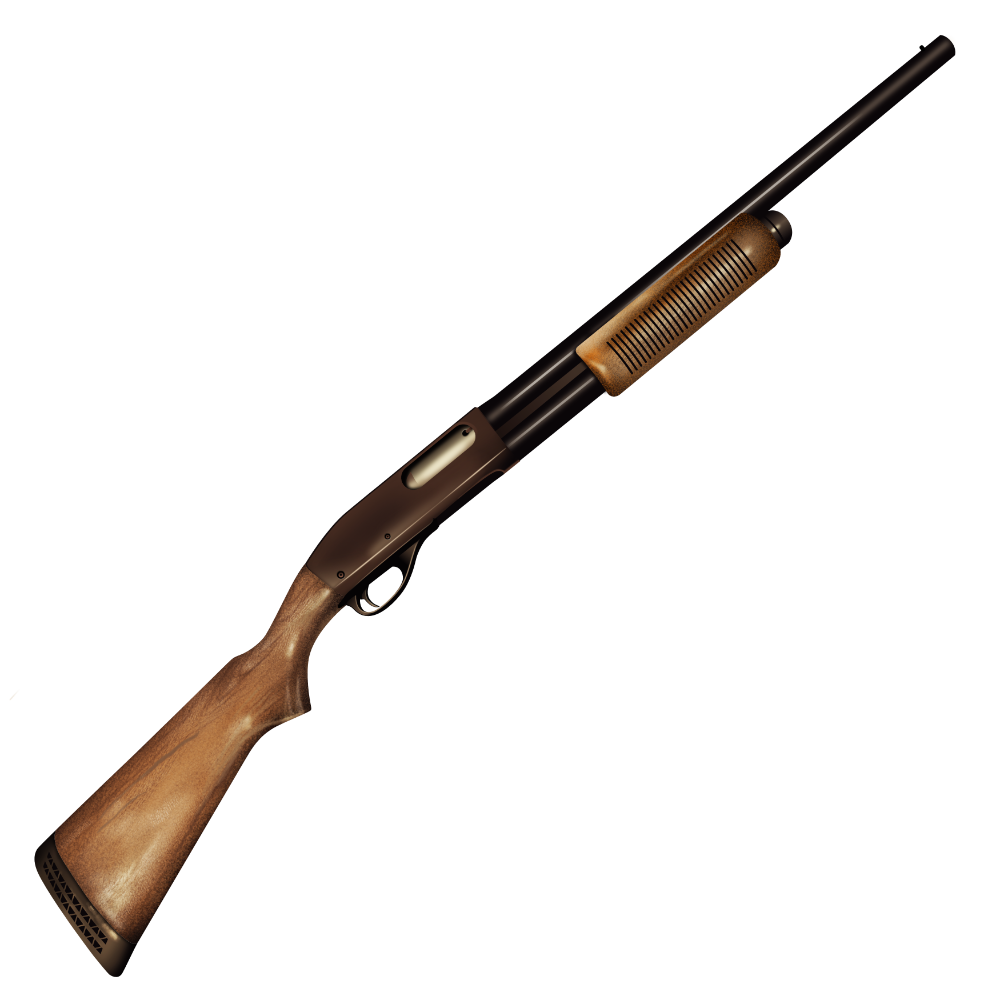
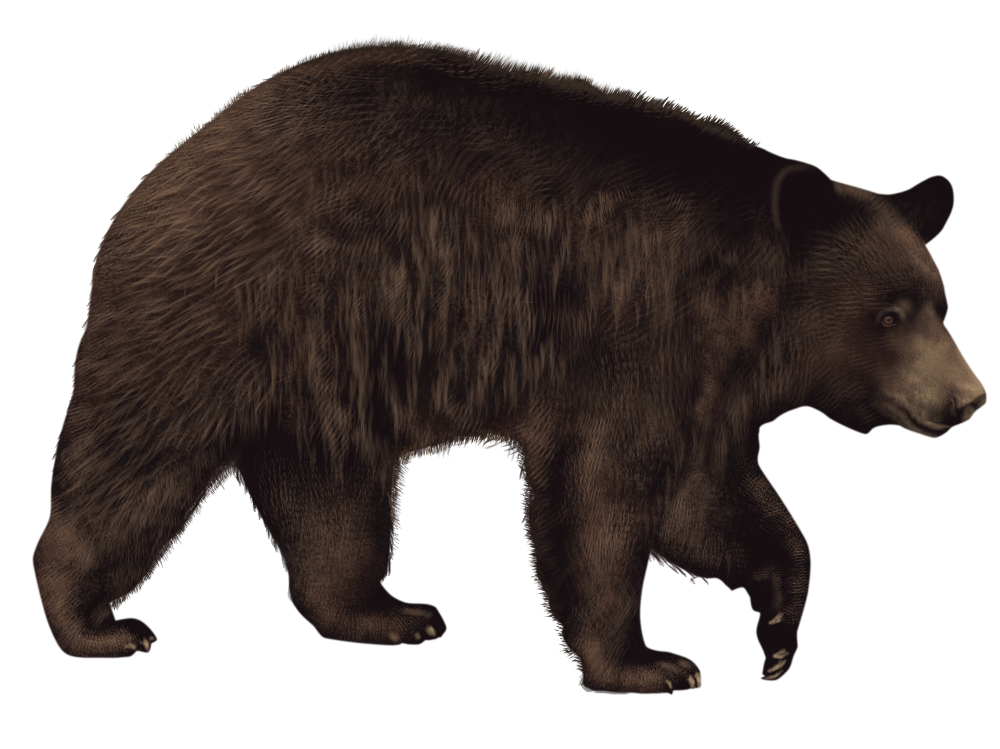
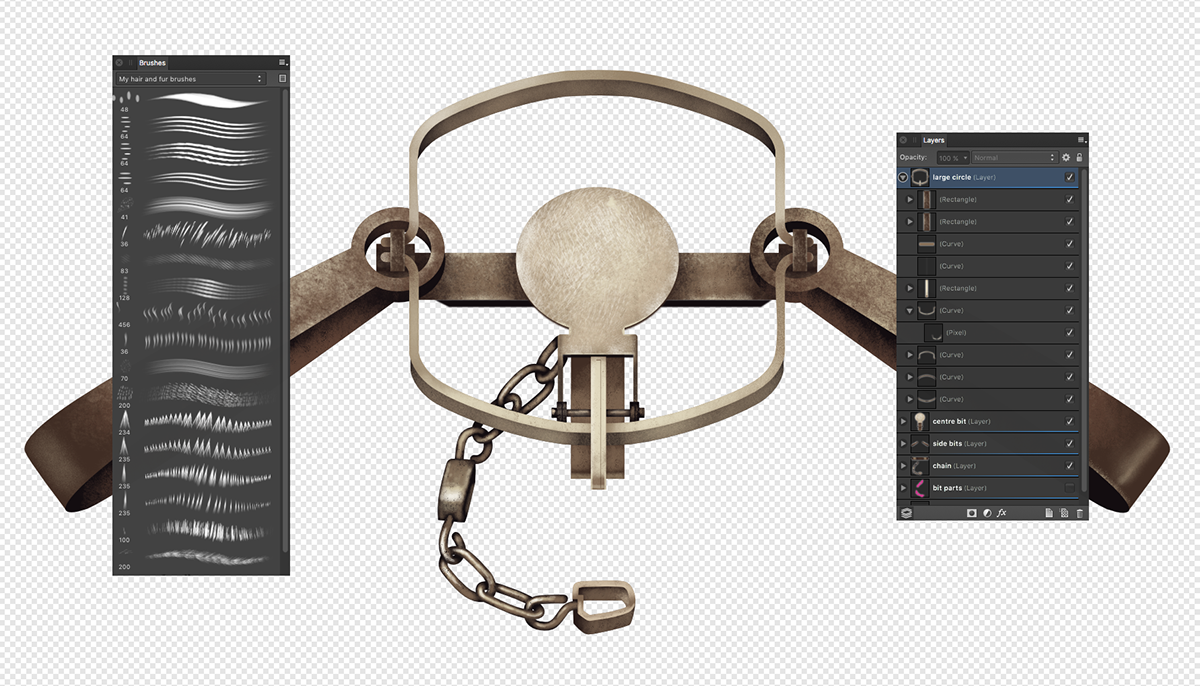
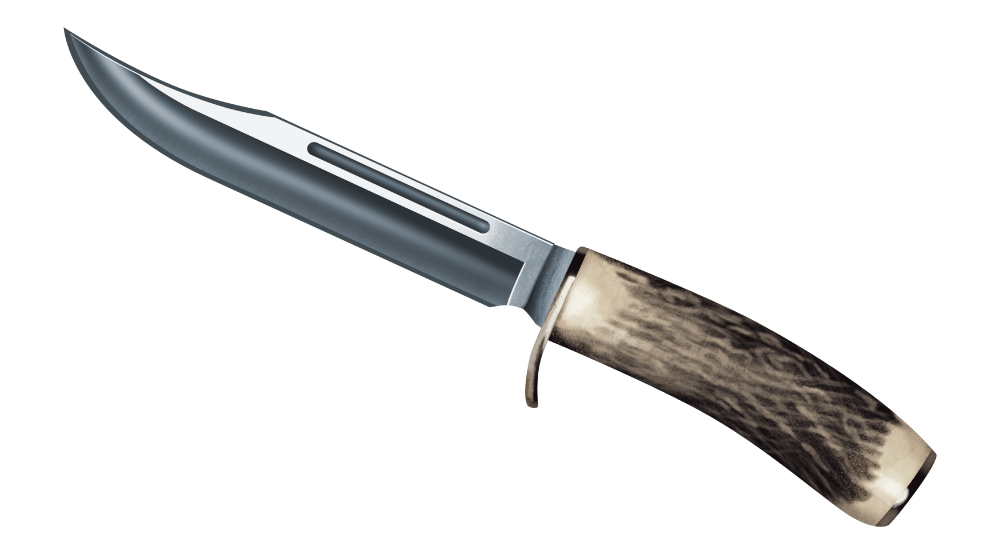
 Hi all, here's something very different from my usual and a bit of a personal challenge on a recent illustration project. Denman Digital in Vancouver hired me to create a series of images for a project they were doing for their client the Aboriginal Peoples Television Network (APTN) here in Canada. The Hunting in Canada Field Guide lays out the traditional methods, tools and prey Indigenous people used and continue to use to survive and thrive in Canada's northern frontiers. This project is a web companion piece to their Moosemeat and Marmalade adventure cooking show on APTN. https://aptn.ca/moosemeatandmarmalade/ Almost every aspect of these illustrations utilized the pixel persona in Designer. I could've use Photo exclusively for this but I am much more comfortable and familiar with Designer and the process is basically the same. I created a bunch of new custom brushes as well as used many of Designers default and user-contributed brushes for this. I was rather pleased with the final outcomes and have since started adding more of this pixel painting workflow to my usual work. Rather than upload a bunch of images here I'll point you to a few links on my Behance site below and leave just a few images here. The project was broken down into 3 areas: Prey, Hunting Tools and Hunting Strategies. https://www.behance.net/gallery/77640277/Hunting-in-Canada-Field-Guide-for-APTN-Prey https://www.behance.net/gallery/77647417/Hunting-in-Canada-Field-Guide-for-APTN-Tools https://www.behance.net/gallery/77647933/Hunting-in-Canada-Field-Guide-for-APTN-Strategies Much thanks to Denman Digital and APTN. :-)
- 5 replies
-
- 13
-
-

-

-
- pixel persona
- painting
- (and 5 more)
-
 Hallo zusammen, in Photoshop gibt es eine Möglichkeit die sich "Schnittmaske" nennt und ziemlich nützlich ist. Ich versuche mal zu erklären was ich meine: Beispiel (Ich Zeichne in Pixel Persona): Man hat 2 Ebenen A und B. Auf der Ebene A ist ein Hintergrund mit Farben usw. Auf der Ebene B ist ein Objekt (Ein Gesicht eine Hand was auch immer). NUR dieses Objekt in Ebene B soll jetzt coloriert- Schattiert werden usw. In Photoshop hat man dann die Möglichkeit, wenn man auf der jeweiligen Ebene ist, die Taste "l" oder "j" zu drücken als Shortcut (ich weiß es leider nicht mehr genau welcher Buchstabe es genau war) und eine "Schnittmaske" hinzu zu fügen. Dann hat diese Ebene in der Ebenenübersicht einen "Punkt" davor und man kann NUR in dieser Ebene Zeichnen, sodass die anderen Ebenen von der Farbe, nicht berührt werden. Das ist SEHR praktisch. Ich hoffe sowas gibt es auch in Affinity Designer/Pixel Persona und nicht all zu kompliziert? Hoffe ich konnte mich klar Ausdrücken ansonsten versuche ich es irgendwie anders zu erklären Netten Gruß
 -
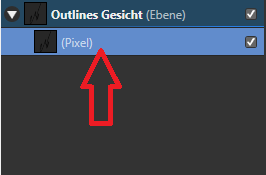
Hallo, ich verstehe es nicht, ich erstelle eine neue Ebene in Pixel Persona und möchte nur in der Hauptebene Arbeiten. Man kennt das ja wie in Photoshop. Das Programm öffnet aber in dieser Ebene eine "Pixel-Ebene" oder Rasterebene als neuen Untereiter. Wieso ? Ich möchte keine Rasterebene/Pixelebene erstellen wie kann man das Deaktivieren. Siehe Sreenshot. Würde mich sehr über Antworten Freuen :-) Besten Dank
-
 Hi! I've been working with AD now for a little and have a few suggestions that would make at least my workflow better: Guides: it would be nice if I could rotate the guides (set the angle) I could dock the guide manager window I could group guides in the guide manager window and show/hide groups of guides Shape tool: it would be nice if you could add a (logarithmic) spiral Pixel persona: it would be nice if you could add a halftone filter and a possibility for color separation to layers (CMYK): needed for screen printing; right now I have to use other programs for these tasks which would be a real benefit if I could do it within AD Keep up the good work!
 -
 This is just a small tip/warning but it took me a while to figure out what was going on. Since Designer has the Pixel persona one has to be aware that there is the second type of selection - the pixel selection. The first type is obviously the object selection (selection box). If you are working with both types of selections (switching to Pixel persona and back) at one point you may forget to clear the pixel selection (deselect) or you may create the pixel selection accidentaly. And that might cause problems/confusion later on. This happened to me: While in Draw persona I selected a pixel object and noticed that the selection (bounding) box is completely off the object and has a different size: I thought that it had to be some kind of a bug. It took me a while to figure out that it is in fact a forgotten (or accidental) pixel selection. So ultimately Ctrl + d solved this issue. So if something is off with your object selection box or you get any sort of weird behavior alway try Ctrl + d. Maybe this is too obvious but you never know... Anyway I just wanted to share this.
-
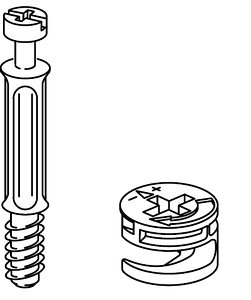
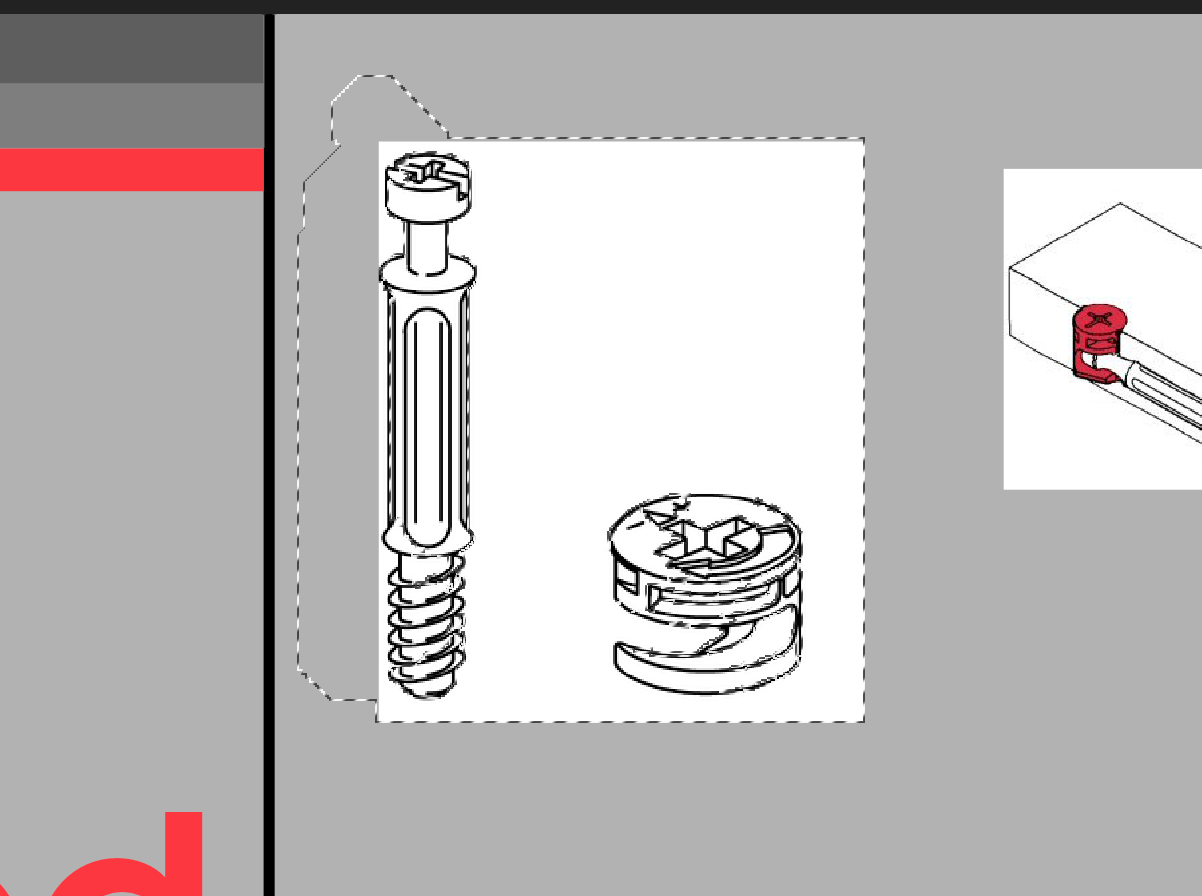
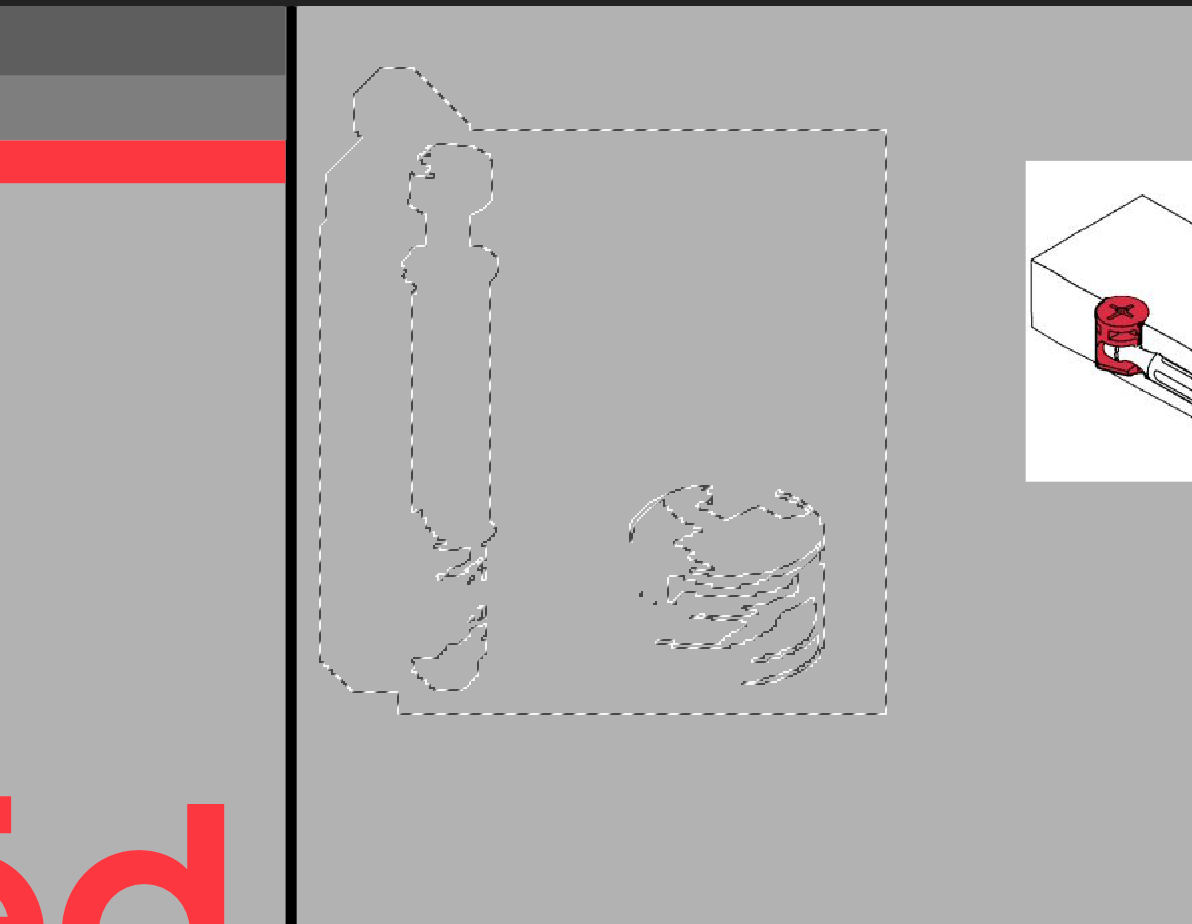
 So I've followed the steps to remove the white areas from my image, use the pixel persona brush and highlight it all then press delete. However if you look at the pictures I've attached, those steps don't work for me and I'm left with a highlighted area that I can't do anything with. Any help would be appreciated, cheers
-
 Hello guys! First of all. Nice job on the latest Beta! Love how things are coming out with every release. However, there's a problem regarding Pixel brushes, which is happening since the first release of Designer and doesn't appear in the roadmap yet. It's this 'polygon-like' strokes when drawing with Pixel Brushes (attachment). Would be nice to have this fixed, since in my opinion, ruins a little bit the whole sketching experience. Thanks guys and keep up the amazing work you're doing! Cheers, Enrique
-
 It would be great to occasionally do some inpainting or blemish removal of an image I have in Designer. Yes I do know that I have a full set of tools in Photo, but sometimes I just need to make a slight correction and it doesn't warrant this round trip.
- 1 reply
-
- 1
-
-
- affinity designer
- brushes
- (and 1 more)
-
 1. It will be nice added "OFFSET" tool & panel just like on AutoCAD and Adobe illustrator have this. 2. I think more Greater than before if Programmer Staff added tools like on http://astutegraphics.com. 3. And will perfectly if Lasso Tool, Polygonal Lasso Tool, Magnetic Lasso Tool added to Affinity Designer in Pixel Persona Tools. 4. Make all any panel on studio panel list resizeble or make it "iconize" look like Adobe illustrator to make more space for drawing area, and fix or Adding scroll for right side panel, if i'm try to embed "Constraints" to the right tab panel at the bottom standard panel it wouldn't appear because it can't embed to the right side panel at the bottom. 5. Add "Stroke Effect" embed to effect tab like on PhotoShop & add stroke effect with Gradient Editor. Example at 0:26 second : https://www.youtube.com/watch?v=5Warkrzej98 6. Add more complex Gradient Editor like Adobe PhotoShop have with Structure and fill type. Example at 0:32 second : https://www.youtube.com/watch?v=5Warkrzej98 7. Make convert Path to Selection or Selection to Path and Phat to Shape or Shape to Path & create panel for Paths so when path double click it will convert became selection if push Ctrl + double click like on Adobe PhotoShop , embed in Pixel Persona. Example : https://www.youtube.com/watch?v=iQQsZ7aLg40 8. Add Filter Affinity Photo to Affinity Designer at Pixel Persona for add filter cloud / perlin noise inside shape object as overlay, cause Adobe illustrator added filter same as Adobe PhotoShop filter. 9. In this case I want to create UI design or Interface for games or web design but with vector, so far people always make it in Adobe Photoshop not in Adobe illustrator / vector editor 10. Sorry for bad grammar.
 -
 Hi all, I cannot find the information of the dimension of my selection. If I use the rectangle marquee tool around my design - I supposed to see the dimension of the current selection in the transformation panel, or in the navigator. But there is none. Because now I have to "guess" and create my artboards by eye, move the content of my mockup into the artboard and adjust the artboard afterwards. Thanks, Stefan.
 -
 Hello everyone, like I posted in my previous topic, I really appreciate the pixel-view in Affinity Designer and wanted to explore the Pixel Persona a bit more. I wanted to experiment a bit and see how far I could push it. I really enjoy automotive design and well.. pretty much everything about cars, so I thought I'd do a bit of a virtual tuning thing with the Pixel Persona and see how it goes. I looked through the tools and messed around for a while before I set off with the project, and pretty much figured, that AD has all the basic tools needed for photo manipulation, aside of it's powerful set of vector tools. I drive a '98 Nissan Micra K11 preface, so I thought I'd give that model a bit of a touch up. Now please bare in mind, that the last time I gave a car the "photoshop-chop" treatment was probably about 10 years ago, so I'm a bit rusty in that regard, but I am really happy with the final result: The full resolution is 1080p, just click on the picture to view it. Here's the original image: So do I think Affinity Designer is not only a great vector software, but also a killer photo manipulation software? Absolutely. Obviously something like a mesh-distortion tool would make the process much easier and will open up a lot more possibilities, but even as it currently is, you can still manipulate the software and cleverly use it's functionality to do some complex pixel work. As in my previous project, I recorded the entire process, but I have to edit the video first. I wanted to share with you my result, so I'll post the video as a comment, when it's ready (I'll get right on it). Thanks for having a look!