Search the Community
Showing results for tags 'gradient'.
-
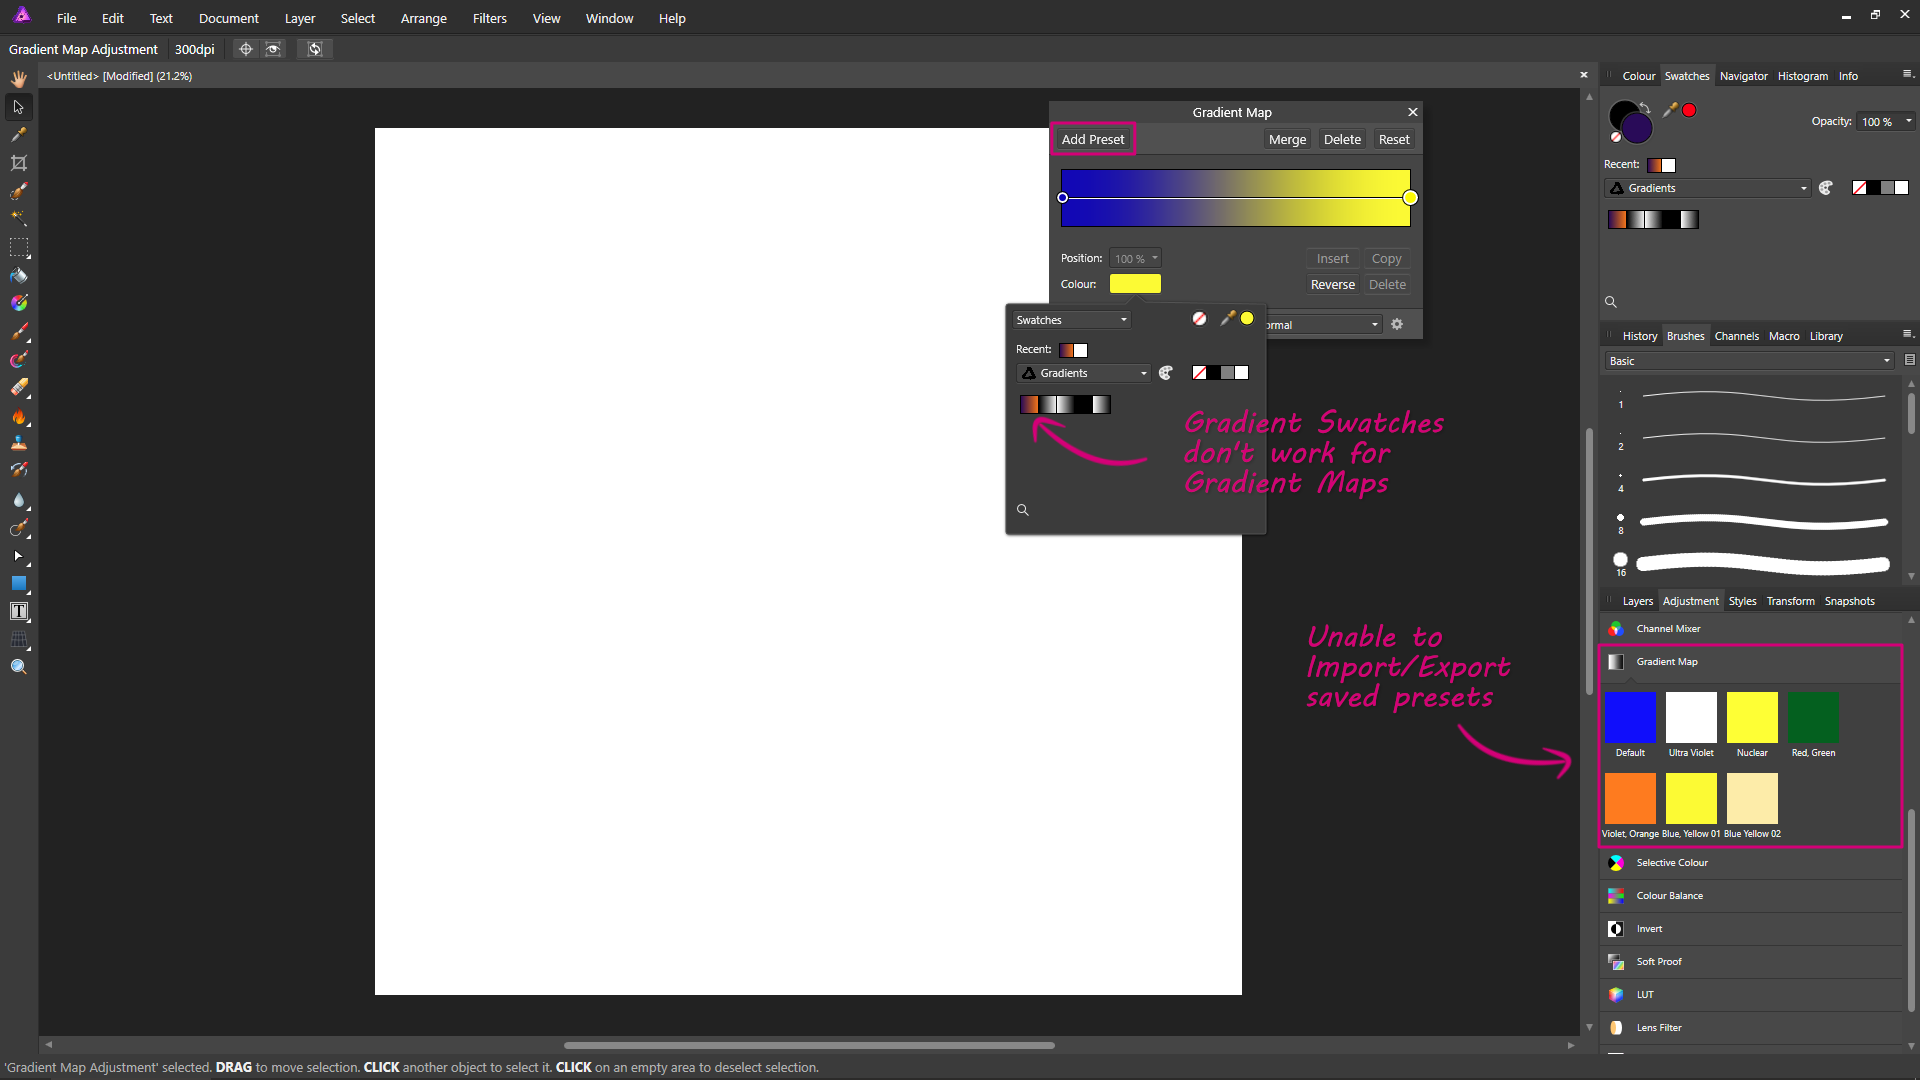
 When creating a Gradient for a Gradient Map, in order to save it the only option seems to be to click the 'Add Preset' button, which adds it as an adjustment preset. The problem is that there doesn't appear to be any way to import/export these presets. I've instead tried saving gradients as Swatches (as Swatches can be imported/exported), but these don't work properly for Gradient Maps. Is there a way to import/export Gradients for Gradient Maps that I'm overlooking?
-
 Hello, In Photo (Win10) is there a way to set a bitmap fill to be exactly 100% of the original size of the file that you use? For example: I'm using a pattern file that is 100x100px. When I use that as a bitmap fill in a Photo document I want the base pattern to be exactly 100x100 px as well. Is there an exact way or a way to put in a numerical scale value for the bitmap pattern file? Thanks, Jeff
 -
 Good Morning, I have been looking for a way to create a Gaussian blur gradient. That is to say slightly blurred on one end of an object and progressively becoming more blurred toward the other end of the object. Specifically a shadow of an object (pole) composted into a photo. I have been told that there is a way to accomplish this in PhotoShop using a channel selection and applying a gradient to the selection. Is this possible with Affinity Photo? If so how. Thank you. Paul, Ocala, Florida, USA
 -
 I am presently trying to make the switch to Affinity. After twenty years of working with the competitor's products, I am finding this a little difficult. Please forgive me if I'm putting too many questions under one topic. I am starting to embrace the differences, as much as possible. However, the export function does not appear to be my friend. I am starting to get the gist of it, but I am confused as to why my images dimensions get resized when working with jpegs and tiffs when I export. With the jpegs it appears that no matter what size I am working, it defaults back to 72 dpi and changes the dimensions accordingly. My cmyk tiffs appear to be changing the dpi to 180 with the dimensions shifting as well. Is it supposed to work like that? Also, how is it best to work between Photo and Designer for printing? Do I need to export a tiff or eps to place in Designer or just use the native file? I initially had some trouble with parts of the images going grey when I tried to print a Designer layout with a Photo image. Does this have something to do with the embedded profile? I would really appreciate a video, or some sort of instructions, on best practices to place an image from Photo to add to a Designer layout for printing purposes. Lastly, I am struggling with the gradient tool. Is there anyway to go from a solid color to transparent? I just can't figure that one out. Thank you.
 -
Letter to Santa Claus : (i) make the gradient tool operation closer to the brush tool, so that it no longer erases the initial content of the layer when applied with a reduced opacity. (ii) Make it reminiscent of the previous color choice. (iii) Allow for a few useful presets (such as Black to White, Foreground to Transparent, etc.) or allow to save and reload various adjustments.
-
It might be useful to have a way to apply a gradient on a curved path, and even a custom path, instead of just a straight line/other preset option.
-
 EDIT: The post mentioned below has been moved to the feature request forum, so this topic is not needed anymore. Can a moderator delete it? Improving the PDF output so that objects filled with gradients can remain as vectors. Currently they are rasterized or converted to non-native art. As discussed in this topic: https://forum.affinity.serif.com/index.php?/topic/35820-some-areas-will-be-rasterized-until-when/ Thanks!
 -
 Hi, I am new with Photo for Mac and need to adjust the colour balance differentially along an edge of a photo. It is a scan of a very old colour negative with substantial colour shifts close to the negative edges. I have looked into gradients, feathered regions, but neither seems to be either right or easy or I am not yet skilled enough. Can someone suggest an approach for tackling this? Thank you in advance for any advice. Ron
 -
 Ich möchte ein Verlauf über mein leeres Farbdokument legen.Mein Verlaufswerkzeug lässt sich klicken aber in der Auswahl erscheint nichts zum auswählen nur "ohne" Was kann der Grund sein?
 -
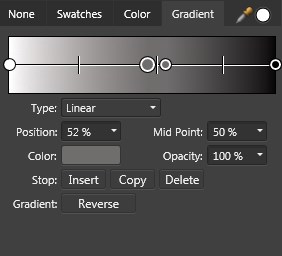
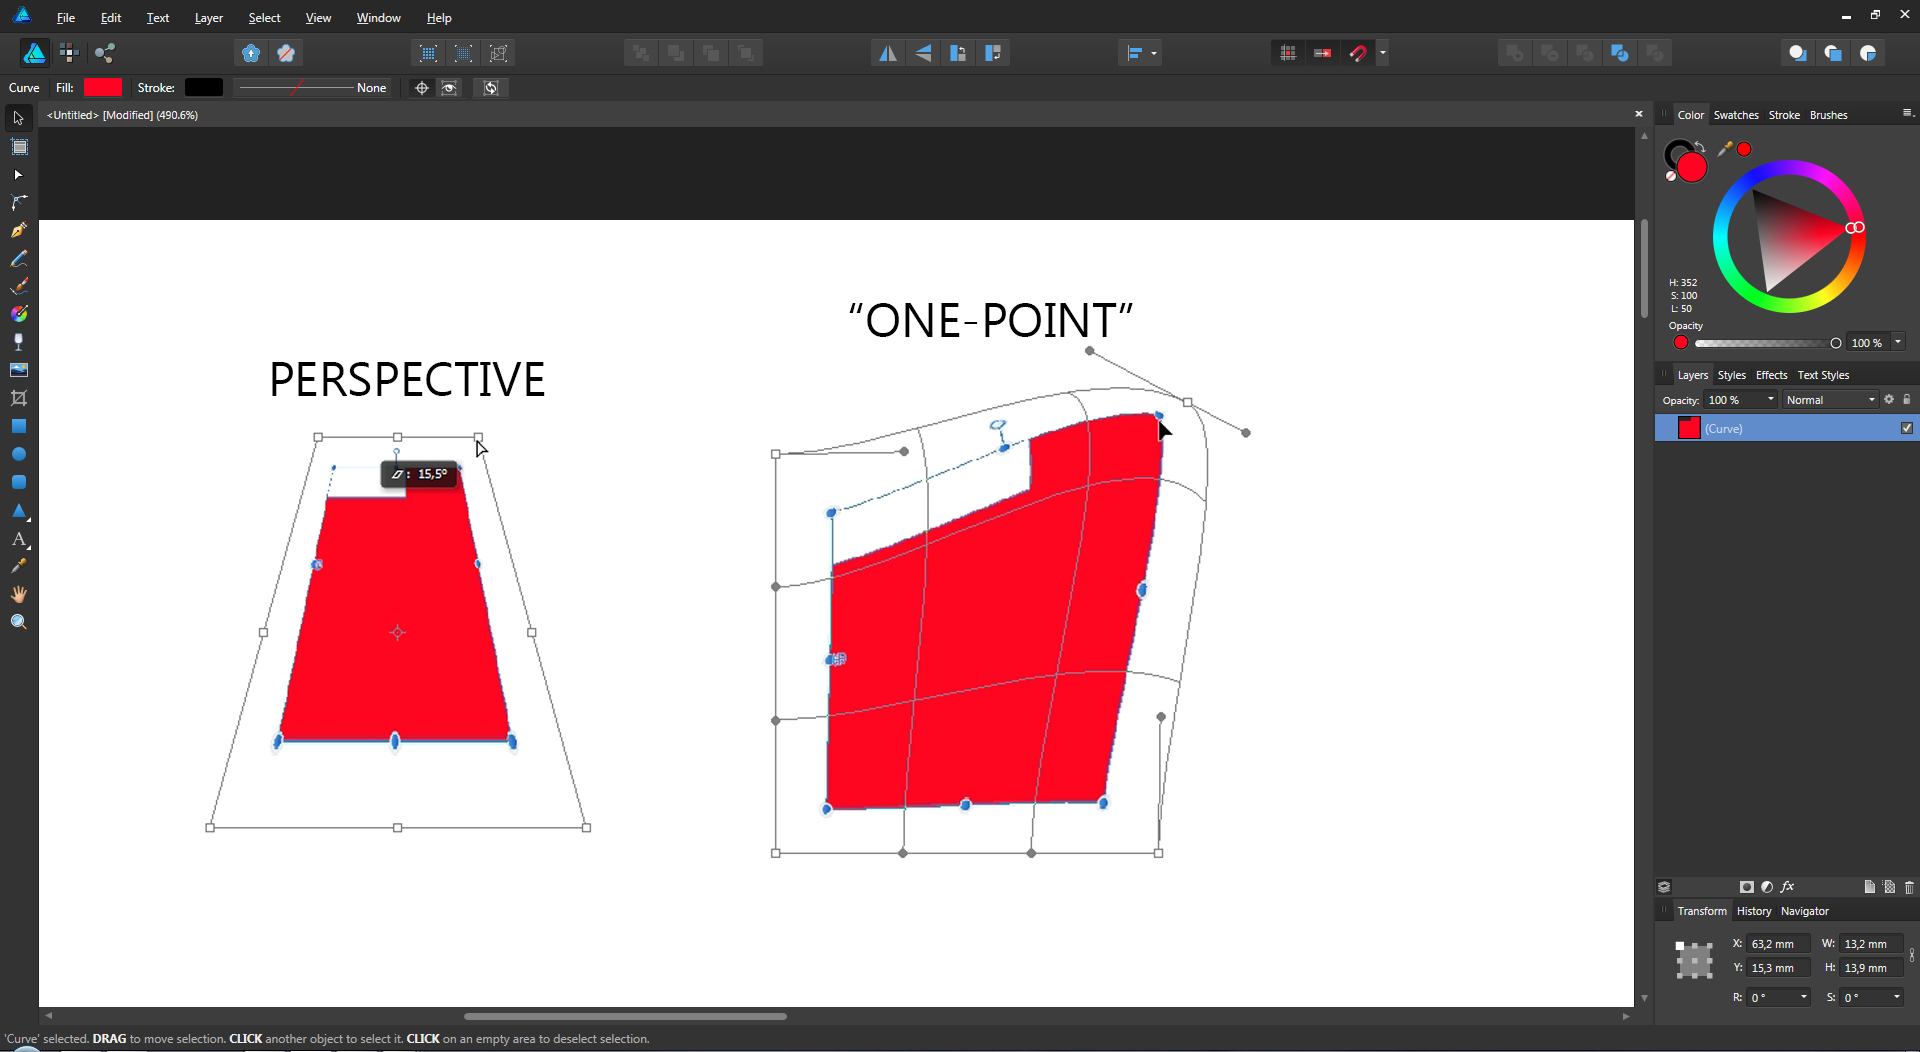
 Hi guys, I'm using Affinity Photo for Windows and can't seem to find how to adjust the direction of a gradient stroke added to text, all I'm presented with is the attached? The Fill isn't a problem as that's controlled by clicking the Gradient icon. Thanks in advance Neil
-
 Dear Affinity Team, I´d wish for a solution where I can select colors from my picture (f.e. with the eyedropper) and make a gradient out of it. When I try it now, I can only select one color and the gradient is then applied automatically. I´d be glad if you could implement that <3
 -
 Hi! I'd love to see a Gaussian Blur tool that acted similarly to the Transparency or Gradient tools ... You could have the blur get progressively heavier as you dragged the mouse pointer towards the edge of the object. Having the ability to have a "blur gradient" could make for some awesome effects! Does anyone know of a way to duplicate this effect without the Affinity folks having to come up with a new widget tool?
- 9 replies
-
- 1
-

-
- gaussian blur
- gradient
- (and 2 more)
-
 Is it possible to copy gradients in Affinity Designer? How would you do it? If I wanted a repeating gradient to occur, it would be very time-consuming to individually create the gradient for many different objects.
 -
 Does the design loose some of it's effect like gradient/shadows when it is exported to EPS or SVG? I exported a design to EPS and SVG. I had a gradient button. I can't edit the features.
 -
 I have a gradient with various opacities on the colors within a closed curve (a region within a geology map). To place a pattern above the same area I duplicated the gradient curve, unchecked the gradient in this duplicated curve and then tried to place my pattern within this duplicated curve by dragging the pattern over the duplicated curve and then dragging the pattern within (sublayer under) this duplicated curve. I have done this hundreds of times and it works beautifully. However, this time the pattern disappears. Then I tried to apply a fill or a stroke color on this duplicated curve and found that it would not take either one. I have checked all of the opacities, putting them at 100% if they were less, all within this duplicated curve. Nothing helps. What am I missing? Is there a hangover from the gradient that is doing this? Must I redraw the curve to create an "empty" curve? Thanks.
 -
 Is it possible to use one of my pre-made gradients from the colour palette as a gradient map? I've tried clicking, dragging, everything I can think of; but I'm stuck with the three built in gradient maps or the option to make mine again from scratch. Any ideas?
- 2 replies
-
- 1
-
-
- gradient
- gradient map
- (and 1 more)
-
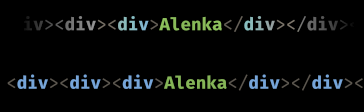
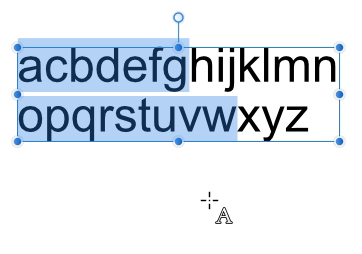
 Hi, I'm having troubles with a small design of mine. I want to apply a gradient fade (from both sides) on a text layer. I tried this method: https://www.youtube.com/watch?v=m5TqqrC3AOY. It works quite well, I get my faded sides of the text. But unfortunately, the colors get gradually desaturated as well. I'm attaching a screenshot, where there are 2 layers visible. One with the fade (and desaturation problem) and the other as a reference. I tried rasterising the text and then the fade works fine, the colors are preserved. But I need to keep the text as a vector. Am I doing something wrong? Could I achieve this effect on a vector text without losing color information? Thanks for any tip or advice.
-
 Hi eveyone I can create and edit gradients, but am unable to go back and redit. Reselecting the gradient tool doesn't show exiting nodes and clicking on the layer clear the exiting gradient and creates a new one. Am I missing something?
 -
 I was using the beta and was pretty happy until I started looking for frequently used features from Photoshop at work and GIMP at home. Here's stuff that's missing that would help with productivty: Precision guide-making. You have a "manager" that doesn't let you manage much. It'd be nice to be able to edit the exact position of those guides (Let's say I want to quickly set up guides at 25/50/75% in percent mode or just set specific pixel values to each). Even GIMP's got this! "Pattern" layer style is also quite handy for the same reason as the "Fill" layer. [Edit] Solved or has a workaround: Move selected option for the mouse cursor. It'd be nice to be able to tap a layer and then drag an object around without having stuff that's in the way get selected. PLEASE add the option. Ability to duplicate layers between open files (and in the same position if equal size). Ability to create new alpha channels. It's handy for selections or when 3D texturing to be able to use even the A in RGBA images (or in some special cases, remove one of the channels). "Solid color" layer style like in PS (easier to edit than filling a raster layer with color, plus you needn't worry about resizing). Hopefully none of these are repeats since I didn't see them on the list. Thanks for listening!
 -
 bggradient.afdesign Is it possible to export a gradient from an artboard to css? Would like to export that file as a gradient. Thanks
 -
 Hi, I encountered an error when trying to change either color for a gradient to transparent. Here are the reproduction steps: Create a new document Select the Gradient tool Click on the color picker in the menu bar Select the Gradient tab Click on color and select the transparency icon You'll get an unhandled exception error Affinity Designer for Windows version 1.5.0.39 (beta) running on Windows 8.1 If you have any questions, I'll be glad to answer them. Kind regards, Karel
 -
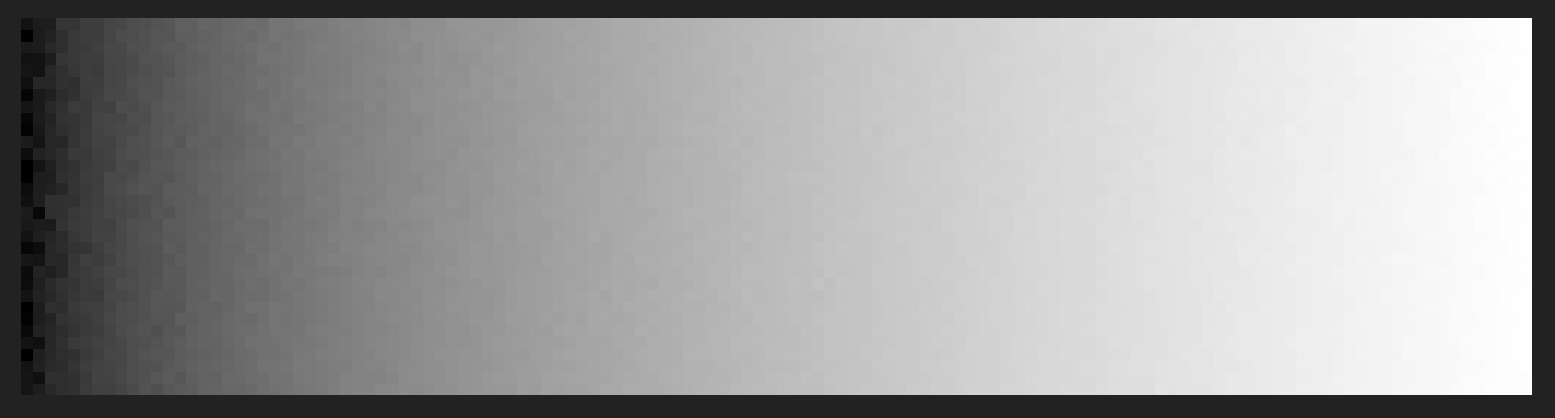
Hi, I need a precise gradient in 32-bit mode, to go from left to right. (I use it as a texture in a game - the values control some math functions over time.) The "Noise" value is set to 0 (or so I guess, because there is no numerical input). Yet still there is a visible dither. I use version 1.5.0.35. Win 7 64-bit, NVidia GTX 760, newest drivers. Oskar gradient.afphoto
-
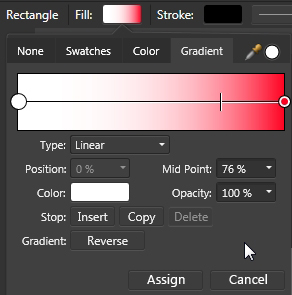
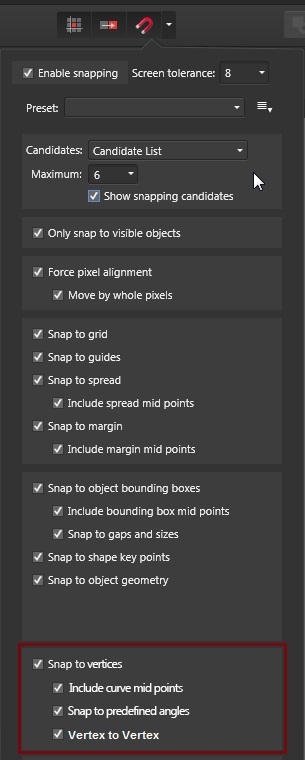
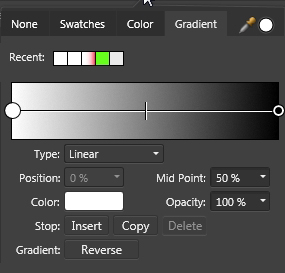
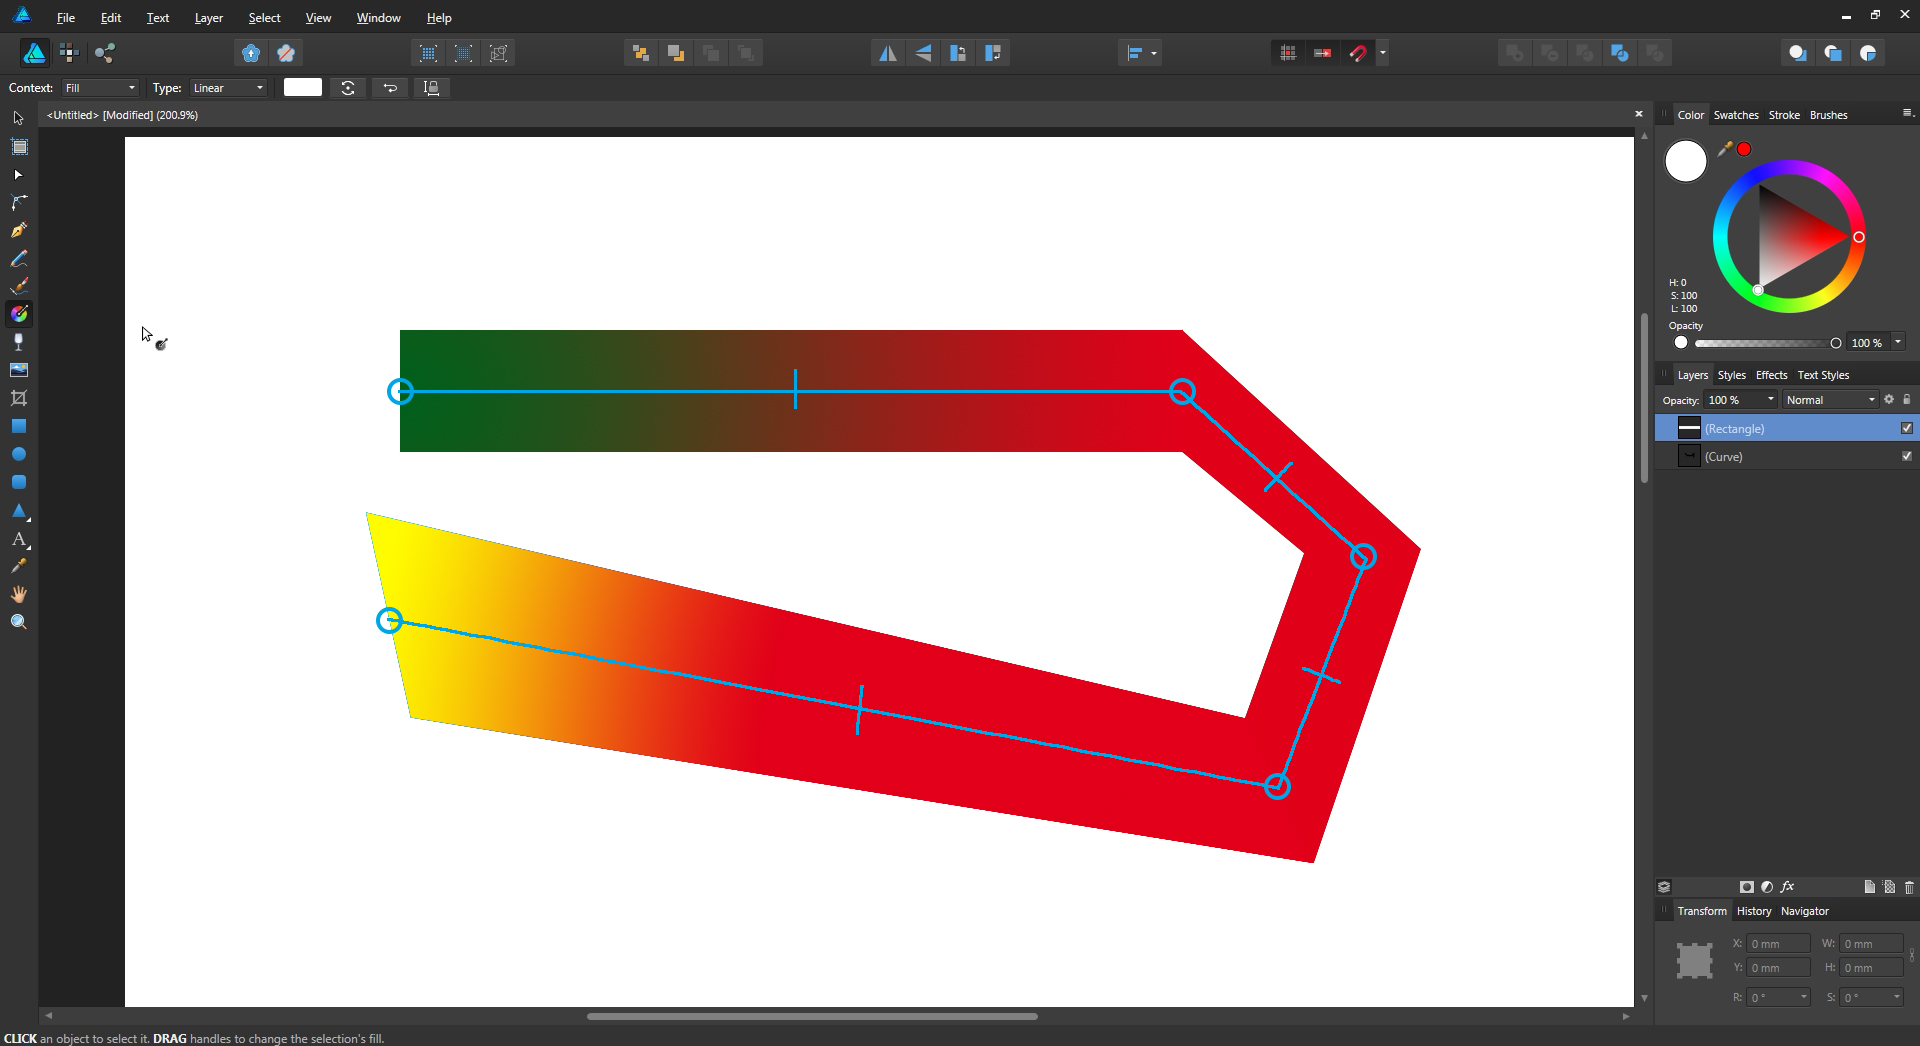
I will use this thread for all of my future feature requests, unless my requests fit in under an already posted thread, in which case I will post/reply to that thread. If you see any requests that have already been posted somewhere or are already being worked on, let me know and I will update this thread! Requests 2016-11-24 (Affinity 1.5.0.36): A fill/flood tool for the vector part of Affinity. Ex: If clicked on an empty canvas it would create a shape of the canvas with no stroke, only a fill with the currently selected color. Seems to be worked on already, according to the roadmap! A multi-select option when editing text An option in the snapping options to affect vertices as well. Ex: When you create a rectangle and then add a node in the middle on one side and slide it, that it could snap to the middle point between those two nodes. Another nice option would be if you could make vertices (and other objects as well), snap to the straight horizontal/vertical and all of the diagonal snaps without being relative to the starting-point. Also a mirror mode would be nice. It would be a mode that lets you affect two sides of an item at the same time. An option to alter the diagonal snapping angels. This option could be visible at all times for easy access or it could be implemented in the appropriate context sensitive menus. One could use presets or input directly with desired value. If dragging an object with nodes/handles, that there would be a node/handle snap option, so that when the nodes of the dragged object come near another object's node(s), that it snaps to it. Ability to mark/manipulate two or more node/vertex handles at the same time and maybe a way to copy a node's parameters and paste them? Option to resize UI elements and the layer thumbnails. Ex: Small, medium and large. The option could reside in the "Customize Toolbar" window. When dragging layers, it would be nice if you could hold a hotkey to have layers not wanting to be group, only arranged. Also, vice versa. When arranging layers, when dragged atop one another, that the layer beneath the "grabbed" layer gets highlighted and if released, grouped. A little more margin would be nice, so that you have more space where it would group it and you would have to go more to the "top" of the layer icon to have the grabbed layer be placed above it. I don't know if it is a bug or anything, but at the moment you can't resize panels vertically, only horizontally. If it's not a bug, I would find it nice to be able to do that, at least on the layers panel. An option to be able to merge vertices when on top of each other, but also expanding this feature to be able to merge vertices; to center, to horizontal/vertical center, to left/right diagonal center, to first/last selected etc. Expanded functionality for the "Arrange" tool so that it would work on vertices. That would make arranging vertices easier. Make so that the rotation center affects the flip horizontal and vertical actions, since right now it only affects rotation origin. When you choose "None" in the color-wheel panel, it would be nice if you could press the "None" button again to get the "deleted" color back. (Right now you can use "Ctrl+Z" to get "around" this, but if you only realize you want that previous color back later, after a lot of actions, then the previously mentioned method would be superb!) Having a "swap" button whenever there is a "fill/stroke" option, in the context sensitive menus so that you don't have to look for the color-wheel. Or have "X" key actually flip the colors, not just flip between what color is selected. Can be done with "Shift+X". This will flip the colors around. Slide vertices along path. Use "ESC" to deselect text bar/editing (Can be done by "Ctrl+D") A hotkey for deleting layers. Ex: Like when a layer is selected, pressing "DEL" would delete it. Perspective scaling and warping. Seems to be worked on already, according to the roadmap! When in any menu with many check-boxes, that you could hold "Ctrl" when clicking a box to uncheck everything but the checkbox you clicked. Could be nice for the layer panel and it's visibility toggles. A "focus" hotkey, maybe on "F". Ex: If something is selected and you press "F", the screen zooms in on it and fits it to the screen's width and height. If nothing selected and the user press's "F", it fits the canvas to the window screen. Can be done, somewhat, by double-clicking on the thumbnails of layers. Although I would still think a button would speed up workflow. A button that says "Assign" and "Cancel" when in the gradient menu, since right now if you go to the gradient menu you have to click/move the "midpoint" slider in order to assign the gradient to the selected object. If you just go to the gradient menu and click outside of menu it doesn't get assigned. Also a value to set the "hardness/softness" of the blend between both colors would be nice. An option/hotkey in the "Eyedropper" to be able to select single color or whole gradient. Automatically deselect the previously selected node in the pressure customization window so that the automatically selected node doesn't fly all over the place when you go in and try to select another node without thinking. More tools to customize pressure. Ex: Ability to enter x and y values for nodes, enabling/disabling node snapping. An option in the settings menu to be able to set whether all of the layers/slices should automatically be added/checked for export or not. This could also be remedied by the "hold a button to deselect all other check-boxes" feature suggested above. Object based gradient (linear). This is a big one, but the premise would be that you could have a linear gradient "follow" the "flow/direction" of an object by manually placing points on the object to assist Affinity in knowing the "flow/direction" that the gradient should go. It would be nice if Affinity could do some own calculations and perhaps automate the procedure, but that is only if it is possible. Some kind of command to open a "transform" box/controls around the currently selected objects/vertices at any time. This way you could manipulate a group of selected vertices in various ways. Convert "Stroke" to object/solid/fill. The program could do a trace around it or something. The use for this is that I sometimes find myself doing a shape with the "Pen Tool" using only stroke to get the shape I want since it is way easier, but then I realize that I have to go to long way around since you can't make your stroke into an object. Apparently, this is already possible by going "Layer>Expand Stroke" in the top menus with the stroke selected. Thanks to member "JotHa" for telling me! The "Outline" effect doesn't currently have an option to choose whether the edges of the outline should be hard/chiseled or rounded. Would be nice with a way to change this. Some controls/attribute windows that are a digits/values could have that if you hover your mouse over the attribute's name, the cursor would turn into two arrows pointing away from each other, and if you then proceed to hold down and drag with your mouse, you could adjust the value by dragging left or right instead of having to have a slider or manually enter different values for testing. Ex: "Dash width=1", if you placed your mouse over "Dash width" and dragged, the mouse cursor would turn into two arrows pointing away from each other and you could adjust the value by dragging left or right. The gradient swatches could be displayed on the swatches page as well as on the gradients page, since having to switch to swatches just to have access to the gradients feels slow. Snap to curve option. A checkbox that enables "Curve to Curve" snapping and then curves closest to each other would snap together. An option to cut with the following way. Select a "Cut Tool" and press node one and node 2. The program will now create a cut between these two nodes. An option would decide if, when the cut is done, if it makes a gap or not between the two now separate pieces. This or a hotkey where you just have to click somewhere on a path and Affinity would cut there. A "Studio" panel where you can save symbols for later use, so you don't have to have an Affinity file where you keep a bunch of symbols. This could be separate "Studio" or be implemented into the already existing "Studio>Symbols" panel. This way you would have icons/symbols that you want to use across multiple projects, close and convenient. It could be as simple as a folder where, when clicking a "Save Selected" button, Affinity would save the selected graphic and just read them from there, showing a small preview of the items in that folder. This would make for "easy" implementation of said function and would yield users easy access and editing of saved icons/symbols. --------------------------------------------------------------------------------------------------------------------------------------------------------------------------------------------------------------------------------------------If you like any of the suggestions made, you can use the poll at the top to vote for the feature that sounds the most interesting/fun/useful! Just click on the numbers that corresponds to the features that you want to vote for!
-
 How do I edit my gradient applied to a mask with the gradient tool without it defaulting to the grey to white? If AD/AP would remember the gradients used would be good.
 -
 In build 1.5.0.37 (and in 1.5.0.35) the tooltip for the Gradient Tool is just 'Gradient' instead of 'Gradient Tool'. As a side note, the Context toolbar for the Gradient Tool is blank. Should there be other gradient types in addition to linear? The Fill Tool in AD has numerous options.