Search the Community
Showing results for tags 'affinity designer'.
-
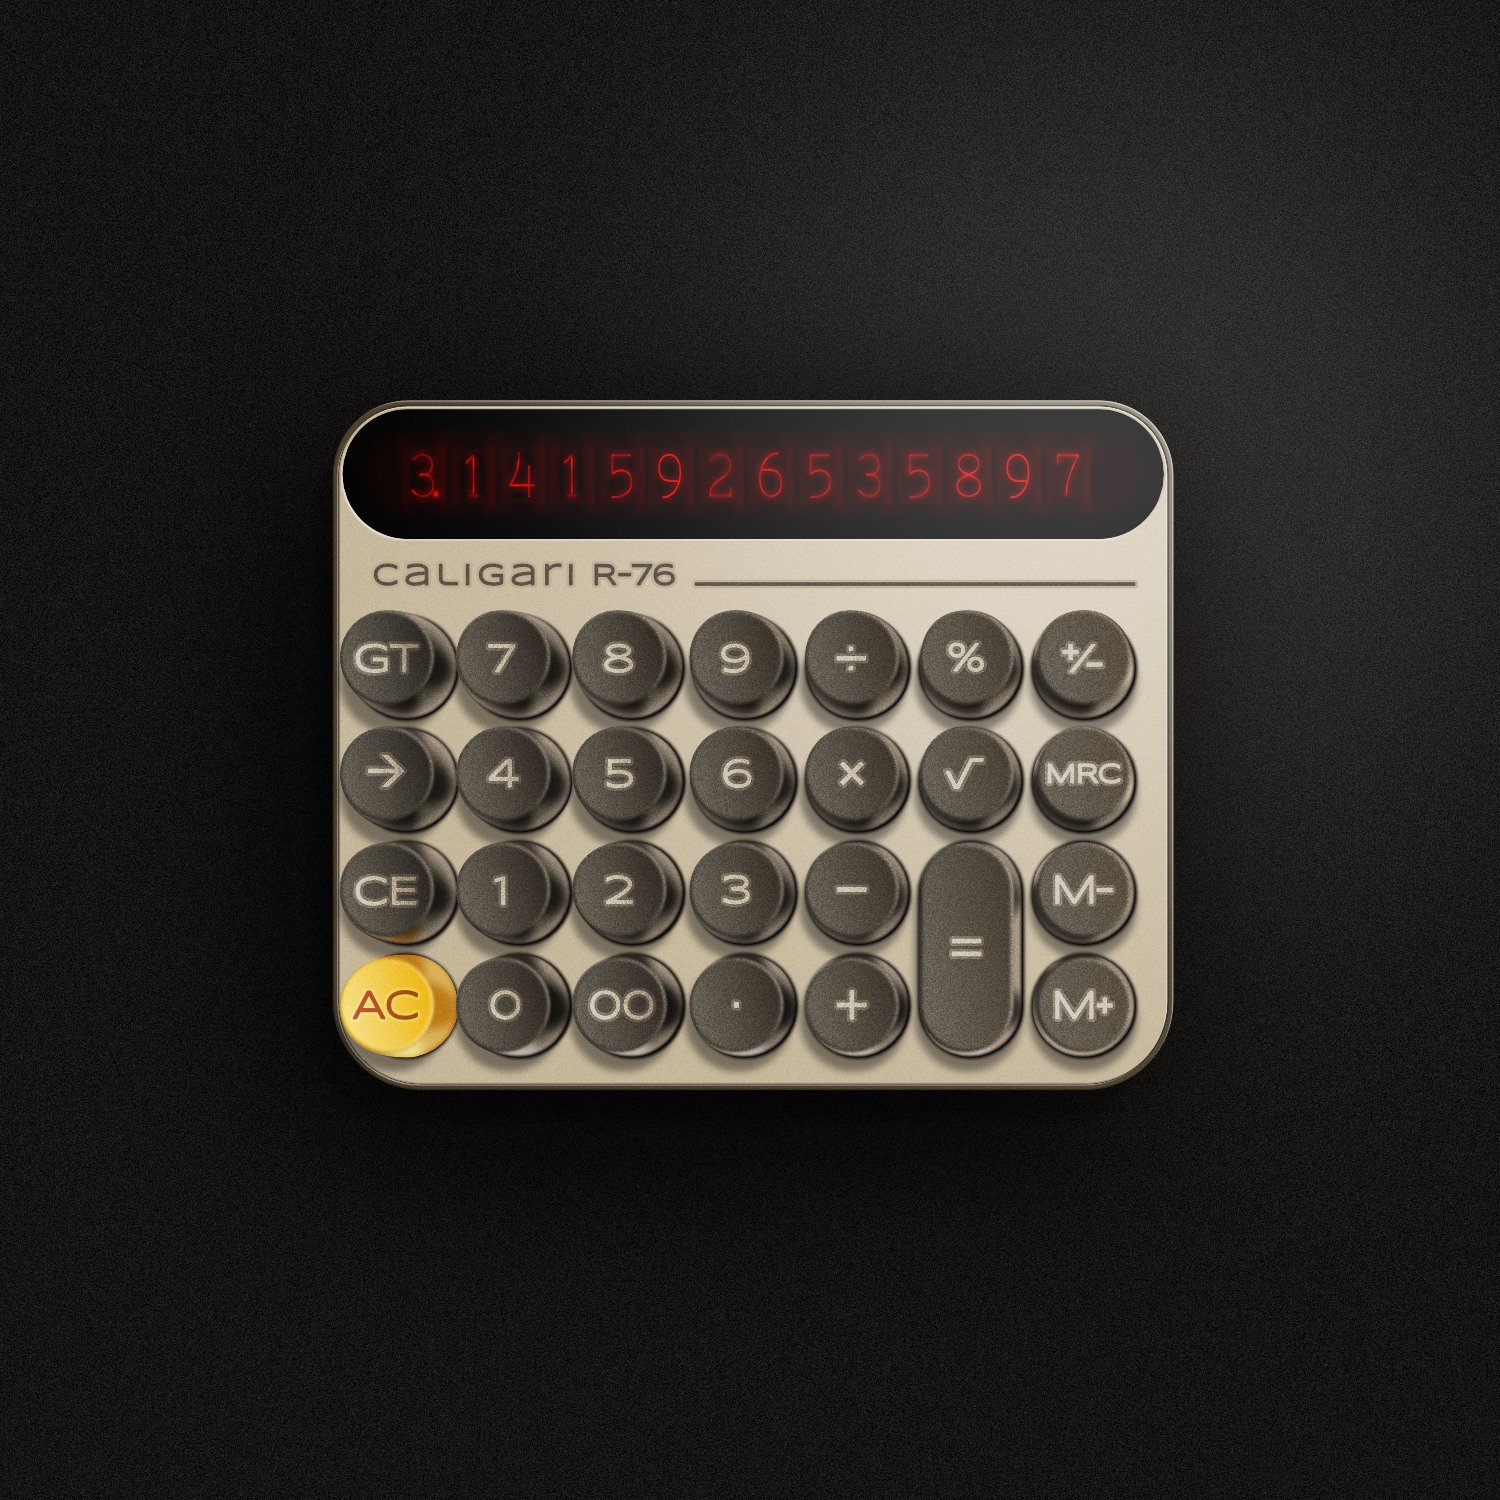
It's all about the "retro" vibe. I grew up in the 80's, I was raised by 80's style items and by the designers of those items. So I'm just filled with that vibe and sometimes I need to express it. I have always admired the keyboards of the first personal computers - their texture, their shape, the way characters were applied to them. Also the tube displays and their magical glow, which no LCD screen can render, bring back good memories of distant times. Here I tried to reflect the style of those machines. The inspiration for this drawing came from a modern calculator with round buttons, whose designer apparently took advantage of the sentiment with which people sometimes refer to objects from the past. #affinitydesigner #calculator #nixietube #80s

- 6 replies
-
- 9
-

-
- calculator
- nixietube
- (and 1 more)
-
Who's in dribbble so i can follow you? My accounts: https://www.instagram.com/heavyblazenight/ https://dribbble.com/heavyblazenight https://www.behance.net/heavyblazenight
-
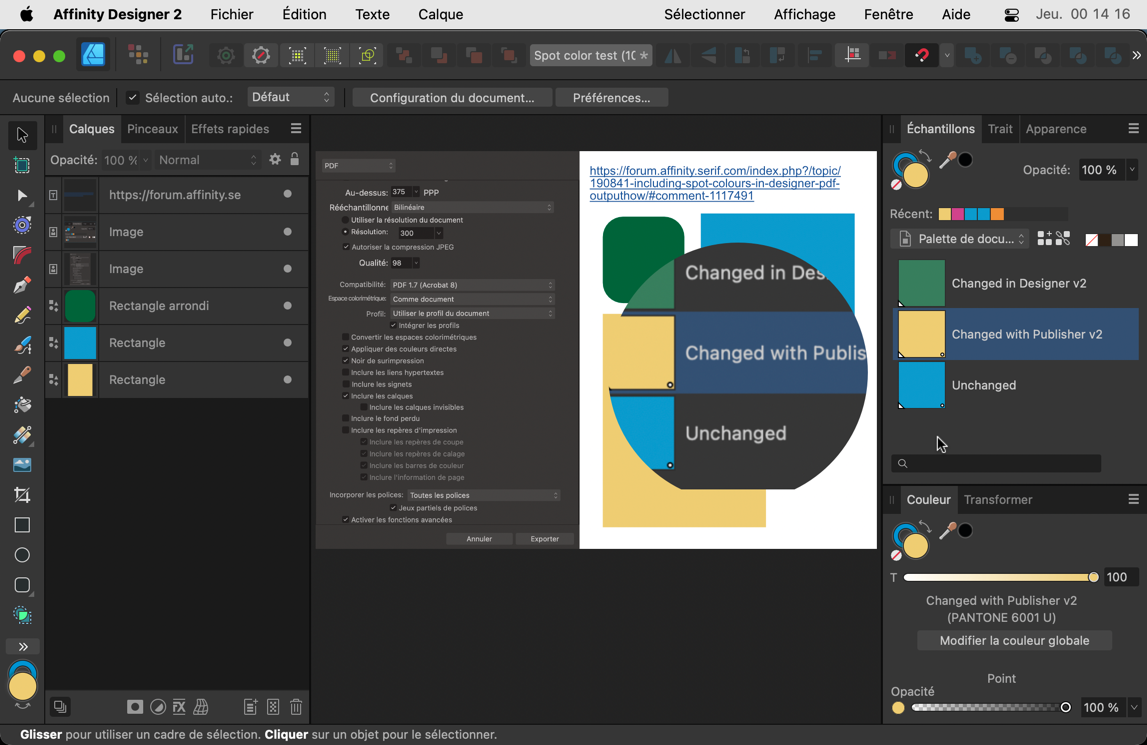
 I create a spot color but when, in Designer v.2.1.1, I assign it a new tint via the right-click, the point in the bottom right corner of its icon disappears. VLC H264 - Enregistrement de l’écran 2023-08-23 à 23.35.53-1.m4v The same does not happen when done in Publisher. Spot color test.pdfSpot color test.afdesign — This issue has been initially raised in this topic:
-
 This happened very reliably using v1 on my old 2012 MacBook, but I recently bought an M2 Mac Mini (16gb RAM) and was sad to see it still happens in v1.10.6 and the v2.1.1 trial under the latest Mac OS 13.5. I'm using an Intuos tablet. To recreate: Create a new document. Select pencil and set Controller to "Pressure" Sketch away Sometimes it only takes a couple of dozen strokes, sometimes a few hundred. It doesn't happen as reliably in v2, so maybe something did change between the versions. I haven't seen the hang triggered when: Controller is set to "None" Controller is set to "Pressure", but strokes are made with a non-pressure-sensitive mouse So, it seems it's only triggered when variable-width strokes are being drawn to the screen. I tried setting Controller to "Automatic" and was able to get a hang in v1, but I haven't seen one in v2 yet (but this could just be v2's overall improvement in reliability). I've tried using Metal instead of OpenGL rendering in both versions and haven't seen any difference in frequency. I only tried software rendering once in v2 and it hung after a few dozen strokes. I can post the OS-generated reports if needed (I've already sent dozens to Apple). Using all versions and renderers, the tail end of the "heavy stack" looks something like this: 65 Affinity::LegacyDocumentViewController::MouseUp(Kernel::Counted<Tool>, Kernel::PointT<float> const&, ToolPointView const&, unsigned int) + 400 (liblibaffinity.dylib + 1813136) [0x10c686a90] 65 Tool::MouseUp(ToolPointView const&, unsigned int) + 968 (liblibpersona.dylib + 14148792) [0x12cb3e4b8] 65 HandleTool::OnEndDrag(ToolPointSpread const&) + 388 (liblibpersona.dylib + 38360520) [0x12e2555c8] 54 PencilTool::PencilHandle::OnEndDrag(HandleTool&, ToolPointSpread const&) + 2612 (liblibpersona.dylib + 90372016) [0x1313ef7b0] 44 Geometry::CurveDbl::ExpandAdaptive(Geometry::PolygonType<double>&, double, Kernel::RectT<double> const*, bool*, bool) const + 1268 (liblibgeometry.dylib + 1275440) [0x1068c7630] 17 Geometry::CurveSegmentCubicBezier::Expand(Geometry::PolygonType<double>&, double, Kernel::RectT<double> const*, bool*, int) const + 400 (liblibgeometry.dylib + 1086264) [0x106899338] 4 Geometry::CurveSegmentCubicBezier::IsLinear(double, Kernel::RectT<double> const*, bool*) const + 228 (liblibgeometry.dylib + 1129112) [0x1068a3a98]
 -
 Is it possible for a bitmap to follow a path? For example, I have a vector of a 2D string and I need a repeat logo to follow it as a path. I'm not sure how I can do this without manually editing the perspective of each logo, which I don't have time for. I'm really hoping this is can be done via bitmaps, but any suggestion is welcome!
 -
 Selecting all unfilled/unstroked objects and deleting them is a common and useful command to clean up files. Sometimes our own, but often those supplied by third parties. However, with this issue, trying to do that will lead to have all your layers deleted, even layers containing objects. Steps to reproduce: Create a new document Draw a few coloured objects, place some in one or more layers Draw an object with cleared fill and stroke Select the unfilled object and use the command Select Same > Fill Colour Notice that all layers and groups in the document will also be select Press Delete, the unfilled object will be deleted, along with all layers and all objects within I've attached a video with a visual guide for this bug. Stroked bug variant: Follow steps 1. to 3. from the list above again Select the unstroked object, but this time use the command Select Same > Stroke Colour Follow the steps 5. and 6. from the list above No video for this variant as it's exactly the same as above, just a different command. There are no workarounds for this bug to the best of my knowledge. Thanks! Gravação 2023-07-13 115028.mp4
 -

Linked images and/or replace image
dantaylr posted a topic in Feedback for Affinity Photo V1 on iPad
I would love the ability to live link or swap the source of images in Affinity Designer for iPad. I’m currently working on a photo book layout and need to make frequent color edits to the images. I would love the ability for these images to either be live-linked to a file or photo in Apple Photos so that edits automatically update. Changing the source of the photo while keeping size, position, and adjustments would be great as well. Please consider this as I am using this tool full-time at this point and this feature is integral. -
 This thread can be closed. I posted a new thread in Suggestions. Has this topic been solved? It's about a simple way of moving an object to another layer, without having to drag it through a long list of objects in the layer's panel. Like so: Right-Click on object Select "Move to layer" in the context menu Choose layer from list See this example from Inkscape: Video.mov
 -
 Is it possible to enter a relative path to the slices for export (MacOS)? So that I can export to the folder above the selected location? Somthing like this Thanks Dave
-
Yeah another Alfa! Just showing where I started blocking in and doing a few bits all over the place and then a week later. Can't decide on the lady so not quite finished either, perhaps a different pose, facing the car? Not sure. Anyway will update when I've decided and I'm done.
-
 New to computer designing in general, never used photoshop. Trying to get the design that is created by pulling nodes to some how blend with another layer that I pulled nodes with. Also not sure if this is a bug but on my document there seems to be a tiny 1px line on the left side that is causing me to go crazy. This is the first layer Second Layer The area I want to blend of those two layers without affecting the source images
-
“Coffee Time” I’m really not very good with hand drawing (stick figures only!) so I really like the concept of vector drawing in which I can make changes after the fact and tweak to my hearts content. To learn how to use Affinity Designer (I have played with some vector stuff before in Inkscape but nothing much at all), I decided to make something look as real as I could that wouldn’t need too much raw drawing skill and I came up with “Coffee Time” : 100% created from scratch vector drawing (no brushes or pixel layers except for the use of the fx “Layer effects"). I did use a photo for reference but I didn’t do any tracing or anything. I’m really, really happy how it turned out. I tried out all sorts of things and learned a lot but it was a lot of fun :) As this is a "Learn and Share” forum, I thought I’d share exactly what I did (see the other other attached pictures). It’s not perfect and I’m a beginner, but hopefully others might be able to learn something, too Enjoy! :) My Process: 01 Create 2 sets of circle shapes to represent the top and bottom of the cup. Squish the top and the bottom with the move tool. The top circle has a smaller one on top to remove later to make a lip for the cup. I deliberately used bright colours to make the shapes easy to distinguish from each other. 02 Join the circles with the corners of a rectangle shape to form the side of the cup. 03 Shape the rectangle with the node tool. Add a handle. Clone the top circle and move it down to make the surface of the coffee. 04 Create a set of “shading shapes” to put on top of the side of the cup. These will then be given a gradient colour and transparency to give the illusion of a bumpy surface. 05 Create some circles and overlay some shading shapes . I used the the smart duplicate function to repeatedly rotate duplicates of the shading shape easily. 06 Squish the saucer with the move tool and move into place under the saucer 07 Change the colours to something closer to the final version and play with gradients and transparencies. I also blurred it to make it blend more naturally. Once I got something that looked good, I made a style of it and then applied it to the others and then hand tweaked each one. 08 Do the same to the saucer. Also added some detail (reflection of the inside of the cup and blurred it) to the coffee. 09 Add a background with a gradient. I used the noise slider to give it some texture. I also added some steam with just a hand drawn shape. 10 Add a shadow. I just duplicated the cup and saucer, blacked them out and then put them in place underneath everything and used the shear tool to project it out. I also added some fine detail on the edge of the side of the cup to add to the bumpiness illusion. Made the lip a nice shiny gold with a slightly tweaked version of the built in “metal” style. Added some self shadowing to the saucer and further deformed the circle shape it to give a more 3D look to it. 11 Added reflections and spectral highlights to the cup and saucer. Now it looks nice and shiny. For the final version, I also added some bubbles to the coffee (lots of circle shapes) and the text, converted to curves and then given a steam like style (actually the same one I used for the shading shapes!) and then each character rotated and scaled to make it look like steam from the coffee.
- 10 replies
-
- 13
-
-
- coffee cup
- vector
- (and 3 more)
-
 Hello everyone, I would like to cover one of our shop windows with decals applied to the back. In the print specifications, there is a trim margin (3mm) and a safety distance (3 mm), so a total of 6 mm. Since you can only print up to 1.30 m in width, I have created several artboards in Affinity Designer and simply added the 3 mm trim margin in white. However, in the final print, it did not quite fit with overlapping fonts, even if you cannot see it from a further distance. What is the best way to handle this in practice, so that it looks seamlessly perfect when fonts/logos/images span across several window sections (decals)? Thank you very much!
-
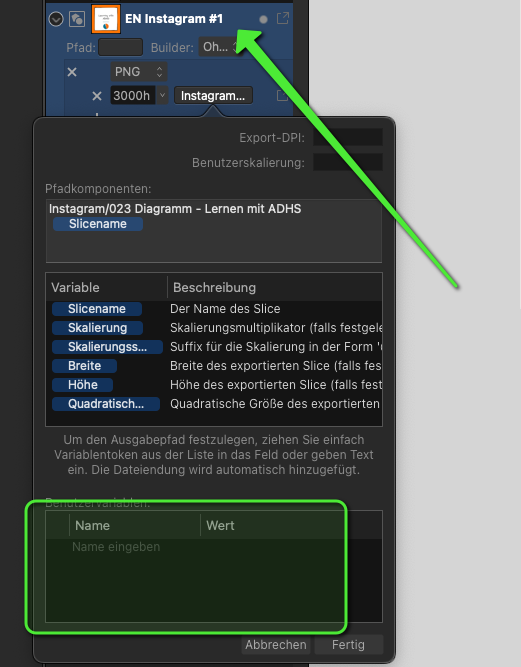
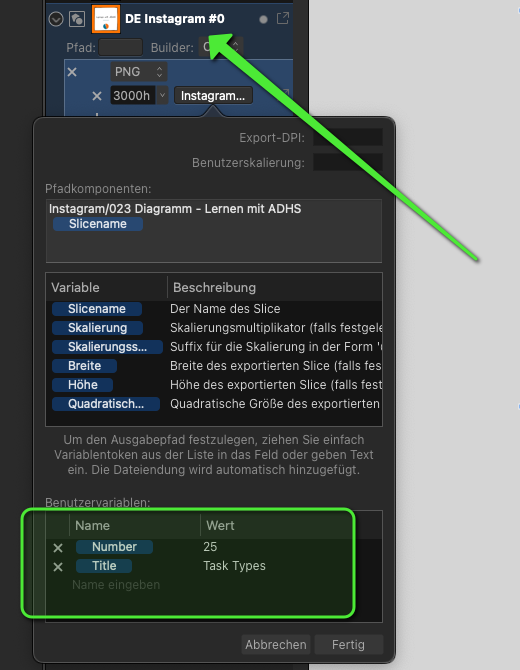
Hi, the User variables within the export persona are not working at all. You can add new variables in a slice, but they don't appear in other slices Affinity Designer 2.1 and 2.1.1 Mac Mini M2 Mac OS Ventura 13.5 No recent change in my system Definitley reproducible. Tried everything for hours old documents New document Updated AD (2.1 => 2.11) Tried to manually recreating the variables Tried to copy and pate the slice settings to clipboard => The variables are only valid within a slice Would be great if you could fix that in the near future. This will save me hours of work, since I use the export persona very extensively (with dozens of slices for each document). One of my main (and most annoying) tasks every day is to rename slices in Affinity Designer... (sorry that I recently suggested that as new feature (I just missed it) Best regards, Dave
-
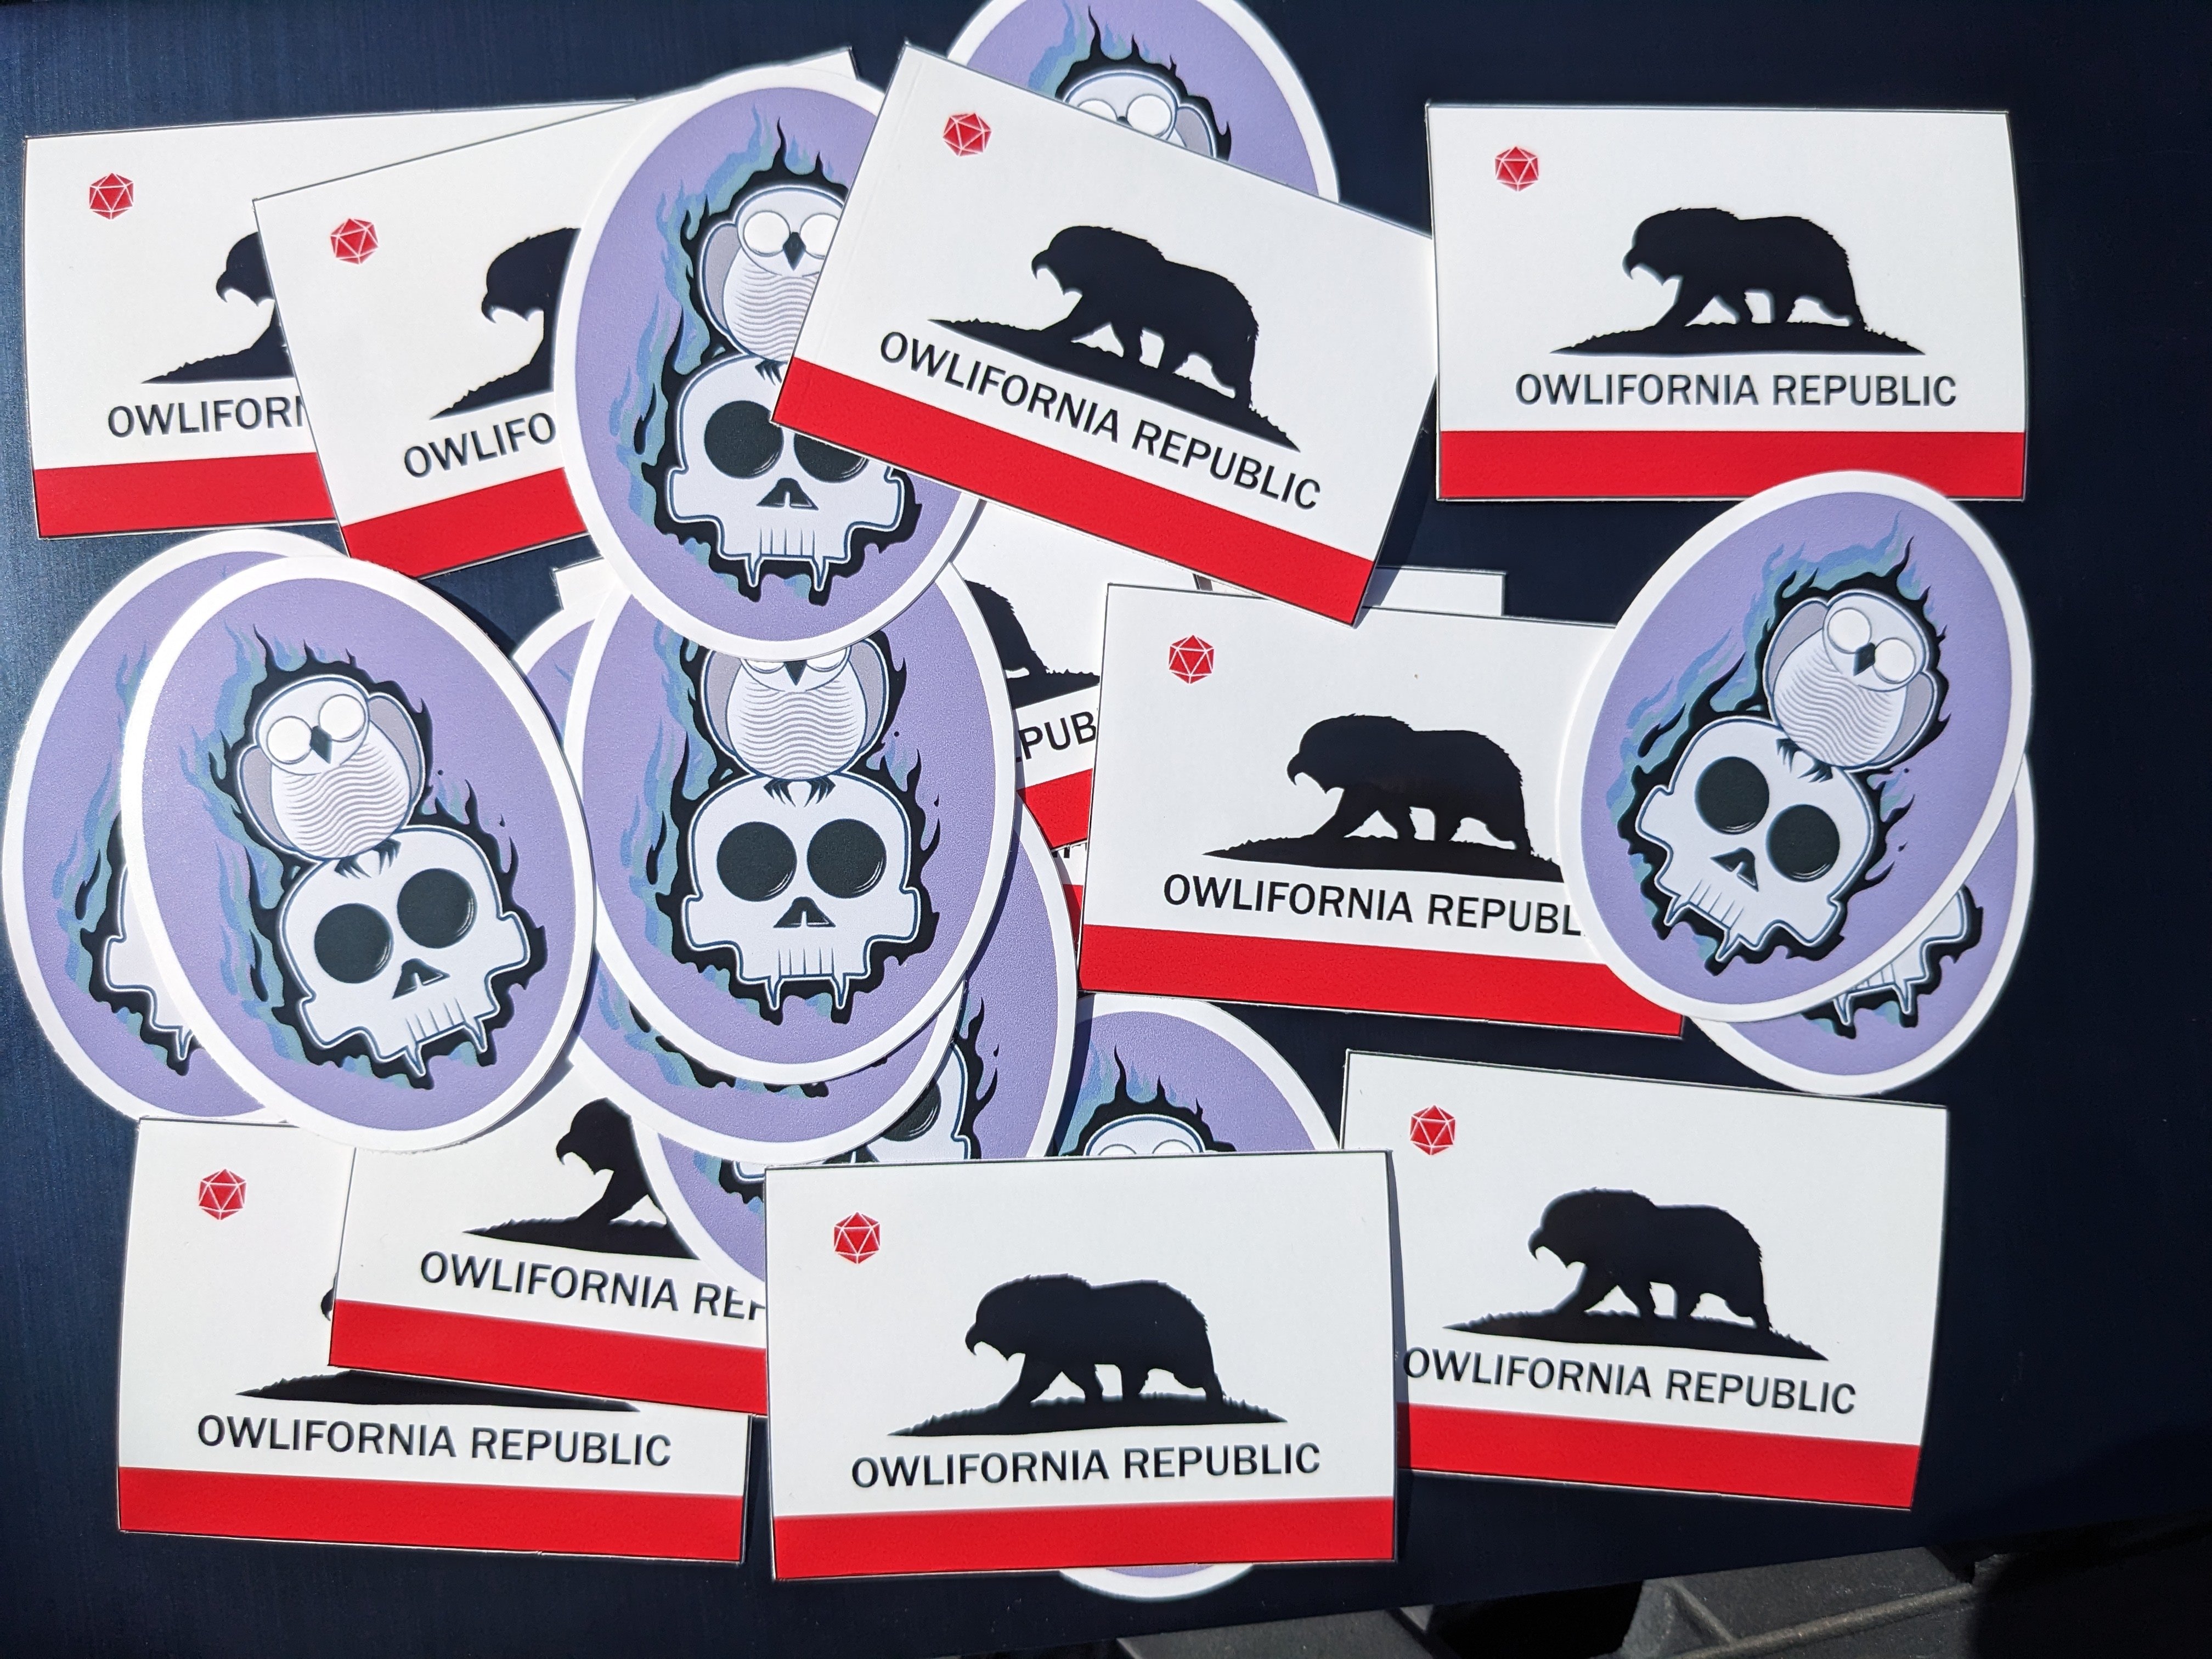
 I sent these designs to a printer. They are printed w/ digital inkjet and cut with a laser. We gave away a bunch in the swag bags at our film festival.
-
 I'm in need of converting a PMS colour to CMYK. Can't find how or any forum posts which solve this issue.
 -
I really like the feel of this one
- 1 reply
-
- 4
-
-
Here's another surfer I drew. People refer to the surfer as "he" but I used a reference photo of a woman shredding.
-
I said to myself, "What this Xbox needs is more awesome flaming sword cow stuff."
-
Hi, I'm seeing this message popup in the viewport whenever I select two specific layers. I'm guessing this popped up earlier in my workflow but I didn't notice it. I created a 5 pointed star using the Star Tool, then used the Pen Tool to create a set of lines which joined opposite corners. Then I did an Expand Stroke and Add on the lines and an Expand Stroke on the star. Trying to Add the star outline with the lines was when I first noticed it. Now without trying the Add, just selecting the two layers causes the message to be displayed. I presume this is a corner case where the maths breaks down. Any thoughts on what to "nudge" to make it work?
-
 Hello, I was wondering if within Affinity Designer is there a "Free transform tool" to allow perspective distort with shapes, this is something that can be done within illustrator where you can take two points and can move them together or further apart with equal distance like the example below. You can kinda do this with the "Corner" tool set to straight but this is set to only one angle when perspective distort can change the angle. Thank you for your time and I hope you have a great day.
- 317 replies
-
- 14
-
-
- mac
- free transform tool
- (and 5 more)
-
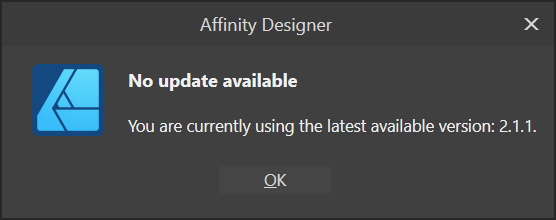
I've just started AD tonight and was presented with this message but the version that downloads is 2.1.1 - is this just a WIP and I need to be patient? Also, please can the EXE version download the EXE version and not the MSIX version? If I then hit OK and run the program and select Check for Updates on the Help menu I see:
-
 Hi there, since Affinity 1.8 it is possible to edit the metadata in Affinity Photo. Exactly this feature I had mentioned a long time ago. I wonder why the metadata panel is not included in Affinity Designer 1.8. Is there anything you can do? I ask again because I am not a friend of work-arounds. Or do I need to buy Affinity Publisher? (makes no sense to me, because I only need this feature) My old thread: https://forum.affinity.serif.com/index.php?/topic/101472-set-pdf-document-properties/&tab=comments#comment-544049 best regards!
 -
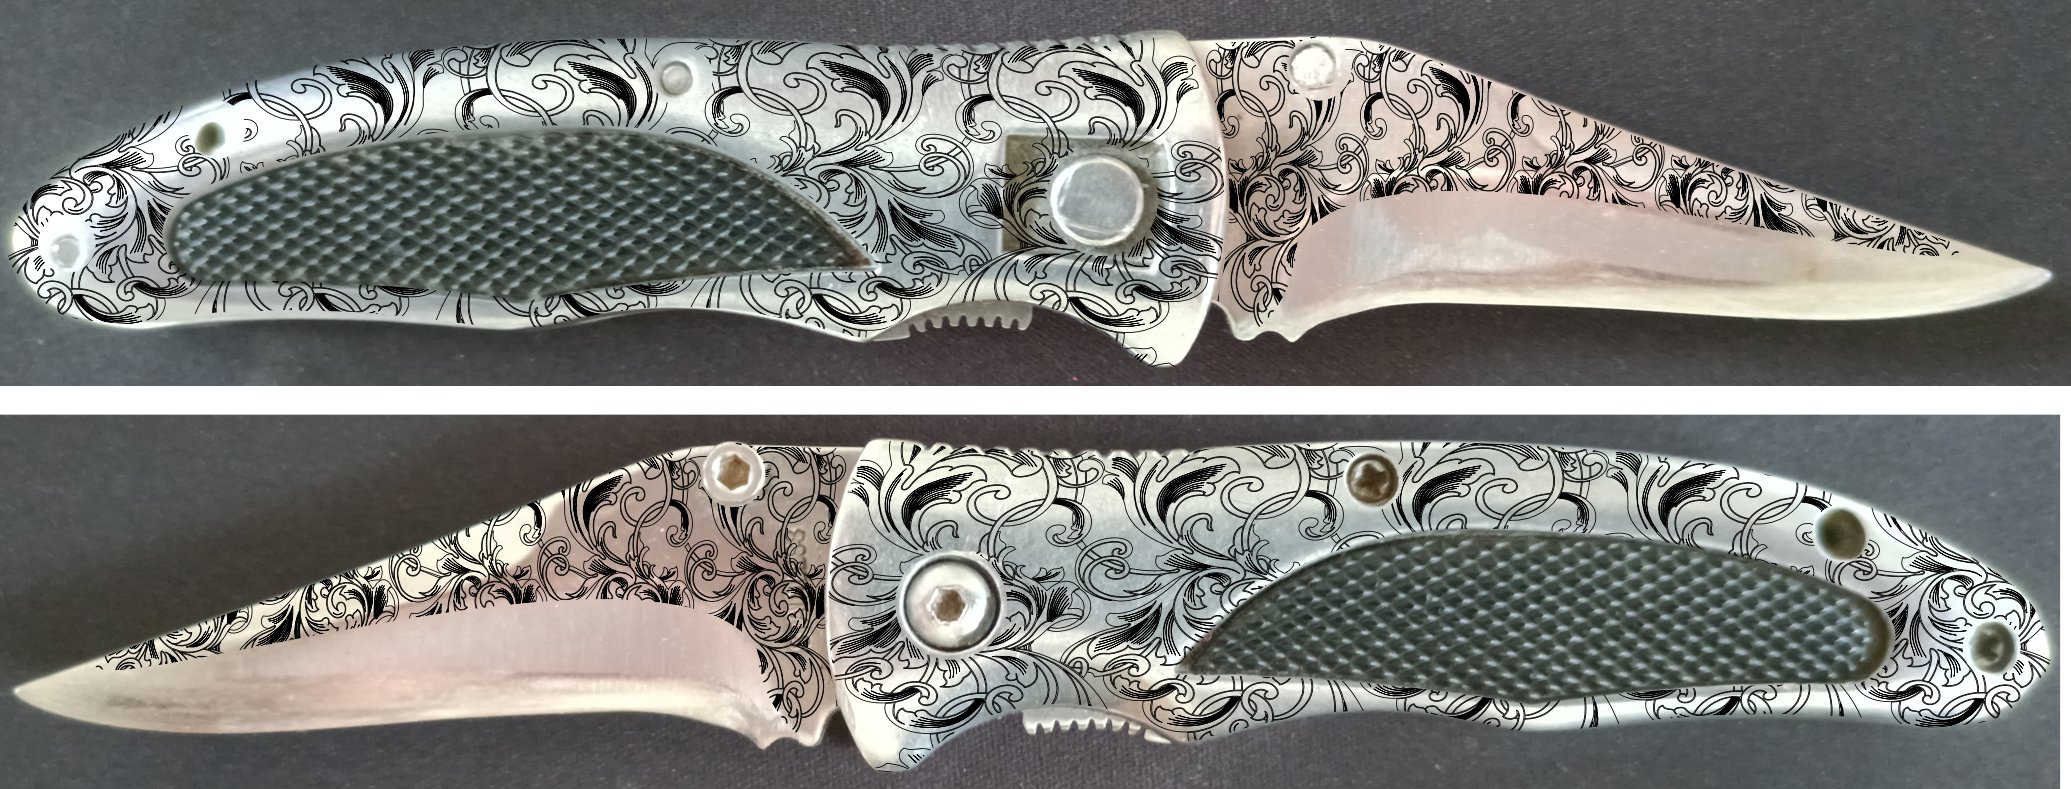
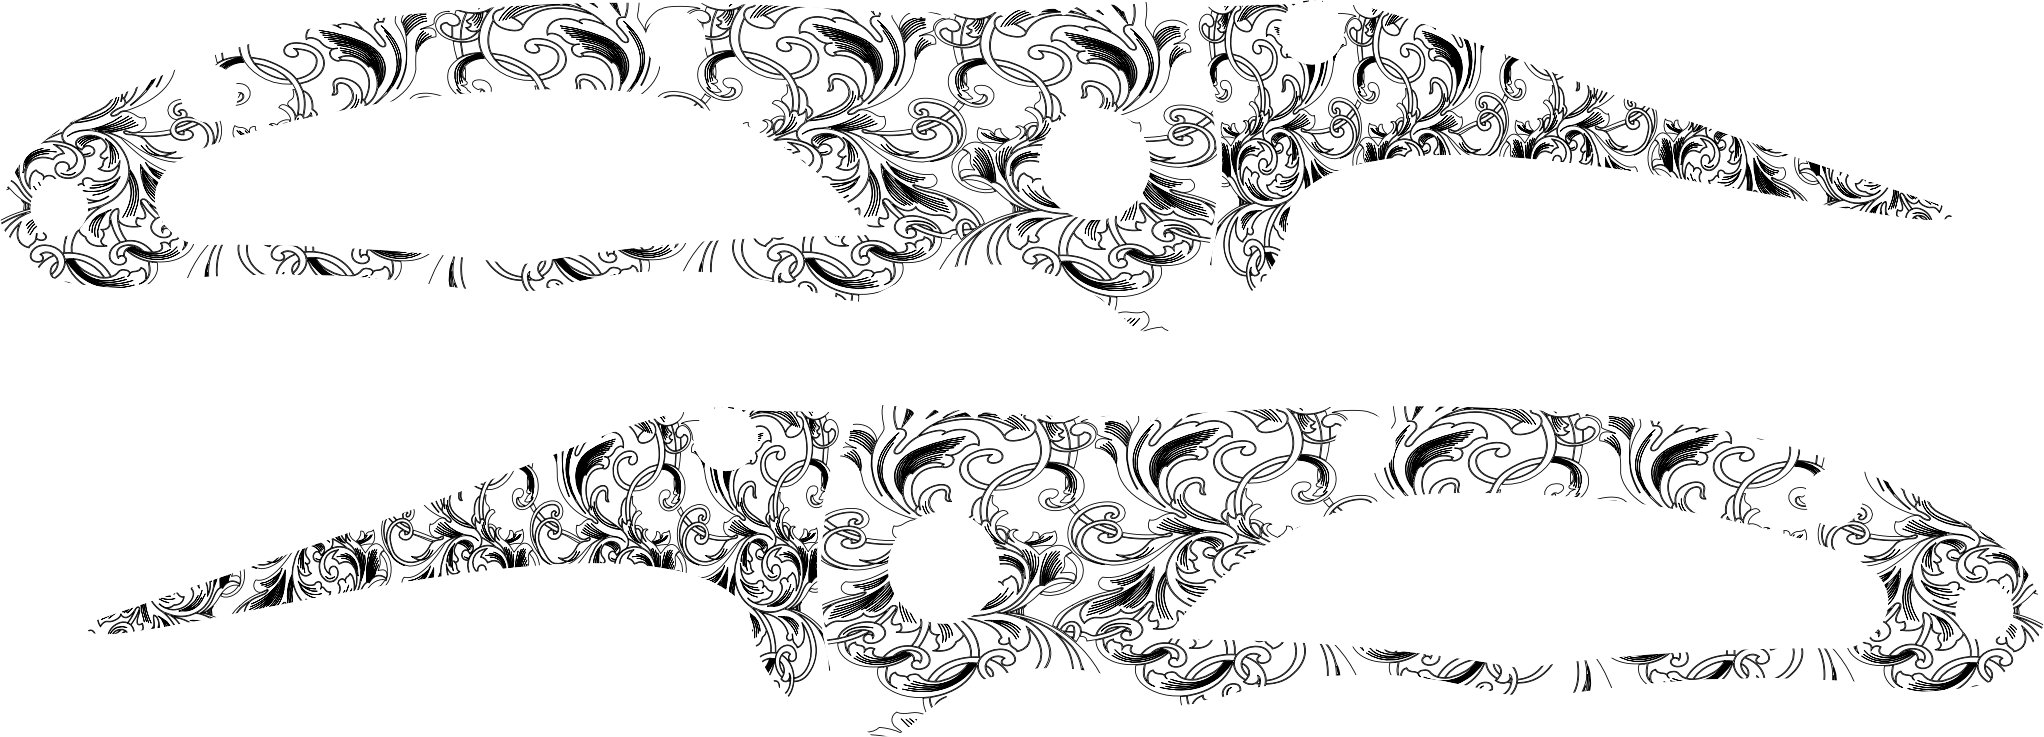
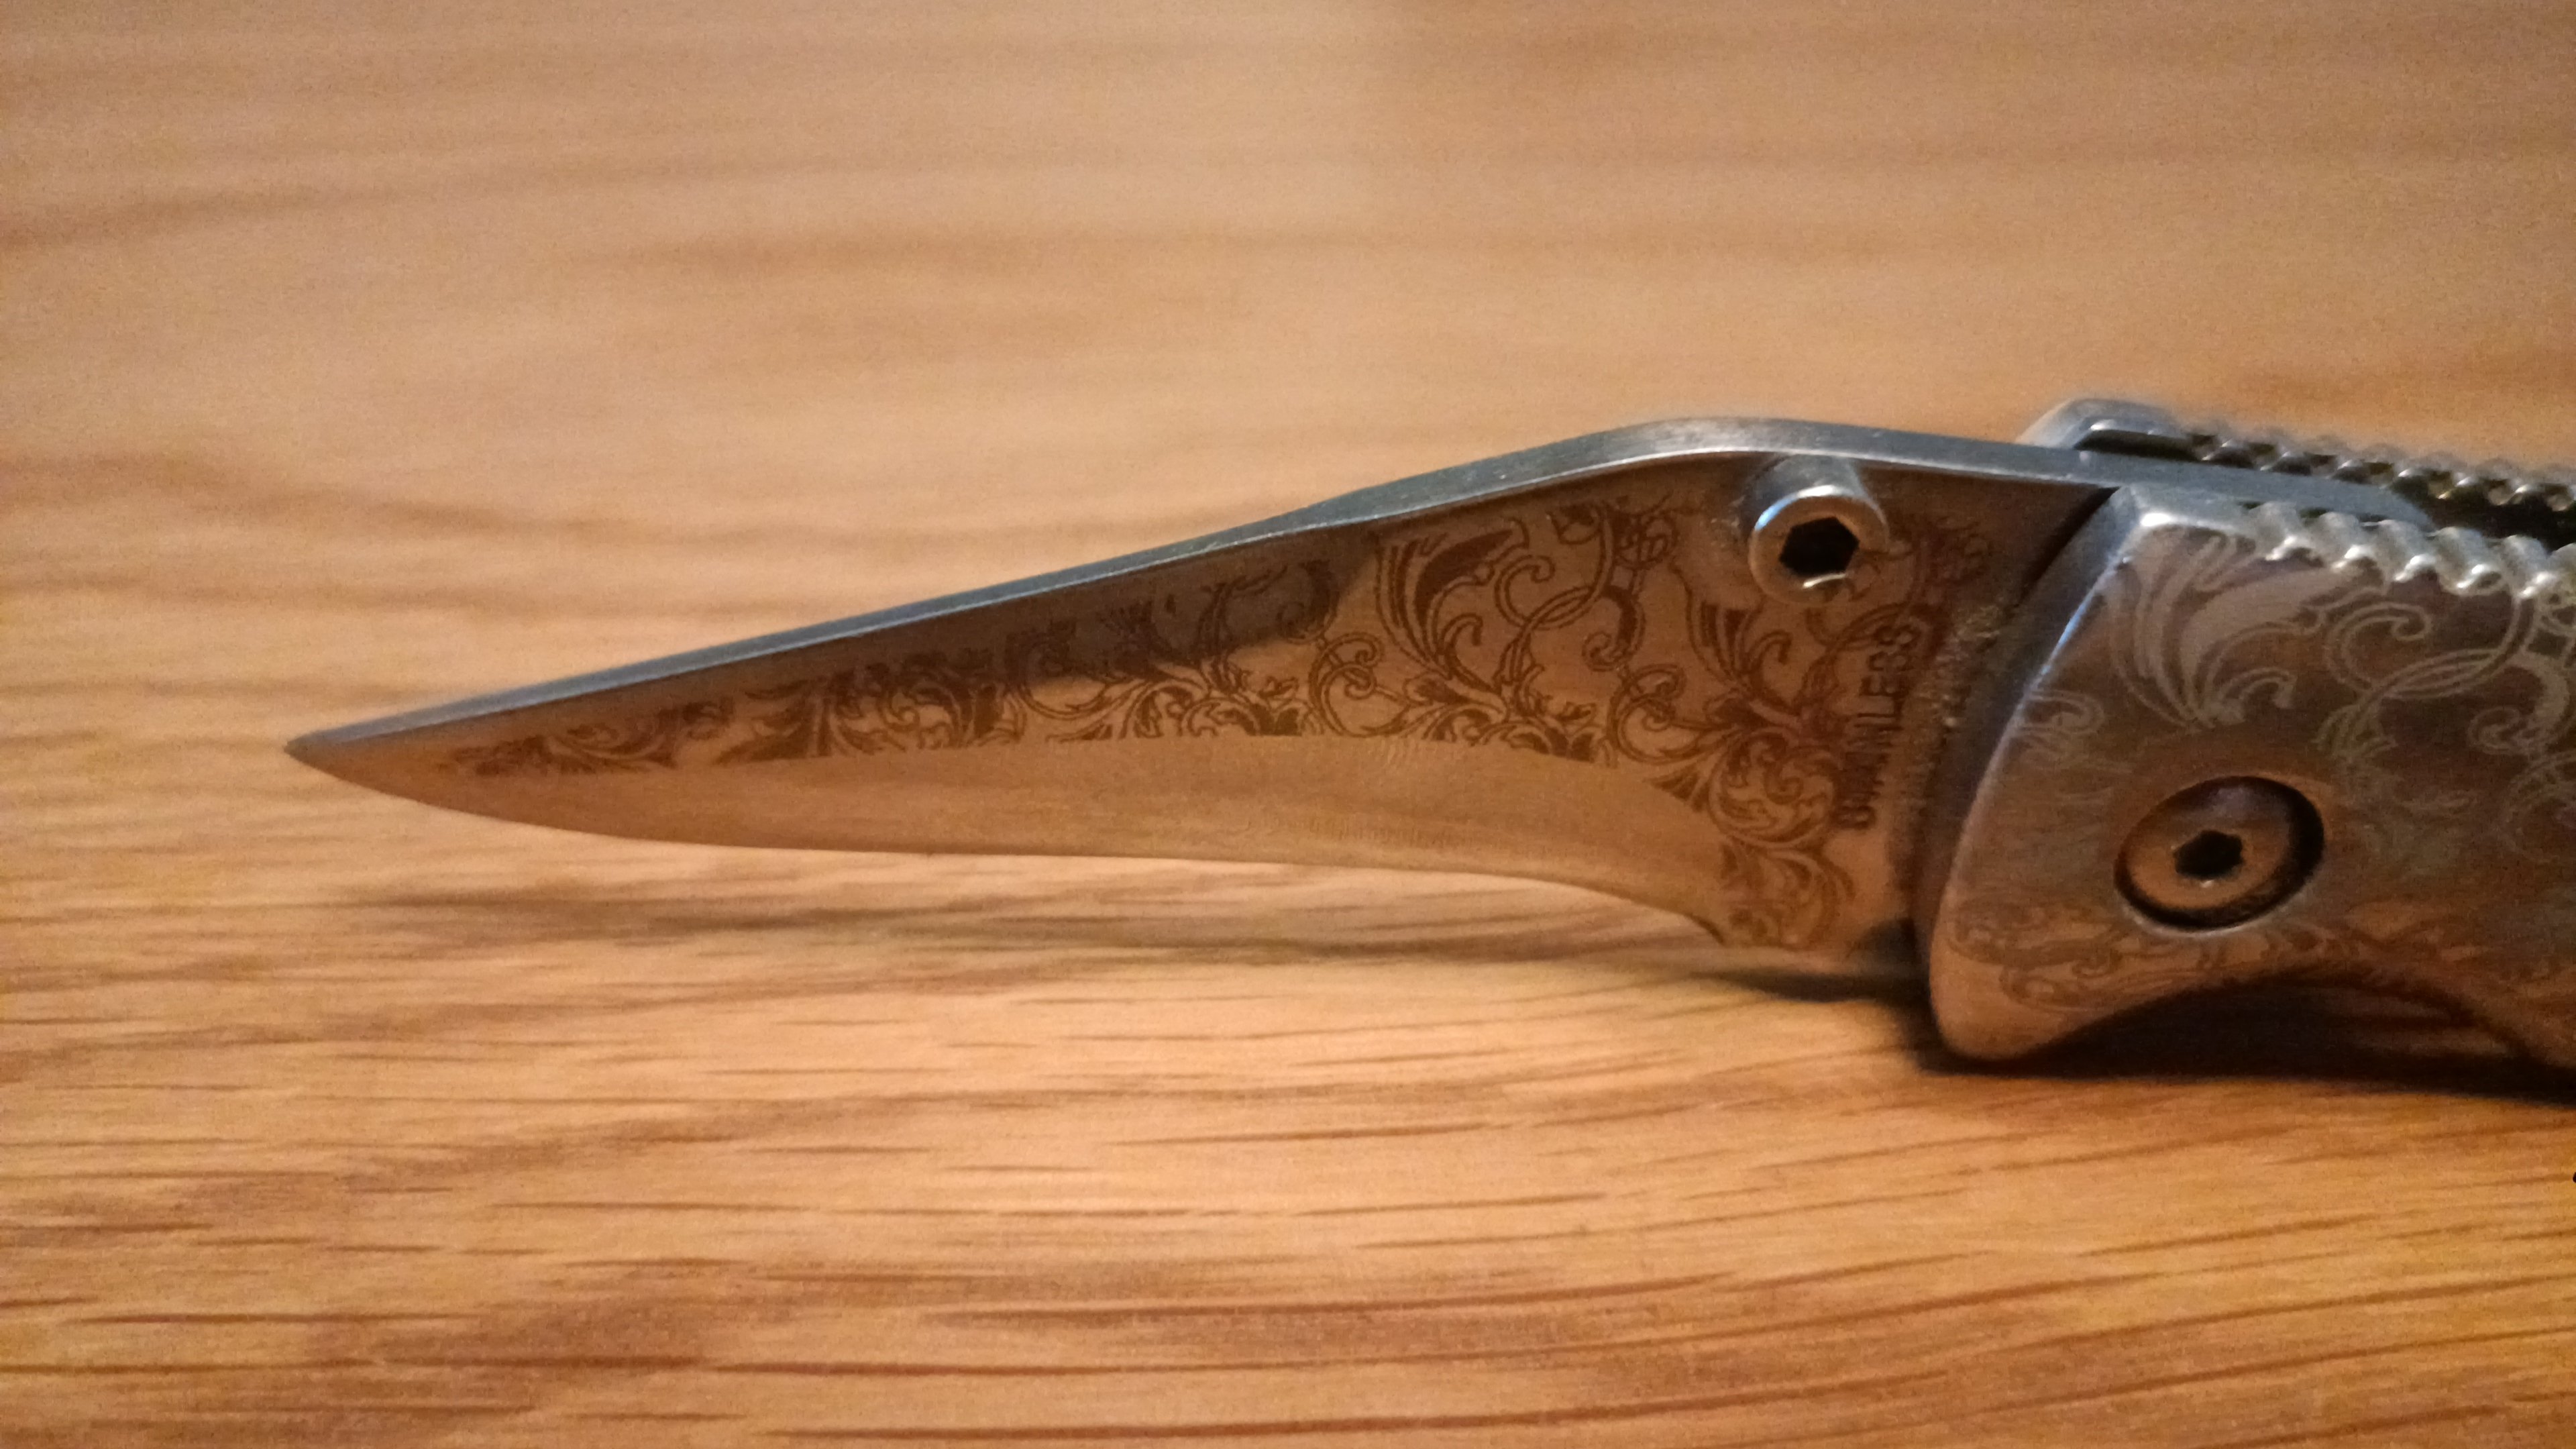
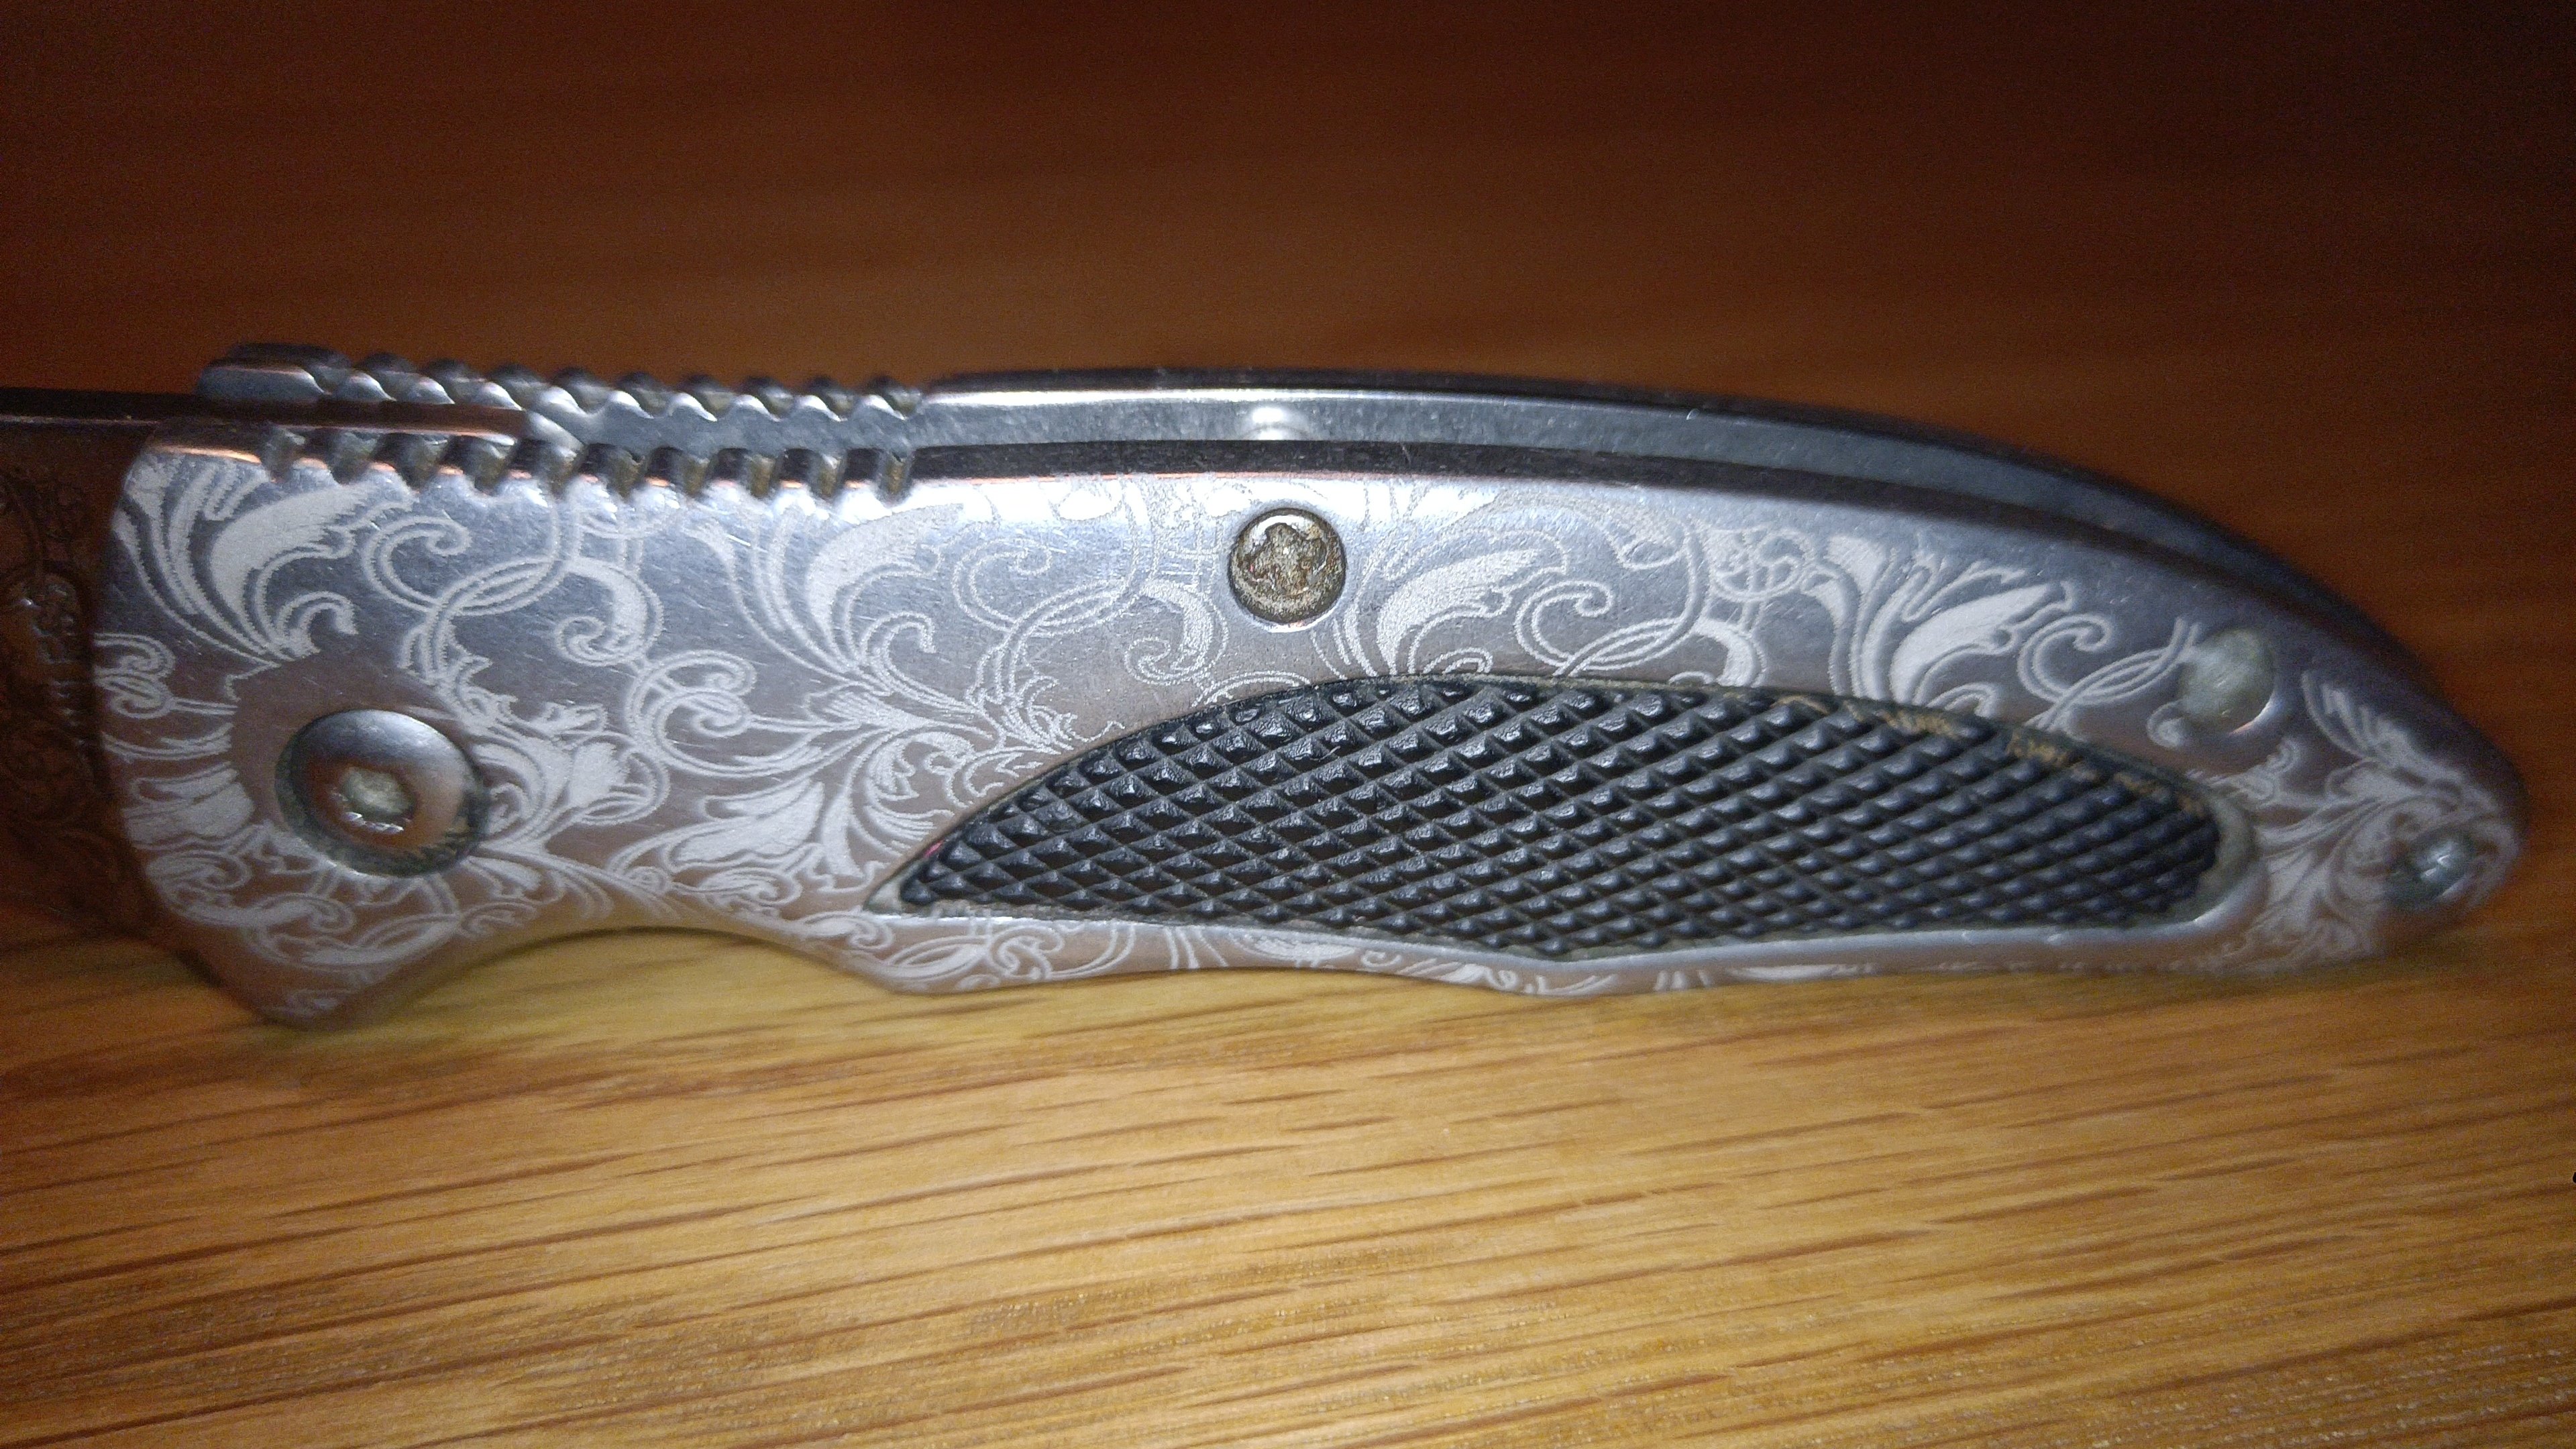
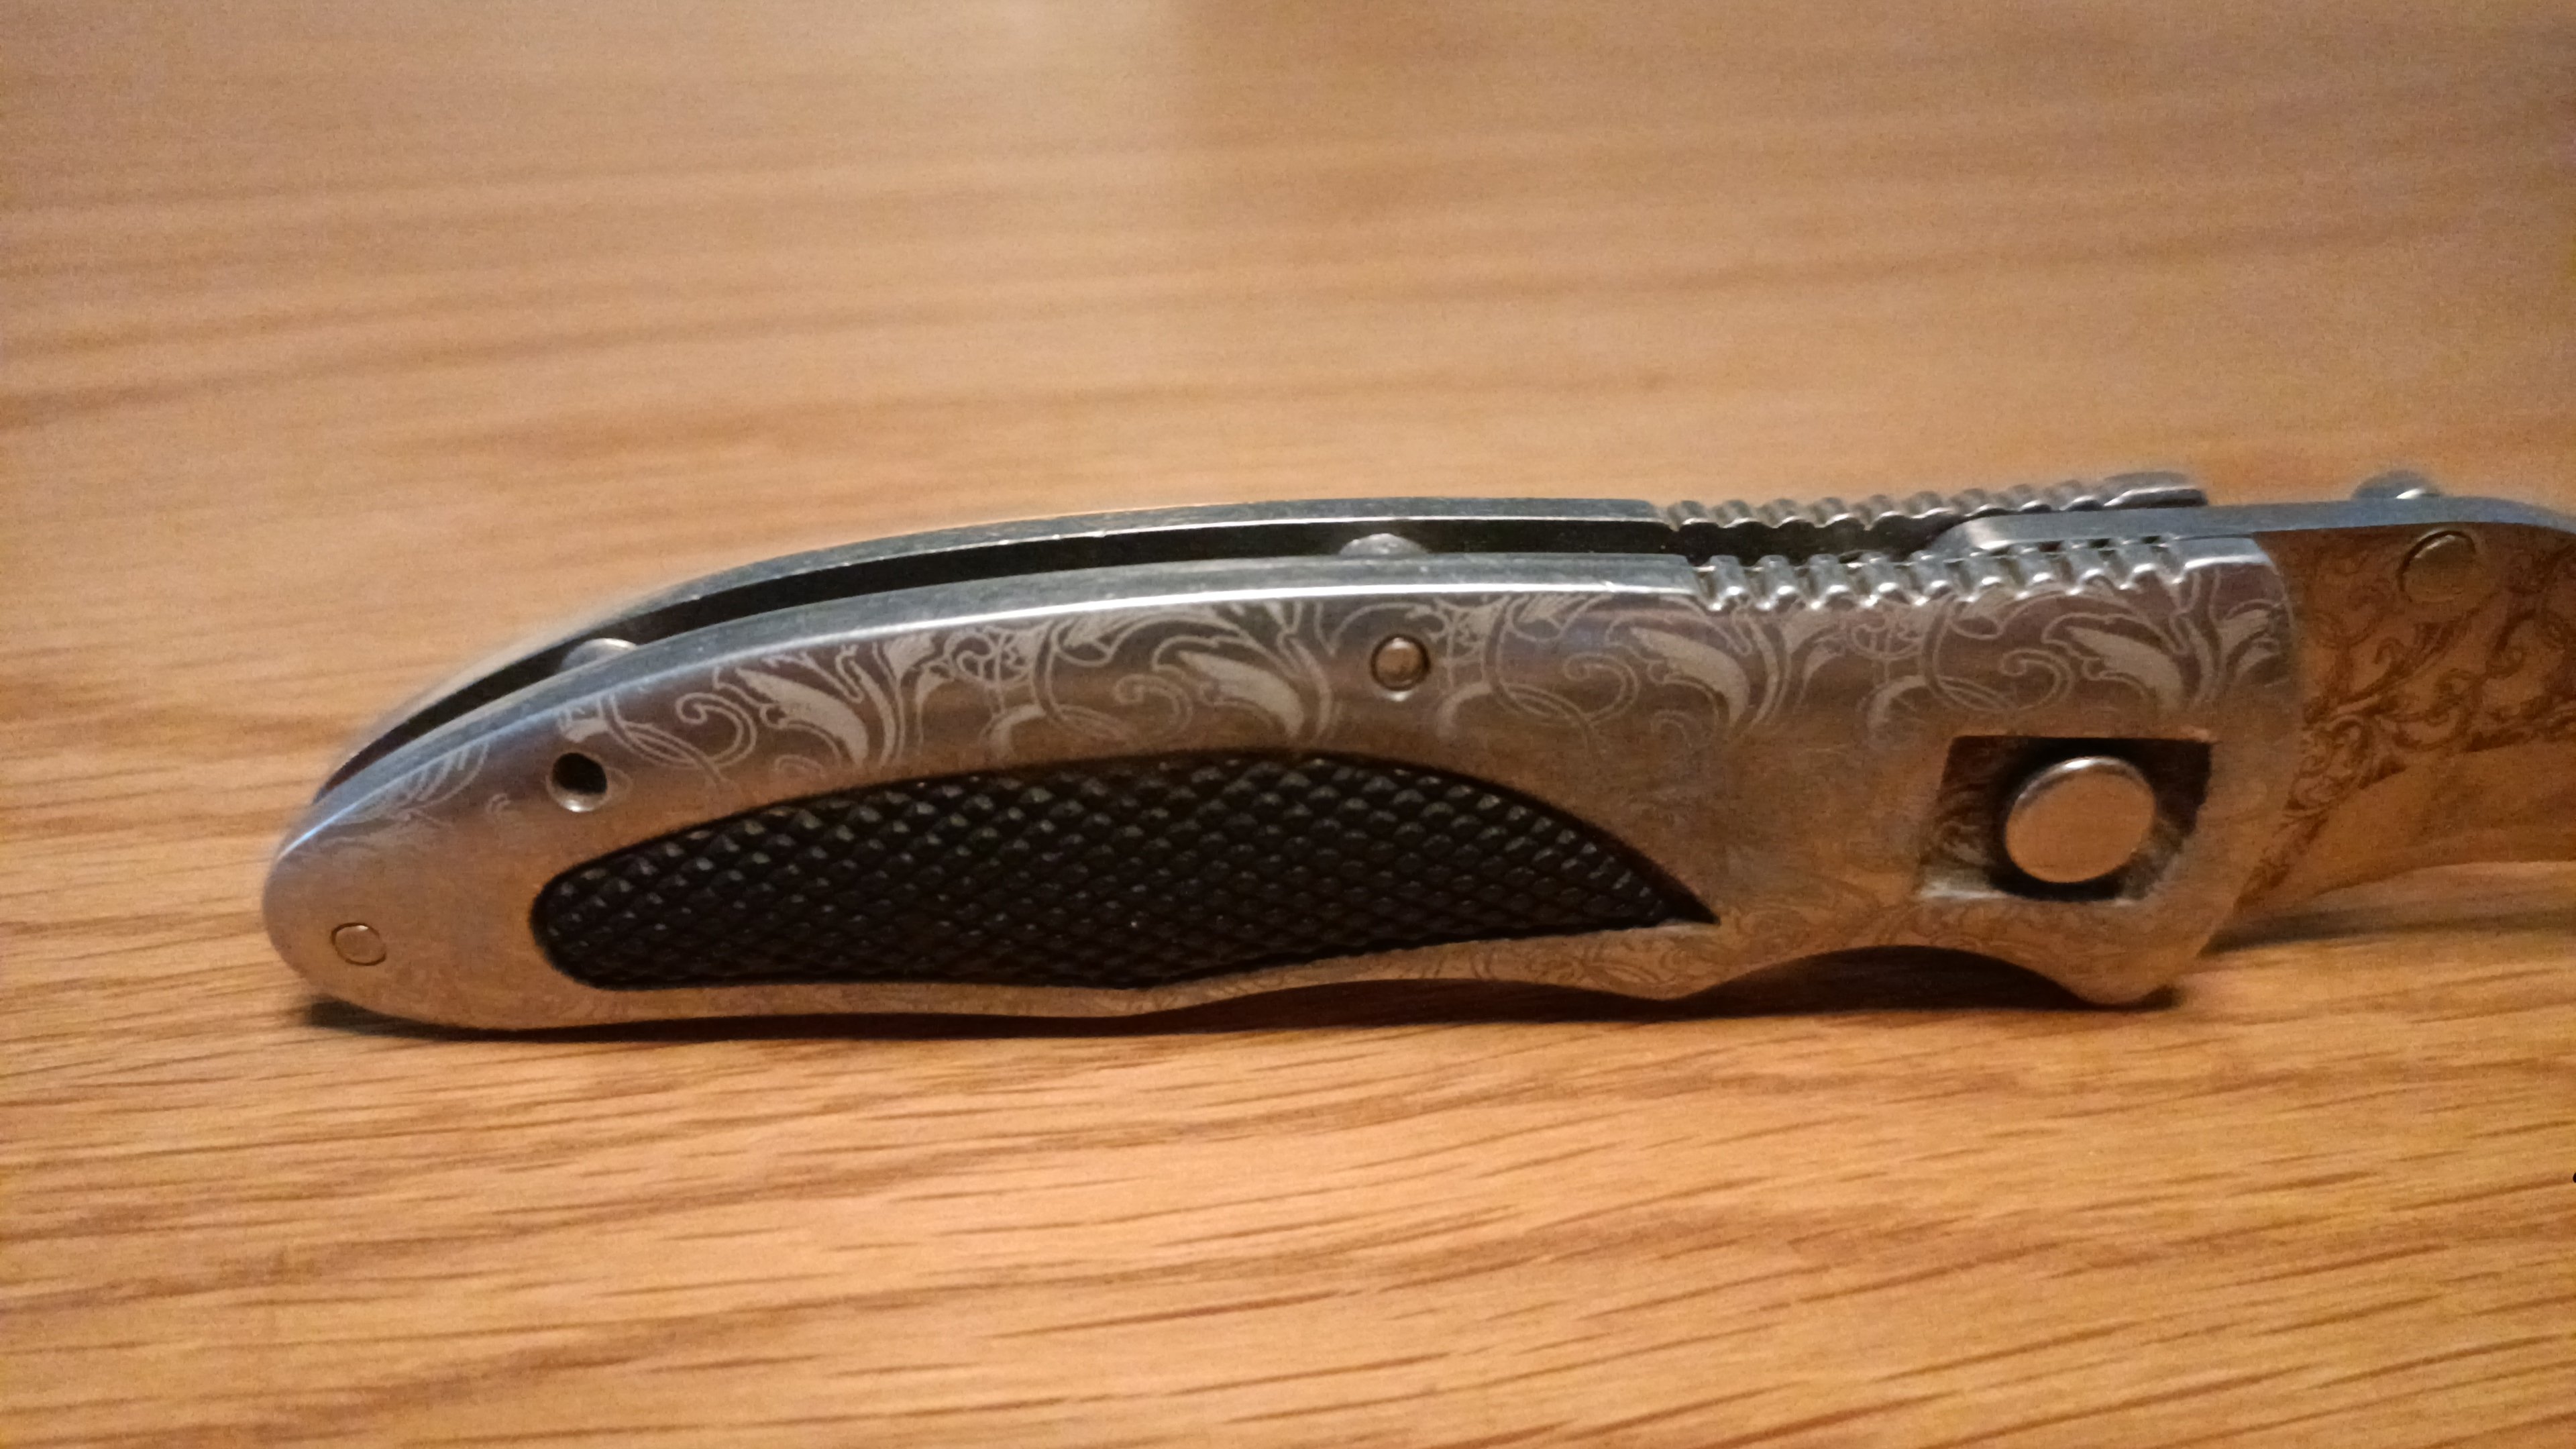
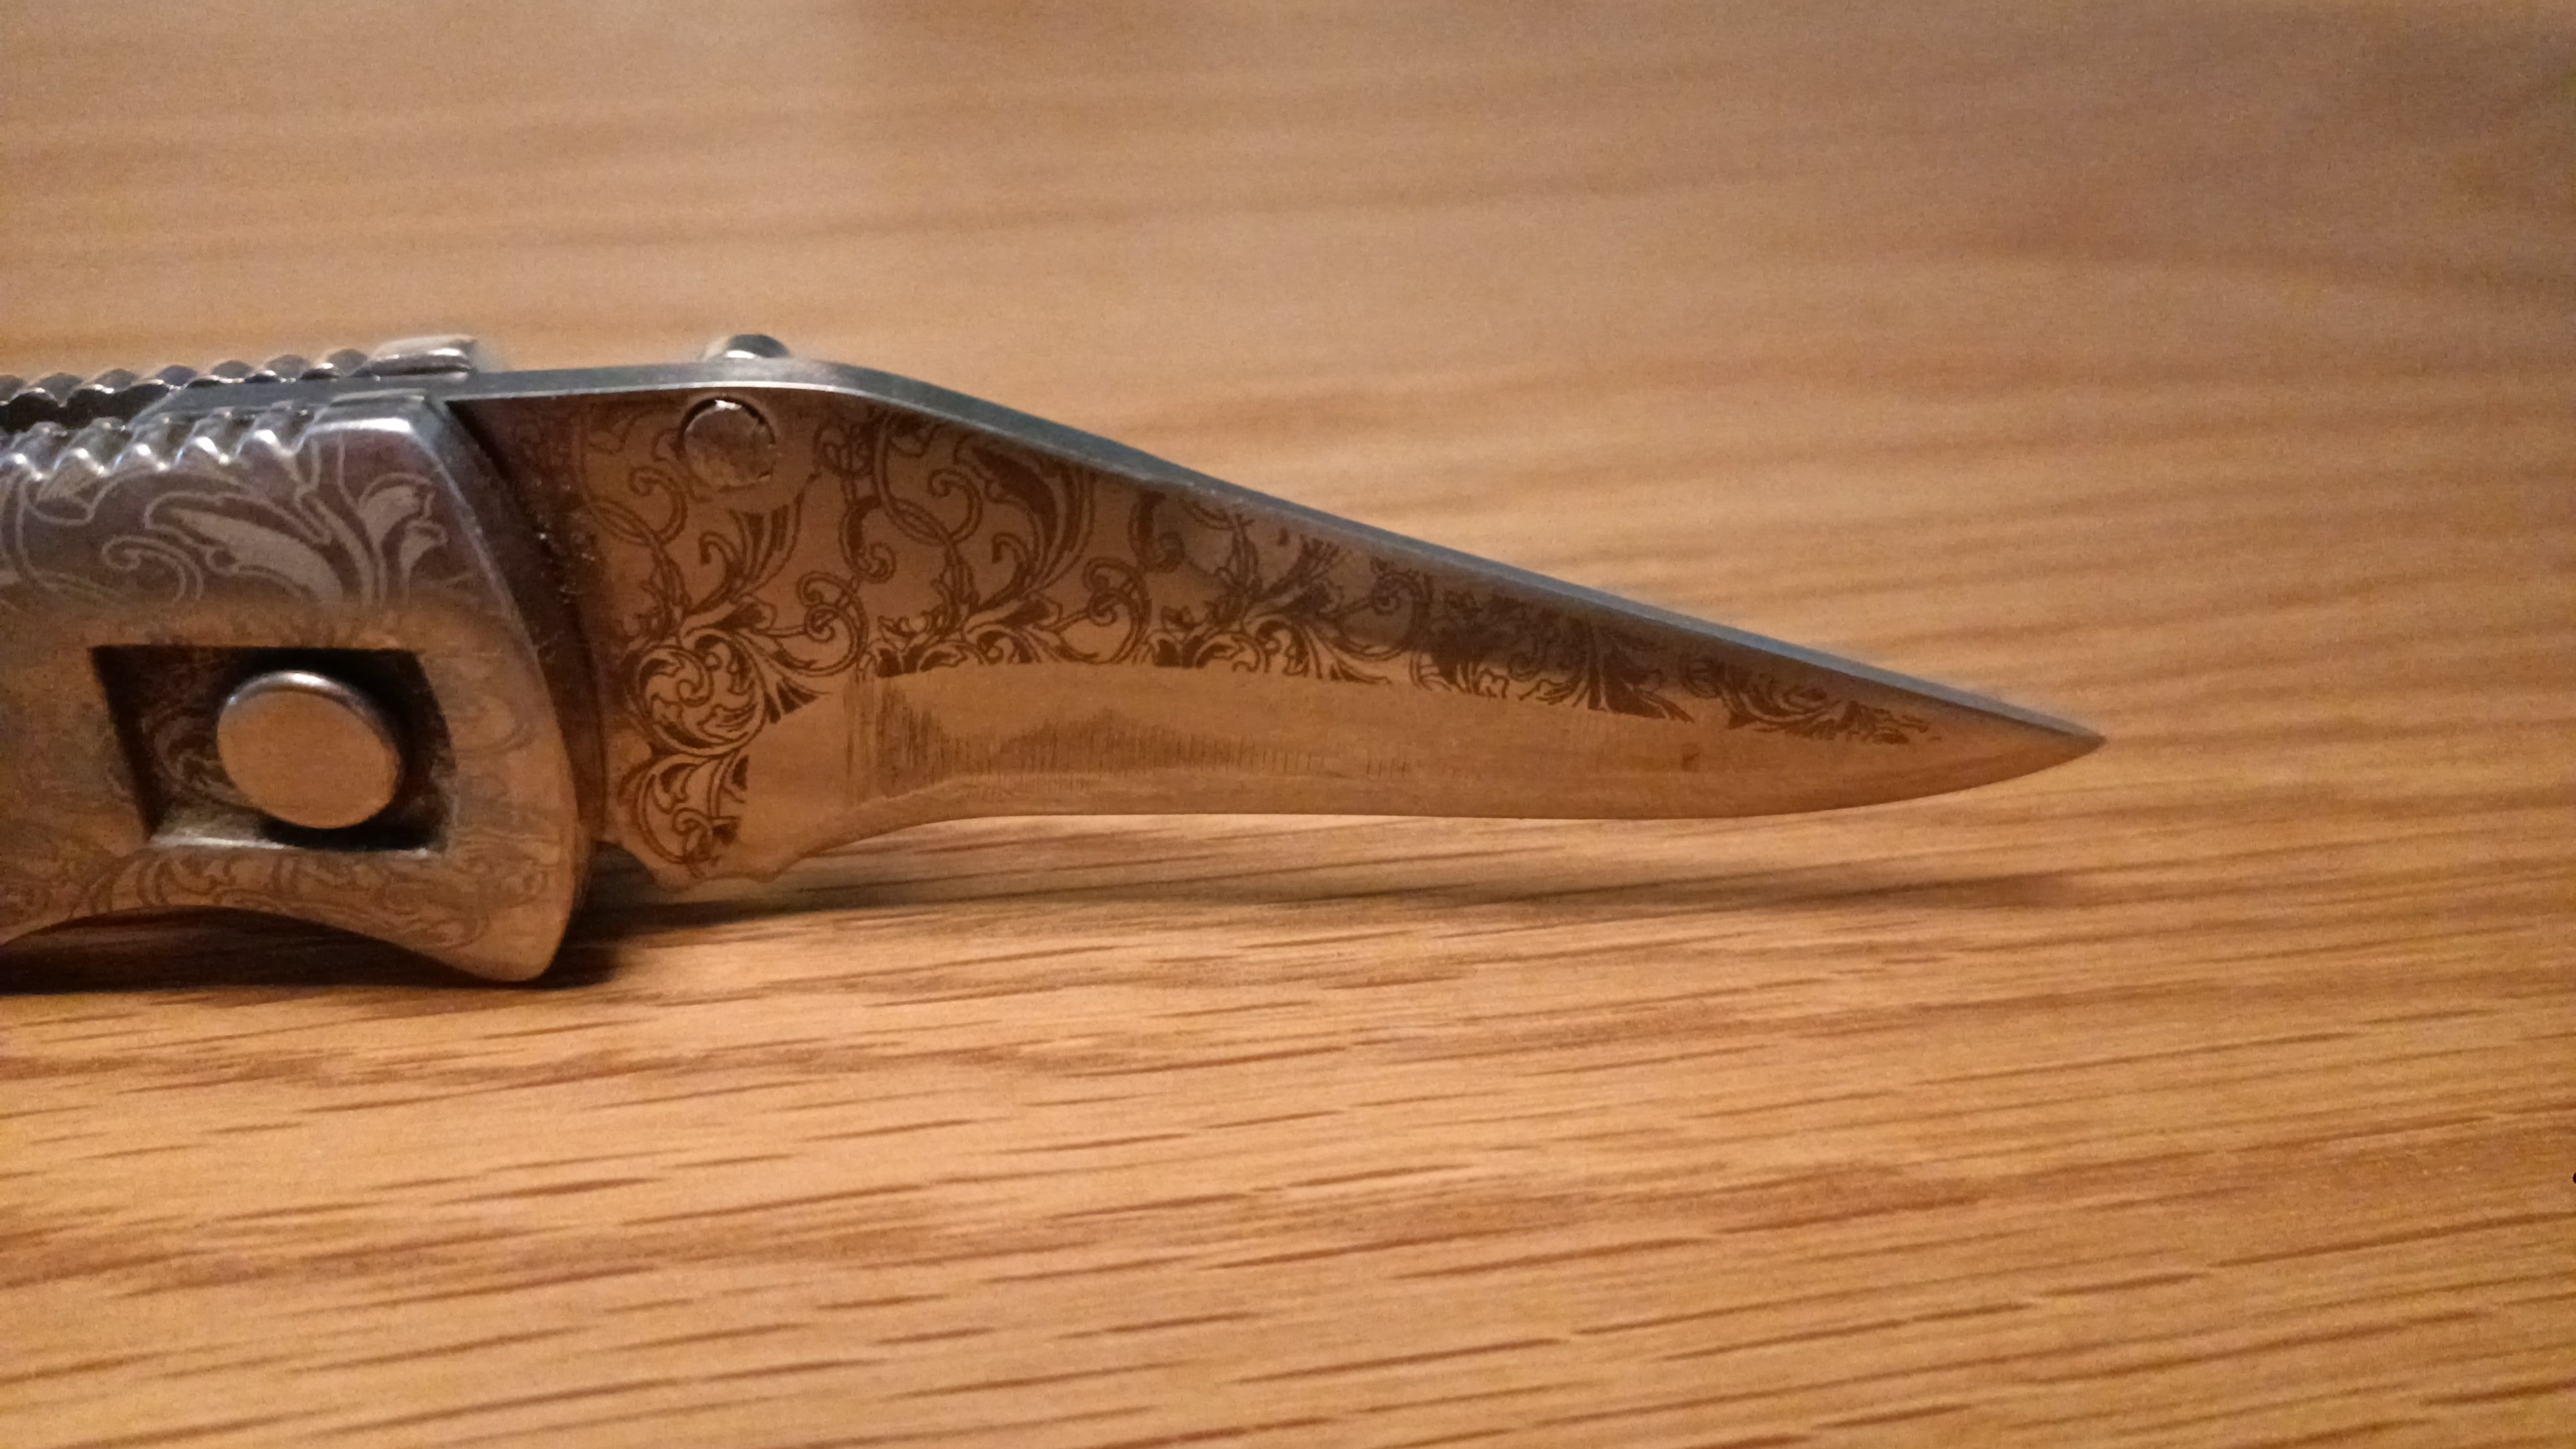
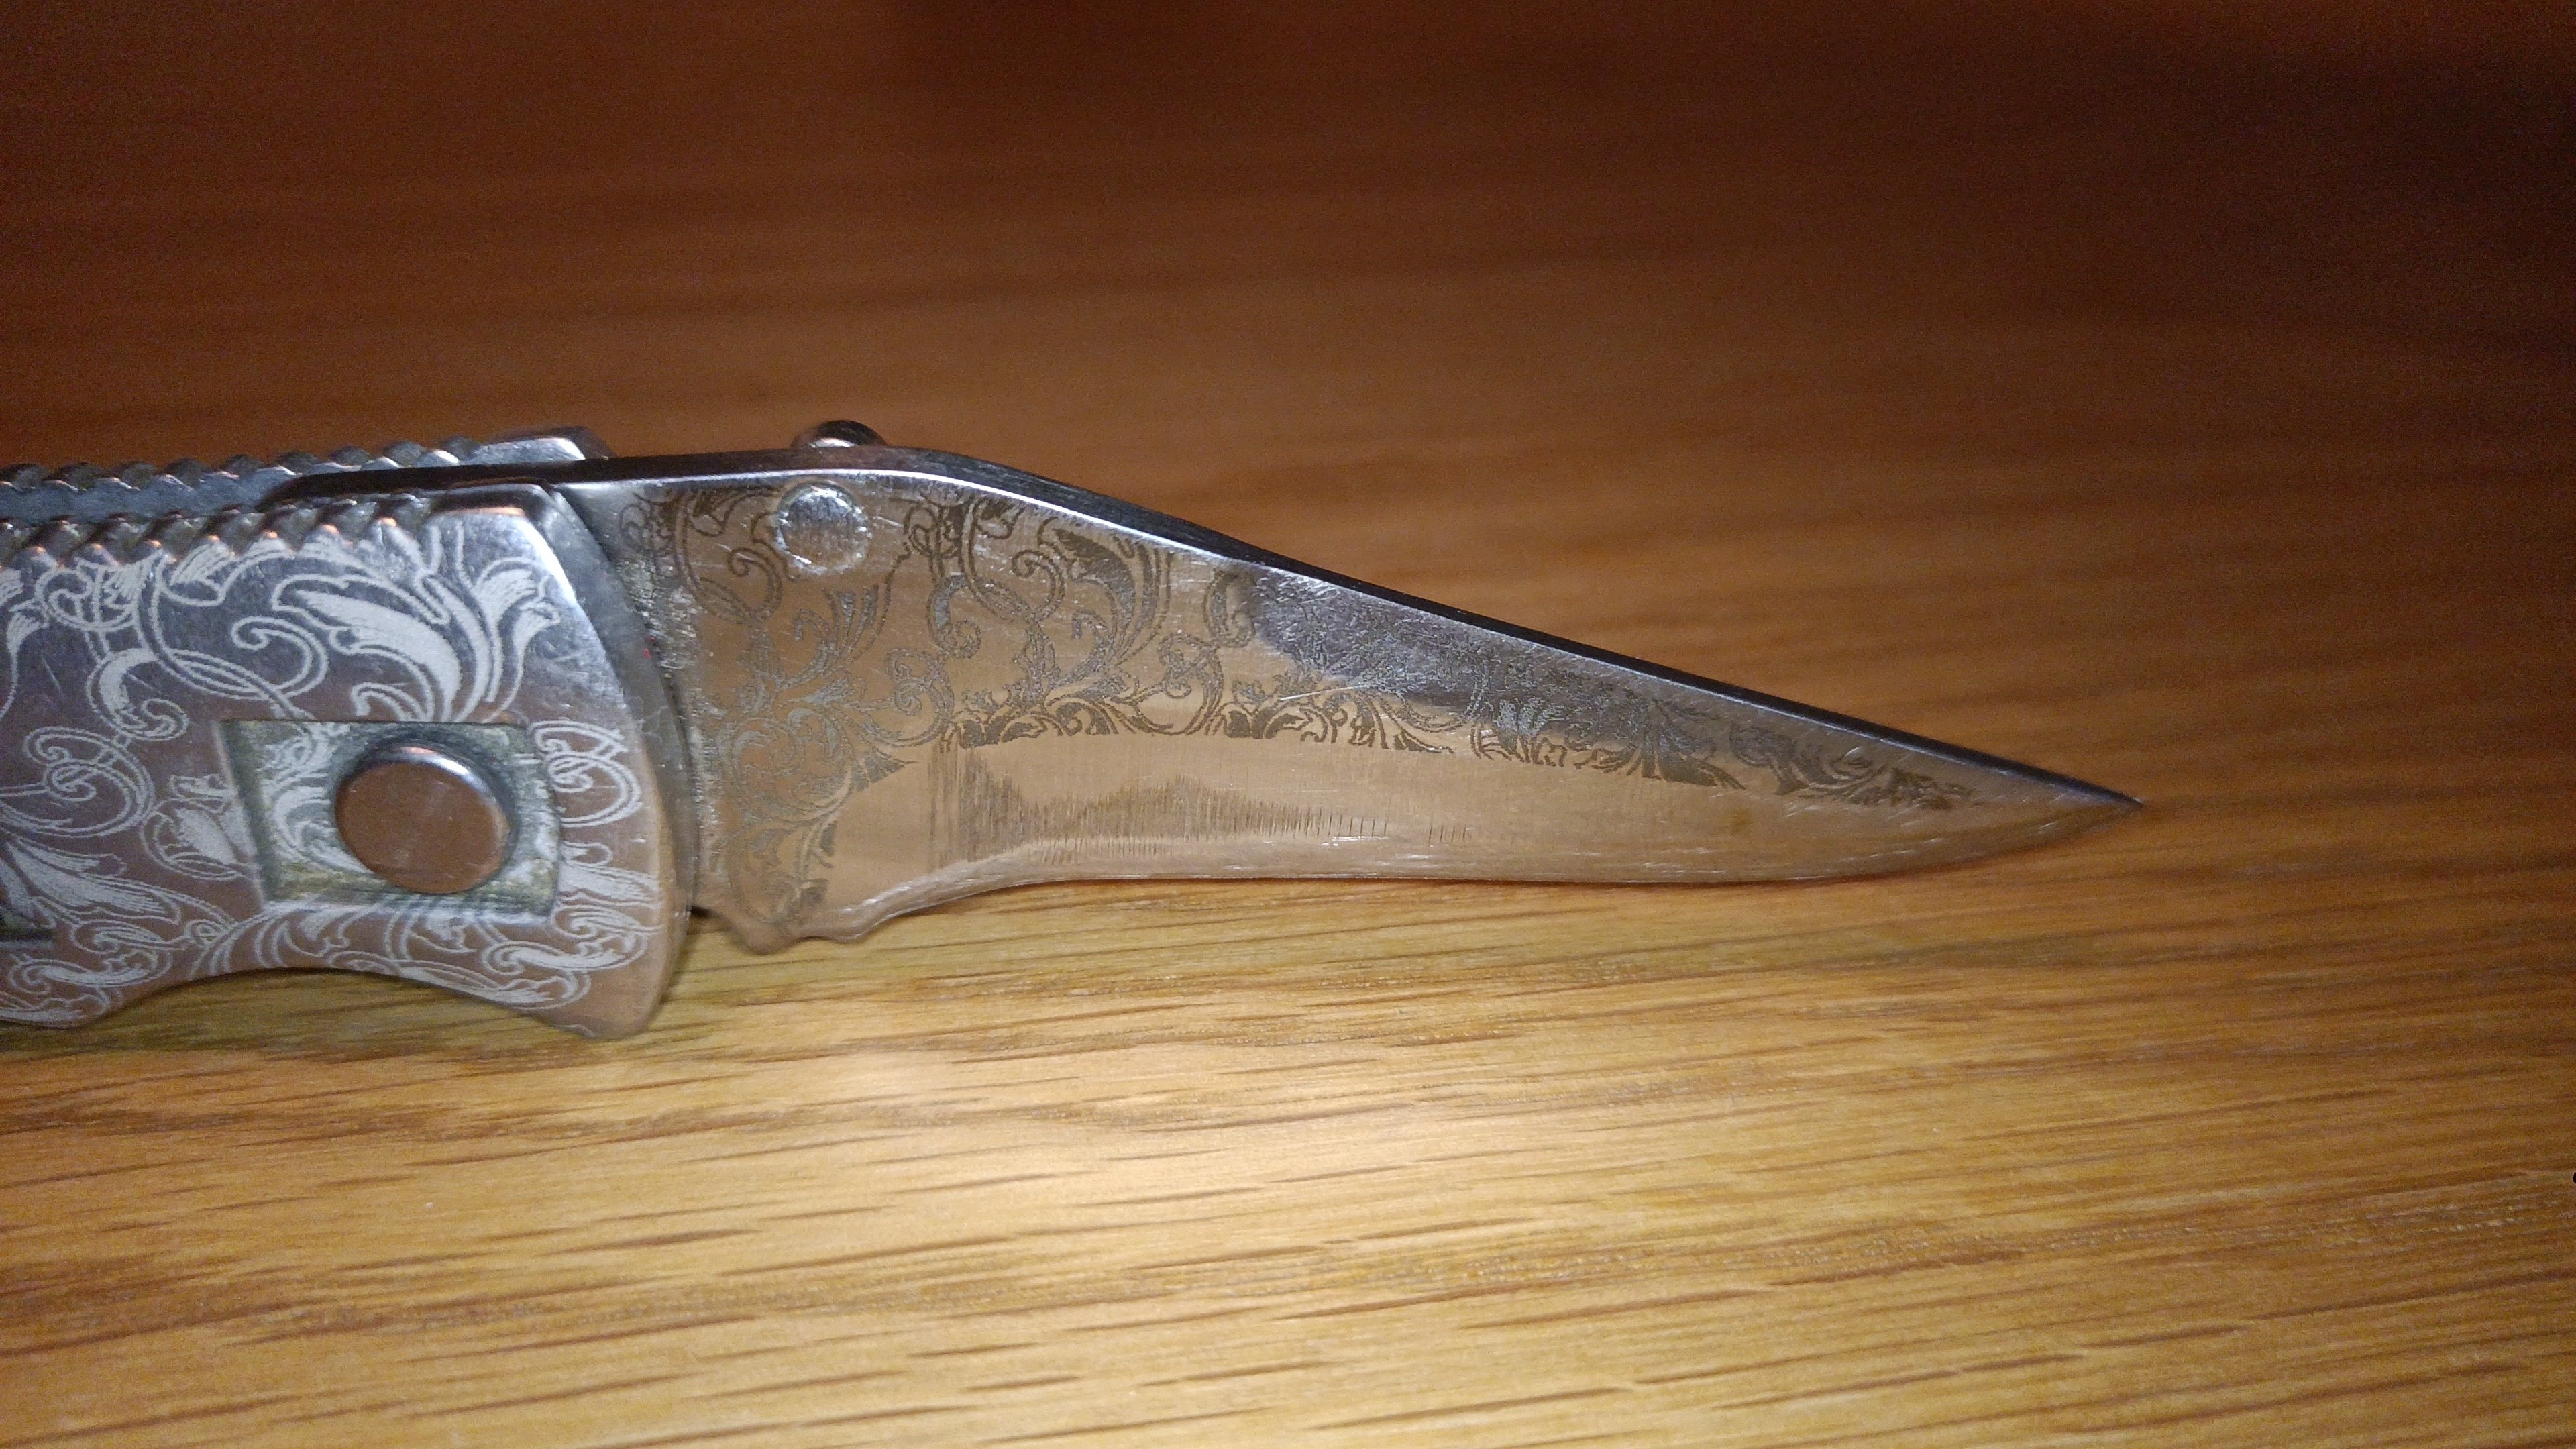
I bought a X-Tools F1 laser cuter/marker and I made å pattern that I am going to try to etch in to a knife. Made masking in Designer and positioned where I wanted it to be. I will post pictures of how it looks after I have lasered it.