Search the Community
Showing results for tags 'Affinity Designer'.
-
.thumb.jpeg.3b39f5fbb33d6270a620ed67c2ebde92.jpeg) I was never able to understand the meaning of the Cat tool, after the upgrade. Who has any thoughts?😎
I was never able to understand the meaning of the Cat tool, after the upgrade. Who has any thoughts?😎
-
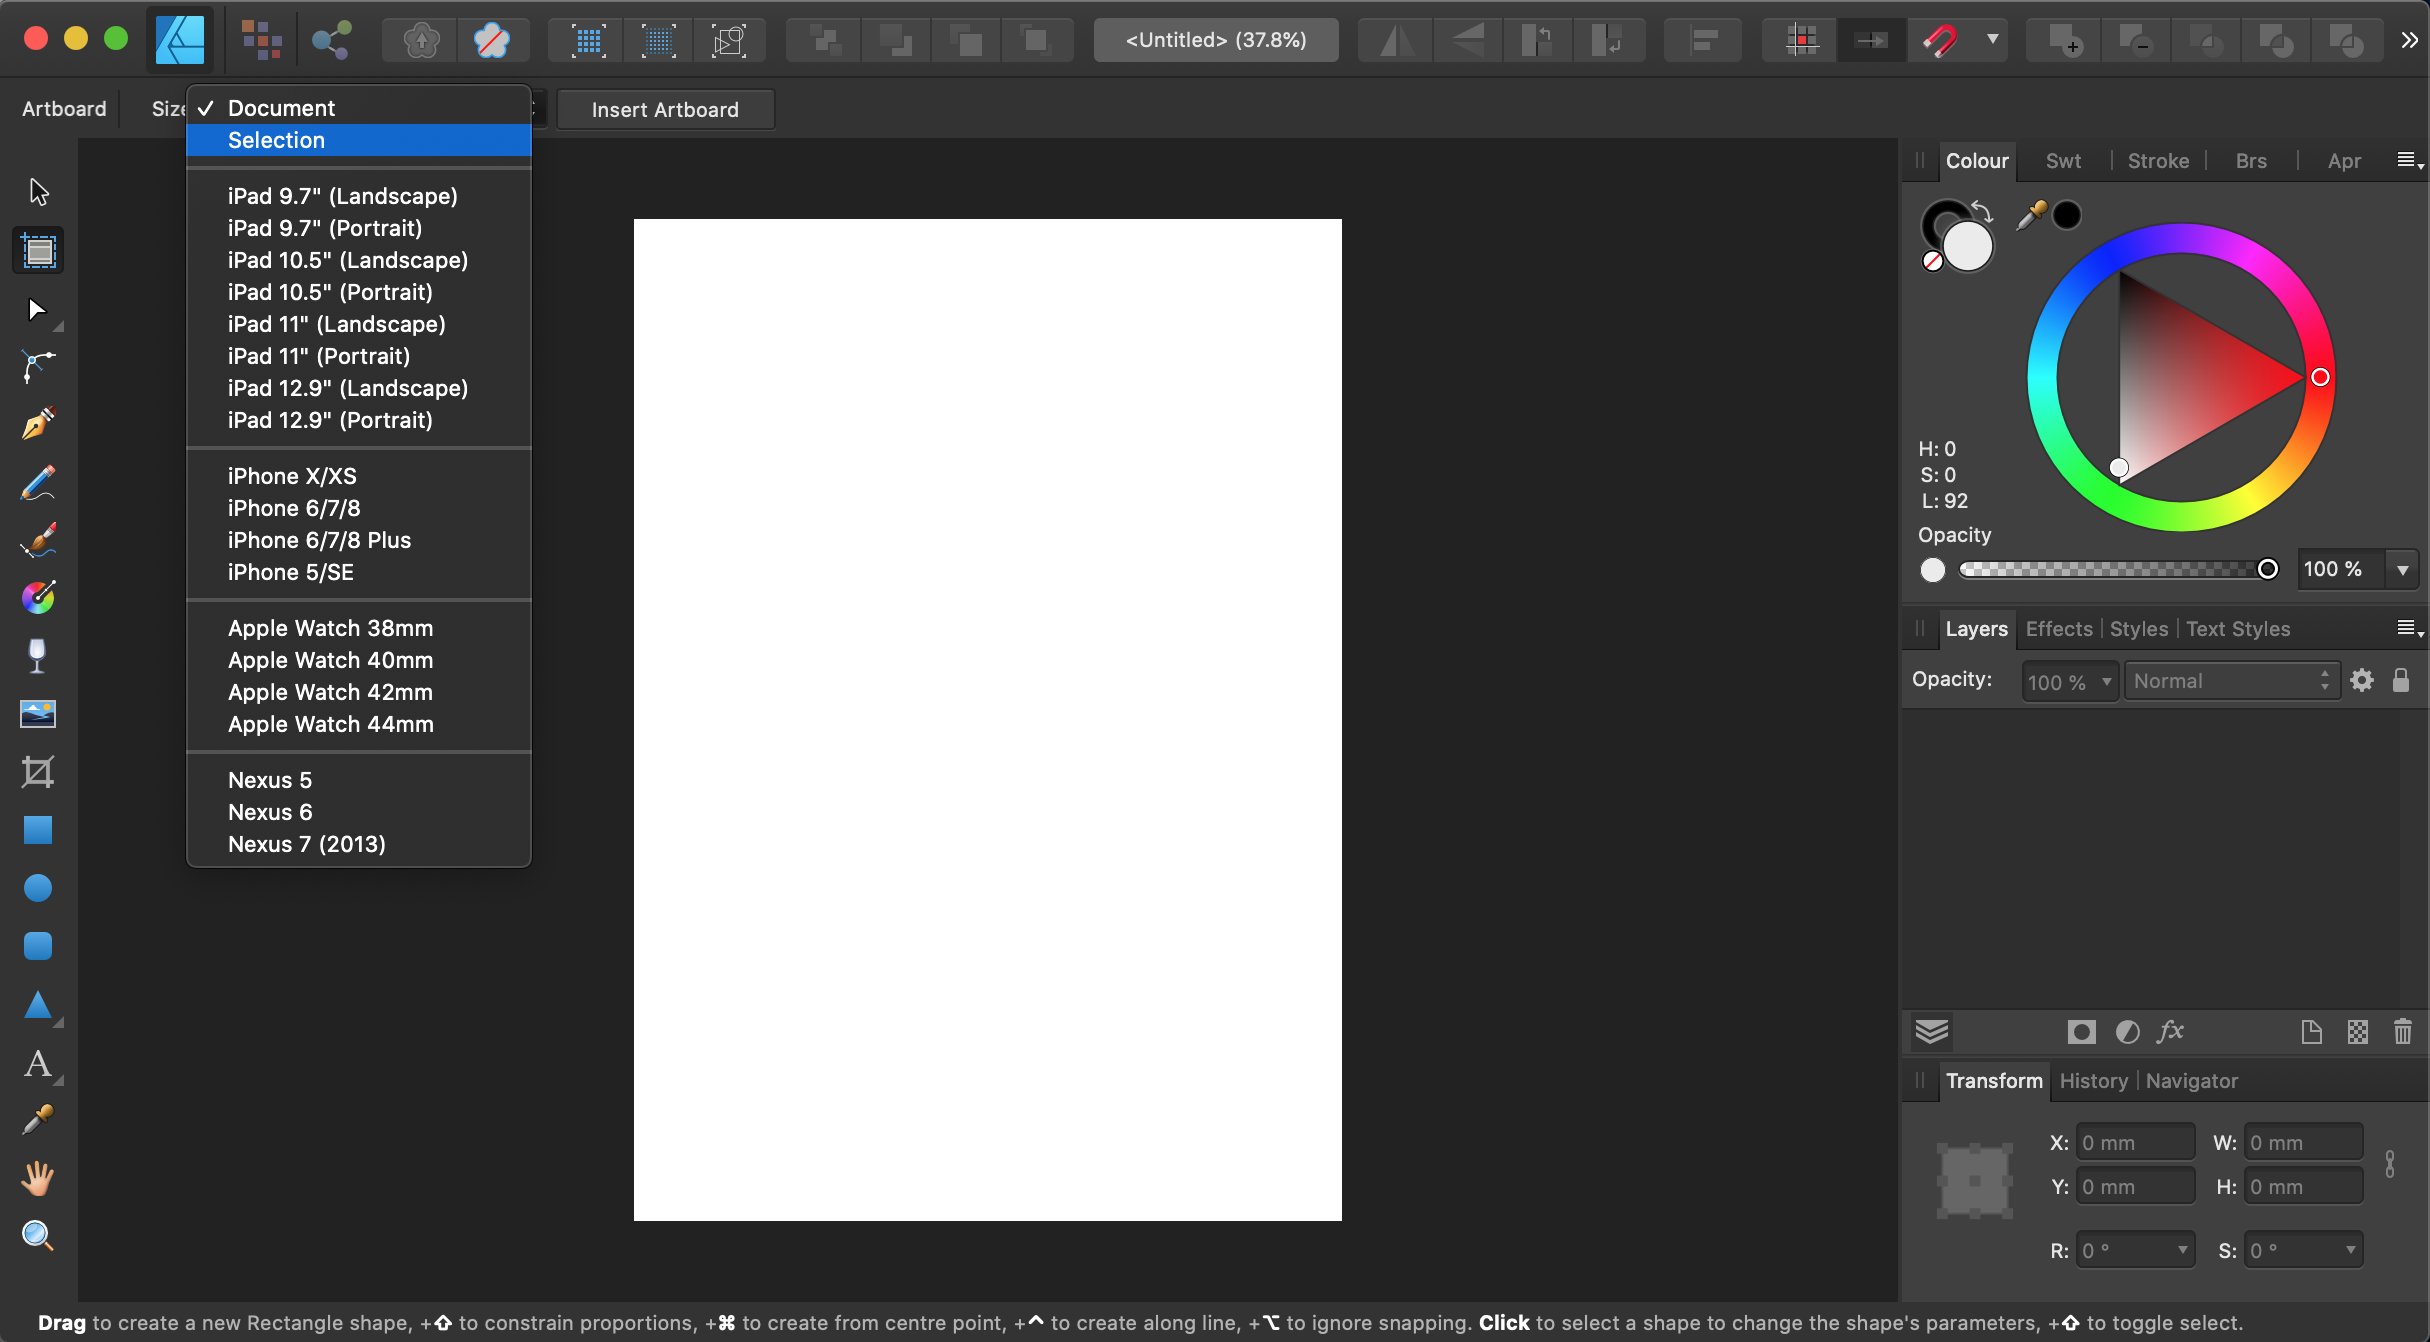
 Is there a way to zoom to fit the current selected artboard? If you have multiple artboards cmd+0 fits all artboards. But what if I just want to center and fit the current selected artboard? Is that doable? Thanks.
 -
I’m having a recurring issue when trying to subtract an overlapping shape from the object below. Every time I try it, the resulting new object is distorted. This is something I’ve not had issues with until now.
-
 If I just move a duplicated object, the next duplication is translated relatively in the x/y space, as expected. However, if the duplicated object is rotated after being moved, the next duplicate action leaves the new object at the original object's position. I expected both translation and rotation to be applied. Am I missing something?
 -
Hey guys, Check this out. AF tried to combine these two shapes with only 4 nodes, removing the one at the bottom and making the new shape round. Edit: I've tried combining the rectangle with a triangle and it's worked fine.
-
 Cool, i've been curious of what miter is? I noticed it in the settings.
-
 My grids are hugging the left side of the canvas. How do I nudge them 10 steps to the right? I've been digging around the configurations but can't figure it out.
-
 Hi, I want to use the function as follows: An image is placed on the page. The image is converted to vector. A circle is created and placed on top of the image. The image is cropped to the same size as the circle. Both objects are selected and the intersection tool is applied. The result is not what I expect. The image is being shifted and the result is that the wrong part of the image is showed. This worked fine in older version of the software (1.5, 1.6) Please let me know if there is another way to accomplish a circular cut out of an image that can be used to apply further effects upon (bevel, shadow etc.) '
 -
 I purchased Designer and Photo through the App Store in 2014. I was updated to 1.7.1 on both apps. Recently neither would open and id have to force quit them. I tried to update to latest versions on app store and it didn't fix the issue. I deleted the apps for a fresh install and now the app store is asking me to buy the apps again even though I've already paid for them in full. How can I reinstall these apps without having to pay again? Thanks JC
 -
 What is causing this issue. The colors does not seem to align with the other curves and it is overlapping the canvas. File is originally created via Adobe Illustrator.
-
 Hi Everyone, my AD just broke down. After restarting it, all my objects have flipped 180 degree. They are upside down - standing on the head. I can transform them manually by rotating all objects 180 degree, but the thumbnails in the layerpanel stays flipped. It's a little confusing. How can I fix it? What has happened? Any suggestions? Thanks a lot Fabian from Cologne
 -
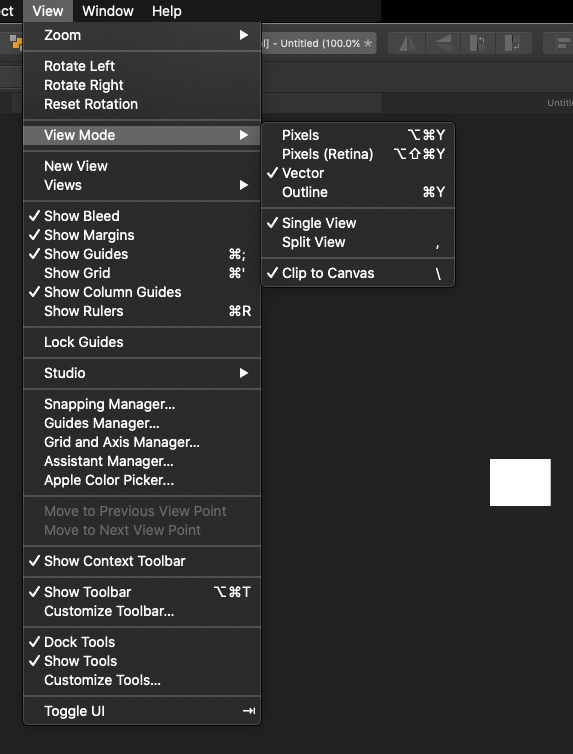
 Hi. I'll cut to the chase here because I'm just about in tears over what seems like a very dumb problem. I was working on a vector design (a simple candy heart) and trying to get a feel for the tools. This is my first time with Designer (trying out the trial version), but I've been using similar programs for decades. I accidentally used the Artboard Tool. When everything disappeared, I undid the action. Except nothing was undid. The Artboard is gone, but I cannot see any of my objects, despite them being visible on the layers menu. No matter how far I go back on the history menu, none of my objects reappear, and if I try to select anything it shows "0 objects". This is no "Artboard" on my layers. This was within the first ~10 mins of using this program, and I have spent the better part of the last hour searching the forums trying to undo this one simple click, to no avail. When I try to view the full image at 100%, it's suddenly almost non-existent. I'll include my view mode panel as well.
-
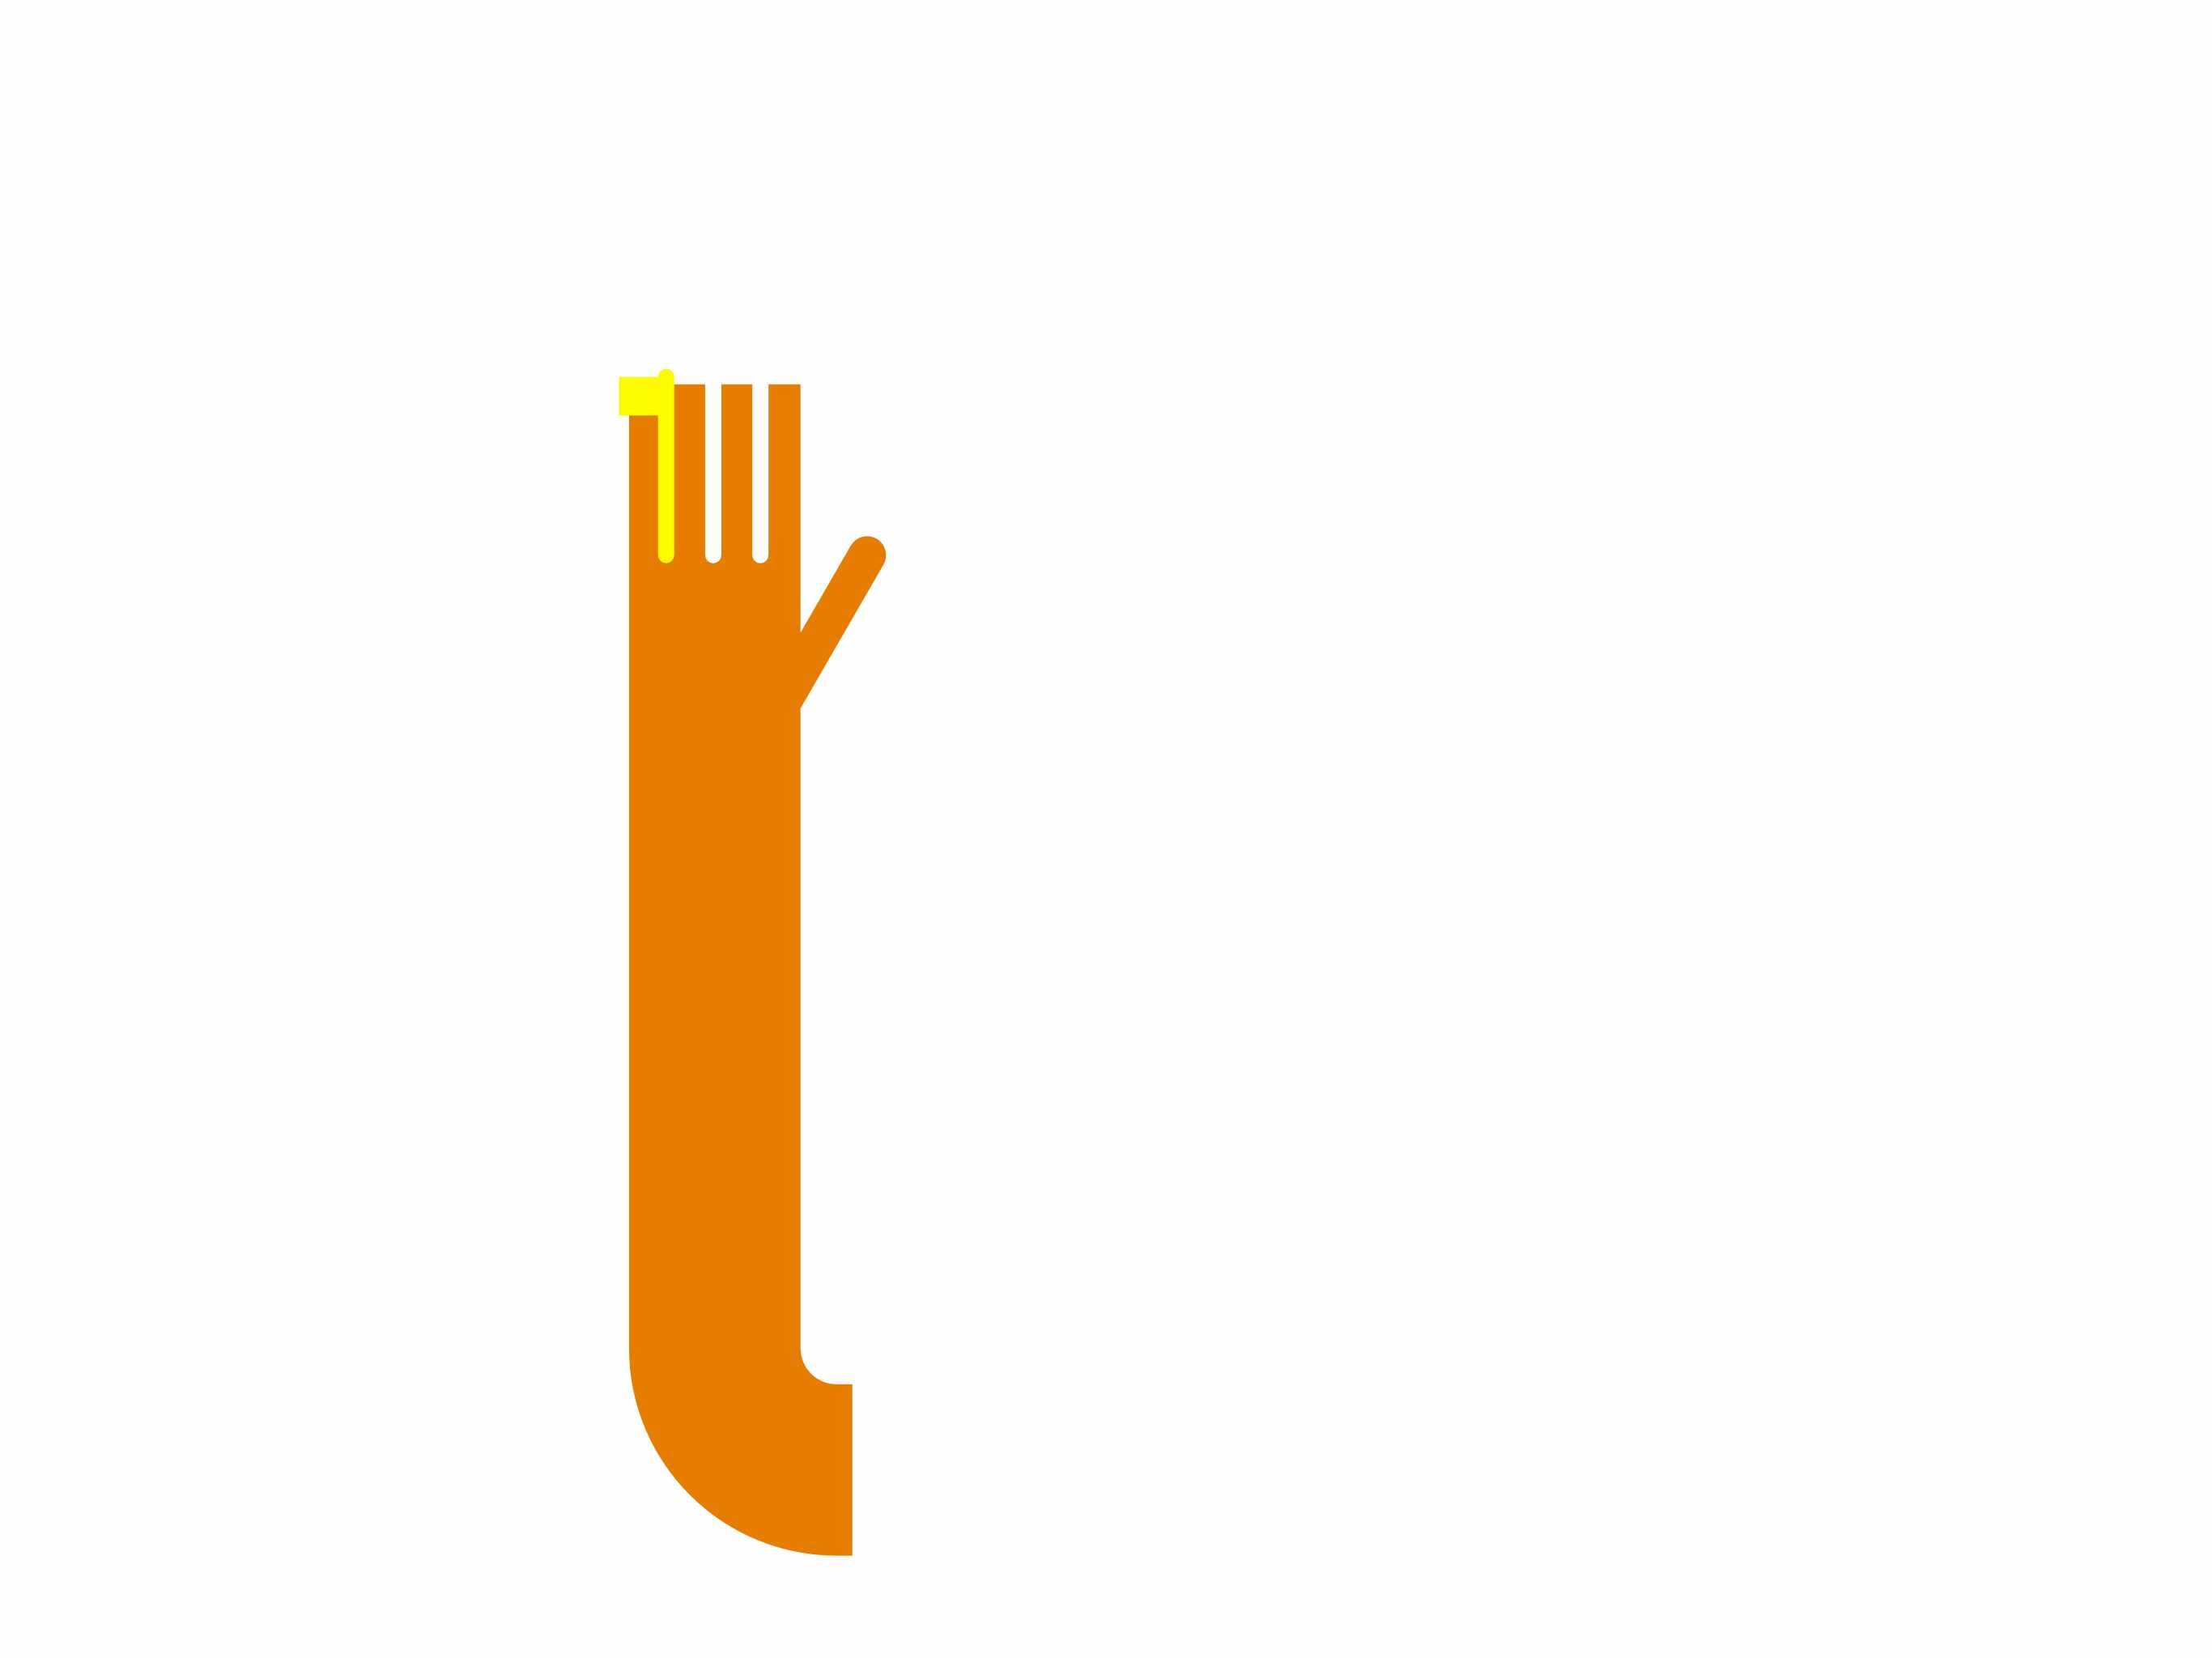
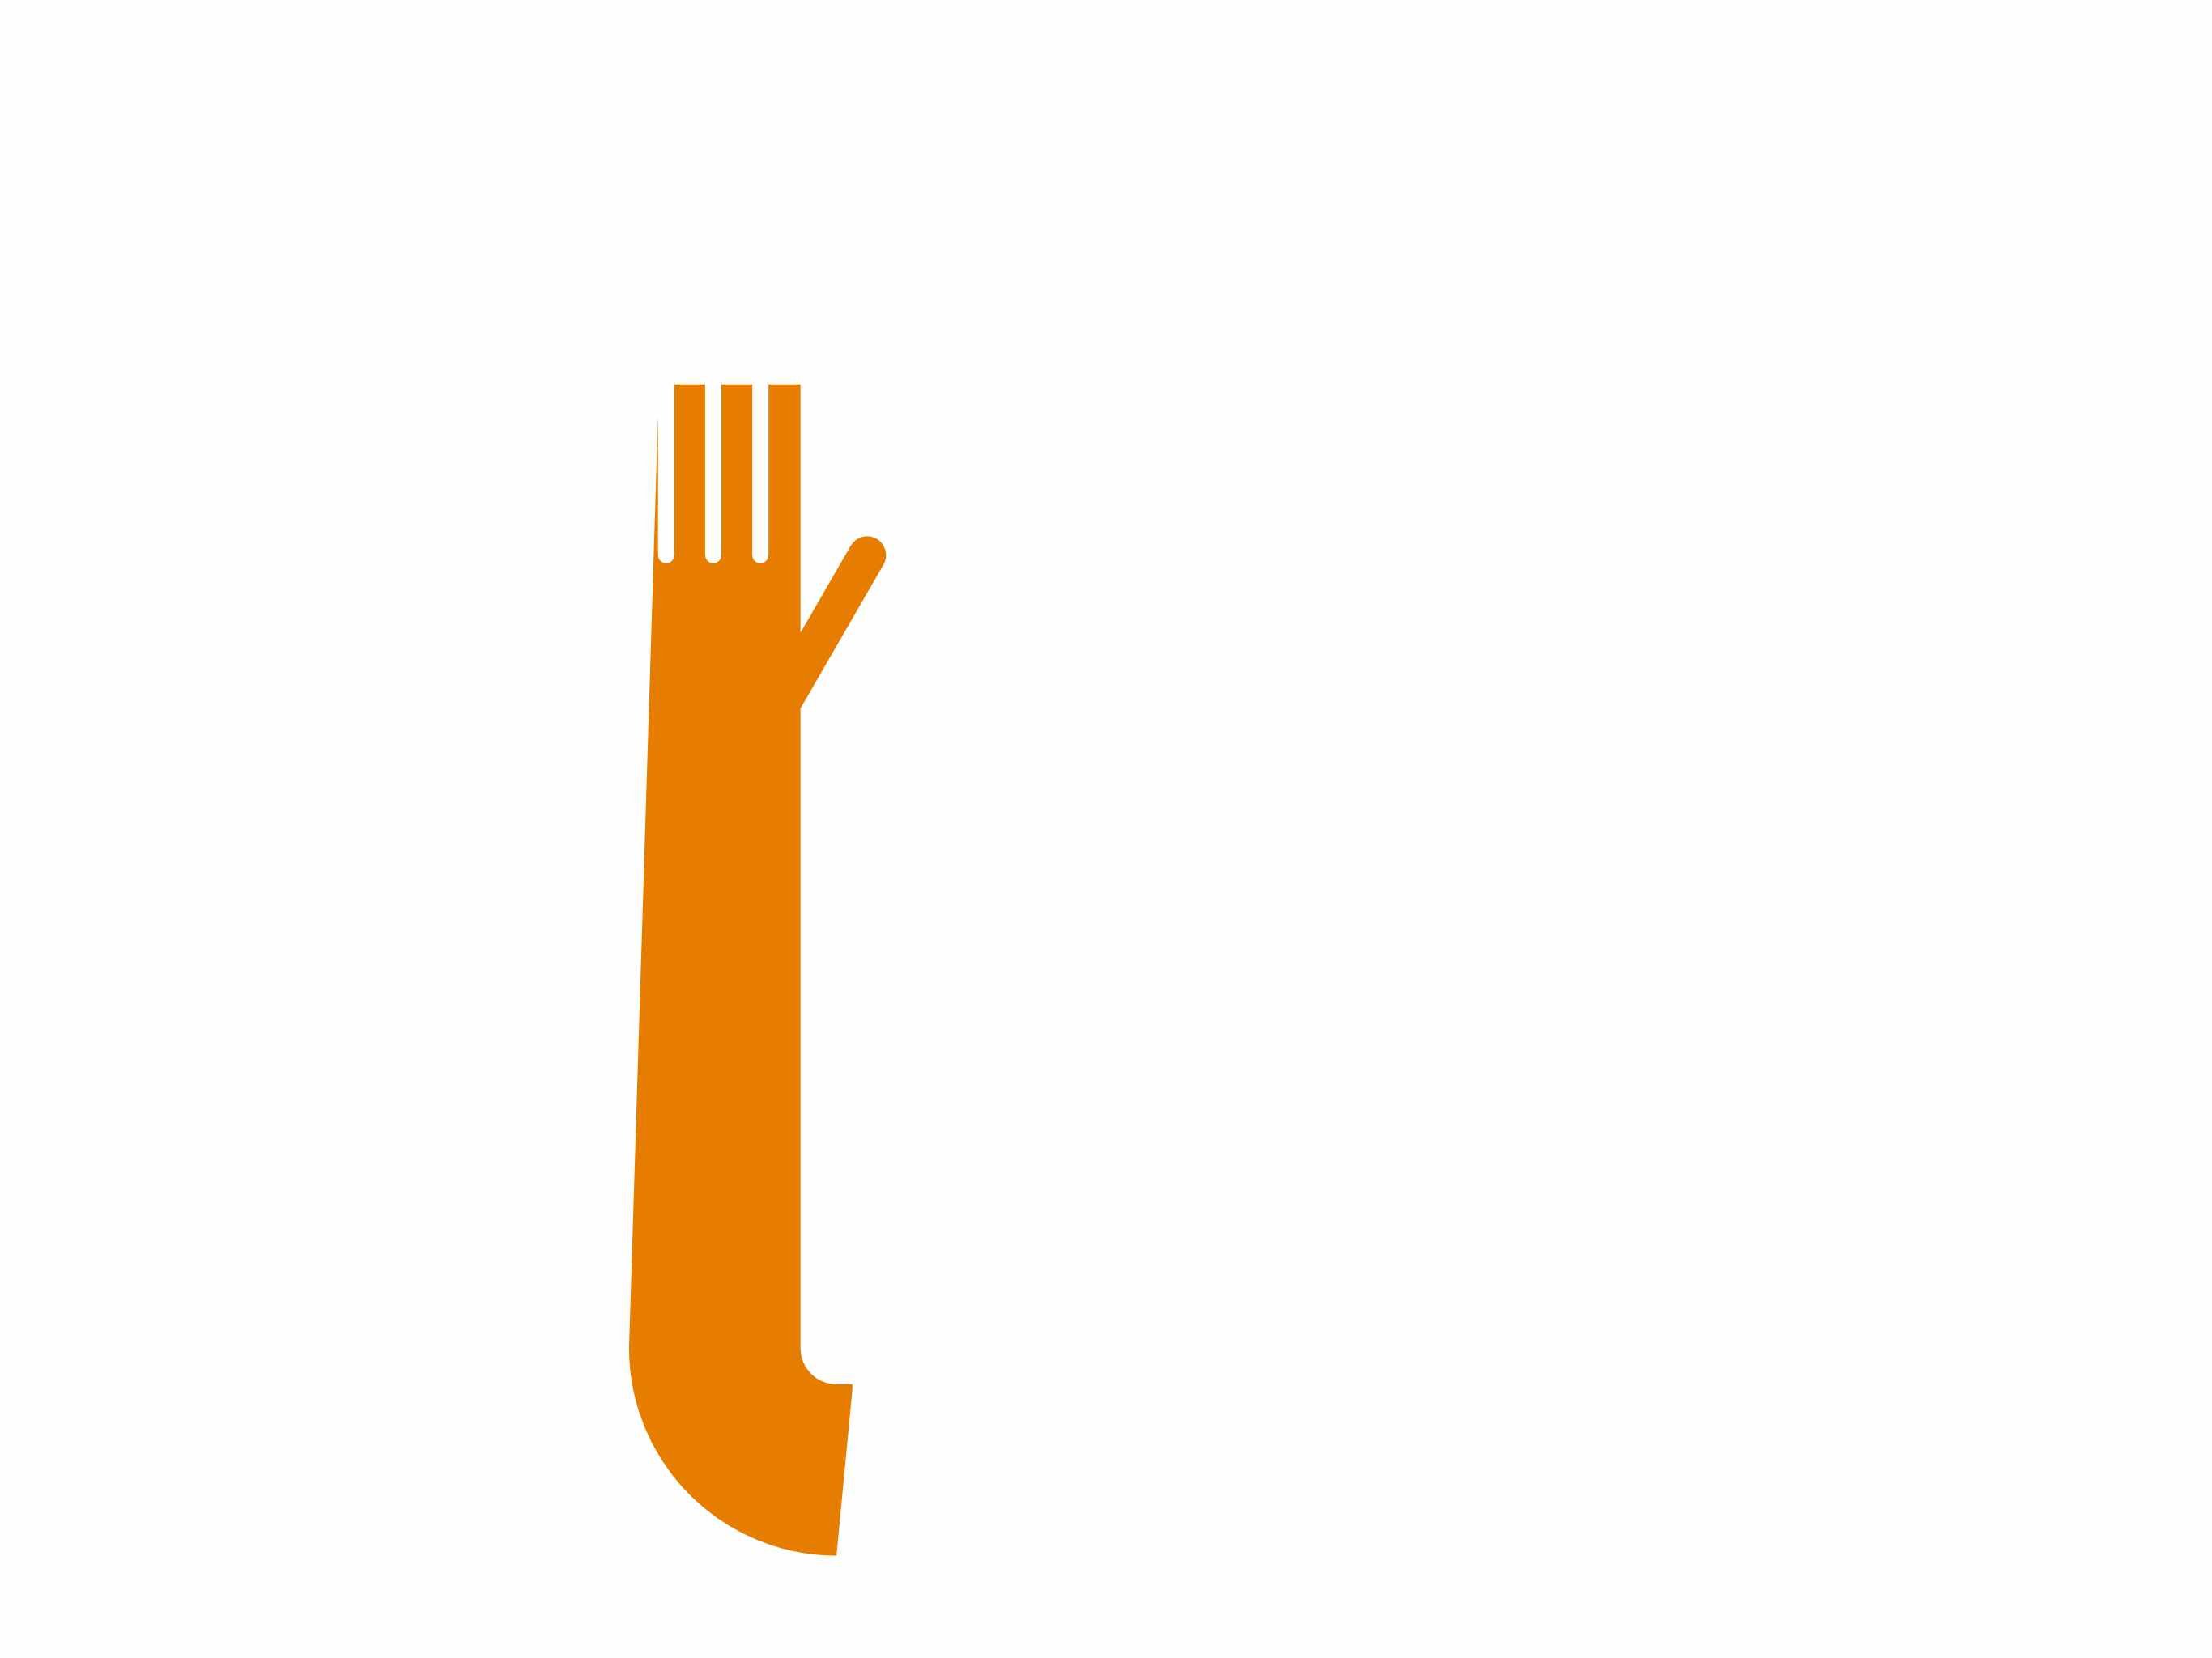
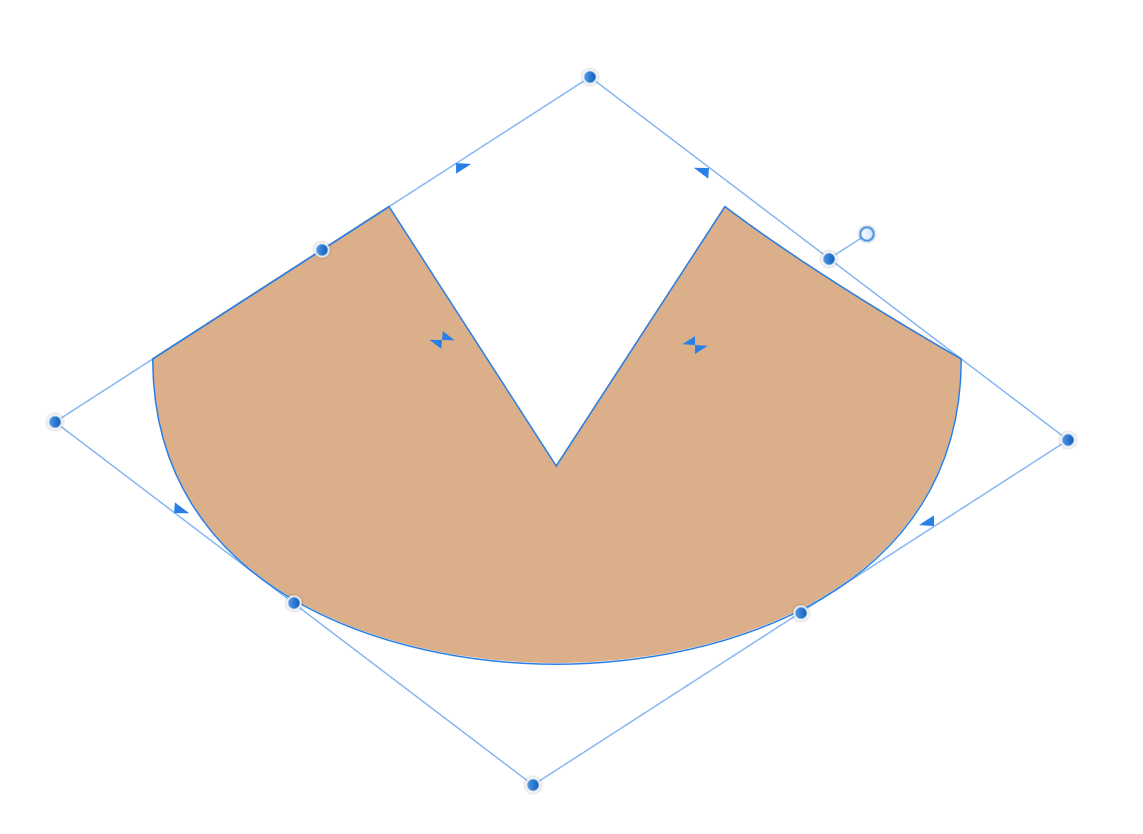
So this one is reproducible. Funny how I needed this shape, its the middle of the Centenary Bank logo if you were wondering. So I use the trimming from the letters expanded outlines and that gives me the cross bar. Next I Add the two parts together, and ... well ... that's when the mathematics breaks. Please see attached, it seems to be the top left and right sharp angles that are getting it confused. If you flip the cross bar over it welds to the to bottom points. Can some one please test this for me and confirm it's a bug. Running the latest (v1.8.0.585) Thanks. Not_able_to_join.afdesign
-
 I store most of my files on OneDrive. Whenever I open a folder from Designer that contains files only on OneDrive, it starts downloading those files. Even though I am not touching the file. Even when I am just saving an image to that folder. How can I stop this? I don't files I'm not using downloaded.
 -
 In this video, you will see the process from the sketch stage to the vector drawing stage of the Davraz Off Road logo, which I prepared using Procreate, Affinity Designer and iPad Pro. I hope you will like it.
-
 Hi Affinity By Serif, I'm using Affinity Photo and Affinity Designer. I noticed that once I have imported new brushes, I cannot re-order brush categories or sort the brush categories by name. The most recent imported brushes are at the bottom of the scroll down menu in the brushes panel. Would it be possible to add such an ordering or sorting feature so that users can actually order the brush categories according to their own preferences? < I could not find such a feature/ functionality in Photo or Designer. > Would be nice. With kind regards, Bastiaan
 -
 When you convert a sheared object to curves, it retains the bounding box of when it was not converted. I don't think this is correct. This is in v1.80. Example:
-
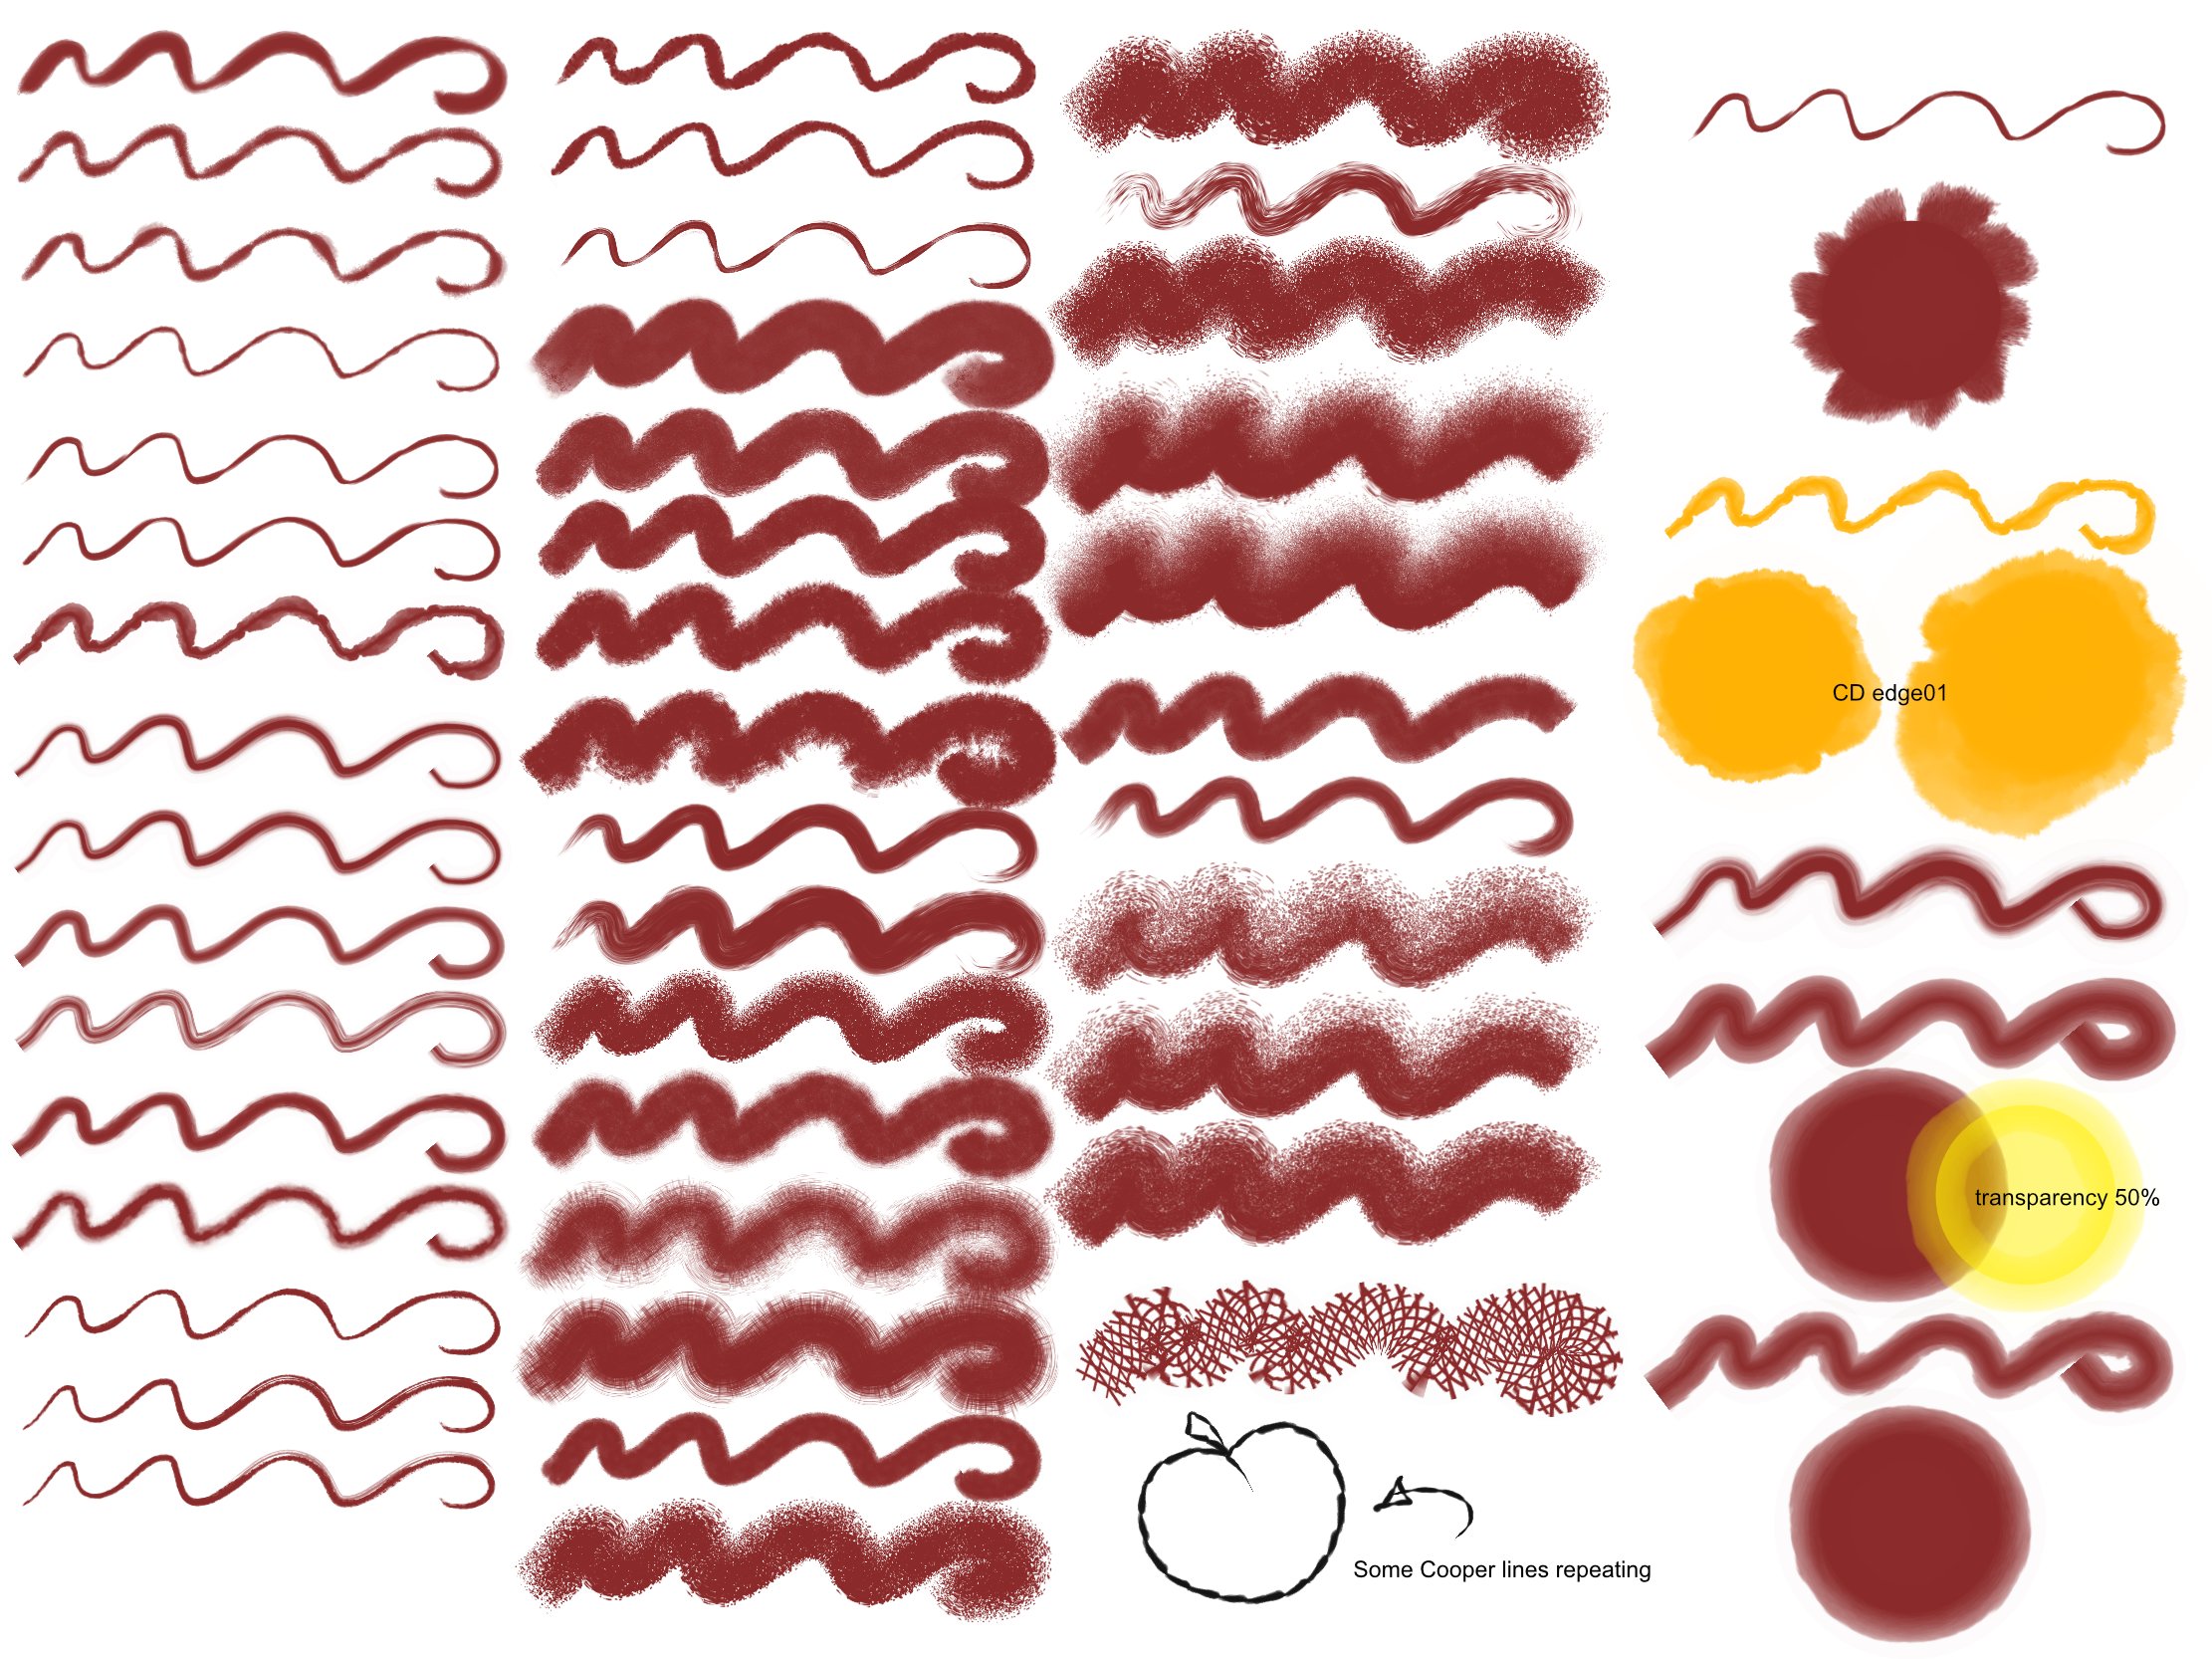
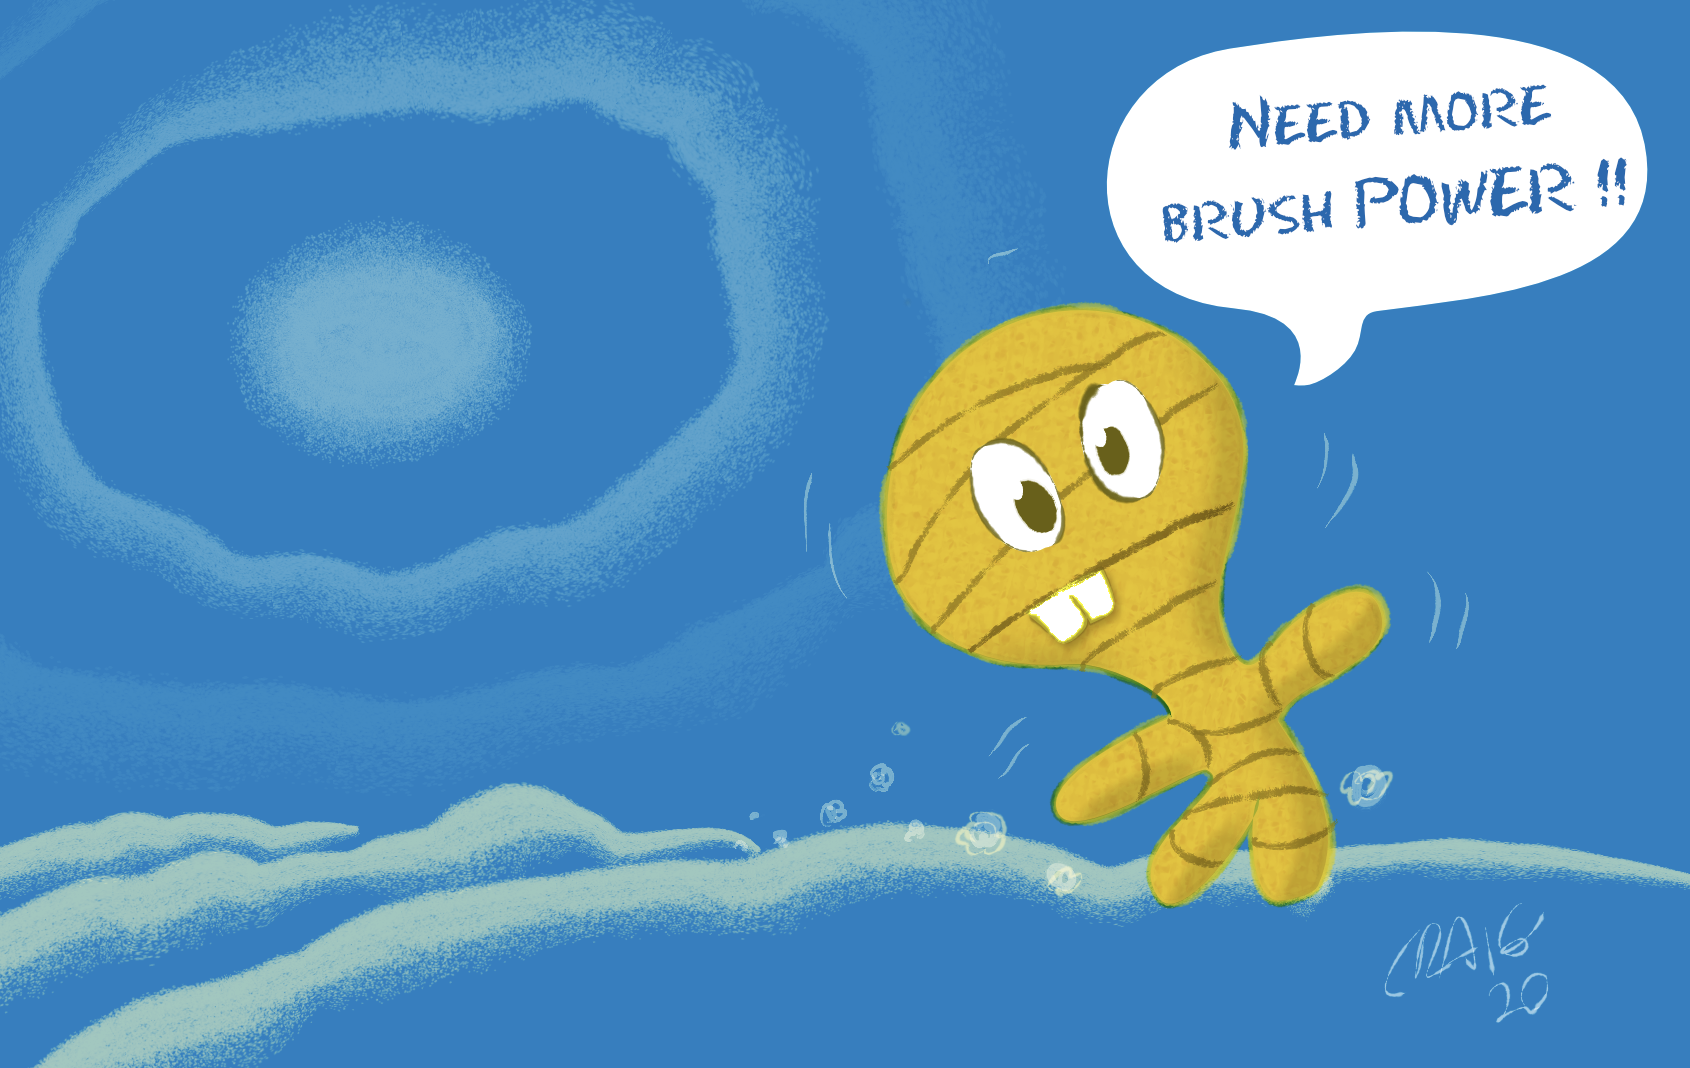
Happy 2020! If a little late. I am posting some interesting experiments with Texture Intensity brushes for Affinity Designer: http://i-toons.com/archive/CD_illustration_brushes2020.afbrushes.zip These were exported from the 1.8.1 version. This set has several focuses. 1. A fascination with Dave Coopers ink line where a stroke expands and shrinks (pressure) as it is drawn. https://www.youtube.com/watch?v=Aj3BxL85UUE 2. In the olden days of Creature House Expression 3 a feature that produced wonderful textured edges on fills was a favorite of mine for adding… wonderful textured edges to fills! The “edge” was applied to a fill and mapped along the edge of the fill. E3 used a similar technique as ADs textured intensity brushes… The trick to make the edge texture was to have basically a half brush stroke. One edge flat. The rest feathered or textured out as desired. The flat edge mapped directly to the fills edge. There was a little extra voodoo with pixel color at the strokes edge as well…) AD doesn’t have this edge feature - but something like it can be sort of faked. ADs brushes map to fills in a different way - they sort of center the stroke halfway over the edge of a fill. To get a brush to “join” to the fill - I made a brush that mirrors itself - with a 100% dark center. The brush must also meet at its ends so it wraps horizontally as well. The mirrored version seems to blend nicely with a fill - and can wrap in either direction (reverse curves). Some sample of how this looks are in the attached image. Sadly the stroke and fill don’t share the same “intensity” - if transparency is dropped… But the textured edge done this way can look ok. Brushes that don’t mirror like this extend out from the fill but often show hard fill edges. A future AD feature in the making. 3. I had been experimenting with hatch and dot pattern edges - looking for an illustration style I admired - and straying into a dot like airbrush look… See attached brushpower image. The hazy moon glow and sand dunes. AD has a lot going for it. The textured intensity brushes are the main reason I dig this software. The brush engine has a long way to go as I have mentioned in the past: Affinity Designer Brush UI enhancement: Affinity Designer brush-ui enhancement Identify and switch Brush and Stroke attributes option/tool: Switch brush With a little more power in the brush features - this would be such a stellar tool! Here's to 2020 and maybe making an illustrators wishes come true! ; ) If you happen to use any of these brushes. Post an example. I love to see how the brushes are used! Enjoy! Craig
-
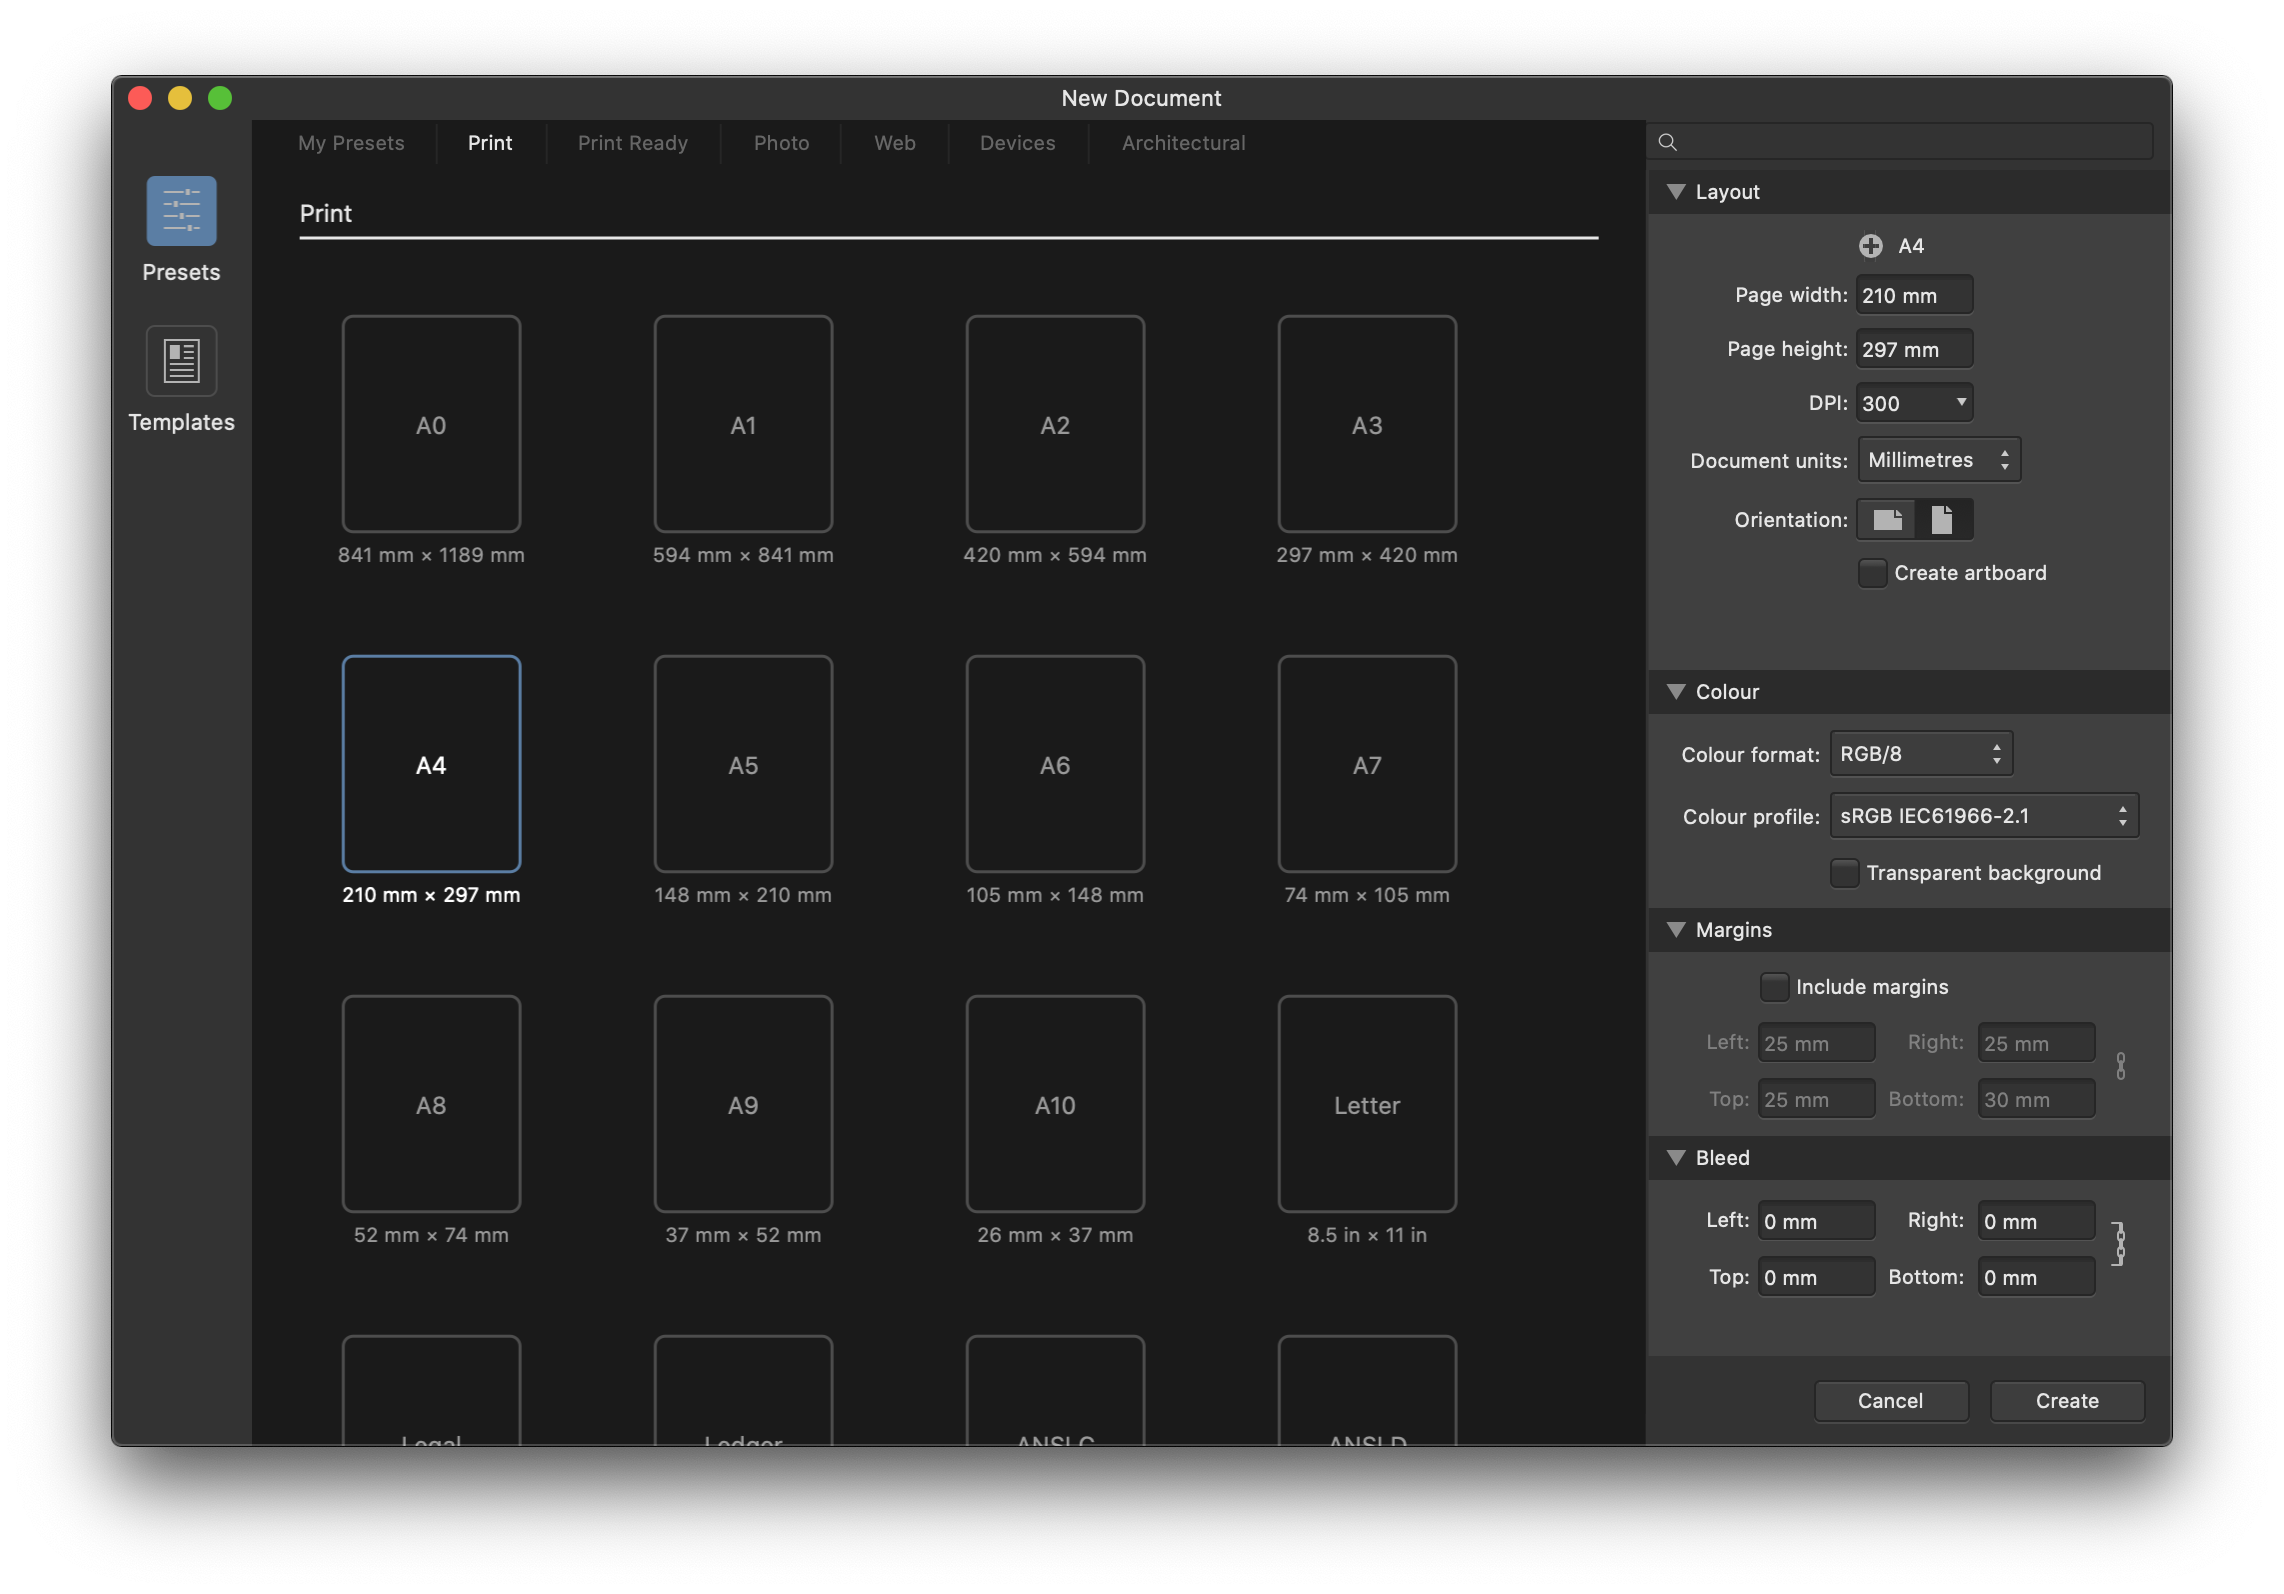
Question about creating a new artboard. If I create a new A4 document using the print template and I late decide I want a new artboard, lets say an A4. But the only sizes available in the dropdown menu are devices? Wouldn't it makes sense I would could choose from template group used when creating the document... Print, Print Ready, Photo, Web, Devices...?
-
A message from our sponsor... kreynum1.mp4
-
Say I create a repeatable pattern 1000x1000px and turn it into a symbol. How do I then fill shape with that symbol? The closet possible solution I've found it exporting the symbol as a .png and using the Fill Tool and select Type: Bitmap and load in the exported .png. But it doesn't keep its original size, but scales to fill the shape. And I can't tile it. If I select Extend: Repeat I would except the bitmap to tile, but it doesn't. What am I missing here? I don't get it. (Artboard1 is just the Symbol duplicated 9 times. What I would expect the Fill Tool to do)
-
 I have purchased Affinity Photo and Affinity Designer from Apple Store and my laptop runs on macOS Catalina. I do not find the 1.8 updates for the software. For the Affinity Publisher that I had purchased form the your website I did find the update. Why are they not available on Apple Store for macOS Catalina? And when will they be available?
 -
 Hi everyone ! I am currently working in Publisher using Designer's tools. As you can see on the sreenshot, I have a tile here which is part of a group. What I wich to do, is to make is responsive the the text that is written (artistic mode), the red rectangles representing the margin I wish to keep. In other words from left to write: The first blue rectangle shouldn't be mofified The text, here "Skills and knowleges", would be anchored on the right. Then the last rectangle would see its size varying depending on the length of what is written in the title while conserving the margin (in red). I've tried in many ways, like using constraints but I don't manage to do what I want. The point is that this title is a text place holder in a master page (affinity publisher) and on the other regular pages I'd like to have different titles that will obviously not have all the same length. I'm not sure if I'm clear.. Thanks for you help in advance Have a lovely Thursday !
-
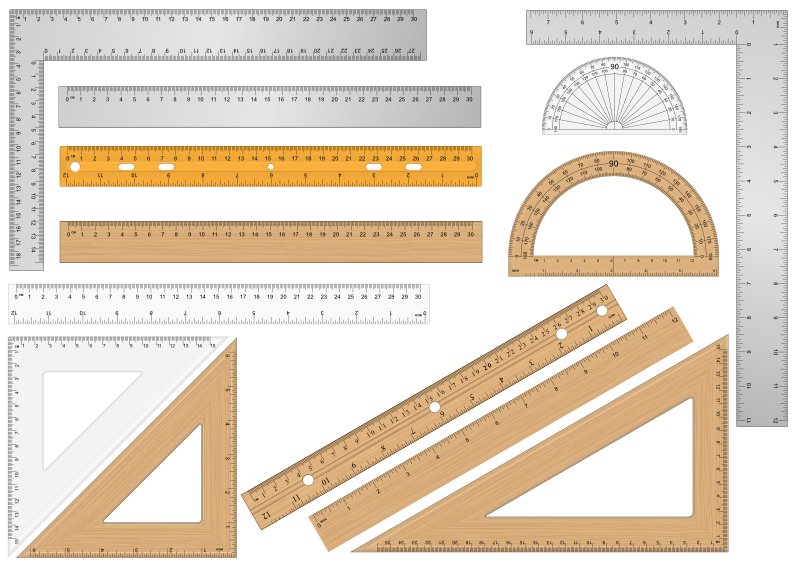
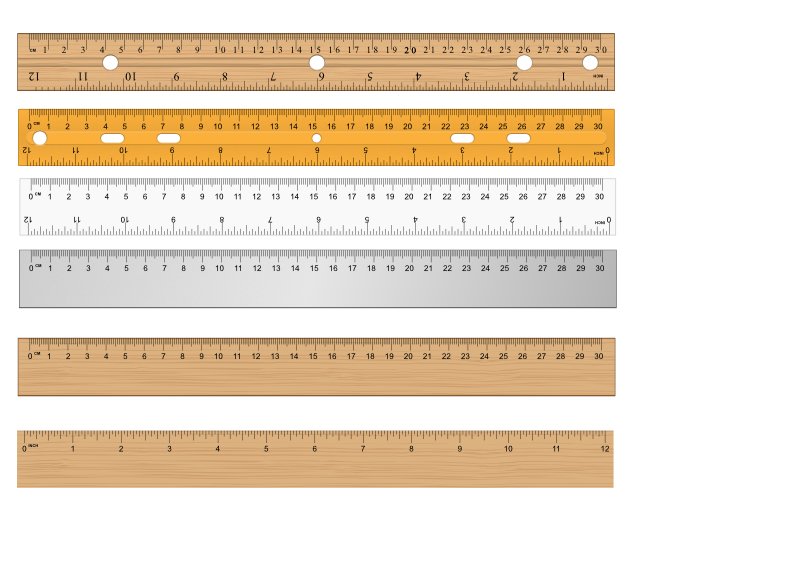
After endlessly playing around with units and scales, my set of customizable rulers slowly takes shape. The drawed scale measurings (cm/inches/degrees...) have been verified against Affinity Designers build in rulers and seem to fit well together. Not sure yet, but maybe these will be part of some reusable assets then.
.jpeg.7fb2e158aee8e2f607881c61090026e8.jpeg)