Search the Community
Showing results for tags 'Affinity photo'.
-
 As in Photoshop, the brush can be made a rectangle with no radius, how do I do that in Affinity Photo? Thanks Also how can i rotate the brush as seen in Photoshop? Thanks
 -
Hello! I have just purchased Affinity Photo for IPad, and so far - I’m mind-blown with how wonderful this program is! I don’t know what took me so long to try it out ☺️ That said - there is an issue that I’m seeing consistently. When drawing, (brush tool, with size variation and transparency variation) the start of the stroke appears as a dot. I have tried different settings to no avail. It seems impossible to start the stroke as a thin line, without the dot. I’m including a screenshot of what the results look like. Sorry if this was answered already... I would appreciate any ideas for how to fix this. Technical information: I’m drawing on IPad 6 with apple pencil, in the 1.7.1.143 version.

-
 So I am trying to replace the green background from a photo with a simple light grey background. Here is a detail from the original photo: I use the Selection Brush Tool and then refine the selection to get rid of the green color while selecting the hair. The preview looks pretty good (over the new background I added): I then output as a mask and I get this: As you can see the green is still showing in the hair area. Why isn't the end result as good as the preview?
-
 As in title. Brush size change depending on pressure level works in pen mode but I can't find a method to let it to change opacity on pressure level change. In Photoshop and Artrage it works without problems but not in AP Windows 10, Huion Inspiroy Q11K V2 Pen Tablet.
 -
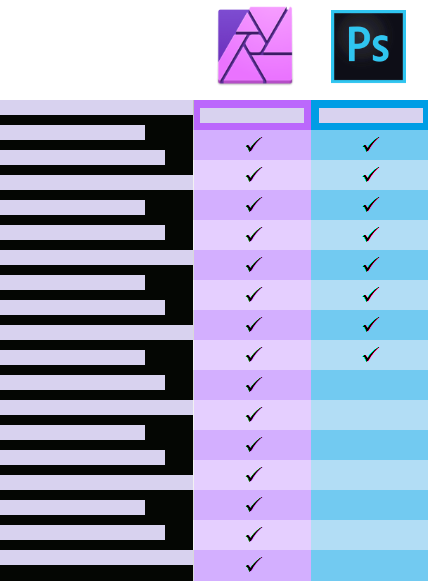
 Does anyone here have a link to or access to a feature comparison chart for Affinity Photo and Adobe Photoshop? I'm asking for a friend — really. My friend is considering either updating to a more recent version of Photoshop CC or else moving over to Affinity Photo. My talking about software is great, but I would also like to show him some resources other than my own enthusiasm. Thanks in advance.
-
 Hi When using Photoshop I use a threshold layer to help set the colour balance when restoring damaged photos. I can shift-click using the dropper tool to mark a number of pixels, each one is given a unique number. In AP I also have the threshold layer but can't see a way to mark pixels. Is this possible? Thank you.
 -
 Affinity Photo Assets Manager Live Q&A Affinity Publisher Live Review FREE Content Pack Support me on Patreon: https://www.patreon.com/sarikas Follow me on: https://www.facebook.com/sarikastutorials https://www.instagram.com/sarikasat/ Join us on Reddit: https://www.reddit.com/r/AffinityPhotoTuts/
 -
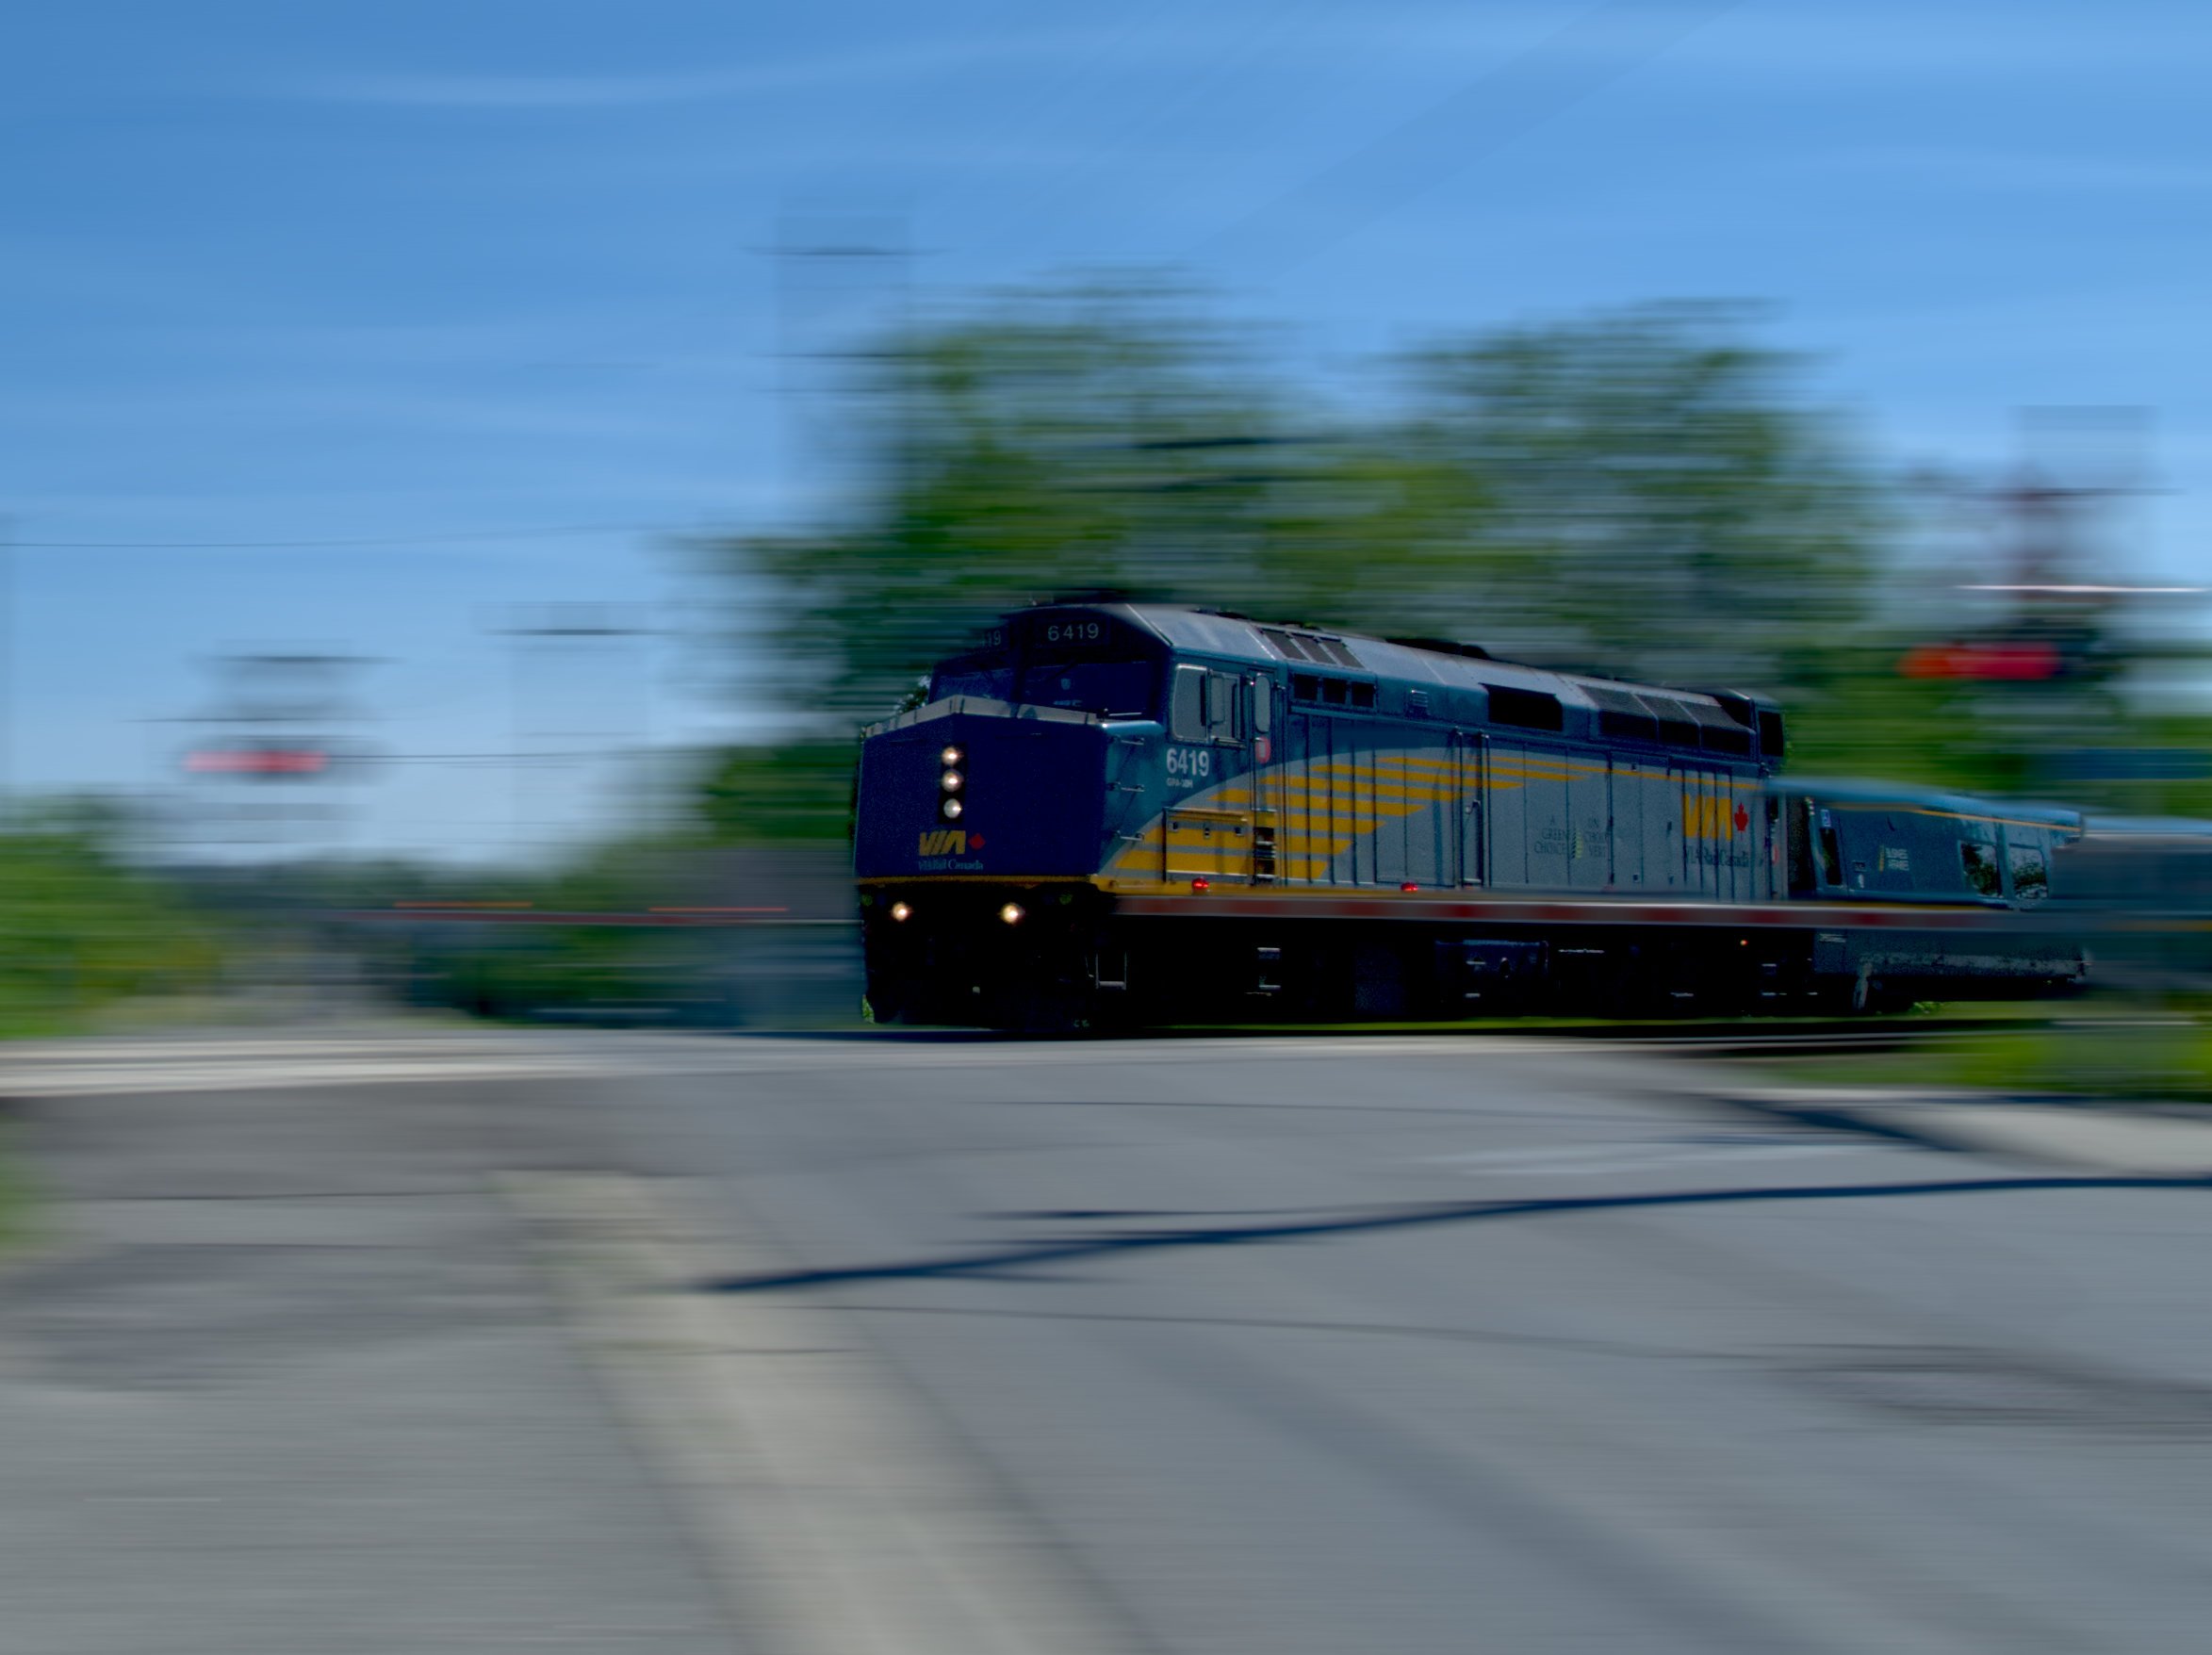
I decided to have a little fun with what otherwise was a boring photo of a passenger train at a level crossing. To get this effect in Affinity Photo, I duplicated the photo layer. Then I added the Motion Blur filter to the top layer (Layer > New Live Filter Layer > Blur > Motion Blur). I selected Radius: 72 px, Rotation: 0, Blend Mode: Normal, Opacity: 100%. Preserve Alpha is checked. Next I selected the Erase Brush tool, and erased the blur to reveal the original train photo on the layer below. I played with the size of brush until satisfied. The front is not perfect. Playing with Preserve Alpha checked and unchecked makes a difference, perhaps adding a bit too much blur. It's all subjective, right? Before digital, getting an image like this would require panning at a slow shutter speed to blur the background while keeping the moving subject in focus. Then wait for the film to be developed. Original NRW (RAW) image was made with the Nikon P7000 compact camera.
-
 Hi: I don’t see the select tool in affinity photo ipad. Please help
-
 I think this is more of a bug report than a question, but it’s always possible there’s something I’m doing wrong. I’m going through the Photo workbook and have reached pp. 184-85, Removing Ghosts. I’ve merged the supplied photos and selected Toggle Source Preview to heighten the panel containing the source images. The next instruction is to scroll through the list of source images one at a time. “Each image will preview on the main canvas and you will be able to see the different wave shapes.” The problem is that this isn’t happening. When I scroll through the source images, nothing changes on the main canvas. Attached are two screenshots, showing two different source images selected alongside the main canvas. The main canvas doesn’t change no matter which source image is selected. I’m on an iPad Air running OS 10.14.5. I’ve gone through the workbook page by page, and this is the first time something hasn’t functioned as described. Thanks for any tips.
-
I am having issues with my keyboard working in Photo 1.7 running Mojave. I have given Photo access to the computer, yet it will not respond. Makes it very difficult trying to use the pen tool. Any suggestions?
-
I used the new great Isometric function at Affinity Designer and created this simple 2.5D scene for the presentation of the box design. I also used Affinity Photo for the final effect and light settings.
- 1 reply
-
- 2
-

-

-
- affinity designer
- 2.5d
- (and 2 more)
-
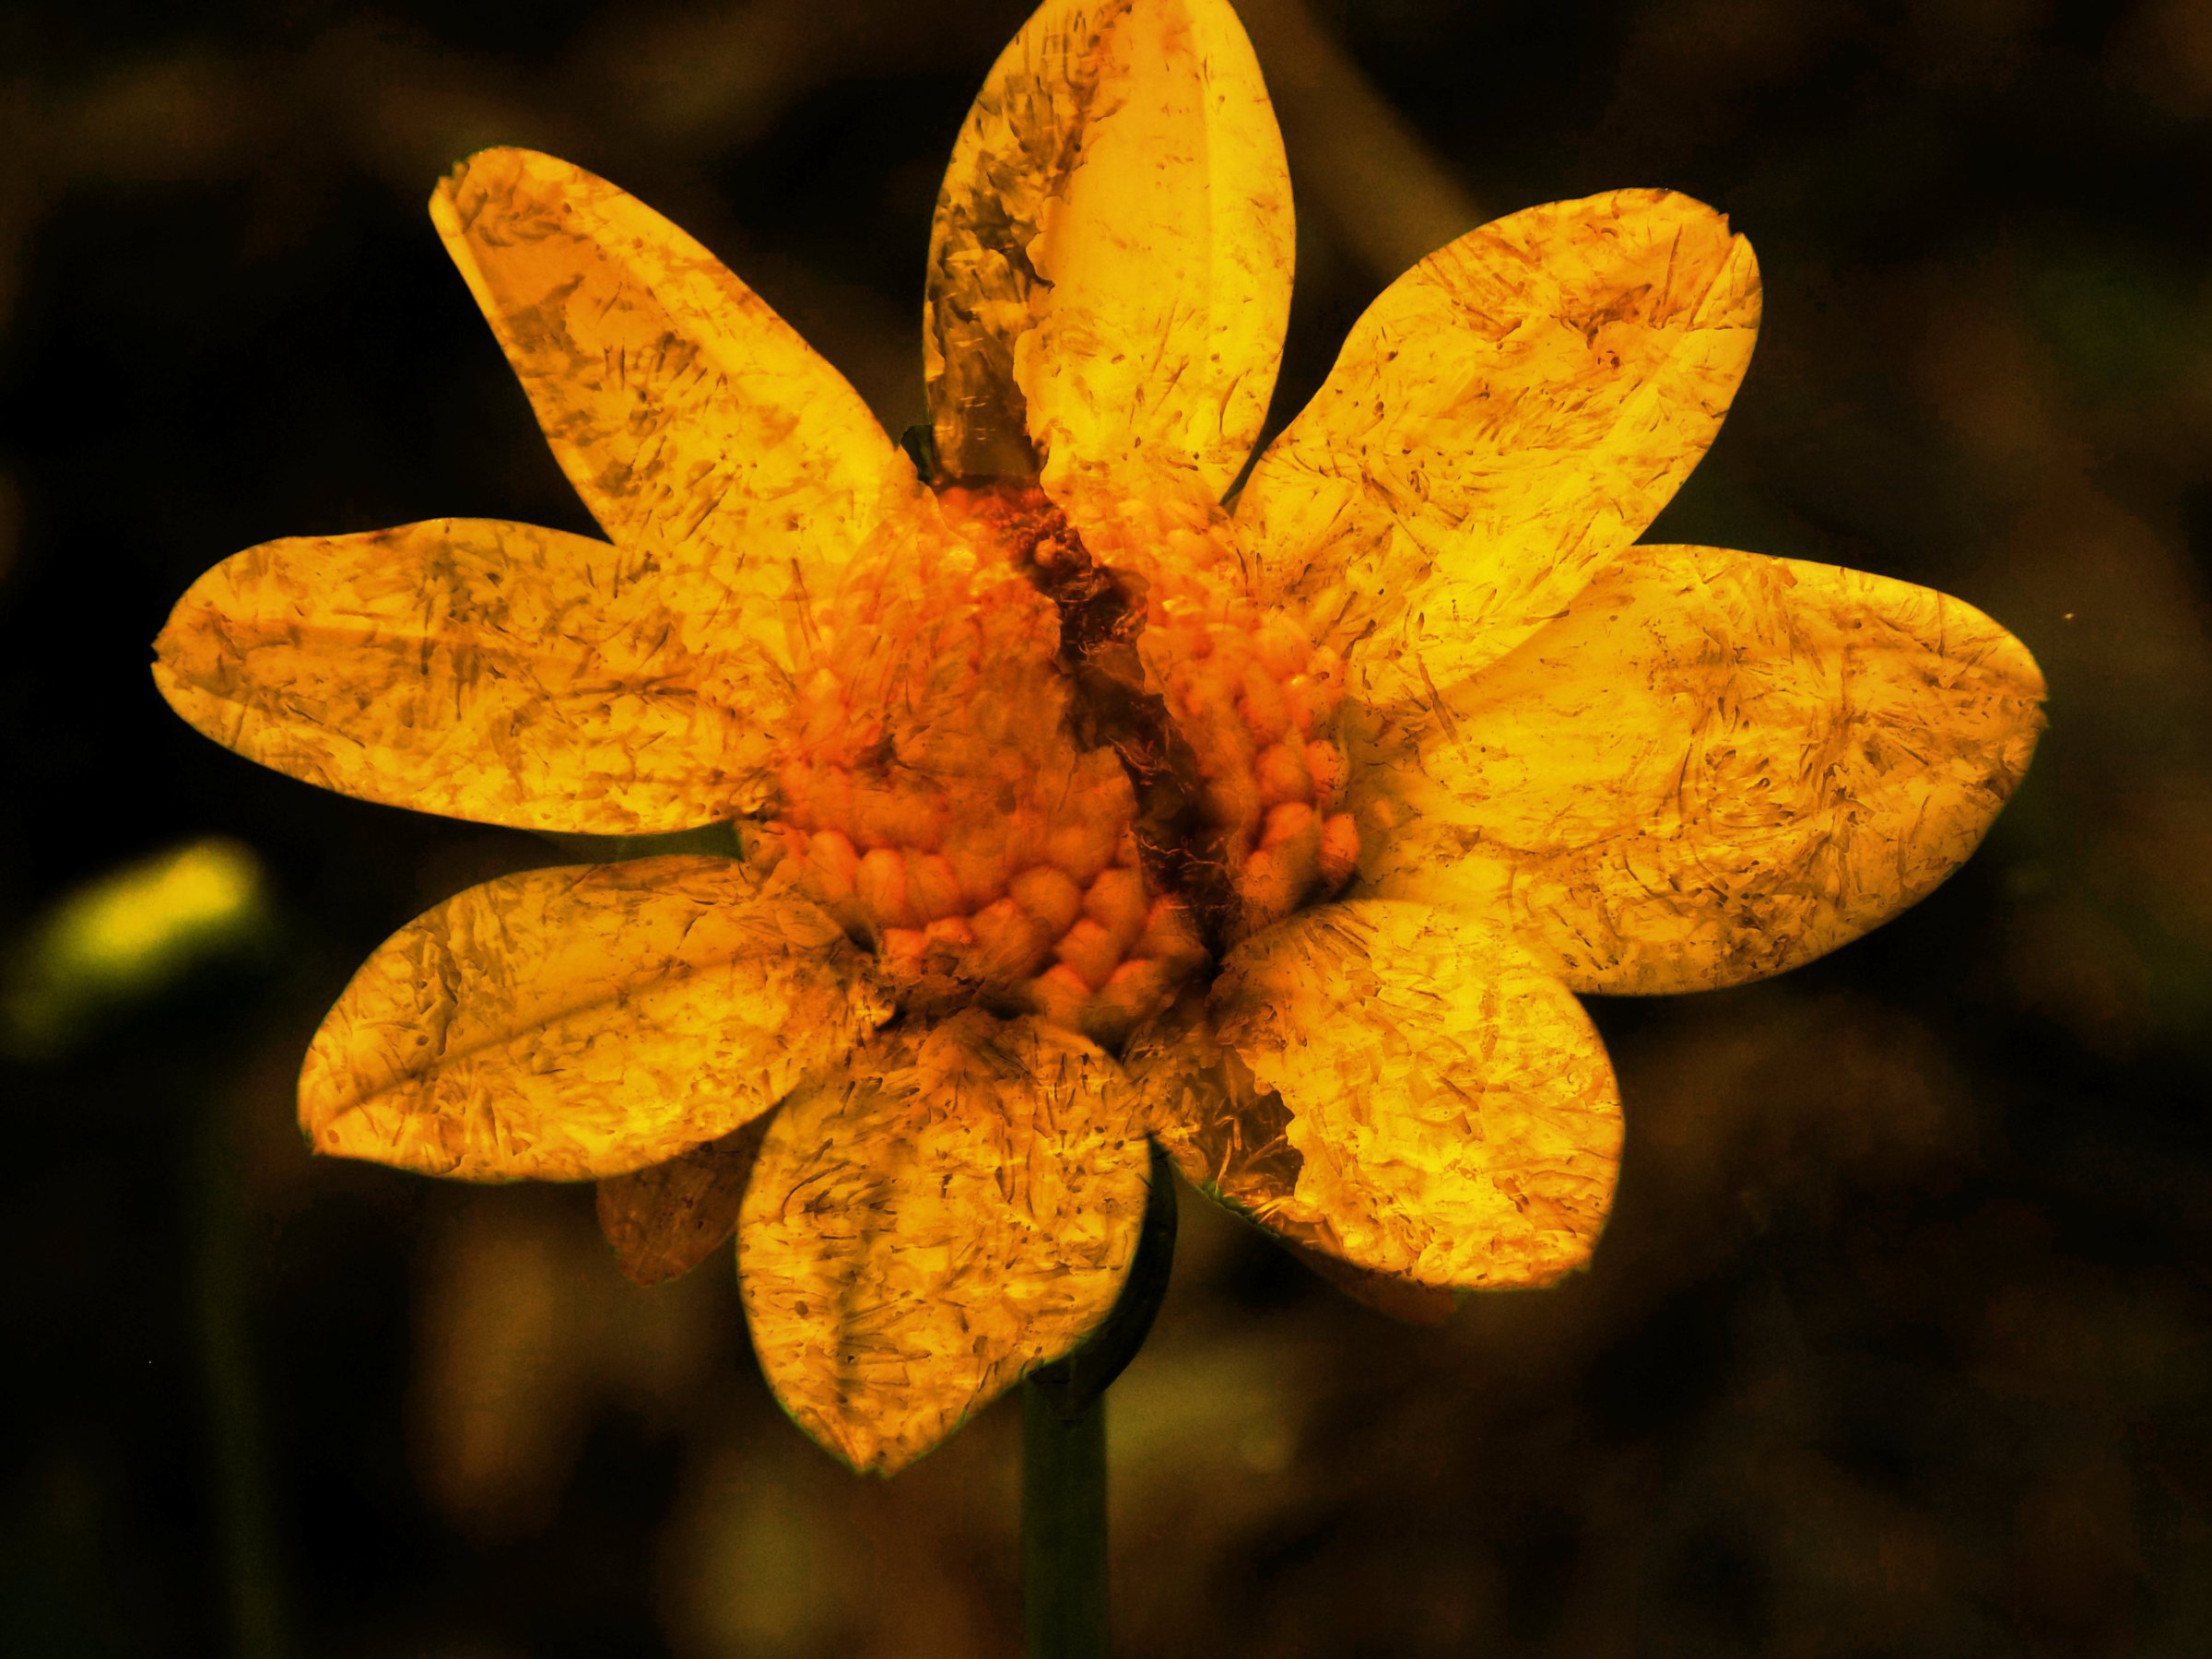
 Playing with textures and flowers. Was in Bossier City, LA and saw a neat bit of concrete that had a neat texture. Flower is a yellow dahlia.
-
My latest poem Phoenix Rising using Affinity Publisher and Affinity Photo to create the layout. I used PagePlus X9 to create the title using filter fx and preset styles and exported it as a 32bit PNG. Then I placed the image onto the page in Affinity Publisher, although the colours are slightly different.
-
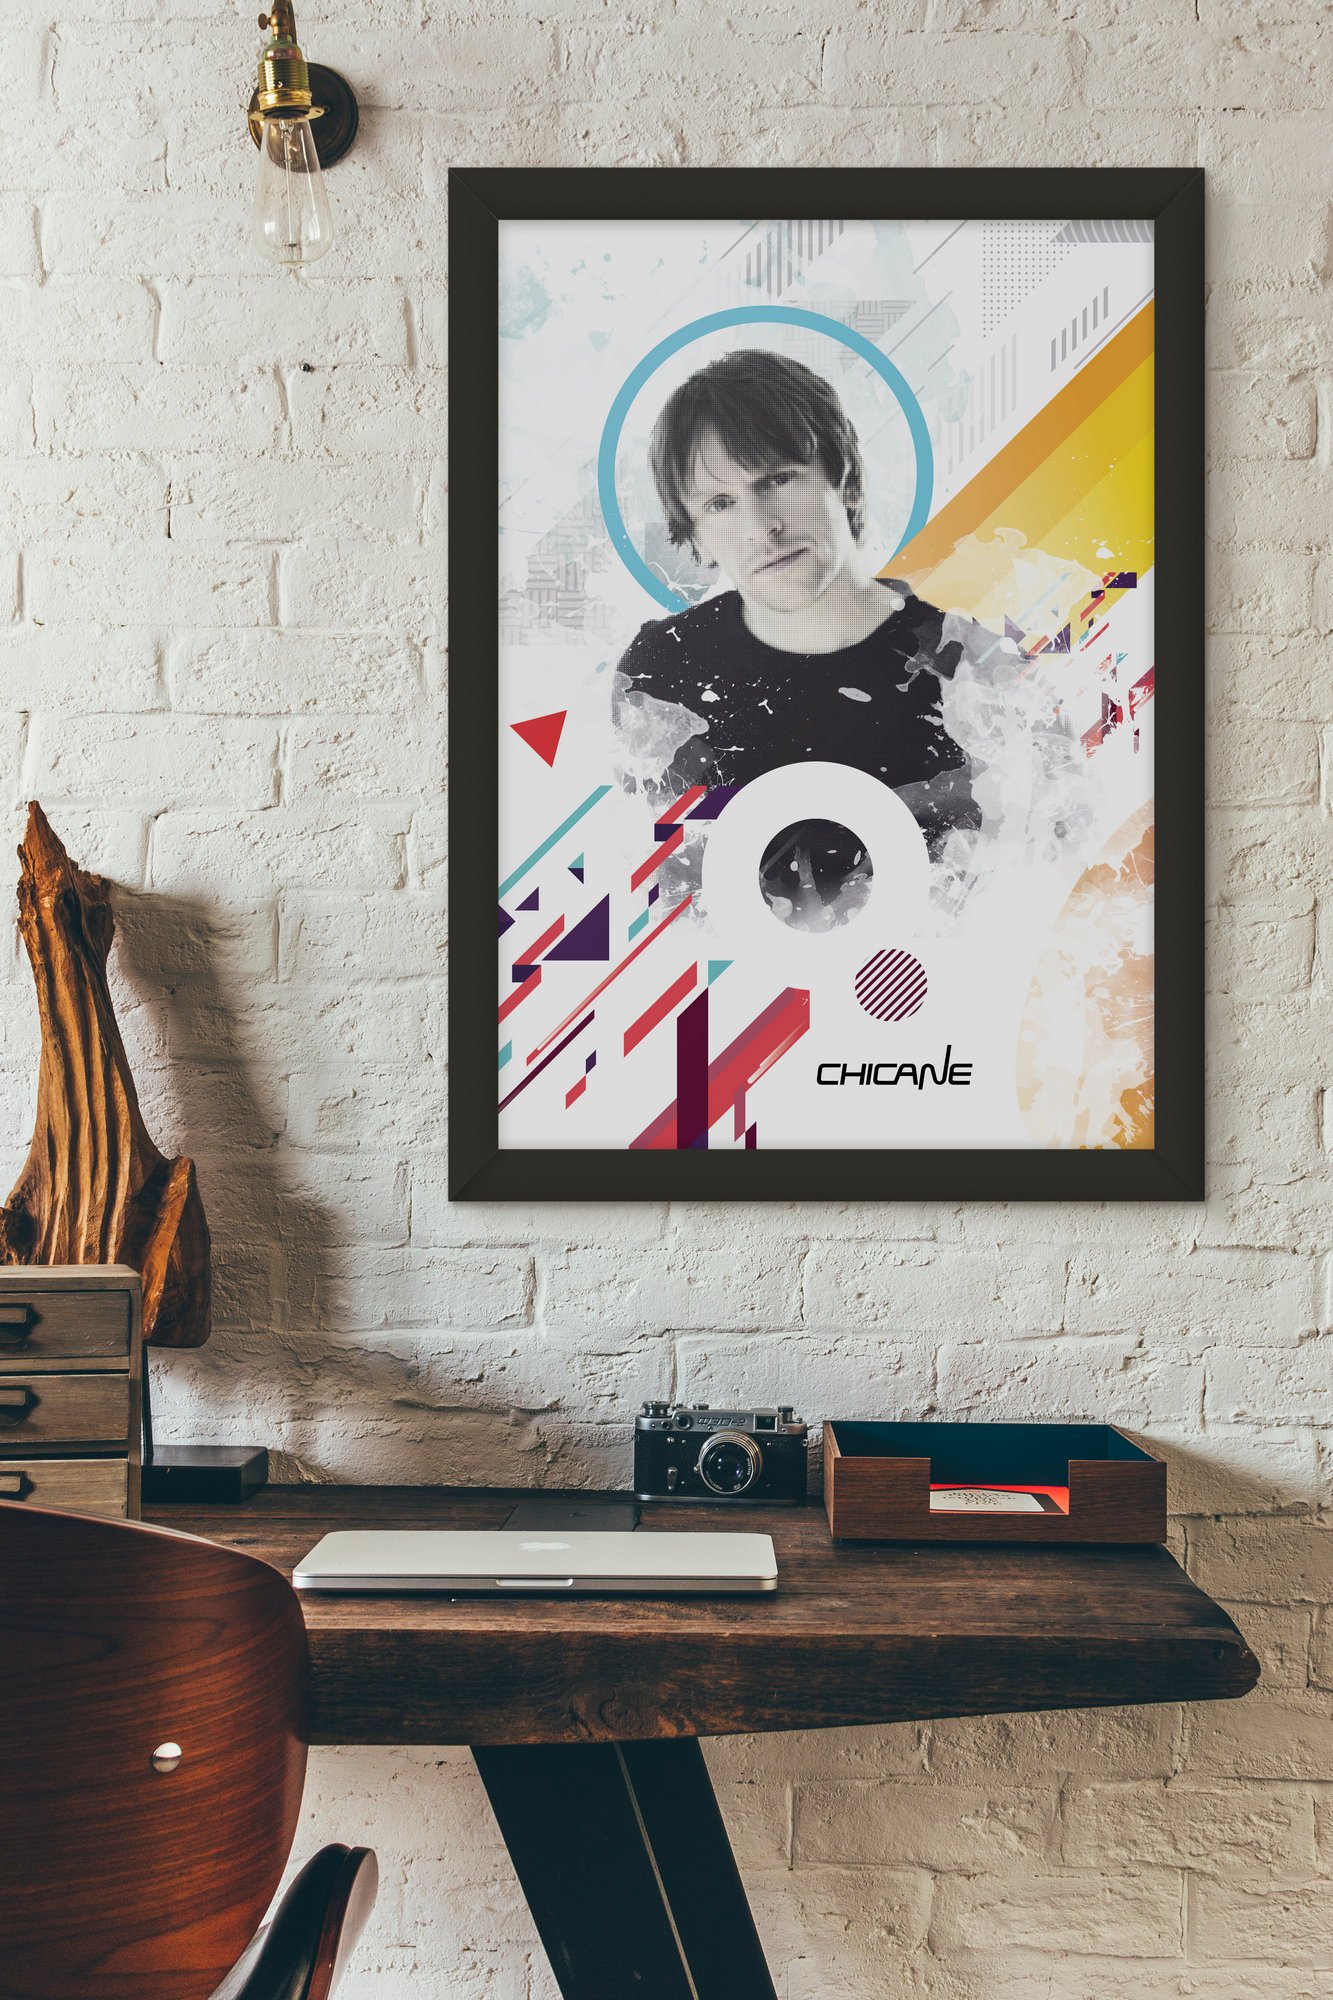
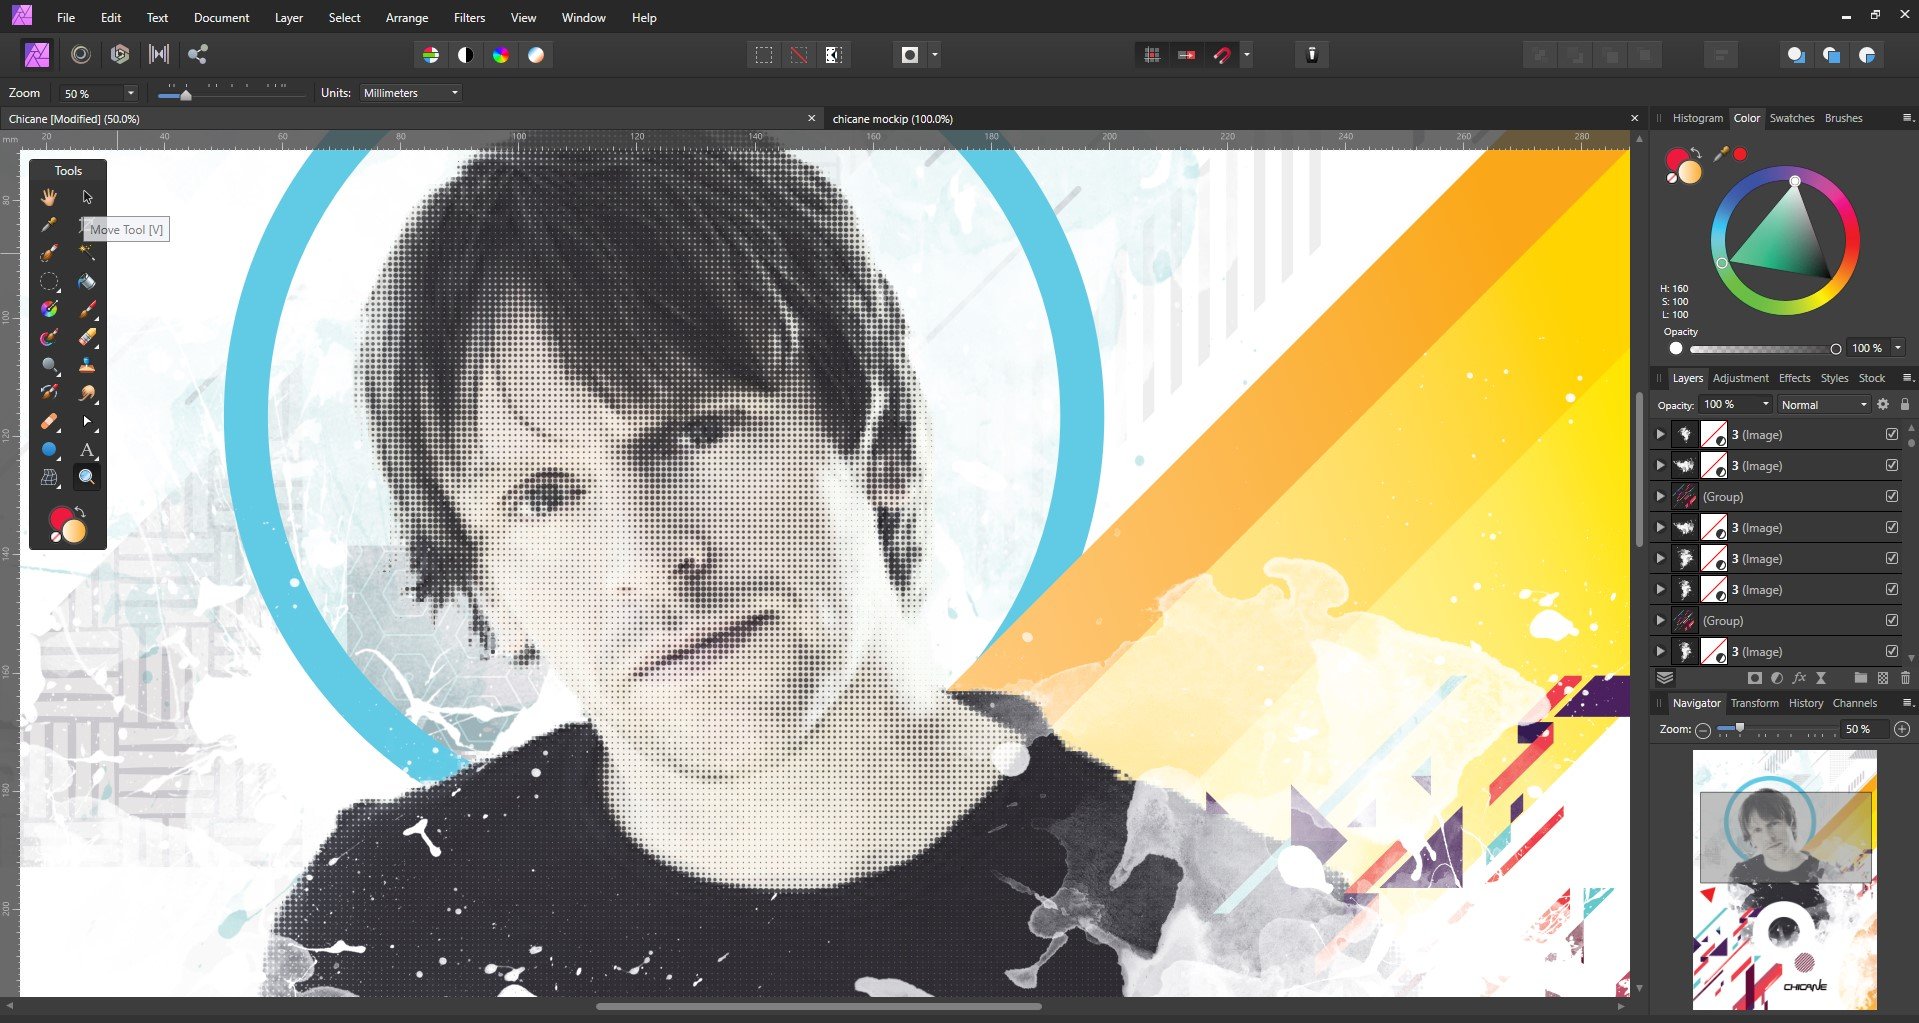
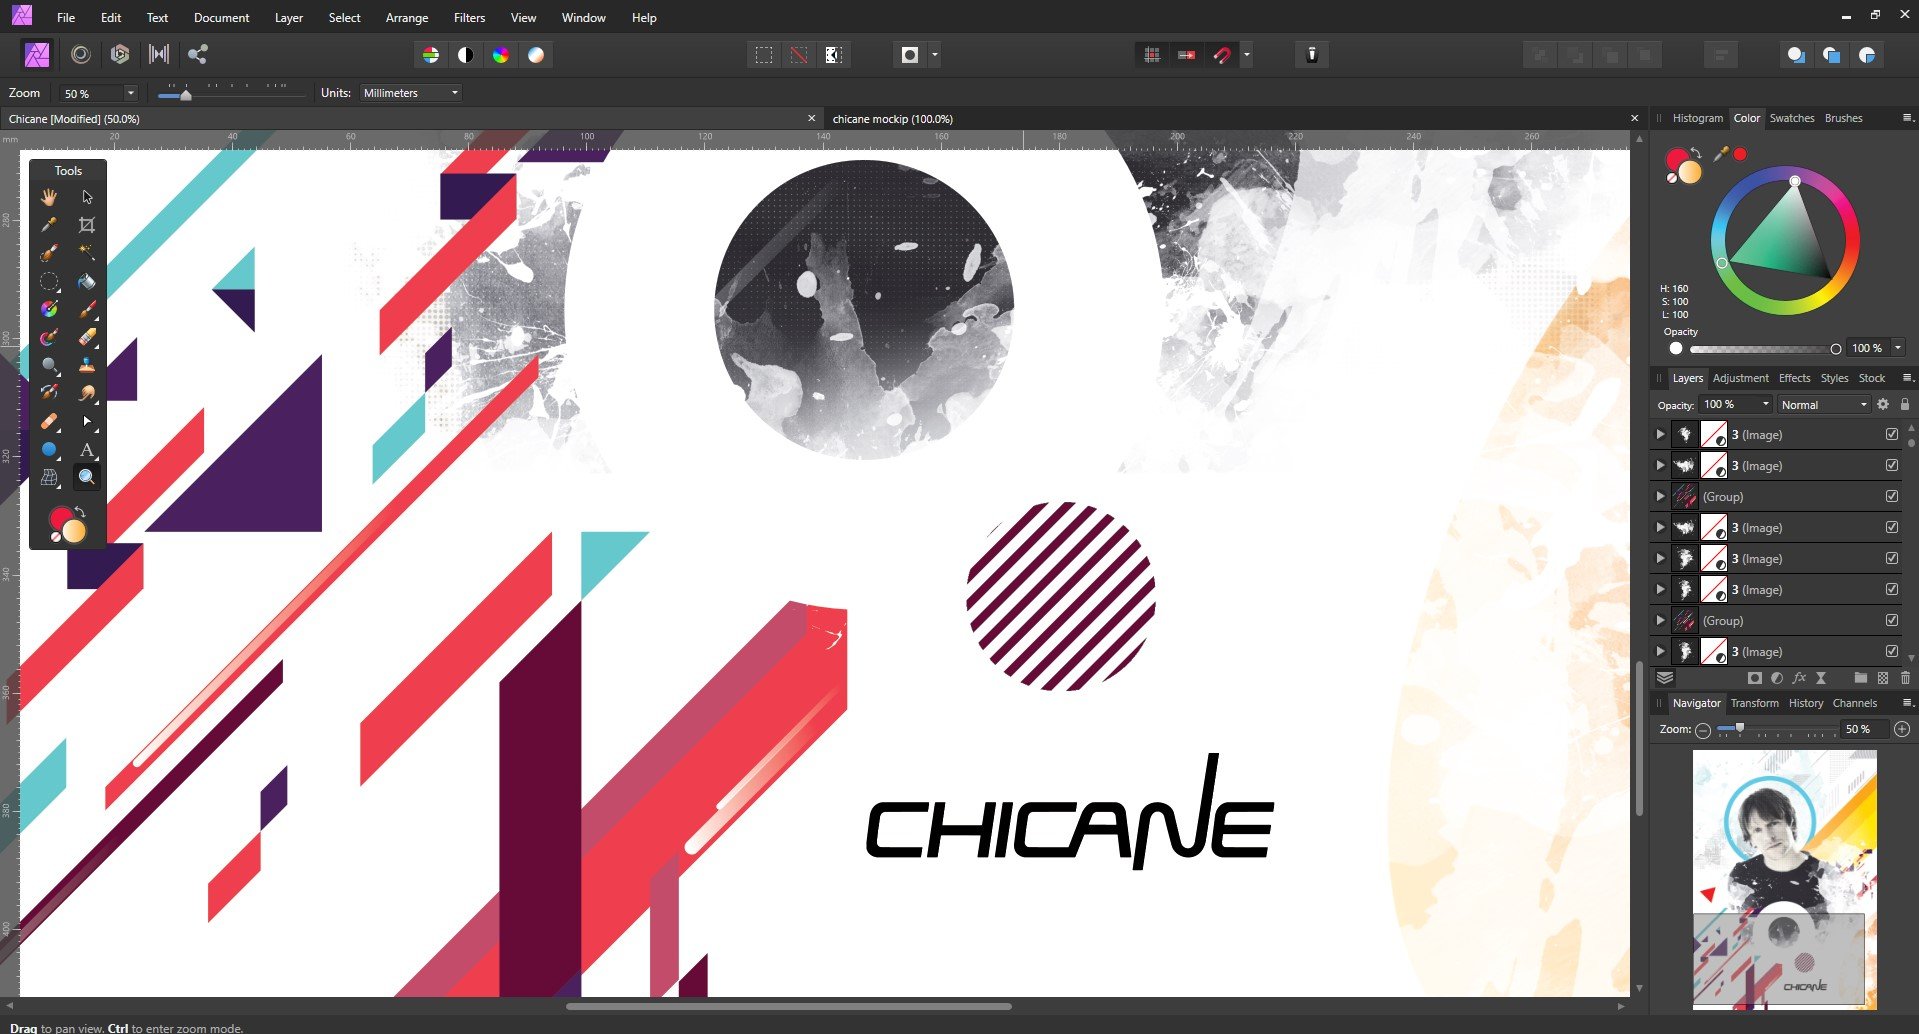
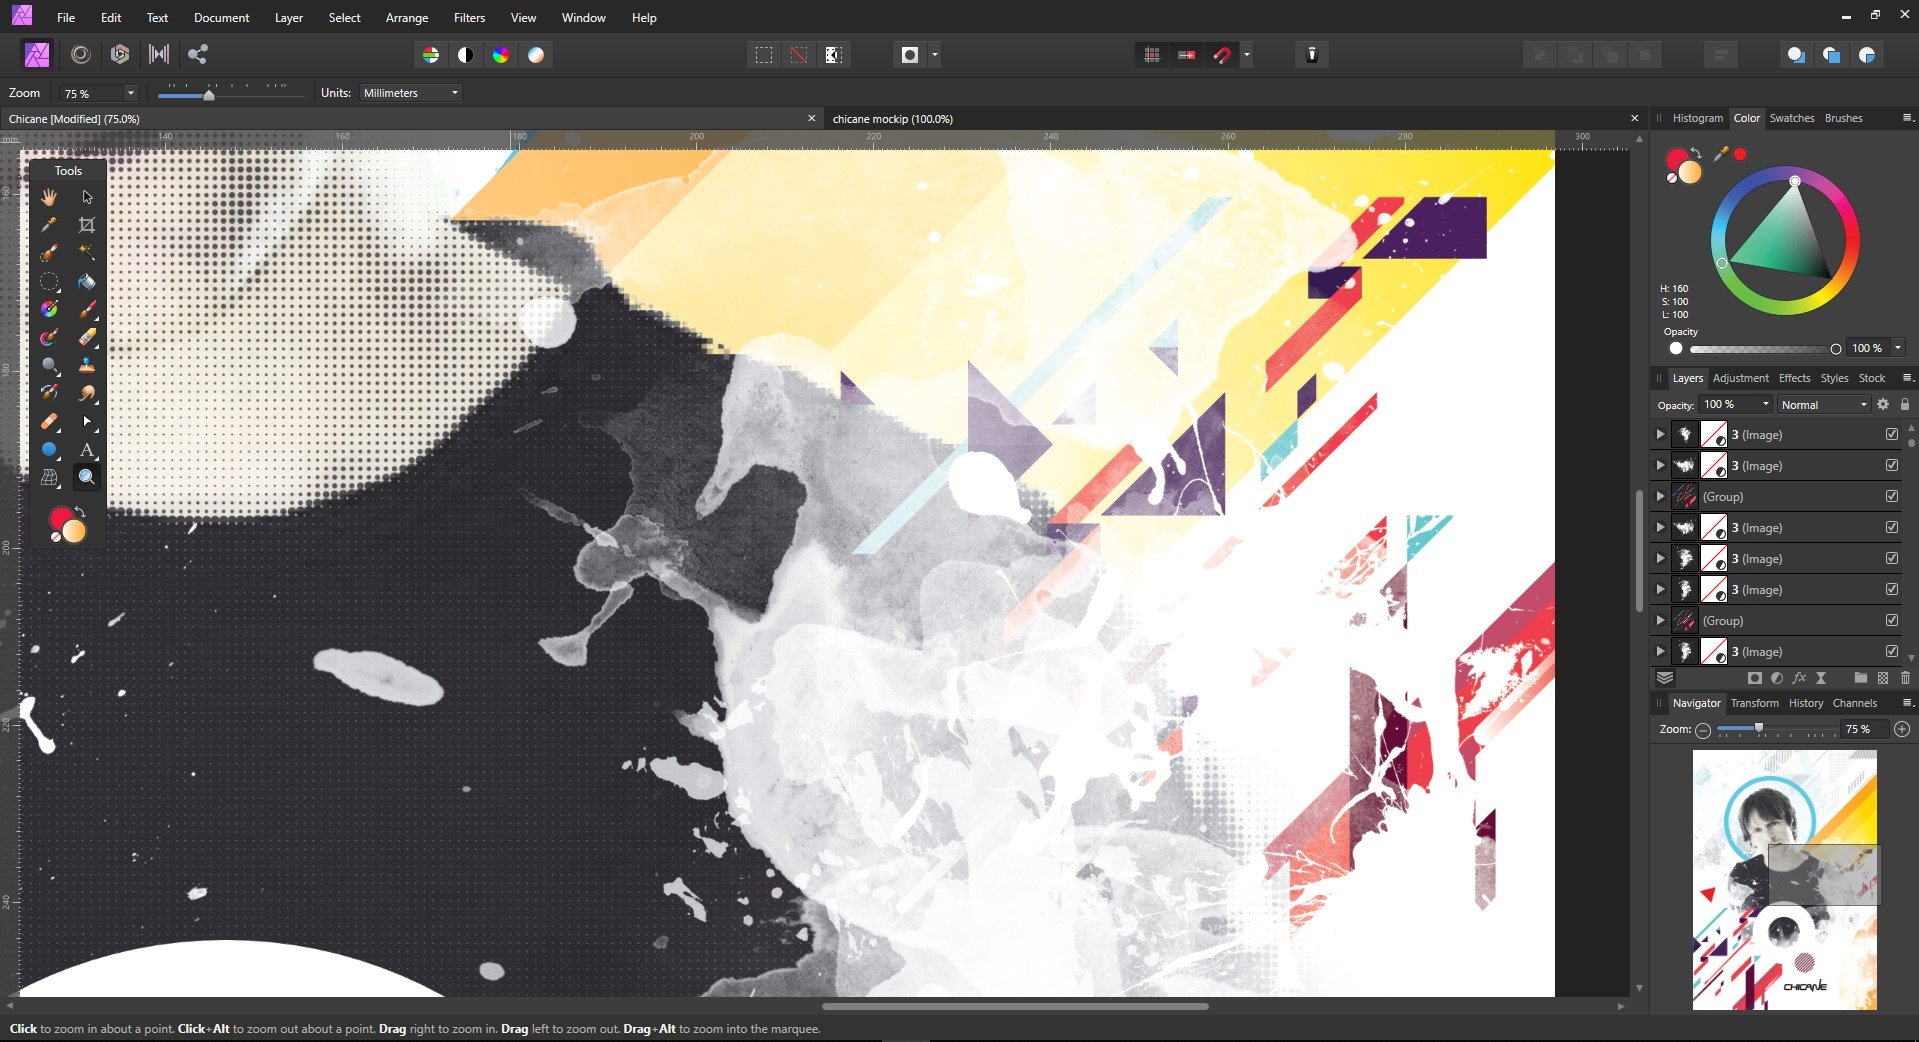
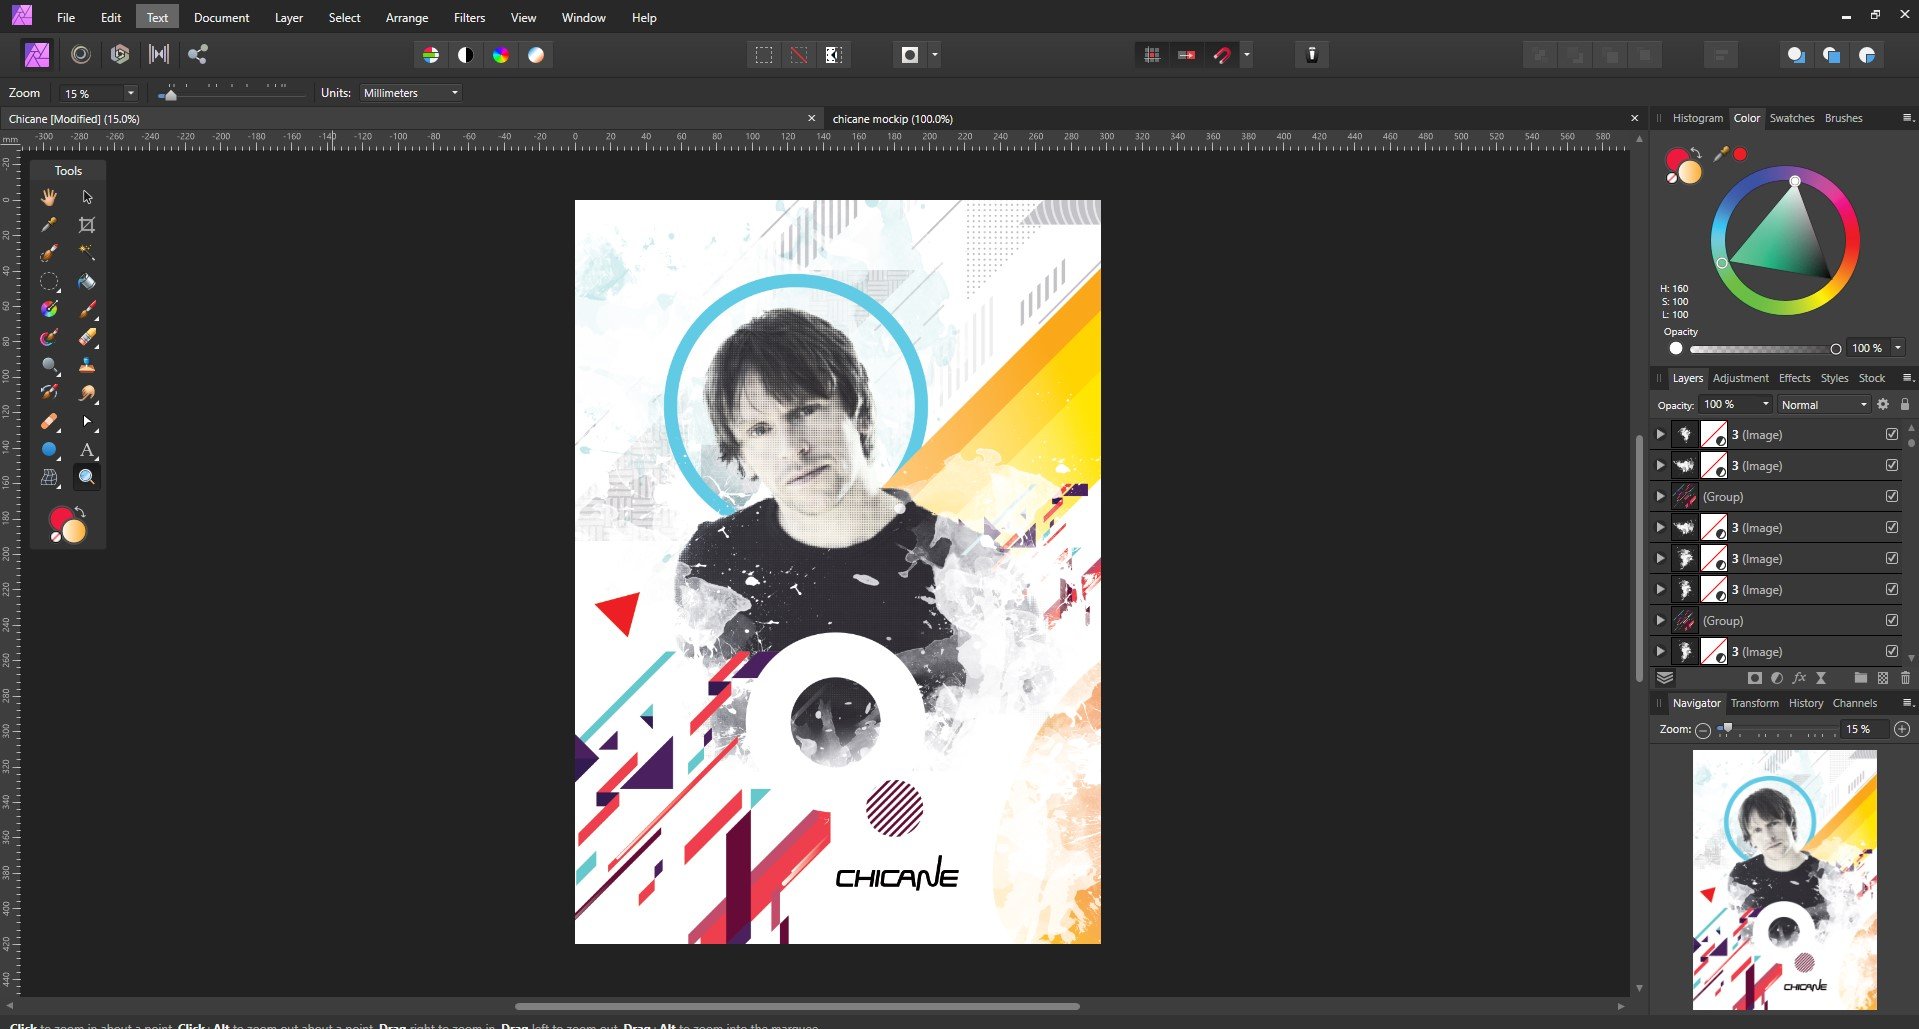
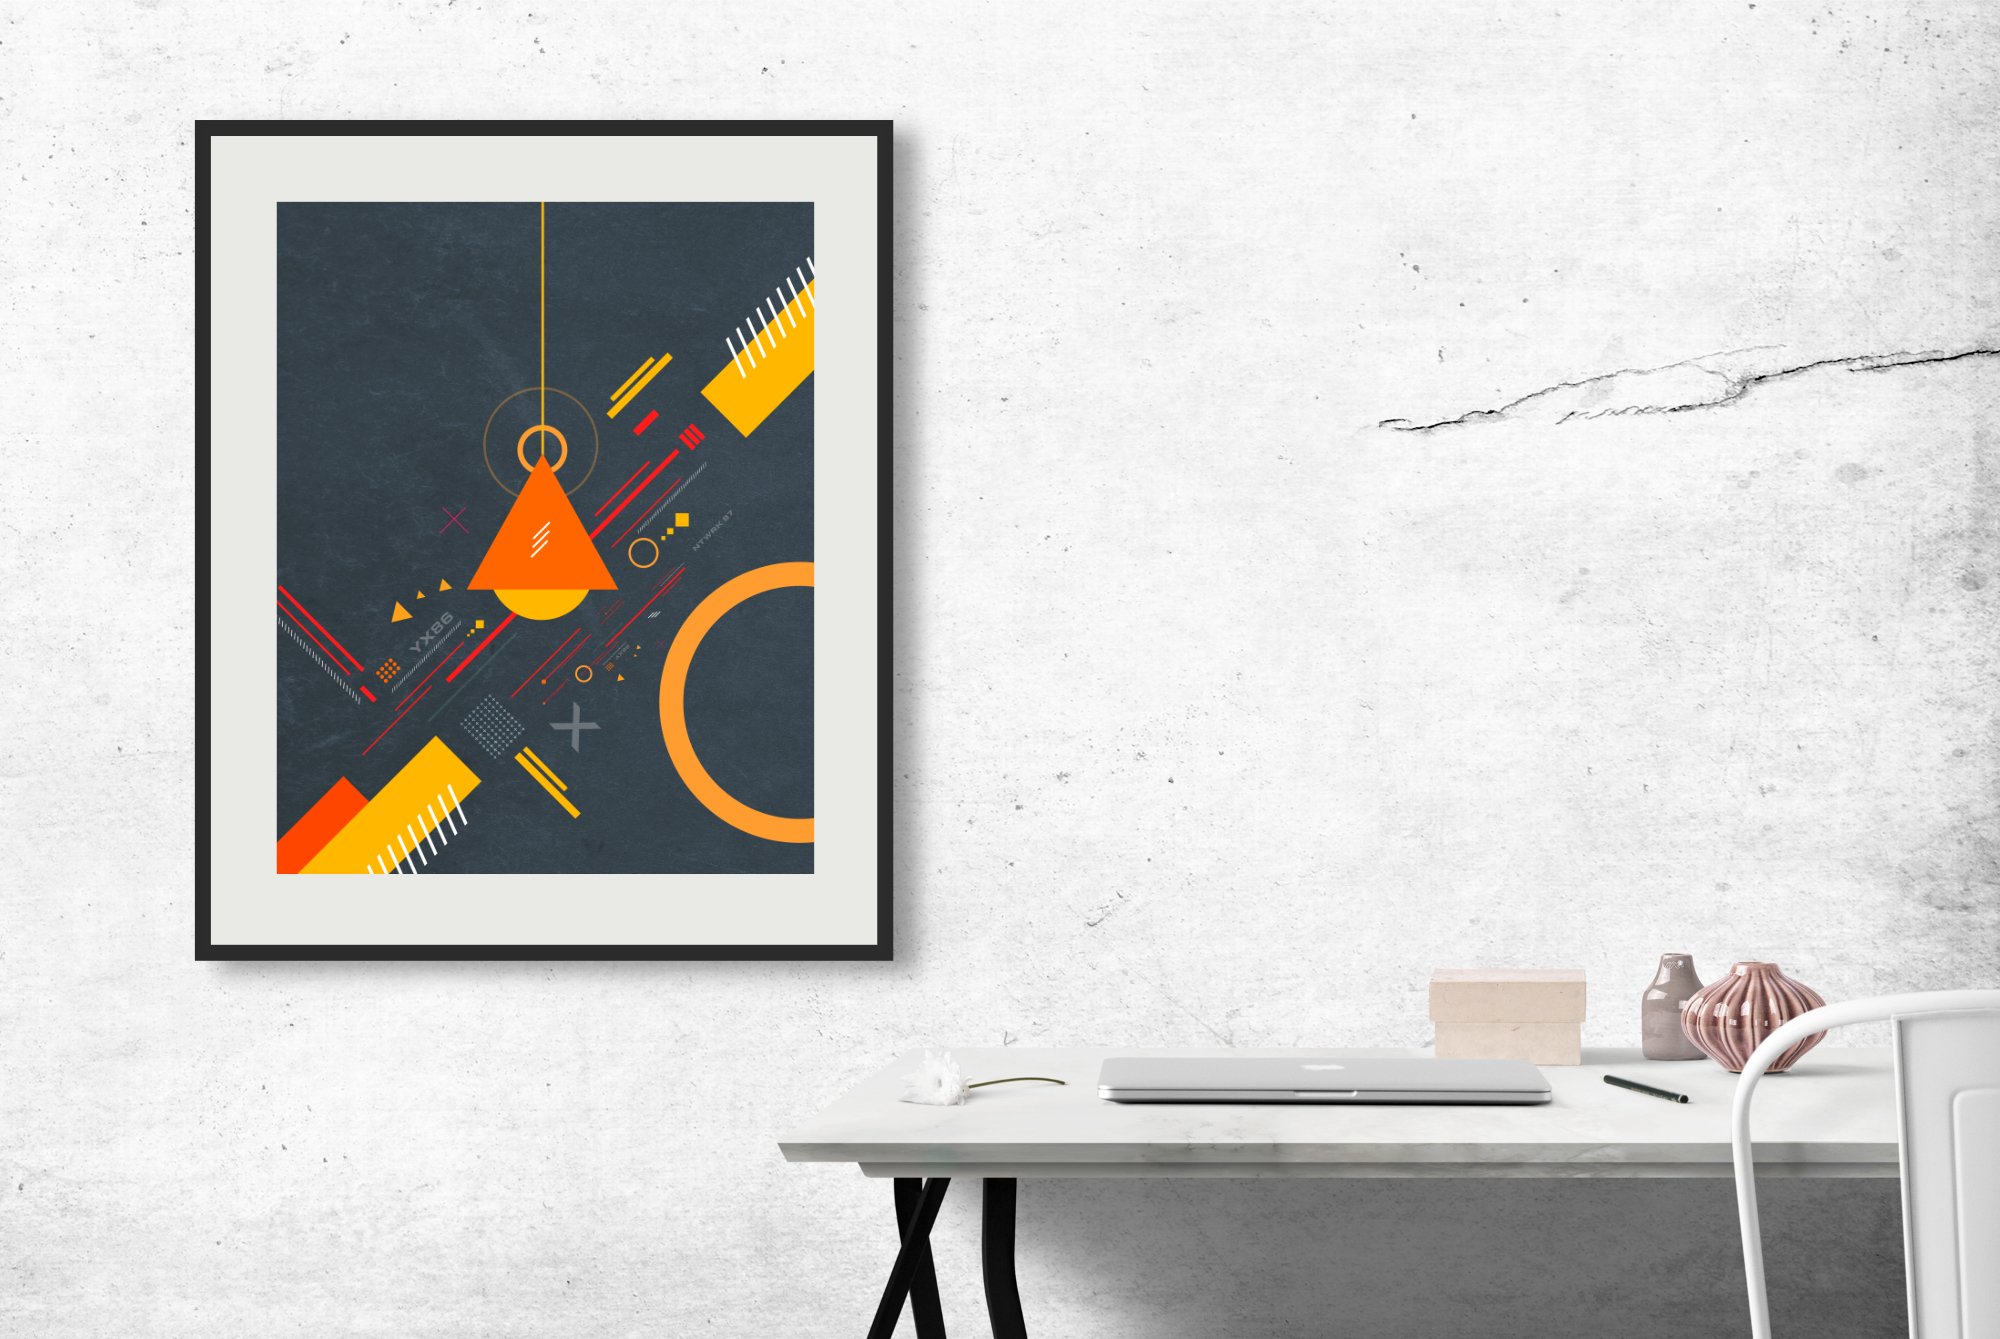
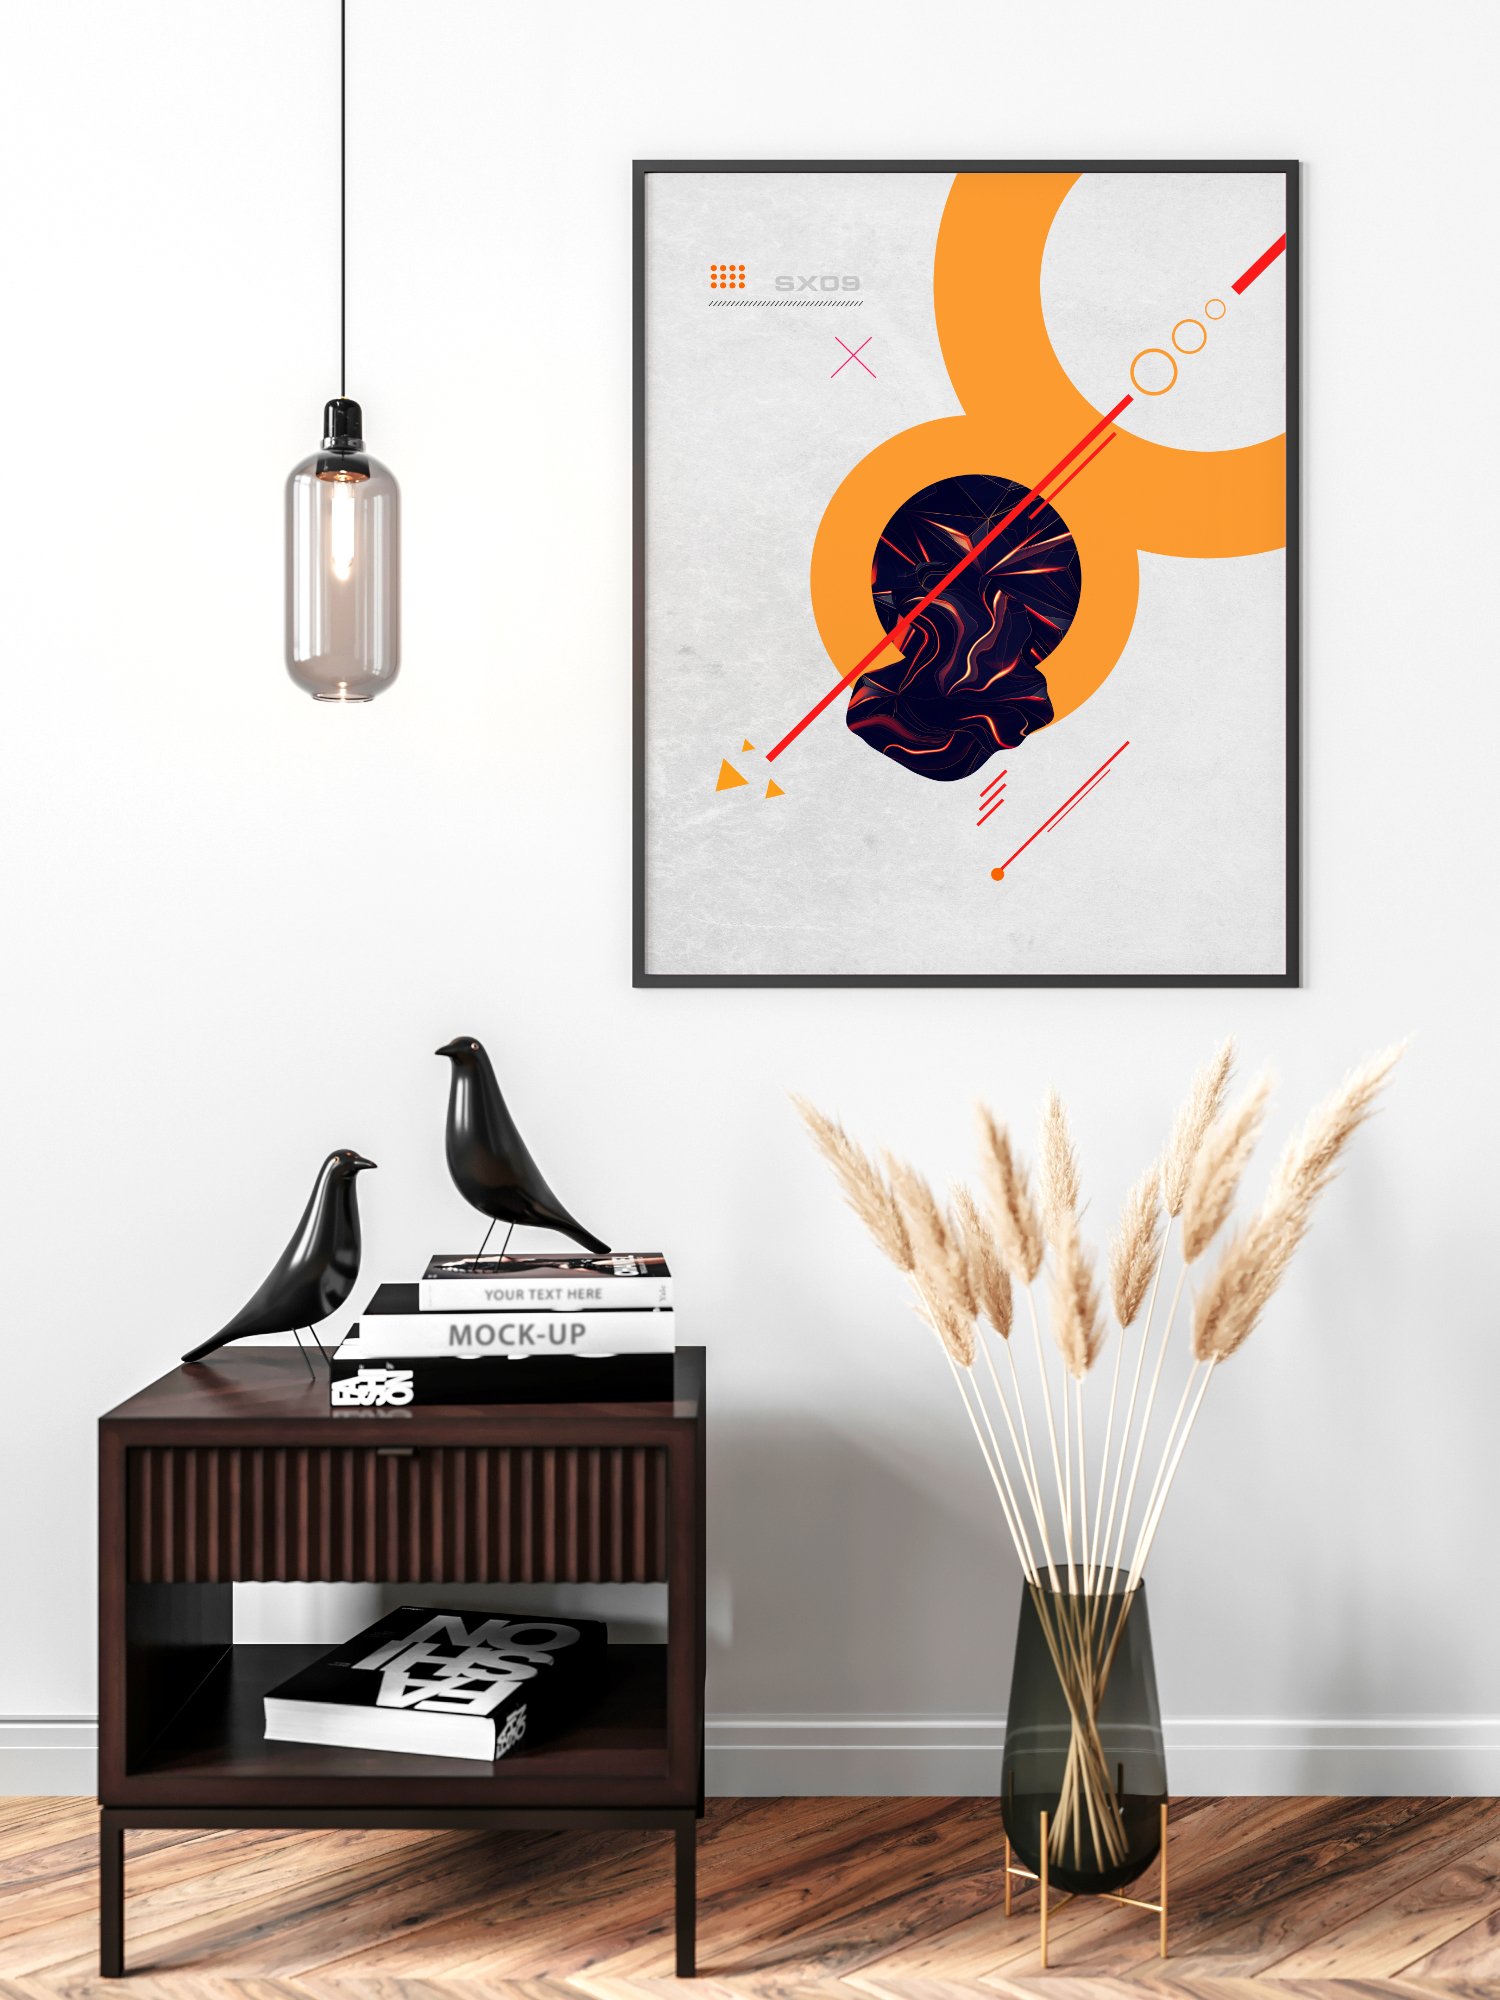
 Sundays are always good for experimentation and blowing off some creative steam, without client deadlines and briefs. So for this Sunday I created a poster for one of my favorite Electronic Music producers: Chicane. Chicane has released a few albums that have been my creative companions for many many years ad I always go back to them when inspiration is needed. Here you can see the poster and some screenshots with details. Got any questions? Let me know. I would be more than happy to answer them Cheers from Greece Stratos.
- 1 reply
-
- 4
-
-
- illustration
- abstract
- (and 2 more)
-
I am working through the tutorials to learn Affinity Photo for the iPad. The gradient tool in the photo personna is repeatedly referred to, yet when I select the tool that looks like the gradient tool it is just the Fill Tool. What do I do to find the Gradient Tool?
-
Find out how to create a Exorcist Horror Style in Affinity Photo. In this tutorial we will dive into the realm of the dark and spooky. Let's have a little fun with Fog and spooky lights. In this tutorial we will turn a photo from day to night and and some scary elemts. I will provide a lot of tricks and insights on how to create the atmosphere, bind the elements together and have find a nice composition. All inspired by the 1973 Movie The Exorcist by William Friedkin. Support me on Patreon: https://www.patreon.com/sarikas Follow me on: https://www.facebook.com/sarikastutorials https://www.instagram.com/sarikasat/ Join us on Reddit: https://www.reddit.com/r/AffinityPhotoTuts/ Brush used: https://www.brusheezy.com/brushes/58018-free-fog-photoshop-brushes-8 Photo used: https://unsplash.com/photos/T9A31lqrXnU
-
We are pleased to announce a major update for the MacOS release of Affinity Photo, version 1.7.1 Changes in this build The changes in Affinity Photo 1.7.1 for macOS over the recent release Affinity Photo 1.7.0 are as follows: General performance improvements. Fixed Nik V1 plugins. Fixed hiding / showing multiple layers in layers tab. Shadows and highlights improvements. Fix for old Sony RAW files. Another attempt to fix sporadic HSL UI crash Fixed brush performance issues on big documents. Fix crashes on Intel GPUs in macOS < 10.14. Fixed crash when adding a mask when editing selection as layer. Fixed noise filter crash when changing layer. Fixed Levels Metal implementation in CMYK. Reduce bloat when resaving 1.6 files where possible. Improve Live filters appearance...Made inpainting fast again. Gamut check works again in soft proof. Fixed selection refinement working only once per document. Fixed posterise adjustment. Fixed legacy selective colour adjustments rendering wrong when they have children. Fixed potential crash in HSL adjustment. Fixed mixer brush crash. Fixed TIFF loading with Edit In extension. Fixed crash when adding a live filter when in “Edit selection as layer” mode. Fixed rogue toolbars on update. Fixed startup crash for some Intel GPU users. Fixed live denoise filters when repositioned in layer stack. Fixed export bugs / crashes / weird questions. Fixed marching ants in Metal view. Fixed shadows & highlights filter. Startup fixes for 10.7, 10.8 (on MAS) Help improvements. Localisation improvements. Changes in 1.7.0 since 1.6.7 (1.6.11PK) The changes in Affinity Photo for MacOS 1.7.0 over the last Affinity Photo patch 1.6.7 (1.6.11 PK) are as follows: EDR Added support for EDR displays to Photo. When editing a 32bit document, enabling EDR will switch macOS into a mode whereby it will increase the backlight intensity and darken screen content - increasing the dynamic range available when rendering content. Performance The core processing engine in Affinity Photo has been rewritten to take advantage of the powerful discrete AMD GPUs in modern Mac hardware. It will now automatically use any compatible discrete GPU, alongside the Intel GPU support present in 1.6. Typically this improves compositing / editing performance by at least 1000%. Performance when using integrated Intel GPUs has also been massively improved. External GPUs (eGPU) are also supported - including hot-plug-and-unplug support. Multiple GPUs are supported - if you have more than 1 GPU (ie. Intel + AMD in MacBook Pro, or Intel + eGPU in other Macs) Photo will use them all, at the same time, to improve performance. There is no limit to the number of GPUs which can be used. Brushes Photo 1.7 introduces a new “sub-brush” mechanism, developed in conjunction with Paolo Limoncelli (DAUB® Brushes). This exciting feature allows any brush to have a list of other brushes attached which will draw at the same time. Each sub-brush has a fully separate and customisable set of dynamics. You can control when the sub-brushes are drawn and how they blend with the main brush. The brush engine in Photo has been rewritten to use the new GPU architecture described above. With GPU support, even huge brushes with 1% spacing will perform well. All brushes / brush tools are accelerated. Symmetry (up to 32-way) is now supported - including on-canvas controls and optional mirroring. We have more symmetry features on the way - so stay tuned during the beta process. Wet edges and accumulation are now available on colour brushes and brushes with HSL variance. Brushes with multiple nozzle textures have always chosen the nozzle at random. In 1.7, the nozzle choice has a dynamic controller and ramp for greater control. All brush tools now support left and right arrow keys for rotation - a common feature request. Allow Ctrl key to be held when typing numbers in a brush tool (will change flow instead of opacity). Fixed ABR brush import (would ignore "random" controllers). Brush Tools now allow you to constrain strokes with the Shift key. Brush Tools now allow you to constrain the X-axis or Y-axis with the Shift key. RAW The RAW processing engine in Photo has been rewritten - producing better results and improved performance. It also takes advantage of the GPU architecture changes described above. RAW files now load much more quickly - especially if you have a compatible GPU. Reimplemented support for XTrans sensors. The denoise algorithm has been rewritten. It produces better results and takes advantage of the new GPU architecture. Hot pixel removal is now automatically performed by the Serif Labs engine. Profiled lens correction are more stable, apply more quickly, and can be toggled in the Develop UI. The histogram in the Develop persona is now presented in the output colour space - as opposed to always being linear. Develop now respects the output profile when previewing. Added support for CR3 RAW when using the Core Image engine. Show which autofocus rectangles were in focus and which were selected by the camera (yellow, green respectively). A large number of new cameras are supported for RAW development (we will provide a list of the new supported cameras as soon as possible!). Automatically fall back to Core Image for cameras which are not supported by Serif Labs. Filters New “Procedural Texture” filter with advanced presets support. New “Voronoi” filter. Denoise, Clarity and Shadows / Highlights filters have been rewritten (using technology from the Develop Persona). More filters are now available as Live Filters - including the new Procedural Texture filter. Live filters have been rewritten to improve performance - especially when multiple filters are used in a document. Improved Polar to Rectangular and Rectangular to Polar filters. Added round dot type to the halftone filter. New “Lens Correction” filter - apply lens correction from the built-in lens database. Bilateral blur accuracy improvements. Adjustments The HSL adjustment layer has been rewritten. It now supports custom hue ranges, a new algorithm, new UI and picker controls. The Levels adjustment layer now supports output levels - a common feature request. The White Balance adjustment layer has been rewritten. The Selective Colour adjustment layer has been rewritten. PSD import / export of adjustments has been improved. The Vibrance adjustment layer has been rewritten. The Recolour adjustment layer has gained a lightness slider. Layers Layers Panel- added option for transparent background for thumbnails. Layers Panel- added multiple thumbnail size options. Layers Panel- added ability to tag layers with a colour - including PSD round-trip. Allow Panel an empty group from the Layer menu. New “Duplicate Selection” item in Layer menu (old behaviour). Duplicate now duplicate the whole layer ignoring pixel selection. Alt / Option is now used to make a pixel selection from layer luminance. You can now also hold shift to add the result to the current selection. Hide / Show / Show All Layers options in layers menu. Ability to either rasterise or rasterise and trim a layer. Previously recorded macros will trim. Selections Significant improvements to selection refinement. When using selection tools with no pixel selection, default to New / Add as appropriate. Added “Alpha Similarity” to Select Sampled Colour tool. Tools Grouped tool shortcuts now default to needing the shift key held to cycle (option in preferences). The Crop tool has been rewritten - it now supports resolution changes, absolute pixel size and has a much improved preset mechanism. The Sponge Brush tool now gives more correct / pleasant results. Allow brush rotate / size key changes while dragging. Added a “Reveal Canvas” checkbox to the crop tool - defaults to off. Added new “Transform object separately” mode into Move tool. A general tools overhaul has been performed - providing editing of grids, guides, page origin, across multiple tools (not just in the Move tool) Patch tool now supports arrow keys for rotate / scale. All brush tools can now be axis constrained once brush has started - not just the pixel tool. History “Alternate futures” for document history have been added. Traditionally, if you roll back the undo history then do something else all your changes after that point are lost. Photo will now display a small branch icon in the history tab when you do this. Pressing that button will cycle between all the different “futures” after that history entry - meaning you will never lose work you have done. The History page now has an “advanced” mode - which shows thumbnails and time info. I/O HEIF images can now be loaded directly into Photo. If they contain a depth map, this will also be loaded as a second layer. Because depth maps are typically lower resolution than the main image, optional “smart” upsampling will be performed. TIFF export now has user selectable compression method. Added support for 12bit TIFF files. Introduced new metadata mining - completely rewritten to improve performance, flexibility and correctness. Metadata is now dynamically synchronised with your document - so if you resize then export, the values will be correct. Added Focal Length to metadata summary view. Added a button in general preferences to open a folder from which Photo will read LensFun-style XML files - if users wish to add / experiment with their own lens profiles. Support 16bit CMYK TIFF import. General New ability to control how macros are scaled / aligned when playing back. Added an “Assets” panel to Photo. New cube setup mode for grids. Add “Fill with Primary / Secondary” to the Edit menu for fast access. The batch process dialog now fully supports expressions for height and width - available constants are “w”, “h” and “dpi”. “Lock guides” added to menus. Support for drag dropping .afstyles into Photo. Support for drag dropping .afpalette into Photo. Photo now supports custom document presets - a popular feature request. A new blend mode - Linear Burn - has been added. New “Move inside / outside” commands have been added - useful for quick operations on clipping masks etc. The Hard Mix blend mode has been improved. New provider options have been added to the stock panel - support for Unsplash, Pexels and Pixabay. All of these providers offer full-resolution stock imagery which is free to use. Numerous text improvements have been made - including new features. Significant stability improvements when working on non-local files (network shares, USB drives, etc.). Significant PDF import / export improvements and fixes. Huge macro and batch processing improvements New welcome screen layout and all new samples. Numerous other bug fixes - too many to list! This thread is for commenting on this announcement. Please do not post bugs or problems that you find when using this version of the software in this thread, instead make a new thread in the Photo Bugs on MacOS section and questions about usage go in the Desktop Questions forum. UPDATING TO THIS VERSION (Free for existing customers) For purchases from the Mac App Store: These are done automatically (next time you run after it is available in the store). In the Mac app store, go to the updates panel and press CMD+R they should appear if rolled out to your region. Apple sometimes phase roll outs around the world sometimes taking up to 72 hours. For purchases from the Affinity Store: Each time you start the software it will check for updates and offer any available update, or in the application main menu there is an option "Check for Updates", or it can be downloaded from here (that link is NOT for Mac app store purchases). Alternatively you can log into the affinity store here and find the order in your account and use the download button in there.
-
 not sure if this is going to show to quality but either way..... loving the updates thanks much so worth the beta process. here is what im currently creating. Im starting with vectored images to produce examples images hopefully will turn into a full scale marketing project combining photography and affinity photo as my post production tool, love all the new brushes worth it's weight in gold for sure.
-
 Hi, Yesterday I purchased Affinity Photo (for Windows) on 20% off sale. I downloaded the application directly from the order page. When I installed and launched it, there was no option for activation! The application worked straight without that! I uninstalled it and tried launching again after re-installation. Sill the same; there was no activation window! I also tried removing the Serif registry entries and reinstall. Still no option to enter the product key for activation. Is that normal? Does it come pre-activated as I downloaded it from the order page? If no, what's the solution? Is there any option on Affinity Photo to know whether the product is activated or not? My OS: Win 10 Home 64-bit (1809)
 -
multi Abstract Posters with Affinity Designer / Photo
Stratos Agiani posted a topic in Share your work
Hello Everyone. I am Stratos from Greece and these are a couple of abstract posters I created in order to decorate our offices. So far I have created 5 and these are the first two that will go out to be printed. Fan fact: almost half of all posters were designed on an iPad while on the go ;-) Love Affinity software so far and we are transitioning from Adobe and Corel to Affinity, fast and surely :) Kind Regards Stratos Agiani
-
Learn how to use the Deform Filter in Affinity Photo. This effect, also known as the "Puppet Warp" in Photoshop, helps you make suddle changes in photos. The results look very natural and with the use of anchors you can protect other areas in your image for changing. So you can work ver regional with this and create great results. Support me on Patreon: https://www.patreon.com/sarikas Follow me on: https://www.facebook.com/sarikastutorials https://www.instagram.com/sarikasat/ Join us on Reddit: https://www.reddit.com/r/AffinityPhotoTuts/ Photo used: https://unsplash.com/photos/CPlPoAVENhQ
-
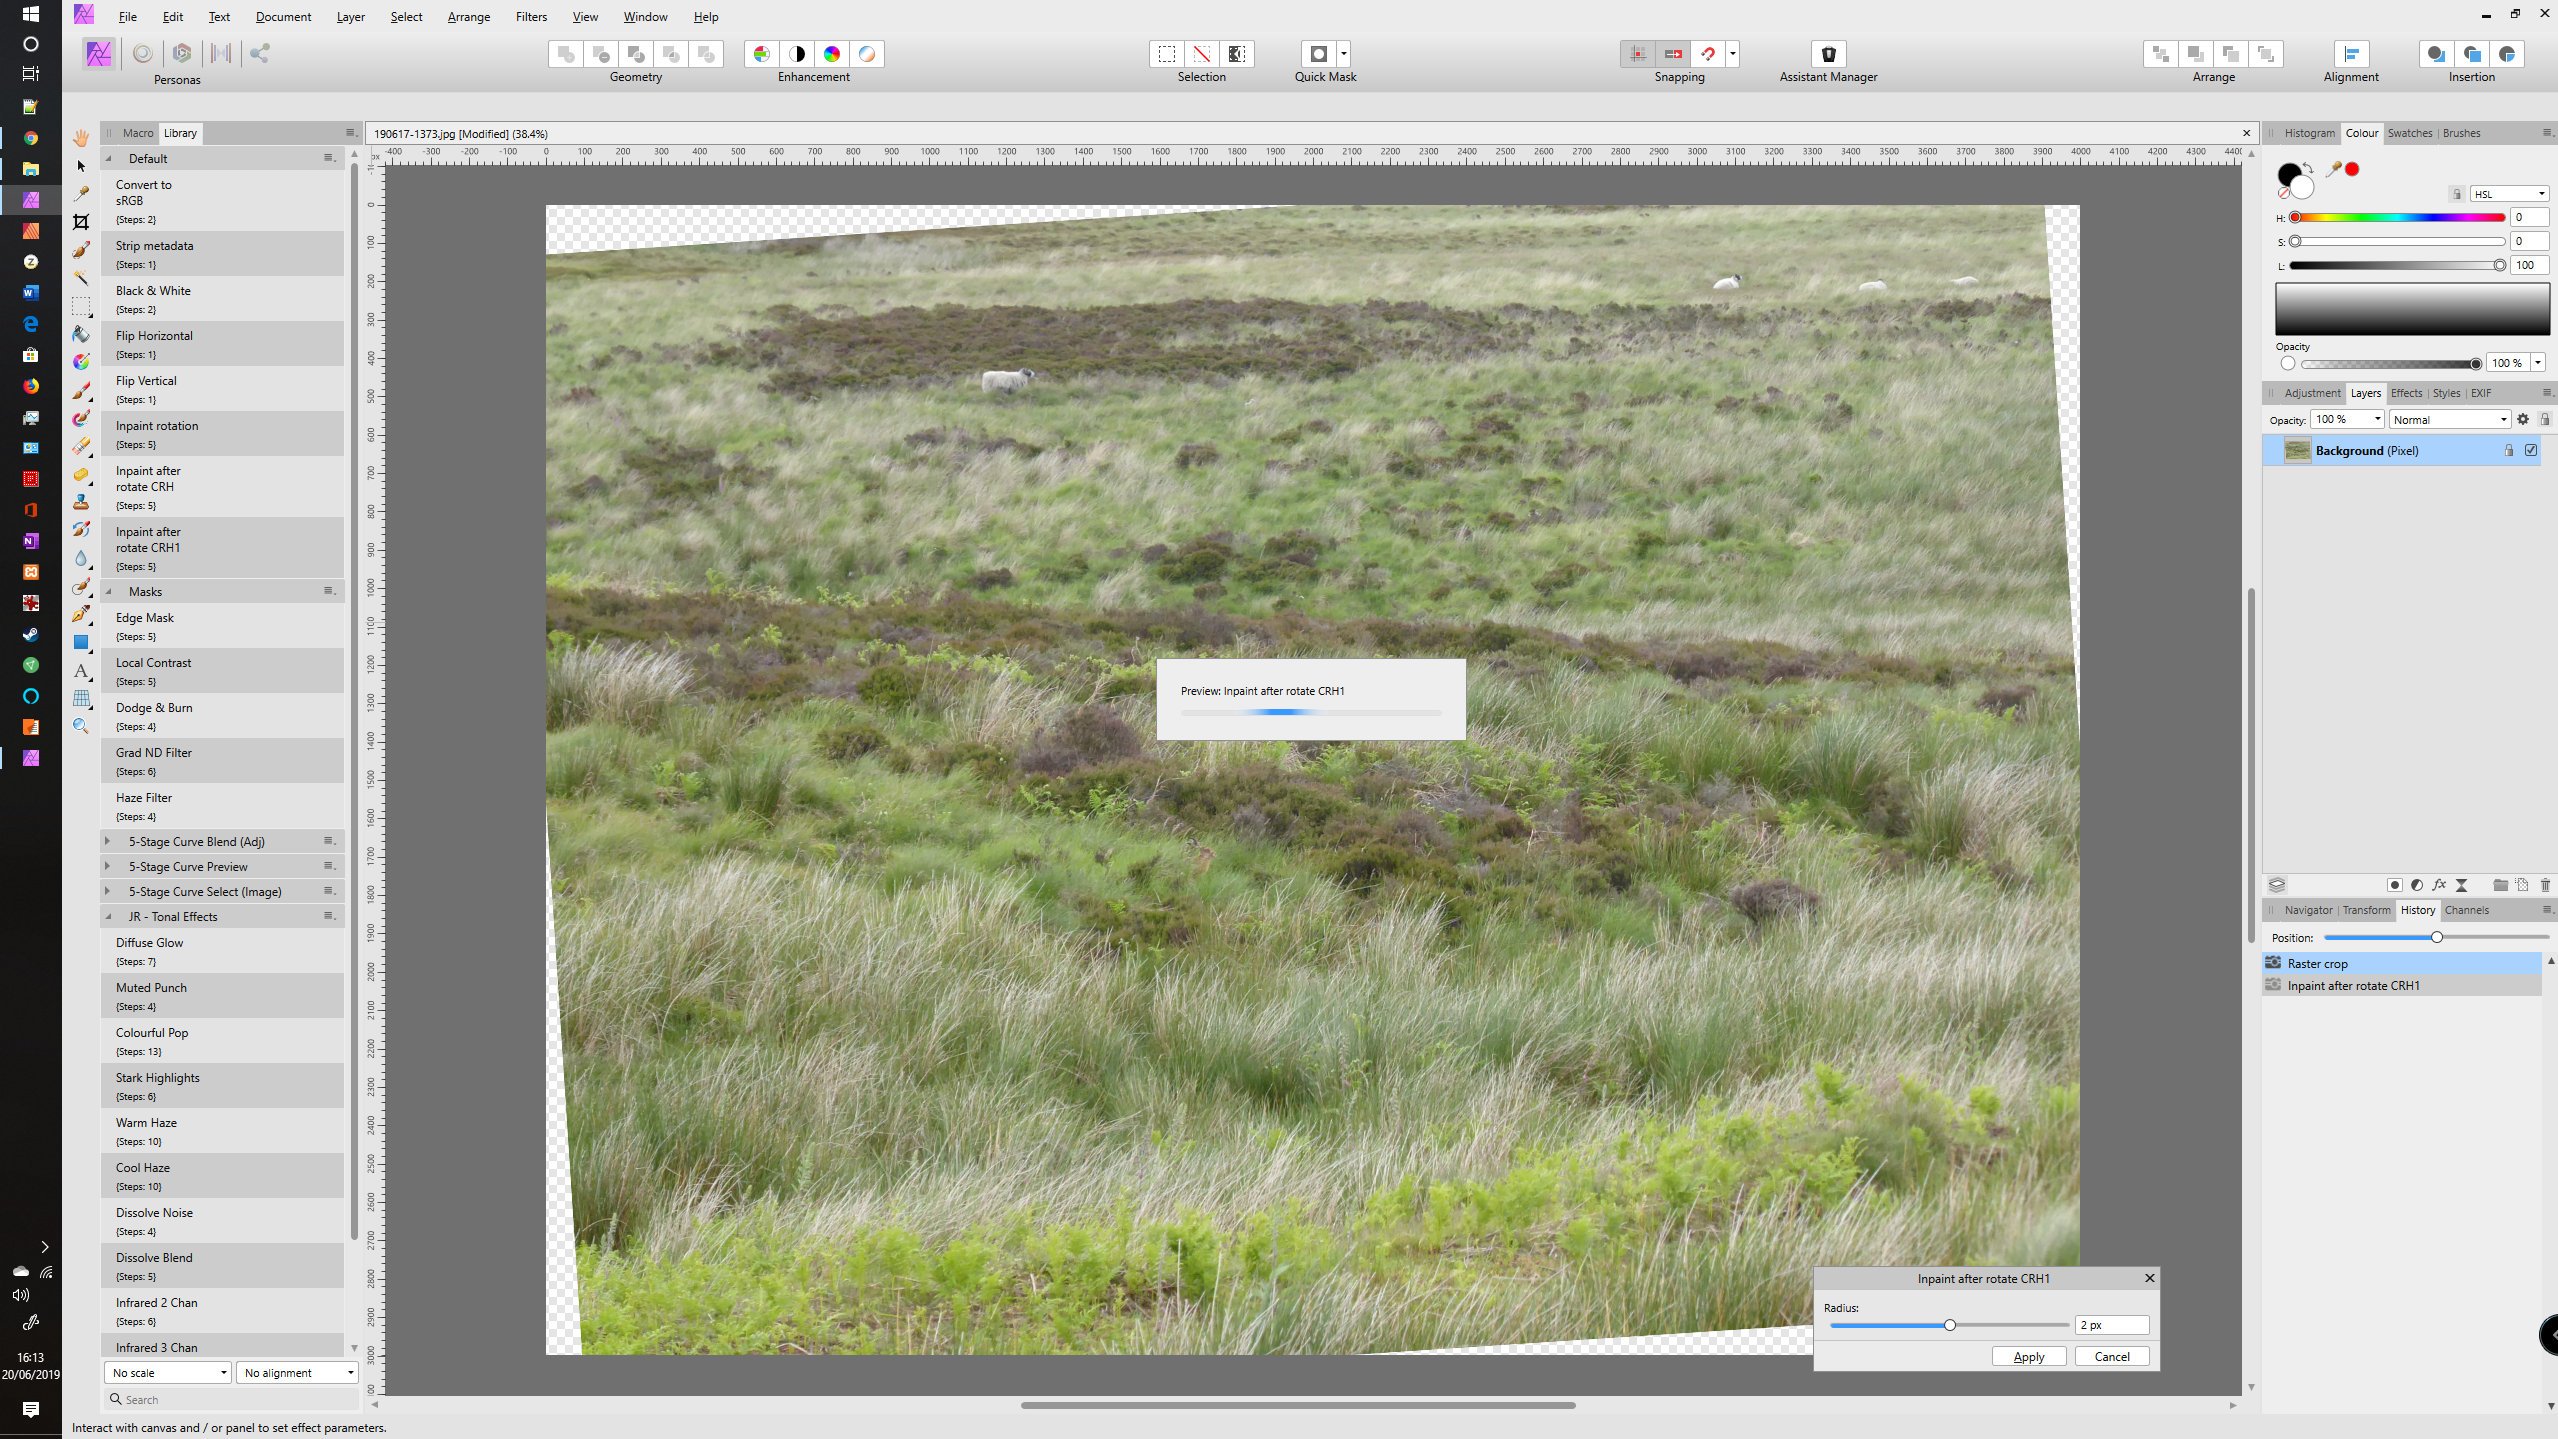
 Affinity Photo v1.7.1.404 (Windows) After viewing the macro tutorial video I generated the macro following the steps then clicked the settings icon to activate user interaction on how much to grow the selections before triggering the inpainting process. When I run the macro it displays a box with the text Preview: Inpaint after Rotate CRH1, as well as the Grow/Shrink radius settings dialogue box. However, after a couple of seconds the macro continues without waiting for the user input (that is, I haven't clicked the Apply button) & completes the operation with the settings dialogue still visible. If I then click the Cancel button the macro actions are undone, or if I click the Apply button it seems to run the macro a second time, although nothing changes. In the tutorial video a Preview box is not seen, so I do not understand why it appears when I run the macro. Also, I was expecting the macro to wait until I click the Apply button. Is the macro behaving as expected, & if so, how do I get it to let me change the grow/shrink radius value interactively when running it? I attach a screenshot showing the two boxes as described above, & the .afmacro file of the exported macro. crh1.afmacro
-
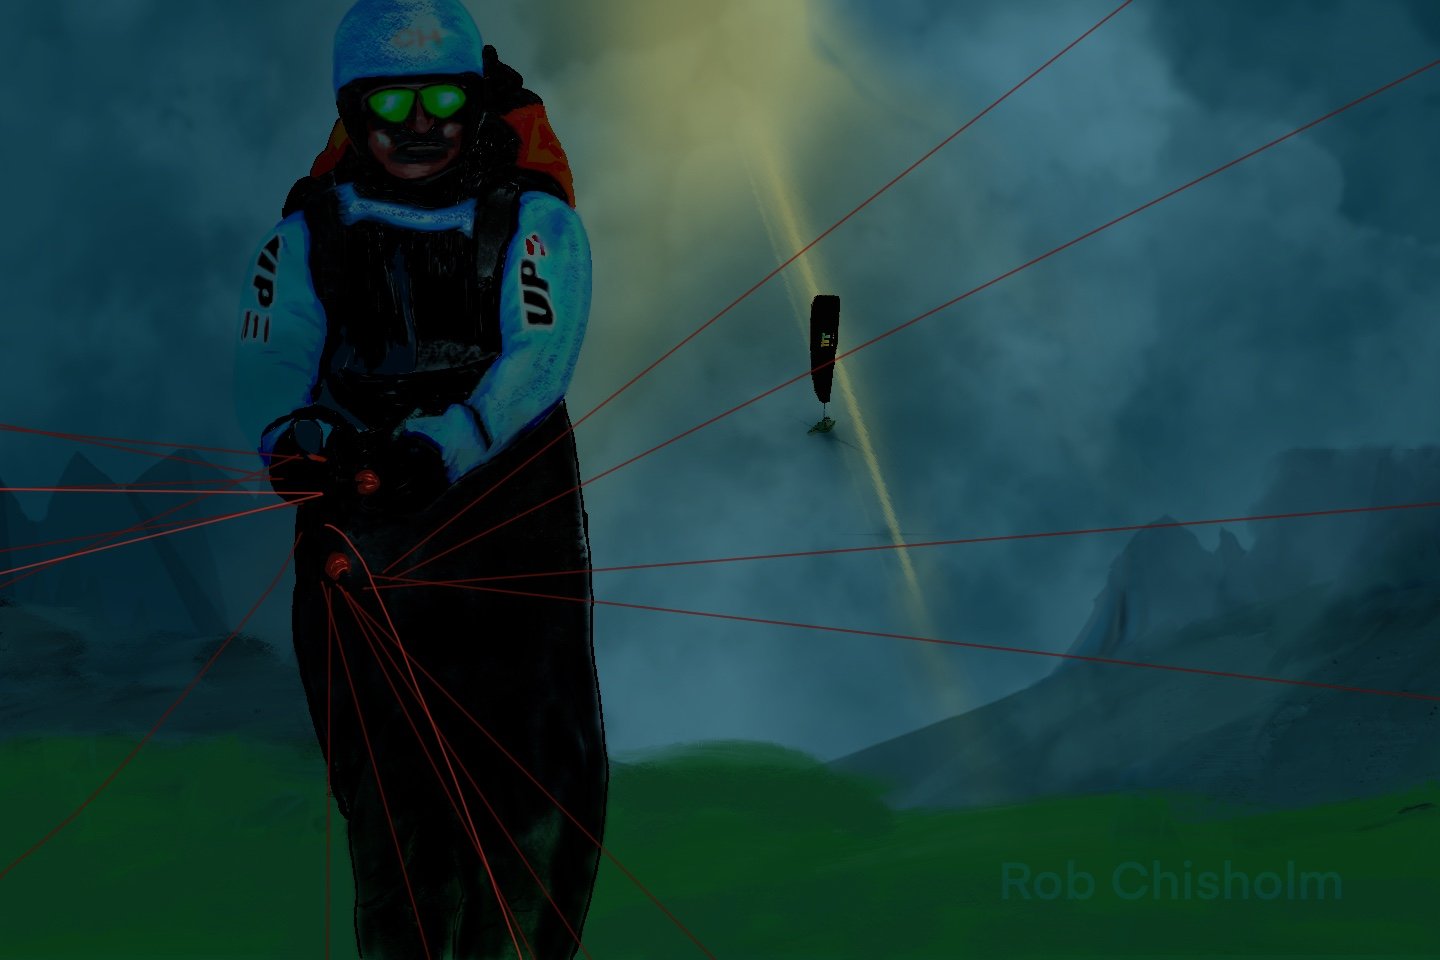
Rob at work
-
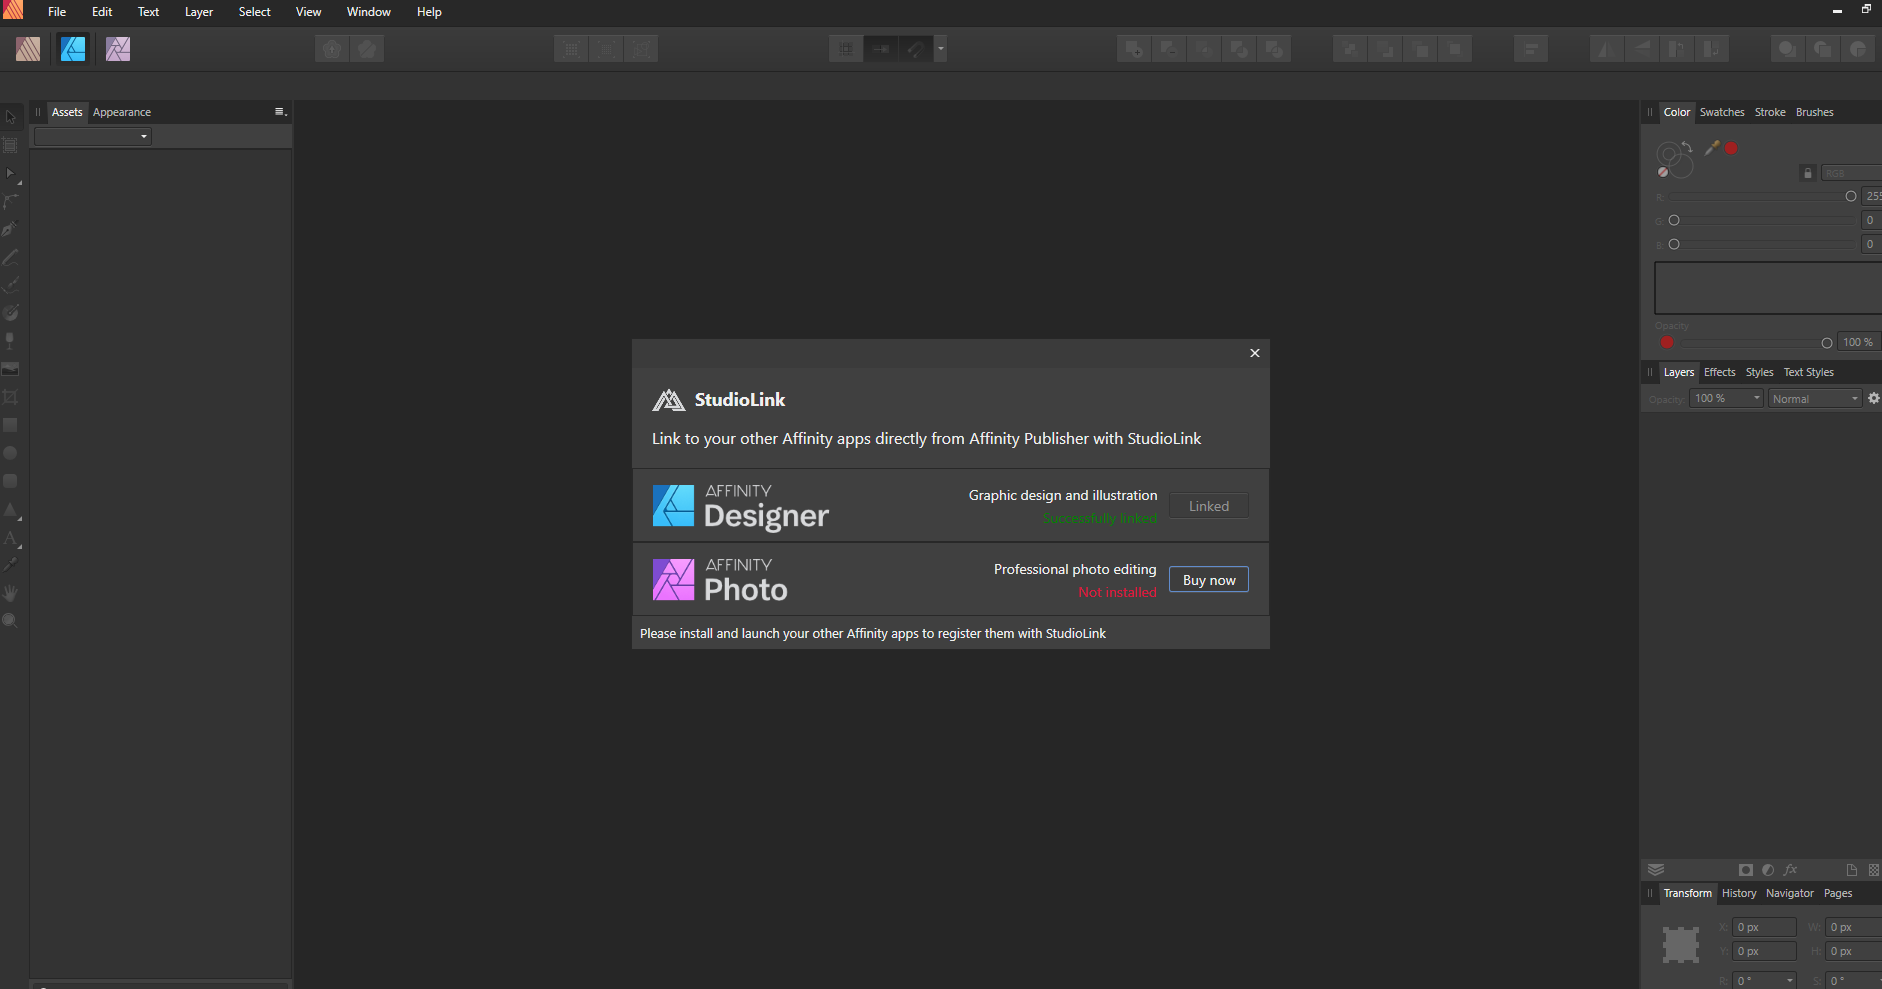
 I have purchased & updated my Affinity Photo application (this is all on my windows laptop), & yet still Affinity Publisher can't seem to connect to it. Any thoughts or suggestions as the problem & solution?