James Ritson
-
Posts
908 -
Joined
-
Last visited
Everything posted by James Ritson
-
 Hey Fred, You can optionally pre-process raw files and save them as JPEGs or TIFFs. This gives you two advantages: 1) Faster processing of images since Photo doesn't have to decode each raw before merging/stacking. 2) External handling of raw processing if you prefer the results that other software offers (for example, Photo doesn't have camera picture profile support at the moment; emulations of in-camera profiles like Vivid, Portrait, Natural, etc). You don't have to pre-process though. Just start a new HDR merge and add your raw files. Noise reduction is already checked, which will denoise the merged result. You may want to experiment with the strength though, as I've found the default value of 40 can be a little aggressive. 10-20 seems to work better for most low ISO HDR work. Hope that helps!
 -
Hi Fotis, chromatic noise and luminance noise is present in all raw images. However, most raw processing software will perform some degree of noise reduction by default; chrominance noise is usually removed automatically because it looks ugly and appears to degrade the image quality. Previously, Photo didn't do any automatic noise reduction, leading many users to believe its raw handling was sub-par and that it actually "introduced" noise to raw images. This wasn't the case; rather, Photo simply exposed how raw images can look before any filtering is applied to clean them up. The 1.5 update now analyses the image and performs (by default) colour noise reduction to give the user a better starting result when working with raw images. The patterning of the noise is likely due to the demosaicing of Affinity's raw engine. There's always room for improvement here (I believe improved demosaicing may be planned for a future update), but the automatic noise reduction should remove the patterning for a cleaner image. I've looked at several different raw engines and they all appear to take slightly different approaches. I believe one technique is to actually smooth the image of both chrominance and luminance noise, then dither it with some artificial, smoother luminance noise (usually Gaussian) to retain some texture. You can reproduce this in Photo: try a base setting of 25% colour noise reduction and 50% luminance noise reduction, then check the Add Noise filter and try a value of between 4-10%. You'll end up with a texture that looks more like grain than digital sensor noise. Hope that helps!
-
Jagged edge
James Ritson replied to wjauch's topic in Pre-V2 Archive of Desktop Questions (macOS and Windows)
Are you using a high DPI screen? (Or do you have Windows scaling set above 100%?) If you zoom to 100% (try Ctrl+1) in Photo then zoom to 100% in your other apps like Irfanview is the scale the same? -
Windows HDR Merge
James Ritson replied to a topic in Pre-V2 Archive of Desktop Questions (macOS and Windows)
Hey, this is probably because a last minute issue crept into build 45 that stops the sources panel from opening automatically. It has been fixed in subsequent customer betas (and an official update will of course include the fix), but until then, it's best to go to View>Studio>Sources as MEB suggested. Apologies for that as several of the videos use the sources panel! Hope the above helps. -
Focus Stacking using Layers
James Ritson replied to Maultierhirsch's topic in Older Feedback & Suggestion Posts
Ah, I've just noticed both of you are running Windows. There's a bug in the current public build (45 I believe) where the sources panel does not appear automatically after a focus merge or HDR merge. For the time being, once your focus merge completes, you can go to View>Studio>Sources to bring up the panel, then select the Clone brush tool (see the linked video above which will talk you through the process). I believe this issue is fixed in the current customer beta if you wanted to try that - otherwise, an official update will correct the issue. Hope that helps! -
Focus Stacking using Layers
James Ritson replied to Maultierhirsch's topic in Older Feedback & Suggestion Posts
It's not the same as a layered output, but the Sources panel allows you to tweak the final result - when the focus merge finishes it populates with all of your source images, allowing you to clone from any of them into the final composite. You could even clone onto a new pixel layer to do it non-destructively. See this video for more info, I hope it's helpful: Focus Merge: Retouching https://vimeo.com/192632435 -
Metadata .CR2 to .JPG
James Ritson replied to vskatusa's topic in Pre-V2 Archive of Desktop Questions (macOS and Windows)
Hello, yes, all metadata is preserved when you develop the image and will be exported with the JPEG unless you specify not to embed it (see the More panel when using the Export dialog to toggle this). Bear in mind that you cannot edit any metadata apart from Description at the moment - more editability is something that will hopefully come in a future update (or the DAM software). Hope that helps! -
Hi Dieter, this is a known issue - the values you're seeing on the EXIF panel are for the embedded preview JPEG in the raw file. In an ordinary JPEG file, these values would be correct, but for raw images we should really be grabbing the resolution data from elsewhere. This will hopefully be fixed - for now, please just refer to the correct resolution on the top toolbar. Thanks!
-
OK, quick video to show a couple of different ways of what you're after: https://www.youtube.com/watch?v=ozlfwI3HngI
-
Hey Webb, there are a couple of aspects to my reply so I've tried to split them up! Hope it all makes sense: Firstly, you needn't add a mask layer to your adjustment layer - it has its own mask to begin with, filled with pure white (i.e. fully opaque). Therefore, any mask manipulations you can just apply directly to the adjustment layer rather than having to create a nested mask layer. Secondly, you can use Apply Image on the adjustment layer and drag your Background pixel layer onto the dialog, then check Equations to enable channel mixing, but you won't get the result you're after this way - it'll just be a greyscale version of the image applied as a mask. Substituting/swapping the channels doesn't seem to work, so I'll enquire as to whether there's a way to improve this. The approach for this in Affinity Photo would be as follows: Select your Background pixel layer (or whatever you've named your source layer that you want to use). On the Channels panel, right click the desired colour channel (eg Background Green) and choose Create Spare Channel. Add your adjustment layer, set the blend mode and tweak its parameters etc. On the Channels panel, right click the new Spare Channel and choose "Load to Adjustment Alpha". If you want to further manipulate the mask, you can just add filters directly to the adjustment layer. For example, you can use Filters>Blur>Gaussian Blur to soften the mask. Don't forget you can Alt/Option click the mask to isolate and preview it. I'll record a short video and put it up here as it's a quiet afternoon ;)
-
Hi Mayukh, Do you mean the colour rendition looks different? If that's the case, can you just check what colour profile you're editing in? (It will be listed after the document resolution on the top toolbar). Is it listed as sRGB or something else?
-
Just dropping a quick message to say that I've redone a couple of videos: Raw: Noise Reduction Graduated ND Filter Effect Raw: Noise Reduction needed updating to account for 1.5's automatic noise reduction, and the image used for the Graduated ND video was just a bit poor really, so I ended up using a nice Derbyshire landscape shot.. it now also references using a fill (vector) layer rather than a pixel layer, allowing you to go back and edit the gradient at any time. Cheers, James
-
Chromatic aberration
James Ritson replied to Dooblaque's topic in Pre-V2 Archive of Desktop Questions (macOS and Windows)
I see what you mean, having the flexibility to move the different colour planes around seems quite useful. You can do it manually by manipulating specific channels, but that's certainly extra work. Do your images have CA in them that can't be removed by regular means then? (IE using a combination of CA reduction and complementary defringing) - I've used plenty of lenses that exhibit CA, but haven't come across any where it's truly bad. I get fringing issues far more frequently, for which I've found Photo is quite good at tackling. You can apply a live defringe filter non-destructively and mask it; handy if you're using aggressive settings and you have areas of the image that contain colours similar to the target hue, as you can avoid slightly desaturating them. Version 1.5 has also implemented automatic lens based correction, including transverse CA plane-shifting for supported lenses. I haven't tested it thoroughly yet but that should in theory limit the amount of extra work needed to reduce it. Thank you for pointing out the feature and for your reply. All the best, James -
Chromatic aberration
James Ritson replied to Dooblaque's topic in Pre-V2 Archive of Desktop Questions (macOS and Windows)
Hey Dooblaque, do you mean defringing? Chromatic aberration reduction just shifts the chroma planes back into alignment (in ACR, CA reduction is also just a checkbox). You can use defringing which has options for hue (colour), radius (pixel width), tolerance (amount to remove) and threshold (sensitivity). There's also a complementary hue checkbox for removing complementary fringing. Hope that helps, James -
Hi Keith, Photo 1.5 already supports E-M1 mark ii raw files; we're not dependent on Apple for raw support, you just have the option to use their engine if it's your preference. Older micro 4/3 lenses should be supported for corrections, but it might be a while before support is added for the new lenses - the 12-100mm f/4 and 25mm f/1.2. There's currently no way to list the supported lenses in-app, but we use LensFun, so you could check on their database (http://lensfun.sourceforge.net/lenslist/) and see if your lenses are listed. Cheers, James
-
Hi bvz, thanks for the suggestion, you're correct that something along the lines of a familiarisation guide would be useful, are there any other techniques or functions that you can point out off the cuff? I can help quickly regarding the colour picker - you're along the right lines, you just have to click-drag when holding Alt/Option to switch to the colour picker then release the mouse button to assign the picked colour to your active palette. Hope that helps.
-
Hey Max, no, I just can't count :) It did remind of an idea to split 32-bit/OpenEXR videos into their own category though, so I've gone ahead and filled that gap..
-
Multichannel OpenEXR import
James Ritson replied to pixeldoggy's topic in [ARCHIVE] Photo beta on macOS threads
Hey Sven, thanks for posting - we're aware of this, Cinema4D's multichannel export doesn't follow the official OpenEXR spec, so it's something that we missed this time around. There are plans to try and increase compatibility with how different software handles multichannel documents, so do look out for updates there. It's a bit fiddly but there is a way to combine your monochrome images into an RGB pixel layer. What you'll want to do is select each layer and on the Channels panel, right click the pixel name's red/green/blue channel - eg if your layer name is Reflection.(red) it will be called "Reflection.(red) Red". Choose Create Spare Channel and it will copy that channel into the channels panel below. Once you've done this for all three layers, create a new pixel layer. Right click Pixel Alpha and choose fill (this just fills it with pure white so it's visible). Now right click each spare channel and choose "Load to Pixel Red/Green/Blue". I've recorded a short video demonstrating this if it's helpful: https://youtu.be/gF2u5qoJ8L8 -
Hi Vinther, the sources panel not appearing was a last minute issue on Windows that didn't get spotted (it only started happening on a release candidate build). Apologies for that, it should be fixed soon.
-
Hey Slawek, you are correct, RAW images are processed in unbounded 32-bit and then converted to 16-bit integer when you develop them. You can change this behaviour if you want and stay in 32-bit - see 32-bit Raw Development. The Develop persona has admittedly gotten slower, especially since version 1.4, because it now operates in 32-bit. This allows increased precision and is beneficial to some specific workflows, but is more demanding. Hopefully performance gains can be achieved - do look out for future customer betas and updates. Hope that helps.
-
Histogram shape/position
James Ritson replied to kesbabe's topic in Pre-V2 Archive of Desktop Questions (macOS and Windows)
Hey all, this is likely because of the unbounded colour format and linear colour space that is used for RAW processing - when you click Develop, the colour space is converted, and unless you set the output to 32-bit, the colour format is also converted to 16-bit integer. Whilst this offers increased precision and quality for RAW processing, the histogram range will appear much wider compared to the developed image. This explains the differences in the histogram but doesn't offer a resolution - will let you know if there are any potential solutions to this. -
Possibly, we found a similar thing in the office, but only with 16-bit and 32-bit documents. Are all your AP documents 16-bit? Do you have an 8-bit one you could try? (Or perhaps convert one to 8-bit and save it as a new file?)
-
Well, doubling the list would have required another 130 videos - maybe we'll save that many for version 2.0 ;) It's my intention over time to go back and re-record some older videos - not only is the presentation smoother in more recent videos, but there's something to be said for not over-complicating them. The first few sets of videos were trying to cram a lot of functionality in (a good example is the Image/Canvas Resize video) and as a result they're a little hard to follow. A good analogy, I feel, is that they seem a little like technical documentation: Everything you'd want to know is in there, but good luck deciphering it! Over time, then, you'll hopefully start to see some of these videos be updated and improved. I'll post updates in this thread as usual. Cheers, James
-
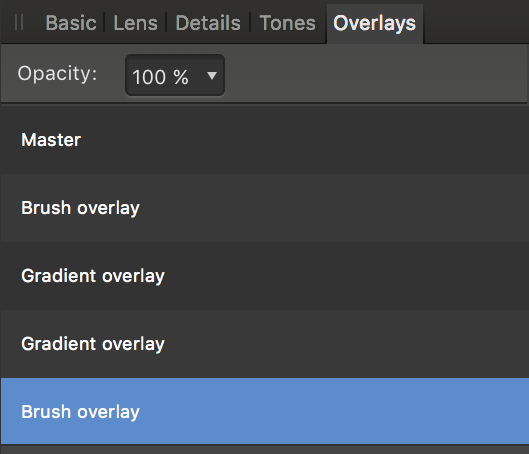
Hello, yes, you can do this. If you navigate to the Overlays panel on the right, you can create paint/gradient overlays and also switch between them. See the attached screenshot for an example. Hope that helps!

-
Hey Andrew, on the Mac side I just tend to keep it simple and use Finder! I keep a top level Photographs folder on an external drive, and within that folder I have many subfolders with a naming convention of Date - Description. So for example, I might have: 2012-08-22 Whitby 2013-02-12 Elizabeth Nature shoot 2014-05-05 London visit 2015-12-23 Winter visit And so on. I just plug my SD card into a card reader (or the back of the iMac) and copy the images across into one of these newly created subfolders. Because Apple's Core Image support for raw images is really good and kept up to date, you can just preview all of the raw files within Finder and quickly hit the space bar for a larger preview if required. Once I find an image I want to take further I just drag-drop it into Affinity Photo. Also, if you're trying to organise several photos, say for HDR bracketed shots or panoramas etc, you can just select multiple files, right click and choose Create new folder with selection - really simple and efficient. I've never actually investigated, but I believe you can also tag/rate photos within Finder? So you could colour code good photos, rejected ones etc. I might be talking nonsense with that though!