Search the Community
Showing results for tags 'line'.
-
 Would be nice if you could add this. I know I can achieve it by closing open curve, but Illustrator does it and it's useful.
-
 Ok, I get it, each line or curve drawn gets it's own layer. Sometimes this is more of a pain when I am trying to edit. I know you can group the layers, however it still isn't convenient when going from one curve to another. Is there any way at all to put these lines or curves on one layer to make it easier to edit them, like other apps do? I am working in vector here.Forgive me if this question is in FAQs, but I do not have time to go through them all.
 -
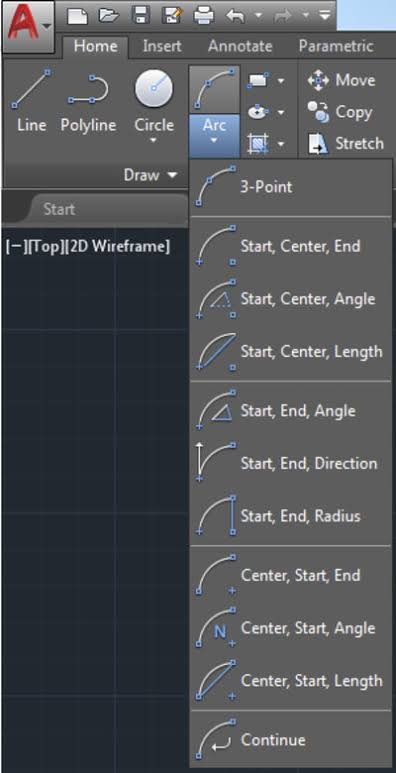
Greetings I came from Autocad technical draws and think may be useful to find tools like straight line, arc and other basic geometrical forms. I know you can do straight line with pen tools, but arcs from two points, from three points, switching from start, center, end or center, start, end can be easily made. Other nice feature can be import dxf it dwg technical draws. Thank you
-

Inconsistency in Preview Mode and program state
poser1999 posted a topic in V1 Bugs found on Windows
Summary Many tools provide a preview mode, which shows the effect of using the tool prior to execution. This preview mode is very useful, since it allows the user to see the result of applying e.g. the erase tool, or a brush, etc. Unfortunately, it does not work consistently: it ceases to work if the user tries to draw a line that connects the previous application of the tool to its current position using the shift key. The situation is further exacerbated by the fact that the position of the previous application of the tool (the origin point of the line) is lost when a line is created and then undone (e.g. if the result is sub-optimal, which cannot be determined prior to execution due to previously mentioned inconsistency in the preview). Directions to demonstrate preview mode inconsistency On a blank canvas, move the pointer (set to any paint/brush/erase tool that allows the use of shift to create a straight line) over the canvas. A preview of the effect of the tool becomes visible. Left-click while on the canvas to apply the tool. Move the pointer some distance away from where it was previously applied. Now a preview in the new location is shown. Hold down the left shift key. Expected behavior For tools that can be applied in a line via the shift key, the preview should change to reflect the outcome of the line being applied; e.g. for the erase tool, it should show a line consisting of background color/transparency that connects the previous invocation of the tools to the new cursor position. Actual behavior The preview continues to show the result of applying the tool in a single location (located at the pointer position). But when applied with the L-shift key held down, the actual outcome differs from the preview. As I mentioned before, this wouldn't be so troublesome if the program reverted all internal parameters to the prior state upon execution of the Undo command. But Undo is inconsistent in that it only reverts visual changes, rather than all internally stored values as well (e.g. l coordinates of where a tool was applied in a prior step). Directions to demonstrate inconsistency in program state Load an image, then use the erase tool in line mode (L-shift) to remove part of it (e.g. for isolation of a foreground object contained therein): apply the erase tool to an origin point, then hold down L-shift to remove the part of the image that forms a line from the origin point to the current pointer position. Execute the Undo command (CTRL-Z). Holding down L-shift, apply the erase tool once more. Expected behavior Upon executing undo, the previously created line is removed. Furthermore, applying the tool with L-shift held down should once again create a new line stretching from the current pointer position to the position where it was applied in step 1. Actual behavior The line created does not connect to the point created in step 1, but rather to the point where the tool it was applied in step 3. This is not only inconsistent ("Undo" only reverts some parameters to the previous state, not all), but unfortunately reduces the utility of applying tools in a straight line, since the origin point has to be recreated in its previous location (sterp 1), which frequently cannot be done easily/consistently (e.g. if the tool applied uses an alpha gradient -- which includes essentially all tools that can be applied as a line). -
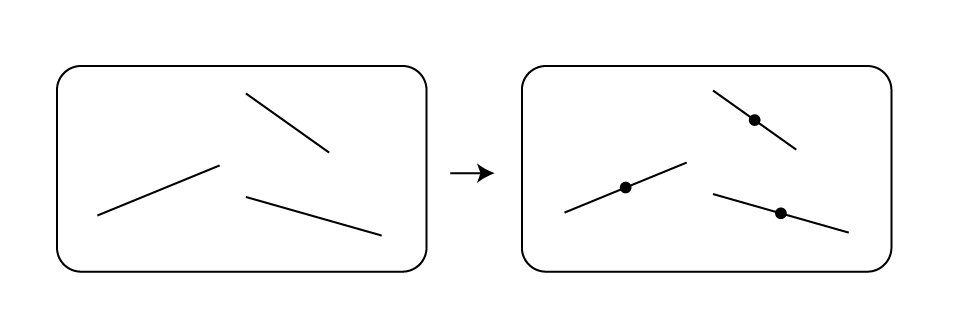
 Hello guys, I'm currently testing out the Affinity suite and I have to say, I'm fairly impressed so far. I'm really considering making the jump and say goodbye to Adobe. However, there are still some functionalities I use daily that are still missing. From what I've seen, the selection feature to include "Select > same > ..." is something people really want too. I really hope this will arrive soon. Anyway, I wanted to ask you guy if you knew how I coud do to put an ellipse at the center of a line ? I have multiple separate lines and need to put a small circle in the middle of each. On Illustrator, I'd just select a line, "select > same appearance" to select all the lines and "Convert to shape > ellipse". These 2 features don't seem to be available on Affinity. Any ideas how to do that ?
-
 There have been similar posts earlier, but as it seems like nothing much has happened, perhaps the topic needs a push? Anyway, it seems to be two general kind of illustrators when regard to having strokes and lines scaling with objects; the first kind is the methodical one, who prefers to build up the drawing first and adding brushes afterwards, which I guess is a natural technique developed from the early days of vector based illustration. Then you have illustrators like me, who are newer to the game and who finally learn vector through programmes like Affinity Designer on an iPad, using Pencil. It’s fast and smooth and intuitive and you can easily swap between vector and raster. That makes it very easy to draw almost like you would draw on paper. You thrown down a quick sketch in raster and continue in vector, adding quick brush strokes, varying the brushes etc. Finally, you add colours and might do some shading in raster as well. But then we have the problem with scaling with objects. For the first kind of illustrator it’s preferable that this is not on by default. For the second kind, it would be great if one could have it on by default. I think that vector illustration has developed a lot since the beginning and is still developing, thanks to the development of software and hardware. Therefore I think lots of people would have welcomed such an option in the preferences. It would have been enormously time saving.
 -
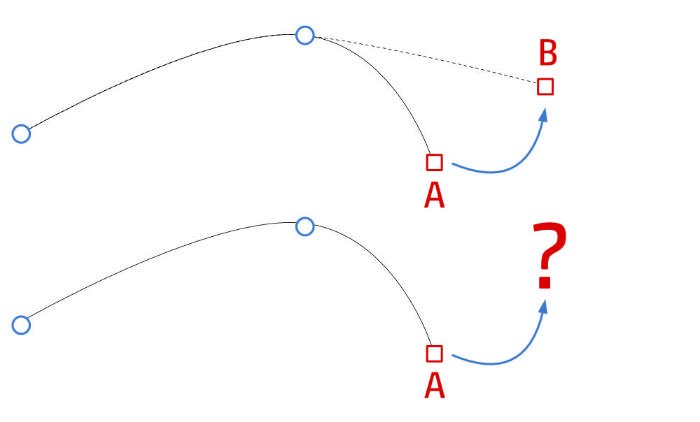
 Hello, I have two lines. From the first, I move point A with the node tool to position B. Now, I want to move the point A from a second line with the same values. How can I do this?
-
I have a project in which I need a star shape with several points—easy. But I also need the points of the star to “wave” like sun rays. I know I can convert to curves and individually add nodes to each of the points, and then “bend” the lines to create the wavy rays. I want to know if there’s a way to create those rays universally—in other words, editing one star point edits every star point. Is this possible?
-
 I’ve noticed that I can draw a line (nothing to do with text) then change its properties and the Outline Style in the Character Studio changes. See attached GIF. Also, changes to the Stroke and/or Colour properties of the line change the Outline Style in the Character Studio too. I don’t think these things should be connected as the Line properties for a line/curve should not have any effect on Characters that the object does not have. Or, to put it another way, why is the Character studio showing changes to the Line properties of something that does not contain text? Or, to expand on that a bit, why are the Character/Paragraph/Text Style studios active at all when the layer does not contain text? Have I misunderstood something basic?
-
It is my understanding that the Texture Line Style is controlled by the Brushes studio in Designer but, since there is no Brushes studio in Publisher, what does it do? I can’t seem to find any way of altering what it does and it acts the same as the Solid Line Style. The ‘preview’ in the Context Toolbar changes but the line stays the same. Am I misunderstanding what is supposed to happen?
-
 How do I draw a straight line across the top of a column?
 -
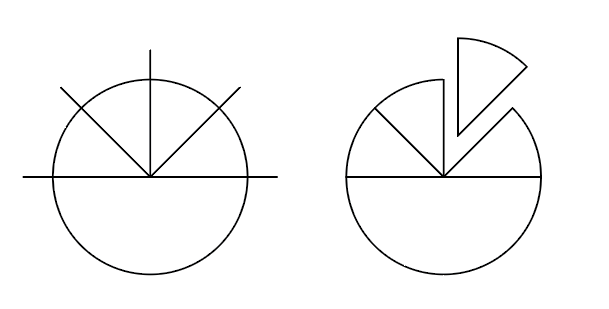
 Hello ! this is not to mention a bug but more of a question and if it does not exist yet a suggestion. It is possible at this stage to draw a straight line with the pen tool then use some filter or options to create a Zig Zag from it ? Like one would do to make waves or to illustrate waters flowing/moving. i know it was possible with Ai but not yet tried to create it with Affinity Designer (Beta or Retail), so i ask. if it is not implemented (such a filter or a straight function to make zik zag of vector lines and smooth them or sharp them) then i would ask it (for both Windows and MacOS) because it is helpful and time saving and very useful for logos design. Blessings !
 -
 When I zoom out the canvas in both AD and AP I get wavy lines when using the brush tool, not super noticeable but still annoying. But when I zoom in the canvas the lines don't seem to have this problemas. I also tested in Clip Studio but didn't get any wavyness. I use a Cintiq. Also I have been experiencing Lag.
 -
 How do I create a line from point C perpendicular to segment AB?
-
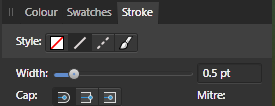
Display of stroke width does not dynamically change as i move the slider. As I move the slider for Width, the display of the point size does not change. When I let go of the slider control, then the display shows the width.
-
 Hi just bought this product for my Mac. Scope is working with svg files (edit and create). I'm unable to find how to draw lines (segments) terminating with arrows. I don't want to draw a triangle and groupo with line to generate an arrow but using a native function present in any drawing tool Can someone help? Thx Sergio
 -
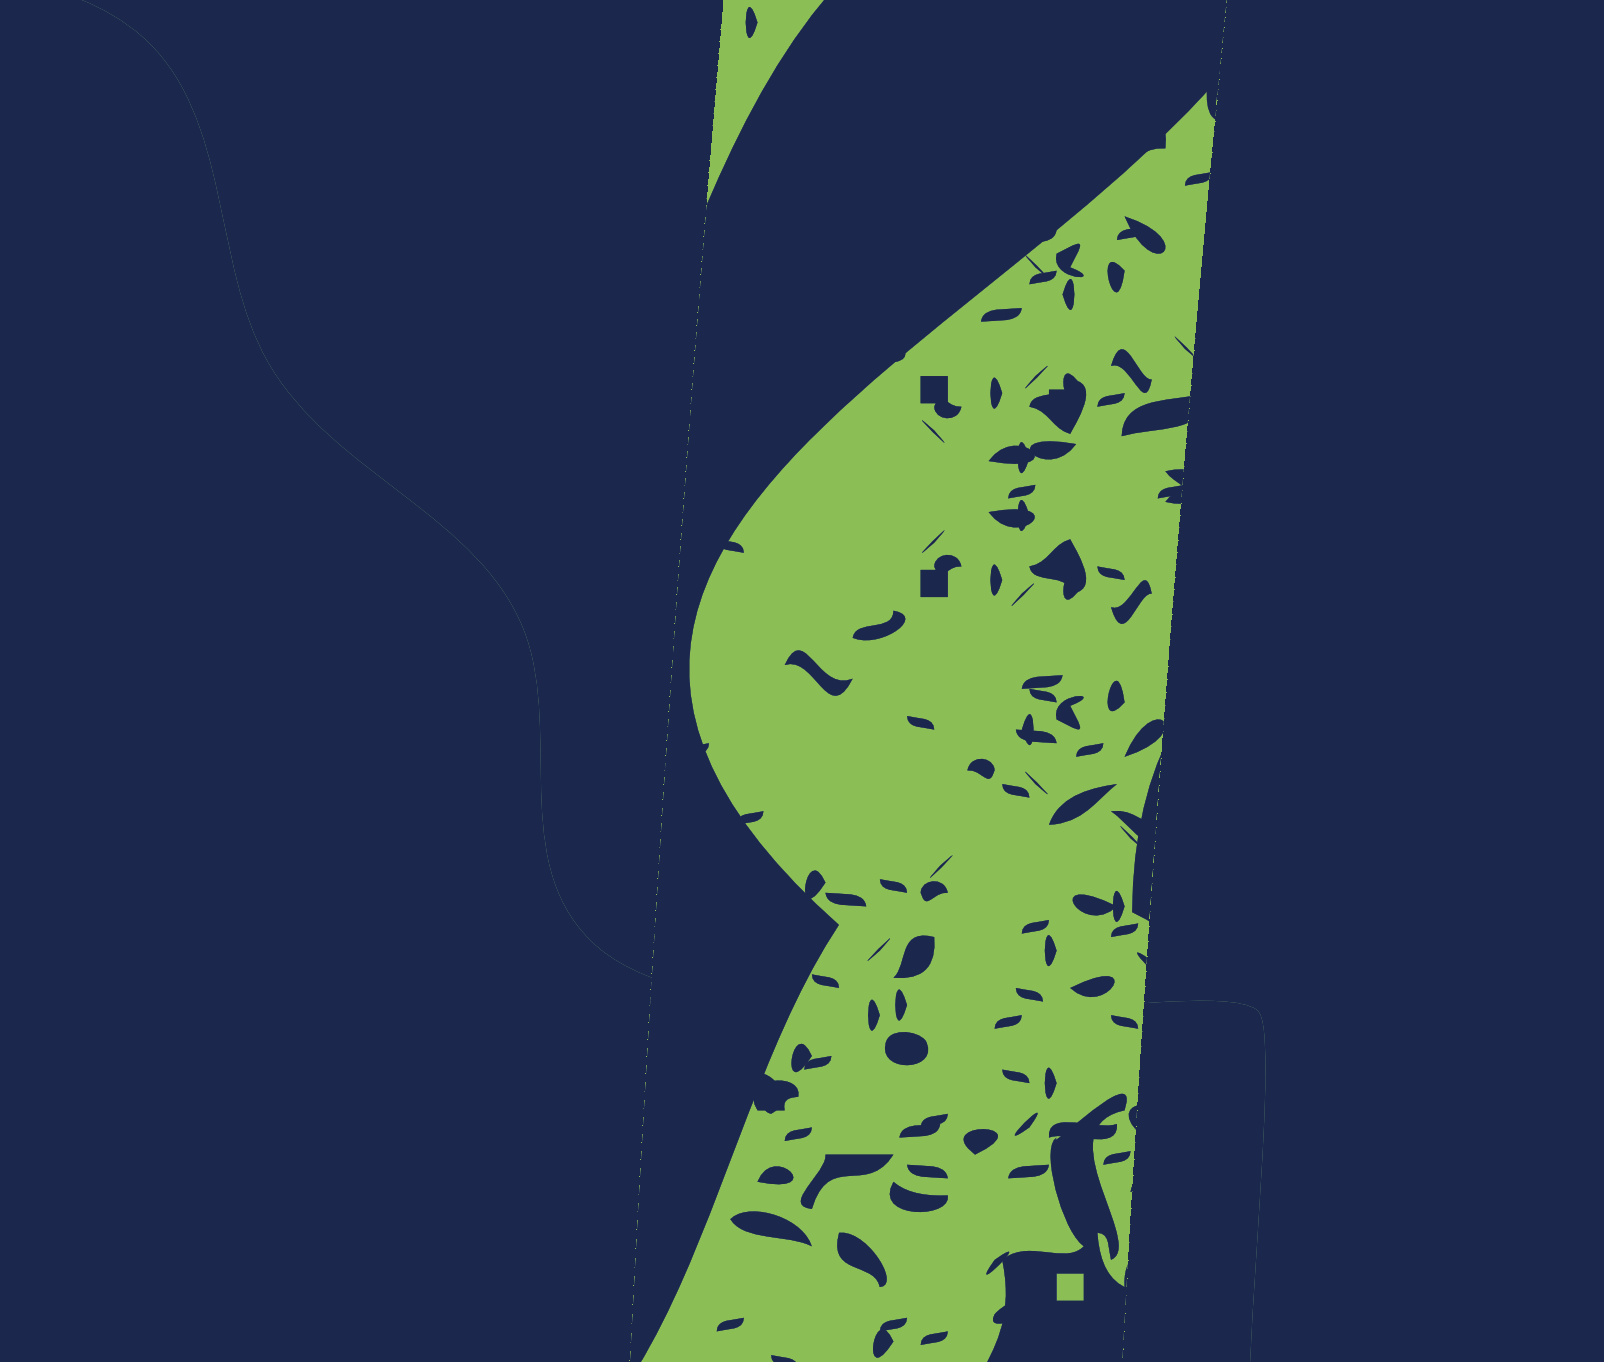
 I’ve lost nearly a day of work trying to fix this issue, and am not ready to give up on it yet. I would really appreciate the help of some of the Affinity Gurus with this issue, as it is driving me crazy. I’m using the latest version of Affinity Designer on Mac. I’m working on a vector illustration of a shark. and I’ve attached a sample of the project I’m working on below, along with some screenshots. If you look at the gills, on one layer (gills erase), I’ve used an erase to punch through to the green. Then, I’ve duplicated that layer on top, change the erase to normal and used it as a container for a vector texture. Unfortunately, I cannot get rid of a hairline thin stroke around the border of the shape. Only it isn’t a stroke, as the stroke is deactivated. More of a border that maintains it’s size as you zoom in and out. I though this could just be affinity showing me the outline of the shape, but this unwanted out carries through to the export. You can see exactly the same effect between the layers ‘lower side’ and ‘upper side’. This line is the same size no matter how much you zoom in or out, and again, it carries over to the export. I’ve researched extensively on the forums, and found no fix so far. Some similar suggestions hinted at an issue with anti-aliasing, but I’m not sure that it the issue. Any help on this would be really appreciated. Affinity_Error.afdesign
-
Please show me where the ends setting tool is in Affinity Publisher like Pageplus offers? I have been looking for it like crazy. Thanks.
-
 Is there a line tool in AP? All I want to do is draw/paint a straight line from one point to another. Maybe extend the line as needed?
 -
 Hey guys I just recently made the switch from Adobe ecosystem to Affinity Designer & Photo because i'm not trying to shell out $600 a year for the rest of my life. I'm getting myself adjusted with Designer right now, but i hit a snag. I can't seem to Add/Remove nodes to existing paths like you could in Illustrator. I've tried searching in Help, but nothing comes up. Is this feature not currently available in Designer? If that's the case, then when can we expect this option in a future update? I only ask because it's something I use often. Thanks in advance for your help and time.
 -
 I use AP since the iPad Pro 12" and never had this problem before. Let me explain: I would like to draw a thin line at a new layer. I use the brush basic 4 pnt and choose black (or any other colour When I place the pen at the tablet I get a magnifying circel with pixels and the colour turns into the background colour. I thought I needed a new pen point but when I chagend it, I had the same issue. Please let me know what the solution is, it drives me crazy!
 -
.thumb.jpg.906d0128edf7eab95162b8f71c9e34a8.jpg) In Affinity Design for Windows I created a shape and gave it an outline. I then I messed around and put text on its path. It changed it so that now - there is no colored stroke/no line and I cannot re-add a stroke or fill it. What am I doing wrong? Windows 10 Latest Design update 3/2018
In Affinity Design for Windows I created a shape and gave it an outline. I then I messed around and put text on its path. It changed it so that now - there is no colored stroke/no line and I cannot re-add a stroke or fill it. What am I doing wrong? Windows 10 Latest Design update 3/2018 -
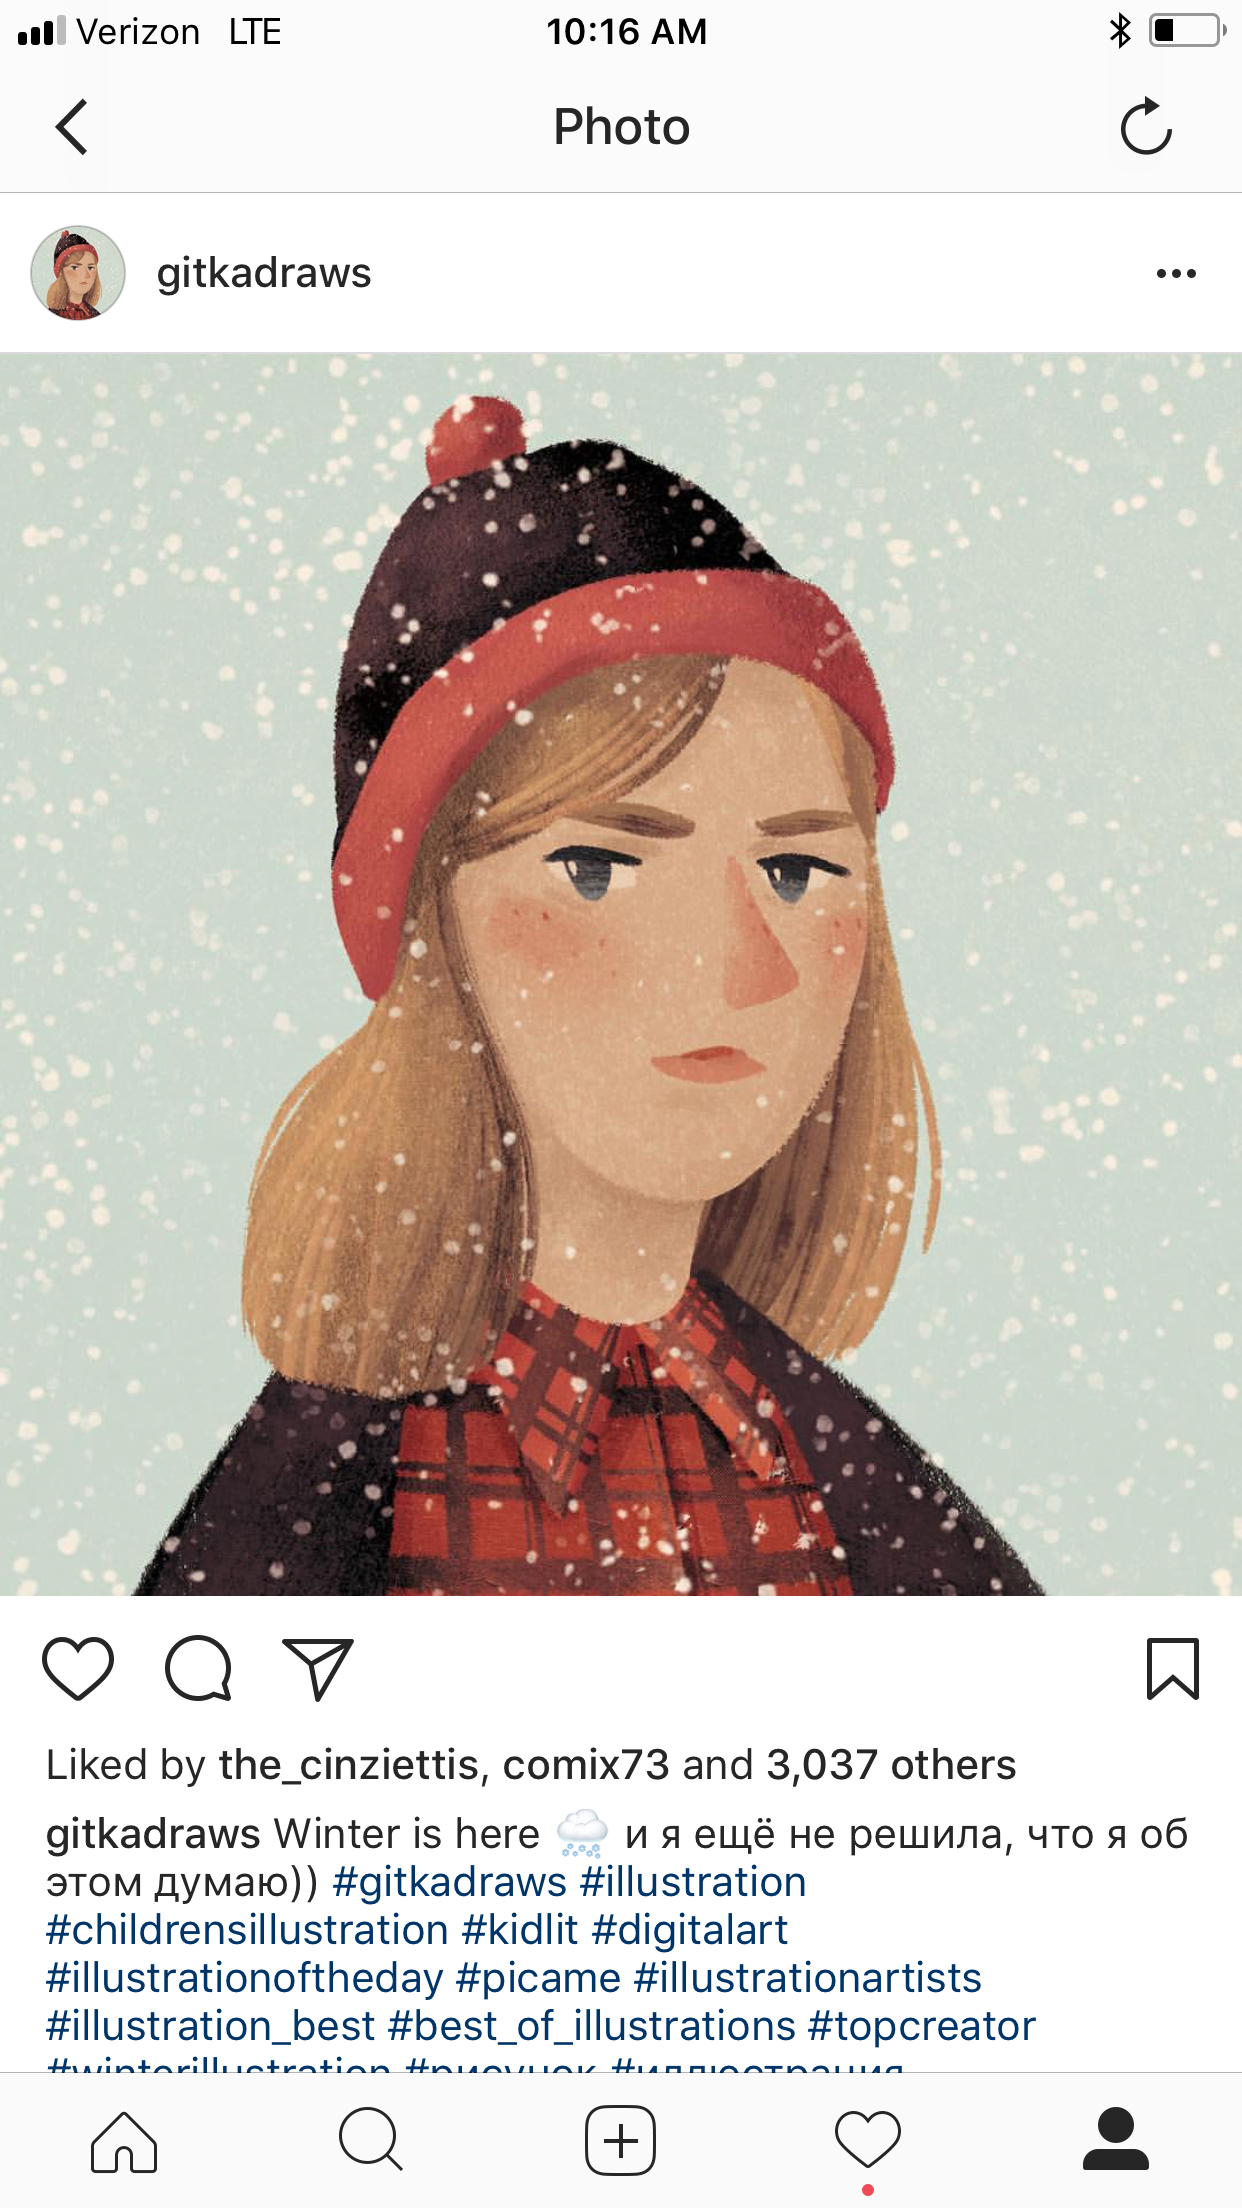
 Any suggestions on how to successfully and smoothly create more texture to the edges of my illustrations? When I chose a vector brush texture I like and use it for outlines, I experience two issues... 1. With affinty’s default texture brushes there’s a large “gap” at the closure 2. With brushes I’ve purchased, there’s not a “gap.” However, when I add any bitmap shading within my shapes, the lines stand out way too much because they aren’t being shaded (even when I expand the stroke). What am I doing wrong? heres an example of a texture in trying to achieve from @gitkadraws. Not sure if you can see the textures in this photo or not...
-
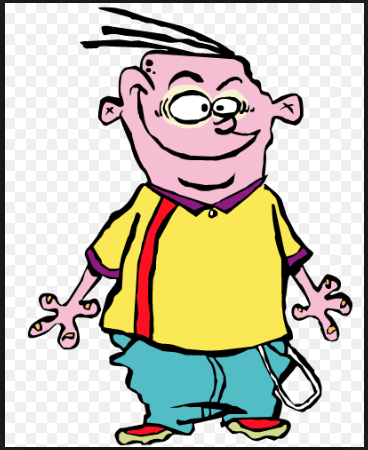
 Can anyone give me any tips on how to achieve lines similar to the style done in the show 'Ed Edd n Eddy'?The line widths are all over the place. Would this be done with a specific brush or by manually altering the line widths?
-
Can anyone give me any tips on how to achieve lines similar to the style done in the show 'Ed Edd n Eddy'?The line widths are all over the place. Would this be done with a specific brush or by manually altering the line widths?