Search the Community
Showing results for tags 'gradient'.
-
 Thank you for the surprisingly quick release of Photo Beta for Windows! I have a few questions / comments on RAW editing as a heavy user of Photoshop and its upstream ACR workspace. While I like that Serif actually chose a common interface for traditional photo-retouching / compositing as well as RAW developing there's also features I miss right away. Photoshop's RAW development allows for global editing of image properties – pretty much in the way the Develop Persona works. That way one can raise the exposure or increase contrast – changes do apply to the whole image. Apart from that one may use any combination of tools for non-destructive brush based operations, as well as graduated filters. The impact of any contributing tool may get changed at any point in time. Even after bringing the edited RAW image into the main PS application as a smart object and having worked for hours in a composition, one can still go back and each and any global, operation as well as brush based RAW operations are still Life. One at that point can even delete the original RAW file, as it has completely gotten embedded into the .psd. If so desired, one could strip out any changes and export to .dng again. The Affinity RAW editor seems not to have any of the tools I just described. Also, RAW development in Affinity seems to be understood as the first step in a linear stream of editing operations. One may of course re-enter the Develop workspace, but all tools have forgotten the settings one had dialed in initially. I wonder what your plans are in terms of RAW editing: Do you plan to keep Develop-setting Live? Is non-destructive brush / gradient-based editing with any combination of tools on the roadmap? I also wonder what happens if one uses a couple of RAW based images on a large Poster. In Photoshop one may use these images at their full size or as a thumbnail. But one can scale that thumbnail up again or paste it into a new file and raise the output size here. As the RAW information is encapsulated in the Smart Object one never loses resolution. Obviously one shouldn't go larger that the original RAW but for all smaller output sizes one can practically forget about resolution issues. Is there a similar solution inside Affinity Photo?
 -
So far I like what AD has to offer. I primarily use CorelDraw and when I first saw AD way back when it was Mac only. I am glad to see the transition to Windows. Inital observations 1. Conical Gradient tool AWESEOME! CorelDraw has had this for as long as I can recall. illustrator is only a cumbersome work around 2. pen and line tools good but if I may suggest a change. In order to change the still I need to draw a line first then add style or line type...it should be if I select a tool type and be able to select object before I draw for example blur blur effect or bevel. This way I can see the effects right away and not have to stop edit then continue drawing. 3. combining object in Coreldraw and illustrator the order is first or last object select. AD has it bottom object only, would it be possible to change this to an active object like in illustrator or Coreldraw?
-
 Hello, When I use the Gradient tool, I can not find the settings window. Where is it ? When I open the adjustment of the color palette, I can not paste a value from a right mouse click. Thanking you. Cordially
 -
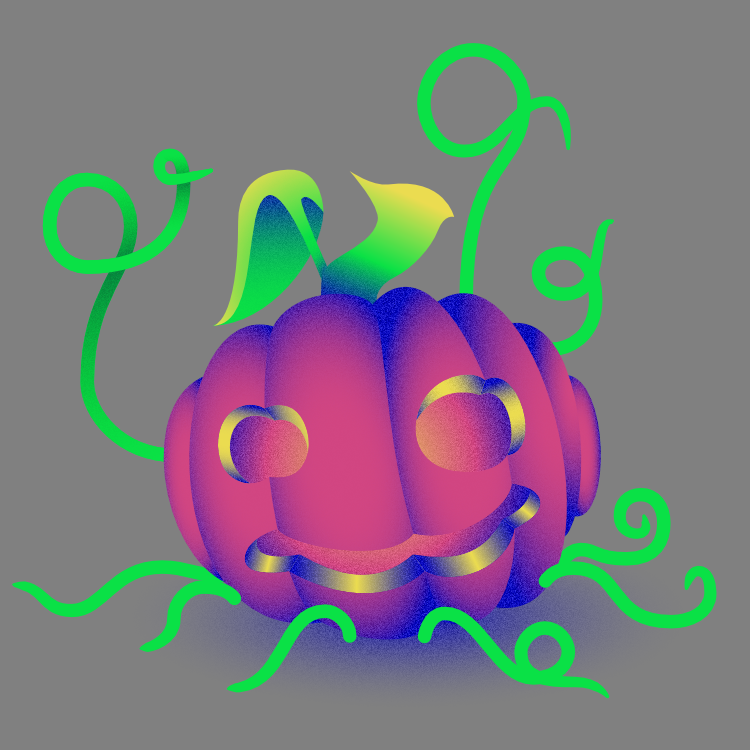
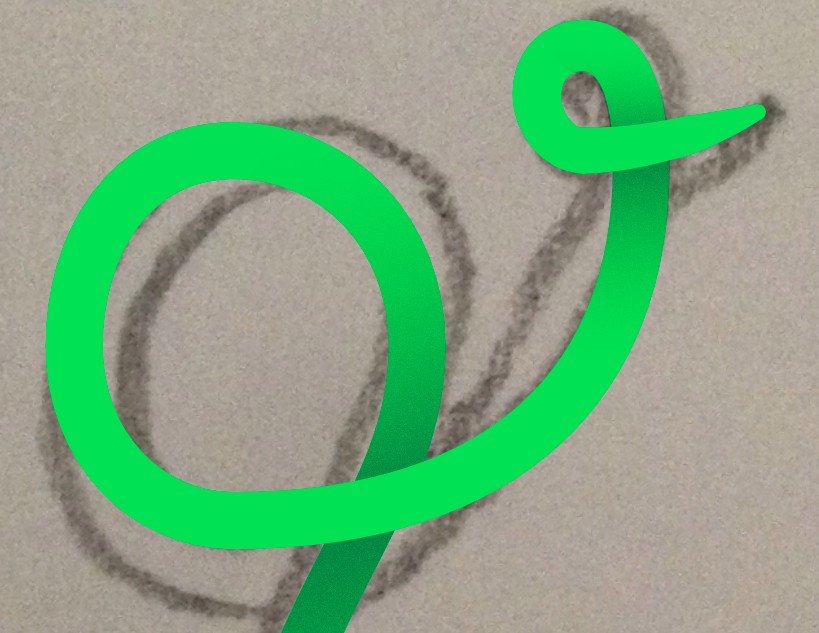
 Hey there! Not sure if this may come in handy or much of use, but it would be a cool feature I haven’t seen in any other App so far (if there are any pleas tell me): I was creating these sort of vines for an illustration in Designer and I tried several ways to create this »overlapping« effect, simulating depth. The vines were created with a regular outline/stroke with some pressure simulation. I then started to destructively split the path into several segments and apply gradients on some parts and place other segments on top (see images, I think you see what I’m talking about). Problem here is it needs further adjustments, cause every time the stroke width is slightly changing – that’s when I came up with the idea of a gradient that follows the form and curves of a stroke from start to end. Not sure if something like this is even possible, but let me now what you think. :) Also if anyone has a more convenient way for something this without necessarily cutting or expanding the stroke – I’m listening. ;) Have a nice weekend Dennis
-
I find the tiny swatches for gradients almost completely useless for identifying them. Setting swatches to large helps this a little bit, but not a lot, and, because it is a global change, makes the main colour swatches very cumbersome and destroys the neat and logical columnar arrangement of the colours unless you drag the palette out very wide. I really think it would help if gradients had long horizontal swatches that really would give the user a chance to see the contents.
-
 I watched the Affinity Photo tutorial for adding a graduated ND filter effect. The first process is to add a curves adjustment layer, change the curve and then add a gradient. That works fine, but assuming I've clicked away from that layer, how to I get back to be able reselect the gradient if I want to change it? I've tried simply selecting the curves layer and also re-selecting the gradient tool, but the handles for the gradient I applied are never shown again.
 -
A request to add an option for cubic interpolation to AD's gradients.
-
 Hello, I can't seem to work out how to do this. I've limited experience with Affinity Photo, using it mostly for simple contrast and exposure adjustments. I'm sure I'm missing something obvious but can't figure out how to apply a simple ND Filter effect to an overexposed sky. Thanks!
 -
I would like to be able to move the gradient and opacity gradient onscreen "stick". I keep having to redraw the gradient if it not right everytime. Thanks
-
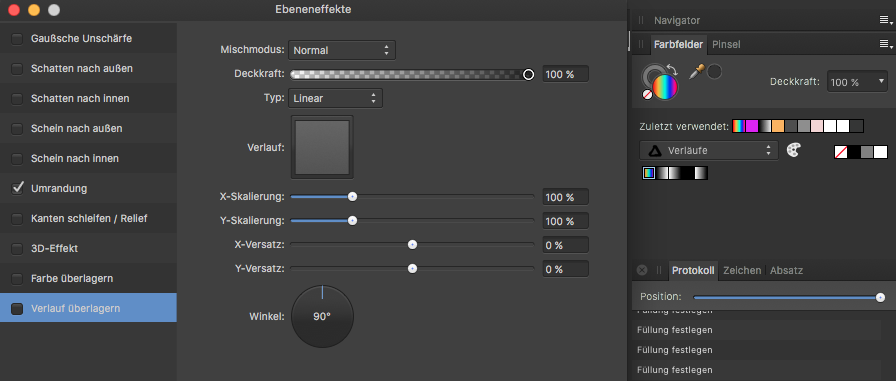
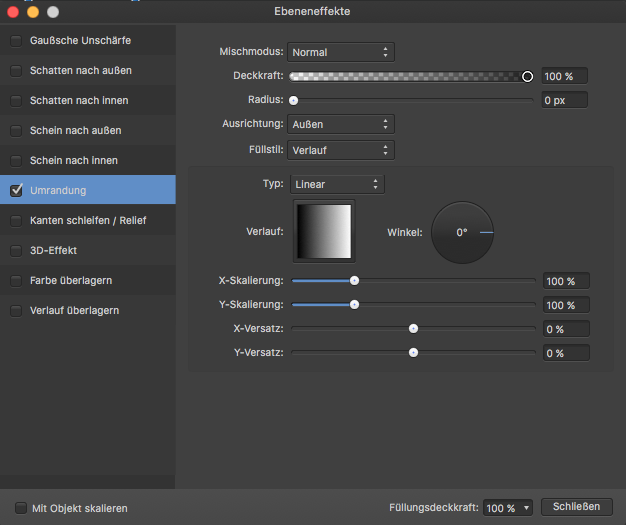
Hi, it would save a lot of time if the layer fx "gradient overlay" AND outline ("Umrandung" - see 3rd attached image) would have the same functionality as "color overlay": the ability of choosing swatches - gradients in this case. For a vice versa functionality - see also: https://forum.affinity.serif.com/index.php?/topic/25422-how-to-get-a-color-gradient-from-layer-fx-into-swatchesgradients/ Thanks for taking your time and thinking about it, Stefan.
-
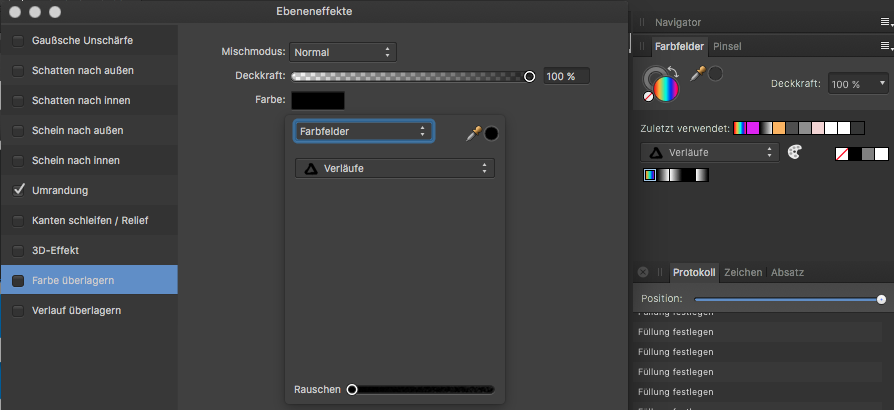
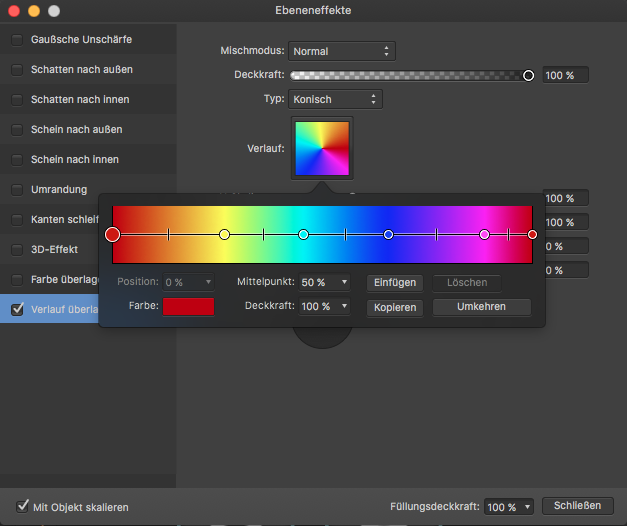
 Hi guys, I have created a color gradient in a layer fx (see image) - now I want to copy that gradient somehow or ideally make it a swatch/global gradient. But I don't see how. Thanks in advance, Stefan.
-
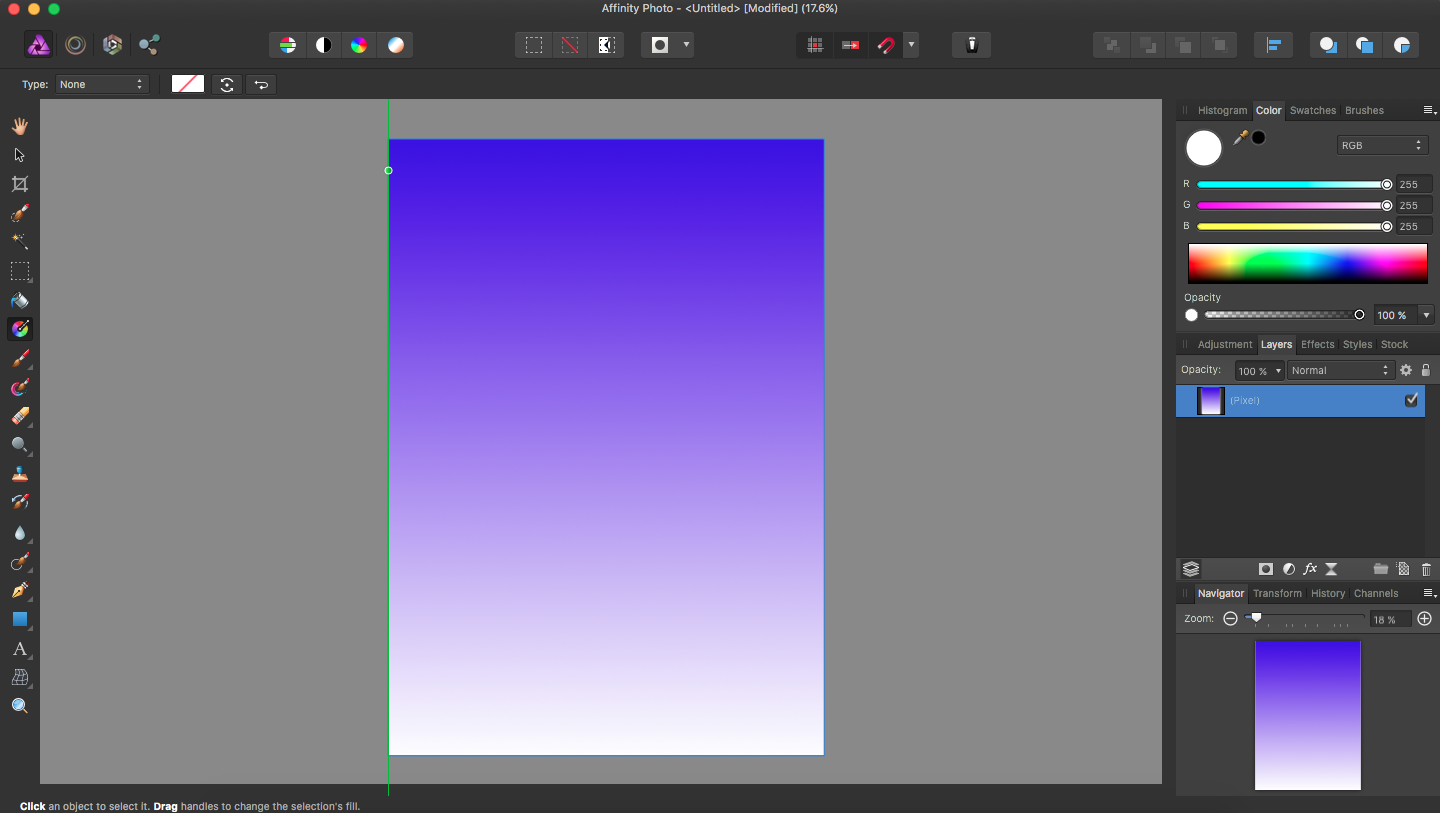
 Hello, I got a small problem. Also have I never used any kind of image editing software before. That's why I might need a while to understand. If I don't express myself well enough please tell me. I'll try again. I added a gradient layer in photo persona. Like the on in the picture down below. When I was kind of done I clicked somewhere else. Afterwards I thought about changing it up again. Just a little bit. But I couldn't get in there again. Everytime it added a completely new gradient layer. But actually I just wanted to change the colors a little bit. Can anyone of you tell me a way to change the gradient pixel layer after I was done editing?
-
 Can anyone give me some links to videos on fading images to transparency? I found one a while ago which helped me out, but it seems to have disappeared. Does anyone have a link to it? I recall the image being manipulated was in an underground garage. My issue is, I can create a box and try to set up the gradient, but on the image I get clear lines where the gradient box starts and finishes. How do I get this smooth? And where do I place the box in the layers?
 -
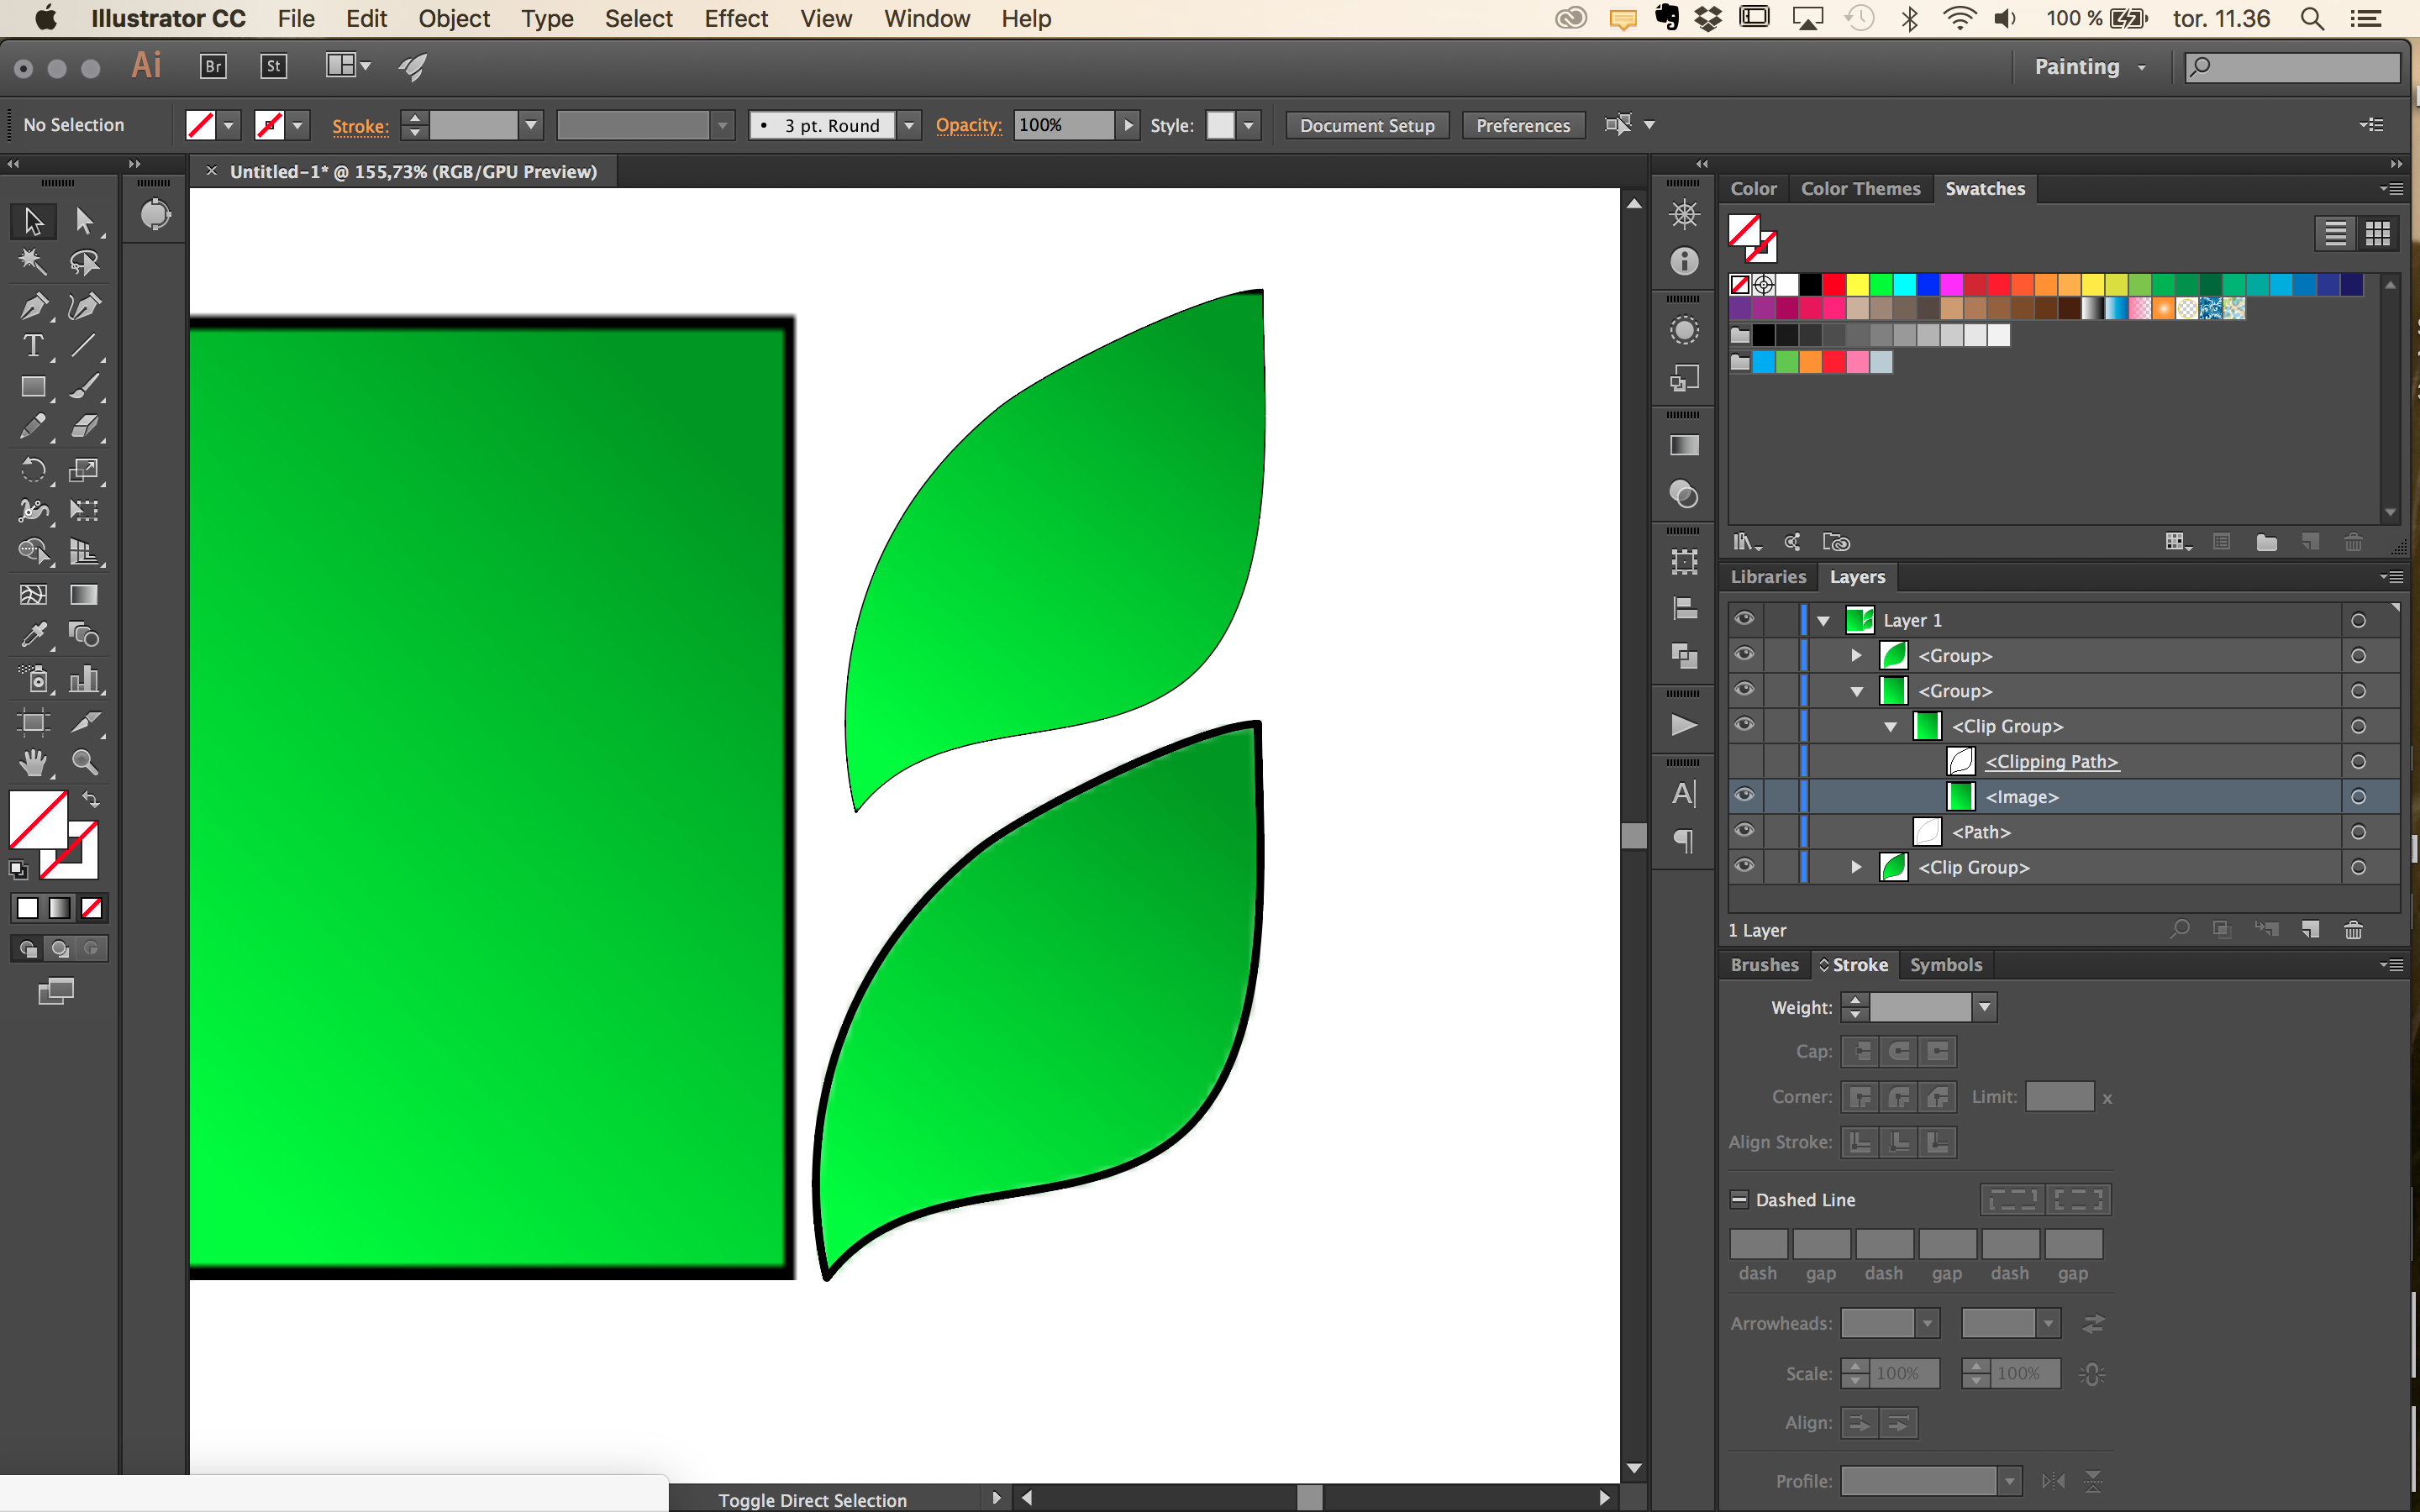
 Hey! I wasn't entirely sure if this went here, or feature requests, but I'll give it a go: I'm required to deliver work in .ai format, but I absolutely prefer using Designer as my main tool. However, whenever I attempt to import work with gradients in it into illustrator, it becomes rasterized. I'm not sure this is something you/Affinity can do anything about, but it really slows down my work flow when I have to remove all gradients and reapply them in illustrator, in order to use Affinity Designer for the work i need. Attached two files: One view of an object with a gradient in Affinity (tried with app store version and the current beta) and view of illustrator. Top leaf saved in Designer as EPS and "placed," bottom leaf copied and pasted. The square to the left is the raster image added within a clipping path that happens (see the layer panel.) Worth a shot! :) Let me know if I'm being impossible!
-
 Hi, I am creating a flower with gradient petals and I am pulling up a default gradient that is not of my choosing. I am trying to make changes, but sometimes it works, and sometimes it doesn't and I'm stumped.waterlily:affinity.afdesign
 -
 Hi, In the develop persona there is a tool called overlay gradient tool. Does this tool not exist in photo persona? The reason I am asking is because some of my scans are in monochrome (no RGB), and the develop persona is not able to handle none RGB files. Which reminds me... is it possible to converse color profiles? Cheers Peter
 -
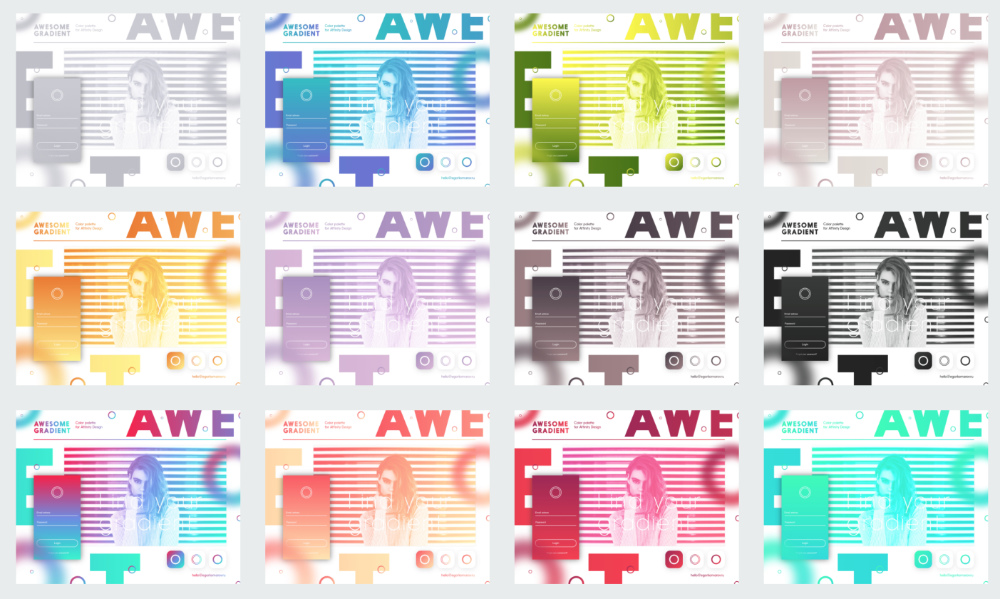
More than 150 ready-made gradiens in .afpalette format. I picked up the best solutions for your creativity. WORK WITH VERSION 1.5 Beta AND HIGHER http://www.demo.egorkomarov.ru/Gradient-palette-for-Affinity-Designer/
- 27 replies
-
- 12
-

-
 Hi folks, How can I simply do this? GradientTool&Mask.mov It's an almost everytime needs for me when advance editing a photo :( Am I missing something? Thanks for your help.
 -
 Maybe I'm missing something but I don't see how to create a closed curve shape with the pen tool and then assign it a vertically oriented gradient (N.B. horizontal gradient works just fine). Is there something I'm missing? Or should this be an enhancement request? Michael http://www.jmichaelsullivan.com
-
 Excuse me i don't know if it can be done in the windows version so i can't copy a gradient from an element to another, and i think the dropper tool is a bit hard to find and as said can't get the gradients. Pls give me a feedback.
 -
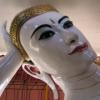 If I export my logo to SVG, it looks as expected in my browsers, or when reopened in Affinity Designer. However, if I import it to PagePlus or DrawPlus the gradients behind the Buddha's head have been flattened to a single colour. Is this a bug in PagePlus/DrawPlus or what? The SVG that was originally produced from DrawPlus looks right when opened in PagePlus, and that is the SVG that I opened in Affinity Designer for editing. When exported again as SVG and imported into PagePlus/DrawPlus, the colours have changed as in "Discoloured Logo.png" AIM Logo.svg
-
 Hi guys, Just started using the beta, and thought I would make something. Started using the gradient tool and it's a little bit clunky. I can't select the little colour points. They are not coming up properly...
-
 Hello, I try to create a circle filled with a colorgradient. But the center of the colors is always at the left border of the circle and not in the middle. Is there a way, to adjust it into the center of the circle? Thanks for any ideas Frank
 -
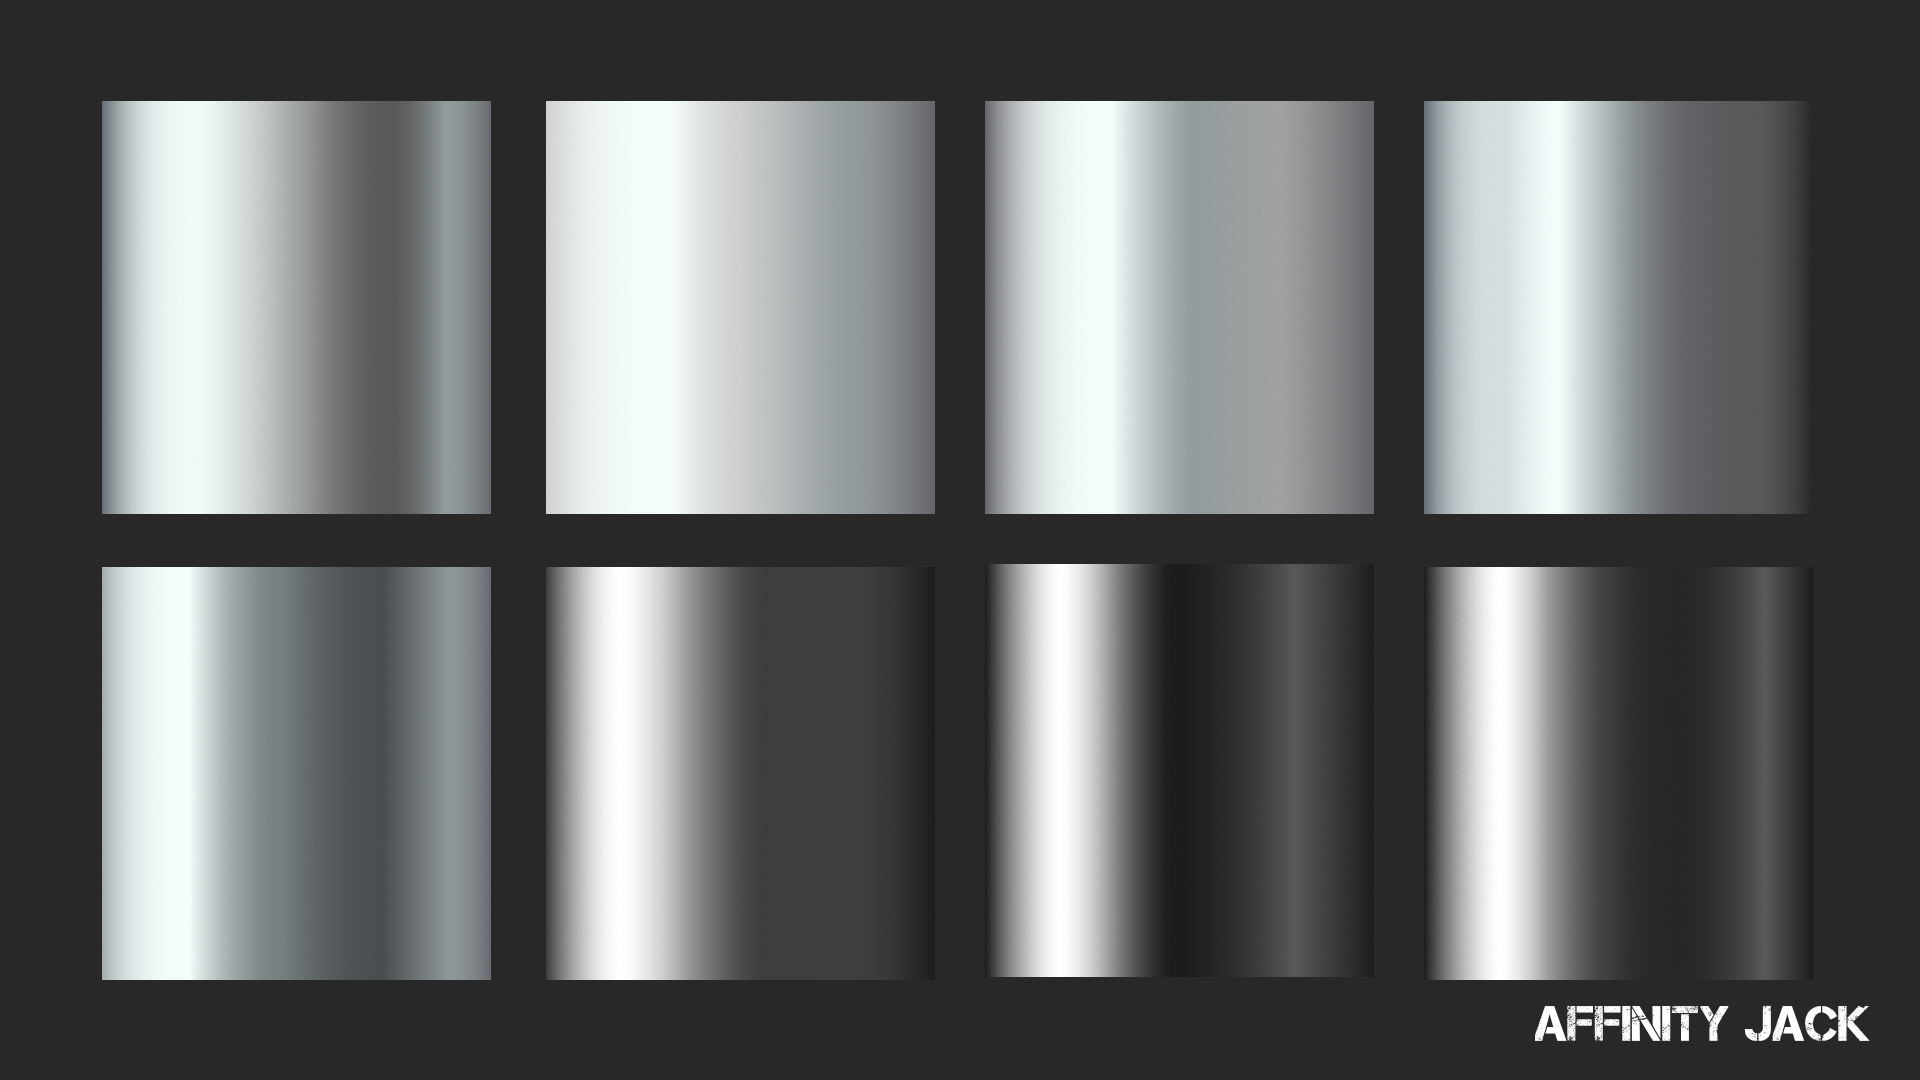
 Hi, In diesem Affinity Photo Tutorial zeige ich wie das Verlaufswerkzeug funktioniert. Dazu erstelle ich einen Metall-Verlauf, definiere Farben und Übergänge, speichere ihn, schaffe dazu Paletten und zeige wie man ihn exportiert oder importiert. In Zukunft werde ich auf unserer Website einige Verläufe zum Free Download zur Verfügung stellen. Hi, In this Affinity Photo Tutorial, I show you how the gradient tool works. I create a metal gradient, set colors, fades, save it, create palettes and show how to import or export. In future, I will provide some metal gradients on our website. Farbcodes für den Beispiel-Verlauf / color codes for the example of metal gradient: (von links nach rechts / from left to right) 1) #1C1C1C 2) #FFFFFF 3) #A0A0A0 4) #3D3D3D 5) #272727 6) #595959 7) #1C1C1C Viel Spaß Euer Jack Video-Tutorial auf YouTube
- 3 replies
-
- 2
-
-
- Affinity Photo
- gradient
- (and 5 more)
-
 Hello, I'm new to the forum so apologies if this question has been asked before. Anyway, I now and then create vector stock images and this is the first time I've done the work with Affinity Designer, mainly because I cannot stand Adobe Illustrator. But the problem is that stock agencies usually demand you send them Illustrator compatible eps files. Therefor I always check the final art in Illustrator. When importing the eps (and pdf) files I created with Affinity, I noticed that the gradient fills have been rasterized to bitmaps (this is a usual phenomena with other programs as well). Is there any workaround to import Affinity created files to Illustrator with the gradients intact. They are simple two color gradients, nothing fancy. It doesn't have to be eps or pdf, anything will do, as I can save them as eps in Illustrator after I have checked that everything is OK. The only solution so far is to create the gradients in Illustrator. -Paul
- 9 replies
-
- 1
-
-
- gradient
- illustrator
- (and 3 more)