gumbo23
-
Posts
273 -
Joined
-
Last visited
Recent Profile Visitors
2,146 profile views


-
 gumbo23 reacted to a post in a topic:
How to remove background fully?
gumbo23 reacted to a post in a topic:
How to remove background fully?
-
NotMyFault reacted to a post in a topic:
How to remove background fully?
-
How to remove background fully?
gumbo23 replied to gumbo23's topic in Desktop Questions (macOS and Windows)
Amazing! Much appreciated. And you're right: Hamburg is pretty great. St. Pauli rocks -
gumbo23 reacted to a post in a topic:
How to remove background fully?
-
gumbo23 reacted to a post in a topic:
How to remove background fully?
-
How to remove background fully?
gumbo23 replied to gumbo23's topic in Desktop Questions (macOS and Windows)
This is great - would you mind sharing the file with me? I couldn't figure out how to mask it. I'm way out of practice! -
When doing erase white paper, I still get a lot of the background. What operations do I need to perform in order to completely erase the background?

-
So once the MP is created, you cannot transform the text box in the document itself? Has it always been this way? I feel like I've only noticed this a few times, but not all the time. Good to know - thanks Dan.
-
Thanks - but why would I delete a text frame from a Master Page, when the whole point is that any MP will have a text frame in it? And how do I avoid running into this again? Or - is it not supposed to matter that the text frame cannot be detached? It's been a while, and I'm not sure if this is a v2 thing.
-
-
There is no lock there.
-
How can I unlock it?
-
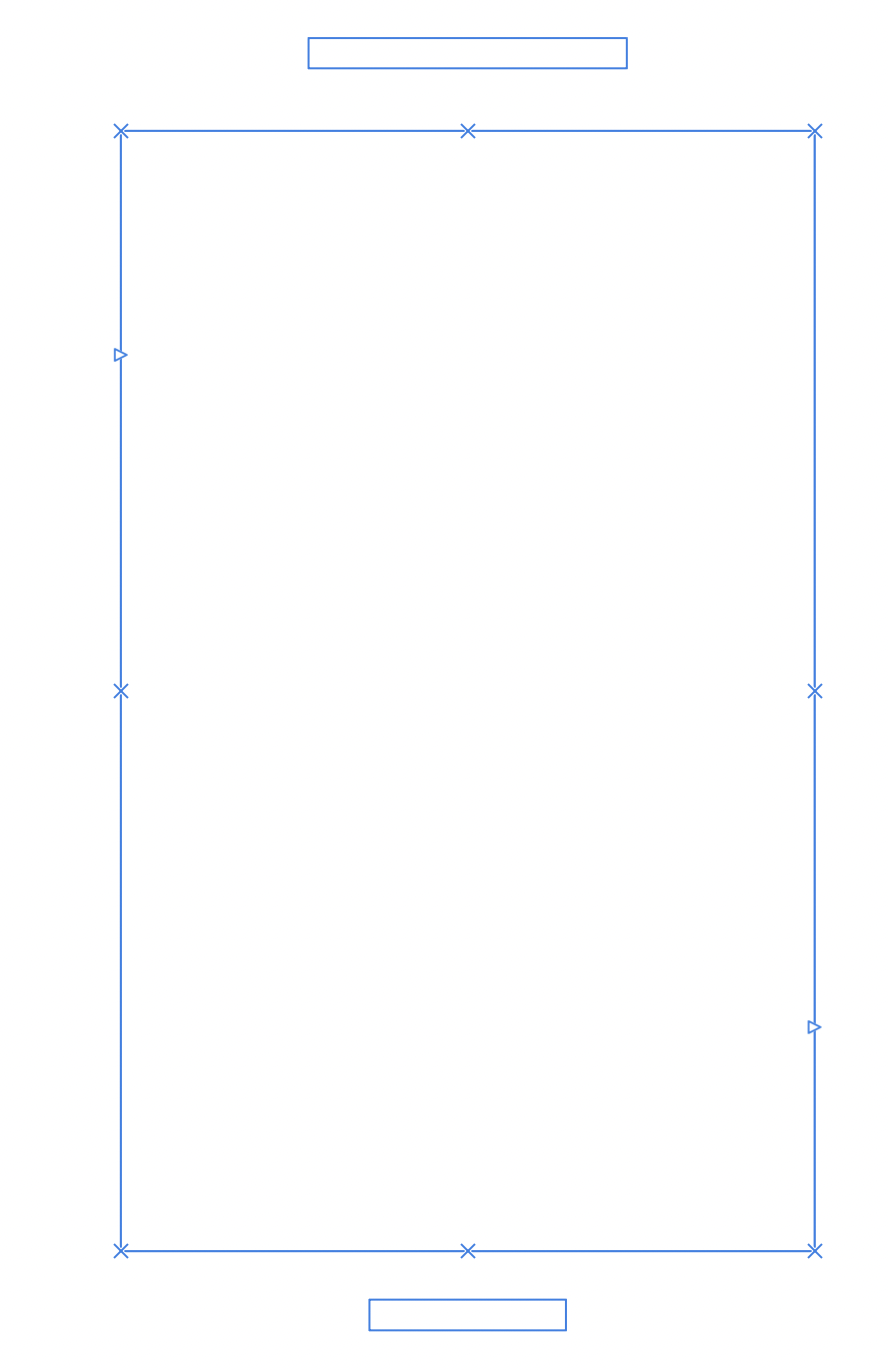
Can someone remind me what the blue Xs are on text boxes? I fiddled with some view options and now cannot move text boxes. Thanks
-
And now it will not work Steps: I paste in the full text and it overflows. I then hold shift and click the little arrow, and it produces enough pages to carry all the text. But it does not actually flow any text in. How can this be fixed?
-
Margin / text boxes out of alignment
gumbo23 posted a topic in Desktop Questions (macOS and Windows)
I wanted to move my margins out - getting text of a novel to sit further out from the gutter. But, when I moved them in the document setup, then moved out the text boxes in the master page to sit in line - the rest of the book has not followed suit. I have different blue lined boxes with text in one place, and margin boxes elsewhere. The correct master page is applied. How do I fix this? And what is causing it? It seems like it should work. -
gumbo23 reacted to a post in a topic:
In Publisher v2, how to link text boxes across entire book?
-
Works perfectly! Thanks Nathan
-
To save myself linking every spread by hand, how do I quickly link all text boxes when generating many new pages? I'm on v2 and can't recall how this is done. Thanks.
-
gumbo23 reacted to a post in a topic:
MM units in Publisher confusion
-
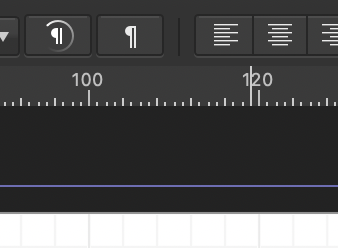
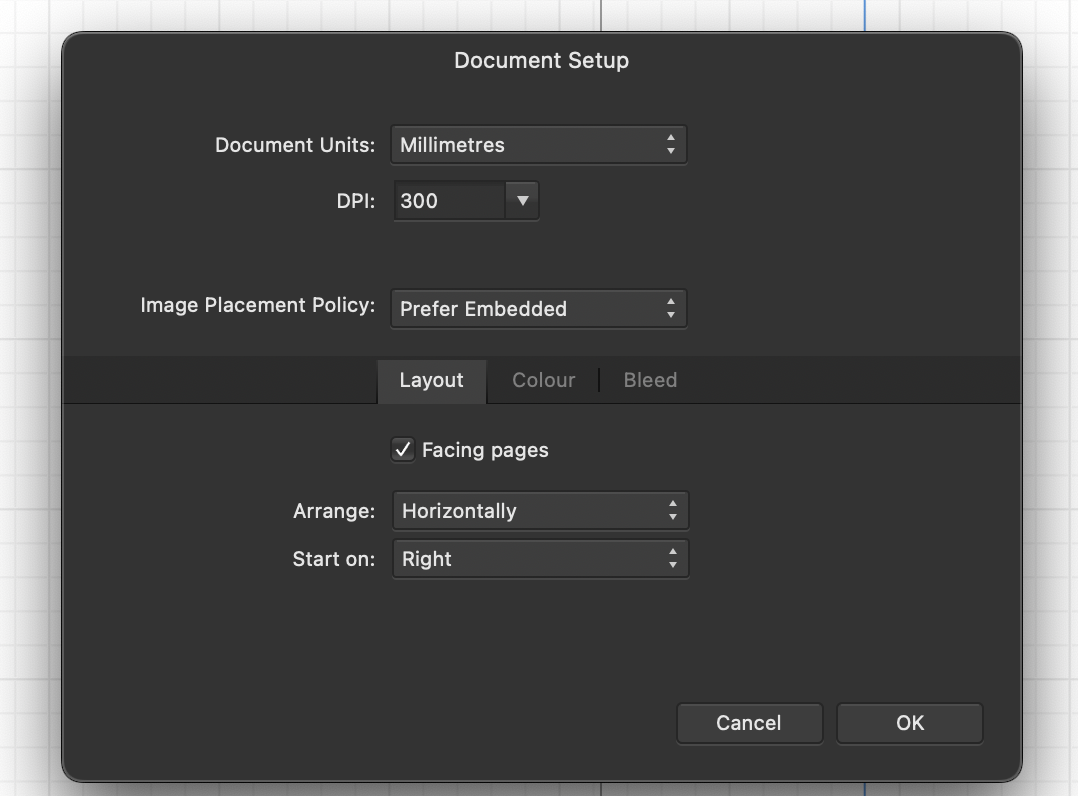
I've tried changing the units in Publisher to mm, but the ruler is subdividing in units of 4. So the larger markings are not for every 5 mm, but for every 4. So between a 20 mm gap there are 5 sections of markings, rather than 4, which is confusing. See images if this is as unclear as it sounds. Is there a way to fix this?
-
gumbo23 reacted to a post in a topic:
Cannot add FX to image in frame
-
I'm beginning a new project, and am rusty. I've created a master page for an image on the left and text on the right. But, dragging an image into the image frame, and switching to Photo persona, I cannot add an outline to frame the image. If I click fx in the main panel on the right every fx option is greyed out. How can I fix this? All my images are PNG. Would this affect the process? Thanks. Using 1.10.6 and Ventura 13.2.1 Screen Recording 2023-02-28 at 11.29.41.mov