Search the Community
Showing results for tags 'gradient'.
-
 Sometimes I need to affect only a very narrow range. That is impossible with a curve. Here it would be helpful if I could switch from curve-drawing to manual drawing with a pen-tool
 -
Sometimes I need to affect only a very narrow range. That is impossible with a curve. Here it would be helpful if I could switch from curve-drawing to manual drawing with a pen-tool
-
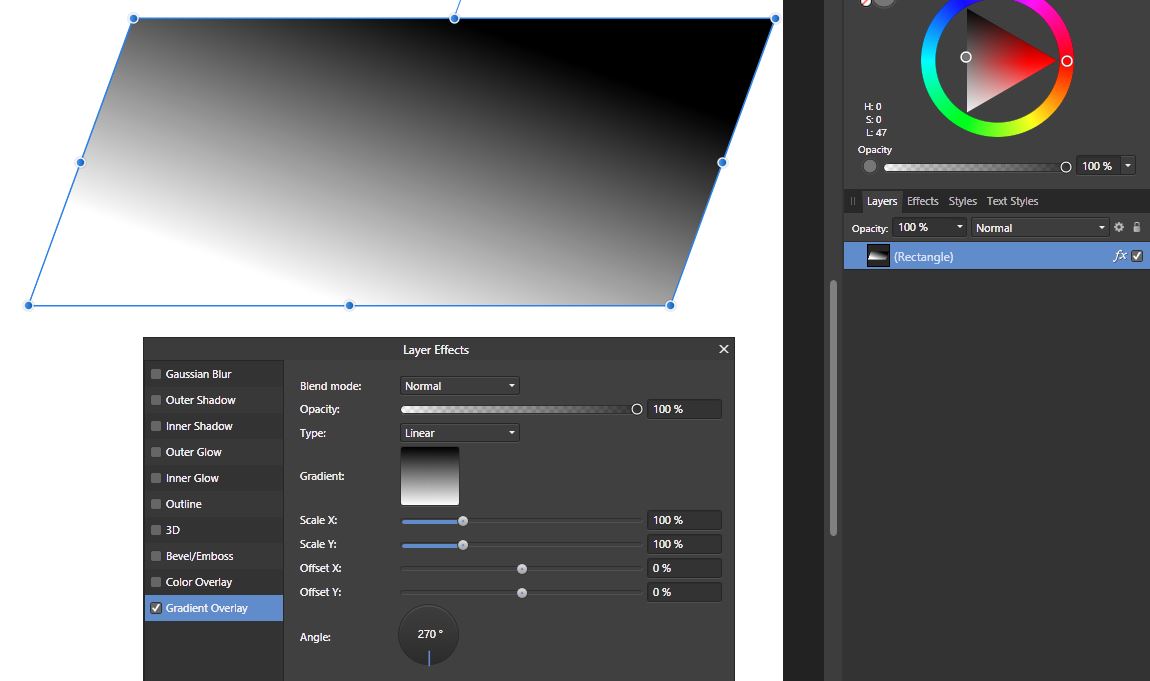
 Hi Developers of Affinity, While using your latest windows beta 1.6.0.87 of your lovely Affinity Designer I noticed following odd behavior. 1) If you create rectangle 2) Shear it with transform tool 3) Apply Gradient Overlay layer FX 4) Set the angle 270 degrees (or zero) The gradient will rotate based on Shear not the layer fx degree value as one would expect. Is this feature or bug? Take Care!
-
I'd like to see an additional Gradient Type added to the option list: Square I find it very useful. Easier than using two linear gradients to get a simple star effect. Here is a screen shot from Corel Draw Thanks for your consideration. Love Affinity Photo on my PC!
-
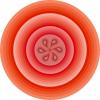
 Hi, I would like to ad radial gradient overlay effect to an artwork and I'm wondering how can I get rid of the annoying Saturn rings – see screenshot – and make it smooth as possible. Thanks a lot for your help! I'm using Affinity Designer 1.5.5.
-
 Hi there, When using the gradient tool, how can I create multiple gradients in a single layer? I can do this in PS simply by clicking and dragging multiple times. In Affinity Photo, it seems to limit me to one gradient per layer - a bit of a workflow nightmare! Also, is it possible to create gradient presets? It's very time-consuming to change the default colours constantly. Many thanks!
 -
As a new user (using Beta before purchase) I'm not sure how much user-ignorance is involved here, but... a) moving mid-point(s) has no effect on gradient (see attached png) b) To re-visit Gradient for editing, Help file says to Modify Gradient: with Gradient Tool selected, make Layer active, enabling editing stops, position, colours etc. But no Gradient controls appear on gradient. Any advice on this would be welcome
-
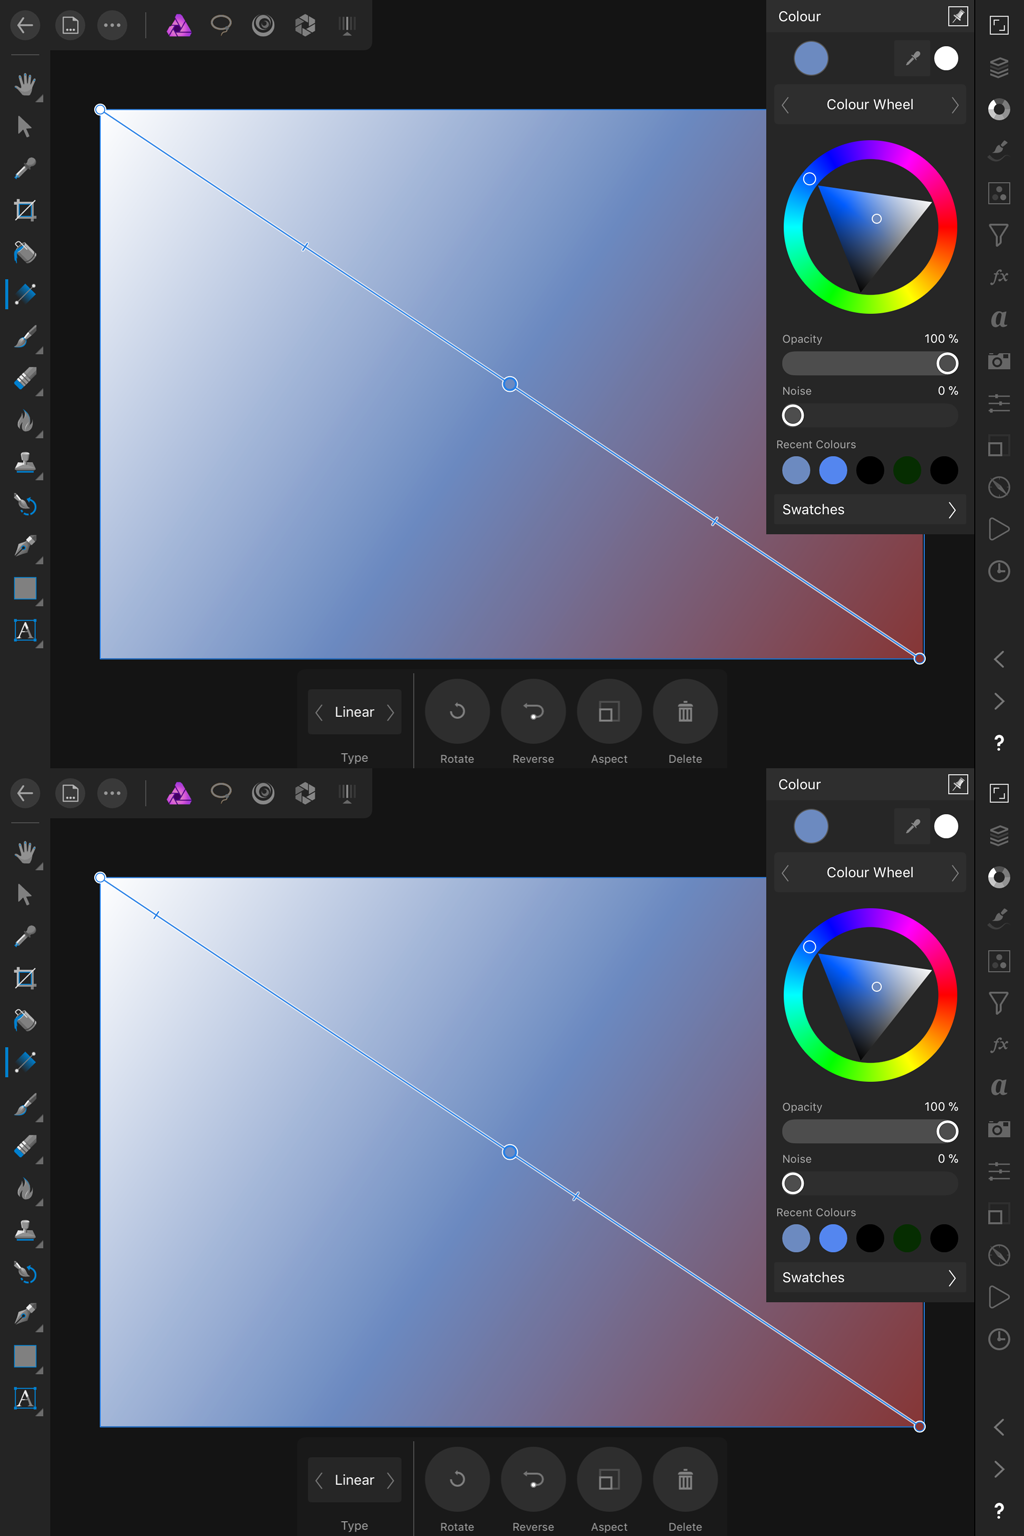
Would love to see some sort of "right angled" snap enabled gradient tool feature (perhaps with a modifier key). When dragging out the gradient tool often I need to drag it 90 degrees perpendicular from an edge to get a nice even gradient that isn't angled. See attached. Second image is the desired behaviour, 90 degrees perpendicular to the centre edge. Illustrator sort of handles this with a dashed line box as you drag the gradient tool but it doesn't snap. A snap would be helpful to ensure it's at 90.
-
On an JPEG picture a Curves layer was added. With this layer marked as active the gradient tool was opened and a linear gradient drawn. When the gradient color at the dark end should be adjusted to black, the hsl color wheel (and this is valid for other color adjust variant, too) dialog disappears whenever one tries to change anything. The color remains not altered. This is repeatable. The same operation in 1.5.2 works as expected.
-
 Do you use the gradient tool? It appears in all sorts of places in AP. Are you a bit irritated with the default white-to-grey gradient? Would you prefer it to be white-to-black without having to click nodes and colour settings? Here's how I do this. I don't know why it happens, but it's jolly handy. In the gradient tool context toolbar, change Type to your choice, eg. Elliptical. Click on colour box. Drop-down box appears. Clicking on Gradient shows the default white to grey gradient line. Here's the magic: Click on the 'None' tab and then the 'Gradient' tab. Ole! White to black gradient.
 -
 I am trying to use the gradient tool on a mask layer to fade either side of a photo I'm compositing. I create a gradient on one side, and switch tools to commit it, then when I make another gradient on the other side, it removes/resets the previous gradient and overwrites it with the new one. Where is the commit gradient button? How to save and get out of the live gradient tool mode? Also for extra credit, how to make radial gradients?
 -
 1) Create an object. 2) Give the object a color gradient and apply a global color to each end. 3) With the object selected, go the Context toolbar and change the color one or both ends of the gradient. Deselect the object. 4) In the swatches panel, change the color of the global swatch. The object's gradient will disappear and revert to the global color.
 -
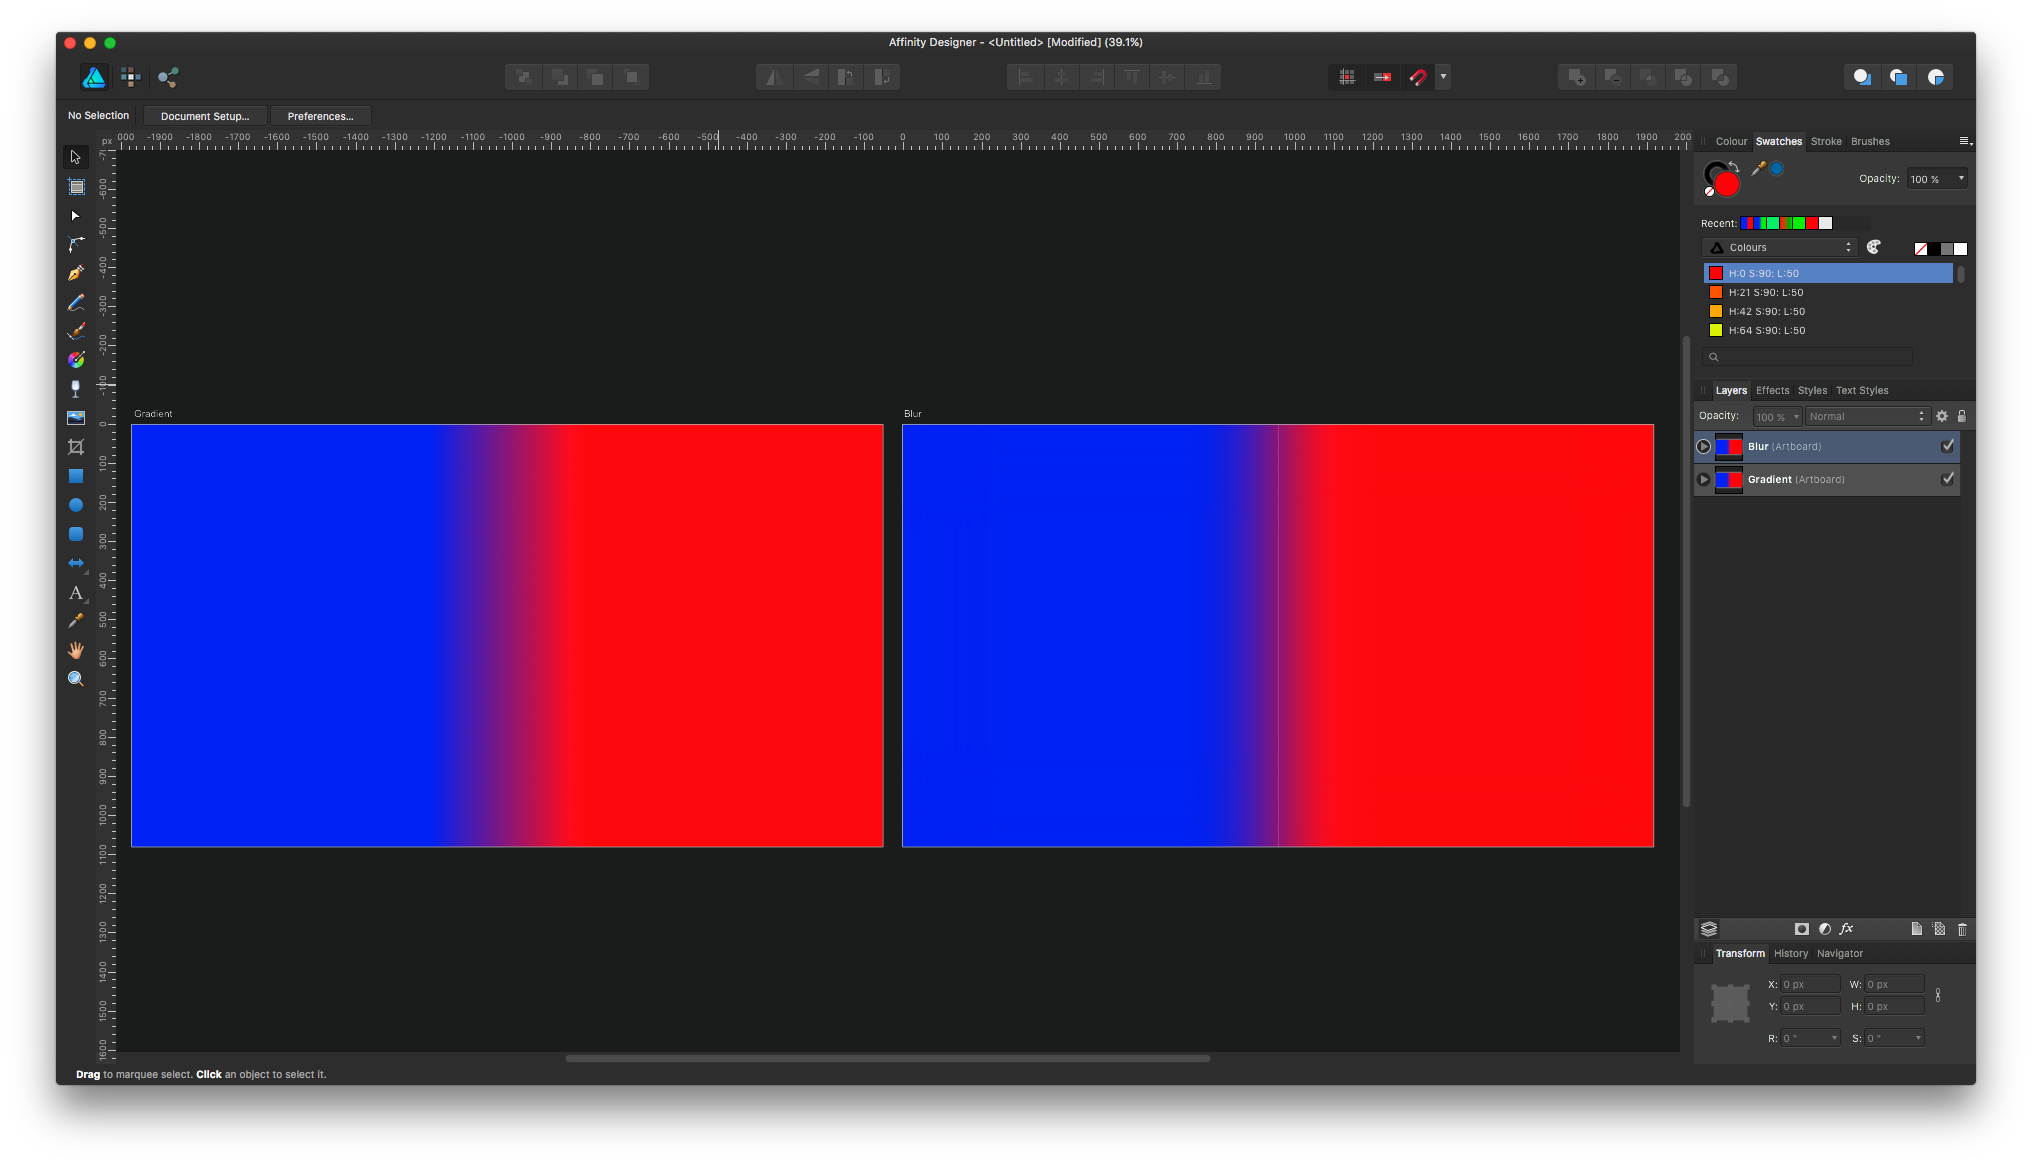
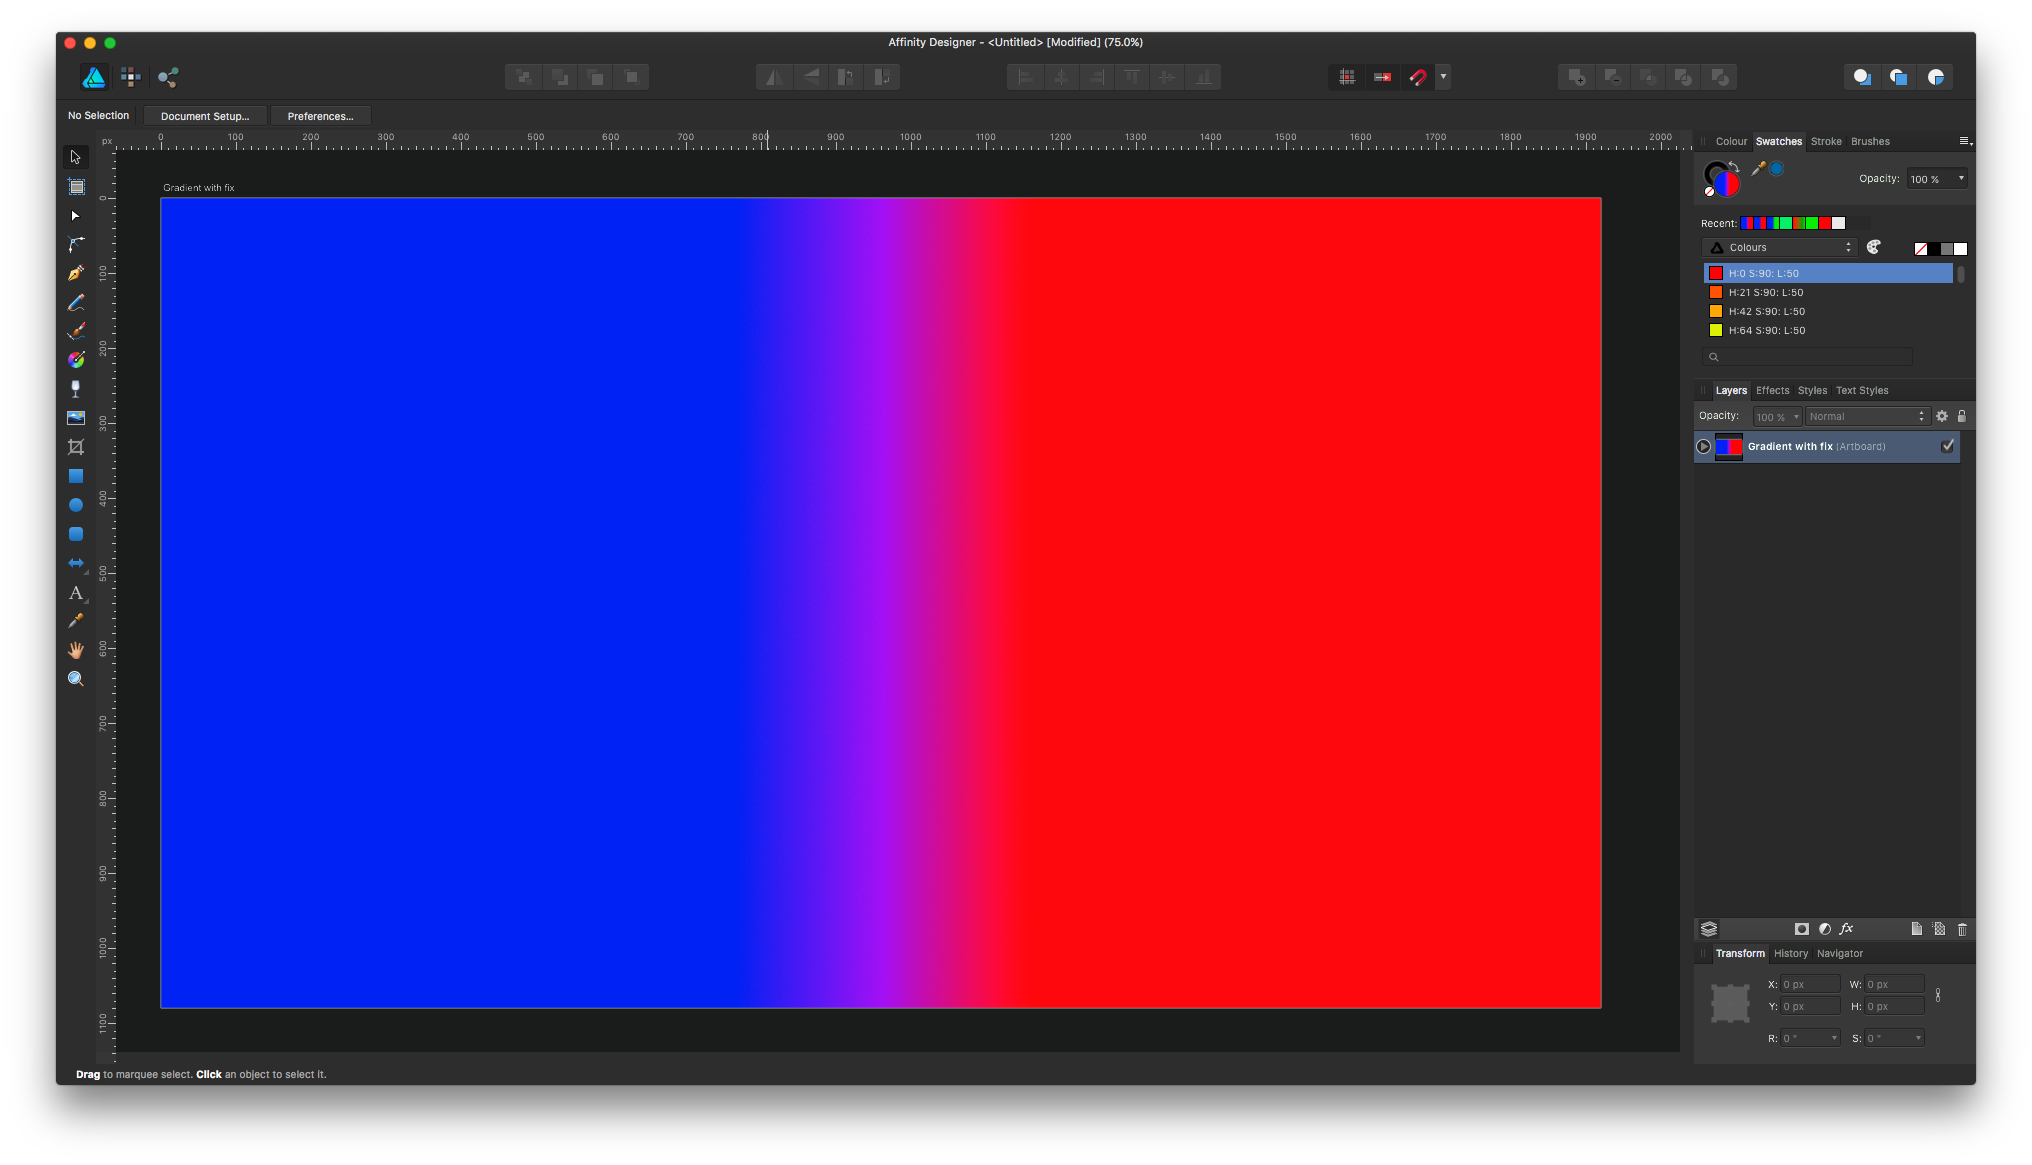
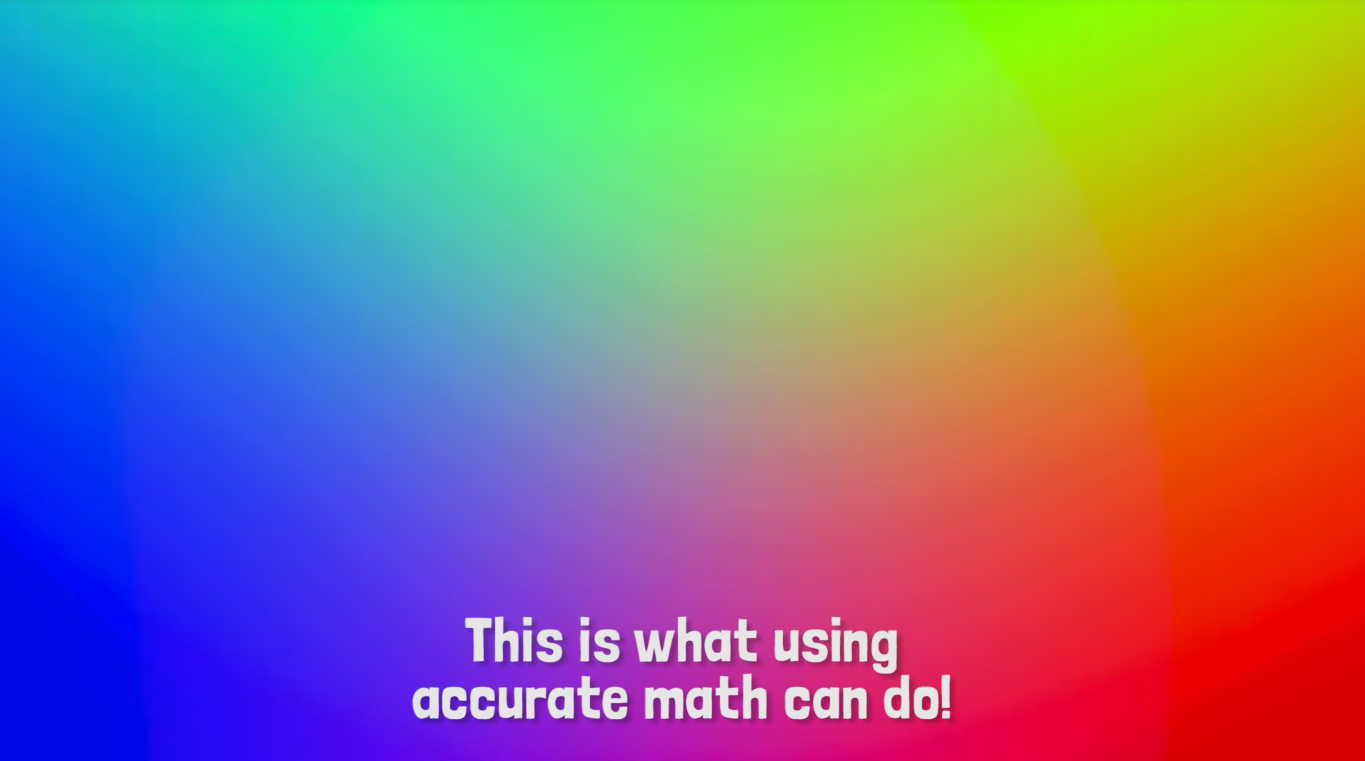
 Problem Gradients have bothered me forever, not only Affinity but every piece of software that has them. Turns out that both gradients and blur are subject to the same problem, which is that they are not performing the color average calculations correctly. The issue is best explained in this video. The gradient is on the left and the blur is on the right. The color between these two is too dark. This happens for every color combination. You can also see the edges of the gradient because it is being calculated linearly. The fix below using gradients is still wrong because it still is victim to the darkness resulting from the bad average calculation. This is also a good example of the linear gradient issue because you can see a definitive purple line down the center. This is my best attempt to fix the linear gradient and make it more logarithmic This calculation issue is also extremely visible in the color chooser The examples above are all using Adobe RGB, not sRGB. Suggested fix Idea 1 Because many documents are now using the wrong calculation, my suggested fix would be to add an option to the gradient tool for what type of calculation to use in order to maintain compatibility with older documents. Idea 2 Take the Photoshop approach and just make it a document setting (and turn it on by default for new documents). Result Fixing this will result in a more accurate and pleasing gradient and blur tool. Fixing this will also fix the linear gradient problem, which causes the center and edges of gradients to be extremely visible since they are not being calculated logarithmically to compensate for how humans perceive brightness/color. Here is a snapshot of the video I linked above showing what the blur and gradient should look like:
- 6 replies
-
- 1
-

-
- calculation
- blur
- (and 3 more)
-
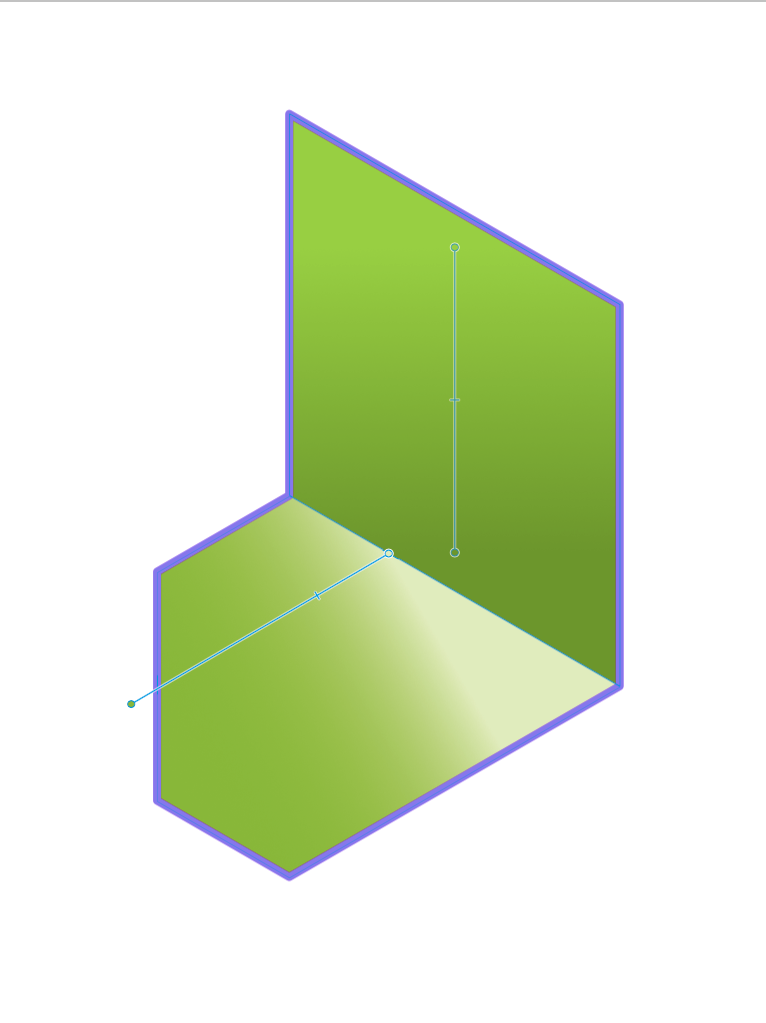
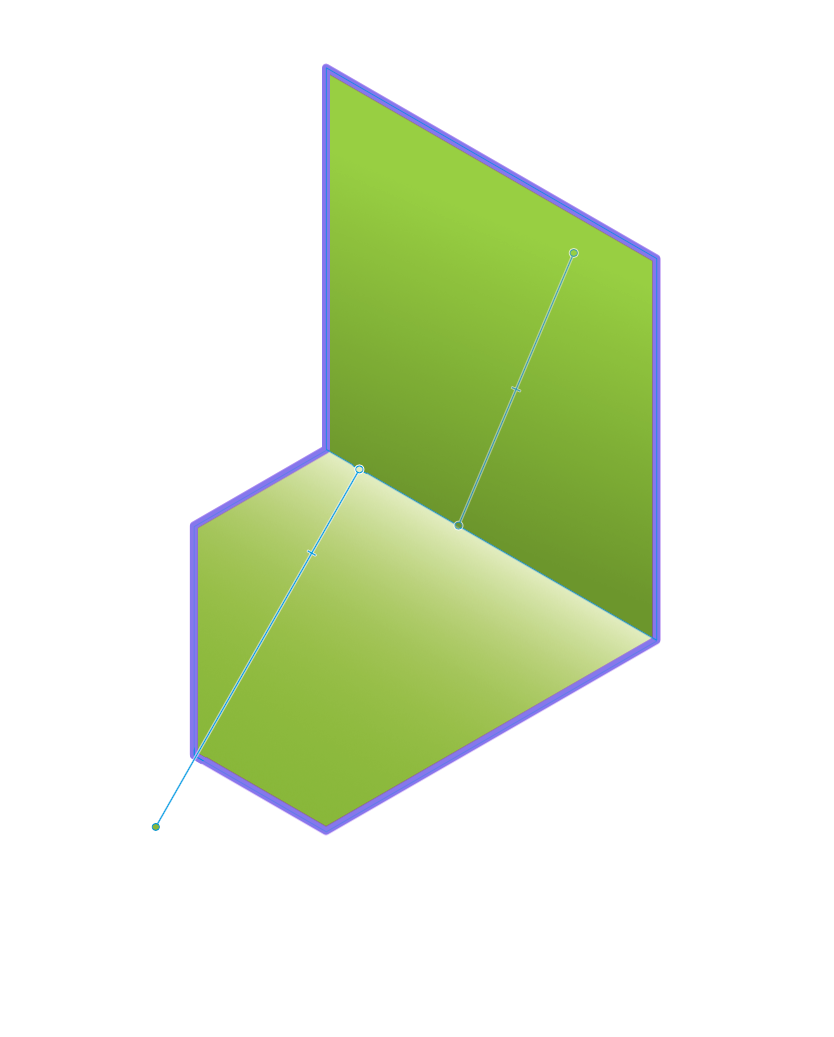
 Question on how to change the angle of the gradient that fills a stroke. Say I have a rectangle. I want to have a stroke that appears from the top left corner and then fades away diagonally toward the bottom right corner (an opacity gradient). When selecting stroke, you can choose a gradient fill but you can't affect the direction that fill occurs at. It just defaults to horizontal. When using the fill option (like when you are filling an entire shape) you can choose to have gradients occur at any angle over any distance by adjusting the slider, but this doesn't seem to be the case when you are using a gradient for a stroke. I can come up with other workarounds obviously by building two rectangles where the front only reveals the edges of the back rectangle and then using an opacity gradient on the back rectangle, but it seems like I'm just missing one button somewhere.
 -
 I don't quite understand the behavior of the Gradient tool. I know what it is for and how to use. The problem I have with it is that if I click outside the image or on another layer before I have finished working with the Gradient, there is no way to bring it back so that I can continue making adjustments. Which means I have to be very careful when I use it. At least with some other destructive adjustments, you have to click on Apply before the changes become final, but in this case there is no such a thing. Am I missing something? Is there a way that i am not aware of to bring back the gradient tool if I happen to click outside the image or on another layer by mistake before I am done with it? Thanks!
 -
 Either I am overlooking an obvious step (as I've been known to do) or Overlays in the Develop persona are not working on the AirPad 2. Bring in a RAW image, click on Overlays, select Brush Overlay, and in the context toolbar select Show Overlay. When I brush on an area of the canvas with the paintbrush, I expected to paint in a red overlay like in the RAW: Overlays on Vimeo video but I don't see any change whatsoever. No red glow where I've brushed. No indication that I have marked the canvas at all. If I go to the next step in the Help instructions and select an adjustment, there is no change in the image. What am I doing wrong?
 -
 Hey, here's another one of my Affinity Designer tutorials. In this one you will learn how to add gradients to objects using the fill tool. If you like this video, give it a thumbs up and don't be scared to leave a comment :)
 -
 It just struck me how handy it would be to be able to set a transparency or gradient vector on an object, and then go to the Transform window to specify the angle and position of the vector. Could be especially interesting when Ctrl-J'ing (new phrase :) )
 -
 Hey Affinity Designer Experts, i have a Question, i cant handle those gradients. those are not 100 clean and it looks like errors. How can i fix it? i need to make it 100% Smooth.
 -
 Hello the A-Team! :) Ok, I'll be straight forward on this one: I'll find attached a video record made on Photoshop. The technique shown on a boring solid fill is in fact an insanely productive method when mate painting, photo retouching, etc. Here's the challenge: Make me this in Affinity (Photo or Designer, choose the one you want). Made in Photoshop in 5 clicks. The gradient tool is set from solid black to 0% black. MakeMeThisOnAffinity.mov I've not been able yet to find any method to match the productivity of Photoshop on this point. (Trust me, combining both words “productivity” & “Photoshop” in a sentence is a serious pain I would like to avoid…). Also, when selecting the Gradient Tool: Why is it always defaulted to "None"? (If I pick the gradient tool, chances are quite high for me to make something else than "none", I even guess linear could be my favorite pick…). Why I cannot set the default colors for my gradient tool? (When starting to draw a gradient, colors are —always— white to grey, and I —always— have to change them afterward… Can't wait to ear from you guys :wub:
-
 Hi guys! Unfortunately I didn't find any clue how to remove a color stop with the gradient tool. Adding and moving additional colors is no problem, but how do I get rid of them? I tried to tap and hold the circles, double tap and hold them and dragging them out. But neither of that works. The context menu deletes the whole gradient. I had a look at almost every studio and menu - I hope - but I found nothing. The unofficial manual ( https://forum.affinity.serif.com/index.php?/topic/34556-affinity-photo-pdf-manual-for-your-enjoyment/) didn't help, neither the tutorial videos. May I have missed something? Thanks in advance.
 -
hi it seems not possible to use the toll Gradient / type bitmap / choose a bitmap file to fill a shape on the iPad version, as it is possible on Mac OS version It seems also not possible to visualize in iPad a file from Mac OS version with a shape filled with gradient toll / type bitmap those features will be available? thanks
-
 Hi here, I've created a donut and I'm trying to make a linear gradient that would follow the shape of the circle/donut. I've tried all the gradient options in AD without success. As a solution, I'm thinking about making a rectangle with the linear gradient I want and tranforming the rectangle into the donut I want. If anyone has a better solution, please let me know. - hoping I was clear enough. Cheers,
 -
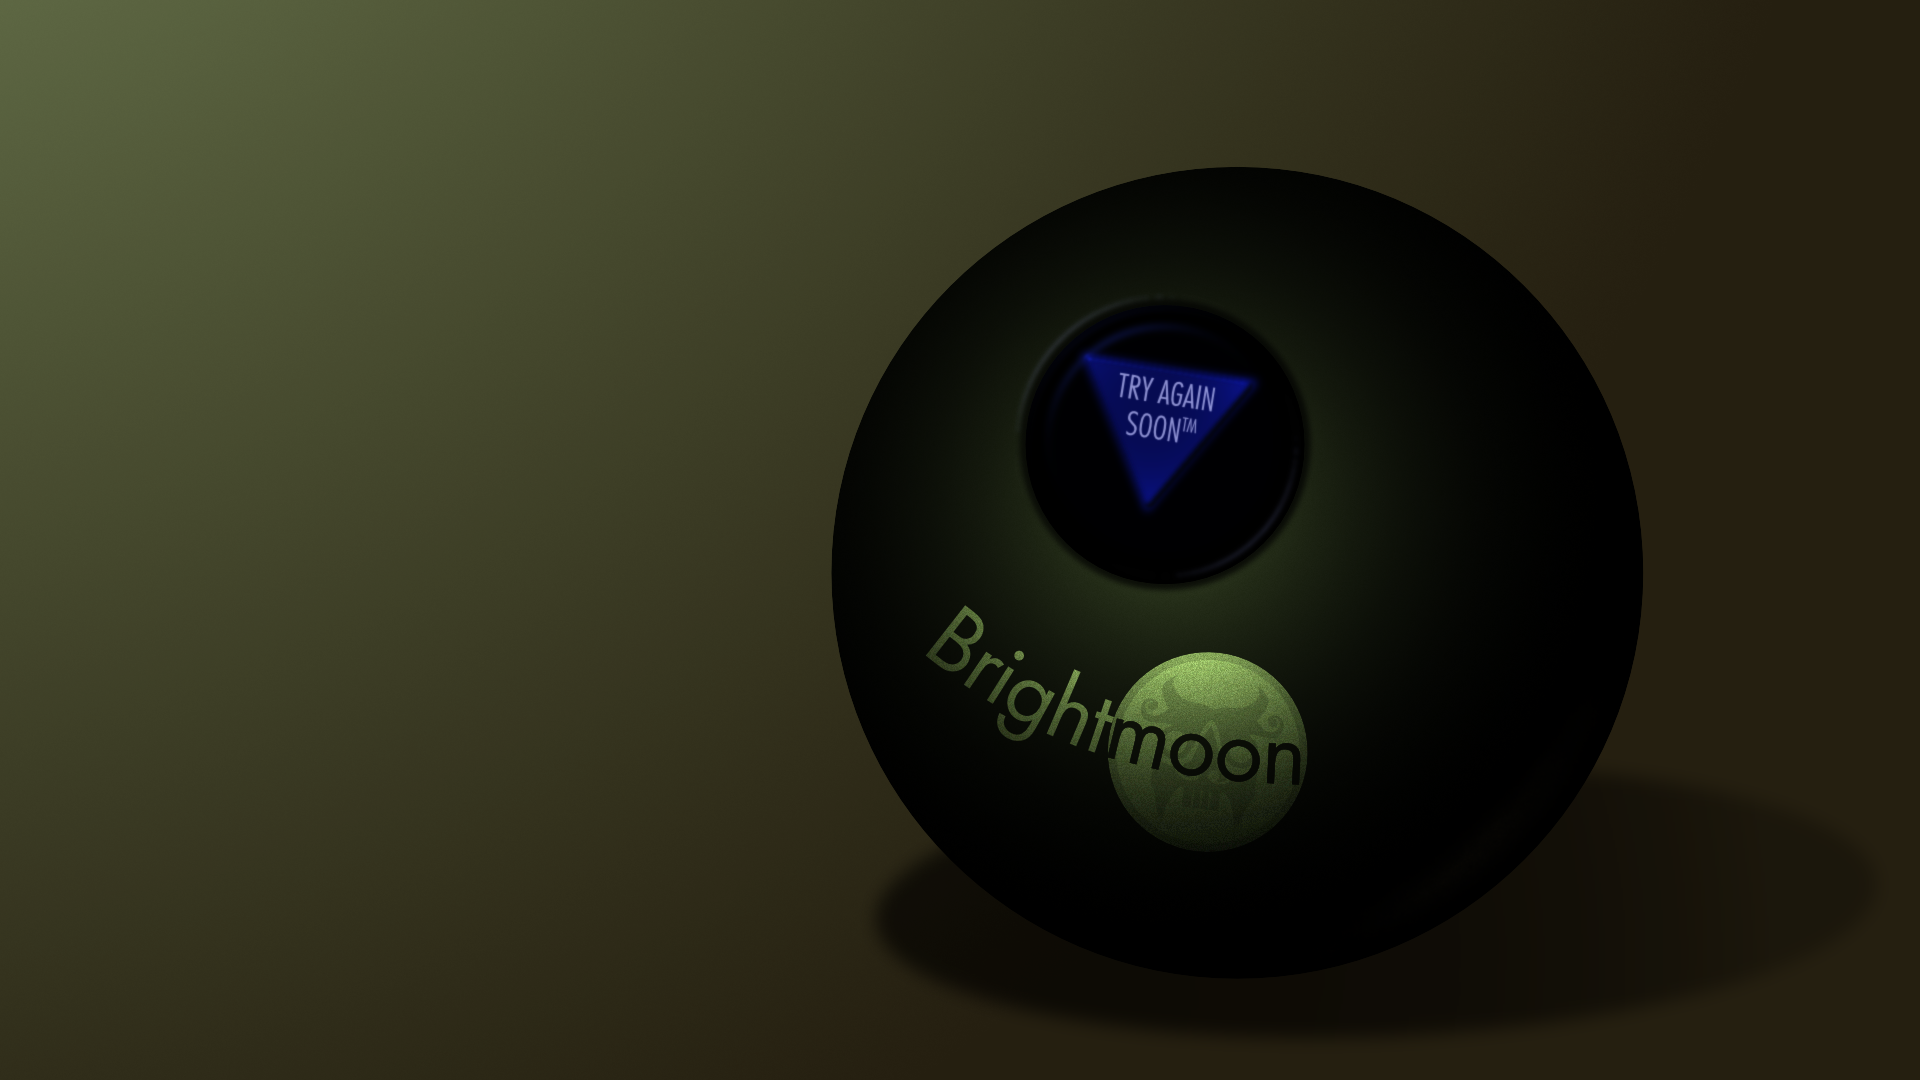
 Twice now I've run into an issue where trying to export a png with Affinity Designer results in a posterized reduction of colors, and I cannot find a setting to avoid this. In my current piece, it resulted in obvious banding of the gradients, and the reflected light being lost entirely. However, if I save the file as psd, then open that in Clip Studio Paint and save as png there, I get accurate colors and no banding. The first file is the png as saved from AD, the second is the png from CSP, and the third is the original afd so you can check and see if there's anything weird about it. Brightmoon 8-ball.afdesign Is there something I'm missing on export to prevent this issue, or is it a bug? Also, I've tried copy-pasting layer styles a few times, but it's prone to changing the values on paste--generally about double or half (i.e., 7px gaussian blur becomes 13.8px). Is there a way to prevent that, as well?
-
 I've made a nice world map with AD and applied a gradient to it. When I export this as a pdf file, it will be rasterized. However, other shapes on that world map such as an arrow (line) won't be rasterized on export. I changed the filling to a solid color and exported again. Now my map won't be rasterized anymore, but I've lost my gradient. How can I export a shape filled with a gradient without rasterizing it?