WalterBeiter
-
Posts
70 -
Joined
-
Last visited
-
 phps reacted to a post in a topic:
AD: show which parts will be rasterized
phps reacted to a post in a topic:
AD: show which parts will be rasterized
-
alexistrn reacted to a post in a topic:
Feature request: CMYK 16-Bit
-
 This would be definitely a great thing! I really like the Sketch implementation and AD should have that as well.
 -
WalterBeiter reacted to a post in a topic:
Continuous Curvature rounding (default)
-
 mnekow reacted to a post in a topic:
Auto saving documents to iCloud without hitting the „save“ button
mnekow reacted to a post in a topic:
Auto saving documents to iCloud without hitting the „save“ button
-
 amatheus reacted to a post in a topic:
Auto saving documents to iCloud without hitting the „save“ button
amatheus reacted to a post in a topic:
Auto saving documents to iCloud without hitting the „save“ button
-
I am having a question / feature request: why is Affinity photo (and designer) not Auto saving a document that I just created? I always have to hit „save“ via the custom context menu (which I wish btw will be an iOS 13 context menu at some point) in the gallery view. On iOS, I am used to that all documents I create will auto save to iCloud or to the local storage at least. is there a specific reason why Affinity photo does not auto save a new document? I use affinity photo to focus stack macro shots on the go, and then edit them on the Mac. It took me a lot of time to figure out why those affinity photo documents where not visible on iCloud Drive on the Mac. Until recently I hit the save button in that context menu. I am not used to save something on iOS... Please implement this auto saving feature which would make Affinity a little bit more iOS friendly. Remember, this is not macOS, some elements could be a little bit more iOS-ish. And I hope that some point, contextual menus find there way into affinity as well as other normal iOS UI elements.
- 1 reply
-
- 2
-
-
-
Chris_83 reacted to a post in a topic:
[DAM] Affinity Lightroom Killer Request
-
Celia at Grafted Works reacted to a post in a topic:
How to draw a shape with multiple stroke interruptions?
-
Unsatisfied ex-customer reacted to a post in a topic:
AD: show which parts will be rasterized
-
Thanks for pointing that out. I could reproduce this issue.
-
WalterBeiter reacted to a post in a topic:
How to draw a shape with multiple stroke interruptions?
-
Alfred reacted to a post in a topic:
How to draw a shape with multiple stroke interruptions?
-
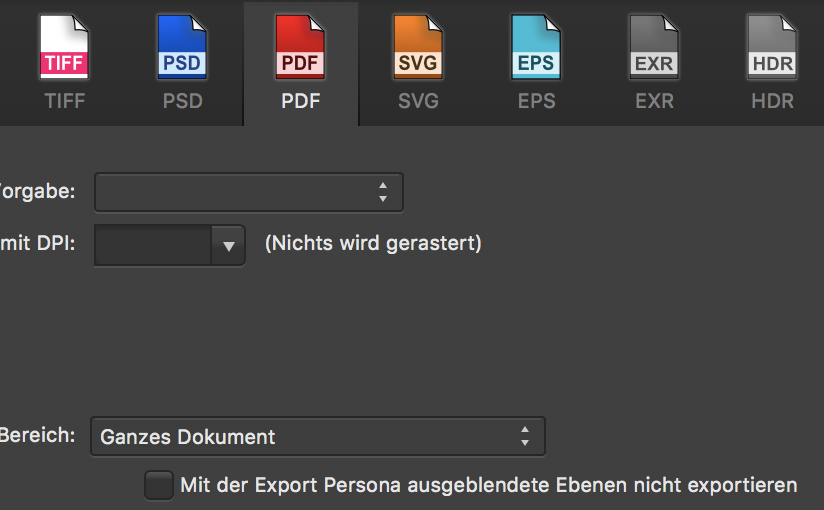
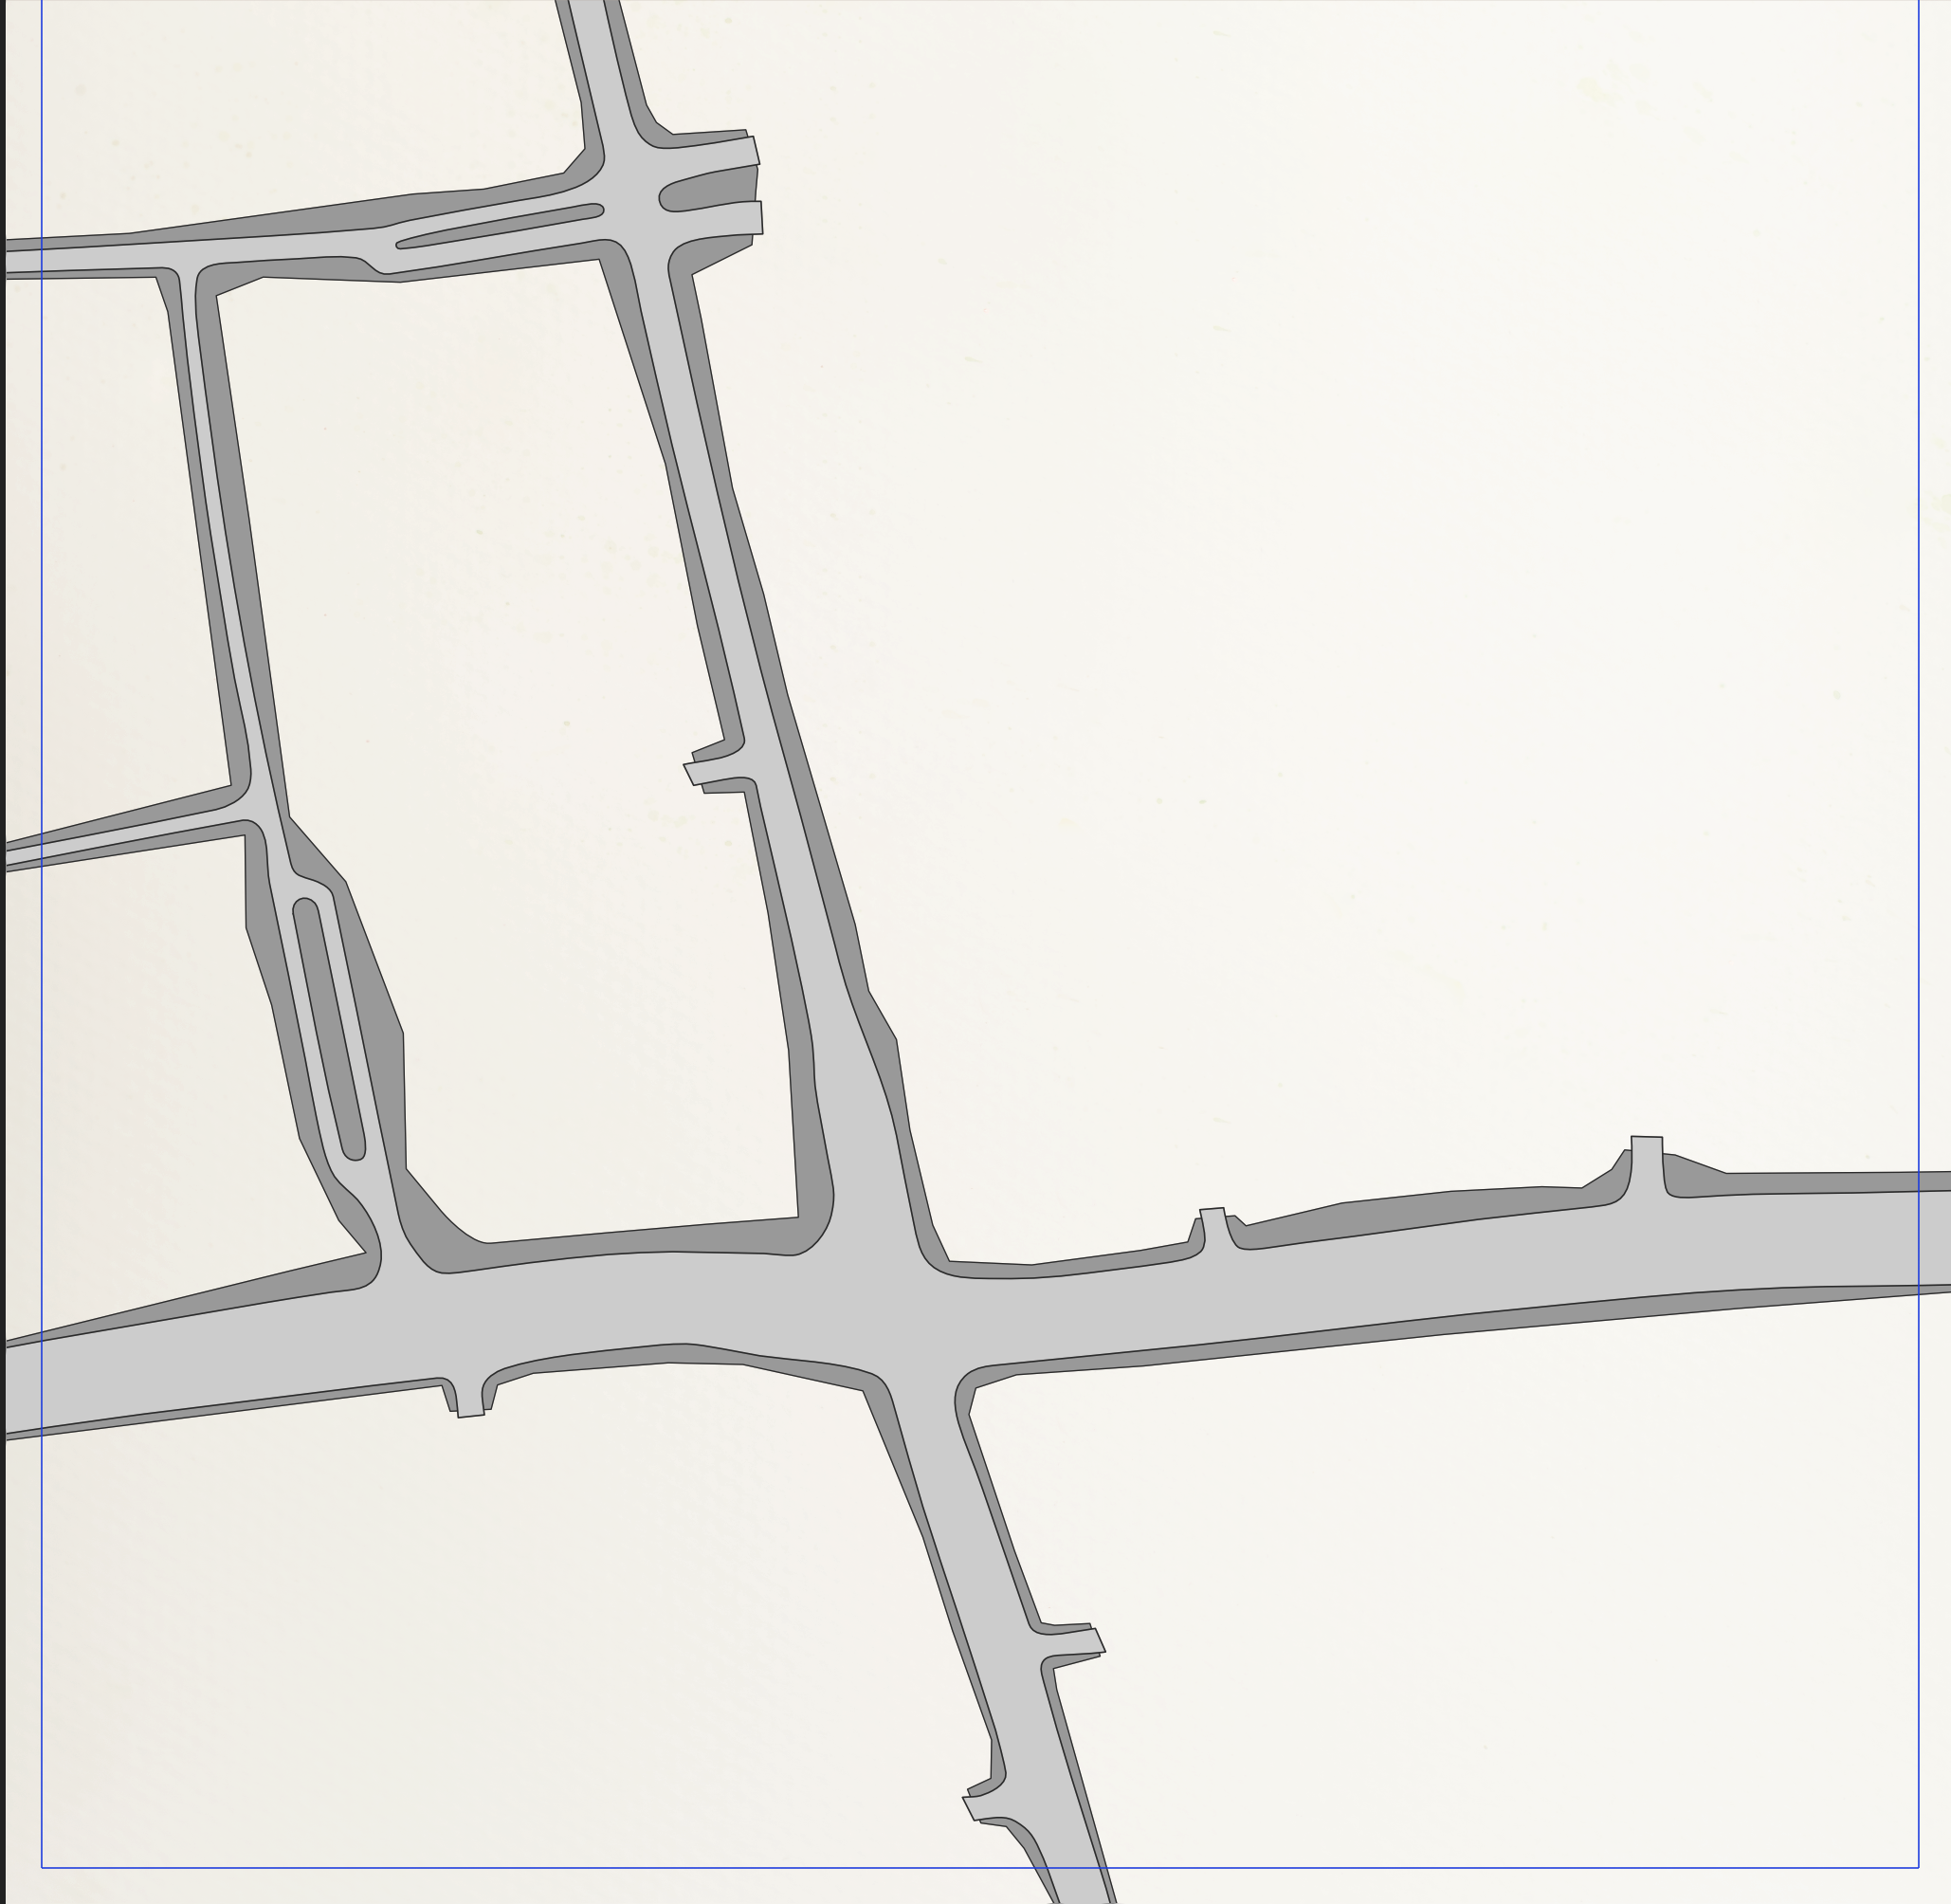
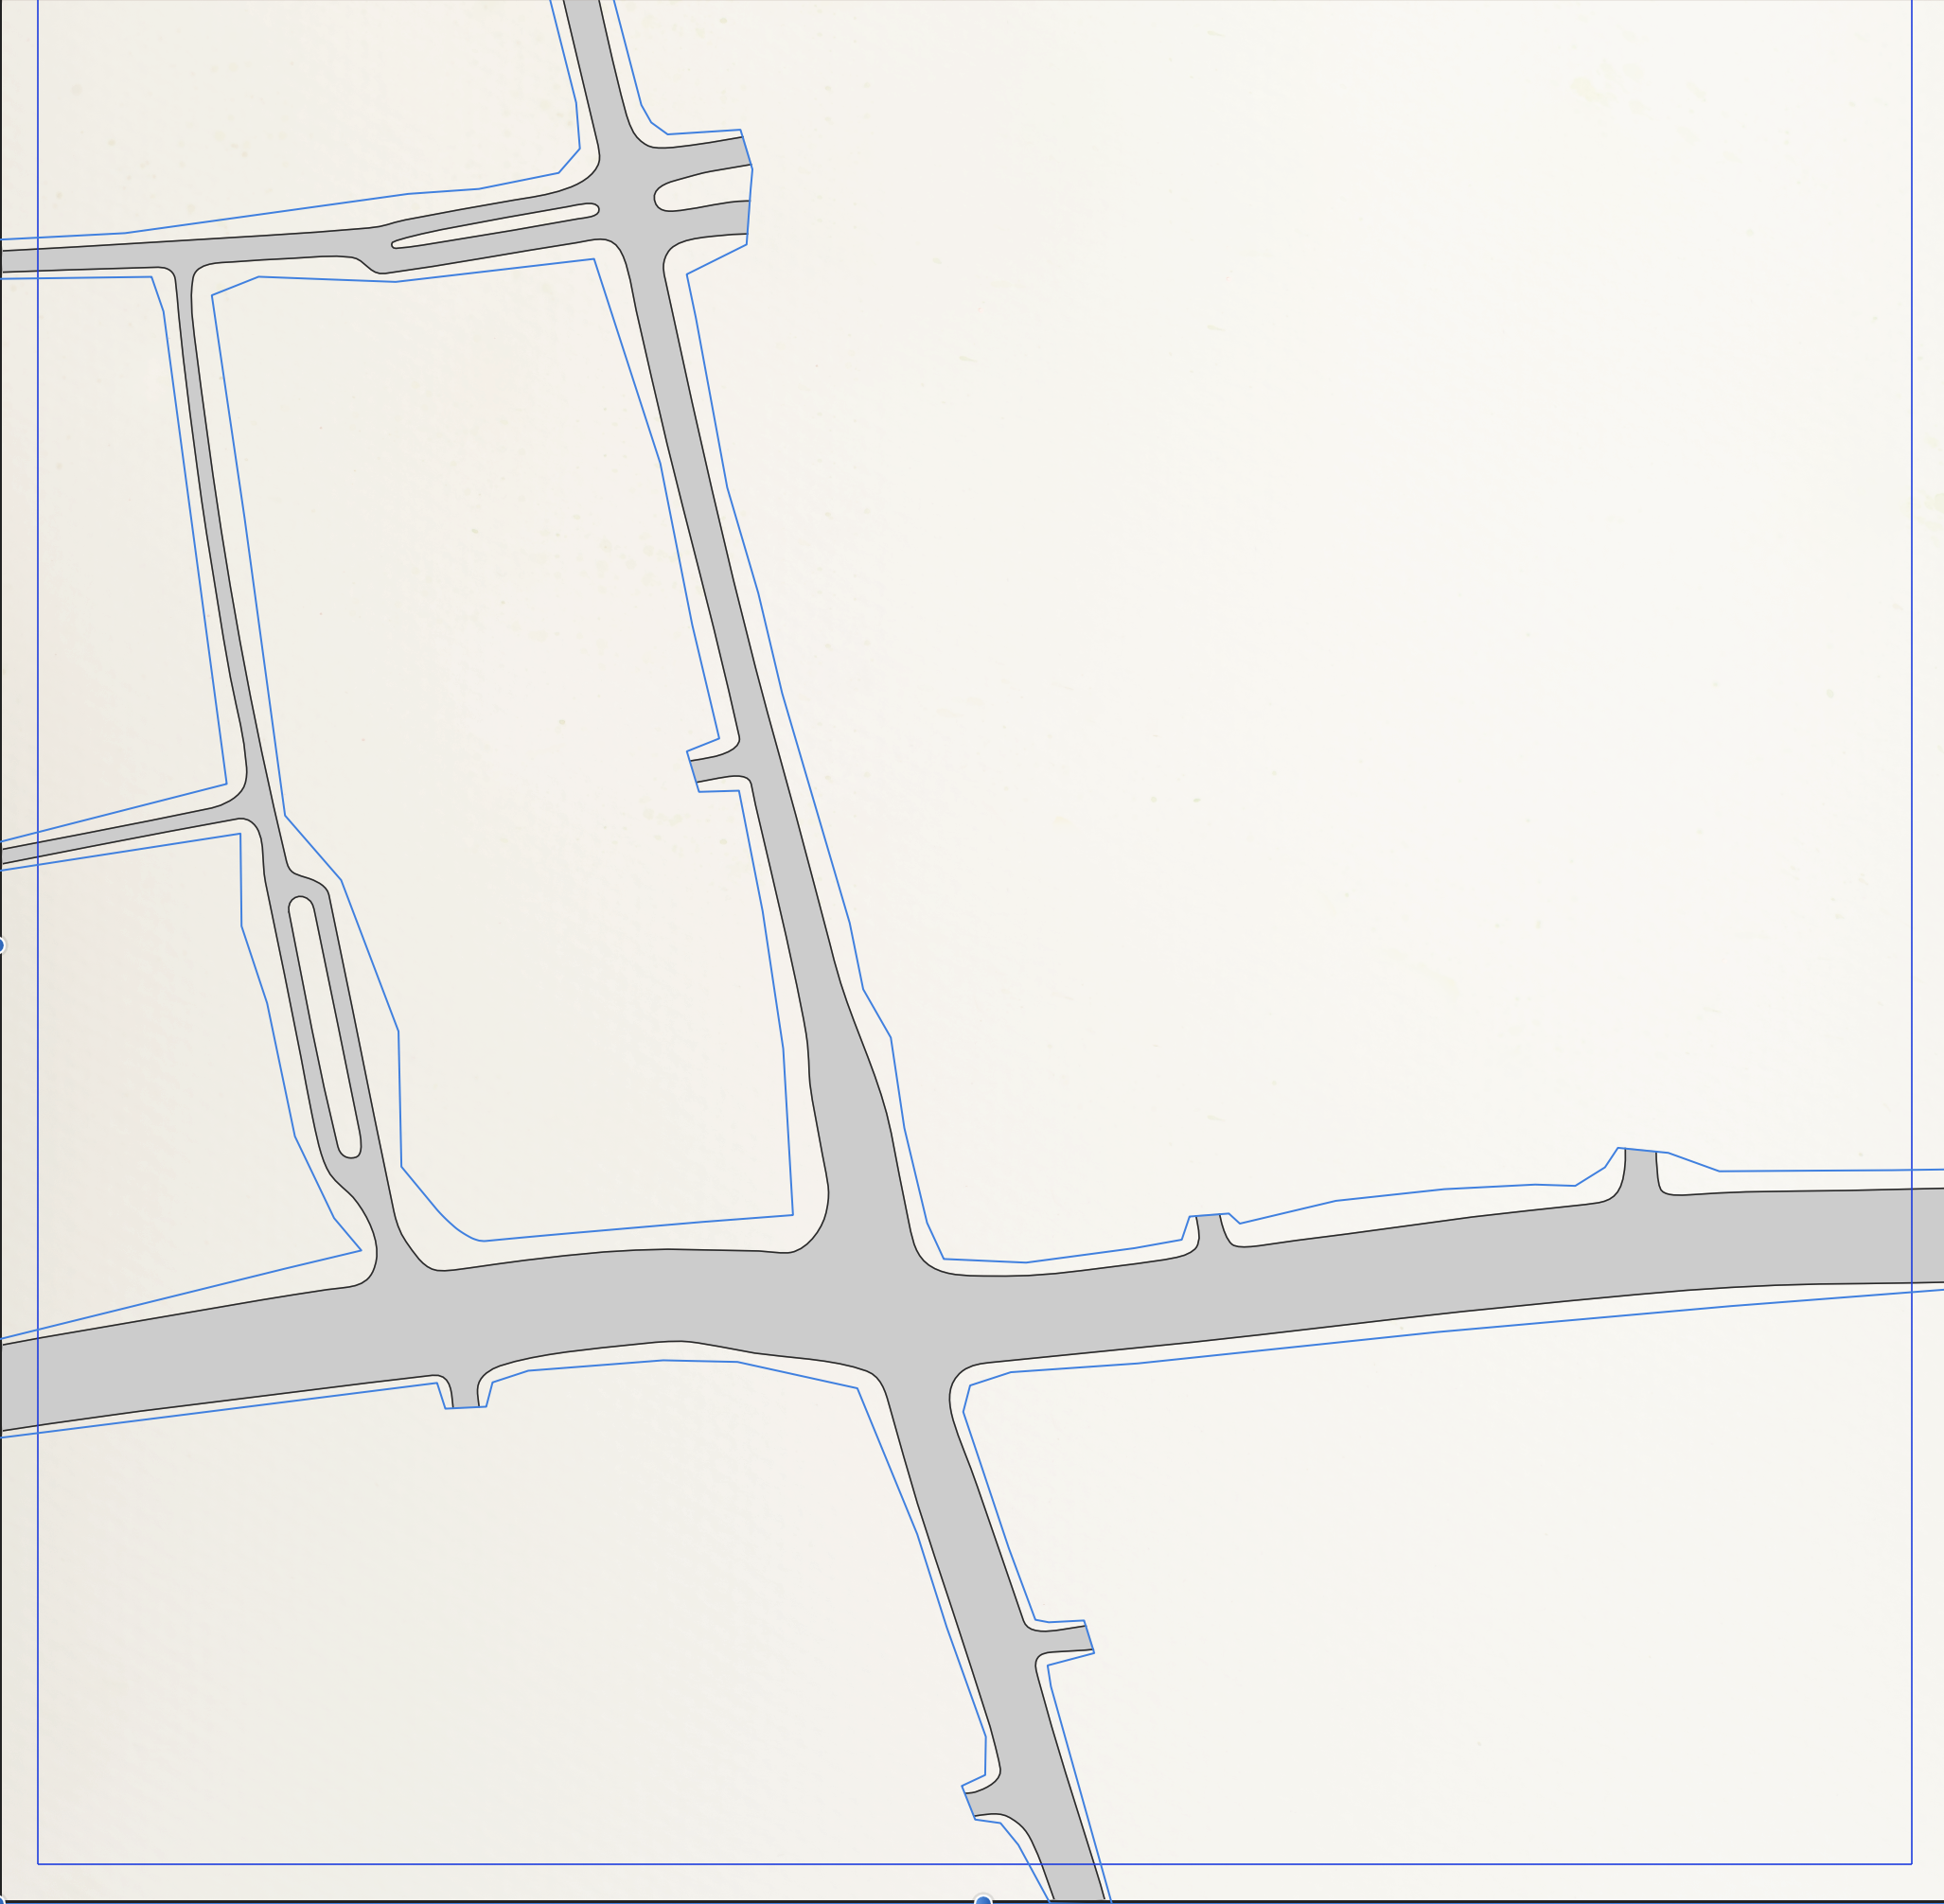
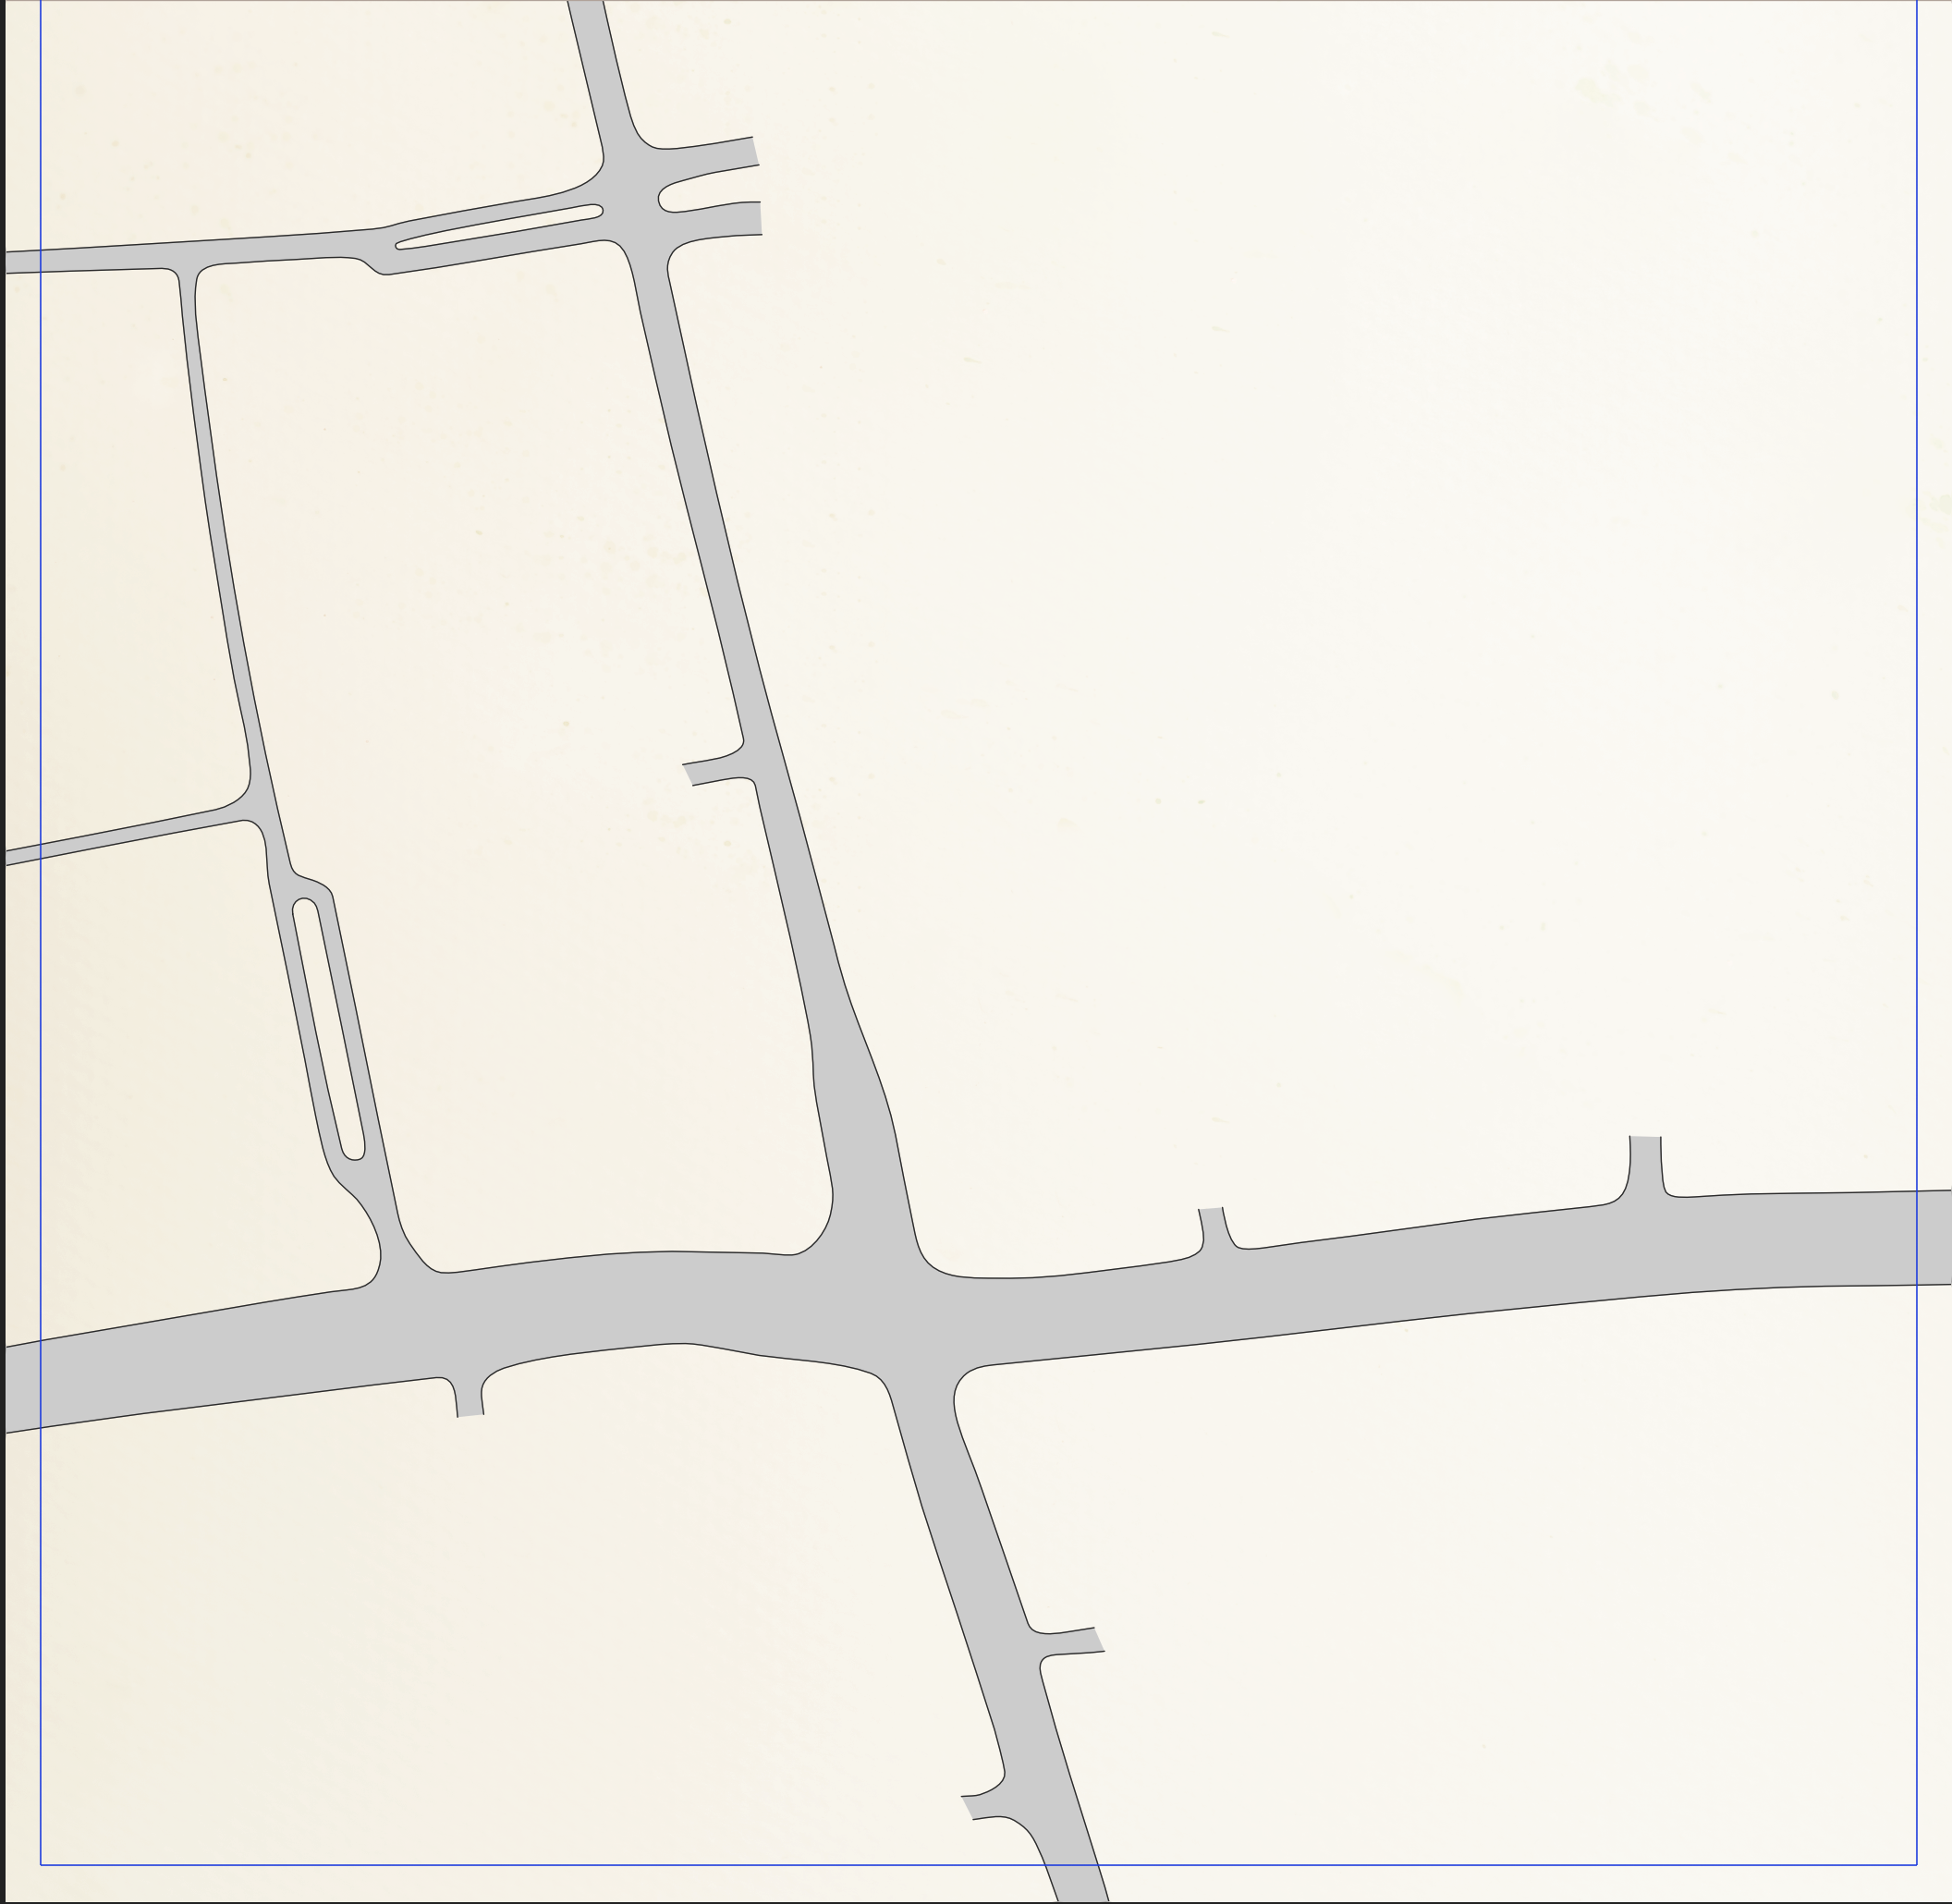
I am trying to export to pdf, so that I can print my map. I figured it out: A stroke on the mask will cause rasterization. Just make your the mask shape has no stroke width (see screenshots). Select the mask shape and change the stroke width to zero (screenshot 2). Then voila, nothing gets rasterized (screenshot 3: "nichts wird gerastert"). So to recap: The solution is to draw a mask shape and then place it like you see in screenshot 1 (or right click - > mask to below, when you place it on top of the actual layer). I am so happy that it works now, I made a crappy gif (which is way to large in file size..). Thank you all for you participation and support.

-
This is something I did not know. I was referring to the vector crop tool which is rectangular. The problem is, though, that I will get rasterized on export ( I do not know why). THIS ACTUALLY WORKED! I created a mask shape which is roughly the same as the street map. But then I left out the street beginnings (screenshot 1). I then placed it on top of the street shape (screenshot 2). Then i did what you said and masked it out using right click and "mask to below" (screenshot 3). This is exactly what I was searching for as it cuts the shape cleanly (screenshot 4 and 5). BUT AD was not able to retain vector and rasterizes this (screenshot 6). This is strange, since I tested this in an other document which worked fine on export (screenshot 7). If I get this method to work properly without rasterization, this would be the solution for my problem. I just don't know why AD rasterizes some stuff that is vector only, sometimes it seems to be buggy.
-
I this what the upcoming knife tool will do, which is mentioned in the feature roadmap for AD?
-
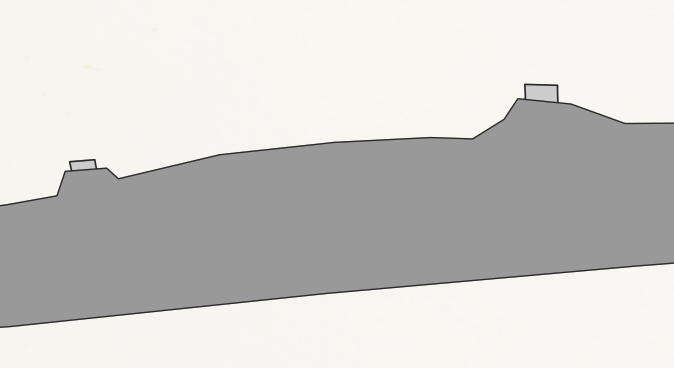
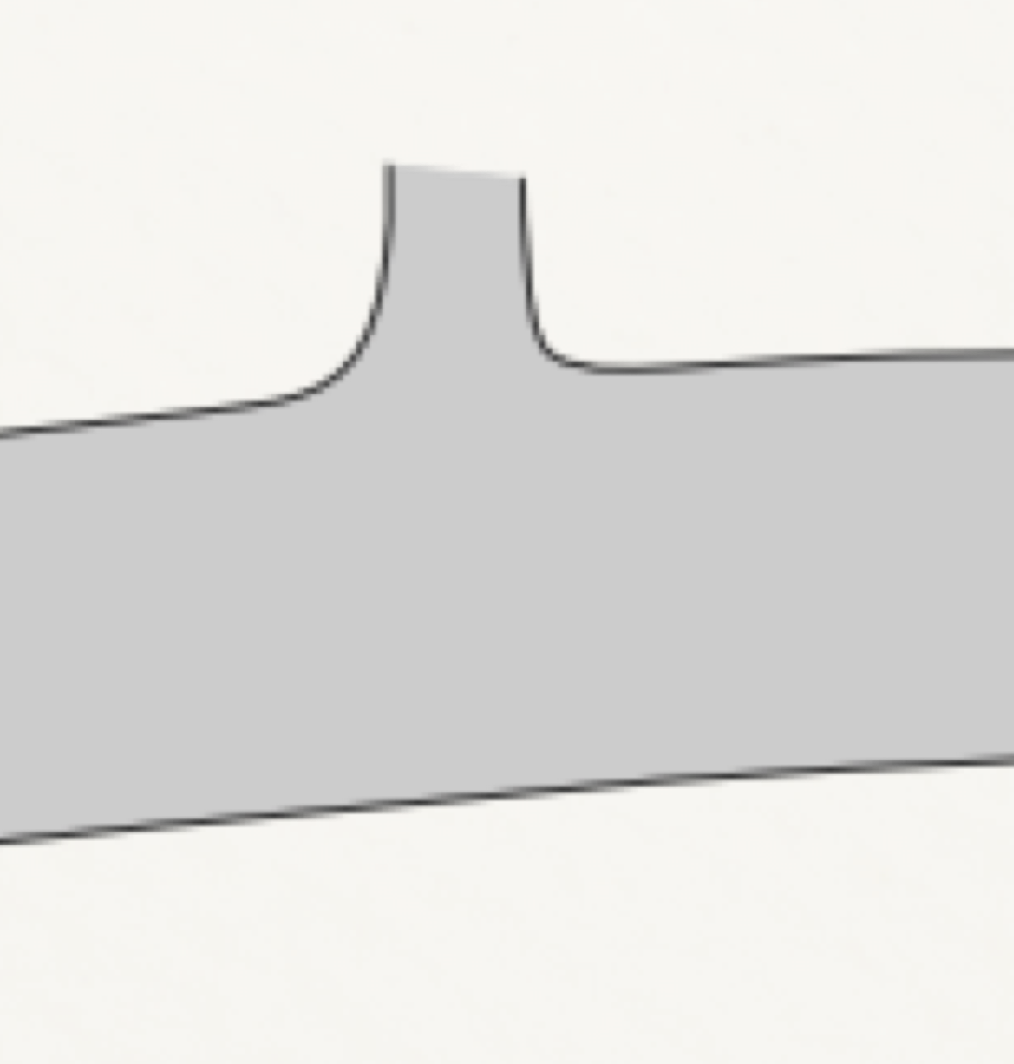
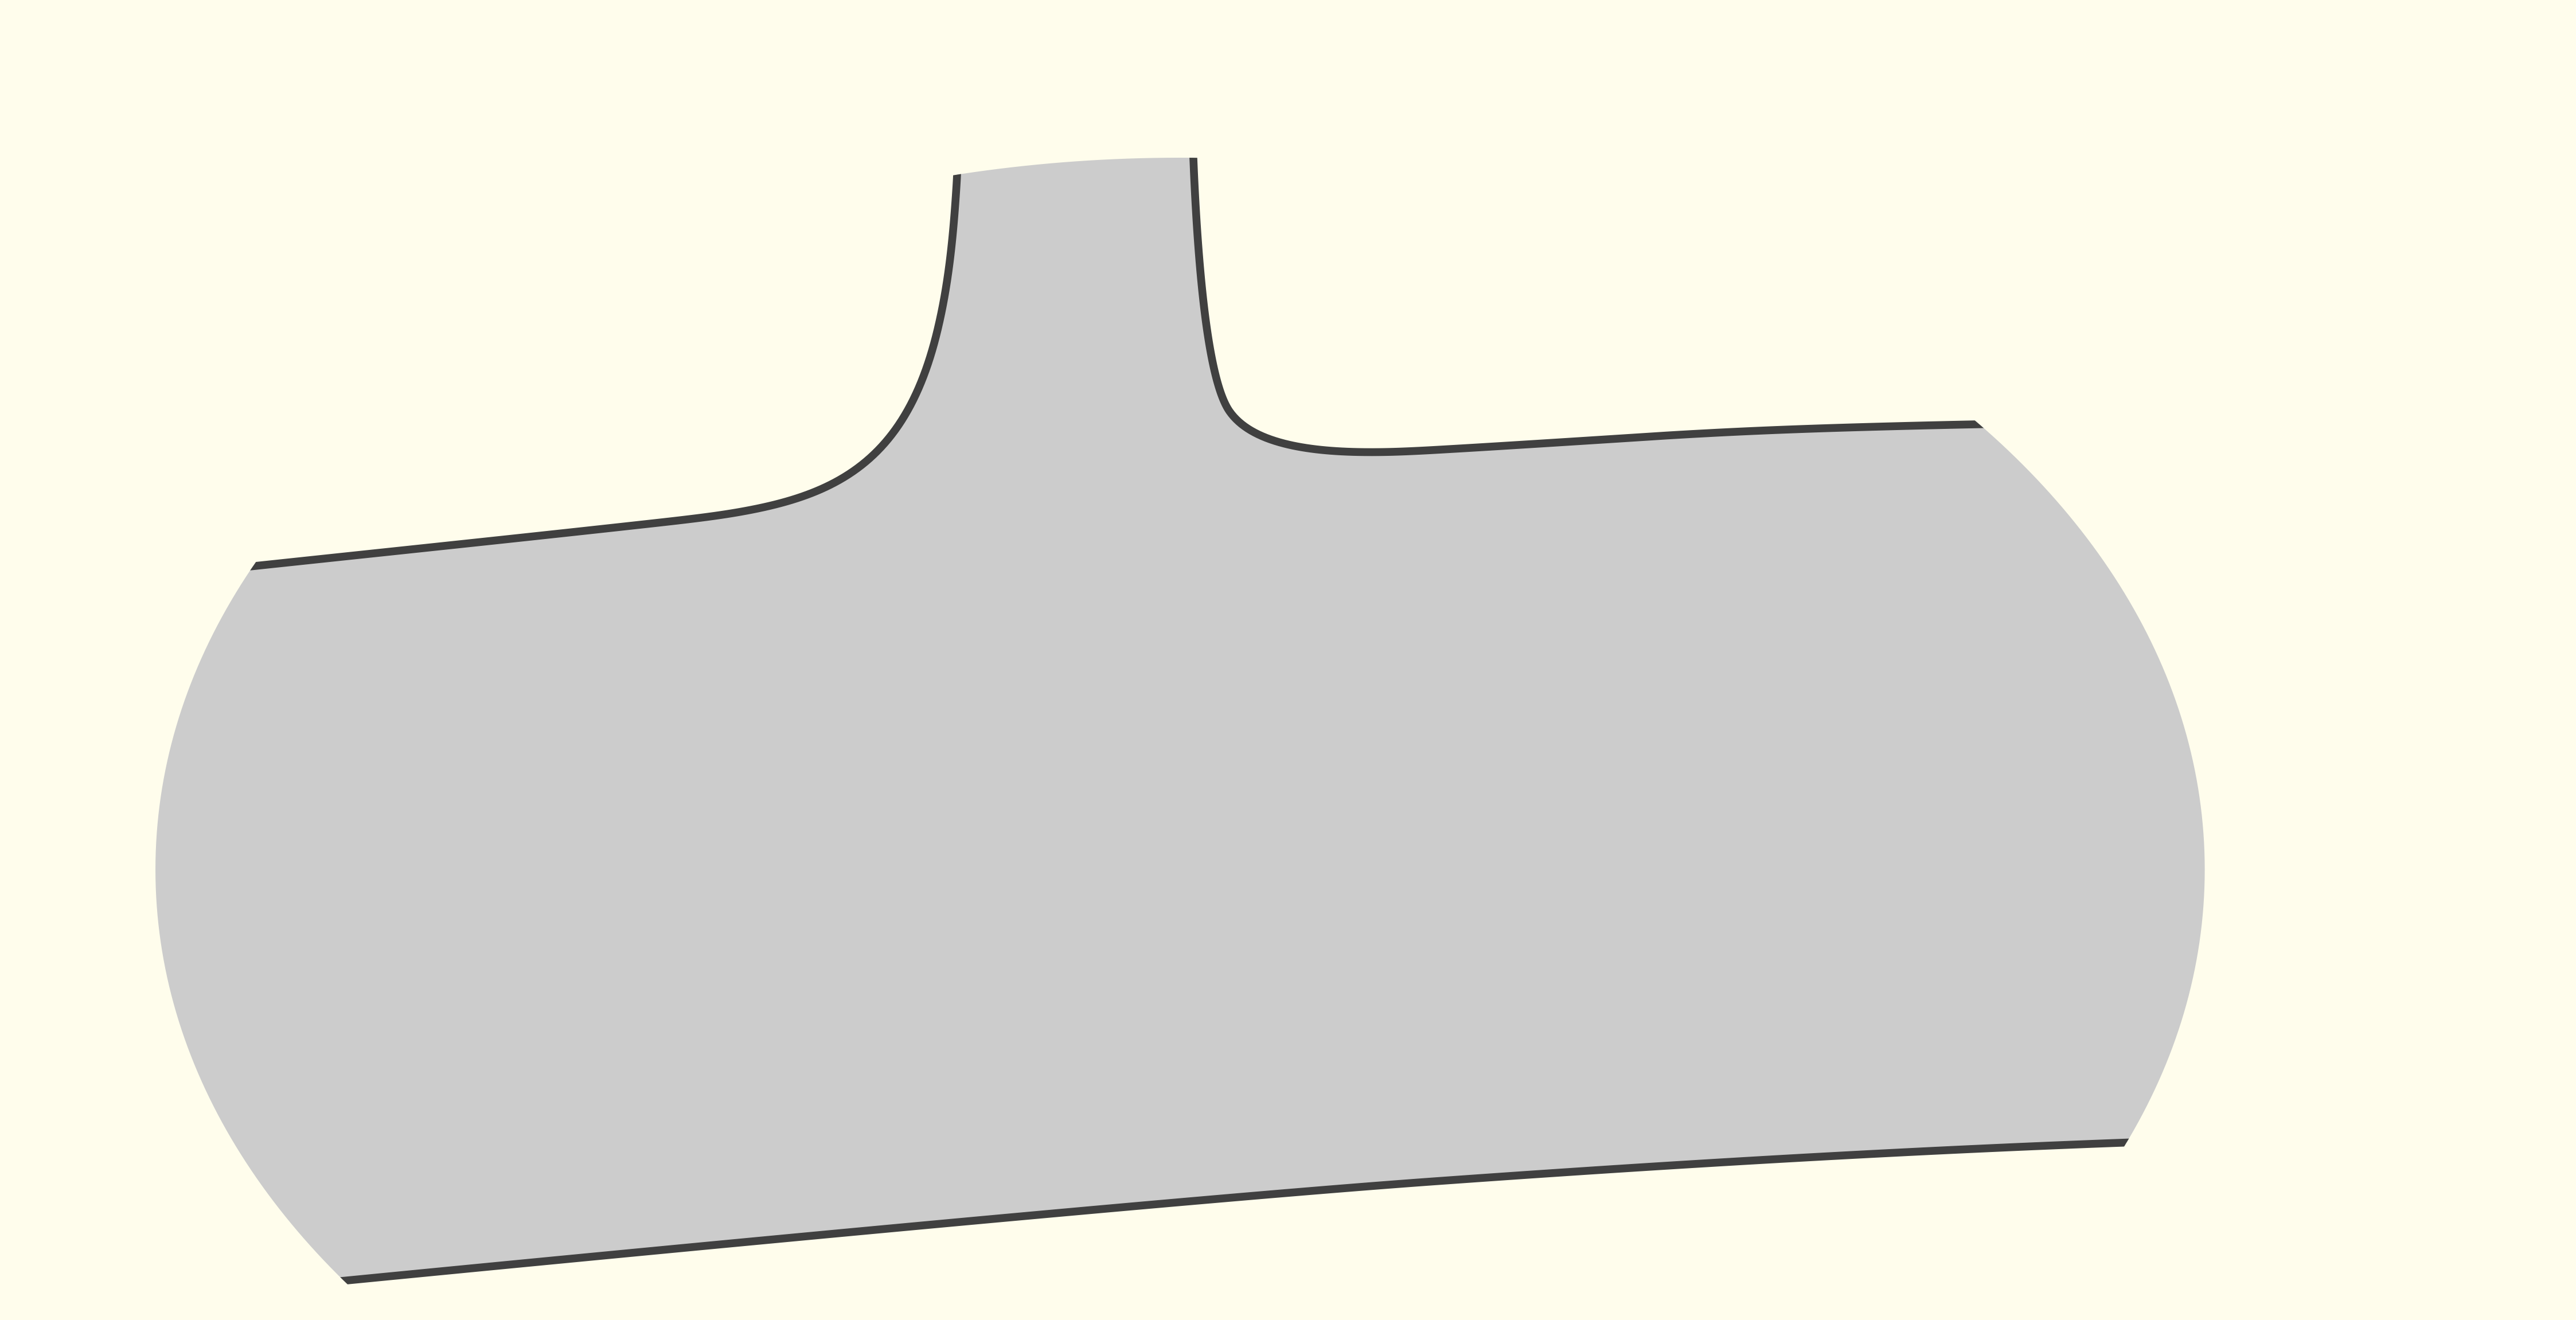
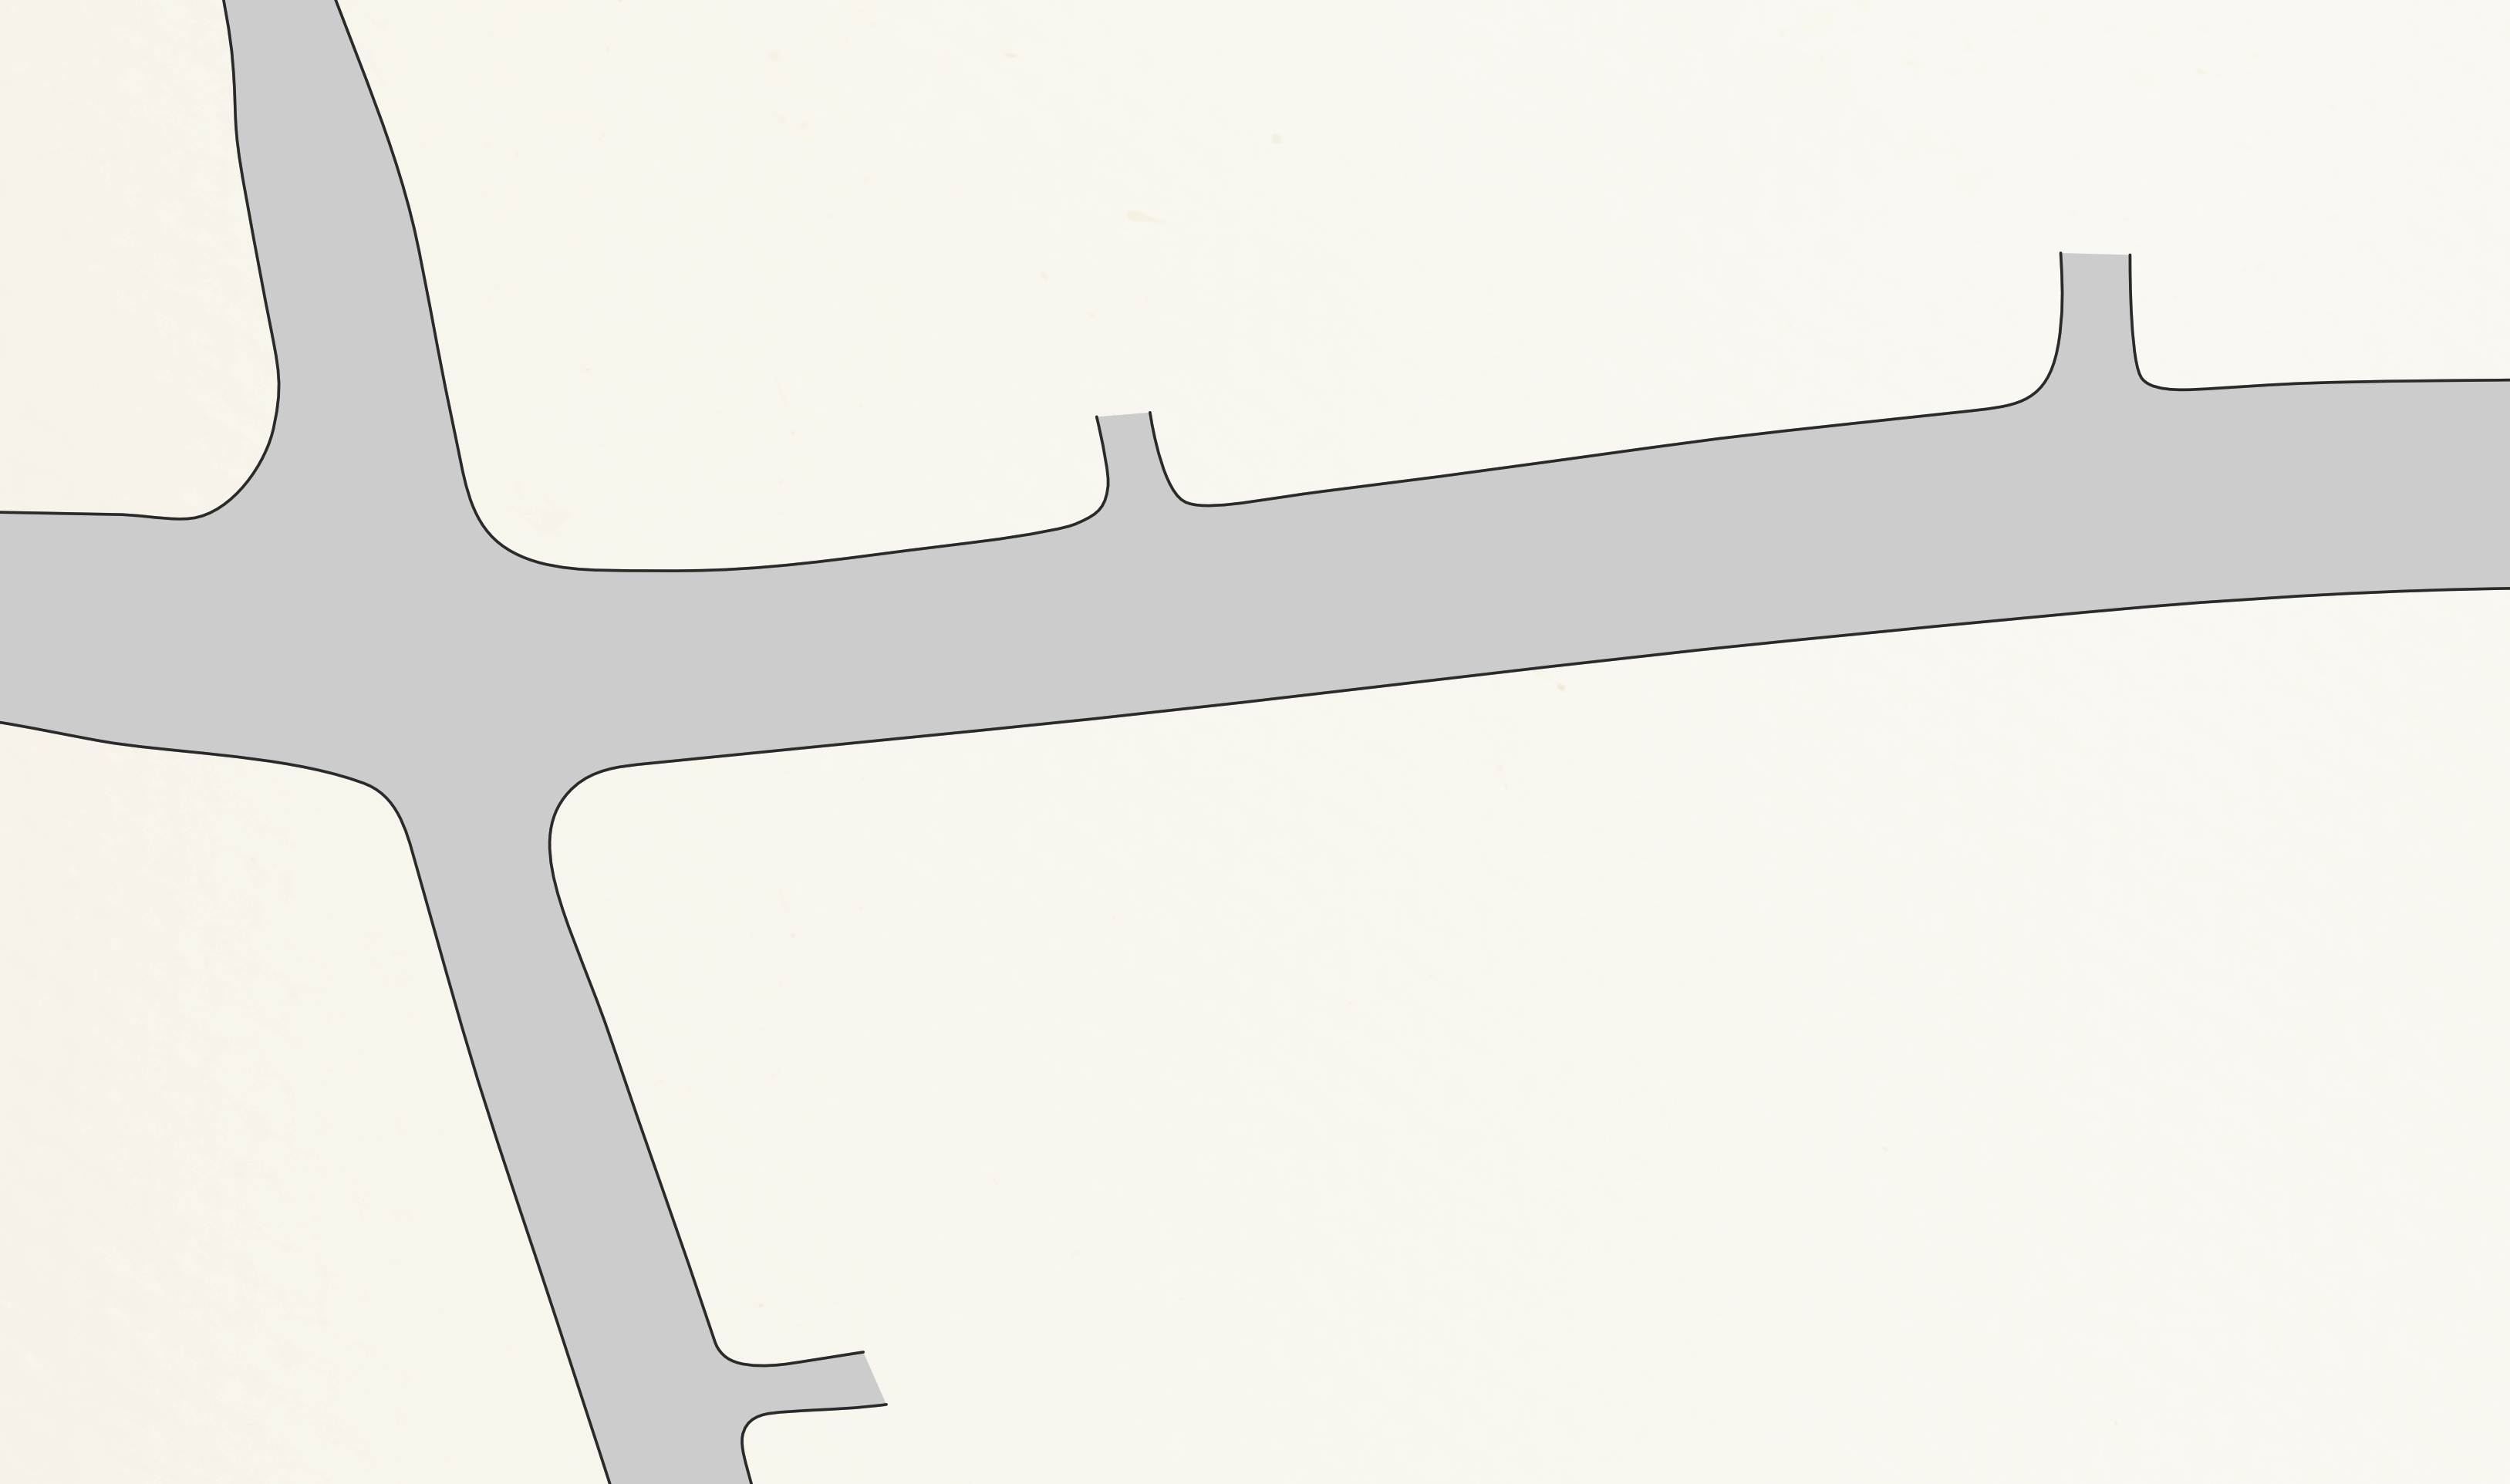
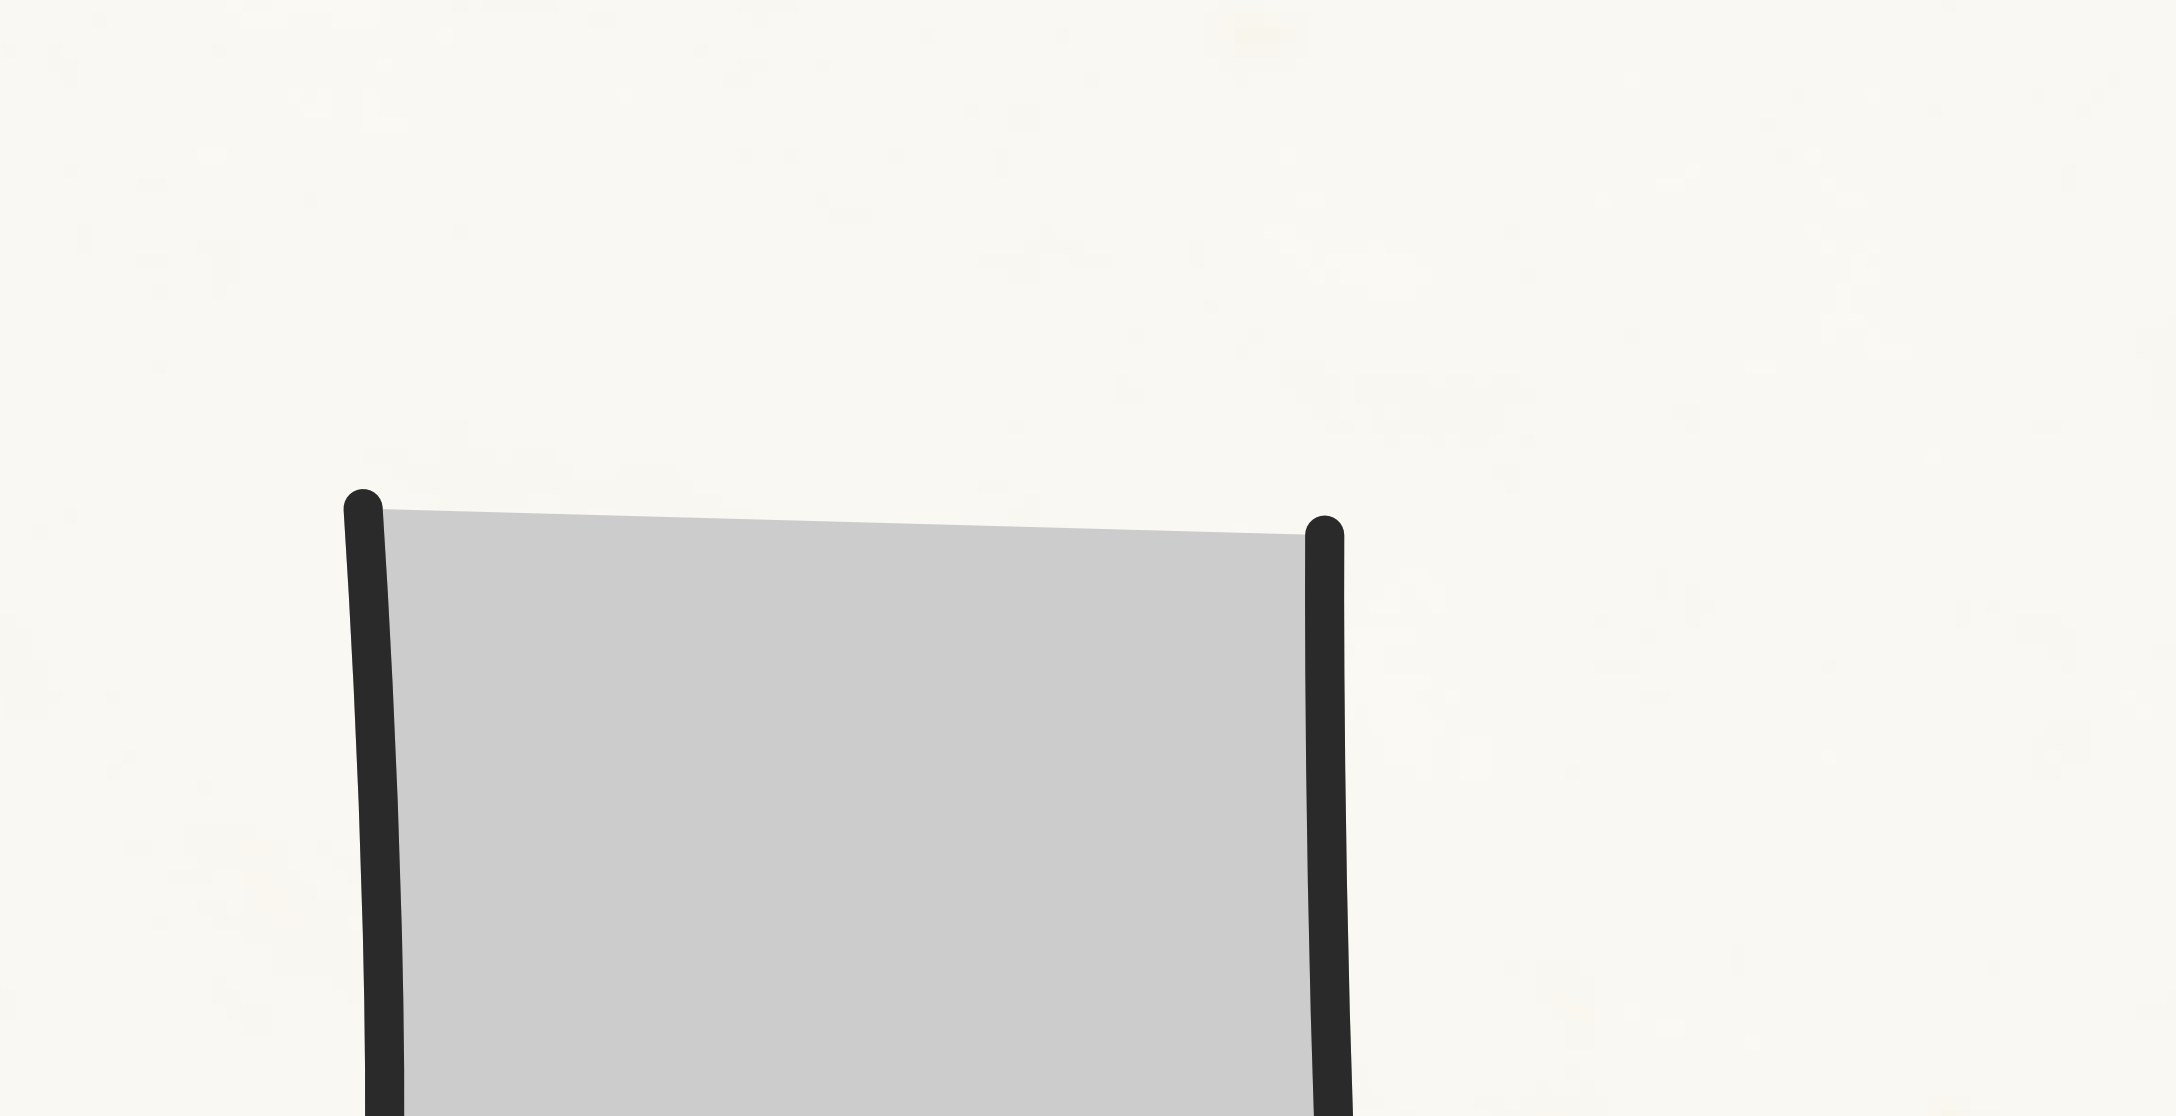
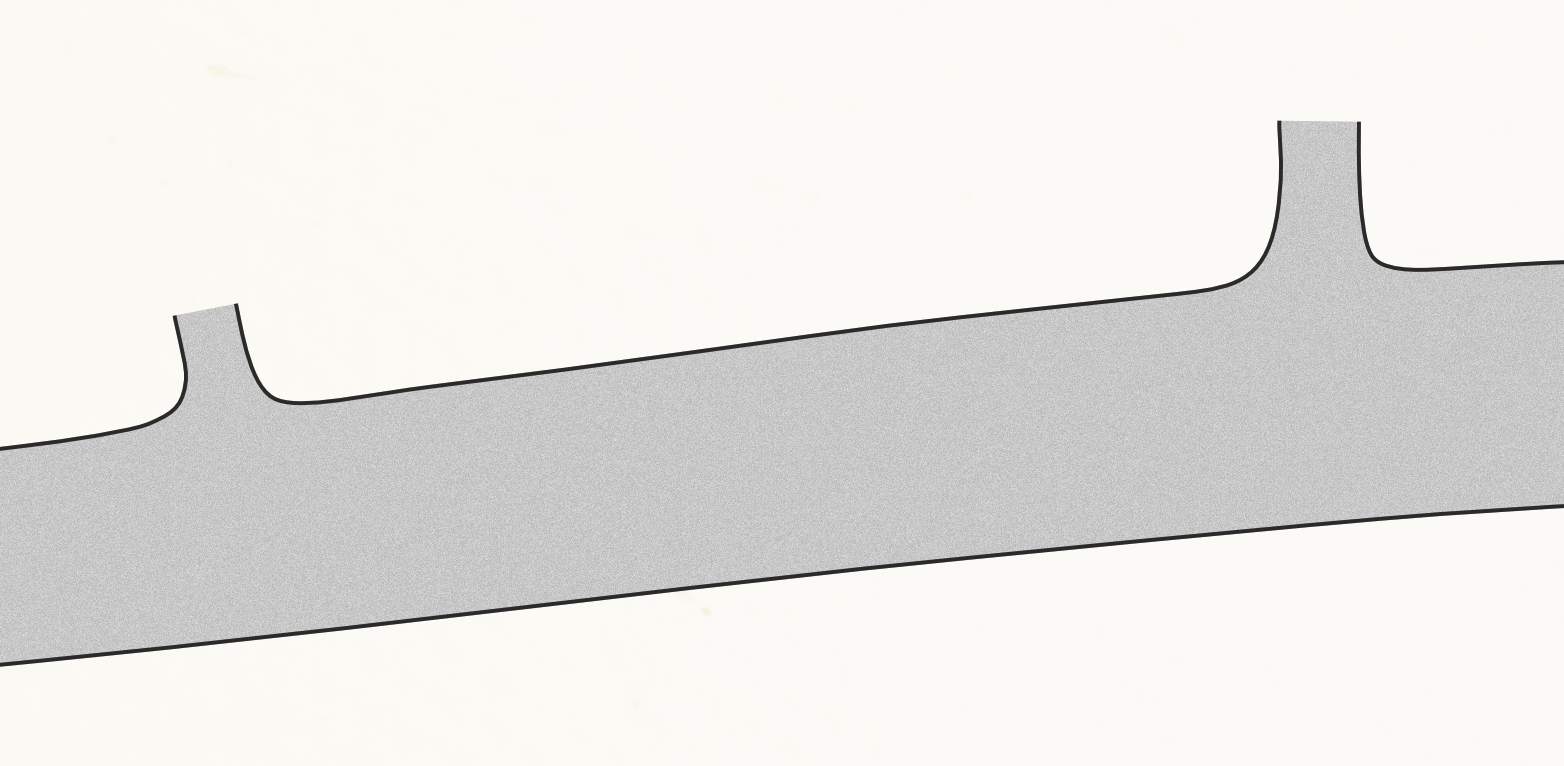
Masking would be exactly what I want, but vector masks are rectangles only. The shape that I deal with looks like the following screenshot (it is a map): I dont want / need to draw all streets. So for small and unimportant streets I would only draw the very first meters of that streets and leave the shape open at that place. Indicating that the street goes further. Therefore the shape has to be open and the stroke has to be interrupted. The method I normally choose is that I just place white shapes top of those "street beginnings" (third screenshot). But the just work if you have a white and consistent background. You could use the same background an fill it in the white shapes, but that only works if you background is a single element. I endet up using the method @Mithferion provided, but that resulted in not so clean edges. I can use rounded stroke endings, which kinda work (screenshot 4). But if I choose rectangular stroke endings, there is now way to have a clean cut like when you use cropping or masking (screenshot 5).
-
This only works if the background is consistent.
-
This only works when you want to interrupt the stroke on one place. It does not work if you interrupt the stroke on multiple places.
-
Alfred reacted to a post in a topic:
AD: show which parts will be rasterized
-
Designer should tell me which part will be rasterized. I almost always choose "rasterize not supported areas" but I just want to have more information than just saying "some areas will be rasterized". I often come in a situation where it is just not clear why rasterization happens and giving more information will help tracking down those areas which will get rasterized for whatever reason. Just a little "show more" button which leads to the appropriate information in the export menu directly under "some areas will get rasterized" would help.
-
Please bring back the dedicated noise slider. I searched for hours finding the noise slider until I noticed it appears when you click the opacity slider. Why does Affinity not just show two sliders? Two sliders would be so much more user friendly and easier to find and use.
-
Hey Mithferion, thank you for your quick response. Yep, that would work, however this would mean that I can never edit the original shape without duplicating it again and breaking the curves again. Even slight adjustments would mean a lot of work (I want to draw a map). I hoped that i could break the curves on multiple places and still have the fill that I want..
-
I want to draw a shape like you can see in the first image. The black stroke should go around the shape but interrupt at multiple points. The filling should be everywhere within that shape. I use shapes with the same background color which cover the stroke part (second image) but that does not always work. Is there a better way to do this? I know I can use the "erase" blend mode but I think this causes rasterization on export. If anyone knows how to draw a shape like in the first image please let me know... I dont want to draw a separate curve and place it on top the grey shape. It has to be one shape for easy editing.
-
cyp reacted to a post in a topic:
snapping control handles to any snapping candidate
-
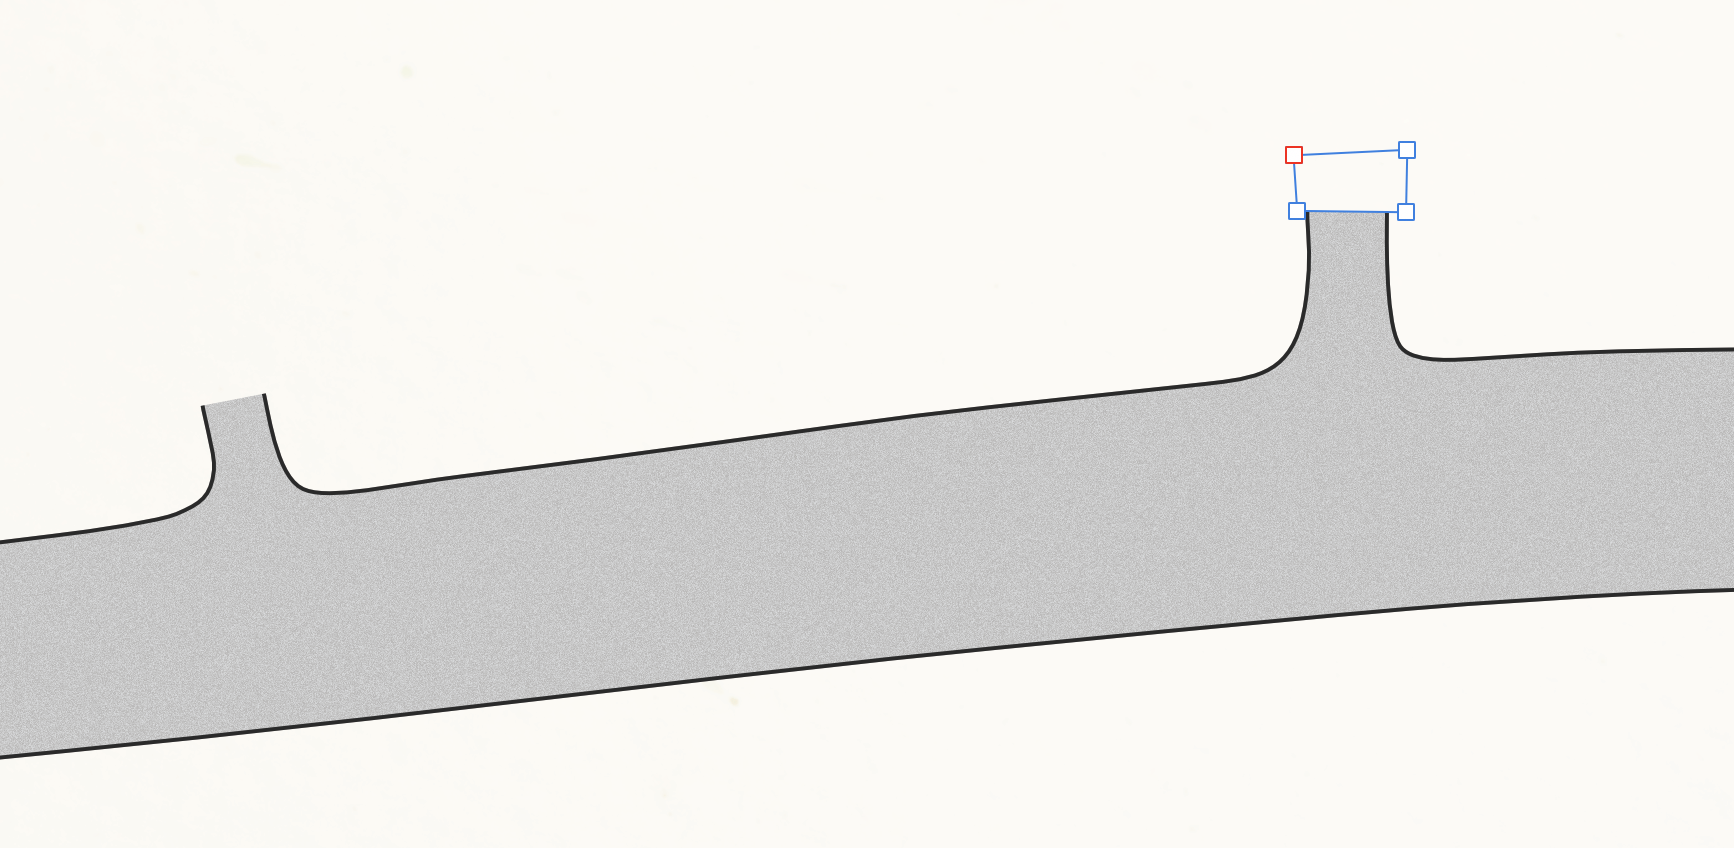
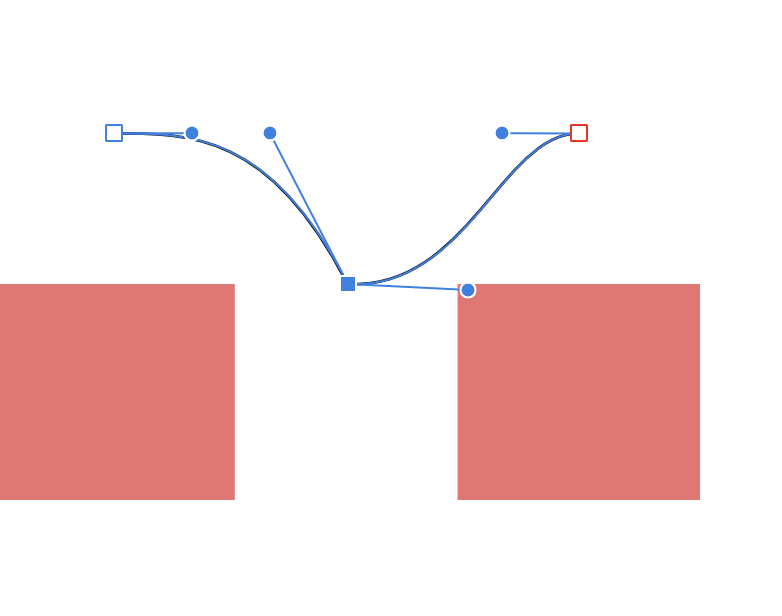
I want to be able to snap control handles to any object or to the grid. It would be great, if those control handles act the same as every other object when it comes to snapping. That way, I could draw very precise curves, because I can simply lay out helping objects to define spaces and specific angles to snap to with the frontal handles of a node. See the screenshot. It would be nice if that blue control handle of the selected node would snap to the red rectangle.
-
Hey AD-Team, thank you so much for this one: vertical text alignment. But please add a UI button.