Search the Community
Showing results for tags 'editing'.
-
 I'm new to Affinity Publisher, coming from Indesign CS6 (which I own but cannot install on my new computer, because Adobe blocks activation now). I have part-finished projects and have exported as idml and opened these in Publisher, but the text does not alway appear correctly. In particular, though Publisher has done a remarkable job, I find that manual changes to Indesign's kerning etc and especially hyphenation is changed. Most of this I can manually fix, but ... In Indesign I have an easy, fast way to add my own hyphenation to the dictionary so that words I commonly use are no longer marked as incorrect spelling and I can have the hyphenation I require. I have found out about using numbers to represent hyphen points (~ becomes 1 and so on) and I have a text file from Indesign with these (export is easy and find/replace changes tildes for numbers). BUT: I cannot find the dictionary file to edit. I'm in the UK, so the installed dictionary is correctly 'English (United Kingdom)' and so I need to add 'my' words to this file. My problem is ... where do I find it (and is this the best way to go?). Secondly, isn't there (I think there should be if not) the means to add words and hyphenation easily to the dictionary, as in Indesign, without having to locate a file and edit it manually. Or am I missing something, which is entirely possible. Thanks for any pointers.
 -
 Introduction I'm "kicking the tires" of the Affinity Publisher, Designer, Photo V2.40 suite this week and wondered if anyone else has also been thinking of or are using it as a Swiss Army Knife program suite for all document related work like notes, letters, reports, papers, books, websites rather than just traditional "desktop publishing", to replace Microsoft OneNote, Word, Adobe Indesign, Illustrator, and Photoshop totally. I've been wanting such a suite for 34 years and after just 4 days of experimenting, I'm already dreaming of a world where the Affinity Publisher, Designer, Photo suite is dominant in all these areas. We are only allowed one main question, so what additions to the Affinity Publisher, Designer, Photo suite would be required for my vision of the future? Version 2.40 now has almost all the things that critics claimed were missing in version 1.0 as a desktop publishing program. The present plague I got my first "real"computer 34 years ago in 1990 and within 1 year I was already trying to import AutoCAD drawings into Microsoft Word for a steel pole manufacturing company user manual. Most of you know that Microsoft Word has never displayed vector illustrations properly and likely never will. I asked the secretary of the company to print out a few pages I had made with filler text and the drawings I had imported, to check the quality of the lines which looked horrible on the monitor. The secretary was horrified at the filler text thinking this was the final draft and notified all the head people in the company and soon I was confronted by an angry mob in the lobby where the head accountant put me in a choke hold and tried to strangle me to death. After this I experimented with Ventura Publisher which only displayed thumbnails in the image boxes, then Page Maker, Frame Maker, and finally Indesign, Illustrator, Photoshop where I discovered how huge those Adobe files are and so would only be suitable for the largest of projects. The file size problem Smallest Microsoft Word version 2016 docx files are 12 K, Adobe Indesign version 2.0 indd files are 144 K, but Affinity Publisher V2.40 files are only 10 K. So Adobe Indesign documents are not typically going to be used in any corporate or home office for small items. Below are minimum file sizes for different documents. Affinity Publisher 10 K, no thumbnail on save Affinity Designer 9 K, no thumbnail on save Affinity Photo 8 K, no thumbnail on save, 22x20 mm stamp size image Adobe Indesign 144 K, compression, no ICC, no pdf editing Adobe Illustrator 273 K, compression, no ICC, no pdf editing Adobe Photoshop 685 K, 22x20 mm image, CMYK, 8 bit Writing everything directly in the desktop publishing program Most people think that writing should be done in a word processor and later inserted by a professional into a desktop publishing program if required. We all know how many times documents are edited, so in the end the "finished" document spends more time being edited than the original write, and it only makes sense for the author to do the editing in the desktop publishing program. So everyone in a company should be using the Affinity Publisher, Designer, Photo suite. The desktop publishing experts would be used to set up the documents and help people with the editing, illustrations, and photos? Program suites Visual documents filled with illustrations and photos are much more compelling but also are often required. A long document text, vector, raster suite of programs developed by the same company is required for this to work seamlessly. There are only 2 companies now in the world selling reasonably popular, reliable, and easy to use suites that do this, Adobe with Creative Suite and Serif with Affinity Suite. Alludo (Corel) decided to drop Ventura Publisher, and Microsoft decided to focus on text and ignore complex graphics. File sizes of Adobe documents are too big and the subscription fees too high for wide use. This leaves only Serif to fill that void for the mass markets. And just like QuarkXPress lost their domination, Adobe Creative Suite could lose it's title of being most popular by missing on the mass market end if my vision of the future becomes reality. Even note taking could be done by Affinity Publisher There are likely over 100 different note taking programs available. Everyone of them has the same problem, not being able to draw or edit quality (Bezier) vector illustrations or add vector text to raster images. The original Zettelkasten note system was using 3x5 inch stiff paper cards, were widely used by academics for text, charts, diagrams, but present computer note programs focus on text only. But what is also required is a proper note making program. I work in the field of science and engineering and we make a lot of research and design notes. So instead of copying something from the Internet, we have to make our own drawings, tables, and formulas. And these are often quite formal with quality drawings and illustrations, as orderliness, precision, and attention to detail results in better conclusions. None of the present note taking programs will do this, they are more for fleeting notes. So am considering using Affinity Publisher to generate these permanent note and invention files. The actress Joan Rivers was reported to have one million cards in her Zettelkasten system. This is why small file size is so important. Because digital documents can be text searched, I am proposing to use longer notes than what was used in the original Zettelkasten system, might be up to 20 pages if there is one main idea, with individual digital files for notes instead of a single huge file like in present programs. This allows addition of different file types like document, database, spreadsheet, presentation, drawing, and image. A descriptive file name is typically used in computer filing systems and complex coding could be used, but also tags would be required for searching. Presently l can't find any tags that can be added in Affinity Publisher that can be found with the advanced search in Windows Explorer?
 -
 Direct delete and position feedback while editing (the proposal would be of interest to Affinity Photo and Affinity Publisher alike). A. You right-click on a guide and a new context menu appears. There you can select delete or edit. An alternative to a right-click could be a double click. B. The editor that opens would be the same as currently, BUT three new features would exist: If you have opened the editor via the context menu of a guide, then the corresponding guide is highlighted in the editor list. At the same time, the guide would also be highlighted in the workspace. E.g. it could be pink instead of blue. Great feedback when there are many guides. As soon as you select another guide in the editor guide lists, the same thing would happen, the corresponding guide would also be highlighted in your workspace. So you always know exactly what you are doing.
-
- 1
-

-
- affinity designer
- affinity photo
- (and 6 more)
-
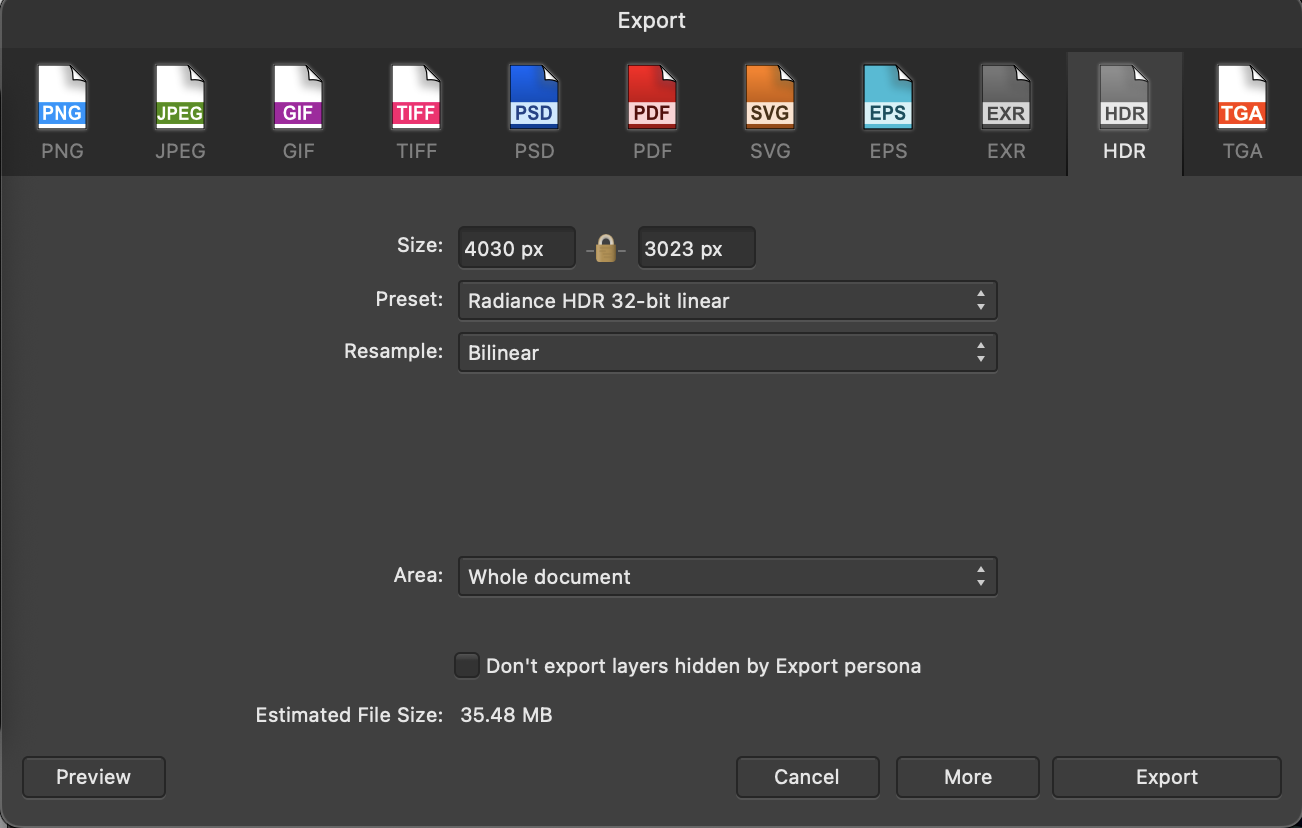
 I'm editing a photo in Affinity for Mac. The photo I'm working with looks completely blown out when I try to export it. The image is a bracketed photo that I imported using the HDR Merge feature. These were raw DNG files that I took with my drone (DJI Mini 3 pro). I'm working on my 2019 16" MacBook Pro if that helps at all. I've tried exporting in several different file formats (PNG, JPEG, and HDR to name a few). They all basically look the same when exported. I've tried sharing directly to Apple Photos on my Mac and that looks the same. I deleted the original file and started again with the same bracketed files, but it continued to act the same way. When I preview the photo at the export screen in Affinity, it looks blown out and when exported, looks like the preview. However when I go back to the editor, the photo looks completely different. Can someone tell me what I'm doing wrong? Or how I can correct this? I'm a hobbyist who is starting to learn more about editing, so I may be doing something dumb. I've attached the photo from apple photos and the AF file for comparison. I also attached screenshots of the export screen and the image profile. Thanks for any help. Barge on the River.afphoto
-
 Hello. I would like to ask why affinity photo's develop persona is still has very limited features? I hope they would at least add color correction features that would allow you to change hue by hue, hue by luminosity, hue by saturation, saturation by hue and etc. A lot of useful color editing tool are only available outside develop persona, making it harder to edit the image without degrading it easily. The masking in develop mode is also still very limited. I hope affinity will soon add it to their updates. Thanks.
 -
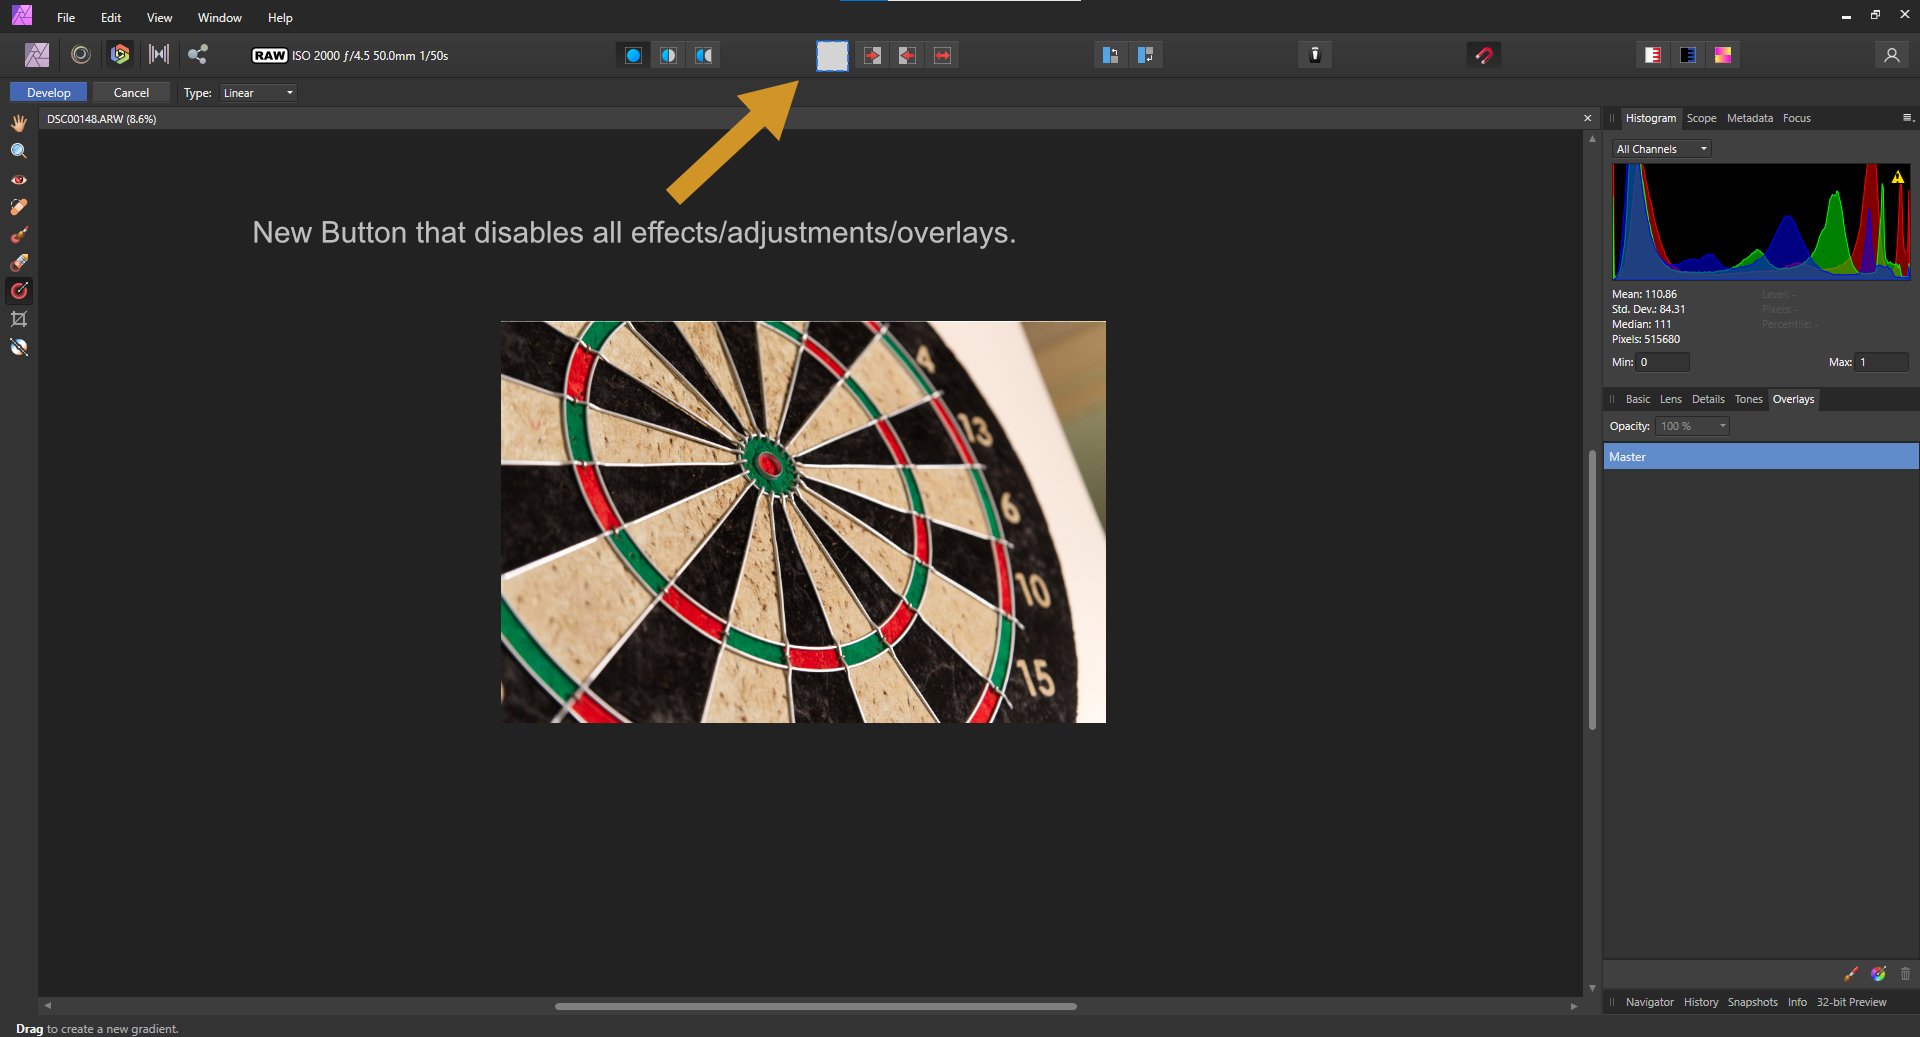
Hello I would like to propose a feature that would allow the user to switch between the orginal and the current adjustment of raw image in a faster way. I am aware of the syncing feature but there are times when it just takes a lot of steps to just view the orginal especially if you accidentaly synced the wrong adjustment. This new toggle button feature would just allow a quick way to switch from orginal. In a simple way, this is like a toggle button that disables all the effects/adjustments including the overlays.
-
 Hi, I was editing my Affinity Publisher file and was saving my edits. While saving, it crashed and when I tried to open the file, it says it has been truncated and I cannot edit or use the file anymore. I saved it on my desktop and I am absolutely devasted. Is there anything I can do? 1330338472_Tryinghard.afpub
 -
 I've noticed something that bugs me, but can't figure it out in Designer (but also the other products). If I have an object - say an image I've placed. And I want to draw a rectangle on top of it, starting at the upper left corner of the image. I change to the rectangle tool, but when I go to draw the rectangle, the cursor "sees" the handle of the image and changes it, rather that 'inserting' the rectangle. Is there a key combination or something to prevent this? This is a basic example, but hoping for some clarity.
 -
 I'm working on an ~170pg book for an author. I'm new to Affinity Publisher. I auto flowed the word.docx following a YT tutorial. Great, however: Here's my question: I discovered I really need to tweak the margins to take into account headers and footers, pagination, etc. Is there a way to change the margins so I don't have to fix each page individually? I need to be able to see how large the book is in two book sizes as well, (ie 5 x 8 and 6 x 9). I created two master pages, am planning on doing sections and such, heading styles - and I don't want to proceed yet until I know if I have to make separate sizes or whether I can duplicate with different margins.
 -
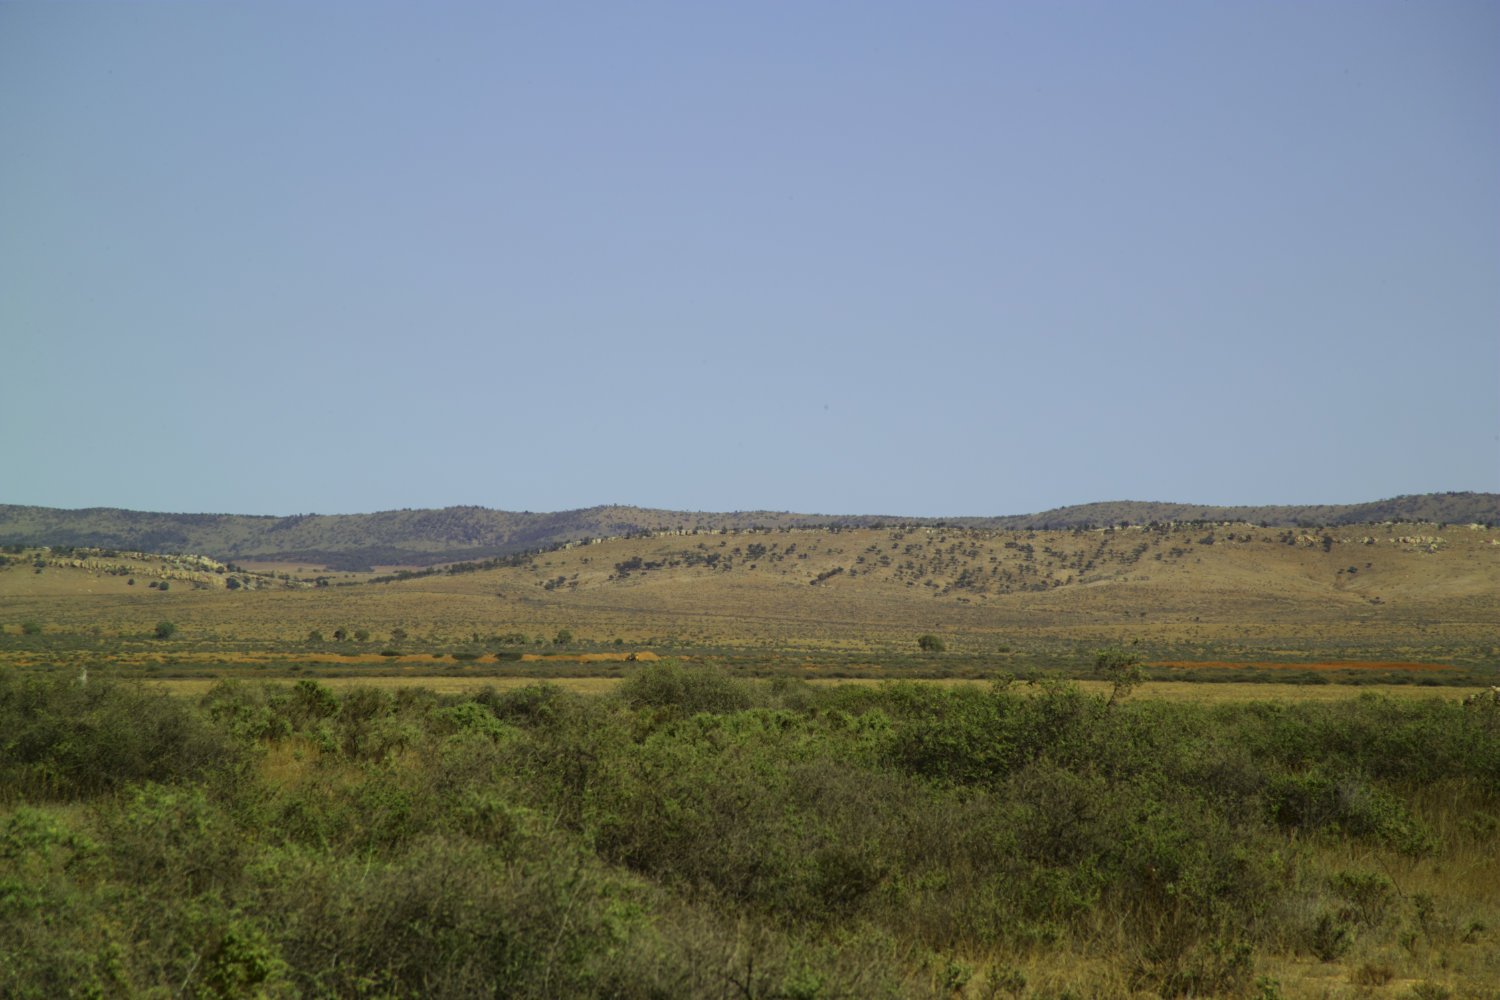
I think that there should be a video showing how to use L.a.b. colour to rescue flat files. I used Photoshop for years for this purpose now I am getting to grips with the different process in Affinity. The present videos do not do justice to this powerful tool. I have attached a before and after edit which only took a couple of minutes using Curves in L.a.b. For your info they are in the South Australian outback. There is much more to L.a.b. and it is the main reason that I chose Affinity when I gave up Photoshop Eric
-
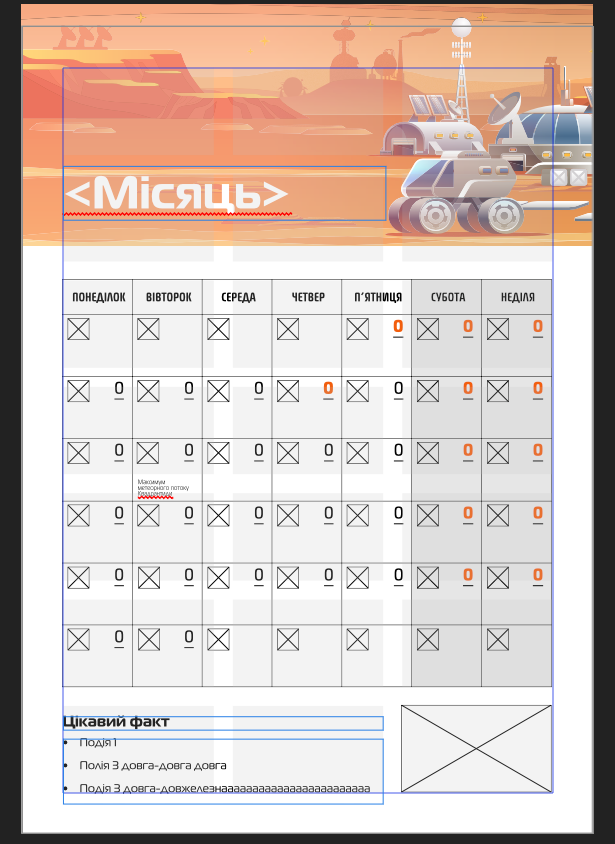
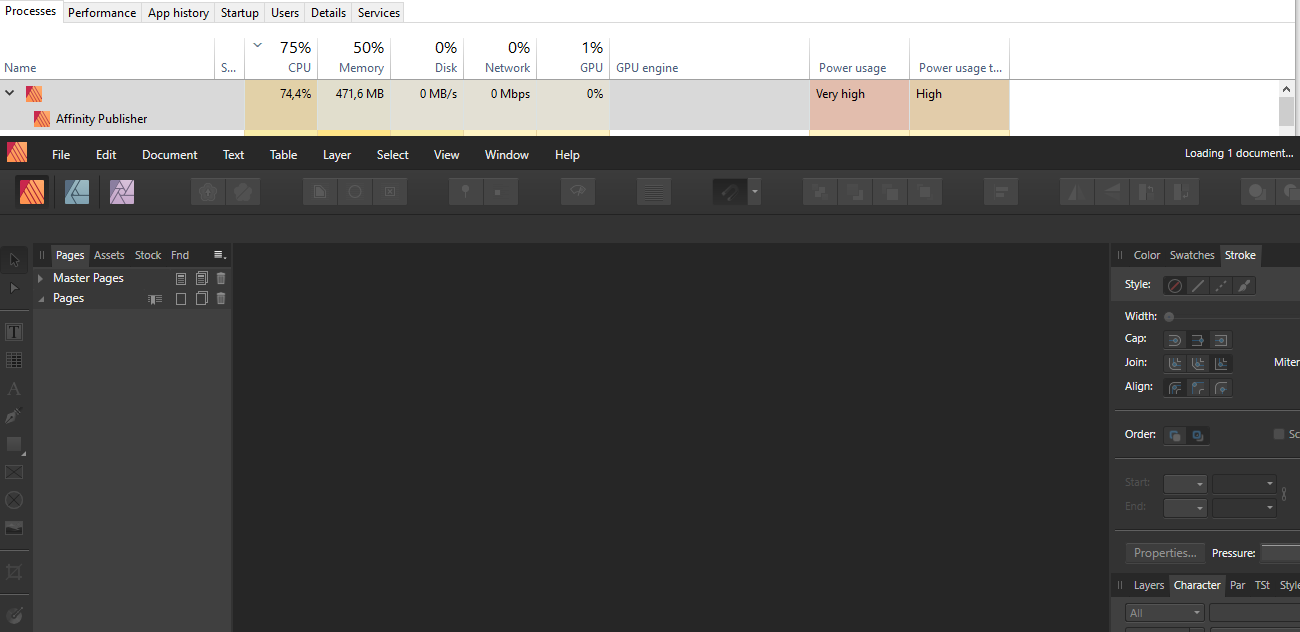
I try to create a 12-page calendar, based with master-page, containing calendar greed-table. I've experienced a series of crashes while tried to set up proper table formatting, then, while tried to put a placeholder text in the table on a master page, and then, trying to replace the placeholder text with an actual data on the calendar pages. And after some edit attempts Affinity just can not load the file (It reports loading, Uses CPU a lot, but open nothing for more than 5 minutes) (see screenshot attached). See master-page template attached.
-
 Hi Affinity Forum! I'm fairly new to Affinity and having been learning as I go since buying it over the summer, but I have come across a hurdle that I need some help with. I'm in the early stages of founding a new online wine startup (caminodelvino.co.uk) and I have been practising and playing around with my photo and editing skills in the run up to launch. Using a mini home studio as my setup, I've managed to edit a photo (see wine photo attached) to an acceptable level so far and recently, used the healing brush tool to edit out the crease line on my backdrop so that it looks more 'professional'. I have three questions: 1) is there a better alternative to using the healing brush for the removing background creases or folds? 2) if not, is there anyway I can make it non-destructive to the photo at all, or is this likely to be a last decision editing job in any circumstances? 3) As much as blue is a nice colour, it isn't the backdrop I'd like to use for my wine on my website. I have alternative backdrop colours, but I was wondering if there is anyway I can lay over a full background colour (RGB Hex #FEF0E2) to be more inline with my companies colour palette, whilst retaining that 'professional' photo look about it (i.e slight shadow effect etc. - see shoe photo for example). Any help would be greatly appreciated thank you!
-
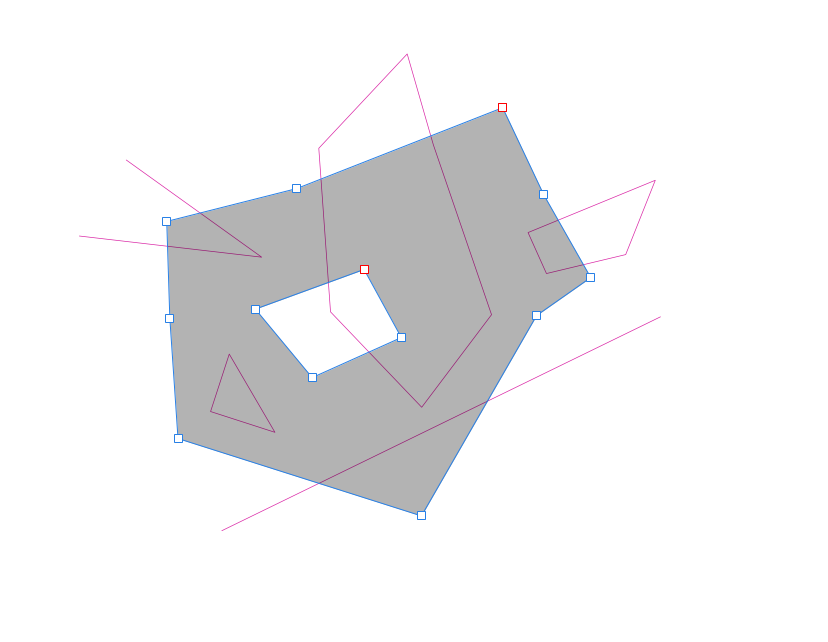
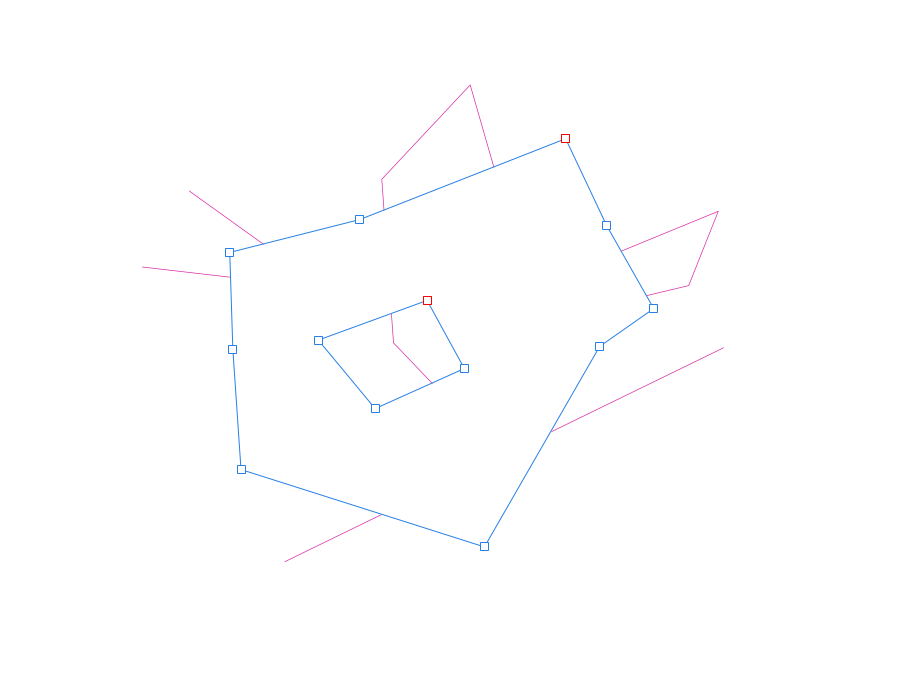
 Hello! I'm attempting to remove lines and shapes underneath a complex shape but having trouble doing this. I've been attempting to use the "Divide" command to remove the overlapping segments and then delete those. Which is a bit time consuming and I run into problems because "Divide" will close incomplete line segments, which creates weird shapes. Images: 1-3 illustrate what I'm trying to do: Remove everything intersecting in the grey shape but keep the rest. 4th image is my actual artwork which gets complex so I need to do this efficiently. It also needs to be fully removed (not hidden) because it's on the way to a laser cutter. 5th image is what happens when I "Divide". As you can see the v line segment on the top left closes into a shape. And the bottom line looses a section. Thanks for your help!
-
 Hello community, does someone know how to import .eps file gracefully in affinity designer to edit the vector file??? Thanks
 -
 I followed the Affinity tutorial re: replacing the sky. When done there was a white line separating the new sky and old foreground. See photo attached. As a new user and new to editing, I could not figure out where I went wrong. I would appreciate any help. New_sky.afphoto
 -
 Is there any way how to basically protect your exported PDF file from Affinity software (mainly publisher)? Or is there any quick alternative? Thank you!
 -

AP and alignment for photos scanned
KFam posted a topic in Feedback for Affinity Photo V1 on Desktop
Photoshop users always have access to the arbitrary rotate option, which is intuitive and automatically taken by users to mean the default angle to correct for vertical/horizontal line (horizon) adjustment. There is no easy access to anything as simple as this in the base menu. Is this an add-on or macro required of the product to make it work ? In addition, when I used the NIK correction modules in AP, there is no provision in the layers to show separate (retractable) adjustments like that which could be done in my CS2 CS3 /CS4 Photoshop. It looks like I cannot reverse the change as in Photoshop's smart object. -
 I'm using publisher 1.7.3 on windows. I was having issues with a white background showing on my page numbers so on some pages I removed the original master test by deleting the text from the master page layer in the master page folder, then realized I can change the master page to delete the white background in the text by doing a factory reset. I couldn't figure out how else to remove the background color on my text. Is there a way to refresh the page so that the master page will reload and fix the pages I tried to adjust or are master pages handled more like instances and each one comes from a parent but can be changed individually? It would be nice if I could reset the pages that use master pages to the original master page from which they came as they are cleared still linked but I don't see where the option to restore them is. I included what my original master page looked like and an example of a page using a master page where I deleted the master page content. If I could click a button to restore to the original master page that would be very helpful.
-
 I am very new to Affinity and am very excited about finding this product. I have been trying to edit a cropped portion of a very old black and white bitmap image. The only image of a sign in the background of a photo taken of my grandparents grocery store. I had been searching for months for a way to edit that one portion of the photo and colorize it to make a print as a gift. I only found Affinity two weeks ago and have been searching on YouTube for tutorials on adding color. I have learned a lot about using vector and isolating each letter but I am not sure how to consolidate the layers of the image to stabilize the color of each character. I have not even gotten to the background. Can I find specific instruction online to help me understand this? Time is not on my side and I need to finish this project soon. I am using Picture and Designer. Any ideas or direction will be appreciated.
 -
 Affinity Photo Tutorial | In this video, We will learn, How to apply a blur effect on any photo background like the Expensive DSLR Camera effect. #affinitytuts #affinityphoto #blureffect
-
- 1
-
-
- background
- blur
- (and 4 more)
-
 With photoshop this is pretty straight forward and I do not know what I am missing. I have a level adjustment and I slide the dark side in. Now I want to paint part of it back. If I use black or white it just leaves gray streaks. Please see videocast. What am I missing? https://www.dropbox.com/s/gjuq2zymnnkl3fc/Recording %23134.mp4?dl=0
 -
 The EXIF information is available during the Develop Persona, but not available in the Photo Persona. Can we have an easy way to access the EXIF data whilst editing? Please? AS it is, one must switch modes (Personas) back to Develop to see EXIF data. Whilst editing, some decision are made using EXIF data (e.g.- "How much noise suppression do I normally use for this ISO?", "Did I shoot that at 12mm or 14mm?") Thanks. Walt Palmer
 -
 With this recent update the ability to "Alt+Mask layer" within a group has changed. Previously, I would be able to create a layer which allows me to brighten sections, such as the eyes of an animal. Now everytime I do the same process, it goes transparent. Any help is greatly appreciated :)
 -
I've been experiencing a number of app freezes on my iMac while creating a custom brush for a project this morning. Creating a new brush is easy, but as soon as I start changing the values of the "Size" and/or "Spacing" (although I haven't even tried changing other options) in the brush editor, I get the spinning rainbow wheel. I hoped that the app was just processing the request to change those values (and taking a bit longer than usual), but it ultimately froze up completely, resulting in me having to Force Quit Photo. Upon reopening, I tried it again, and the same thing happened over and over again. All I created was a standard Round brush, and when trying to change the values in the brush editor, I experienced app freezes every time, without fail. Entering the value is not an issue, but pressing 'tab' to enter the next value section, or simply clicking in the next box with my mouse results in a total freeze.
-
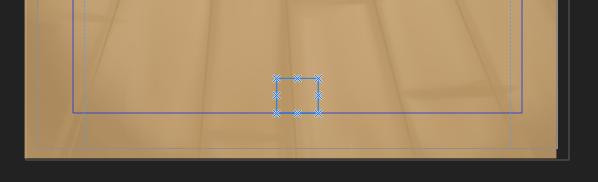
 I have created a Brightness/Contrast adjustment layer and painted over the layer with the gradient tool. Sometime later I want to adjust the gradient. I can find no way to do so. Clicking on the layer in question and then on the gradient tool displays no handles, and clicking with the gradient tool in the document (image) lays down a new gradient. I have tried doing the same thing by creating a mask as a child layer of the Brightness/Contrast layer, then clicking the mask and creating a gradient in it with the gradient tool. I find no way to adjust the gradient on the mask, only to lay down a new one. I just cannot believe that this is not possible and/or not straight forward. Although quite satisfied with @James Ritson's tutorials, https://affinity.serif.com/en-us/tutorials/photo/desktop/video/296616219/ , second use of gradient tool, begs the question, how one edits the gradient on the blur filter when one later wants to change it, especially since, in the first example (atmospheric haze), James makes a point of extolling the advantage of being able to go back and adjust the gradient.


.png.72e88c233a90cb6c0961c5222ee446bf.png)