Search the Community
Showing results for tags 'affinity photo'.
-
 I'd like to use Guides for Lens Correction in Develop Persona in Affinity Photo How can I Enable Guides in Develop Persona? I enable View>Show Rulers and then View>Show Guides. There is no Move Tool to drag a Guide out. There is no View>Guides Manager.
 -
 Hello, in PS, it is pretty handy to be able to copy layer, layers or even group of layer onto other documents. I would appreciate if you could implements this feature in Affinity Photo. Thanks for listening.
 -
 Hi, Has anyone noticed a difference in color of the raw file in AP and that same file in PS? How can i be sure i'm getting the correct color from the adjustments I'm making? Just curious because when i try to process in AP the images don't come out as great as i believe they are in PS. Thanks!
 -
Messing around a bit with watercolours and some blenders. I recently repainted this picture from scratch using the new Watercolour Set, using much more refined tools. Now textures are subtle but perceivable and the final result is more credible. Affinity's engine has been growing a lot since 2015!
- 7 replies
-
- 13
-

-
- painting
- watercolours
- (and 1 more)
-
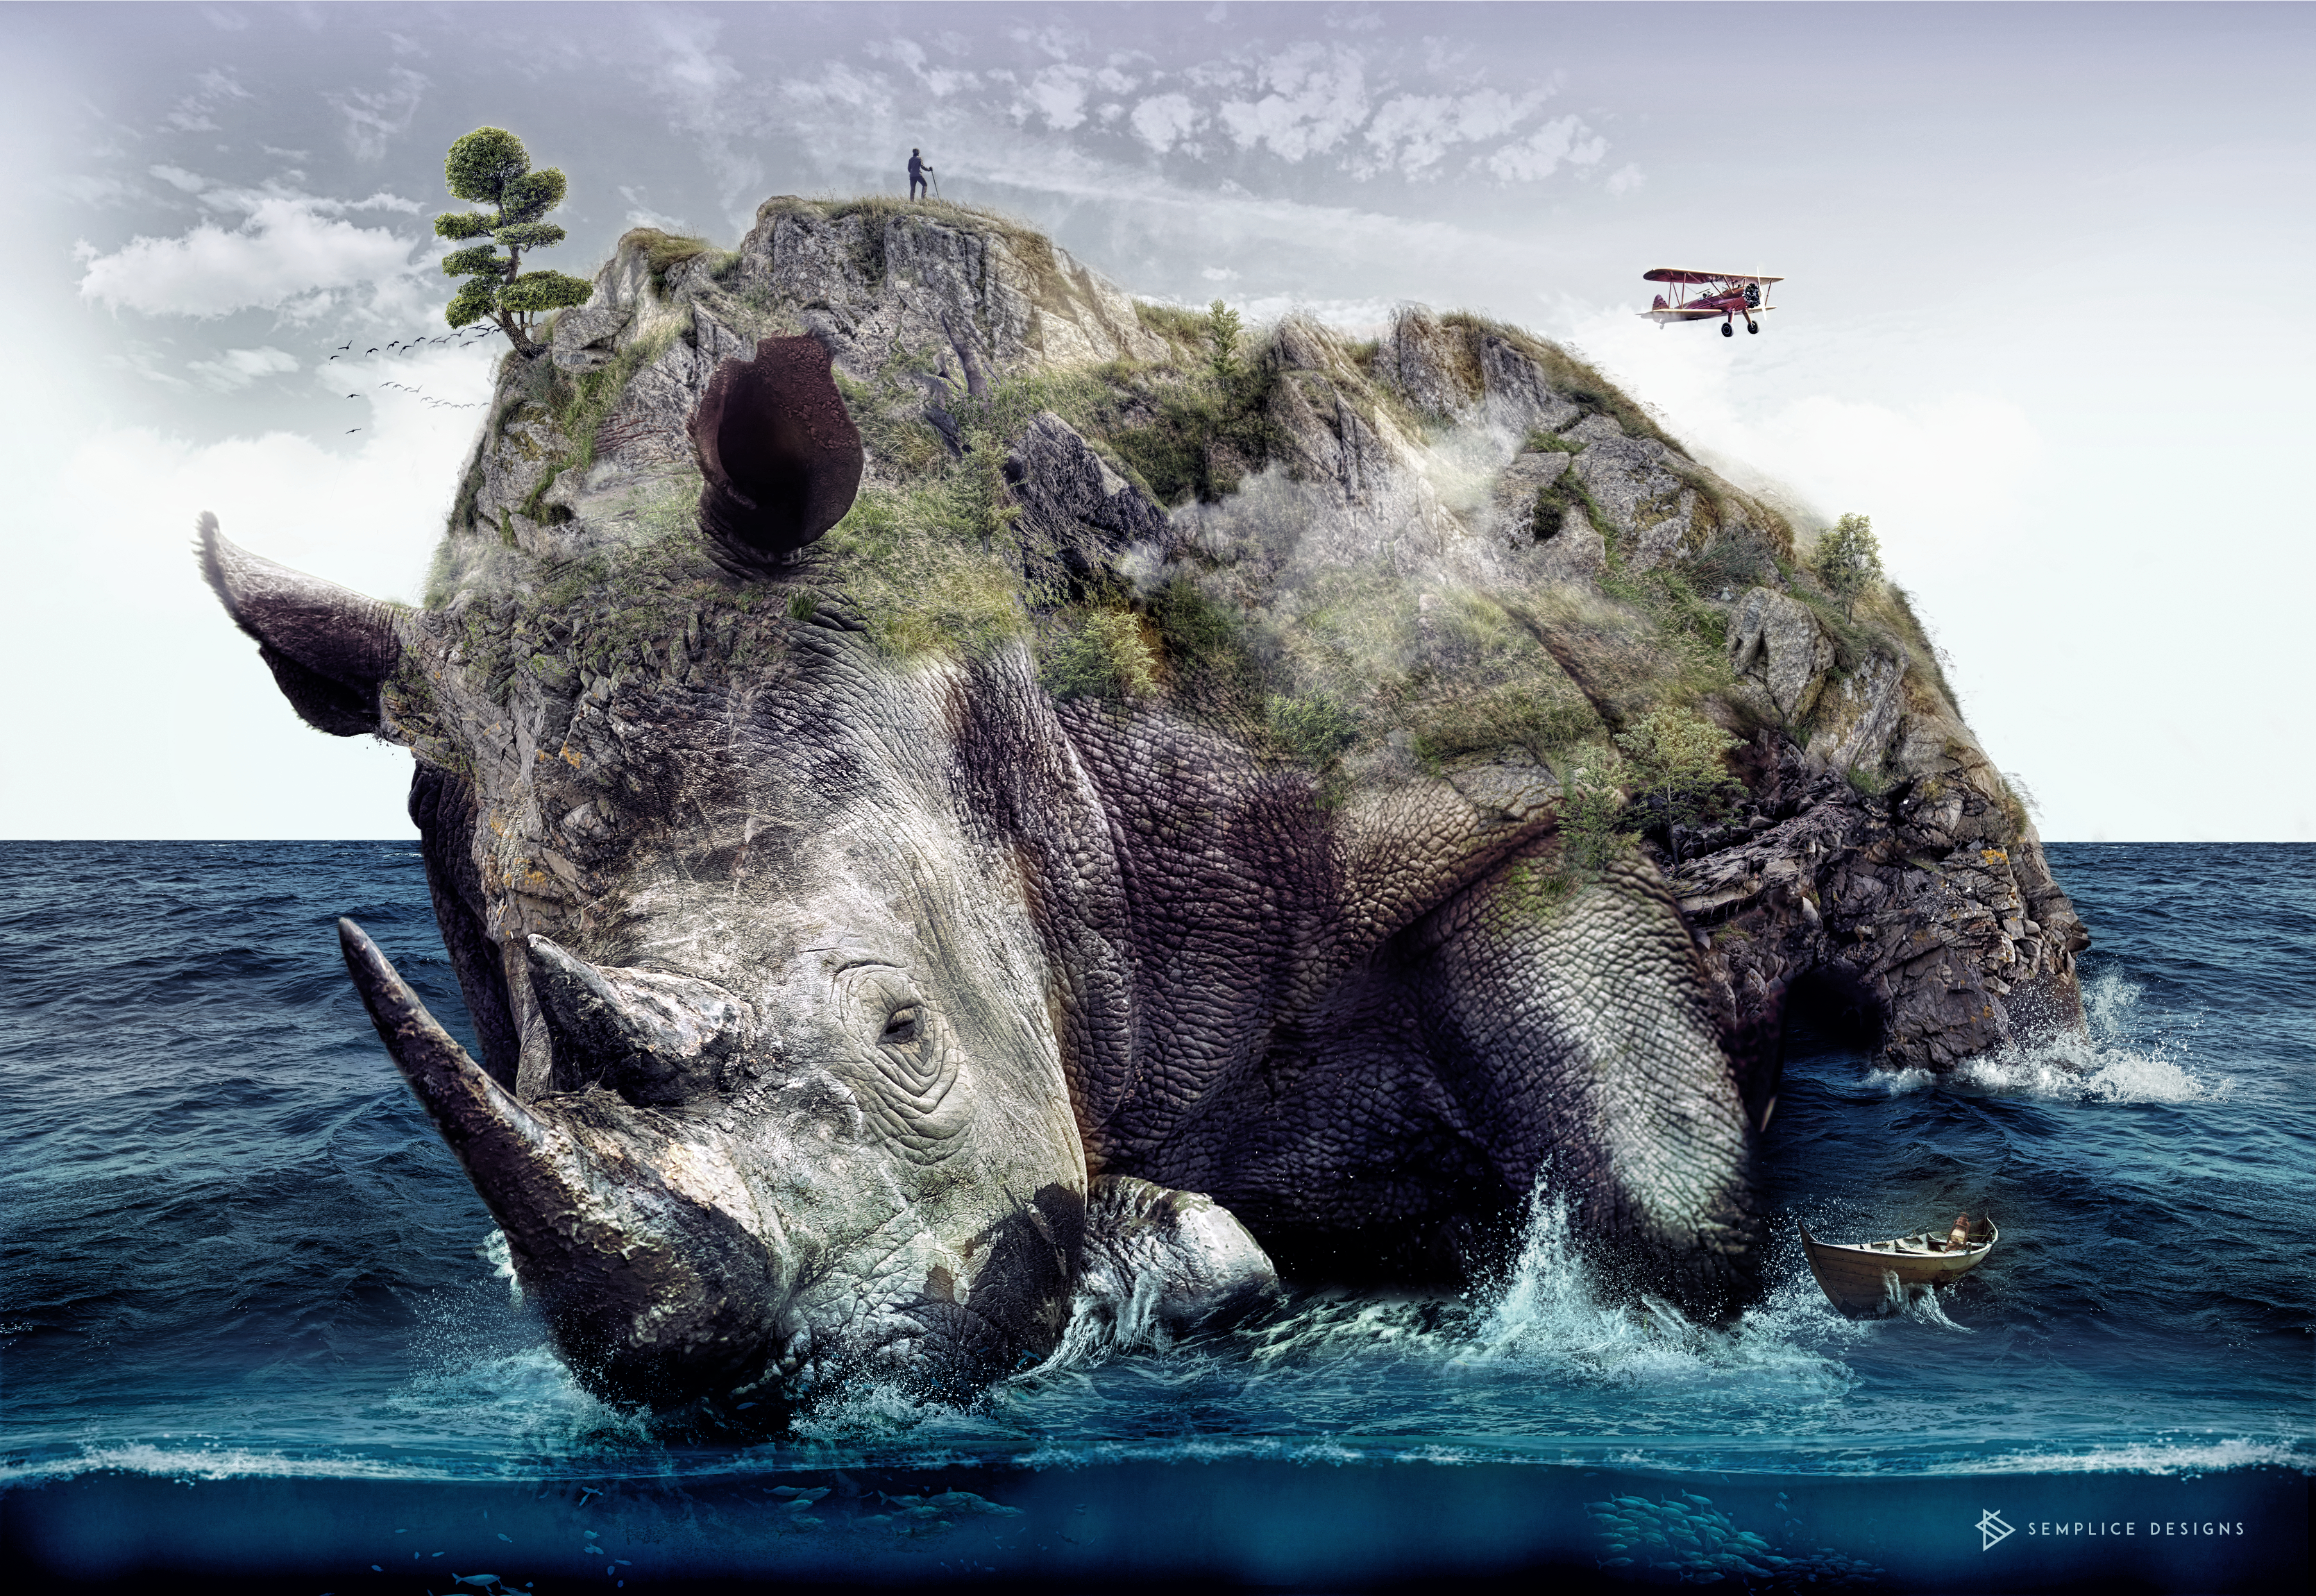
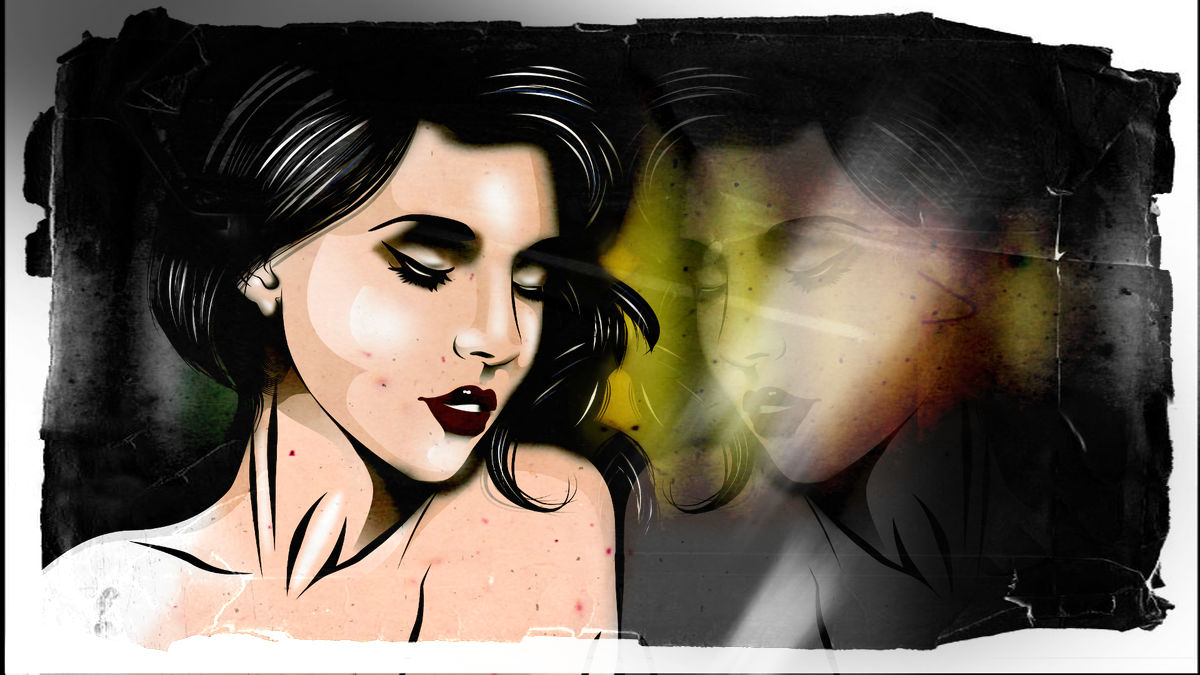
Hello my name is heli herrera, It's my first time in this forum, I made this test of photo manipulation, hope you like Greetings from Brazil Credits: Images used http://www.bigstockphoto.com/ http://tigers-stock.deviantart.com/ http://mysticmorning.deviantart.com/ http://kuschelirmel-stock.deviantart.com/ http://krisderp.deviantart.com/ http://kassmir.deviantart.com/ http://hybridgothica.deviantart.com/ http://frostbo.deviantart.com/ http://gf-stock.deviantart.com/ http://brunilde-stock.deviantart.com/ http://alp-stock.deviantart.com/ http://9j1kabir.deviantart.com/

-
Affinity Photo only has entire image/document based cropping. It needs to have image/layer based cropping. While one can use selection/deletion (which is destructive) or masking (which can be awkward), I think a simple straight line crop tool (like the document crop) and a bezier and b-spline crop tool with handles/point control would be good. I'd like to see two features in that regard (time to suggest them in the Feature Request forum): • There should be a Non Destructive Crop • It should have handles/points (much as the crop tool does). That can work for both "straight lines" or on bezier and b-spline curves. * Ideally it should have x, y coordinate point readout which might help in some cases.
-
 So, Diving into some Affinity Photo. I had a Couple of hiccups, but I am enjoying Affinity Photo so far. Still working this one out, but I am at a stopping point, so I figure I would share what I have so far. Stock Photograph model credit to Fae : http://faestock.deviantart.com/
 -
I try (test) Affinity Photo beta with different motives. Here are two cats from a children's book. Not really ;) , I just try several illustrations to ‚explore‘ AP. Previously Pohothosp was my home in graphics, now it’s AD and AP. That's a bit strange, but… very, very good. What is your own experience?
- 11 replies
-
- 4
-
-
- illustration
- kinderbuch
- (and 1 more)
-
Using a photo from my last post, I wanted to show what can happen when you let Affinity Photo do it's own thing. The first image is the original RAW photo with no changes. The next is my attempt to learn a little more about AP and make adjustments to improve the photo. And lastly is the image produced by AP with no help from anybody. I used all four of AP's auto adjustments and I for one am very impressed with the results. Although it is a little on the cold side, AP managed to pull out a great deal of detail and correct a lot of the indistinct elements. As I said on my last post, the photo is a macro image of a small cut and polished stone. The entire image area is just slighly larger than a US 25 cent coin. The new release of AP is certainly worth a look.
-
This is my first photo from the new release of Affinity Photo. For those who might be interested, the photo is from a RAW file opened in AP, slightly adjusted and then developed. The image was then exported out of AP in 3x which resulted in a 219 MB PNG file with the image at approx 48 x 36 inches with a resolution of 288 ppi. I then squished it down to upload to the forum. The image is a macro photo of a small agate stone that has been cut and polished. Affinity Photo handled the whole thing like a trooper. No hesitation, no slowness, no fuss, no bother. I really like this program. Since I have zero experience or talent in this area, I am really pleased at the result. Thank you guys at Serif. Nice job !
-
 It would be great to have global clipping warnings inside of the regular Photo persona. Photoshop has implemented clipping warning overlays as part of a few tools, such as Levels and Curves, but it won't for instance help you when you are trying to use the dodge and burn tools to get a pure white or pure black background and other workflows. Since I assume that this is already planned as part of the Curves and Levels improvements on the roadmap, I would suggest to make it a view option, accessible either from the View menu or in the Histogram/Scopes panels that can be used at any time, with any of the tools available instead of adding it only to two or meticulously adding it to all sorts of adjustments manually. Holding Option inside Levels/Curves and on the Luminosity slider in HSL adjustments, Black&White etc. would then temporary toggle that option to the opposite of its current setting (i.e. on when it's off and off when it's on). Video cameras often implement the overlay as a zebra pattern, and you can customize the threshold at which it shows up. That's actually a useful workflow for other areas as well. For instance, you could have your clipping warnings at 95% if you wanted to see which areas are reaching a range that while they might not be clipped, would not show detail when offset printing the image. A preference to animate a zebra pattern inside the clipping warning, like the marching ants of selections do, would also make it help stand out when the image is visually very similar to the overlay pattern.
- 2 replies
-
- 1
-
-
- Clipping Warning
- Photo Persona
- (and 3 more)
-
In addition to the current sampling settings in the Healing Brush etc., a "Current Layer and Below in Group" option would be very useful. One frequent use case would be frequency separation. I like to use two groups, one for the low frequency and one for the high pass image. I can then create additional layers in each one. For the low pass group, that's pretty simple since "Current Layer & Below" will work fine. To work with layers inside the high frequency group, however, I need to manually hide all layers below until I can clone/heal from the high frequency image only onto a new layer. That means I currently get no live preview of my results, and checking what I am doing involves manually selecting and toggling all layers below all the time. Being able to restrict sampling to the current group would solve these issues. Also, a checkbox inside the Frequency Separation command to create groups with layers in them instead of single layers would save the trouble of creating the groups, setting the high frequency layer's blend mode to normal and setting the high frequency group's blend mode to Linear Light every time, and it could even create empty layers above each base layer as well. While I am at it, it would be very nice if the Blemish Removal Tool could also get sampling options since that is really the only way one could work non-destructively with that particular tool.
-
Hi, Just curious when we'll see the new Tutorials for AP? :)
-
Downloaded the app! yay.. making my way through the menu, so I can replace Adobe. I was excited to read that it works with PS plugins. I use the Portraiture plugin and have upgraded it to work with the newest PS. I told AP where the plugin folder was. Tried to use it, and every time, this plug in seems to crash AP. It opens, I set it, and get no further. It simply closes the program. help!
-
 Hi friends, Now that I have purchased the Affiniy Photo Inhad dreamed that this one of my former questions would be answered by the working of the app. ut I am desappointed for is not. I am longing to get the selection outline being softened by a slight blurring, but as much as I repeat the action, select-shrink-invert selection-apply blurring....the result is that the blurring does affect the whole shape and. not the outline that is outside of the "marching ants" I have followed a moderator's instructions or tips and the hing does happen again and again, Can anyone have tried to do this action and succeed? I would appreciiate, again a bit of. help in this, Is important for my conpositions and though I coulld refine the outlines with Photoshop...mmmm....the thing is to get ride of it as much as possible...you see. Thank you so much in advance. Rosa
 -
 just purchased Affinity Photo from app store for $39.99 but the charge on my credit card shows $44.98, why?
 -
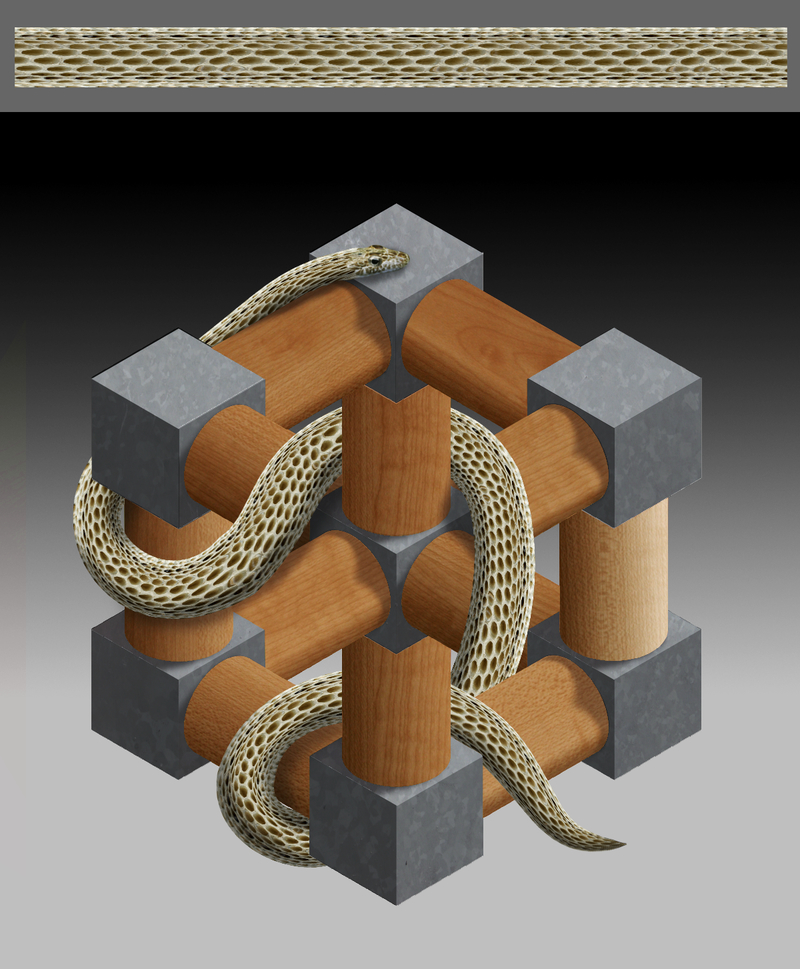
This is my second full image produced with Photo. Once again it is quite simple and, once again, it is focused on familiarising myself with a small set of specific tools. My previous image (the egg) focused on pen and brushes. This image focuses on vector shapes, boolean operations, fills and mesh warping. The snake was created from the rectangular texture shown in the inset above. I used the wonderful Mesh Warp Tool. This is an amazing tool!! The ability to define where you put the mesh grid yourself is just terrific. Whoever developed this gets my five star award ...... so if someone from Serif is reading this please pass this on to them. :) I also played with the Deform Filter but failed utterly to comprehend its workings and got hopelessly lost. So I shall have to hope that there is a tutorial on this later. :unsure: This really is a great app! :) :)
-
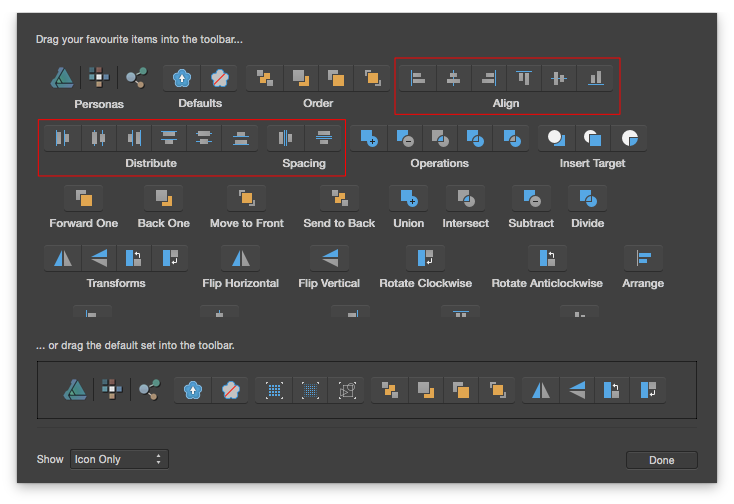
The screenshot below was taken in AD. The alignment and distribution blocks are missing from AP's toolbar customisation window. As it currently is, one has to drag the alignment buttons one by one to the toolbar (not as convenient as dragging the blocks). Could we have them in AP as well please? Cheers!
-
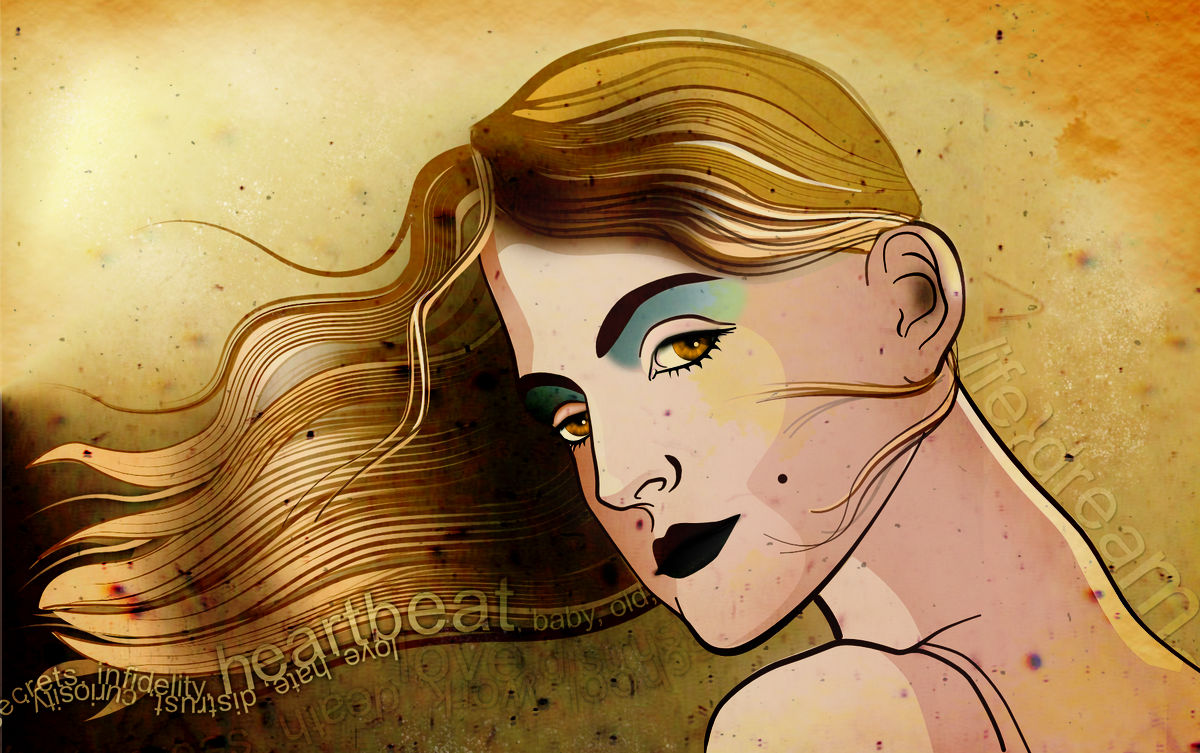
vector drawing (AD), edited with APh (effects). I try Affinity Photo beta, and what can I say ... it’s damn good! :rolleyes:
- 4 replies
-
- 1
-
-
- drawing
- illustration
- (and 3 more)
-
Ok so my mum asked me to fix some photo's to put into new frames on her photo wall. They had all been trimmed in the past to fit oval place holders. One of the photos had a face obscured by a shadow......here we go. 1. The shadow of a tree is blocking my face (one on the left). I duplicated the layer, removed everything except my face from the new layer. Brightened the layer a lot, and the blended it into the base layer. 2. With this one i needed to fill in the blank areas and restore the photo. The clone tool was used to fill the edges, and i adjusted the contrast. I could have used the clone tool to repair the scratches but went to Snapheal for speed. Back to affinity photo and i used layers and the selection brush tool to fill areas with some colour. These were then blended using Multiply and an opacity of around 20-30% .....with more time i would have tidied things up a bit, oh the joys of a paid job and kids to keep me busy.
-
 My question right now is how to compile multiple images into a layout for a website header. I created a new document as a web file with a transparent background. I created a new layer, opened my first image, and copy/pasted it into the document, but it pasted onto the background and not the new layer. So I can't move it, and I'm not sure how to put it onto a different layer and keep the background layer clear. As a disclaimer: I'm trying to learn Affinity Photo without prior experience with Photoshop or any other similar editing program. I would love any help someone can offer! Thanks so much! :-) ~ Stacey
 -
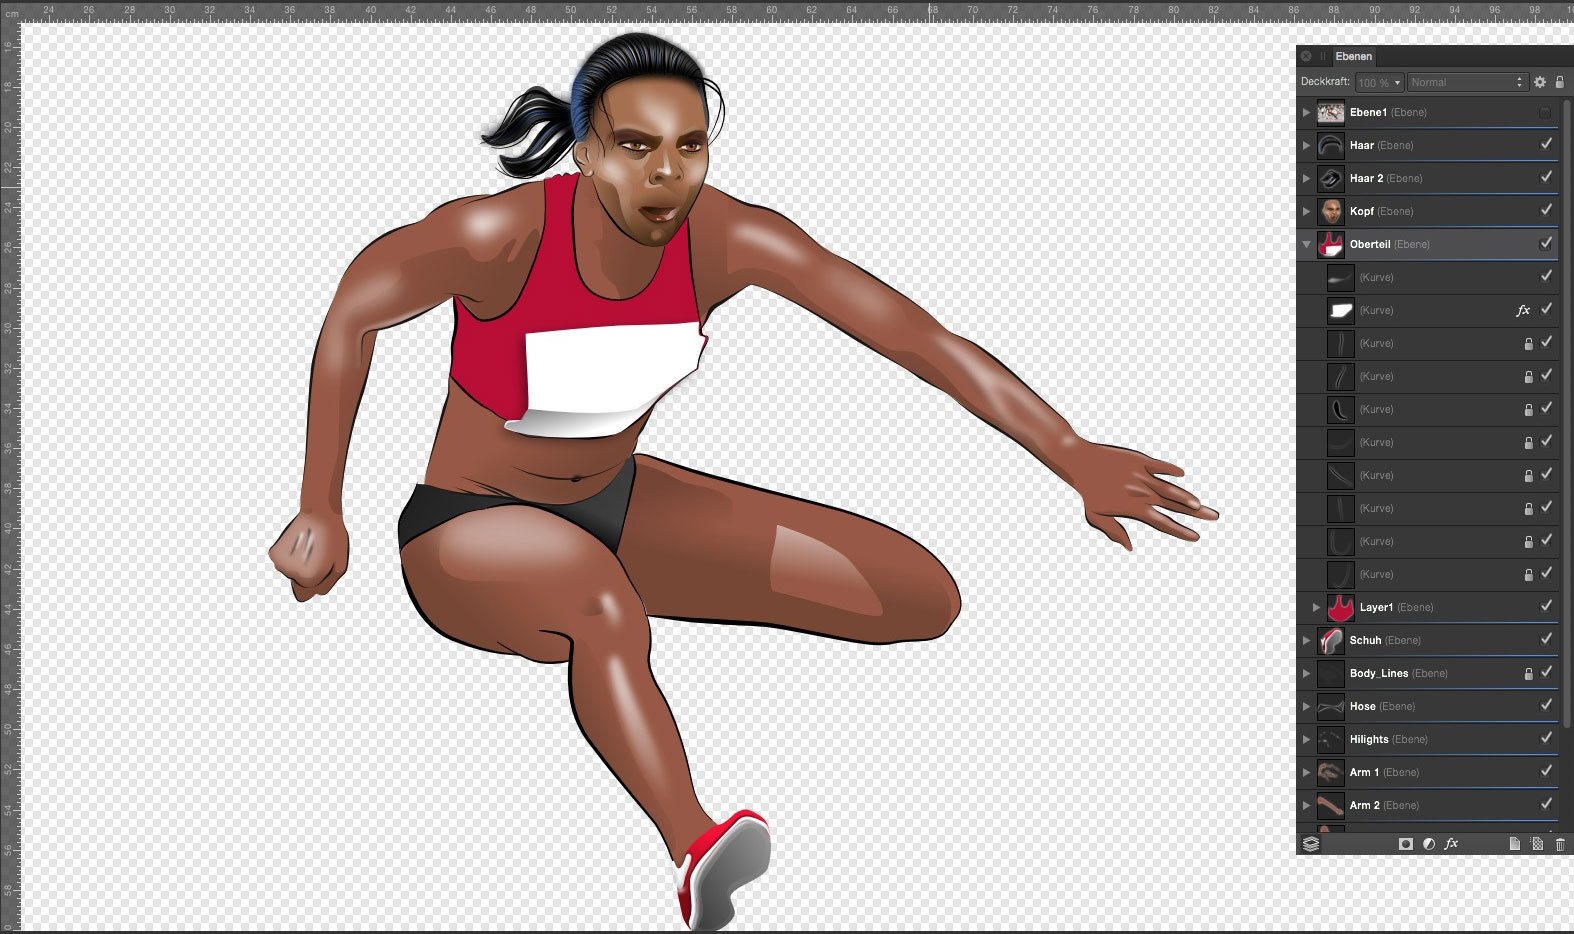
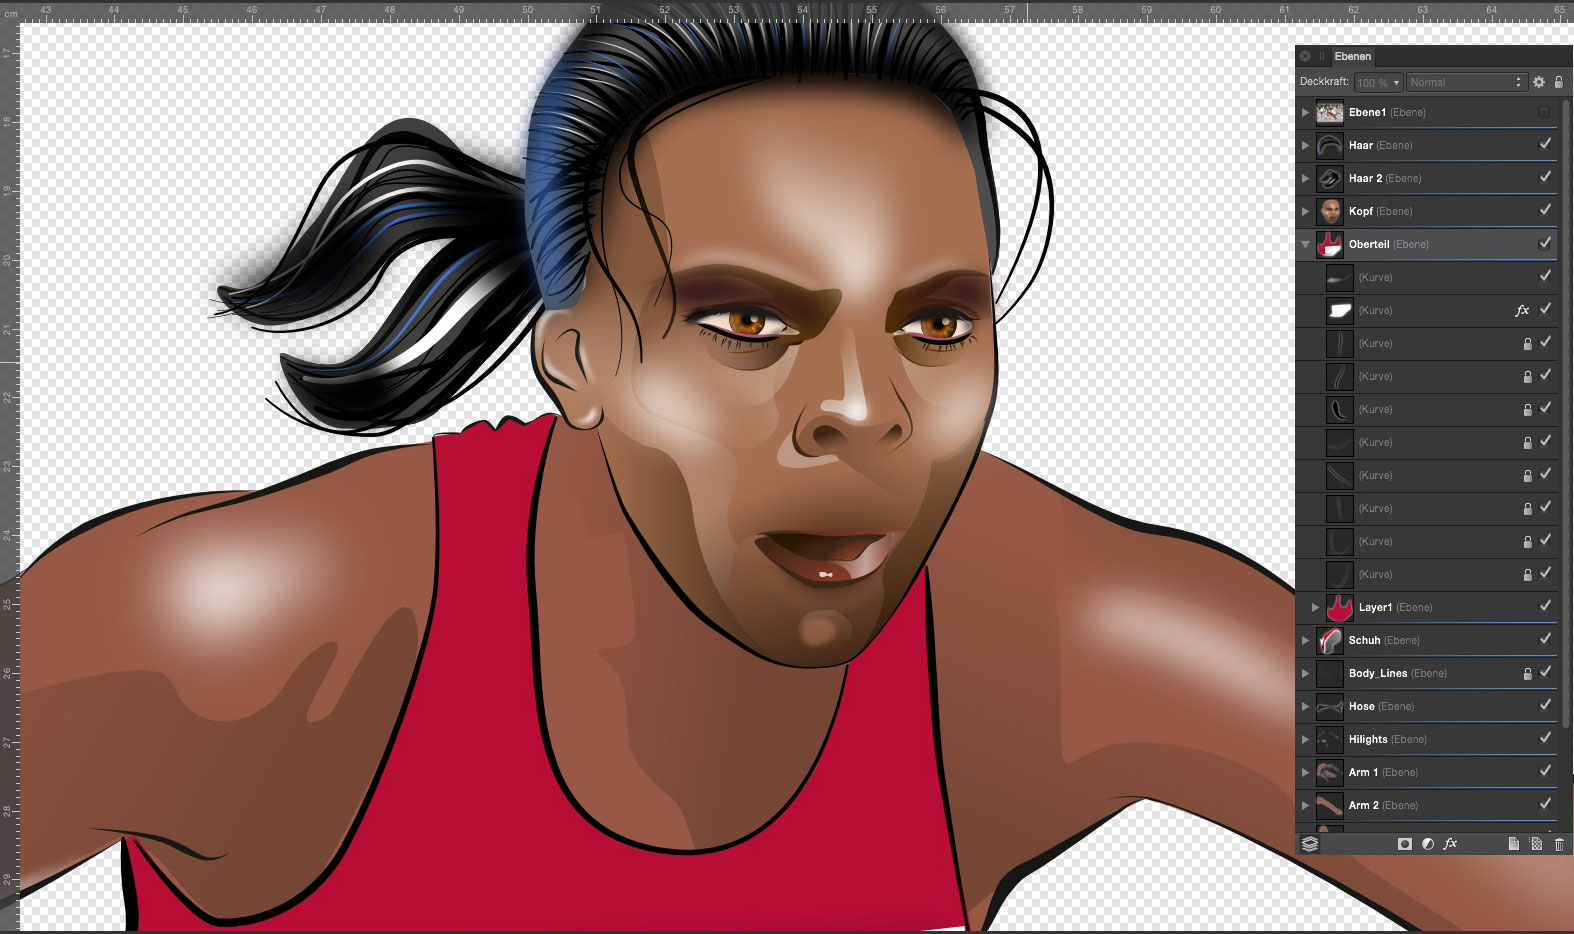
First steps for a sport project (mockup), still in progress ...
-
 Hi, I'm trying to replace Photoshop with Affinity Photo, but I'm kind of stuck in my process right now. I've read smart objects are on the roadmap, but I'm trying to figure out if I can just use the current feature allowing to embed an image. So let's say I want to make a basic compositing with two pictures in the same file. I have "placed" my two picture A and B, on the left and the right side, and grouped them. Now I have duplicated that group, switched A and B to get B on the left and A on the right. I there any means to have A replaced in both group if I "replace image" ?
 -
 I have a black logo on a white backbround as a JPG image. I would like to make all the White transparent (alpha channel), so that I can save it as a Black Logo on a Transparent background PNG. What is the cleanest/ most accurate way to do this, please? Using a bitmap image as a mask is ideally what I need (copy the inverted greyscale image into the alpha channel to get the transparency) any help is really appreciated. I have Affinity Designer & Photo beta.