Search the Community
Showing results for tags 'Affinity photo'.
-
 In this Affinity Photo Tutorial I show how to use abstract motion blur artistically. Technically, this is not motion blur, but rather zoom blur, because a vanishing point must be observed. I'll first show how to apply the zoom blur to just the train. Then I'll show how you can do it exactly the other way around. This requires some preparation, such as determining the vanishing point, creating a selection, and of course, understanding the difference between motion blur and zoom blur. Of course, you can apply the effect to anything that moves: a car, a dog, a projectile. I wish you much fun. Ciao Jack
-
- 2
-

-
- affinity photo
- tutorial
- (and 6 more)
-
 Here is another painting in acrylics produced using DAP Pro 7 and interfacing with Affinity Photo. I have included a video of the painting process along with the resulting multilayered Affinity Photo file so you can see how the painting comes to life with human-assisted AI. Play with the Affinity Photo file to your heart's content to see the layering involved and each painting stage. This is a very productive tool. Thin Acryllic Model.mp4 Model Thin Acrylic_DAP_ALL__Acry-Real.afphoto
-
 Currently when resizing a selection, the selection resamples the nearest neighbor outside the selection. The result is that a resized image that has edged that have been feathered or blended into a gradient due to the algorithm used to resample when stretching the image. I'd like to suggest that the move tool gains an option to select the type of sampling algorithm used, with one option be none, to permit the creation of variegated flood filled rectangle based upon selection without the feathering/blending effect or utilizing a different sampling algorithm. This feature would be applicable to Photo or Design where pixel selections can be selected and transformed. The need for this feature goes as far back as early V1 days - I've found numerous reports of this problem with no suitable solution implemented.
 -
Made in Affinity Photo as a Happy Birthday card.
-
If a screw is loose, life has a bit of play. Playing with paper strukture and dissolve filter ... Paper from Pixabay
-
 I would like to submit a request for GeoTIFF metadata support. This is a popular format in cartography and similar industries. Since GeoTIFF is compatible with the TIFF standard, Affinity Photo is able to open the image. Unfortunately, the typical GeoTIFF tags are irretrievably lost in this process. At the moment, there are few graphics programs that support GeoTIFF metadata, e.g. GIMP. I don't expect Affinity to fully support this type of files as it is a graphics program, but the ability to edit files without losing metadata would be a nice addition.
 -
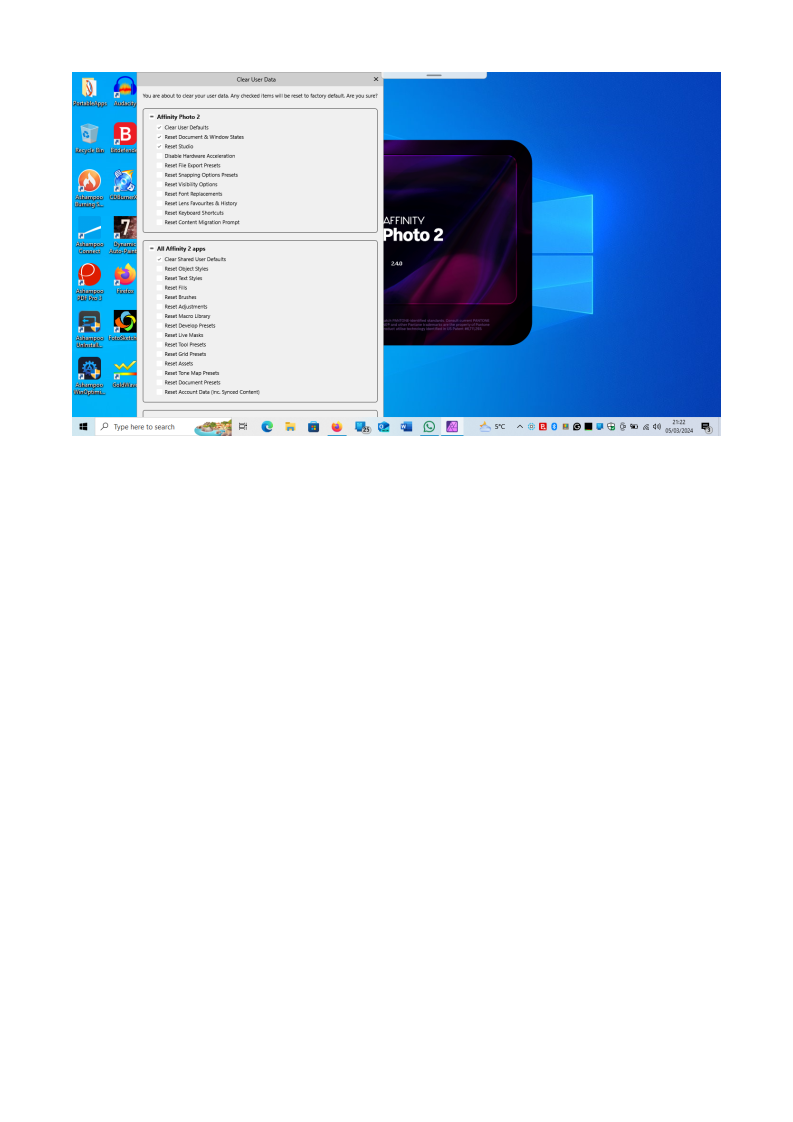
Using the CTRL loading option on Affinity Photo brings up the reset dialogue on my Lenovo T430, but unfortunately, the dialogue is too big to fit on the screen. I am unable to access the buttons at the bottom of the dialogue to effect their operation. 1399 x 768 is the maximum resolution on this computer. Is there a hotkey to access the button to okay the reset? I see no other way to achieve the appropriate result.
-
 When I create a live brightness range mask, I can select which preset I want to use. So far it works fine, but when I close it and open it a second time, only the curve is displayed and the name of the preset, i.e. Highlights, Midtones or Shadows, is no longer shown. I think the error is not necessarily new in V2.4 of Affinity Photo. In addition, the opacity is set to 1% when a preset is selected. Attached screenshot Bildschirmaufnahme 2024-03-05 um 18.25.26.mov
 -
 Hey folks, I've noticed a problem in Affinity Photo 2, affecting both iPad and desktop versions, where changing a layer's fill opacity via the FX options from 100 % to anything between 100 and 0 % doesn't hide the layers contents as expected. Instead, the contents remain visible 100 % at all times. This seems similar to a previously mentioned, but seemingly solved issue with the 3D effect in Affinity Designer, indicating a possible consistent rendering issue with layer effects and fill opacity settings. To reproduce the Bevel / Emboss visibility issue, follow these steps: Open Affinity Photo 2 on either an iPad or desktop and create a new layer. On this layer, draw anything using any colour of your choice. Apply the Bevel / Emboss effect to the drawn layer. Reduce the layer's fill opacity to 0%. Expected Outcome: The layer contents should become invisible, leaving only the Bevel / Emboss effect visible. Actual Outcome: Despite reducing fill opacity to 0%, both the layer contents and the Bevel / Emboss effect remain visible, suggesting that the expected change in visibility does not occur. I'm looking for insights or workarounds from anyone who has encountered this. Any feedback or suggestions would be appreciated. Cheers Dennis
 -
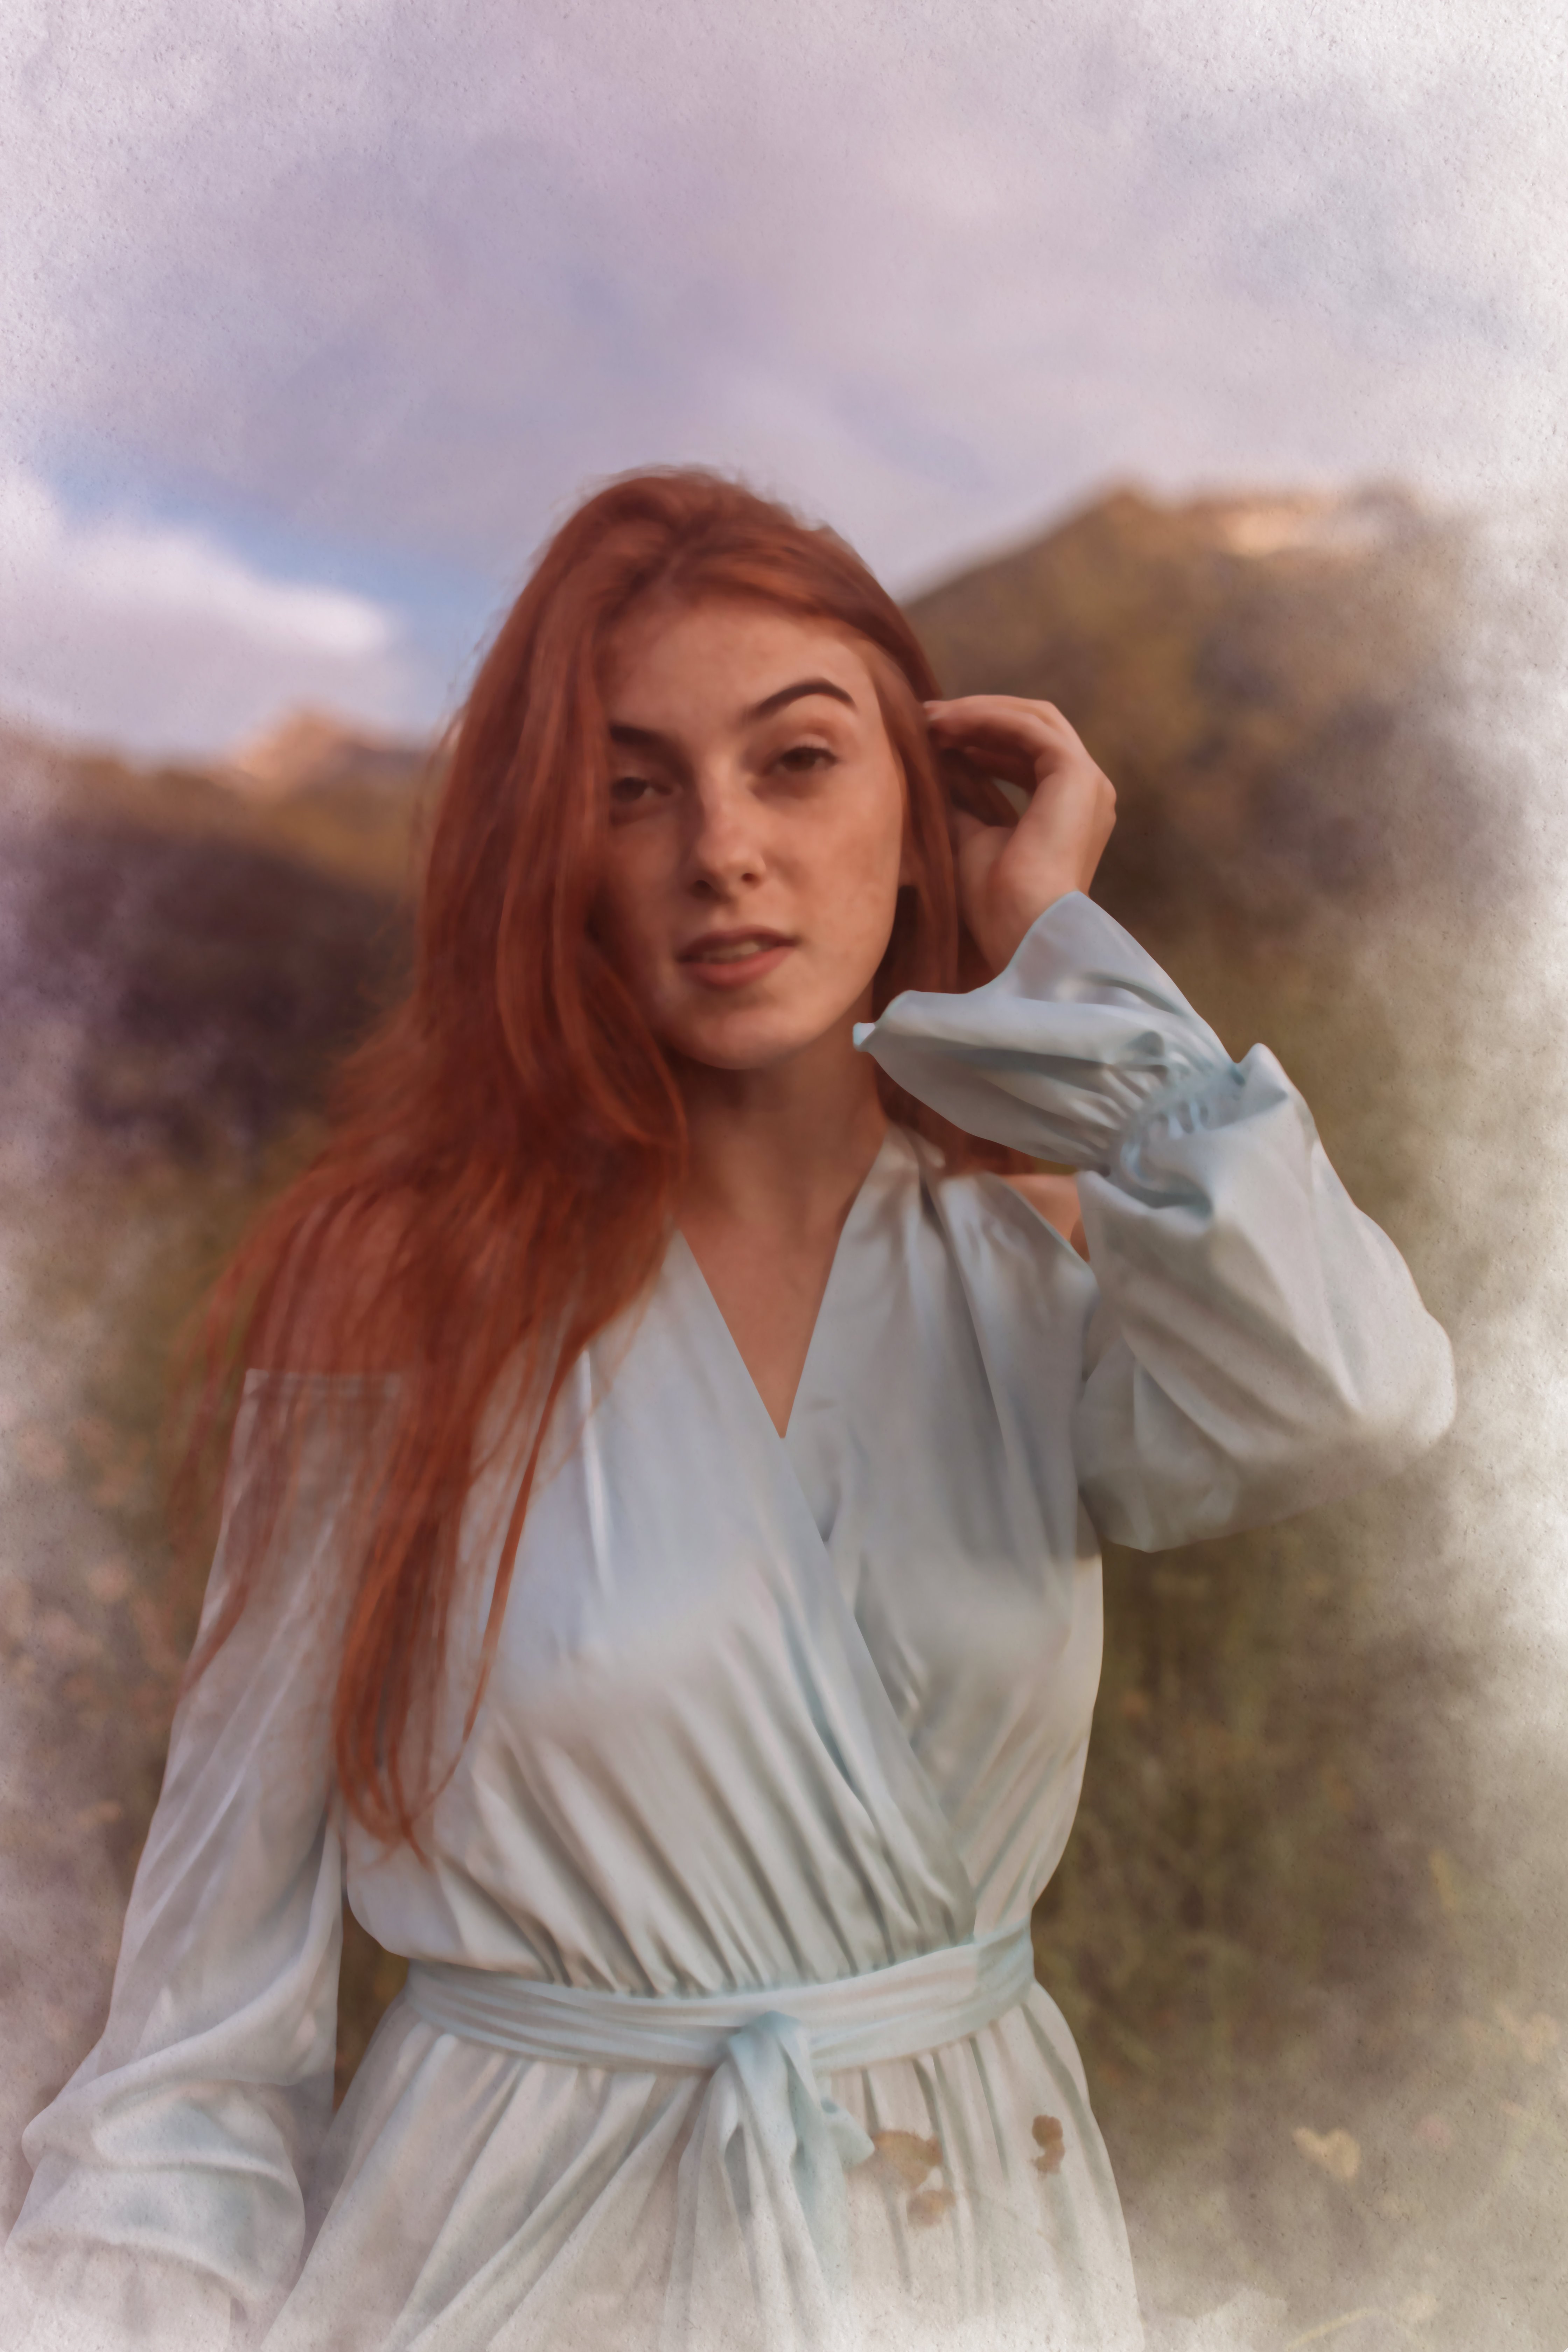
This is the first watercolor portrait that I've created in Affinity Photo. I think the result came out not too bad.
-
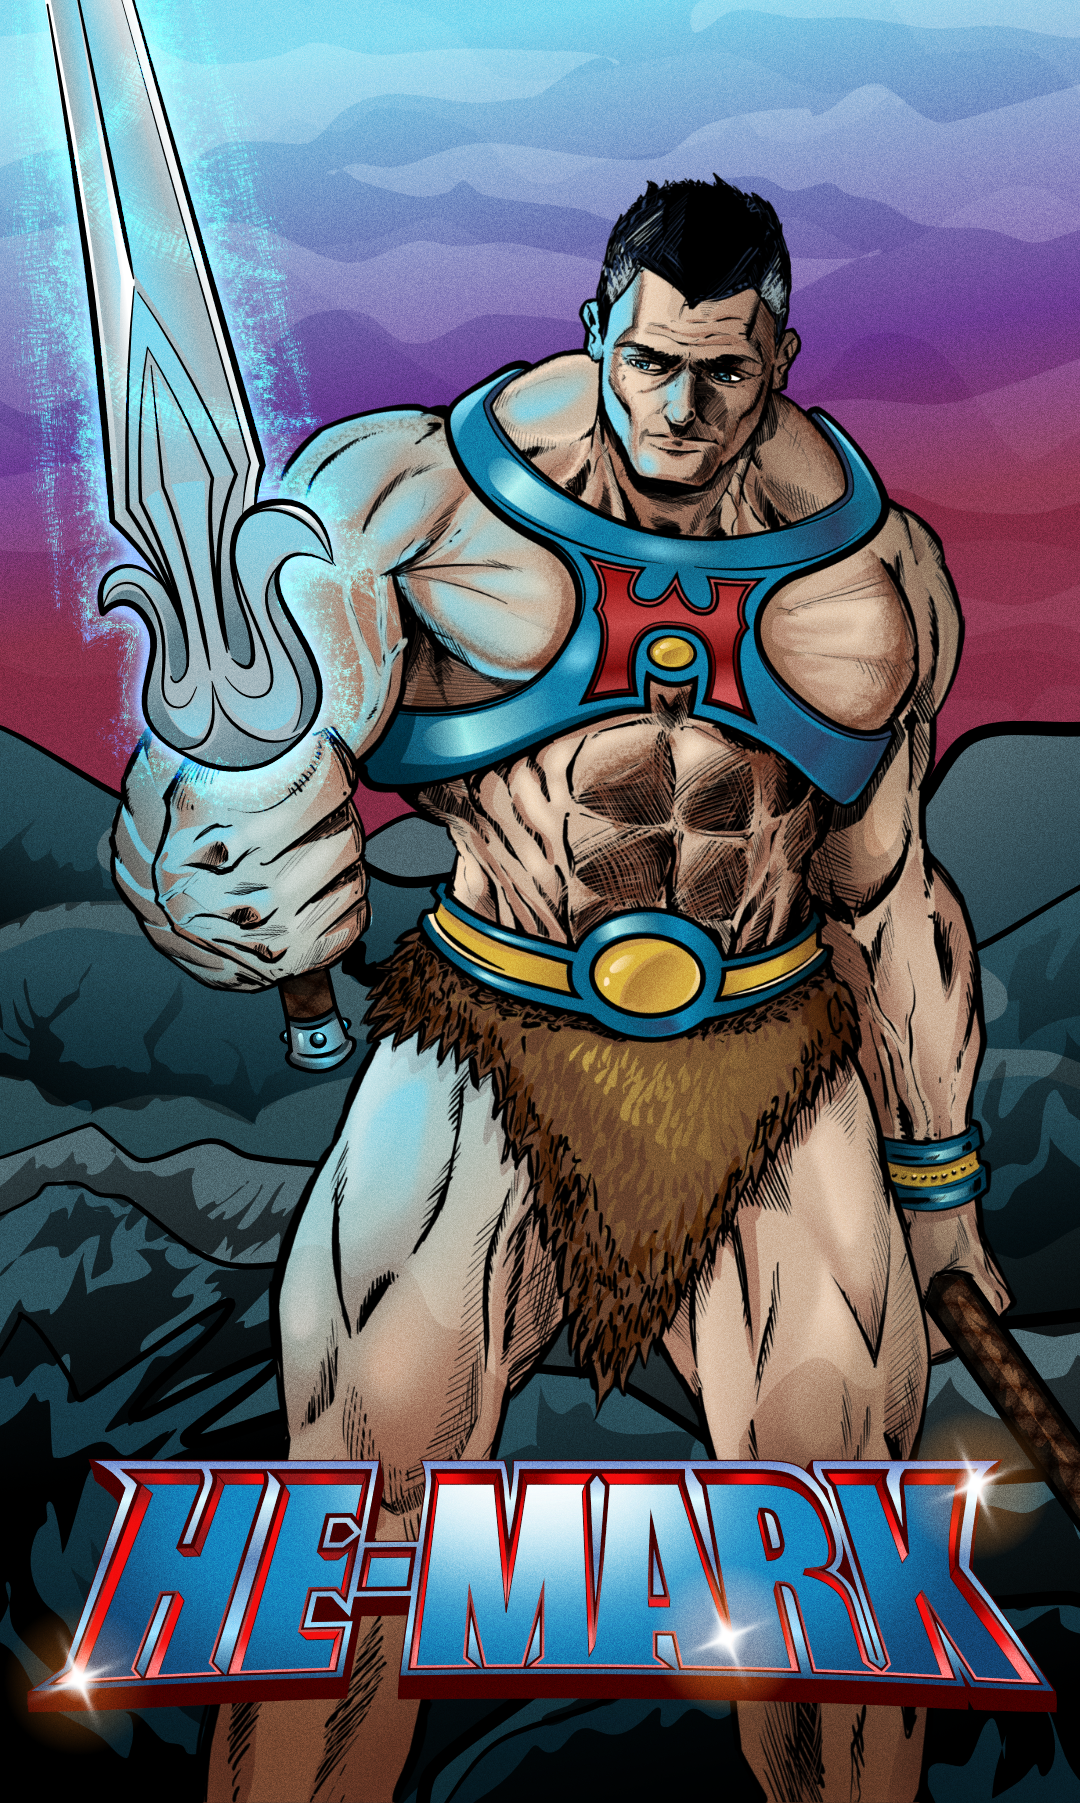
Millenia pass and with Mark as its Emperor the Viltrumite nation grows from strength to strength. With peaceful expansion now on his mind, Mark reaches out to the farthest corners of the universe, discovering new planets and lost civilizations… not all are thriving. On one new planet, darkness has taken over, and its Masters have gone. A whisper calls out to Mark as he wanders the baron land, drawn to a castle in the distance. Wedged in its mighty wooden doors is a rusty old sword. Mark reaches out to grasp the hilt of this leftover relic. A sentence screams into Marks mind… “By the power of Greyskull, I HAVE THE POWER!!” Don't know why but I felt compelled to create this! lol Initial sketch - Artflow Inks - Clip Studio (I did attempt to ink in Designer with vectors, but just wasn't happy the results) Colours and Logo created in Affinity Designer. I also used Affinity Photo do to some liquify and fix elements. It's not perfect, but I'm attempting to create more!!!
-
 I am bewildered and am now at my wits end... maybe someone here can help shed some light on this issue. Using Photo, all was well until I updated to 2.4. Since the update I am experiencing significant screen glitches, which I can replicate 100% of the time. It does not matter if I create a new document, open an existing Affinity document, or a tiff. When opened, and the View (H) tool is selected by default, moving the tool over the image causes the screen to go black, then starts drawing a pixelated path around the screen as I move the mouse. Double clicking will sometimes restore the screen but only temporarily. Clicking V for the Move tool, corrects that issue, but the problem can reoccur at random. Troubleshooting: I deleted Photo, then downloaded a fresh dng file from the Affinity server. No difference. I updated the firmware on my BenQ monitor. No difference. Made certain macOS Sonoma screen recording.mov is up-to-date. Experimented with different settings in the Performance preferences for Display and Hardware acceleration. No difference. Curiosities: I still have Photo v1 and it operates correctly. No glitches. I have Photo 2 Beta 2.4.0, and it operates correctly. Since it does, I felt it safe to update Photo. All my other applications operate properly. I attempted to do a screen recording to demonstrate this, but when I start the screen recording, the problem does not appear. As a result, I took a video with my iPhone to demonstrate the problem Operating Enviornement Mac Studio M2 Max 32 GB macOS Sonoma 14.3.1 BenQ SW272Q monitor v7 firmware Suggestions? Is it possible that either/or Photo v1 and/or Photo 2 Beta are interfering? As it stands now, I can do my editing in Photo 2 Beta, but this issue needs to be resolved. Thanks in advance for insights or helpful advice. Robert
 -
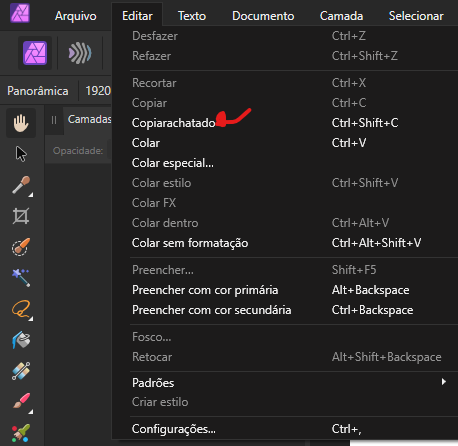
In Affinity Photo, Edit Menu. The option Copiarachatado is actually two separated words: Copiar achatado.
- 6 replies
-
- 1
-
-
- affinity photo
- spelling
- (and 3 more)
-
Hi, In this Affinity Photo Tutorial I show a typical situation: The photo of the sunrise or sunset has become disappointing compared to reality. Simple techniques are shown here on how to bring back colors and dynamics. The Video-Tutorial has english subtitles. (You can activate english subtitles with the gear icon in the YouTube window.) I wish you fun. Your Affinity Jack
-
- 1
-
-
- affinity photo
- tutorial
- (and 8 more)
-
Here's my latest upload and work in Affinity Photo! Please click the picture below and enjoy 2hrs of finest breakbeat alongside some coloring! Thanks for your precious time! @Team: Please add a button to flip the entire artboard in Photo not just single layers! Thanks <3
-
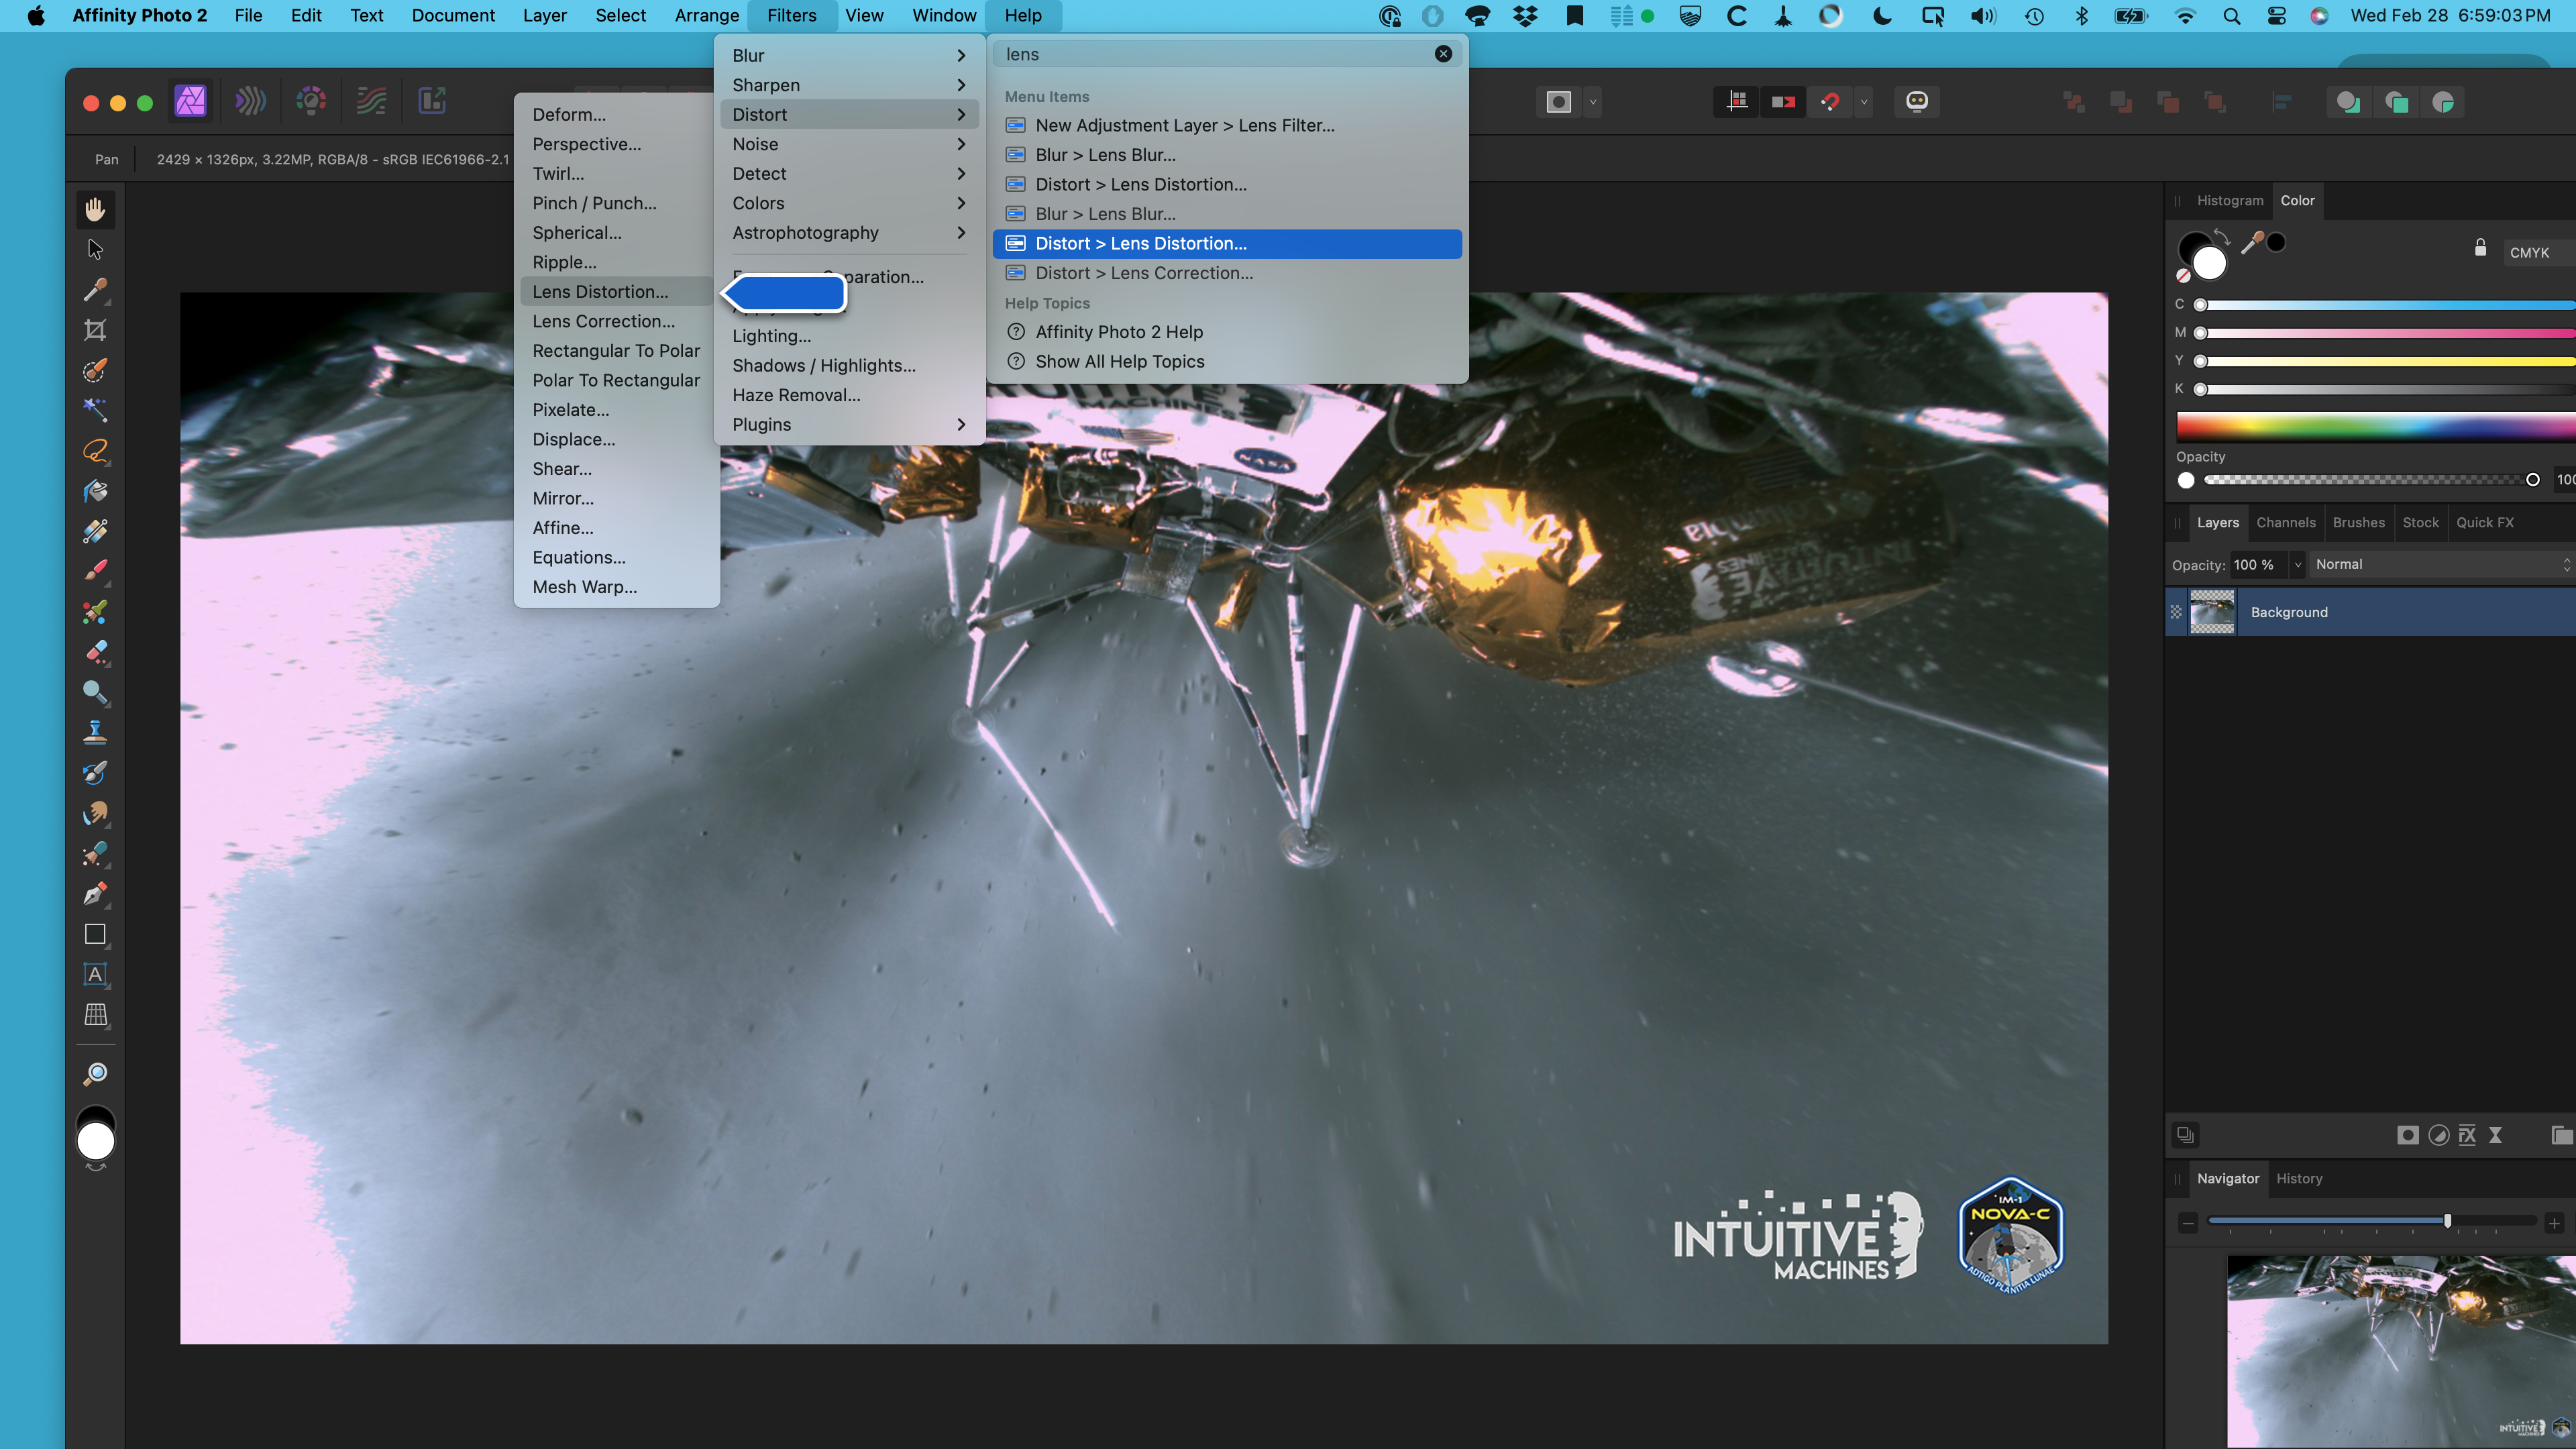
What Application are you using? [Designer/Photo/Publisher] ... Photo Are you using the latest release version? ... yes Can you reproduce it? ... sadly, no Does it happen for a new document? ... Yes -- that is I had been working on it for about 10 minutes. If not can you upload a document that shows the problem? .. No If you cannot provide a sample document then please give an accurate description of the problem for example it should include most of the following: What is your operating system and version ... macOS Sonoma 14.3.1 Is hardware acceleration (in Preferences > Performance) ON or OFF ? ... whatever the default is What happened for you (and what you expected to happen) ... this is where it gets difficult. What happened is that Photos stopped responding. In fact, nothing would respond -- I tried all the tricks. Force-quit could not be invoked from the dock or from the three-key method. Some activity was possible including, thankfully, a screenshot (enclosed). I used Terminal on another Mac and could ssh into the unresponsive one -- I did a "ps", a "sudo kill -9 nnnn" on the Affinity process, which did not terminate the process or gain responsiveness back, and ultimately a "sudo reboot" to restart the Mac. Provide a recipe for creating the problem (step-by-step what you did) ... the best I can do is give you the screenshot. I will note that my intention was to rectify a fisheye lens image (or a part of it), had tried the "Layer > New Live Filter Layer > Distort > Lens Distortion ..." but that didn't produce the result I want. I looked for other "Lens" actions via the Help menu, found what you see in the screenshot ... end of story. Screenshots (very handy) or a screen capture/video .. OK, done. Any unusual hardware (like tablets or external monitors or drives that may affect things) or relevant other applications like font managers or display managers ... No. I do use an external display and Photo was using it. Did this same thing used to work and if so have you changed anything recently? (software or hardware) ... I've never had this happen before. AND, I'm can't claim absolutely that Photo caused the problem (Photo might have happened to be the active program when something else bad happened). I was hoping I could get a kernel dump or an application crash report .. no such luck. I'll look through the crash logs and see if I can find anything. I wish I could give you more to work with; this was a nasty failure. Terminal SSH.txt
-
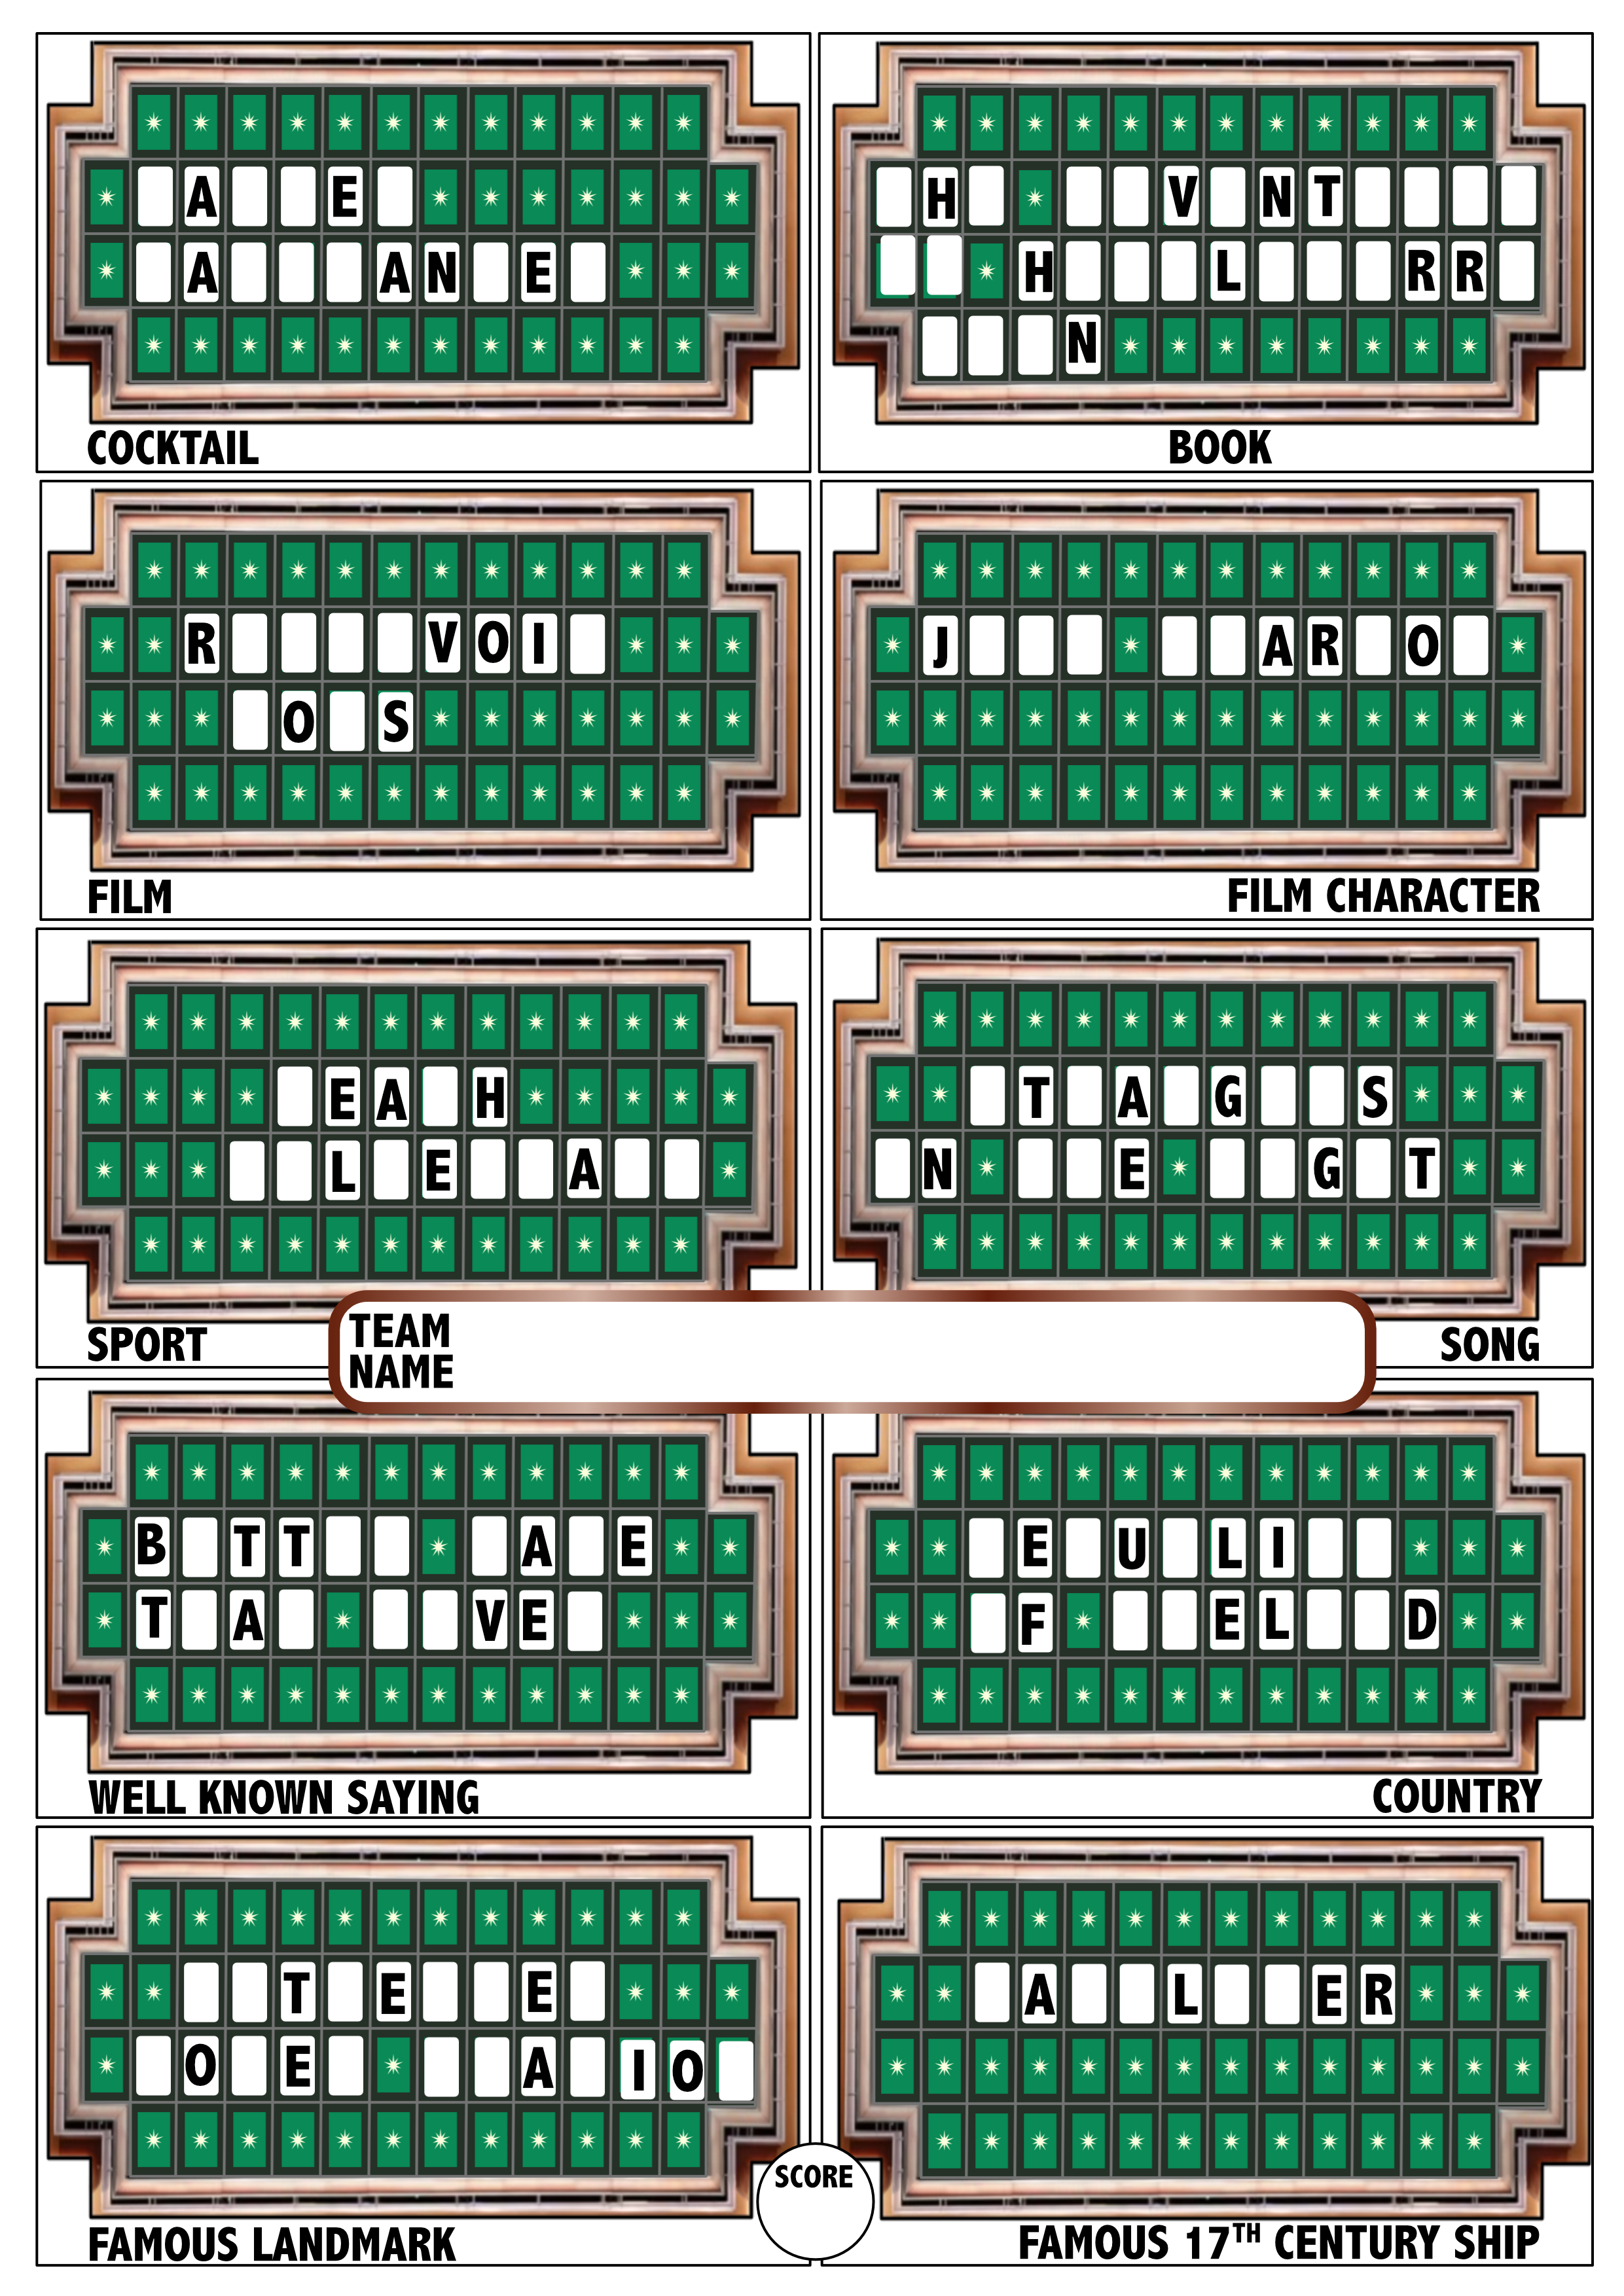
This is a paper quiz round based on the Wheel of fortune a British television game show for the next quiz night at my local indoor bowls club. Everything done in Aphoto apart from the border around the letters and blanks.
-
 Hello! I like how a Live Hue Mask can work in a similar way to Photoshop’s Color Range tool for selecting skin tones. It’s not perfect, but I can get a selection that’s 90 percent there. However, the other ten percent is the issue. Of course, you can remove elements from the mask with a black brush, but can’t paint in white. As such, what can I do to further build my selection other than refining the hue range? If there is nothing we can do, what is the best way I can select skin tones and mask it? AP2 seems to have nothing that’s suitable, which is frustrating. My typical use case is to mask skin, then apply a gradient map and pick suitable tones before moving on. In fact, I’m using Live Hue Masks to do this and also select complex textures like pet fur, flyaways, and other non-uniform elements. Thanks!
 -
Continuing my work with Affinity Photo and DAP Pro 7 I created this portrait version of a photograph that came with DrawPlus X8. The painting effect was enhanced by the use of Tone Mapping and the development persona to give it an authentic painted look. The small JPG was exported from Affinity Photo. I hope you can see the paintbrush textures.
- 4 replies
-
- 2
-
-
- dap pro
- portraitist
- (and 2 more)
-
 I recorded this quick tutorial on how to create an inner shadow text effect in Affinity Photo using layer effects. I hope you guys find it interesting.
-
- 3
-
-
- affinity photo
- inner shadow
- (and 1 more)
-
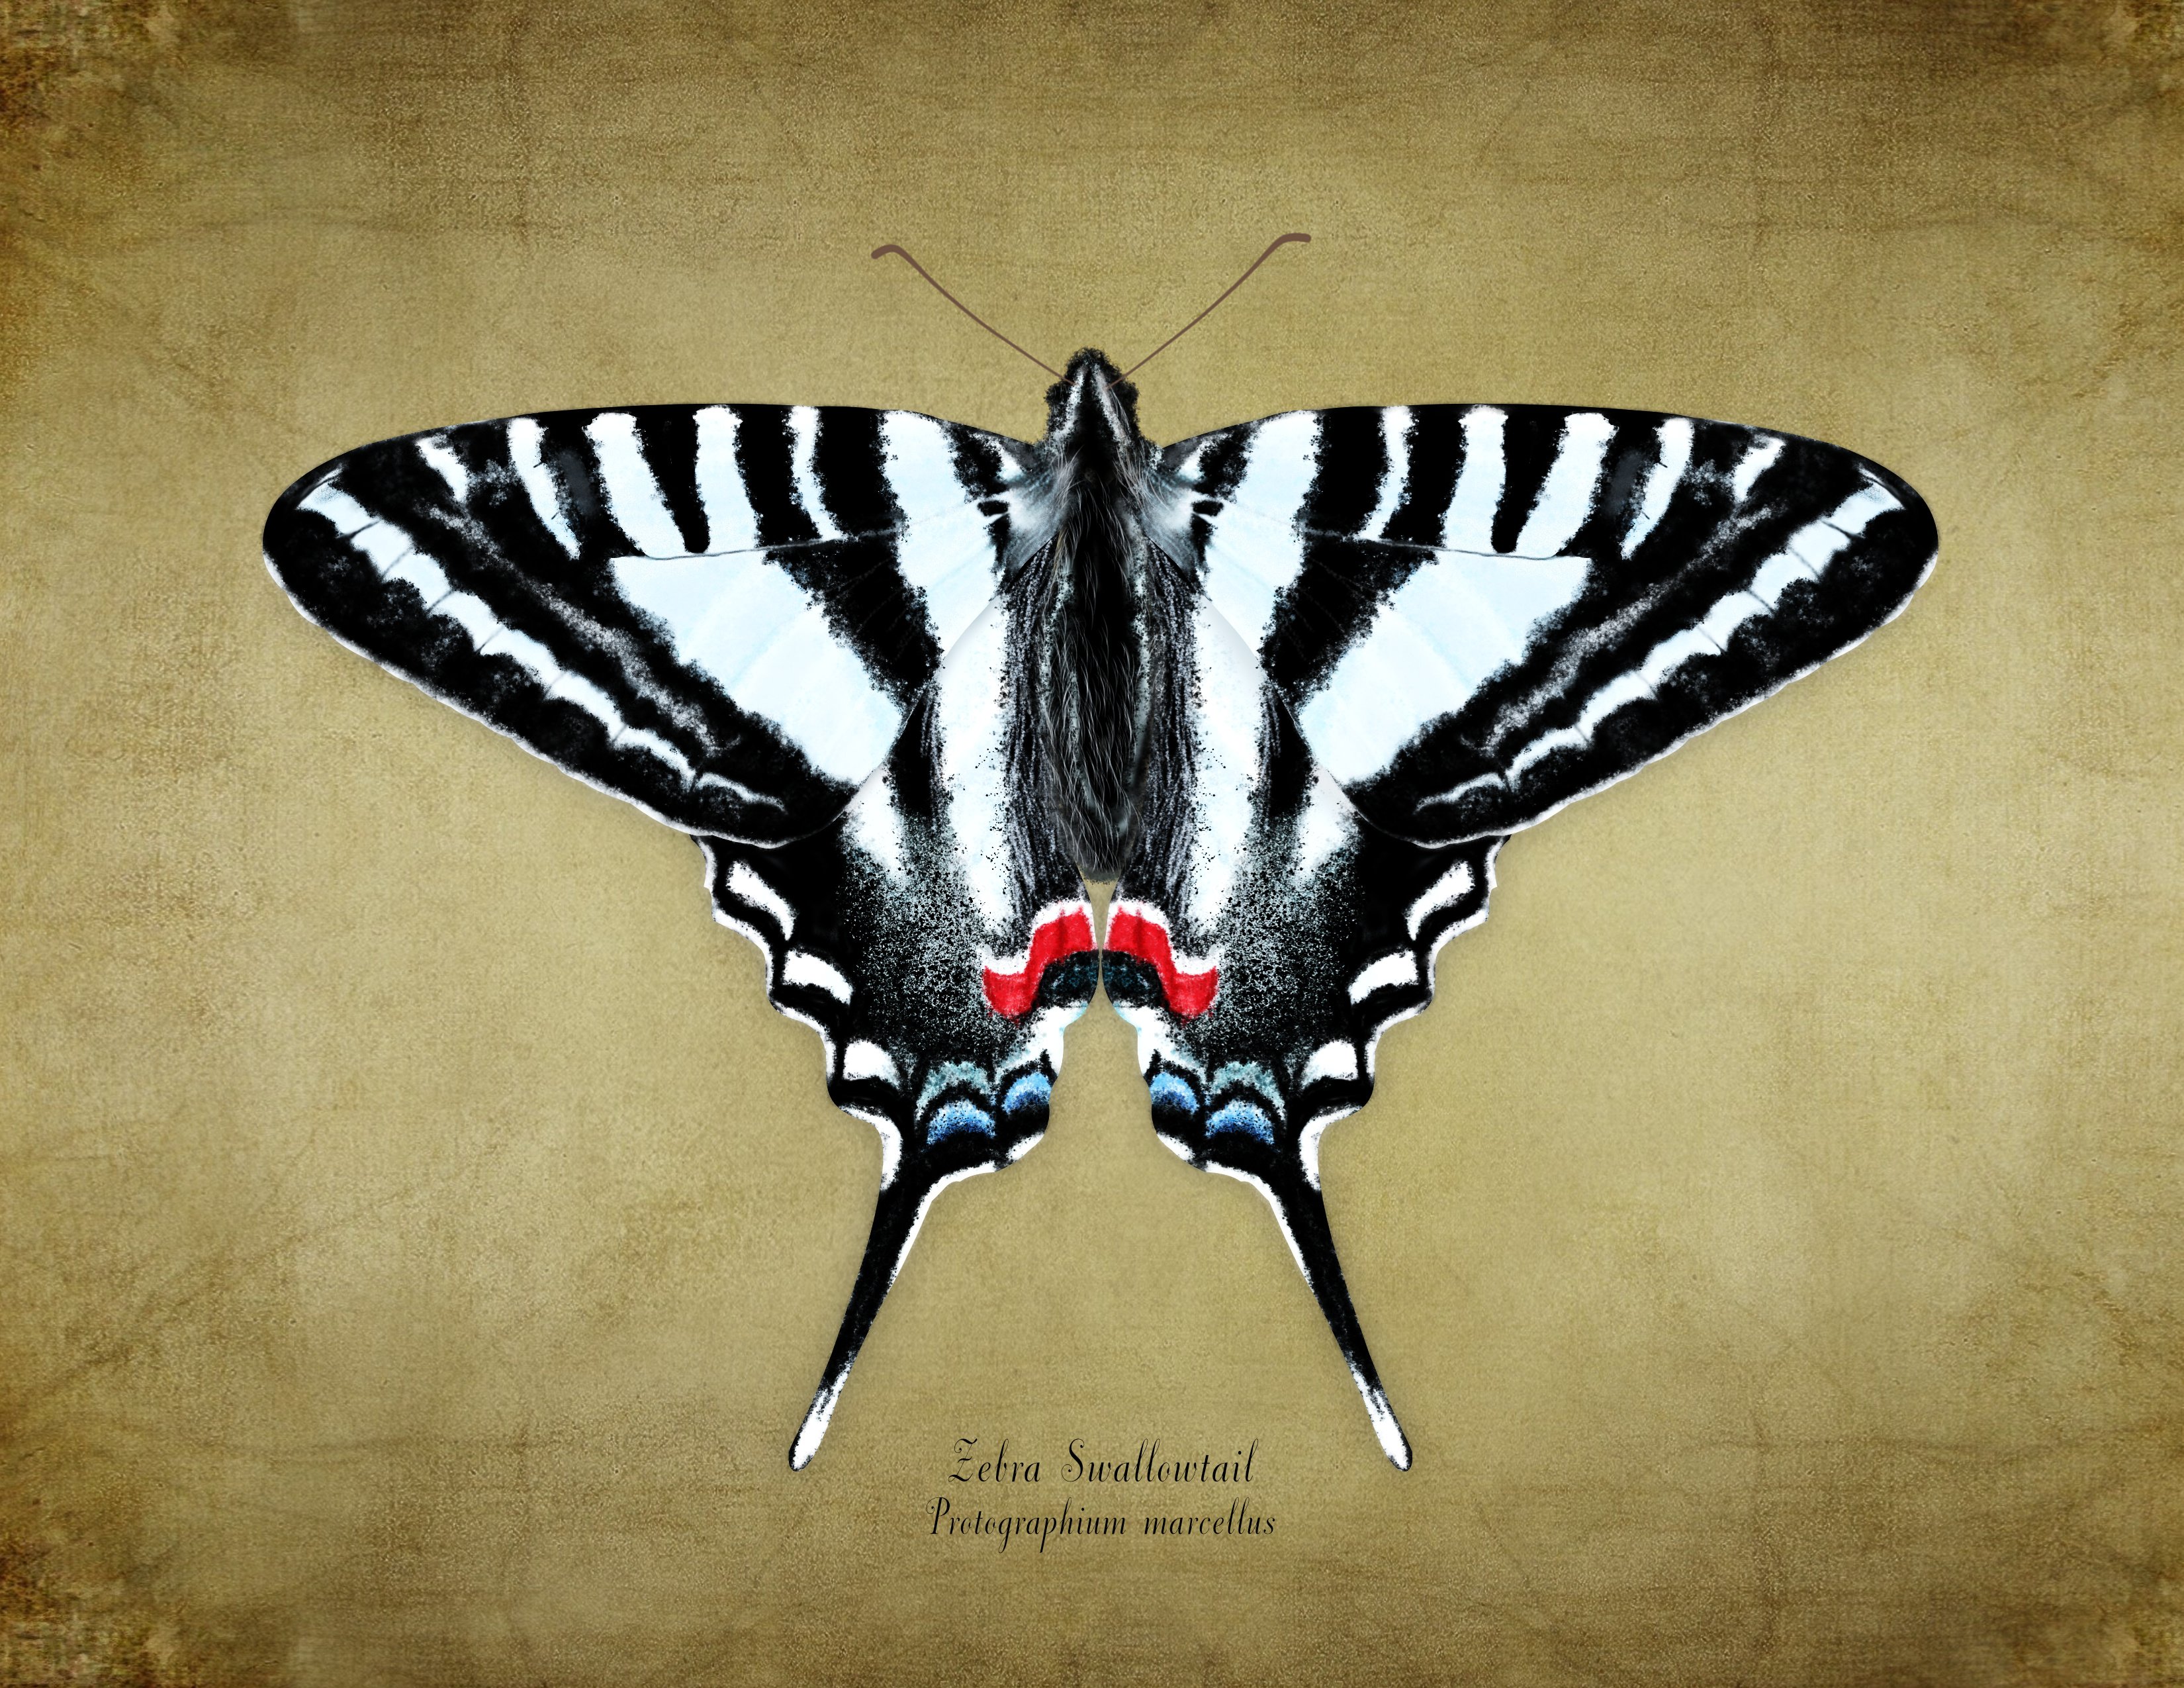
I recently illustrated a Zebra Swallowtail Butterfly (Protographium marcellus) for my brother. He wanted a photo, which I did not have, so I decided to create an illustration for him instead. I used AD v2.31., but spent a lot of time in the Pixel Persona. I also made a few trips to Affinity Photo for a few features that AD does not support. Hope you like it.
- 2 replies
-
- 17
-
-

-
- pixel persona
- butterfly
- (and 3 more)
-
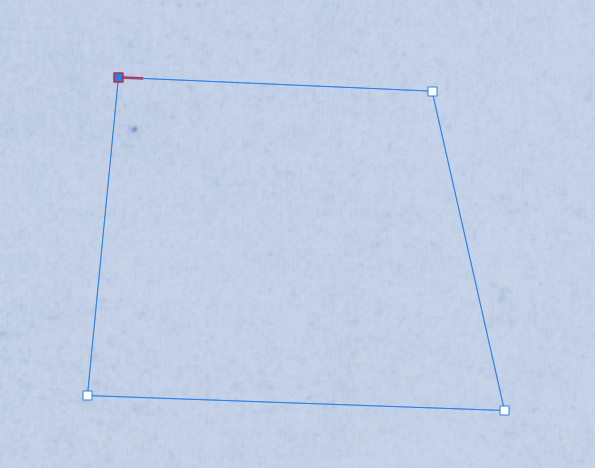
 Hello all, does anyone know if it is possible to change the color of the Pen tool guide lines to any other color other than blue? (Please see picture attached if you're confused on what I mean). I tend to edit pictures of products and sometimes the blue lines blend in with blue objects. Any help would be greatly appreciated.
-
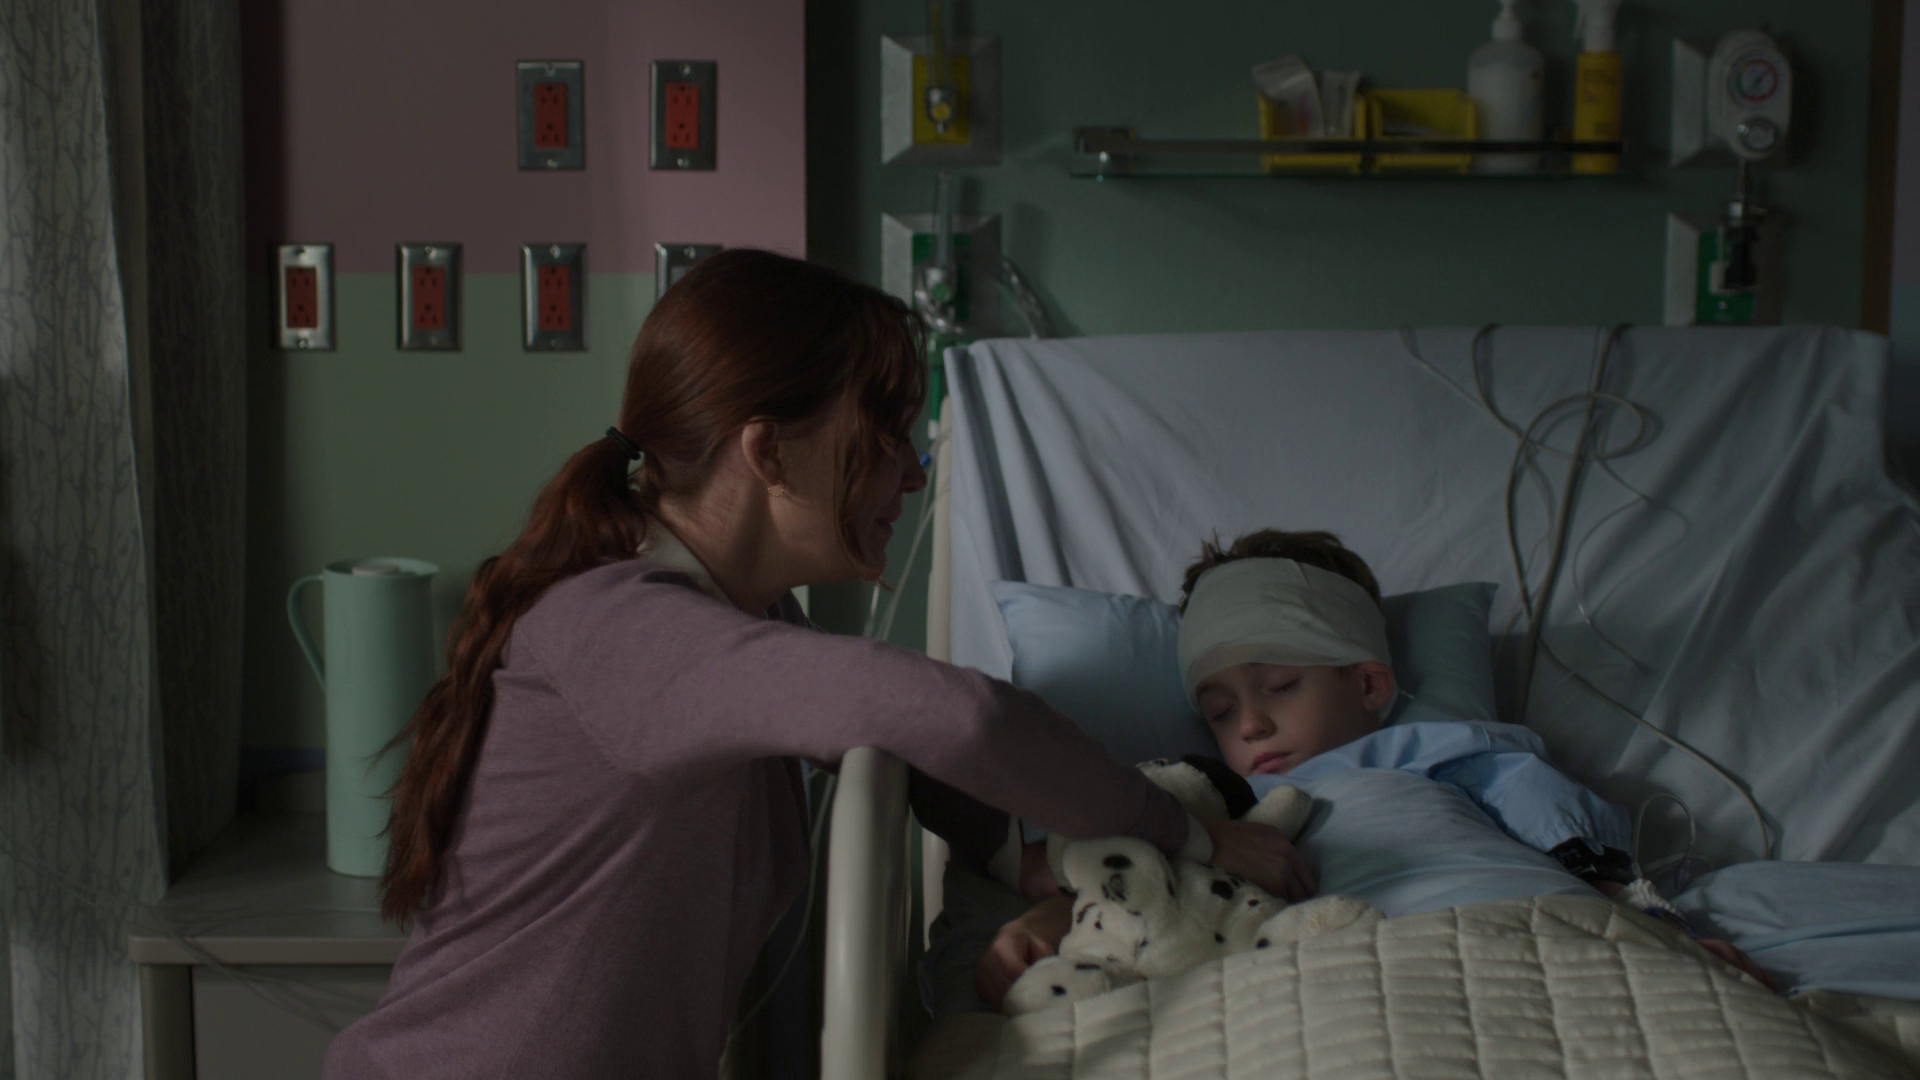
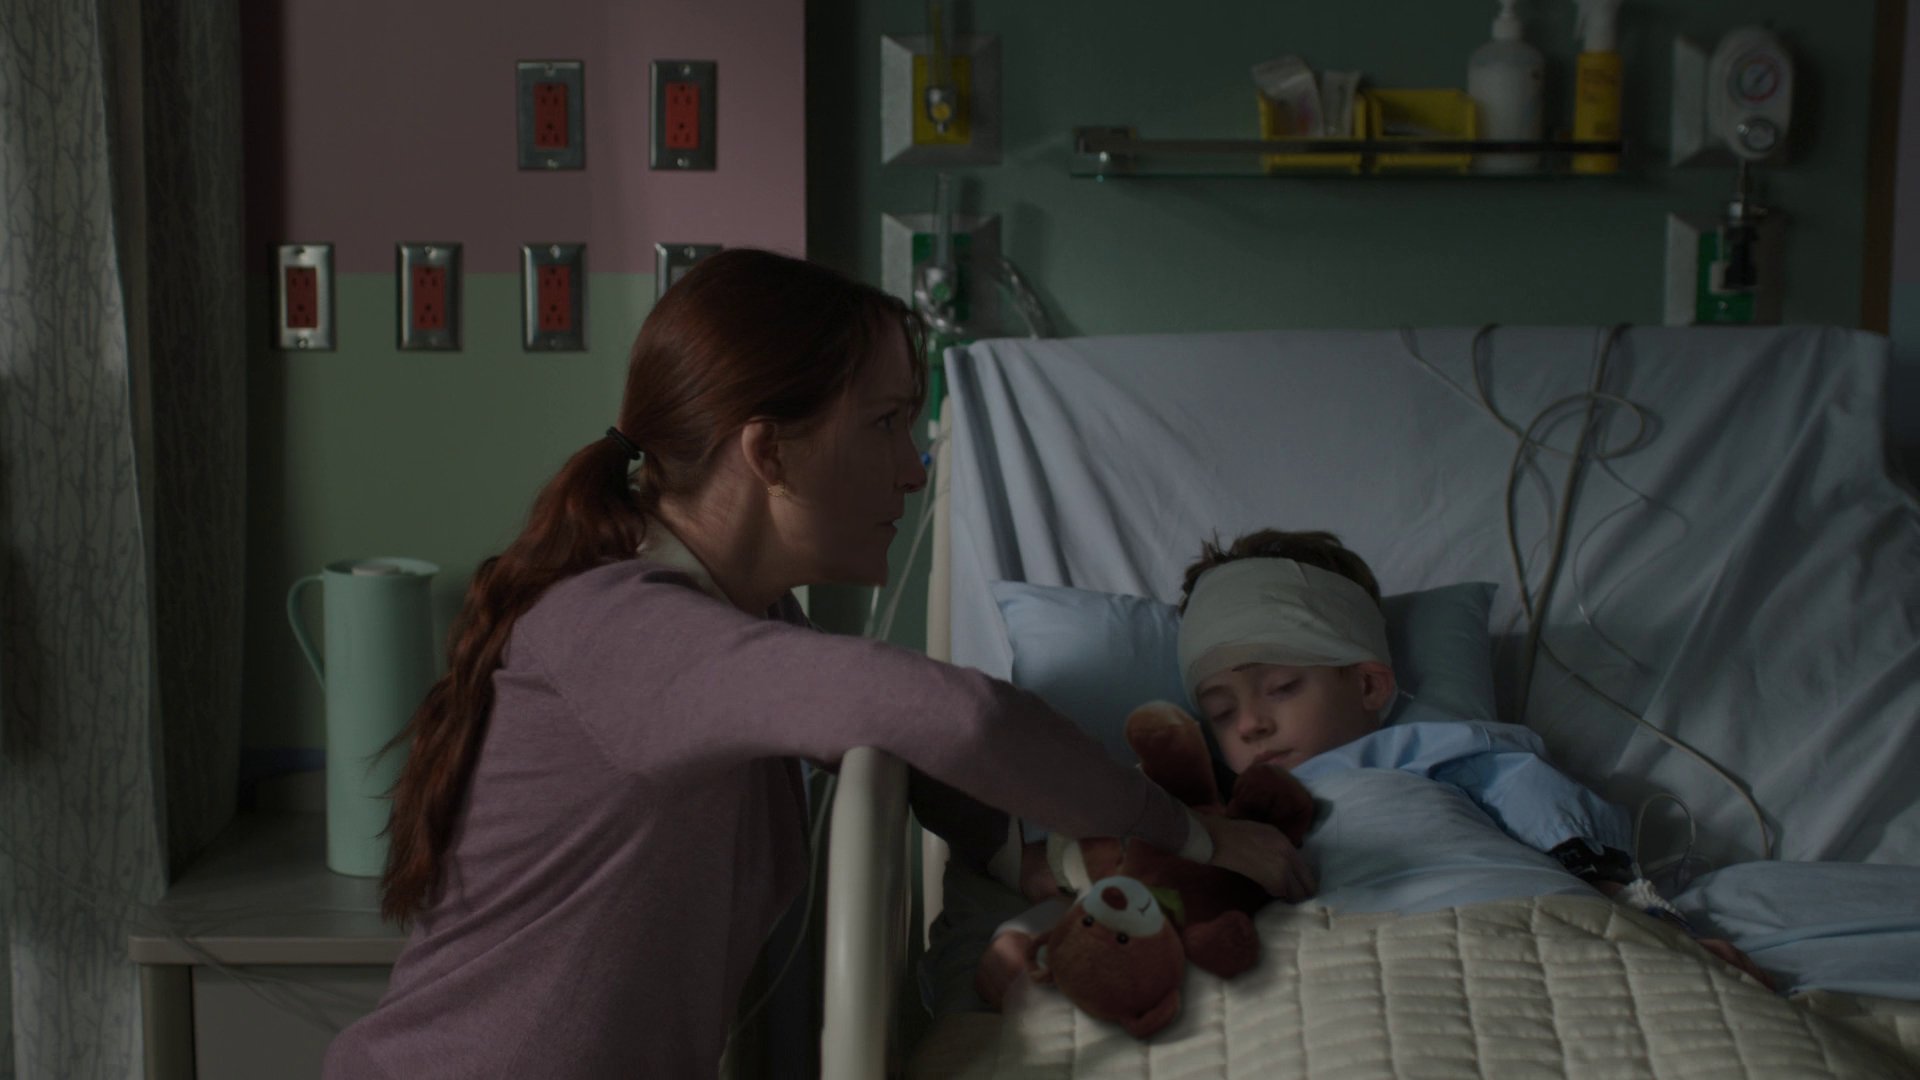
 This is of my composites I have been working on: This is the base image: This is the actresses on the left I chose to play the mother: As you can see, the hair is darker, is there anyway I can change the color to better match the new one's hair color?
-
I am having trouble with Affinity Photo and Designer(Mac OS) today. When I open the app it asks me to sign in?? After signing in the app crashes. It did manage to open once but the toolbar is floating and will not dock(weird), then after a minute it crashed again. Tried opening again, and was asked to sign in....then it crashed everything was working fine yesterday, but I am unable to use the app at all today. any suggestions thanks crash report1.txt
-
 Hello everyone, How can I flatten an image in Photo? Here's my case: I open an image at 500x1000 px and want to resize its canvas to 1000x1000 Well, I do Document > Resize Canvas, unlink the dimensions, set one side to 1000, and press Resize Of course, Photo adds the transparent 250 px margins left and right Then I do Document > Flatten to make one 1000x1000 flat image And nothing happens; the image still has transparent margins, and when I save it to PNG, it saves the transparency as well. In this case, Photoshop makes a flat image with no transparency, which is right. How can I do it in Photo? Please help me understand the logic of this editor.
_DAP_Acry-Real.jpg.75be05a614afeae166f06e5c66f69c9c.jpg)