rcsilber
-
Posts
27 -
Joined
-
Last visited
-
 woefi reacted to a post in a topic:
Photo v2.4 Screen Glitches and Abnormalities
woefi reacted to a post in a topic:
Photo v2.4 Screen Glitches and Abnormalities
-

Photo v2.4 Screen Glitches and Abnormalities
rcsilber replied to rcsilber's topic in V2 Bugs found on macOS
Hello @woefi Photo 2 is the release build 2301; Beta is 2256, intentionally not updating it until the issue was resolved. No, I had not wiped the preferences. @Callum Following a suggestion from @Ron B, I reset the app by holding the Control key while launching the app. That took care of the issue, and Photo 2 is now operating properly. Screen shot is attached since you asked. No, I don't use any screen filters. The bigger mystery is why, when upgrading to 2.4, did something funky start occurring? Happily all is back to normal!
-
 Dan C reacted to a post in a topic:
Photo 2.4 Screen glitches/abnormalities
Dan C reacted to a post in a topic:
Photo 2.4 Screen glitches/abnormalities
-
Ron P. reacted to a post in a topic:
Photo 2.4 Screen glitches/abnormalities
-
rcsilber reacted to a post in a topic:
Photo 2.4 Screen glitches/abnormalities
-
Ron, So, at this point, the gold star ✴️ seems to go to you. I had already tried a stand-by wired keyboard/mouse combo to no avail. My Wacom stays off when not in use, and using it did not give improved results. Performing an app reset did however (holding down Control key while restarting the app) did work! Shame on me... I should have thought of this in my earlier trouble-shooting. Maybe this will help another soul if one experiences what I did. Thanks for your knowledgable insight Ron.
- 5 replies
-
- 2
-
-
-
- affinity photo
- mac studio m2 max
- (and 1 more)
-
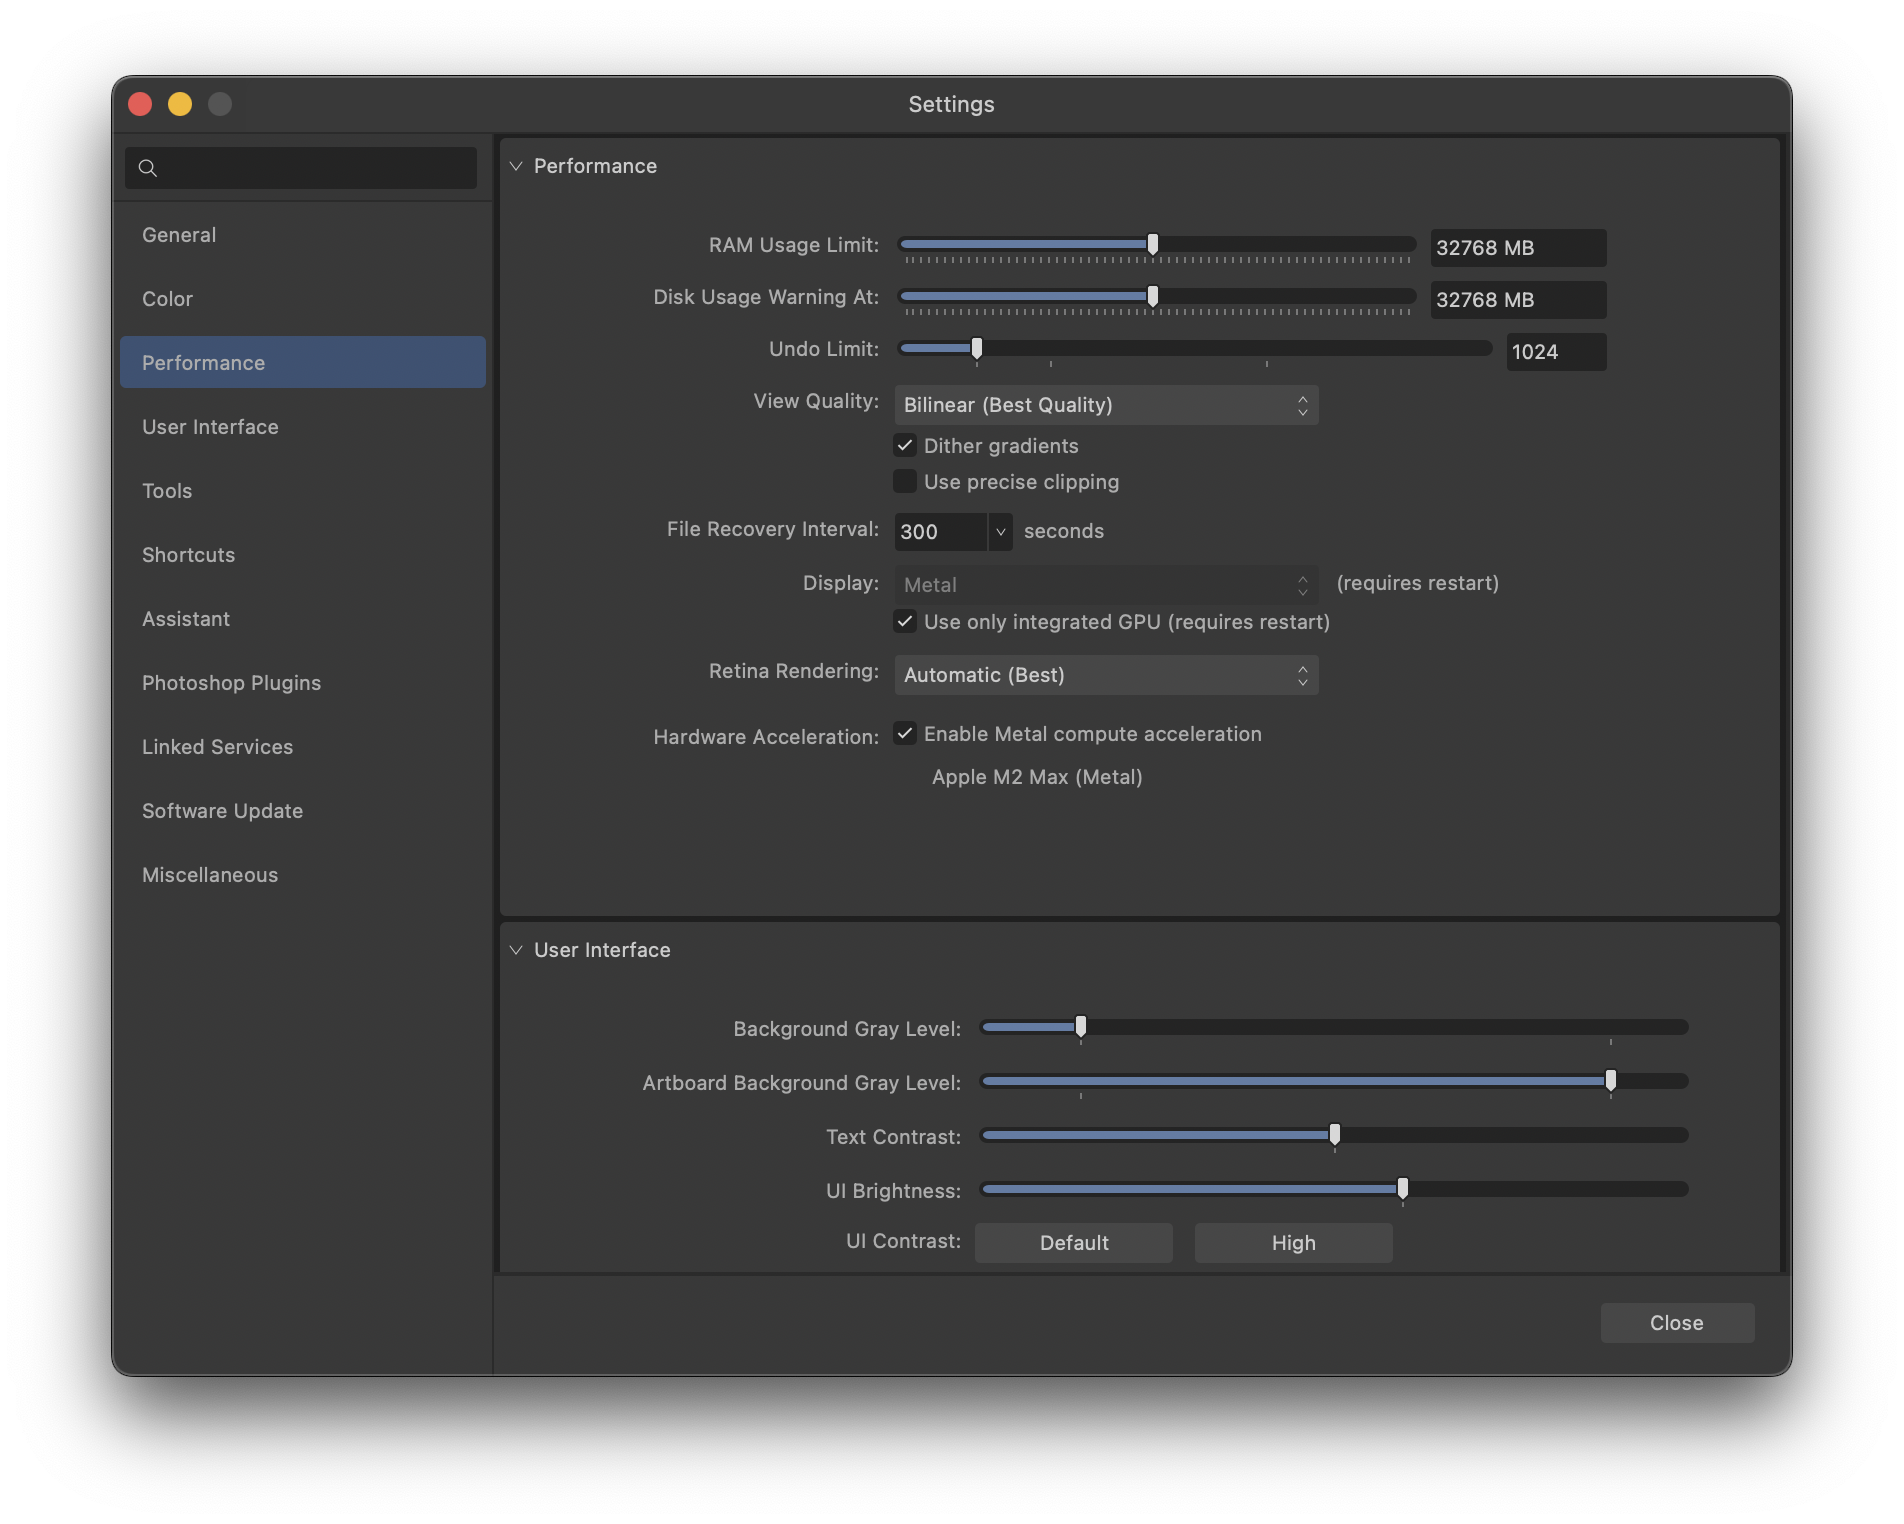
I am using Photo V2.4 and and am experiencing significant screen glitches, which I can replicate 100% of the time. It does not matter if I create a new document, open an existing Affinity document, a raw, tiff or jpeg file. When opened, and the View (H) tool is selected by default, moving the tool over the image causes the screen to go black, then starts drawing a pixelated path around the screen as I move the mouse. Double clicking will sometimes restore the screen but only temporarily. Clicking V for the Move tool, corrects that issue momentarily, but the problem can reoccur at random. All was well before updating to V 2.4 I can replicate the issue 100% of the time. I did read in these forums that this is a bug in v2.4 with raw files; in my case, it is with all files. Troubleshooting: I deleted Photo, then downloaded a fresh dng file from the Affinity server. No difference. I updated the firmware on my BenQ monitor. No difference. Made certain macOS Sonoma is up-to-date. Experimented with different settings in the Performance preferences for Display and Hardware acceleration both on and off. No difference. Curiosities: I still have Photo v1 and it operates correctly. No glitches. I have Photo 2 Beta 2.4.0, and it operates correctly. Since it does, I felt it safe to update Photo to v2.4. All my other applications operate properly. I attempted to do a screen recording to demonstrate this, but curiously, when I start the screen recording, the problem does not appear. As a result, I had to make a video with my iPhone to demonstrate the problem Operating Enviornement Mac Studio M2 Max 32 GB macOS Sonoma 14.3.1 BenQ SW272Q monitor v7 firmware Suggestions? Is it possible that either/or Photo v1 and/or Photo 2 Beta are interfering? As it stands now, I can do my editing in Photo 2 Beta, but this issue needs to be resolved. Thanks in advance for insights or helpful advice. Robert screen recording.mov
-
Thanks Ron for your informative reply. Apparently the bug affects all files, at least in my case. I did disable Hardware Acceleration, with a restart, and the problem persists.
-
I am bewildered and am now at my wits end... maybe someone here can help shed some light on this issue. Using Photo, all was well until I updated to 2.4. Since the update I am experiencing significant screen glitches, which I can replicate 100% of the time. It does not matter if I create a new document, open an existing Affinity document, or a tiff. When opened, and the View (H) tool is selected by default, moving the tool over the image causes the screen to go black, then starts drawing a pixelated path around the screen as I move the mouse. Double clicking will sometimes restore the screen but only temporarily. Clicking V for the Move tool, corrects that issue, but the problem can reoccur at random. Troubleshooting: I deleted Photo, then downloaded a fresh dng file from the Affinity server. No difference. I updated the firmware on my BenQ monitor. No difference. Made certain macOS Sonoma screen recording.mov is up-to-date. Experimented with different settings in the Performance preferences for Display and Hardware acceleration. No difference. Curiosities: I still have Photo v1 and it operates correctly. No glitches. I have Photo 2 Beta 2.4.0, and it operates correctly. Since it does, I felt it safe to update Photo. All my other applications operate properly. I attempted to do a screen recording to demonstrate this, but when I start the screen recording, the problem does not appear. As a result, I took a video with my iPhone to demonstrate the problem Operating Enviornement Mac Studio M2 Max 32 GB macOS Sonoma 14.3.1 BenQ SW272Q monitor v7 firmware Suggestions? Is it possible that either/or Photo v1 and/or Photo 2 Beta are interfering? As it stands now, I can do my editing in Photo 2 Beta, but this issue needs to be resolved. Thanks in advance for insights or helpful advice. Robert
-
I know this may not be your ideal solution, but if you're in a pinch with a deadline, you may Qimage. You can use it as a trial and avoid going back and forth between two Affinity programs. Only caveat is you will export your Affinity file as a tiff, which is what Qimage needs. Any further tweaks can be added as a layer for a non-destructive approach. I've used Qimage for a long time and actually prefer it to Affinity. Your experience and/or need may differ however. Just a thought.
-
Sam's chum reacted to a post in a topic:
Affinity Photo 2 won't open the print dialogue box on Ventura
-
On my end, AP 2.0.4 is working properly on macOS Ventura. For troubleshooting, I would recommend downloading a new copy from the Affinity site in the event your installed copy has a corruption. Once done, if Affinity is still not working properly, I would perform a Safe Boot on the Mac, then restart your mac once again.
-
Glad you're on track now... 👍
-
Naturally, develop your raw either embedded or linked. In Photo, in the layers panel click on the Add Pixel Layer icon in the lower right. That creates a blank layer above your raw embedded layer. Be sure to select Current layer and below for your retouch tool:
-
Not an expert on AP2 processes, my gut tells me no loss as to dynamic range. The raw file is either being embedded or linked, retaining all of its data, which is why it can be accessed again in Photo. I was accustomed, back in my photoshop days, of doing retouching first in my workflow. I'm going to test developing the raw, then in Photo, completing any further tonal or color adjustments, delaying retouching until I'm certain no further raw or tonal tweaks are necessary. A new learning curve! 😊
-
jimh12345, to clarify, my adjustments were minor. If major raw adjustments are made under a clone layer, it will show. Obviously, this is something to have in mind as work progresses. Clearly, my developing workflow is still underway... we have to be conscious of what we are doing and how the tools interact.
-
Yes; that is the intended option. I have tested this as I develop and new non-destructive workflow. I made several "repairs" on a blank layer with both the inpainting brush and clone tool, along with other live filters and adjustment layers. I came back the raw layer and tweaked some settings in the raw base layer, which had the intended consequence on the entire image. As long as one does not create a pixel image layer, i.e. stamping up all layers, you remain in a non-destructive state.
-
Indeed, editing on an image pixel layer is destructive. However, if you create an empty pixel layer, you can clone and heal on that layer, which is non-destructive. This leaves your raw layer untouched, which can be re-developed if necessary. Win-win 😉.
-
Old Bruce reacted to a post in a topic:
non-destructive raw editing... how, exactly?
-
walt.farrell reacted to a post in a topic:
non-destructive raw editing... how, exactly?
-
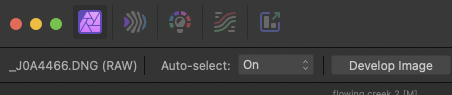
There does seem to be some confusion, somewhere, about non-destructive RAW editing. Walt has correctly stated that, in the raw develop assistant, one must choose Serif Labs as the RAW engine for non-destructive editing. If you choose Apple and bring in a RAW file this is what you'll see in your toolbar: If you've chosen Serif Labs you will see this in the top toolbar (where you can choose Linked or Embedded: For simplicity of demonstration, once you click develop and go back to the Photo Persona, and what to edit the RAW file again, highlight the RAW file layer and with the Move tool selected your toolbar will look like this: Now you can click Develop Image to return the embedded or linked file to the RAW editor. When editing is complete, click Develop in toolbar again. Note that the Output option is no longer editable: I am readjusting my workflow to only use non-destructive layers above the RAW image file layer. If one must use a third party plugin, and stamp the file up to a new (destructive) layer, changes made to layers below will no longer affect the stamped layer. Hope this is helpful... 😁
-
This feature alone is worth the price of admission. I've spent a good part of the day with the videos to learn how to use the new features. 😉