Search the Community
Showing results for tags 'Affinity photo'.
-
 I would like to see an option to set a fixed aspect ratio when using the slice tool. Right now I can set a width and height and then link them, however, when I draw a new slice if it's not the same dimensions I have to unlink the H&W and manually type the correct dimensions and move the slice into position. Ideally I would set a fixed aspect ratio, draw my first slice, maybe move it into place, then line up my next slice with the first and draw it to match the width or height of the and already have the other dimension set correctly based on the AR.
 -
 Get it here: https://www.oliviotutorials.com/laser-delight-pack/ The Laser Delight Pack gives you up to 110 amazing Laser Light Styles for Affinity Photo. Masterfully designed colors will give you the perfect glow and lights to make your photos shine. The skillfully assembled Styles Pack comes with a free Online Course. Explaining everything from Installing the Styles to using them creatively in your workflow. A perfect Addition for Hobbyists and Professionals alike. Enjoy All Version also includes a free Online Course. INFO: This product was NOT tested with the iPad. Please try the free version first.
 -
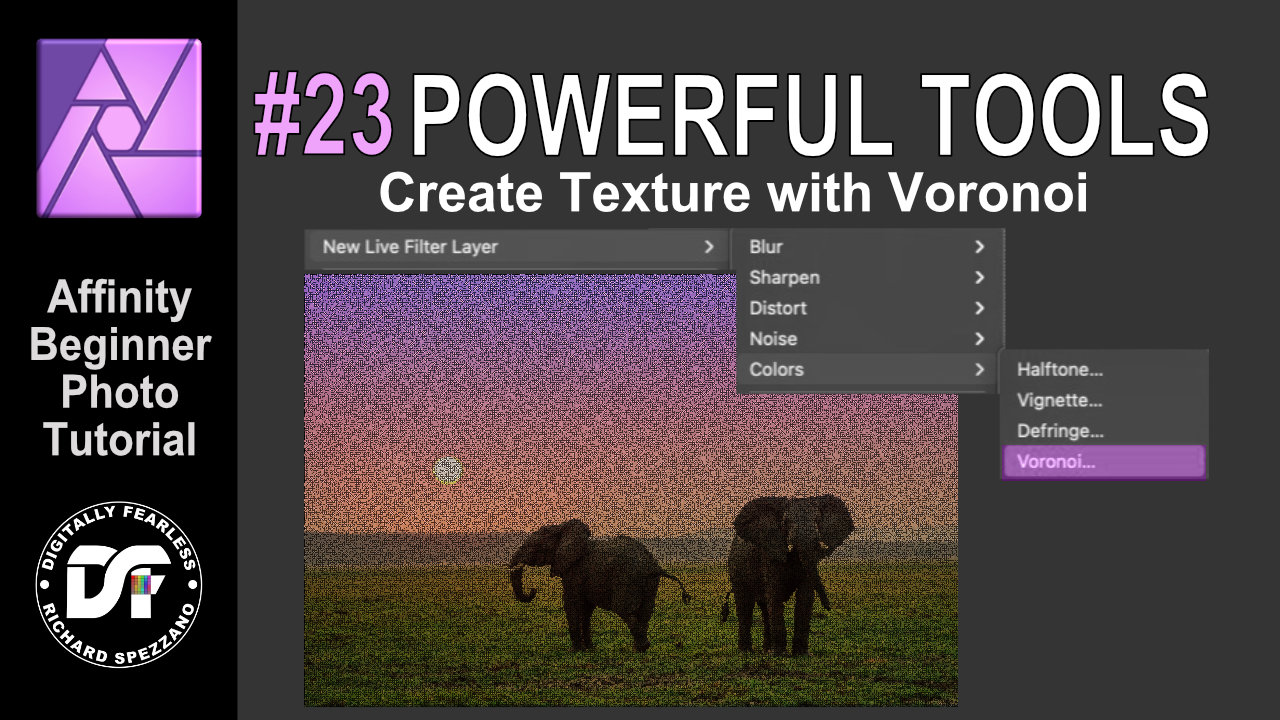
 Create texture using Voronoi. This is an Affinity Photo beginners tutorial and number 23 of the Digitally Fearless Power tools of Affinity Photo playlist. https://youtu.be/DJvrszzygzk
-
 Oh My Gosh. All this time, I did not realize that it is possible to add Affinity Photo to the list of external editors provided in Lightroom (LR). I'm using LR 6, so this likely would apply to Lightroom Classic (sorry can't vouch for HOW to do it in the LR Classic version, but it might be similarly done). In LIghtroom 6, simply go to "File / Preferences / External Editing" - On that dialogue, look under "Additional External Editor / Application:" - then click the "Choose" button on the right of the dialogue. Navigate to the pixel editing application you want (Affinity Photo in this case) and choose it. Configure the setting (file type, color space, dpi, etc.) and then drop down the "Preset" under the Additional External Editor heading and choose to "Save Current Settings as New Preset" All the previous external editors are still available plus the new one(s) you add. The configuration information is stored in "lrtemplate" files and you can see those templates through "Preferences / Presets / Show LIghtroom Presets Folder". In my case, I have the NIK Collection of editors also available. Now I have my favored Affinity Photo in there. The reason this is so powerful is twofold - first, it's quick to enter the external editor (two clicks), second, while your photo is edited in Affinity Photo (or other external editor), when you save your editing work, that edited photo is placed into the LR catalogue automatically. It is my understanding that additional photo editors can also be added to flesh out the editors arsenal at your disposal. Just about any "pixel" editor could be added to LR in this manner. Now here is my request for additional features - please include more editing features into Affinity Photo (to name one, "Luminosity Mask" similar to the feature in LR Classic), but also other really helpful features found in other company's editors and suggestions in this forum. And here is one I would really love to see - a scratch and dust removal dialogue similar to one Polaroid provided years ago that saved hours of one-by-one dust speck removal from scanned old prints, slides, and negatives.
 -
 It would be great if Affinity Photo could create a gradient map from the colors in a selection. The use case for this would be to do an expert level recoloring or color matching from another image. The gradient map should be created from an analysis of the darkest values/darkest tones to lightest values/lightest tones. Affinity Photo can already do color analysis of the current image or other an imported image. It would take a few extra steps to create this. This is something I do using a plugin for Photoshop called Infinite Unity - please see below:
 -
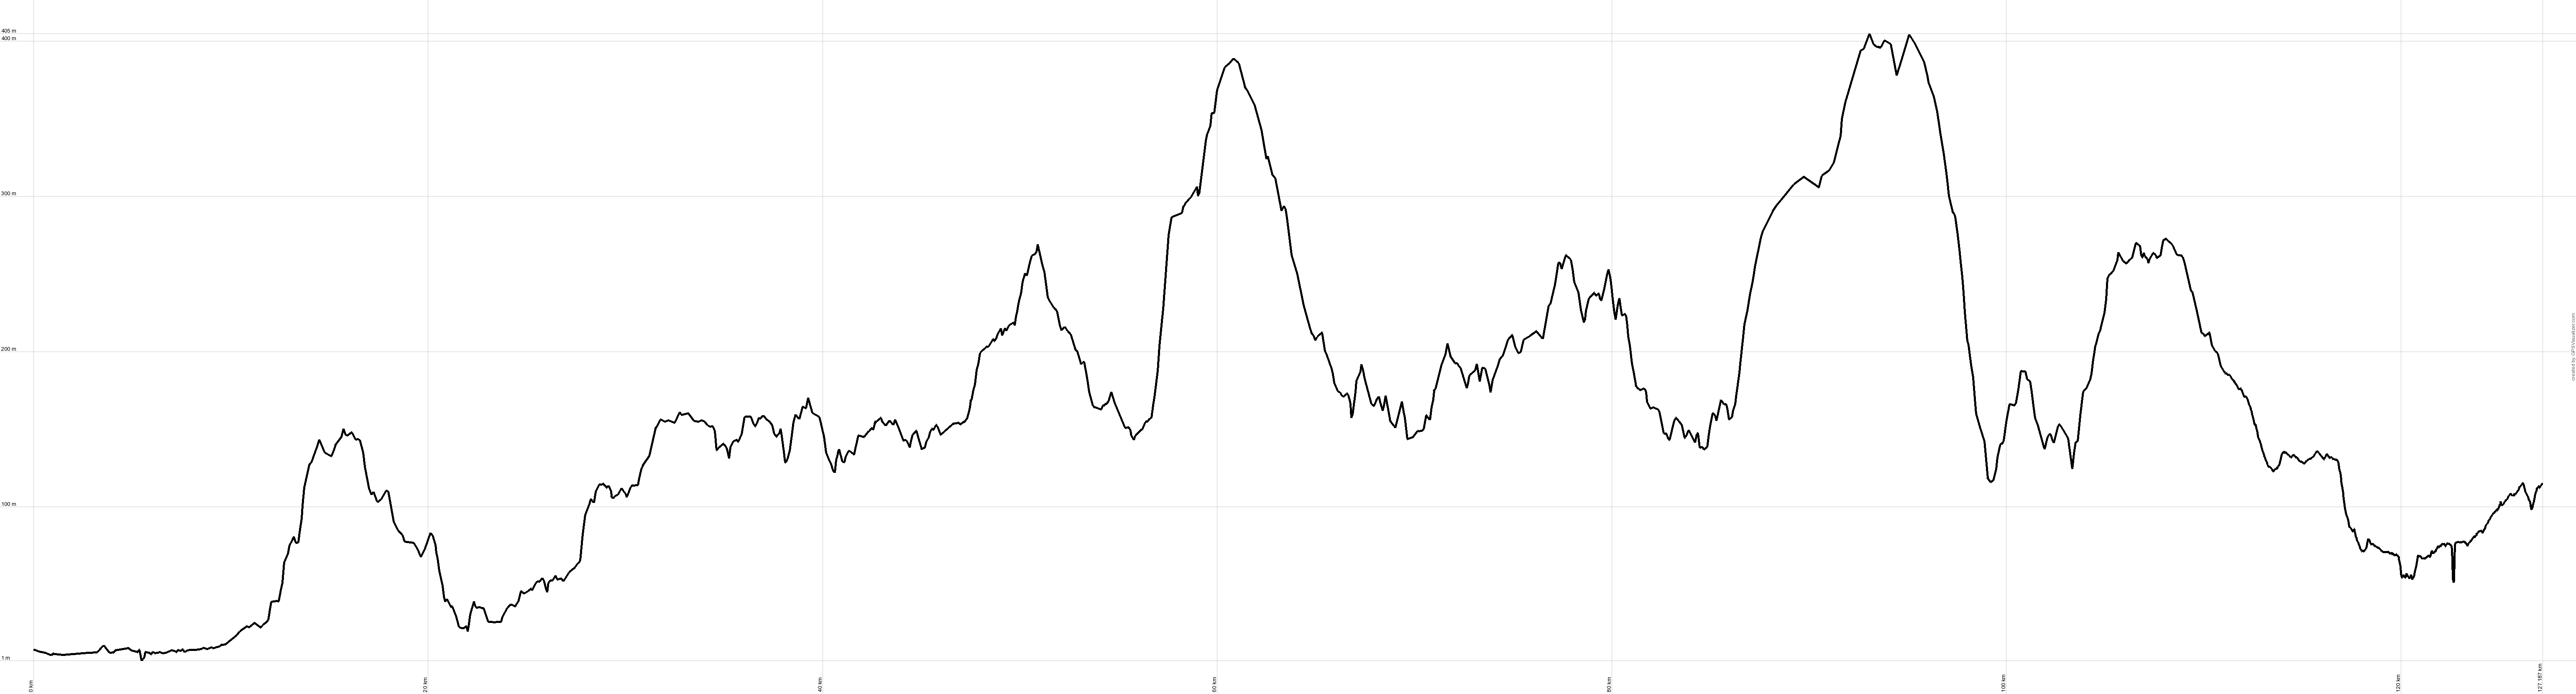
 Hi Affinity Community, I am looking to create a circular visual with text and a profile (which shows elevation and distance) that curves around the edge. I have been looking at this thread: https://forum.affinity.serif.com/index.php?/topic/131951-text-alignment-in-shapes/&tab=comments#comment-726530 And have found useful info for setting out and aligning text. I am also looking to warp this rectangular image onto the outside of the circle. I'd want to adjust the scale of it, so would transforming into a donut would be the best way to manipulate it? These would eventually go around the whole perimeter, I could either stick them together and warp one image, or ideally go around the segments adding another elevation profile. One elevation profile is attached (I have 12 of these) and an example of the final image I am aiming for. I'm using Affinity Photo. Thanks.
-
 My affinity photo hangs and does not recover while making curves adjustment. I was following the steps mentioned in following tutorial to adjust skin tones. https://affinityrevolution.com/color-correct-skin-affinity-photo-tutorial/ While adjusting the red channel affinity photo hangs. CPU usage during hang. Even after waiting for 5 minutes affinity photo doesn't recover. Affinity Photo Version: 1.9.2.1035 Windows Version : Windows 10 - OS Build 19042.867 I am trying to create a repro for this issue, by that time can any one confirm of there are any known issues with version? Thanks.
-
Passthrough Vs Normal. This tutorial shows the difference between passthrough and normal in grouped layers. This is an Affinity Photo beginners tutorial and number 22 of my Digitally Fearless Power tools of Affinity Photo playlist. This is an Affinity Photo beginners tutorial and number 22 of my Digitally Fearless Power tools of Affinity Photo playlist. https://youtu.be/gRZ1vFhwdss
-
 Hi guys, in this video, I'm doing a simple photo composite about how to make an object coming out from a text/alphabet. I hope you enjoy this video, thank you!
 -
 If I need to lay guides for a project, how do I do that if the measurement is not in pixels? Examples: inches, millimeters, etc...
 -
 Feature request for Affinity Photo: Embed changed linked files until an update by user Situation: If you load a project file, then all missed linked files will be displayed pixelized. This is extremly contra productive. Better: To avoid missed linked files please embed the visible result into the Affinity project file. If there are files missing, you can still inform the user, but please don't destroy the implemented material by pixelizing it. This solution would secure the use of the files by 3rd parties, without having the original assets. You don't need to save the original file or filesize, just the edited result is all an user need. Seeing the result, even if you don't have the linked material is better, than destroying the project by showing pixelized results. This is the way how it works in Adobe Photoshop and a much better solution, than currently in Affinity Photo. Do you know, what I mean?
 -
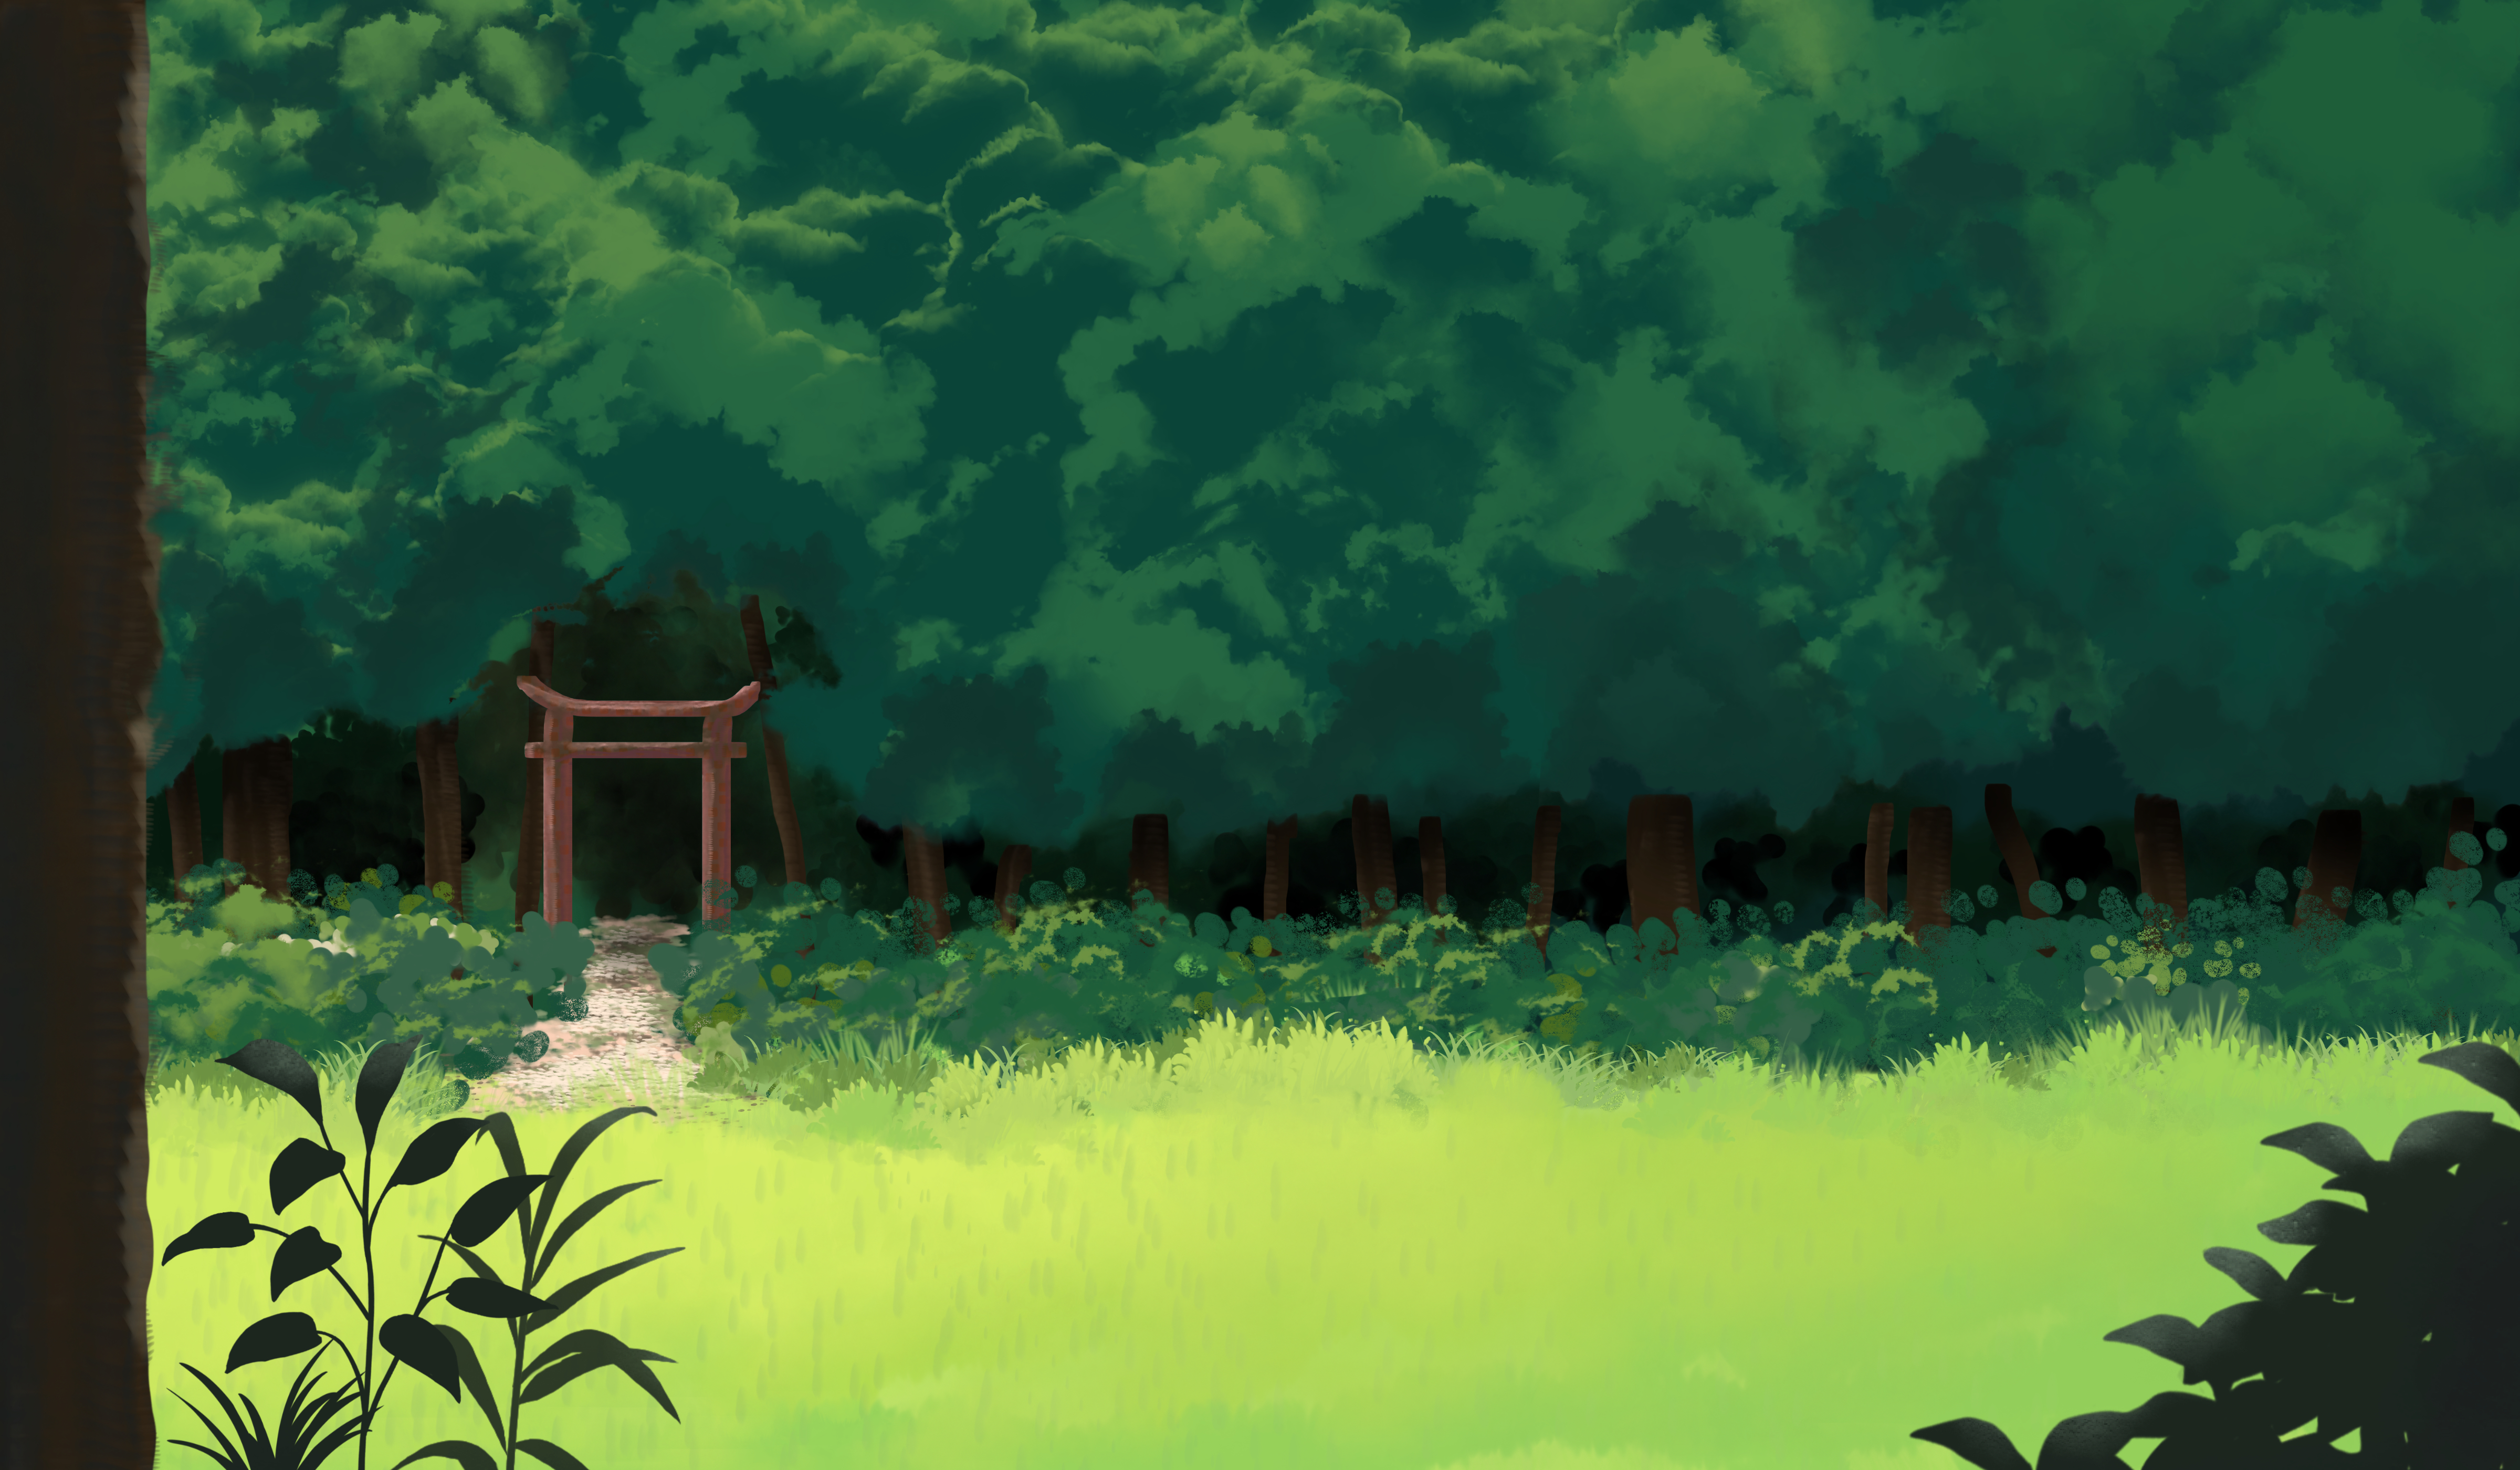
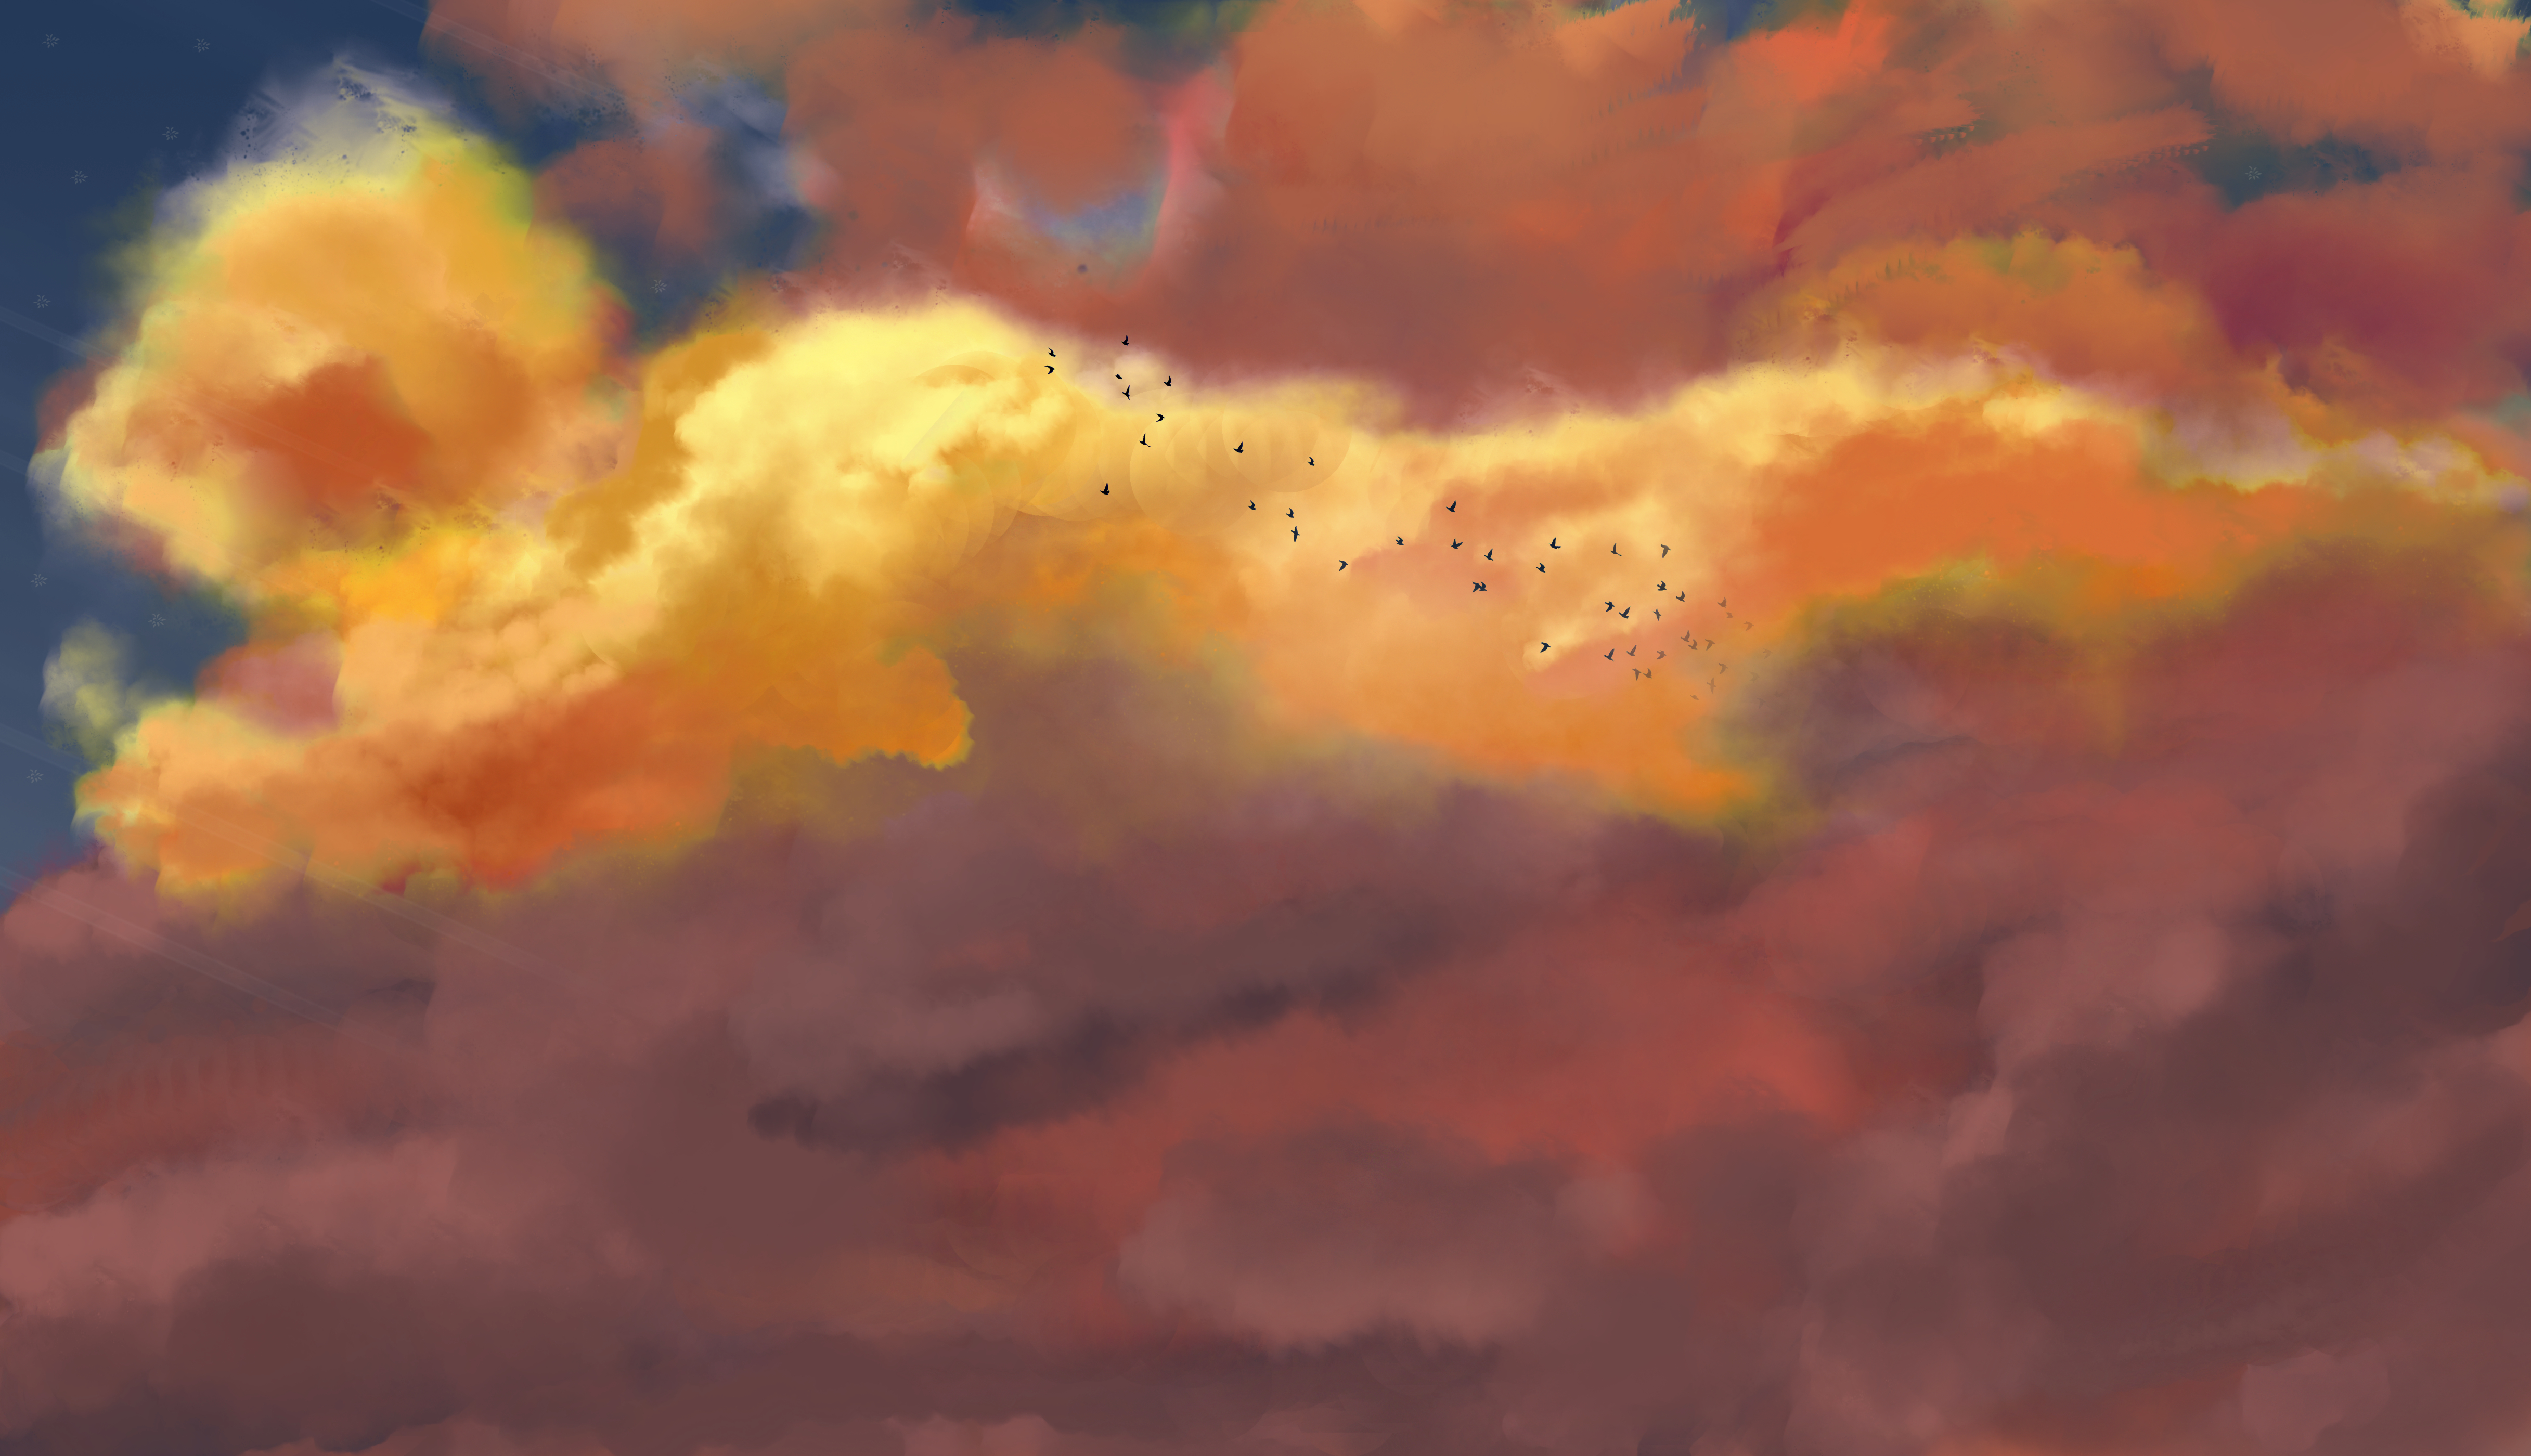
I've been working on some more clouds, and as it turns out, once you are decent at clouds tree tops come along pretty similarly. Maybe not all trees, but certainly the ones used in my Torii Gate illustration.
-
I've lately been doing a study on drawing clouds in Affinity Photo. While I do enjoy the ease of using assets and merging other photos in to get clouds, I want a more Ghibli style look, and as far as I know that does require drawing. Having a tablet for this does help immensely. It does turn out clouds are pretty tough to draw. Each piece took me a few hours just on the sky. And I don't think I'll ever truly feel content with my work. I just want to keep making little tweaks and changes. But that is part of being an artists isn't it? Let me know your thoughts.
-
 I'm a beginner in astrophotography processing. I have watched the YouTube videos by James Ritson but I do not understand all the terminology or how to get all the files (Light frames, Dark frames, Bias frames, etc.) or even what they are. I really need an introduction to astrophotography processing in Affinity Photo. Thanks very mch.
 -
My style is typically centered around being similar to that portrayed in Ghibli films, but today I chose to draw some snow for the first time, as well as in a new way. I wanted some story in it, so I chose to add a baboon. Is it a statue? Is it alive? Both? My main qualm with my piece is I think I could have done some better shadows. But that is something to try out in some future art.
-
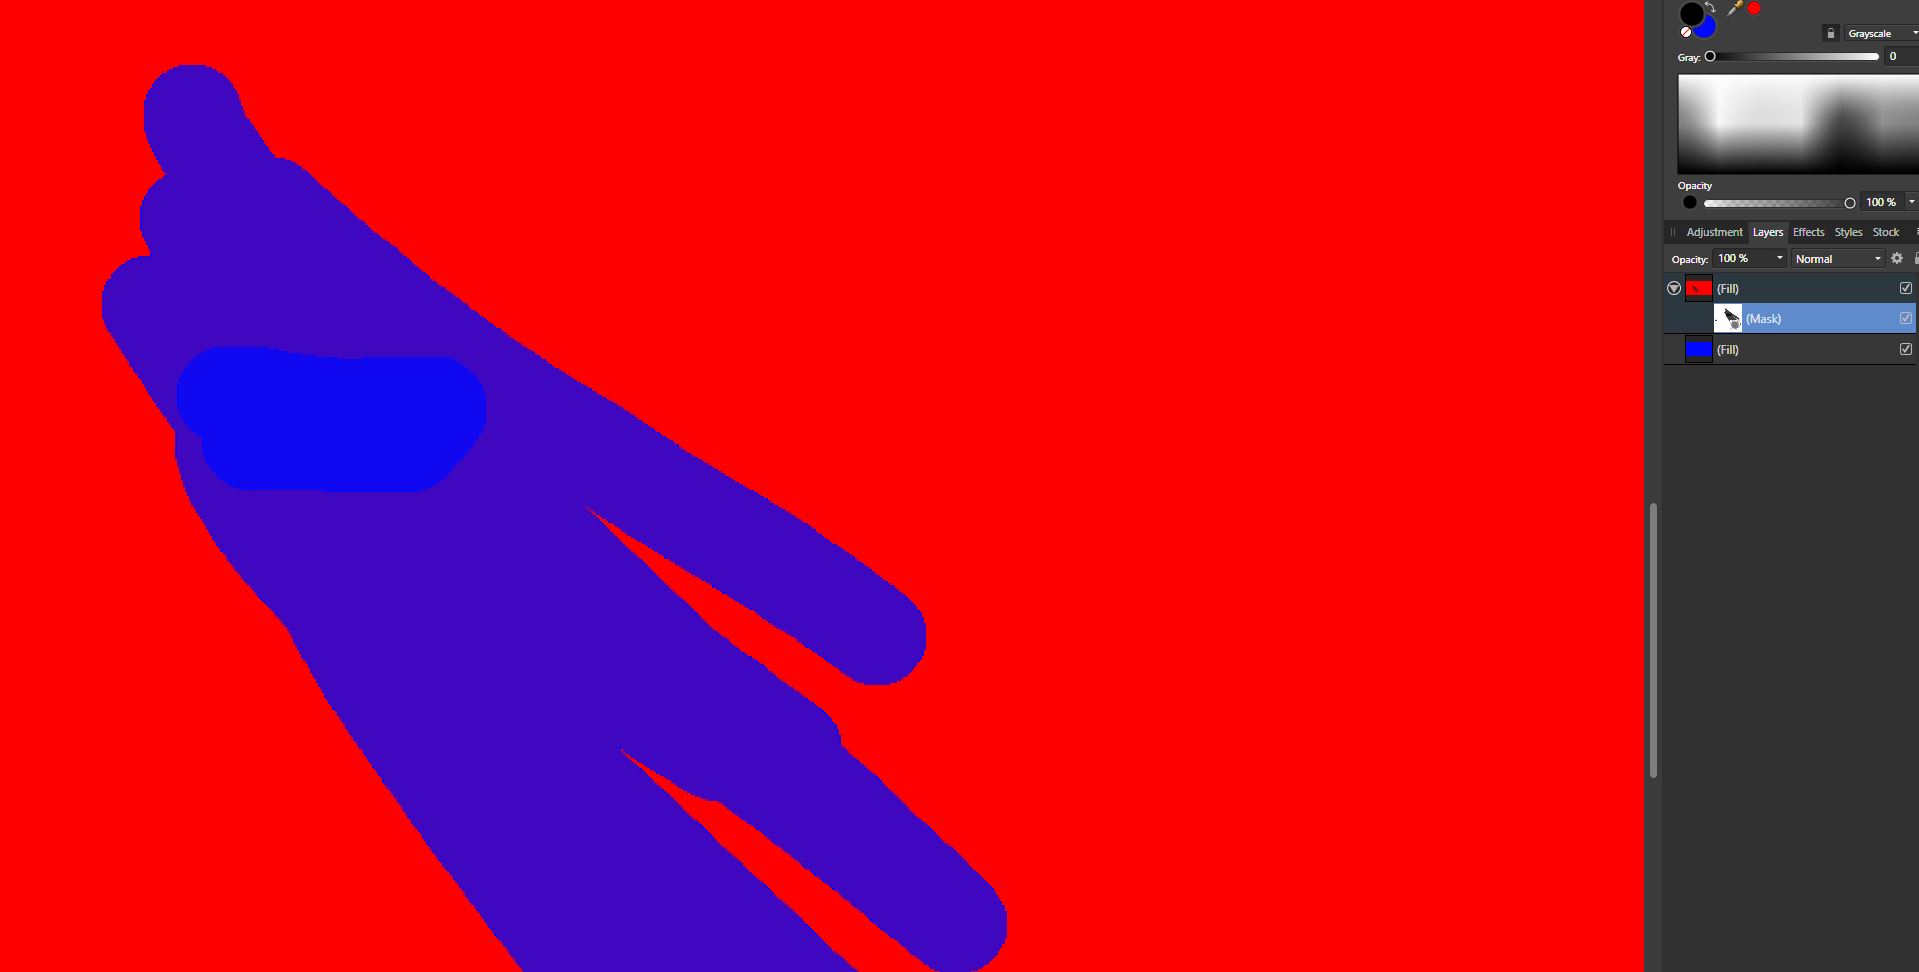
 When I create a mask, then paint on that mask in black, it is as if I am painting in dark grey. The masked layer shows through dimly and is not removed completely until I paint over it again. In the attached file, you can see that I have a red layer with a mask and a blue layer below that. When I paint on the mask, you can see that the result is a deep purple but if I paint over it again all of the red is removed and the blue shows through correctly. Brush opacity is 100%, Flow 100%, and hardness 100%. I must be missing something in the settings but I can't figure it out. Suggestions? Thanks, -dmd-
-
 I am Adobe Illustrator user from many years and using Affinity Designer and Photo from beta but never made logo from basic to finish in Affinity. I was previously made basic vector in Adobe illustrator and then put some colour and gradient in Affinity Designer. oday i thought i sjould give a try to make this logo concept all in Affinity and i made basic drawing in Affinity Designer and then used Affinity Photo brushes to paint. Hope you like my first try
- 3 replies
-
- 5
-

-
- logo
- logodesign
- (and 2 more)
-
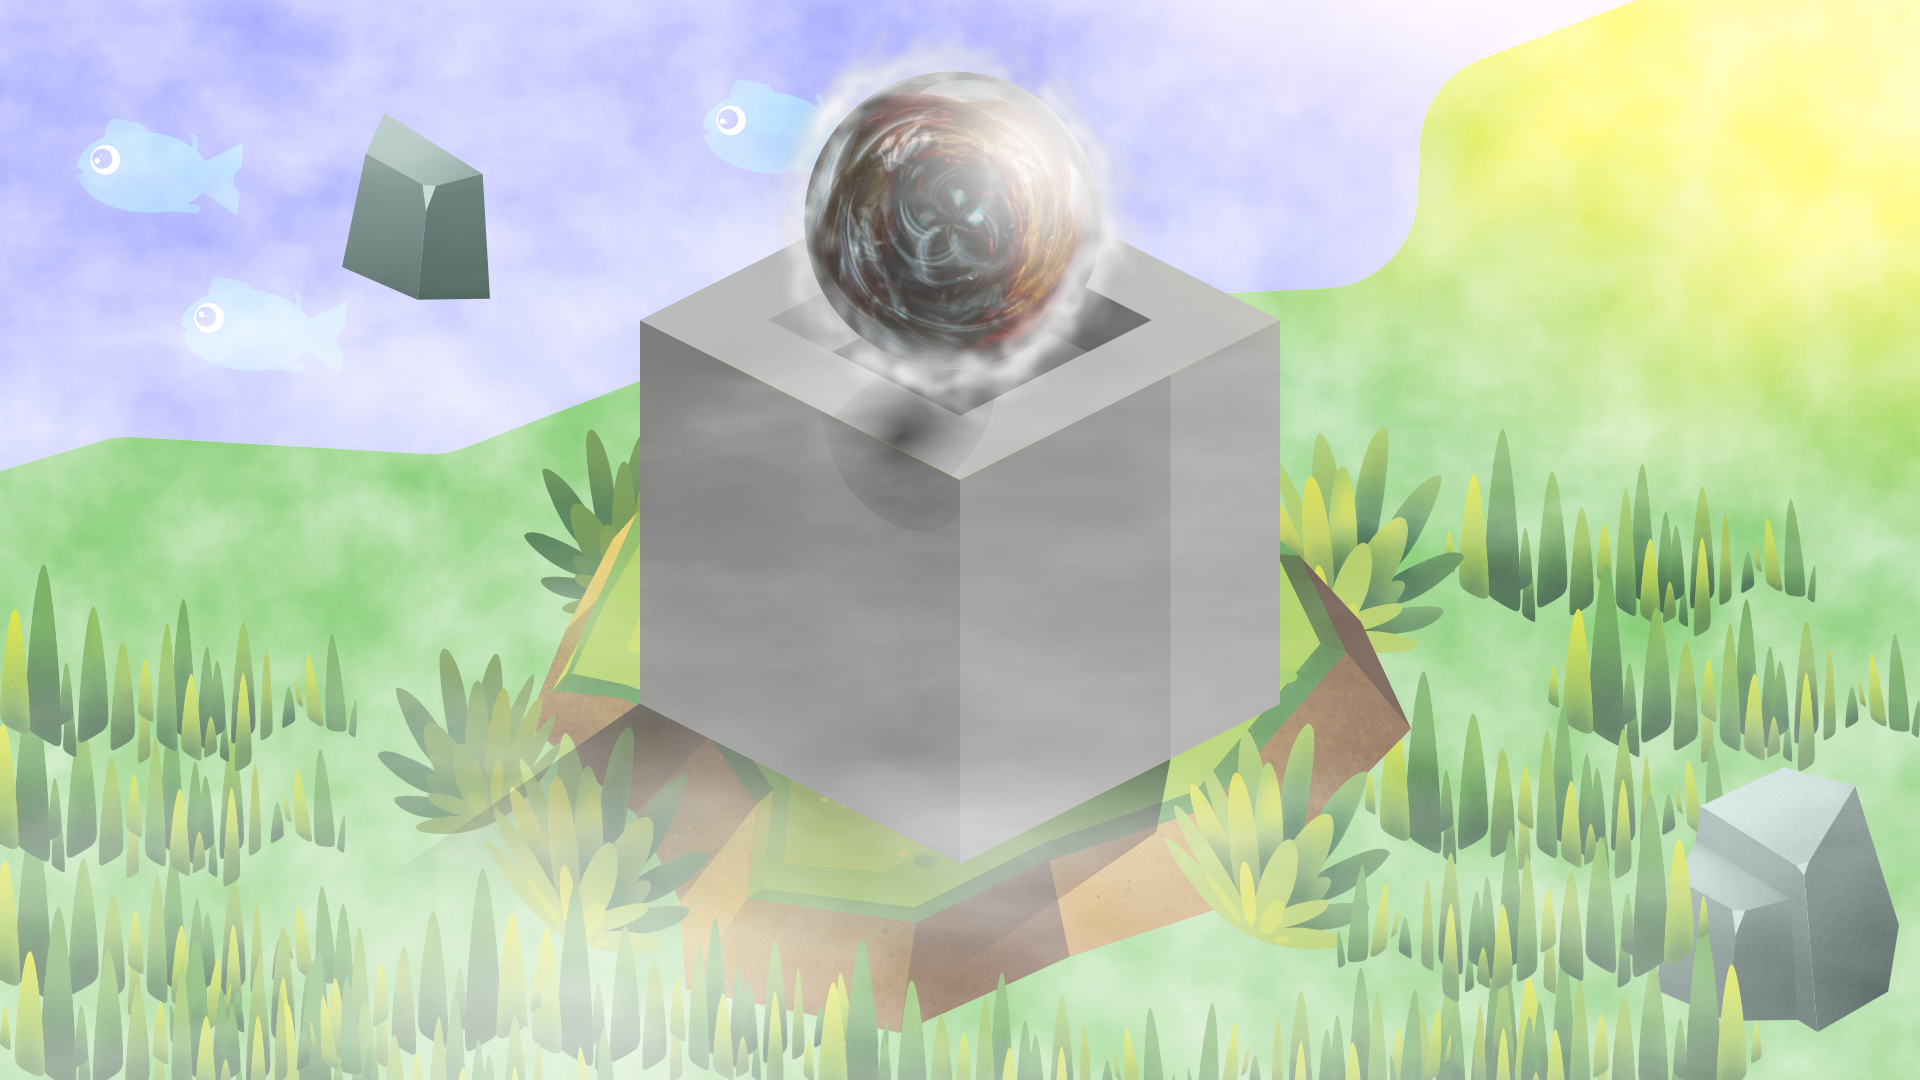
Made this on stream tonight, between Designer (most of the work) and Photo, started off as just the cube, then found the greenery assets while trying to find how to create a sphere... Then added some of the assets and things from the Affinity store. It's nothing overly special, but probably one of the nicer things I've managed to put together. Probably a lot/too much going on, but was just playing around - rather happy with how it came out. Name of it came from a viewer which is why it went from more than just the cube to what it is.
-
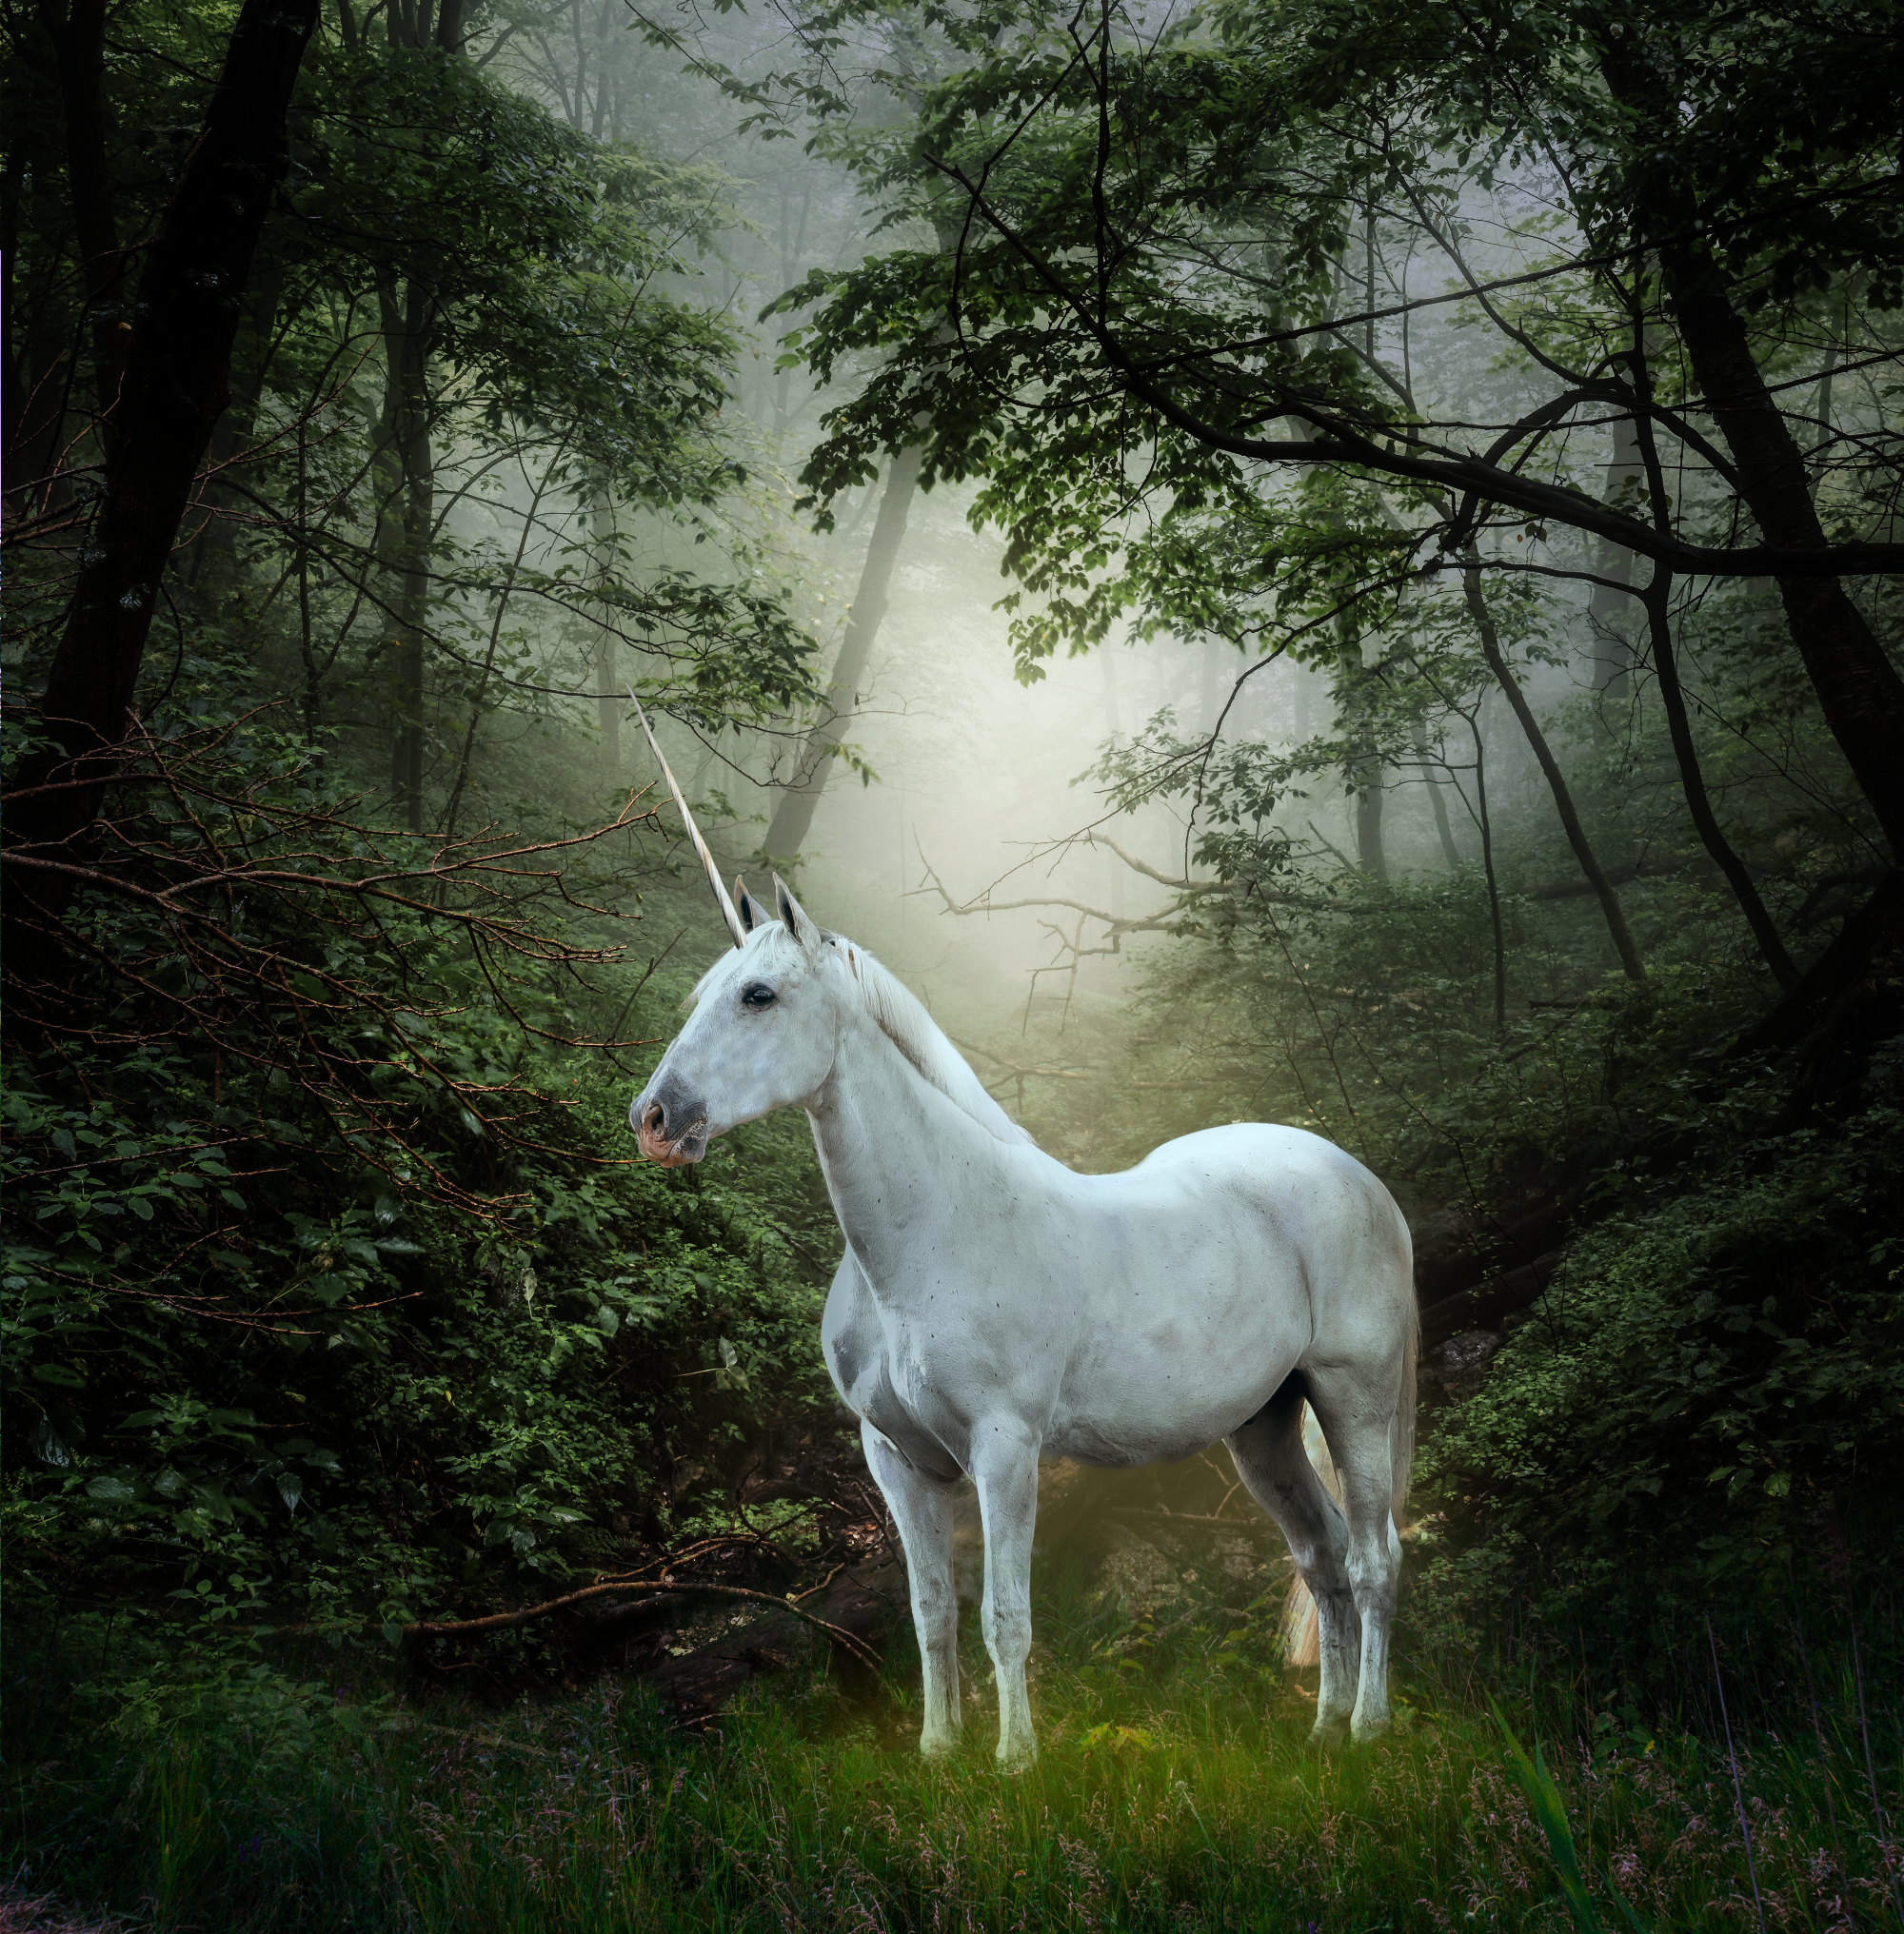
I watched a video today by James Riston on compositing and decided to try out some of what I learned. So I took a couple of stock photos, and an image of a tusk from a narwhal added some experimentation and I brought this mythical creature to life
-
An old friend asked me the other day if I'd done any old Zombie movie artwork recently, Nothing on today so thought I'd have a crack at Return of the Living Dead - The TARMAN zombie was painted mainly in Clip studio paint and finished in APhoto (via studiolink) then page designed in APub
- 2 replies
-
- 11
-
-
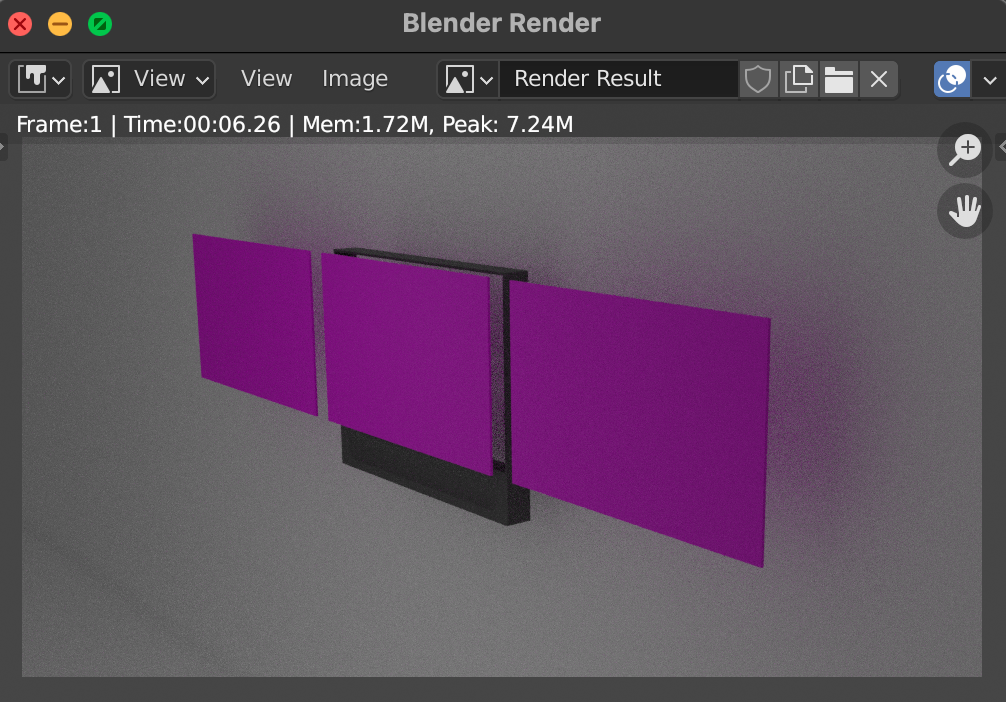
 Hi folks! I need to edit a rendering from Blender in Photo, however when I import the multilayered exr, all the layers are there but I can only see the top most layer in the viewport. Coming from C4D & Photoshop, I think the layer blends didn't work correctly? I was wondering if some of my settings are wrong, but all the resources about this topic I found simply open the files and it works (ignoring color mgmt.). I tried some other example exr files, but they have the same issue. Any help is more than welcome! kartoffel~ (Macbook Pro - OS X 11.2.3) I've added a small size quick render if anyone wants to test my file, and also two screenshots, how it is supposed to look (in Blender), and how it looks in Photo. untitled.exr
-
 Hi Serif! I'm Maurizio, and I'm a graphic and comics student from Rome. I'm having trouble with the iPad version of Designer and Photo. I have a 2nd generation iPad Pro (10.5) with iPadOS 14.5. In the iPad Settings section I saw that Designer and Photos take up a lot of space, especially Designer which takes up more or less 74 GB. Although I have closed some documents and deleted some history, it seems that this indirectly increased the space occupied by the app. Before deleting some documents, the space occupied by Affinity Designer was about 55 GB. How can I reduce it? And how can I see more information about the documents open within the program? I can only see the size of a document when I save it as a file (.afdesign or .afphoto) and only on the Files app, but I'm not sure it's the same size as an "open document" within the program. There is also the cache of the edit history (which will be deleted once the document is saved) to be considered in the space occupied. It’s frustrating not being able to fully and directly view and modify all document information within the app. It would be really interesting to see this feature in a new update! Thanks for your attention, I wish you the best! Keep it up and have a nice day! Maurizio
-
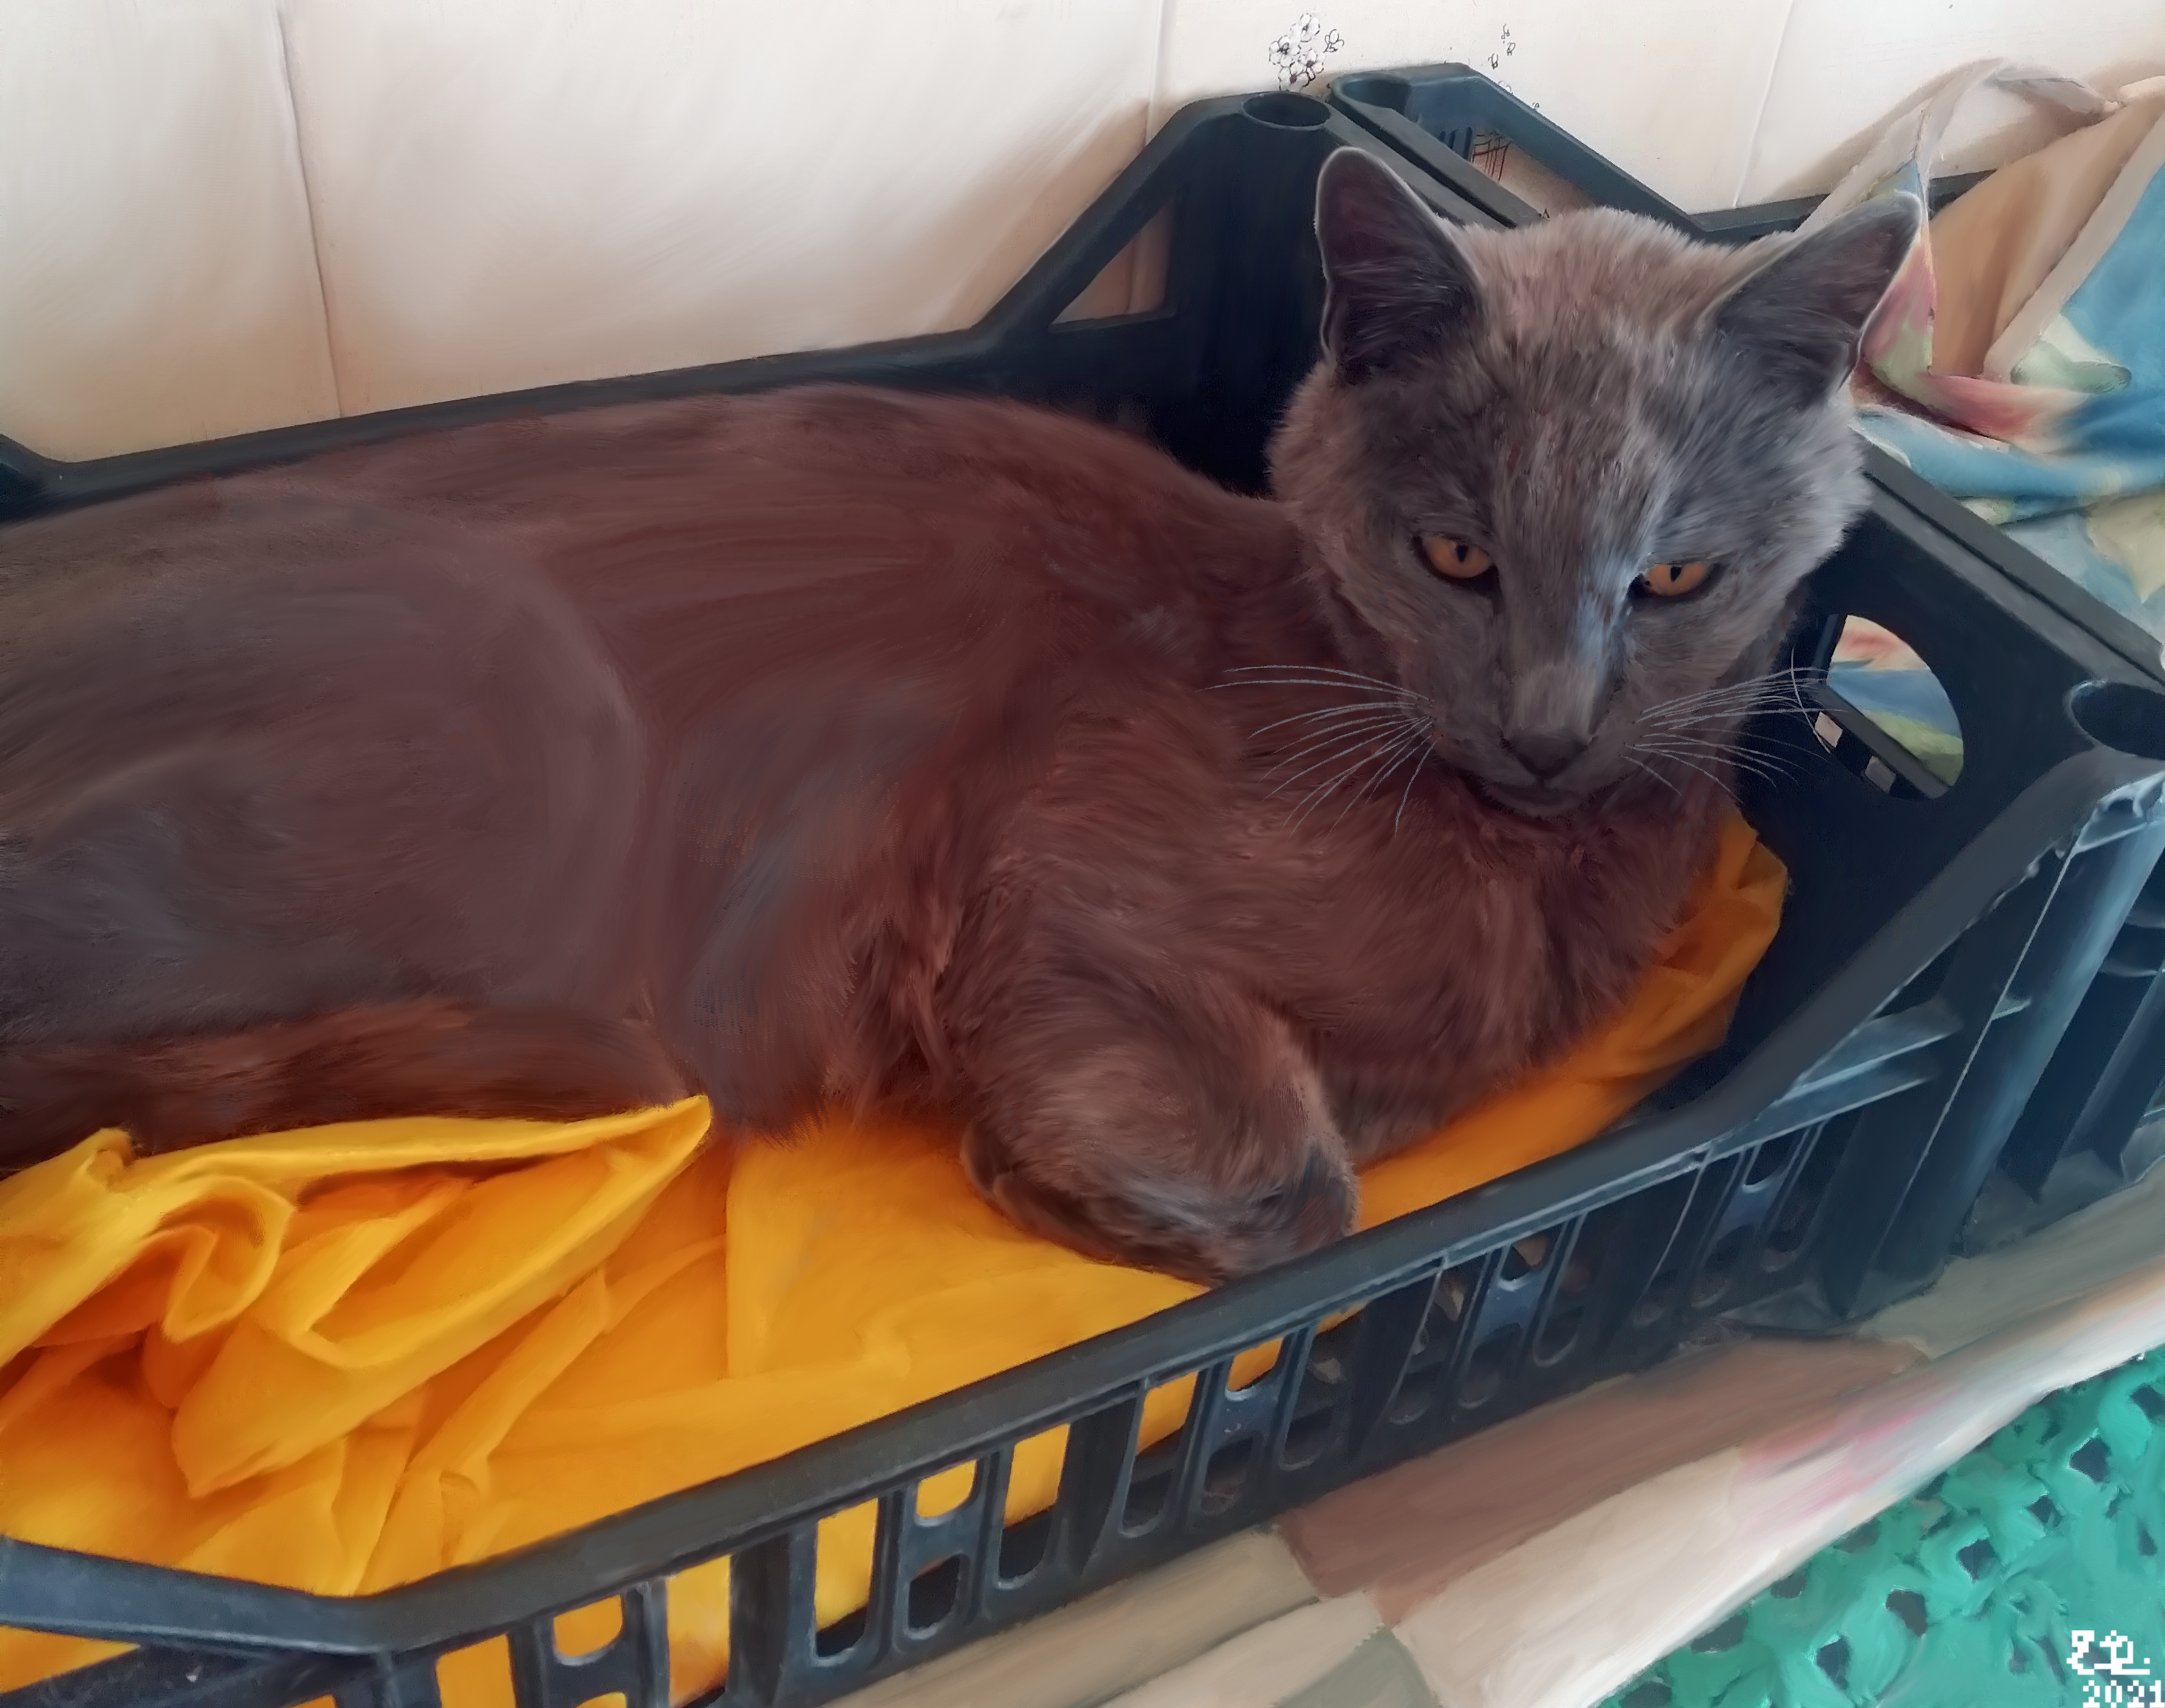
I shoot a photo of my dear cat Indy, and I obtained a painting of him with paint mixer brush tool and some hours of work. Hope the community will like the savage gaze of my wonderful cat. Original Photo attached too. Ok he just did an echography for a gastroenteritis, and in the original photo he lacks some fur, so I have dedicated some time to "rebuild" the fur with various brushes 🤣. But my loyal 15 years old feline companion is with us again in perfect shape, don't worry! Bye 😄😄😄
-
Hi there, I just noticed that the ipad version doesn't stop the user from retouching protected layers immediately (repair, clone etc tools). It takes a few seconds after opening a project until the protection starts working and changes wont be applied anymore. I have neither tested if the same happens on the desktop version or if other types of changes like painting on the layer would work as well.