Search the Community
Showing results for tags 'Affinity photo'.
-

affinity photo Third Week learning Photography & Affinity Photo
I'm Ant posted a topic in Share your work
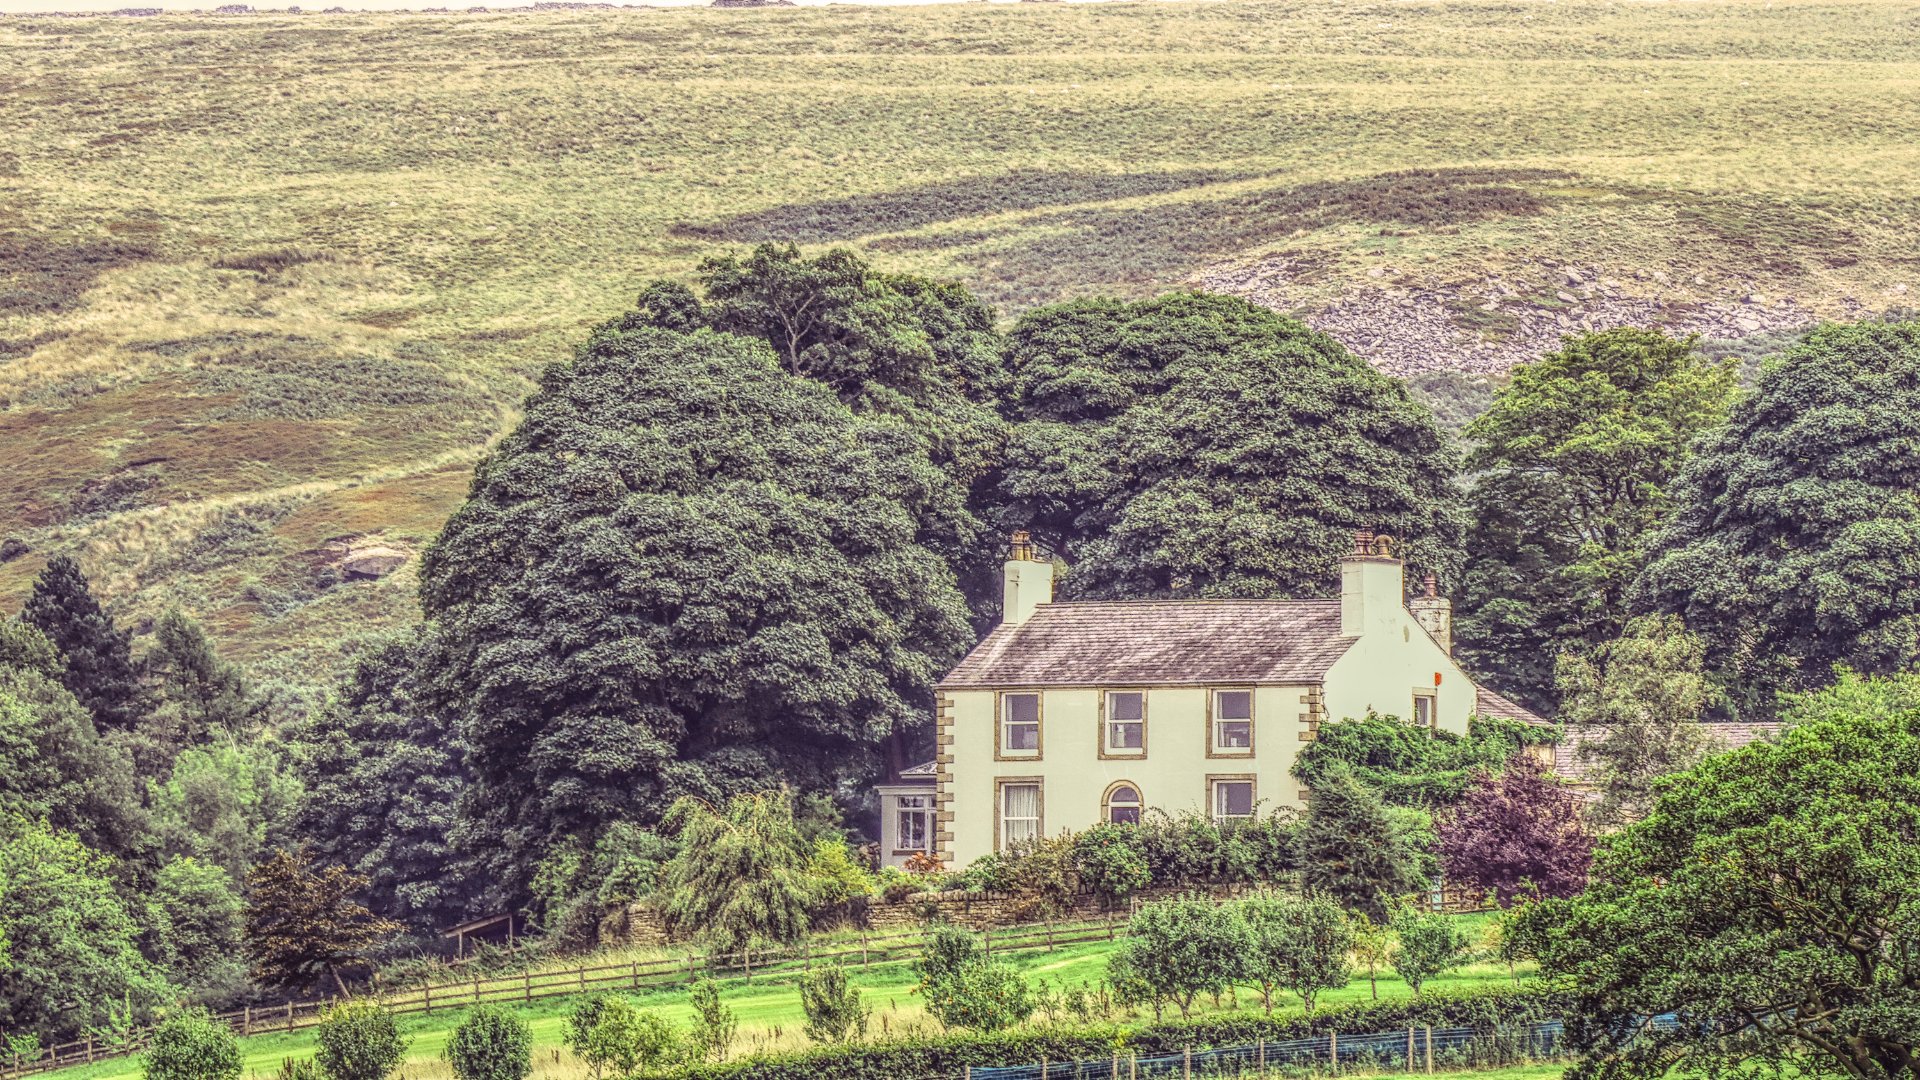
photos taken near Winter Hill, Lancashire, England Camera: Canon m50 Lens: Canon EF-M 18-150mm
-
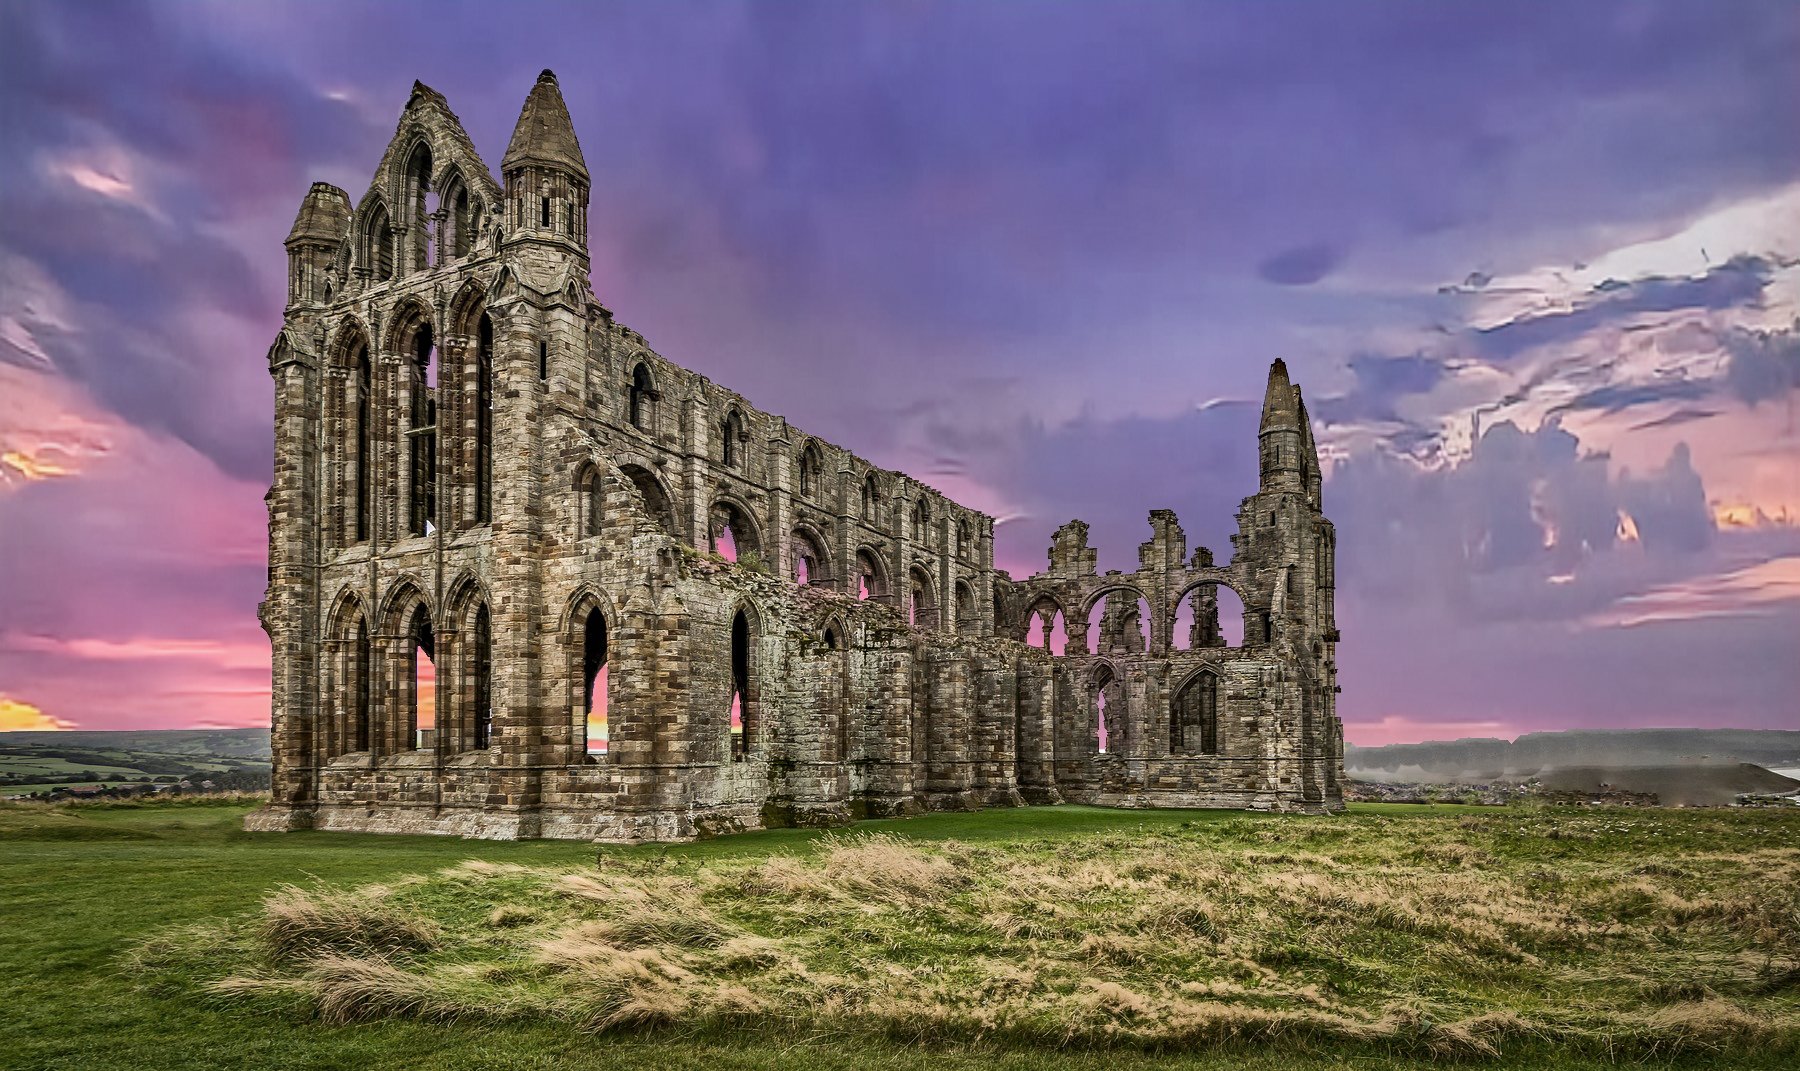
My first successful sky replacement. An abbey in England, courtesy of Pixabay, and a morning sky, from an Osprey Cam, in Maine.
-
 In this video, you will see how to use patch tools in affinity photos and how to remove unwanted content from any photo, Its very easy, Pick up the patch tool and draw a selection around the area you want to patch, then move the cursor away to the area you want to use as the source for the patching, then click the left mouse button to apply it to that area when you are happy with the preview. I hope you like it.
 -
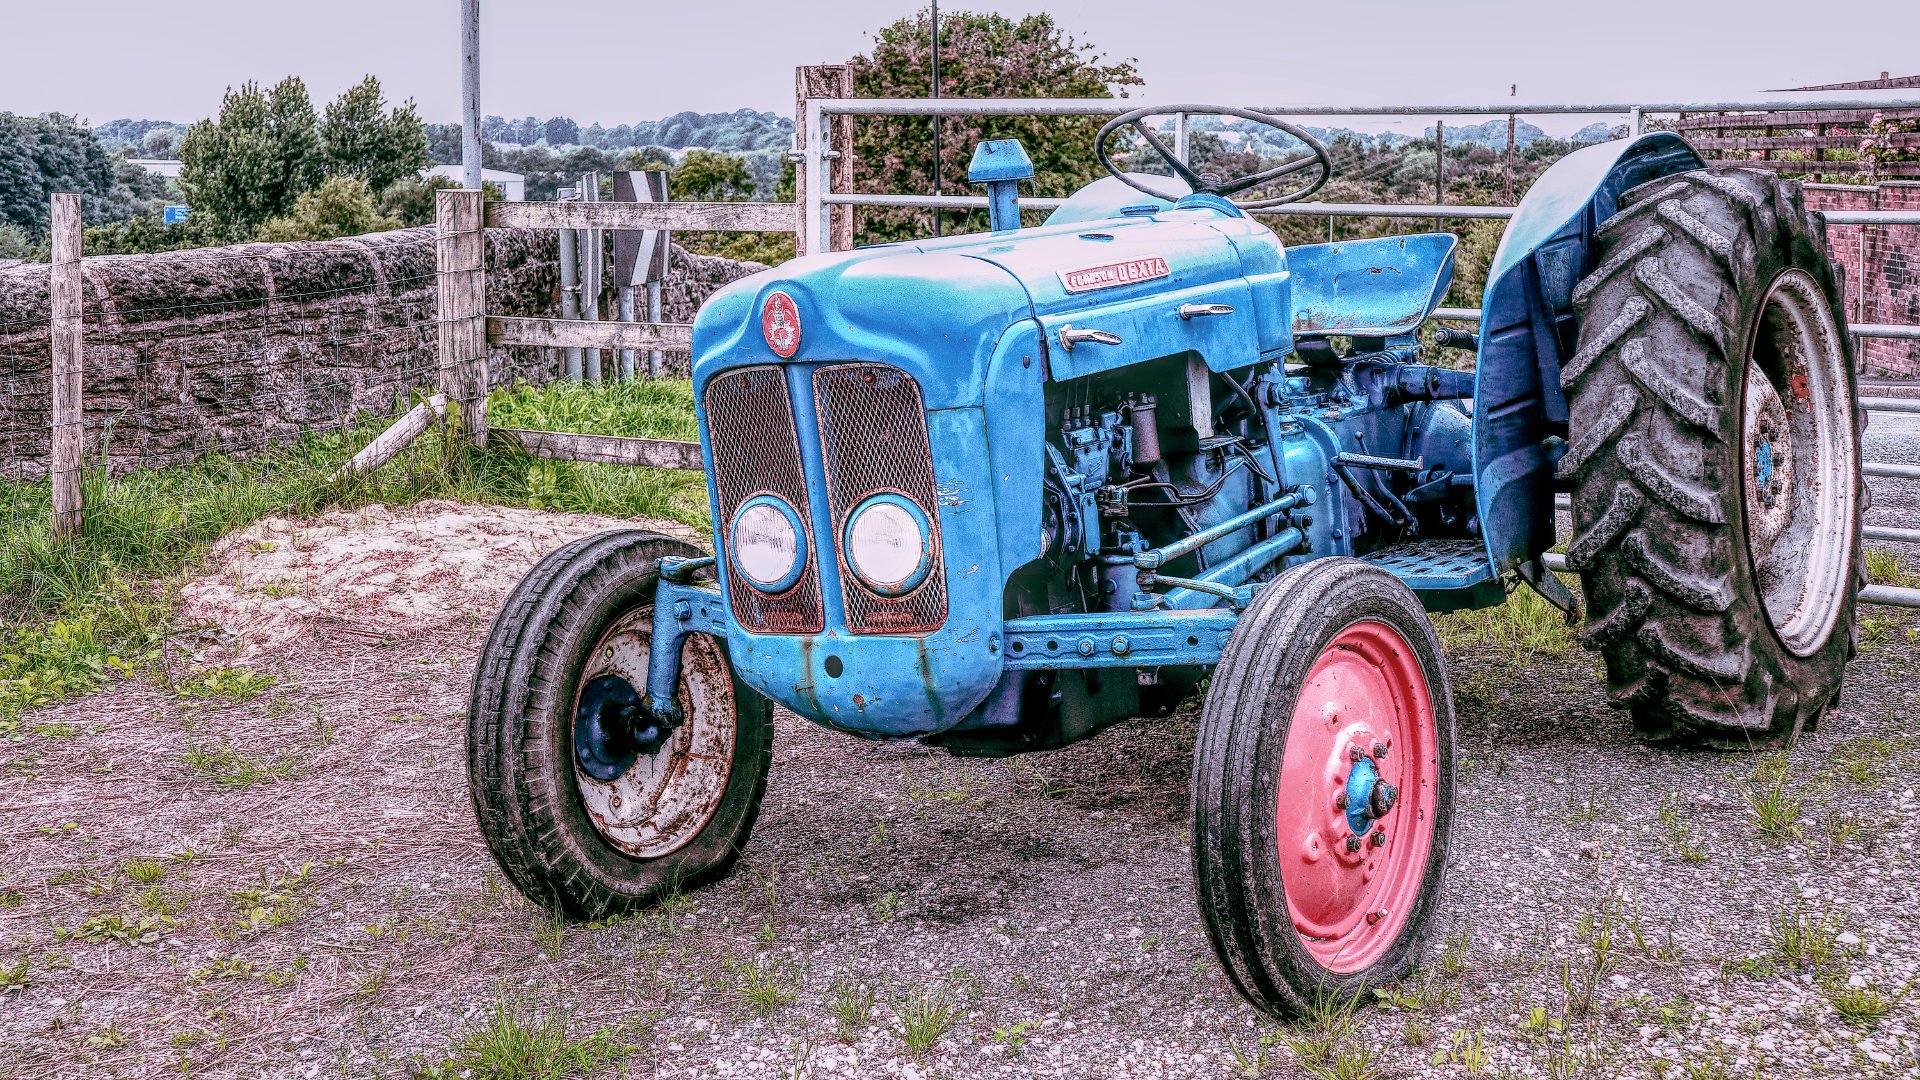
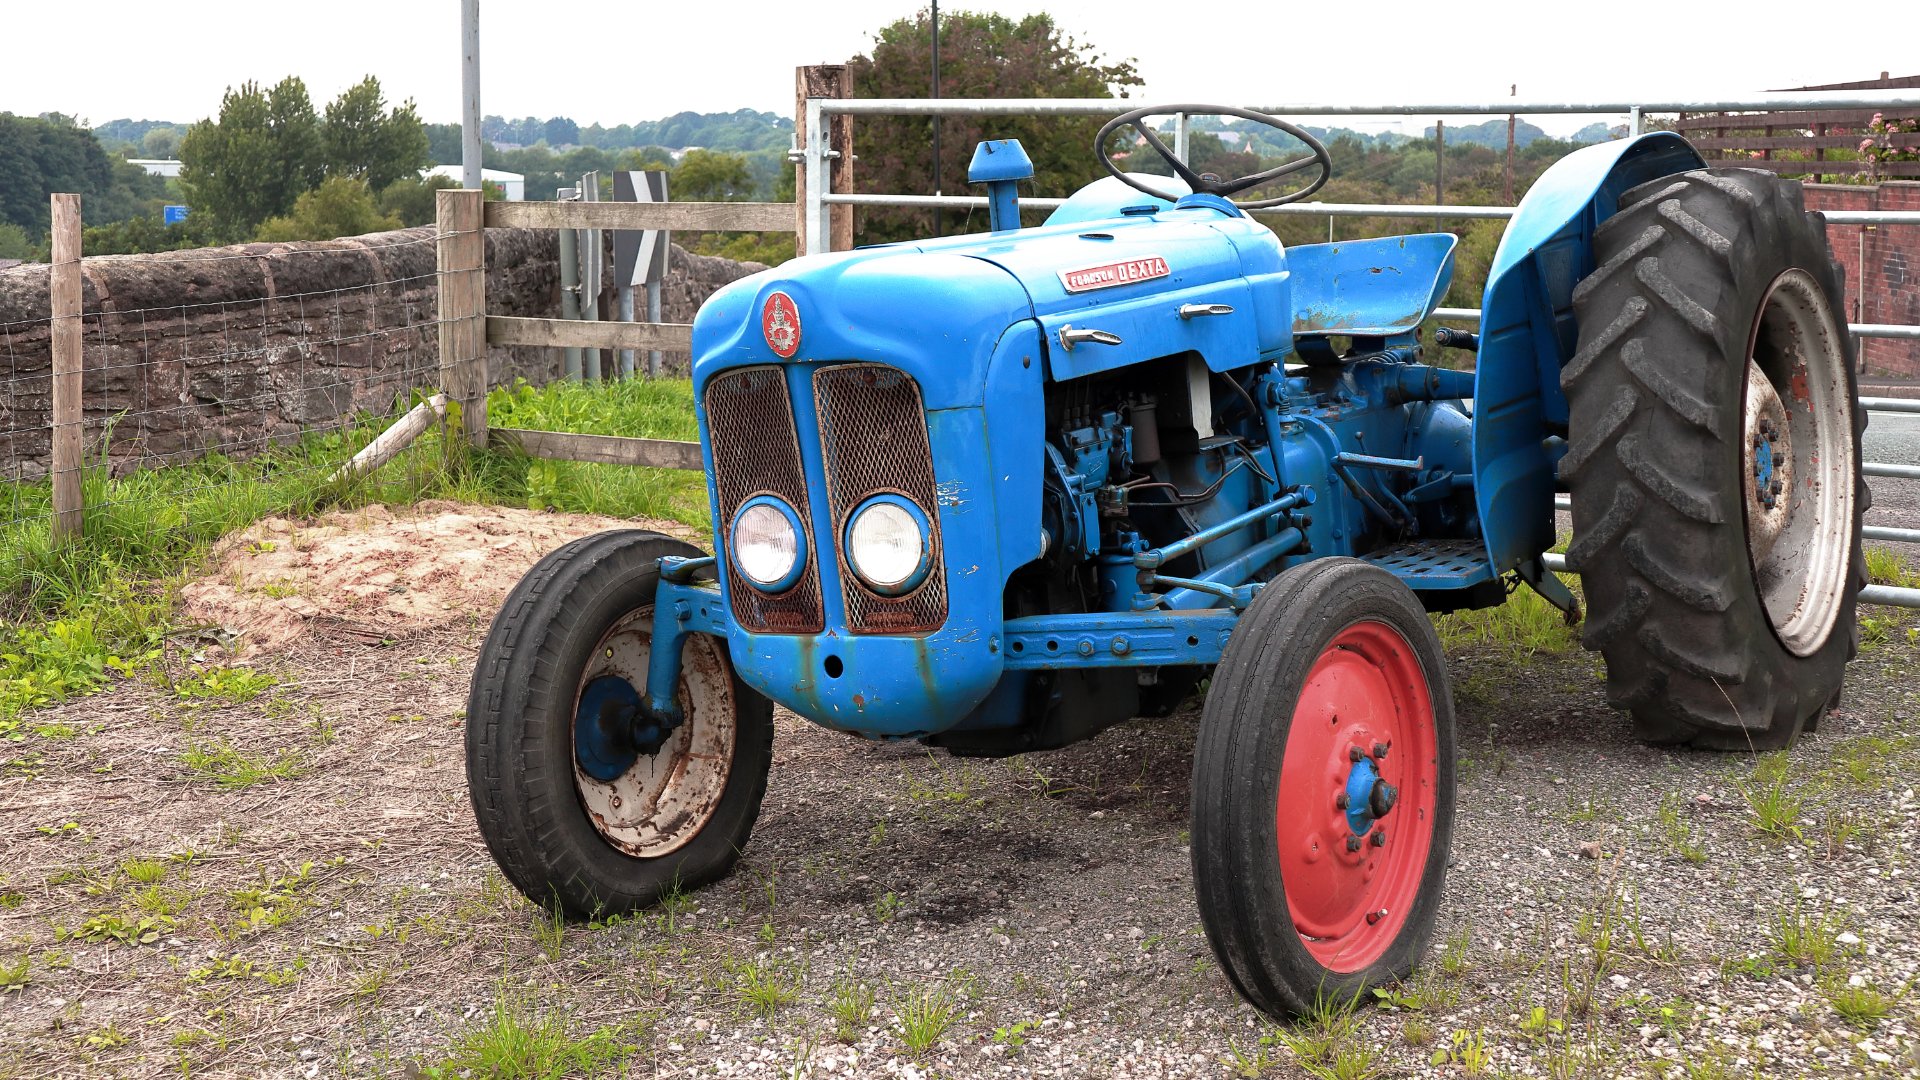
1] affinity advanced edit -- mostly done to see how Affinity can do it better 2] original raw file -- thinking I should go back to this tree when the light is better 3]Lr5 basic edit -- would have happy enough with this a few years ago. Now have too much spare time questions and honest comments welcome
-
Audrey Hepburn: Moon River (Vector) Portrait (Affinity Designer/Photo) https://b-bertuleit.de/audrey-hepburn-portrait/
- 3 replies
-
- 5
-

-
- audrey hepburn
- portrait
- (and 5 more)
-
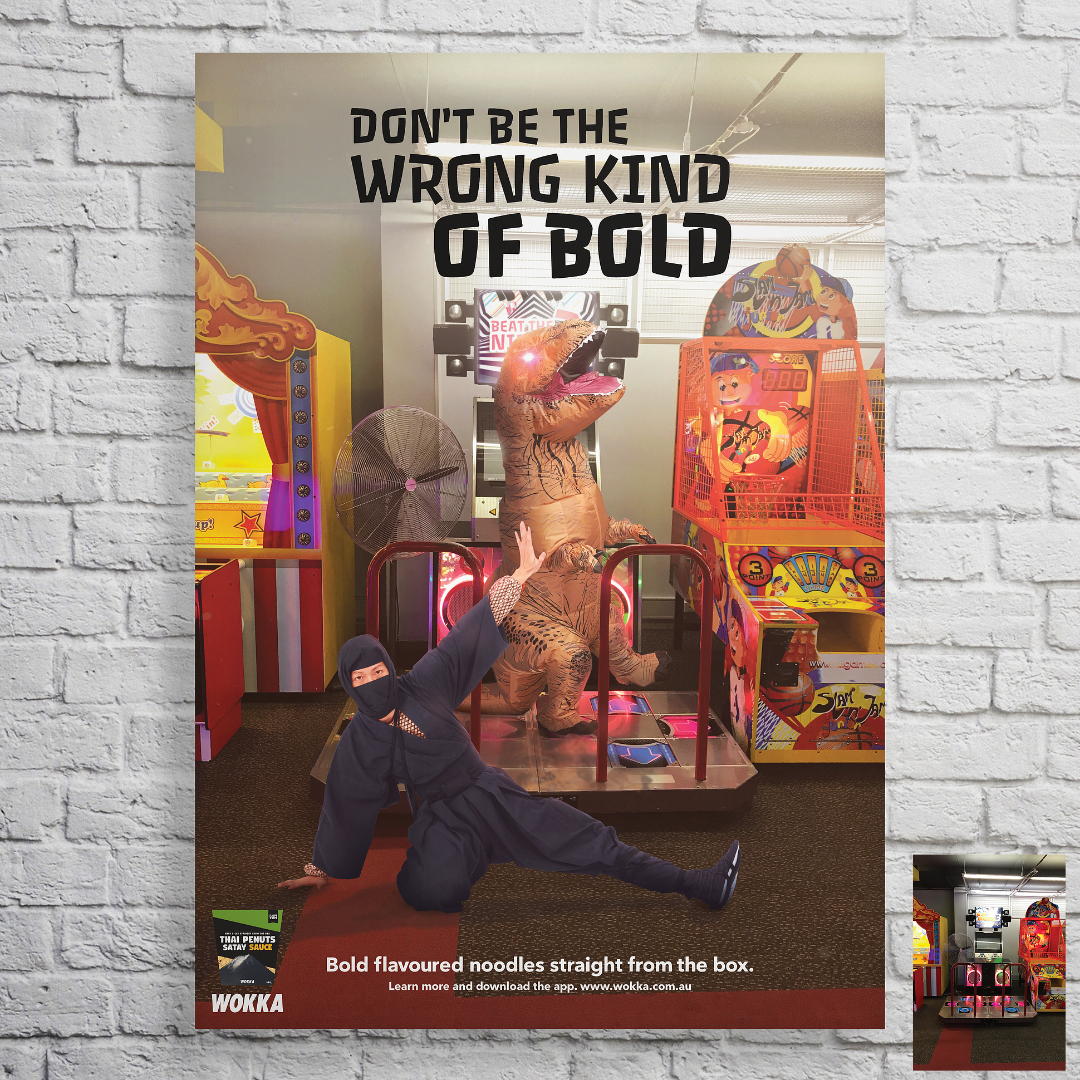
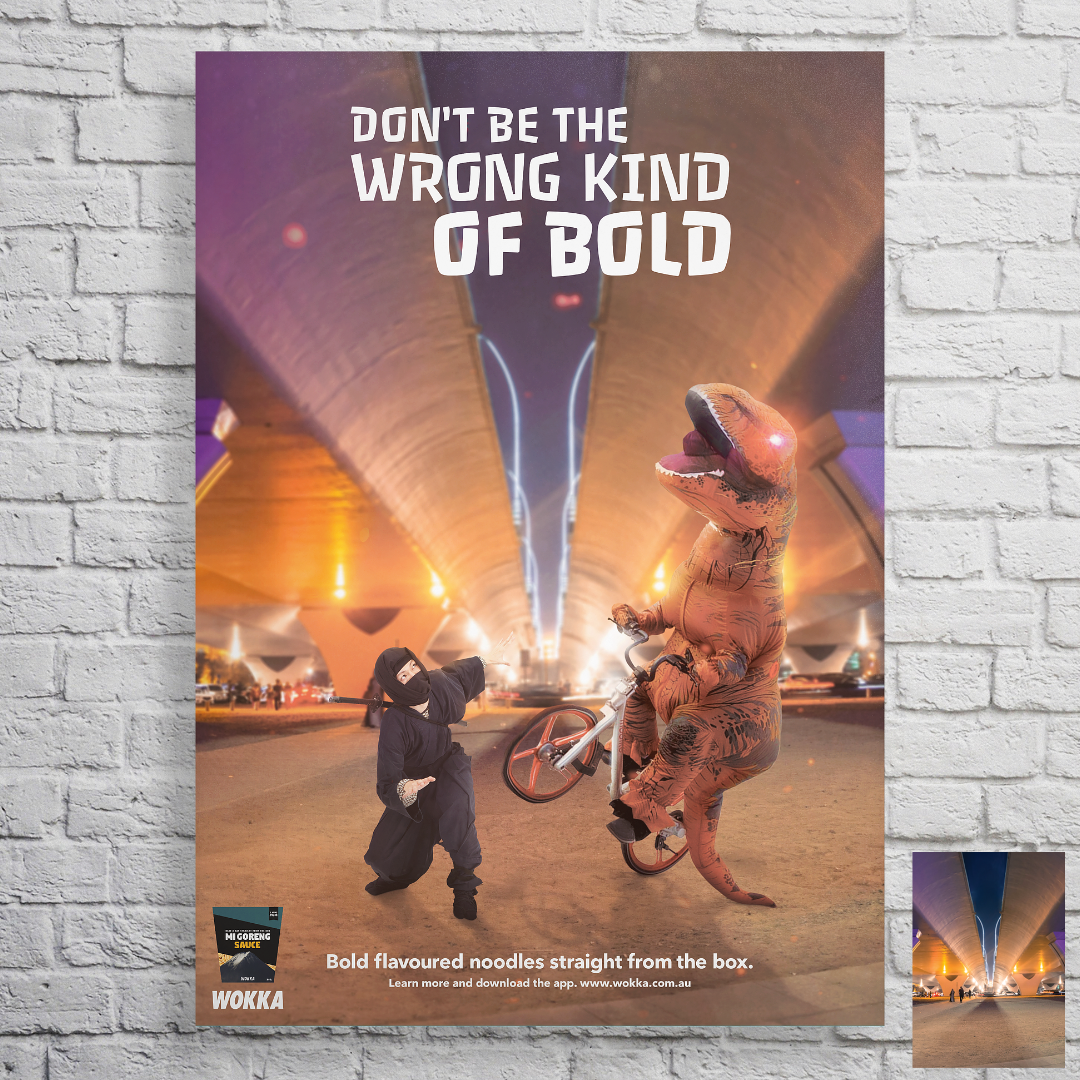
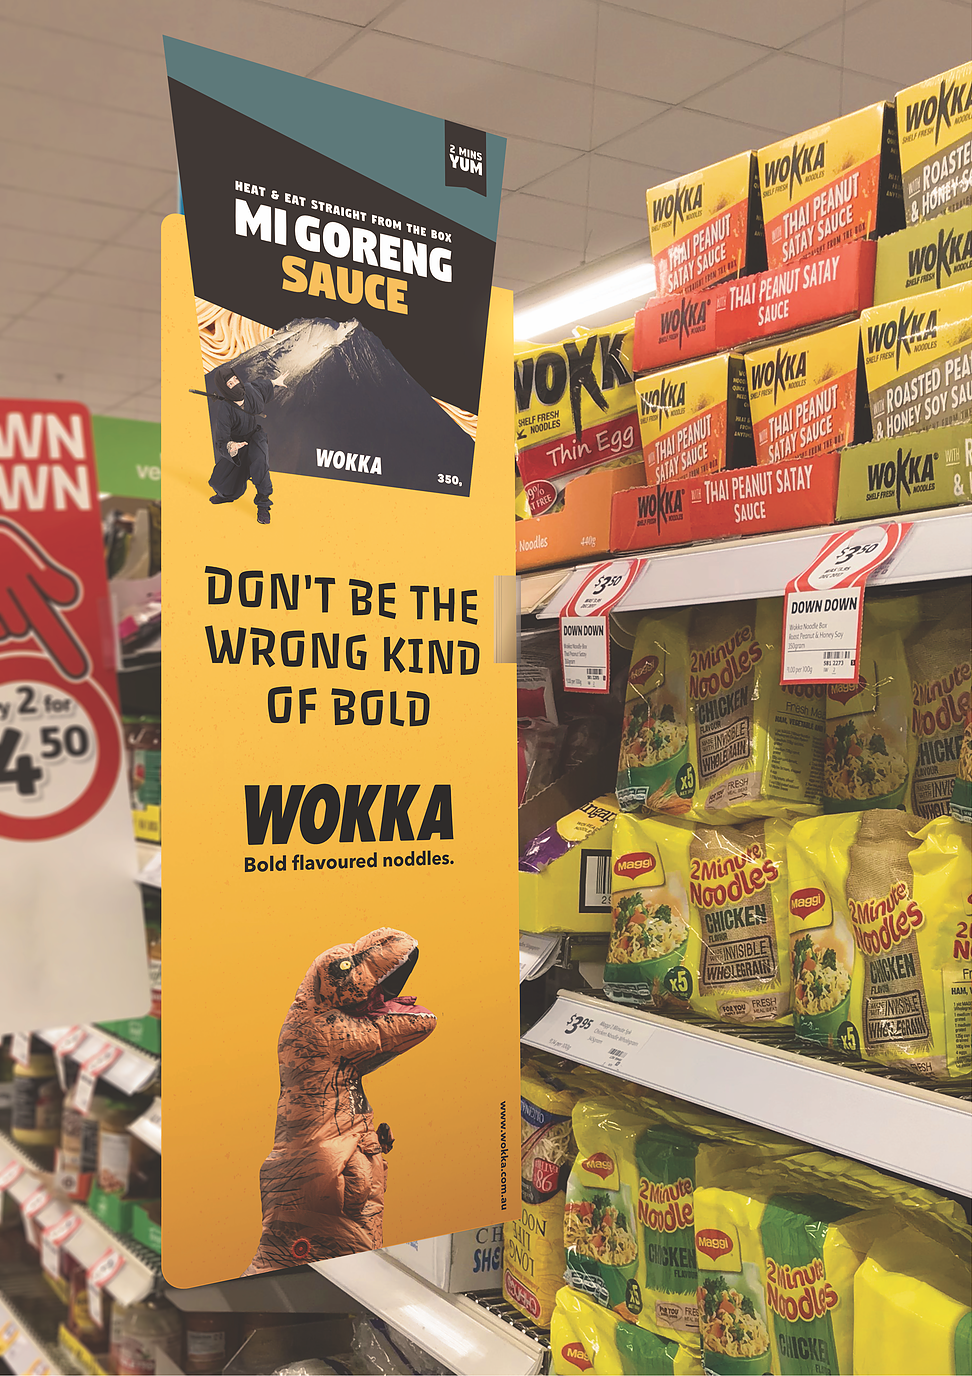
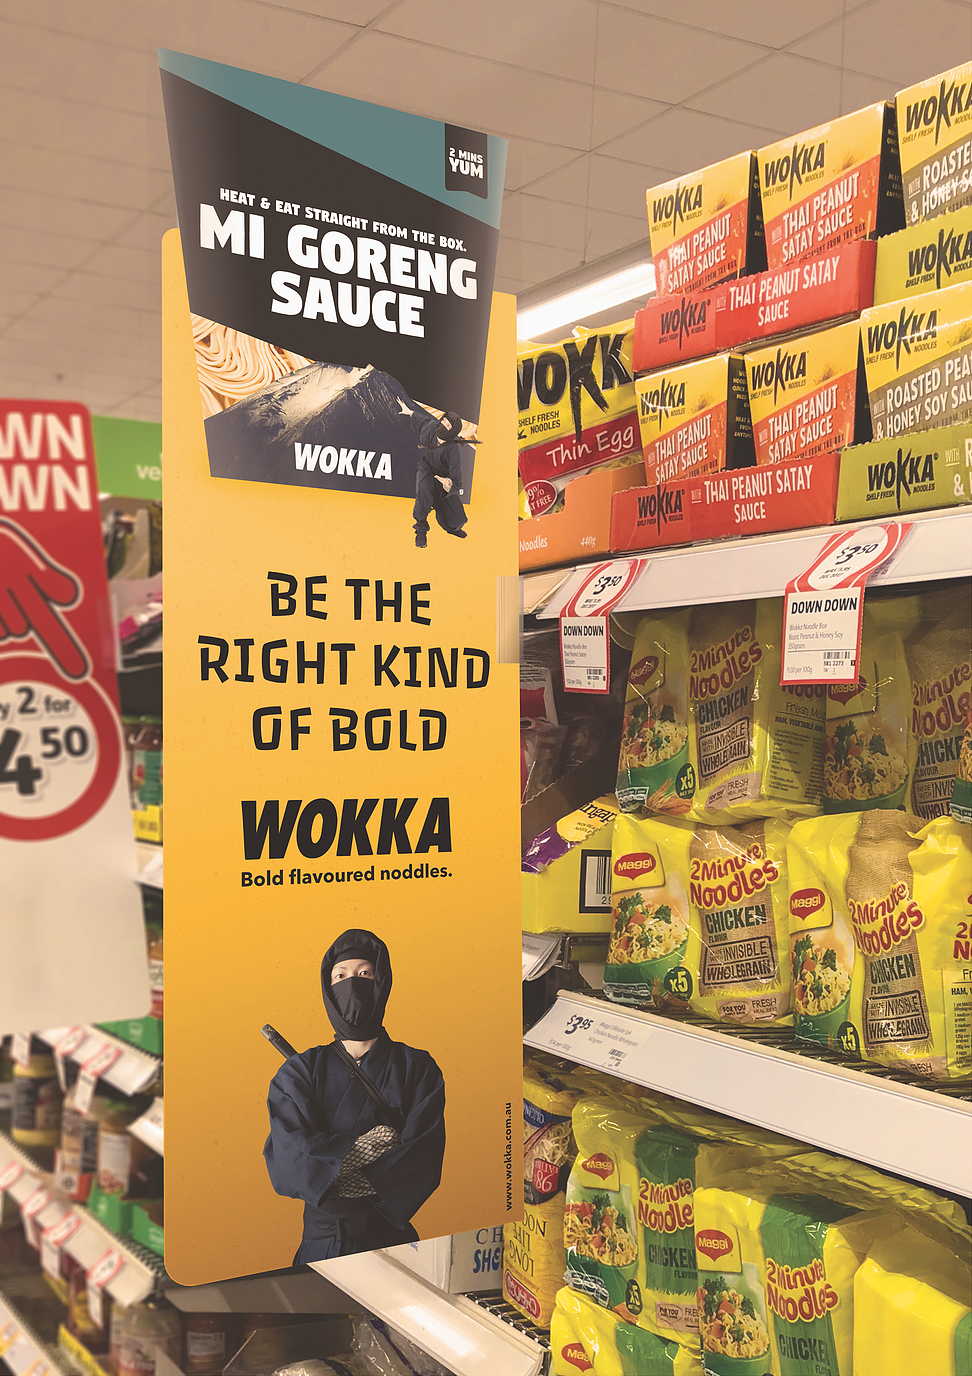
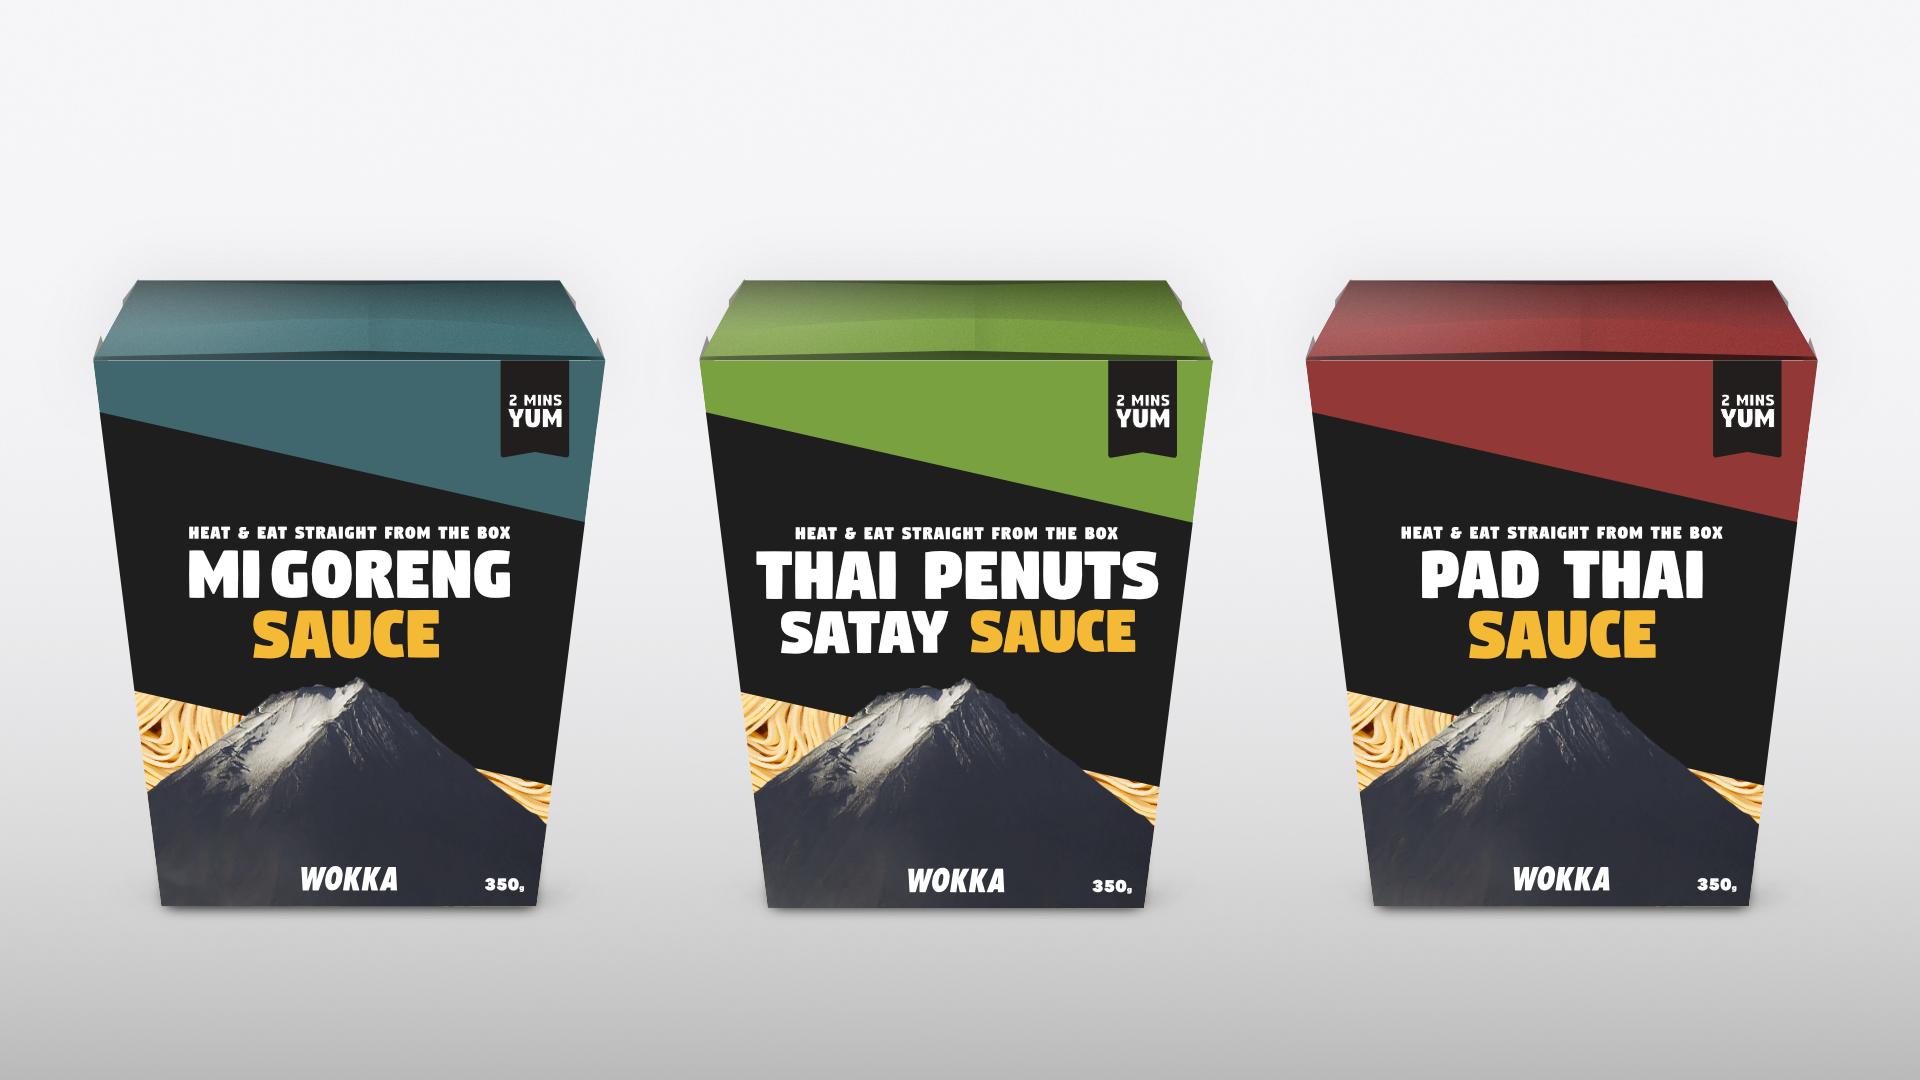
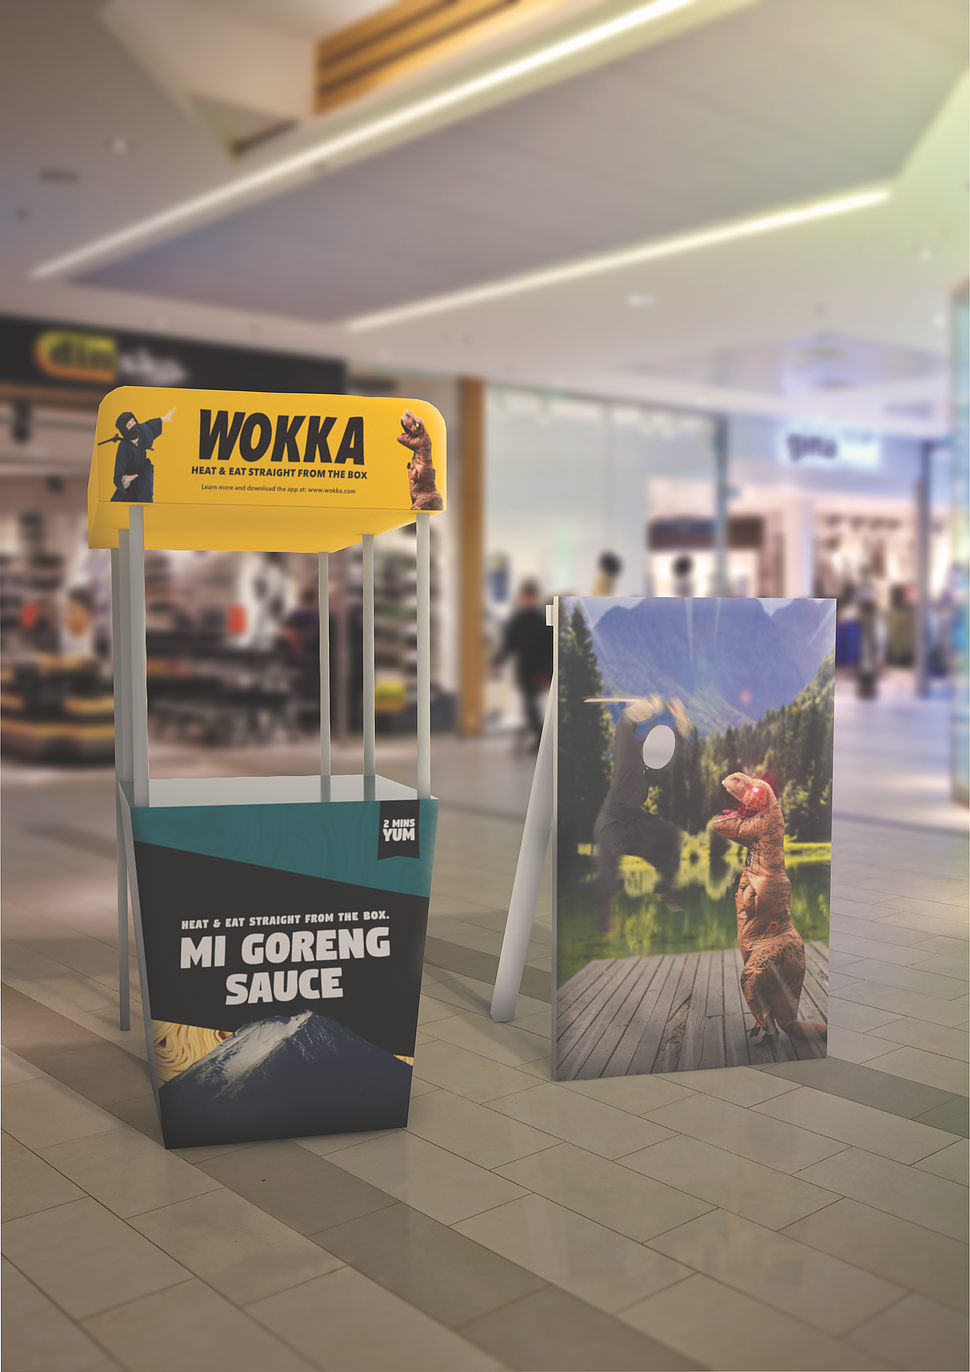
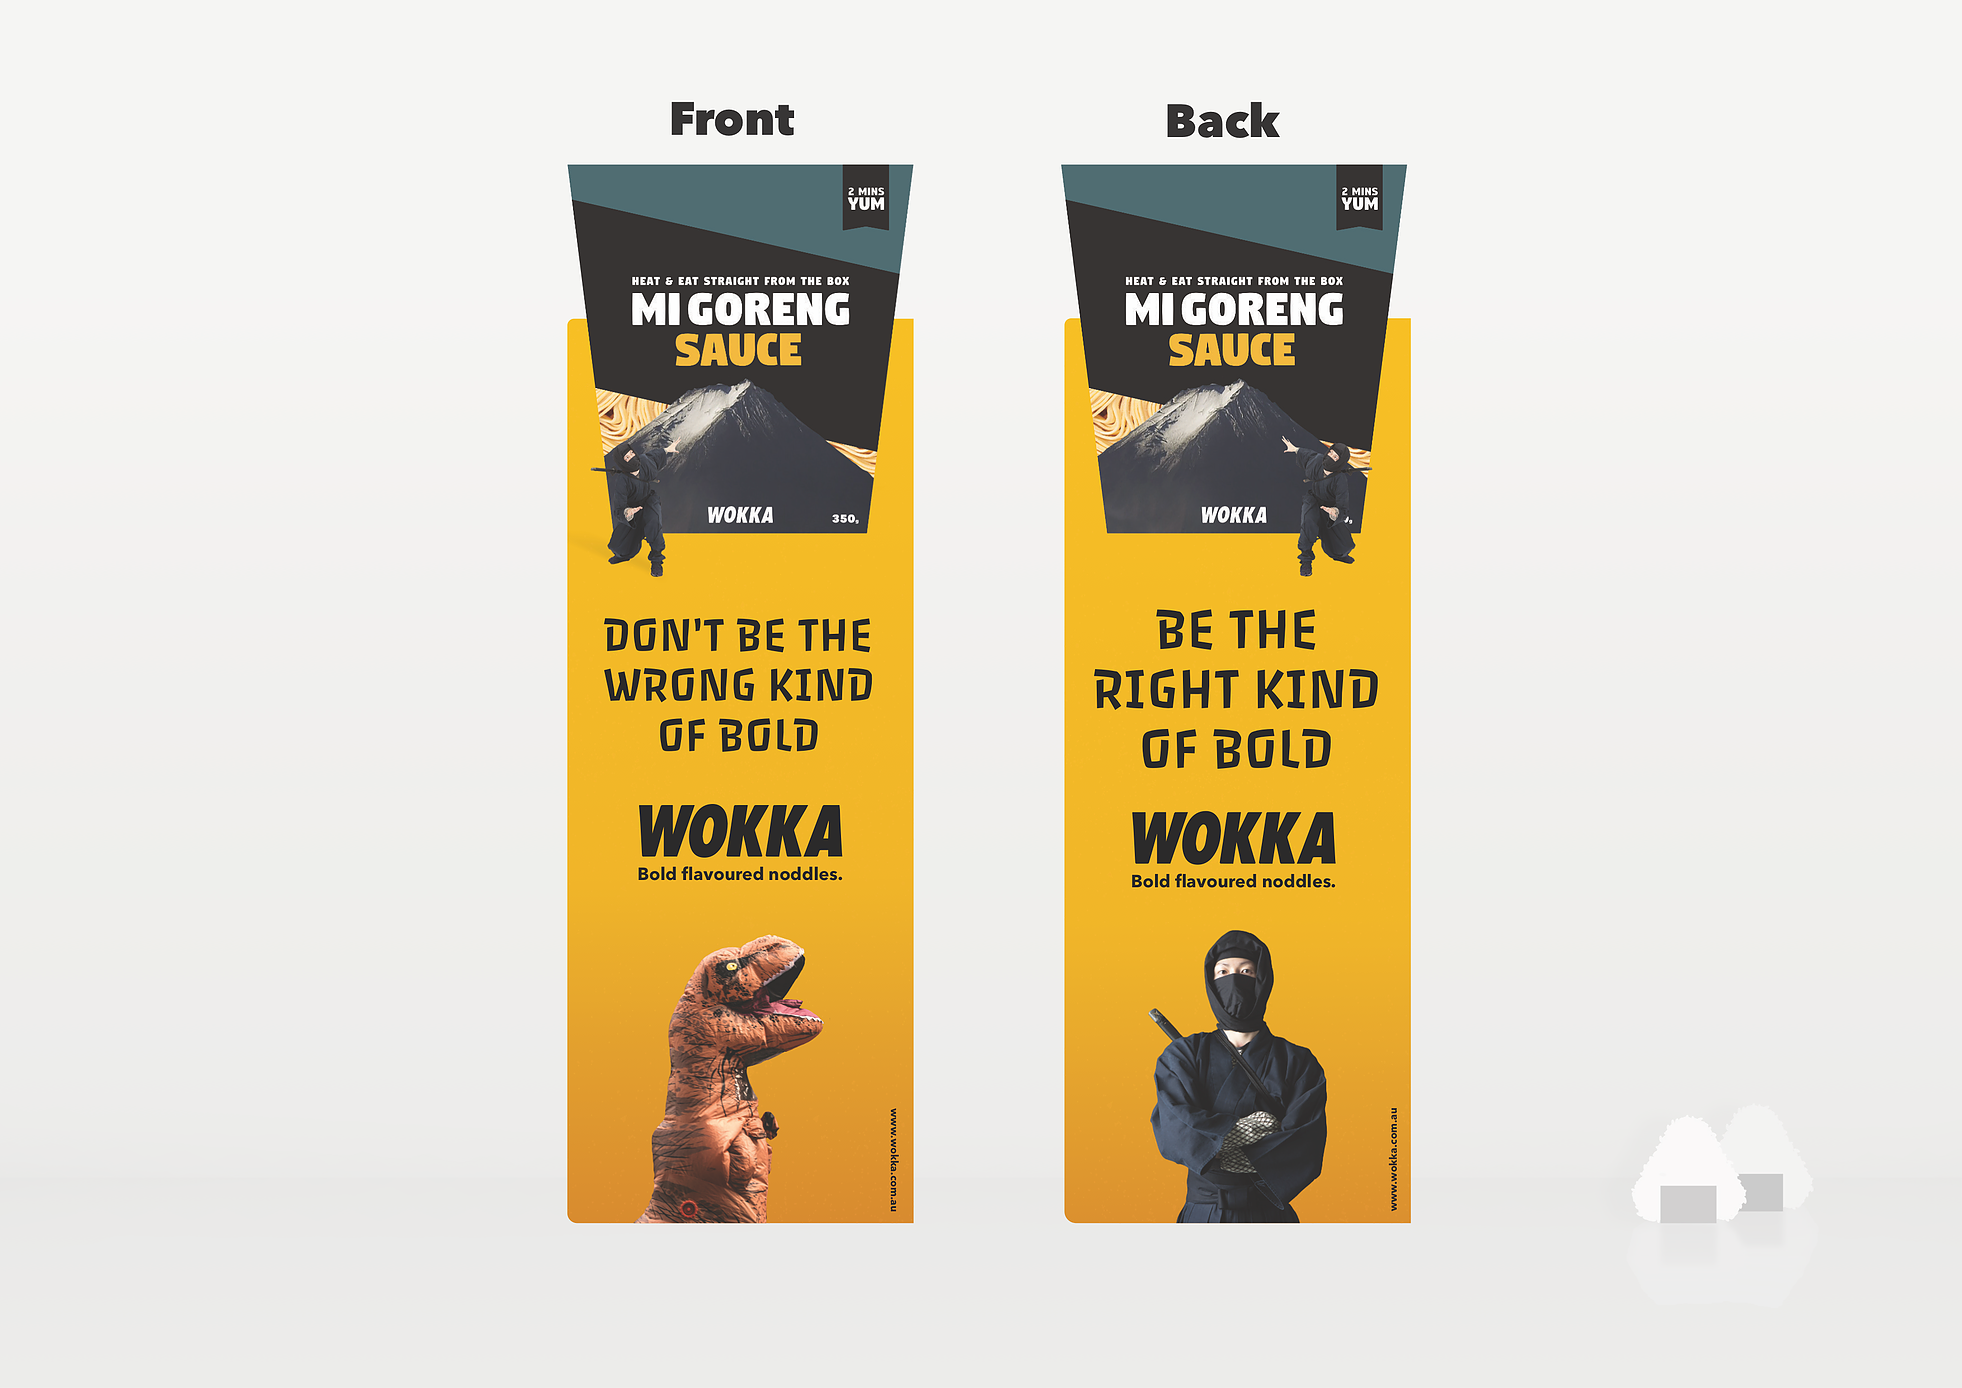
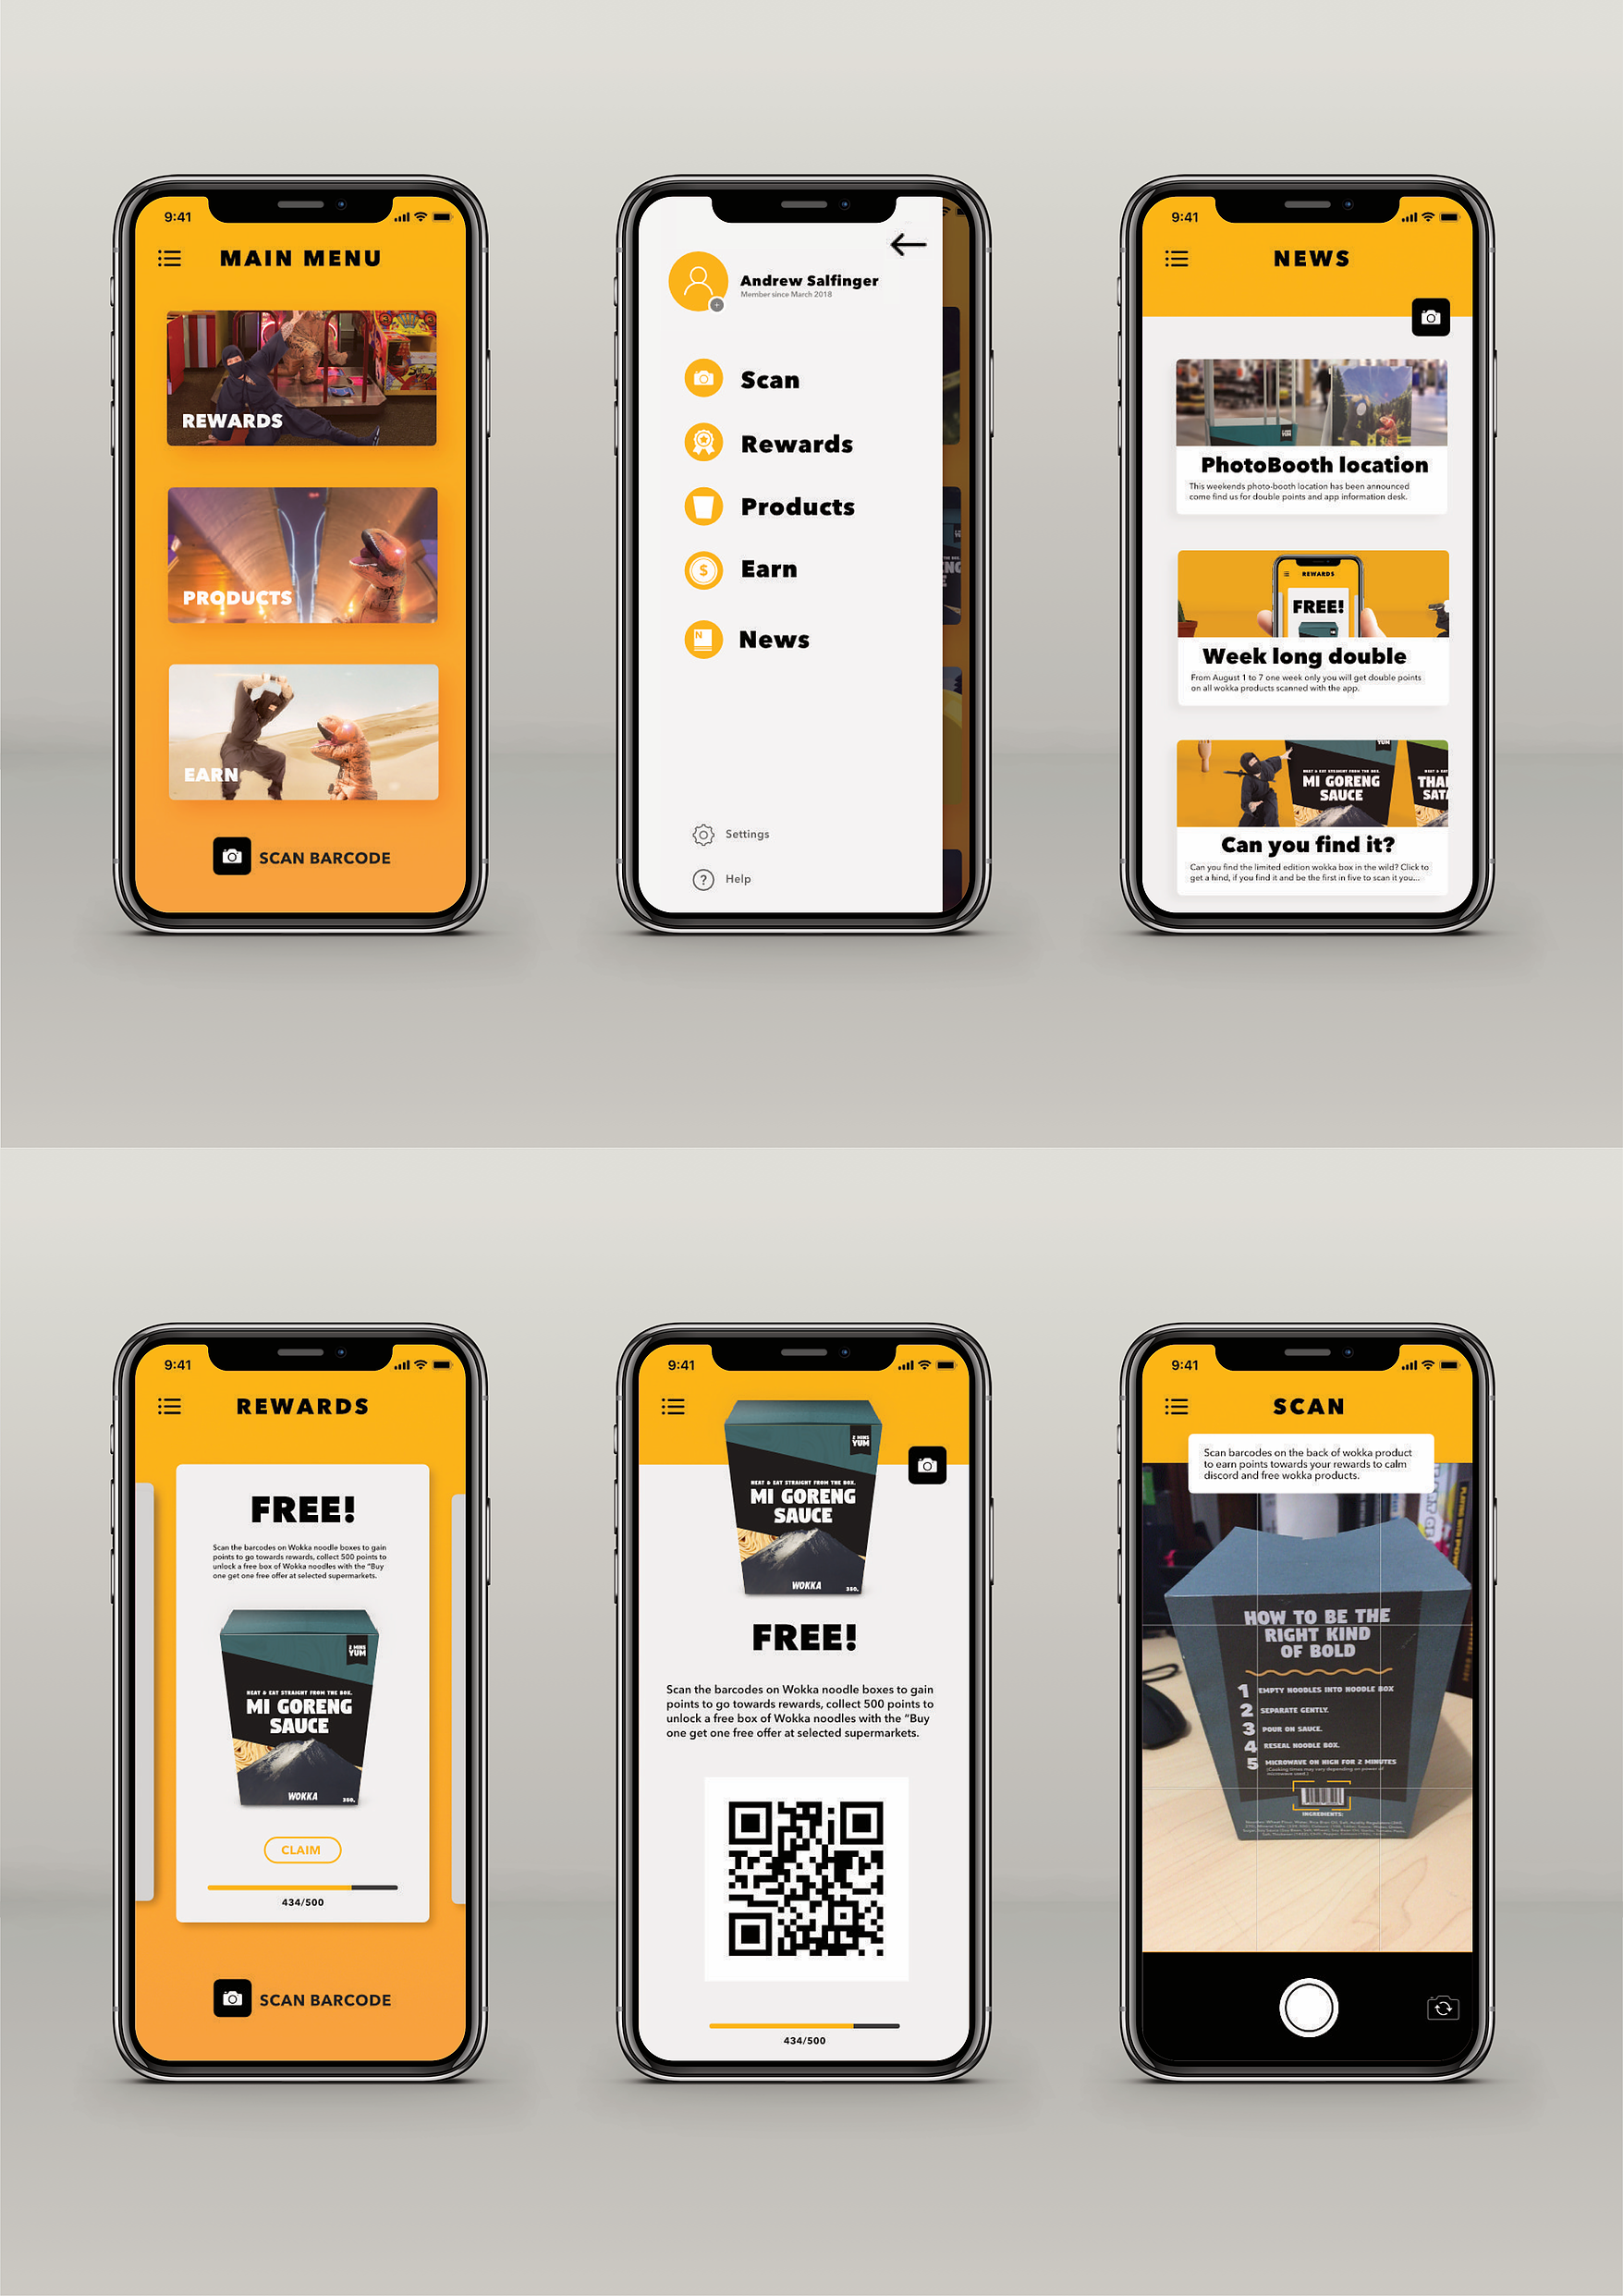
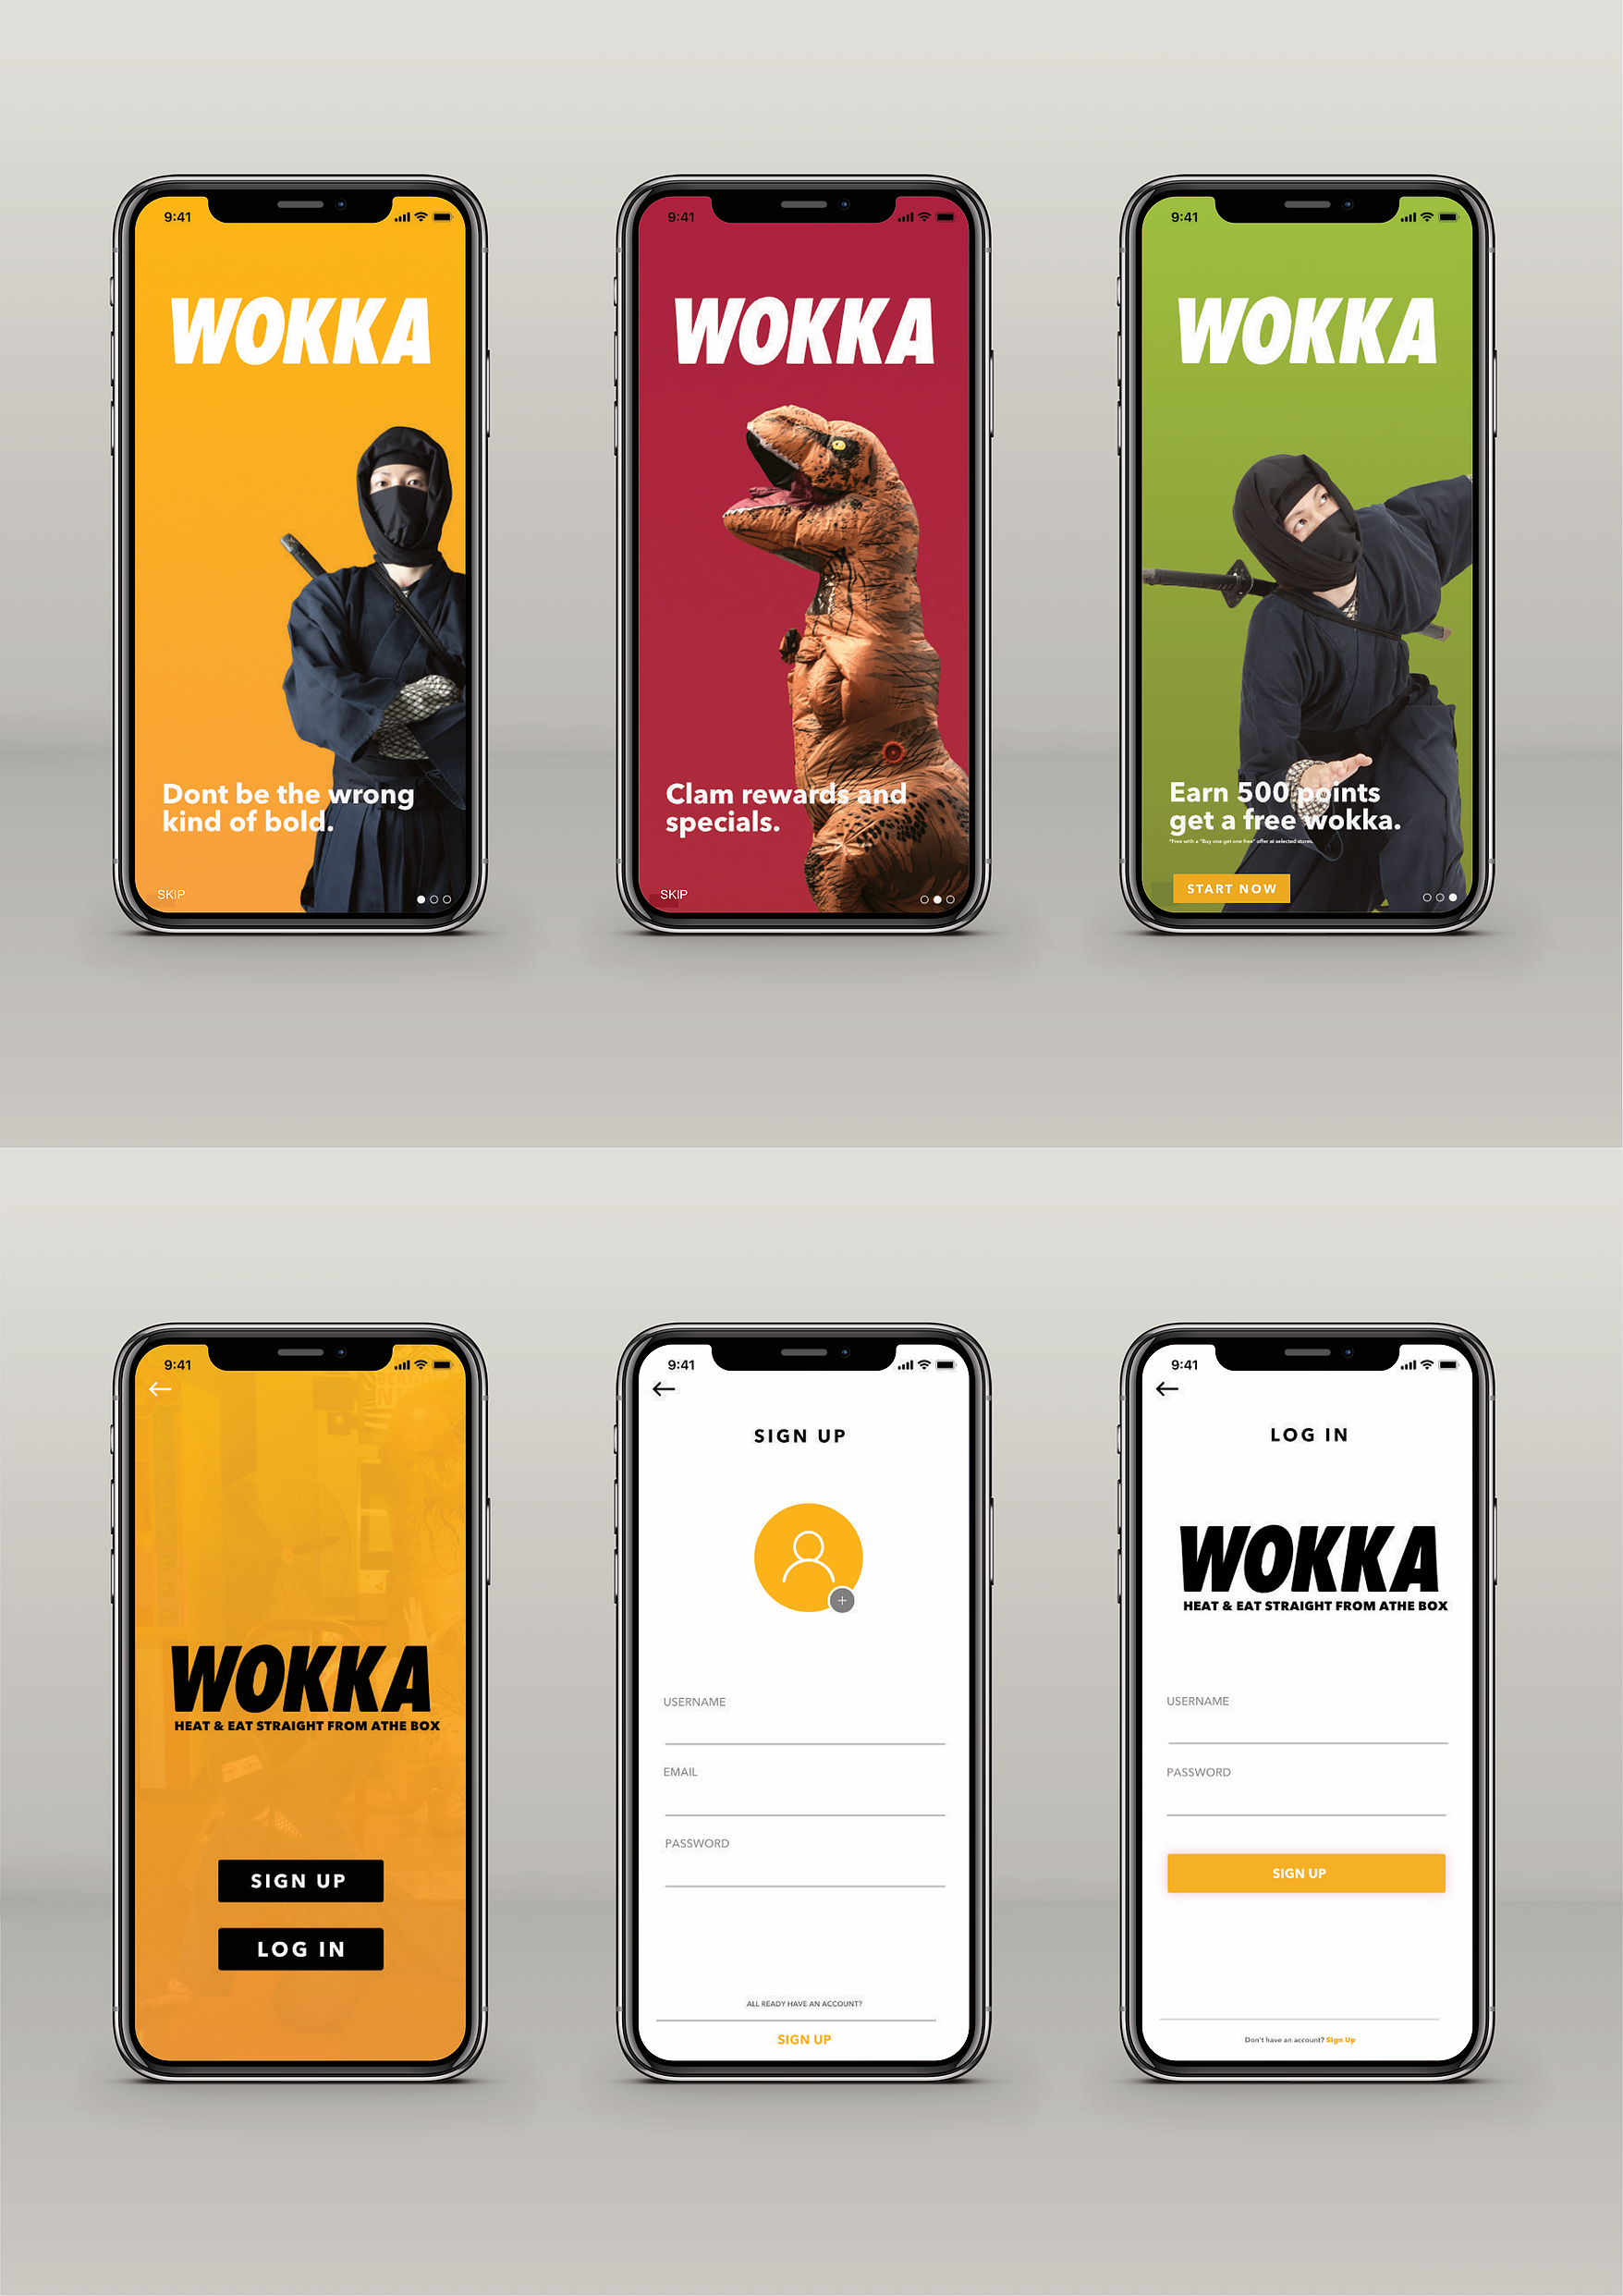
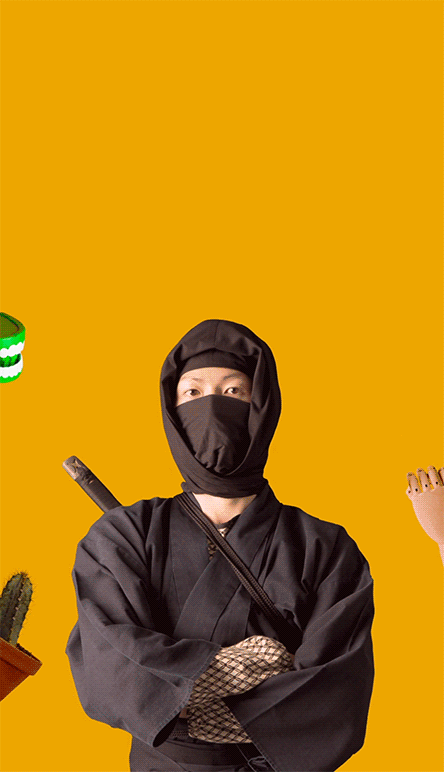
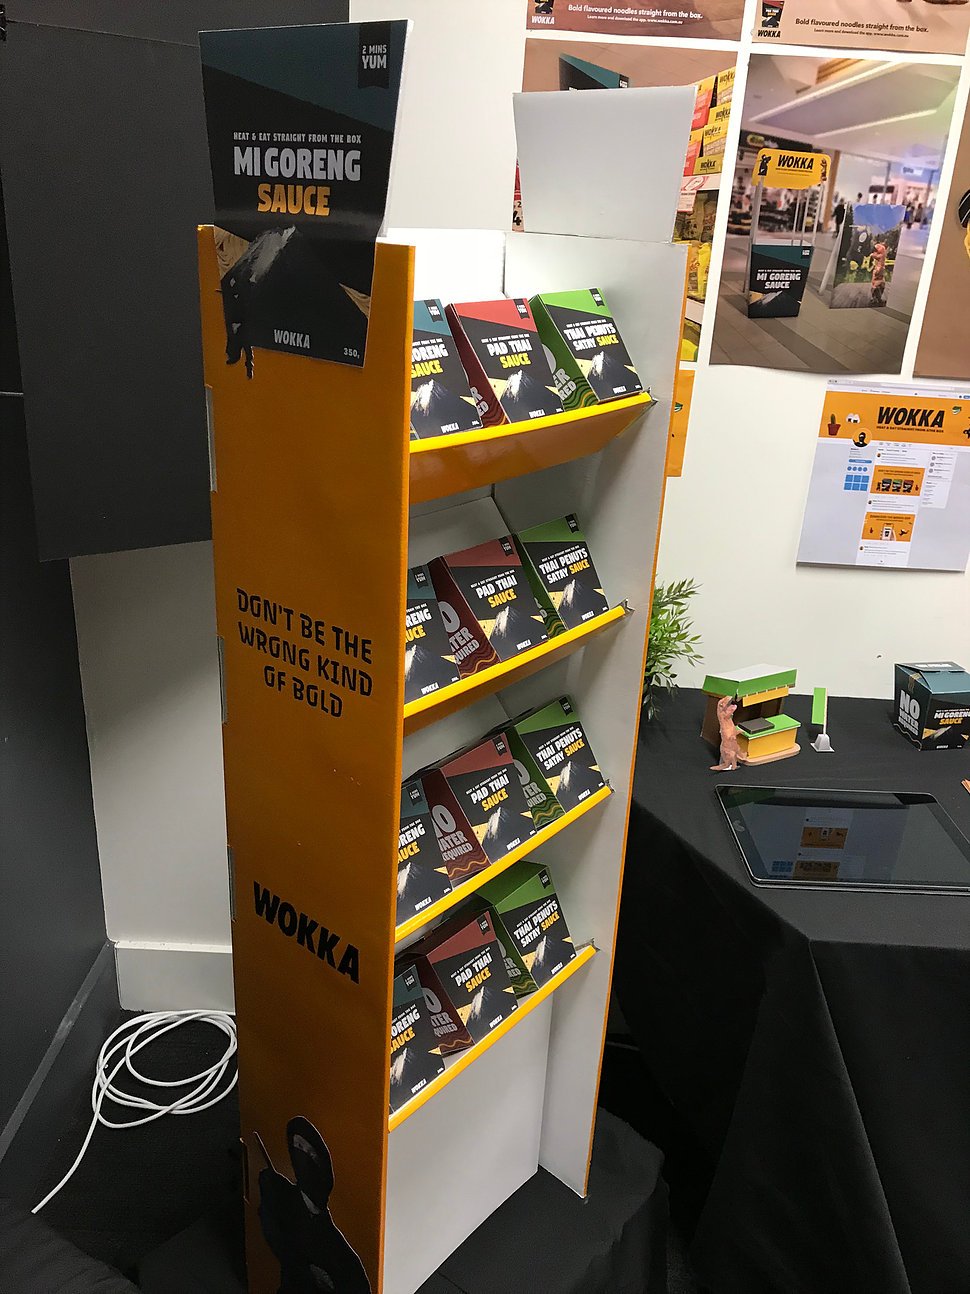
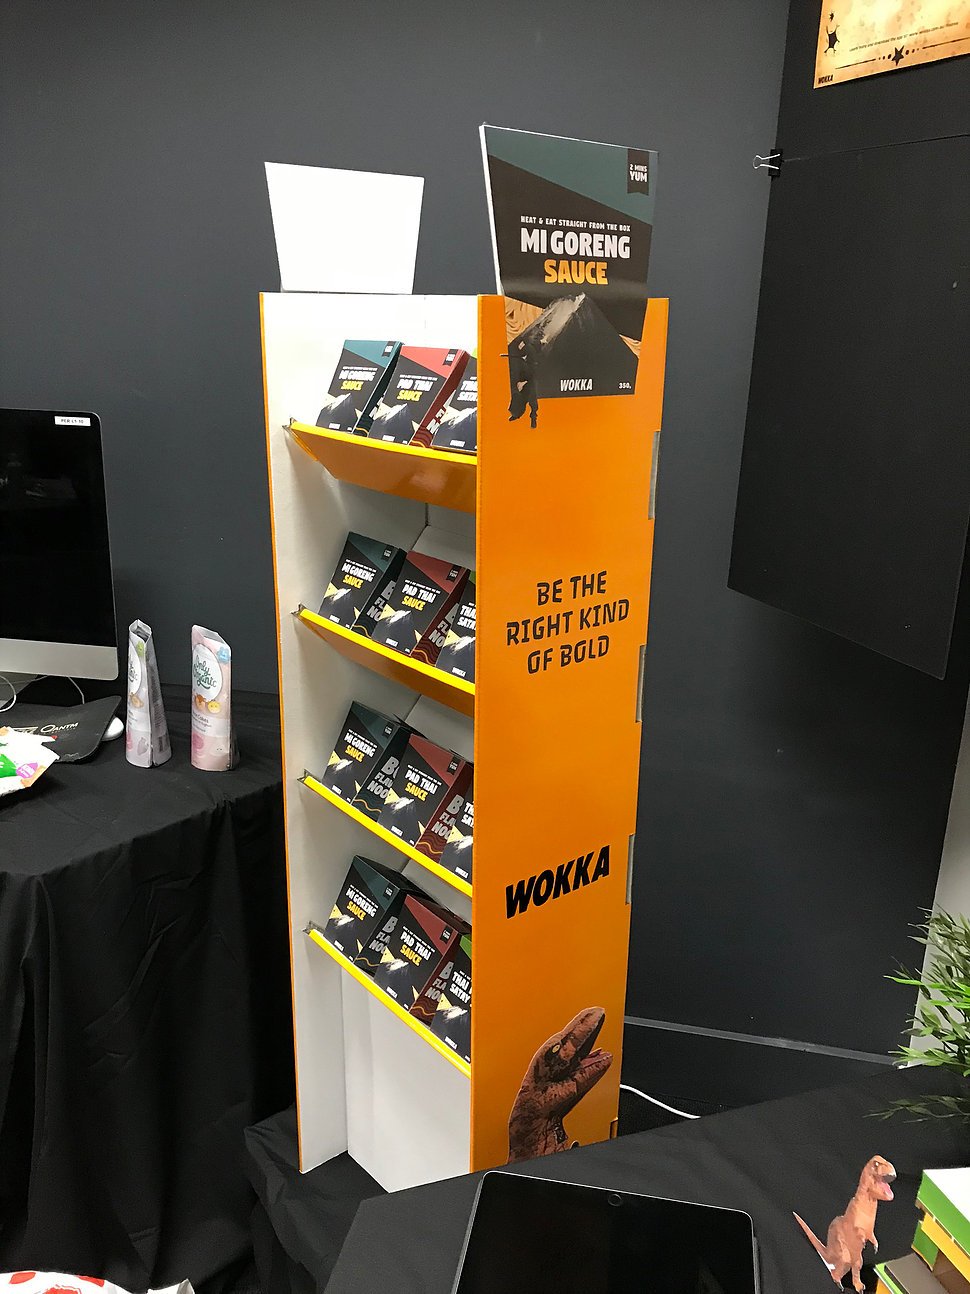
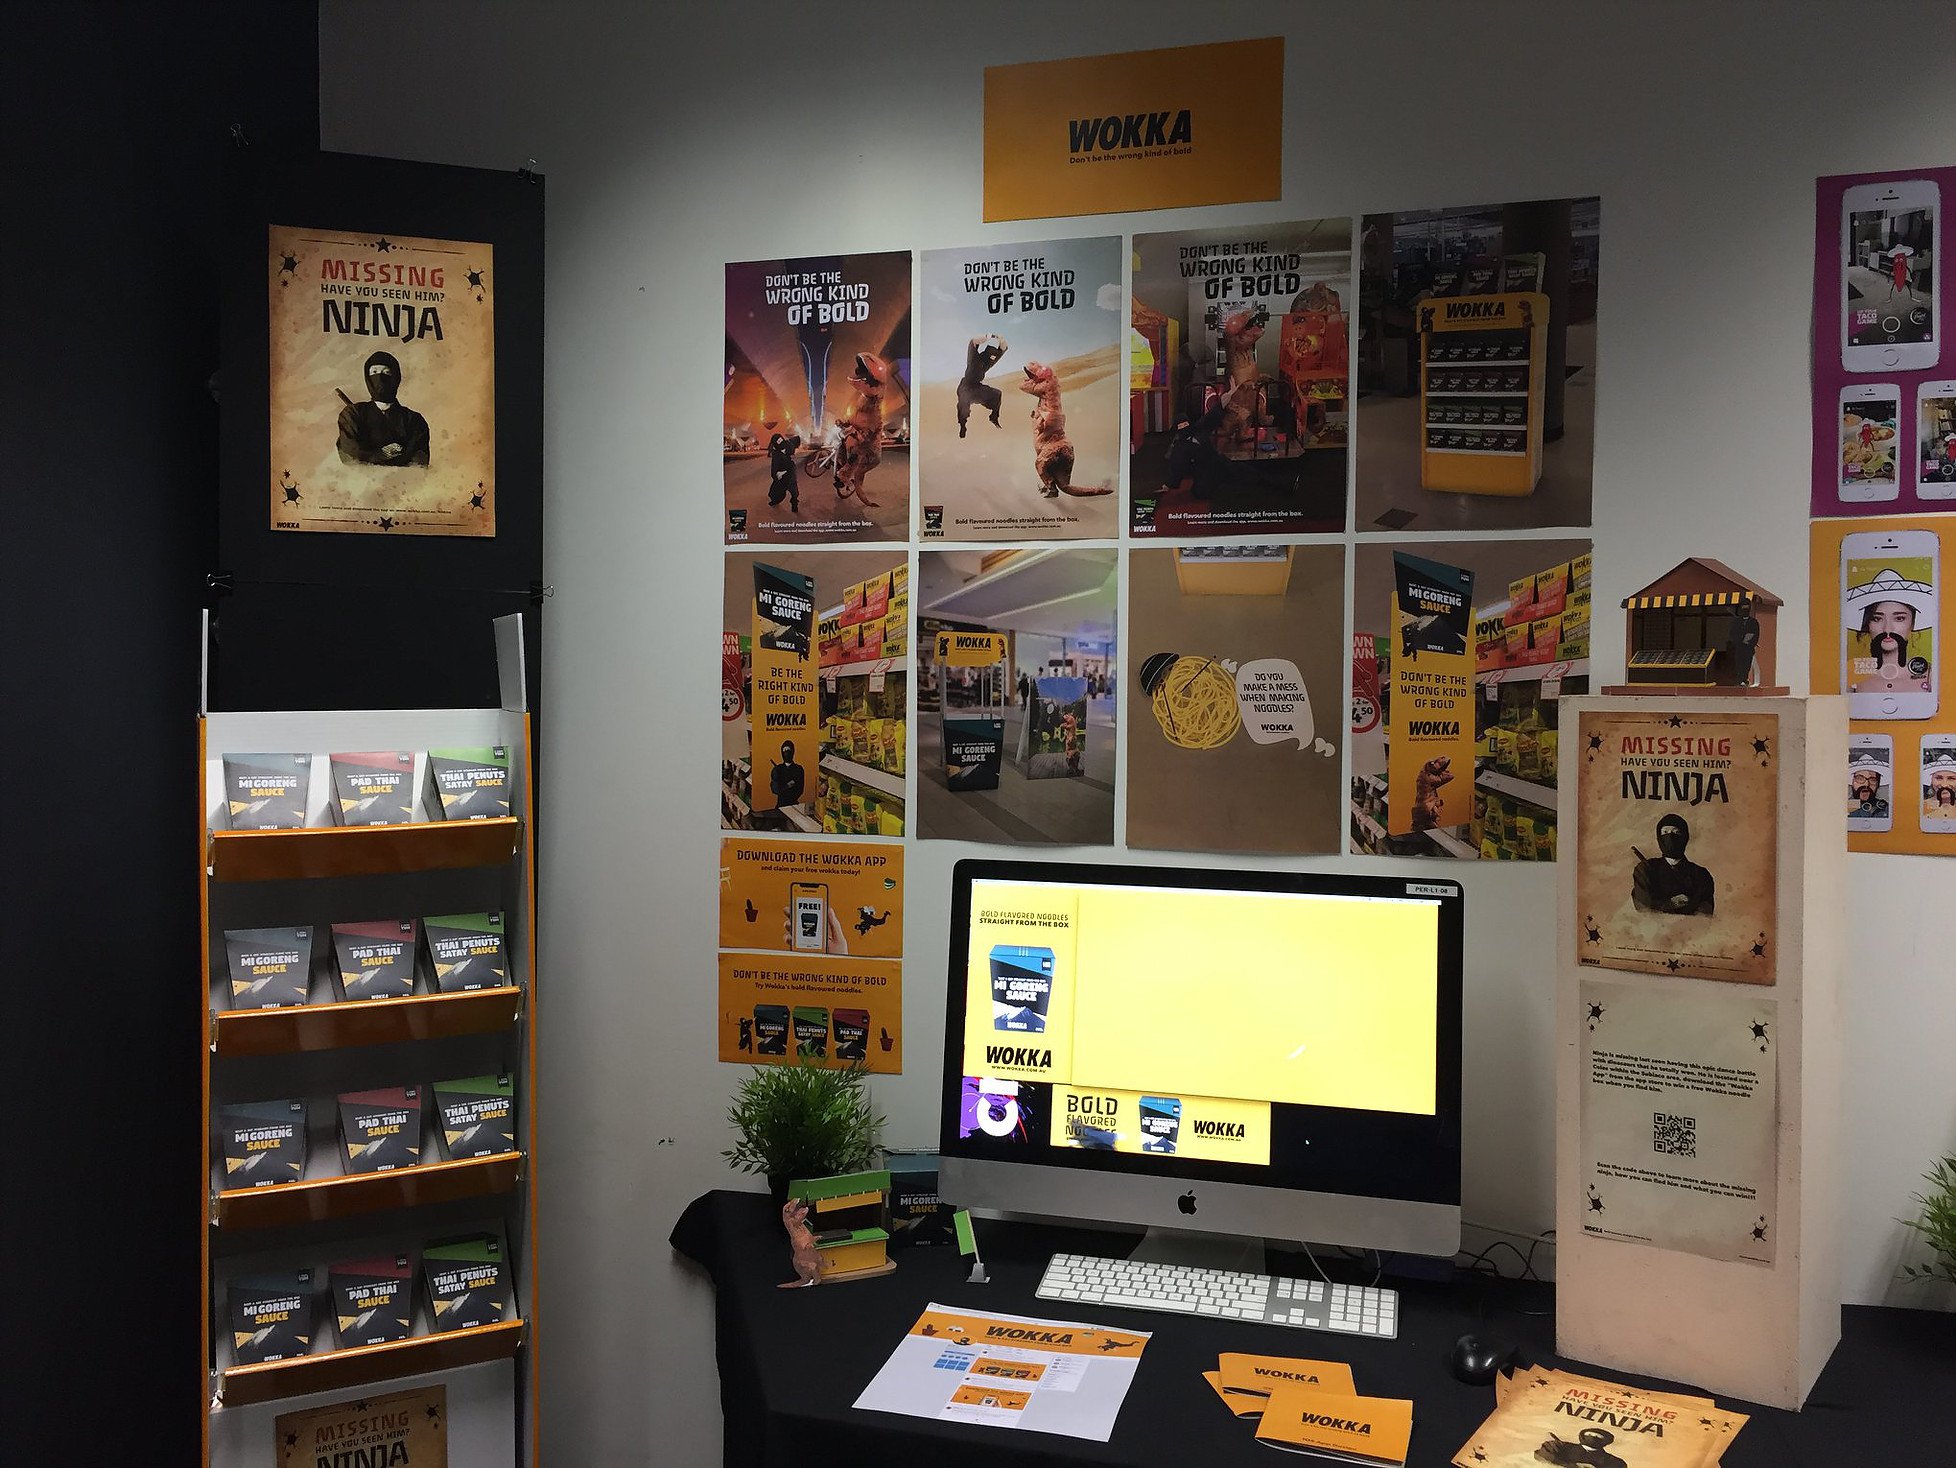
Made with Affinity Photo and Designer complete on the iPad Pro (Also used After Effect + Rough Animator for motion graphic) While studying at SAE for my Bachelor of Design, I got the opportunity to work on a re-brand and advertisement campaign for Wokka. (The following body of work is for university work only and are not for a real camping) The campaign is focused around 3 main posters that follow the story of the Dinosaur challenging the Ninja to a fight (Poster 1) so they go to the battlefield in order to fight (Poster 2) Tho they realized that neither one of them knew how to fight, so they ended it on the dance floor. The Ninja won the battle and the dinosaurs did not like this so he takes the ninja into hiding. After a couple of weeks after the posters go up a new poster he be put up over the past posters along in other area's and within the online place, this poster is a "Ninja missing poster" on the back will give some information and a QR code to give information to the "player" about the "transmedia" game where the "player" will need go around the "real world" with the Wokka app taking photos of the ninja's clothes, ninja sword, ninja star along with the use of information around online such as youtube video, Reddit posts, forum posts and more to help give information to the ninja's location, bringing the community together for a single goal. To help find the ninja's location in order for the first 5 people who find him and take a photo to get one year supply of Wokka noddles and to start of 50% off and double points for Wokka products. Learn more about the project: https://www.andrewsalfinger.com/wokka2018campaign Posters. Motion Graphic. Packaging. In-store. Online. iOS App. Website ad's (animated). Showcase. Learn more about the project: https://www.andrewsalfinger.com/wokka2018campaign Check out Beyond Horizon a game made with Affinity Photo + Designer: https://forum.affinity.serif.com/index.php?/topic/54498-beyond-horizon-game-made-with-affinity-unity/#comment-276535 What do you think? Feed back would be great ^-^ Thank you for your time and I hope you all have a great day.
-
 I bought and installed Affinity Photo through Windows store. This approach did not install shortcut icon on desktop or gave me any copy of the software. When I tried to link it in Adobe Lightroom as an option for photo editing, I could not find the location of executable file of Affinity Photo. Could anybody tell me where I can locate the executable file of Affinity photo? Thanks.
 -
 Dear Dev-Team, can you please bring the Resource Manager from Publisher to the Photo and Designer as well? At least for the Designer it would be a nice feature not to save large images within the .afdesign file. In the case you have to work with images/source files from other sources it would make things easier to update them in the progress. Thanks.
- 5 replies
-
- 1
-
-
- affinity photo
- affinity designer
- (and 1 more)
-
Filling in time -- how and why questions welcome 3rd pic is the starting point
-
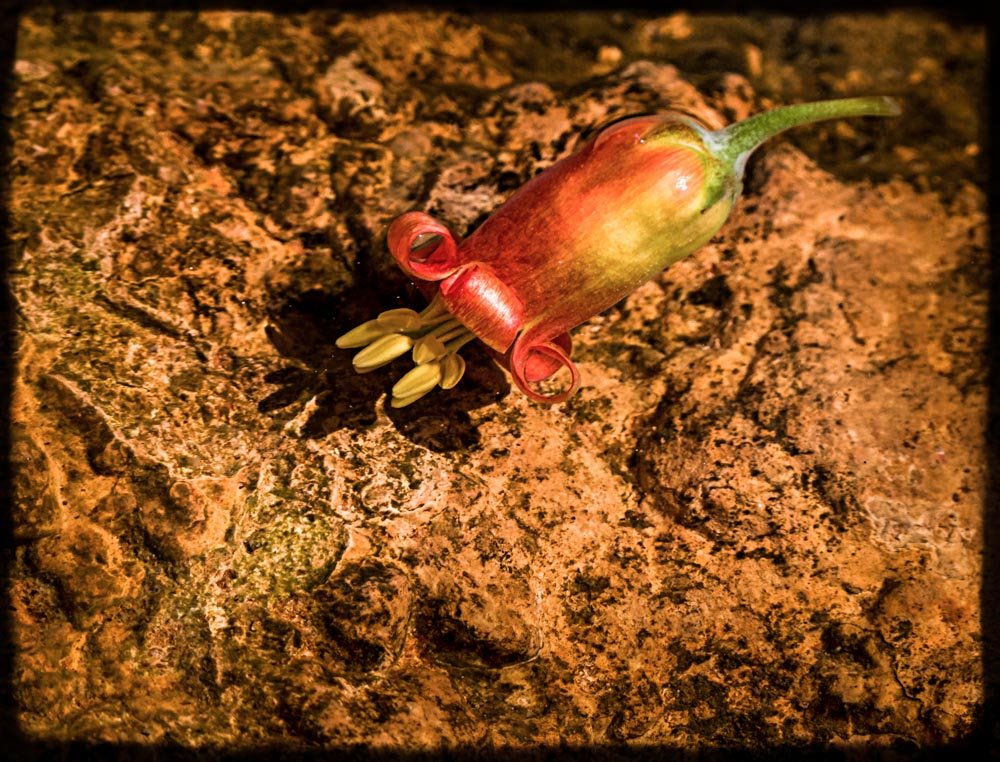
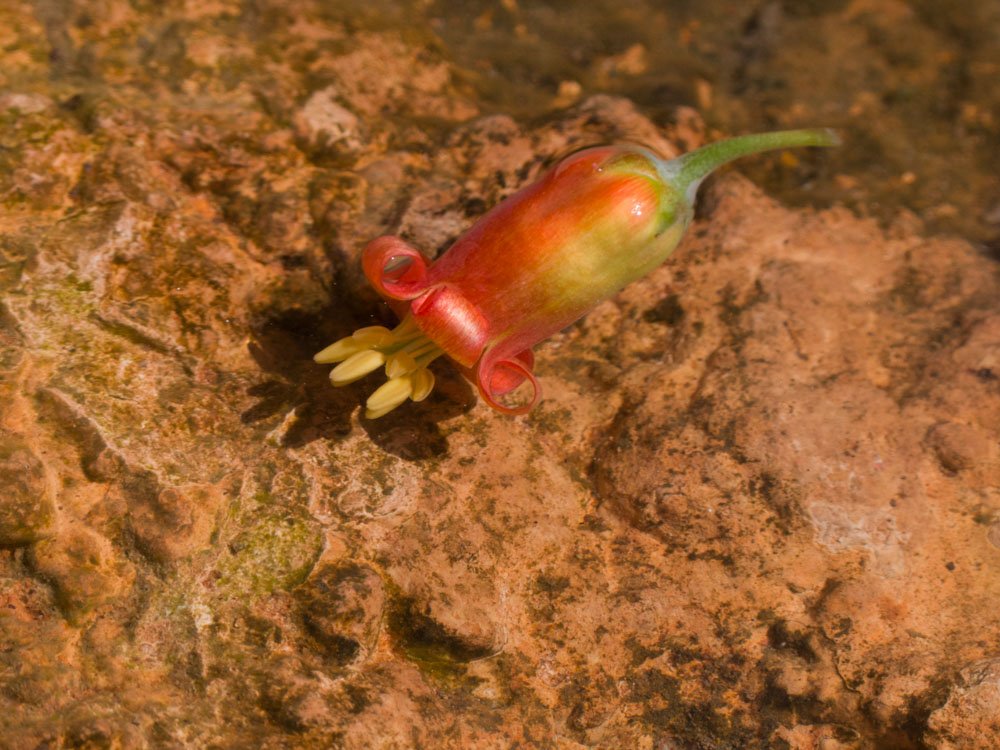
Not sure what I can say apart from the 3rd image is the original Oly raw file --- and the flower is in bird bath Questions, honest comments and suggestions welcome
-
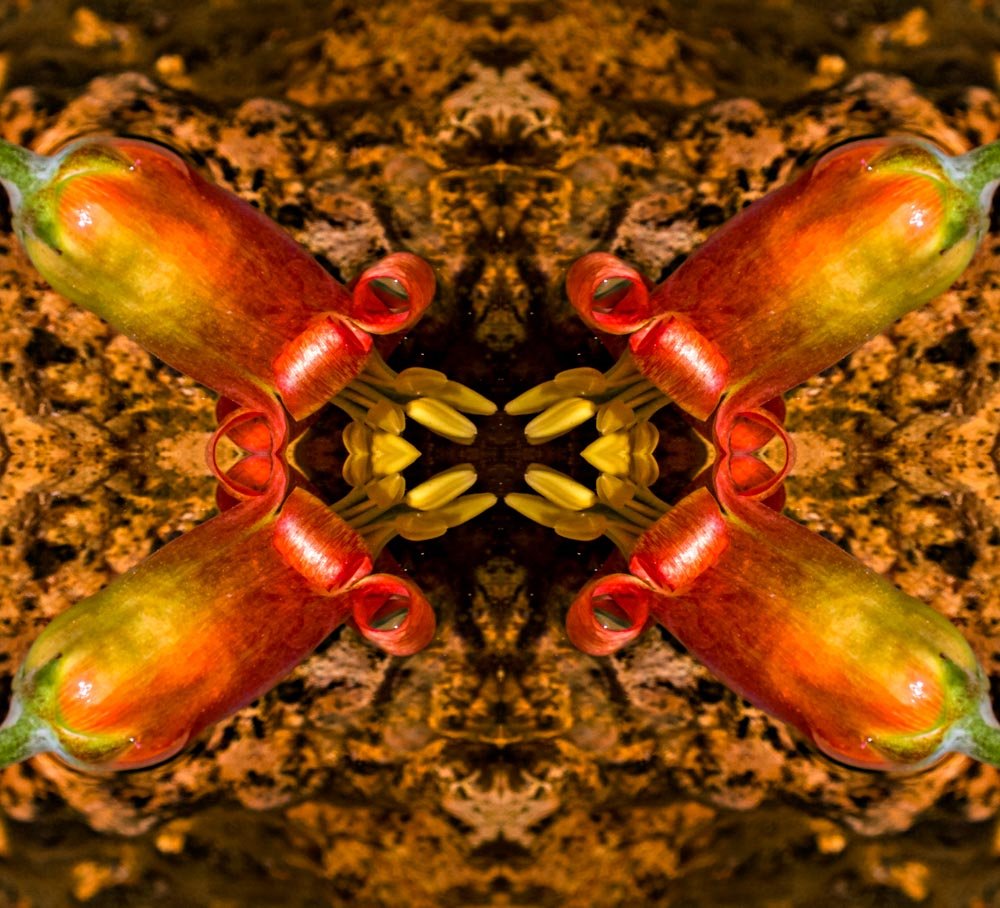
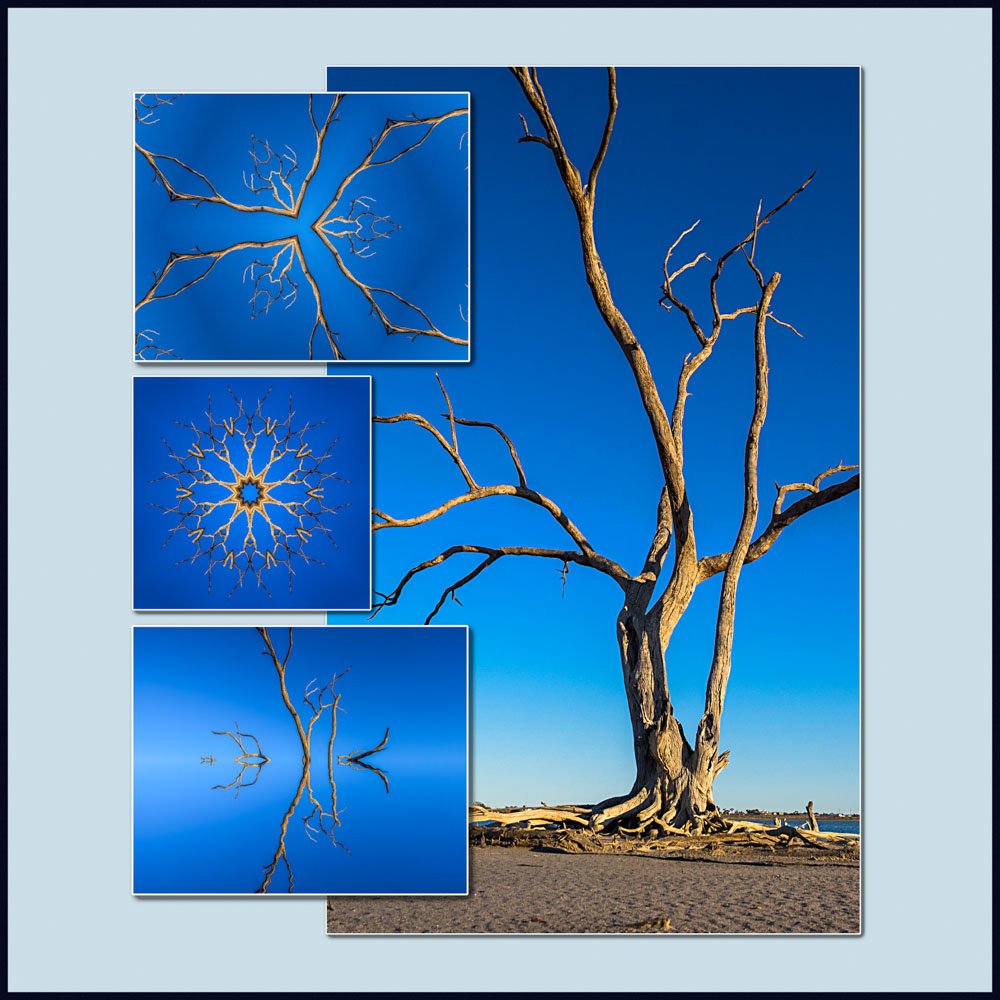
just some more mirroring magic -- I'm still fascinated by the Affinity mirror tool!! Honest comments, suggestion and questions welcome Affinity is becoming my go to editor after Lr5 --- I would find it hard if I lost Lr
-
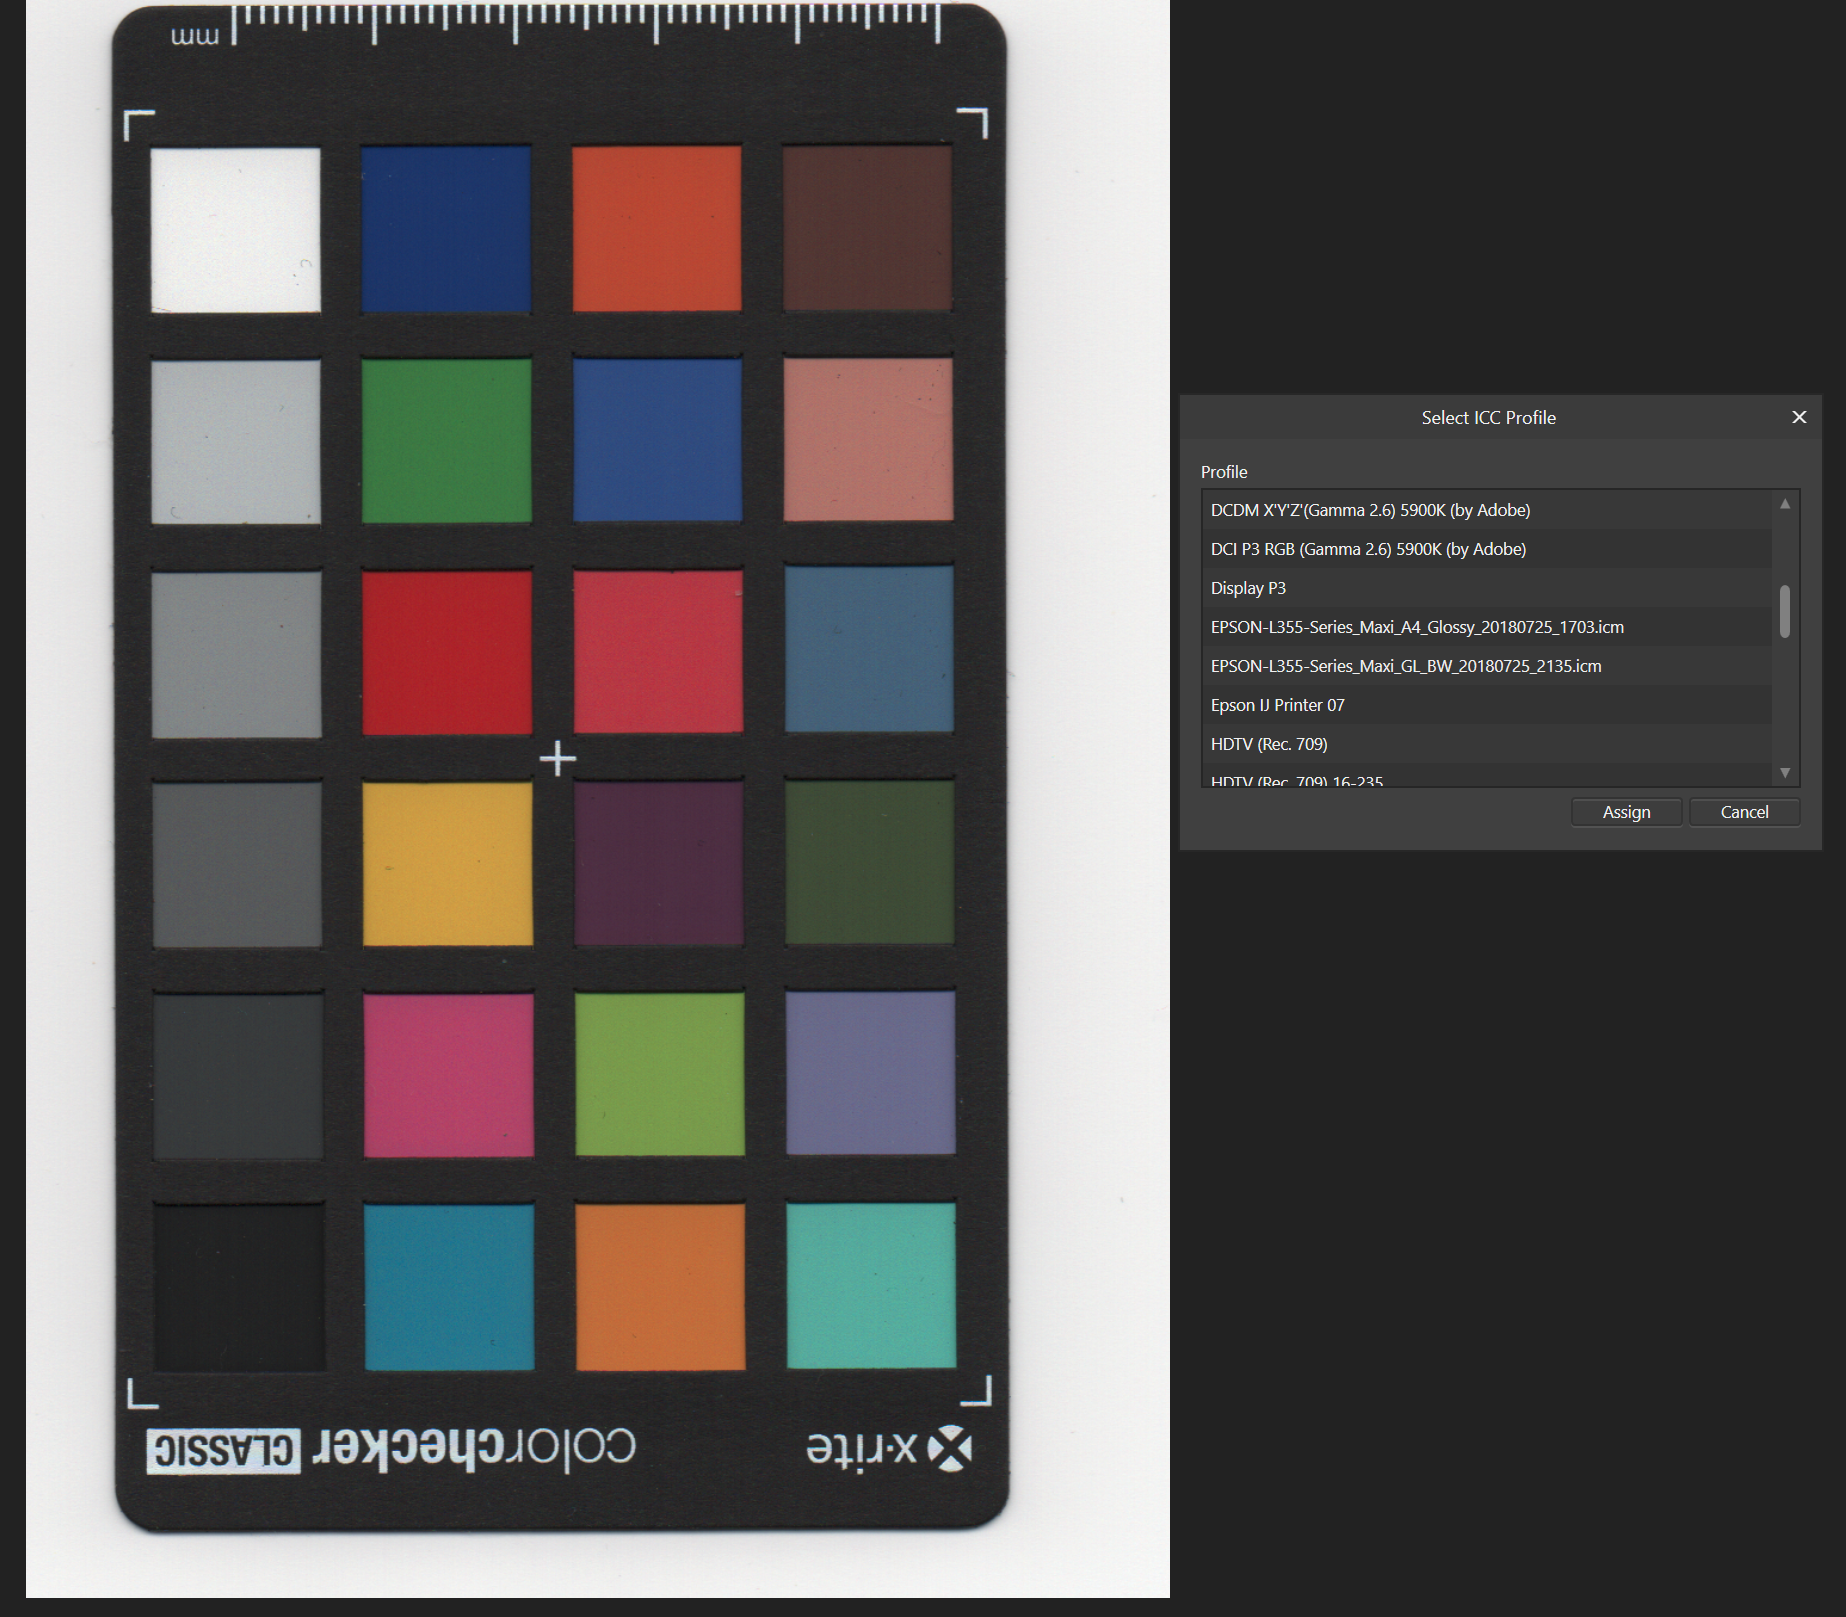
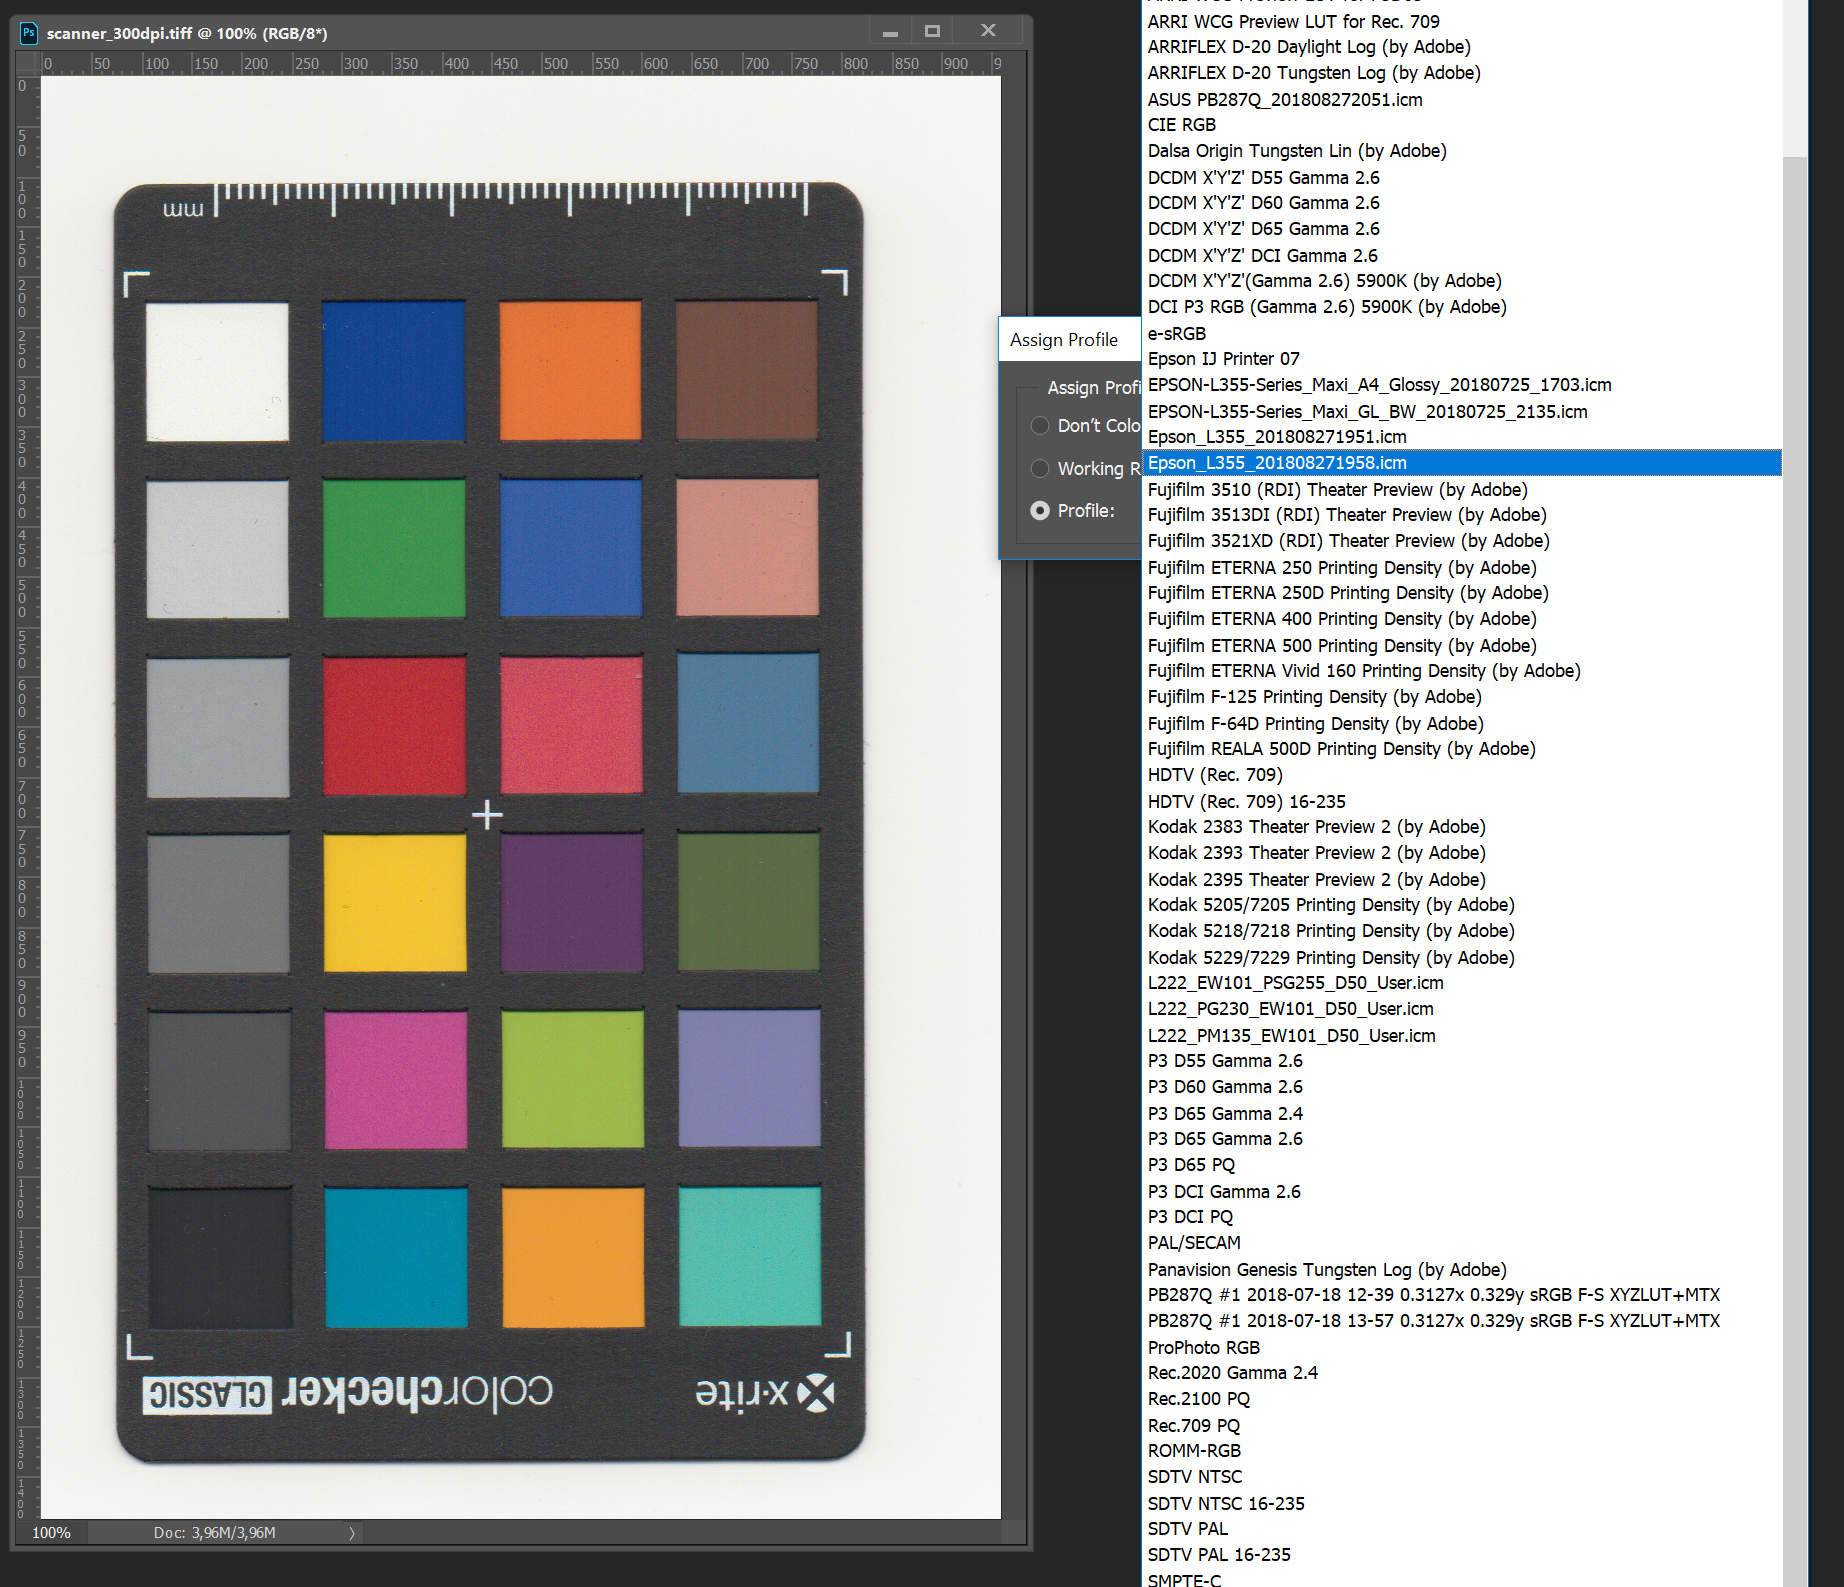
 Hi, I've calibrated my scanner using the X-Rite i1 Studio and that resulted in a ICC profile. The profile is saved in the same place as my printer and display profiles (C:\Windows\System32\spool\drivers\color) but when I choose Document->Assign ICC profile in Affinity Photo 1.6.5.123 my printer and display profiles are there but not my scanner profile. When I do the same in Photoshop CC 2018 I get a very long list of profiles including my scanner profile, why? Best regards Nicke
-
Please. How do I de select in photo? thanks
-
 My affinity photo sometimes moves suddenly during work. Just moved the image to the left while I was working with Pen Tool. Has anyone ever experienced this situation without me? What should I do if I have this problem?
-
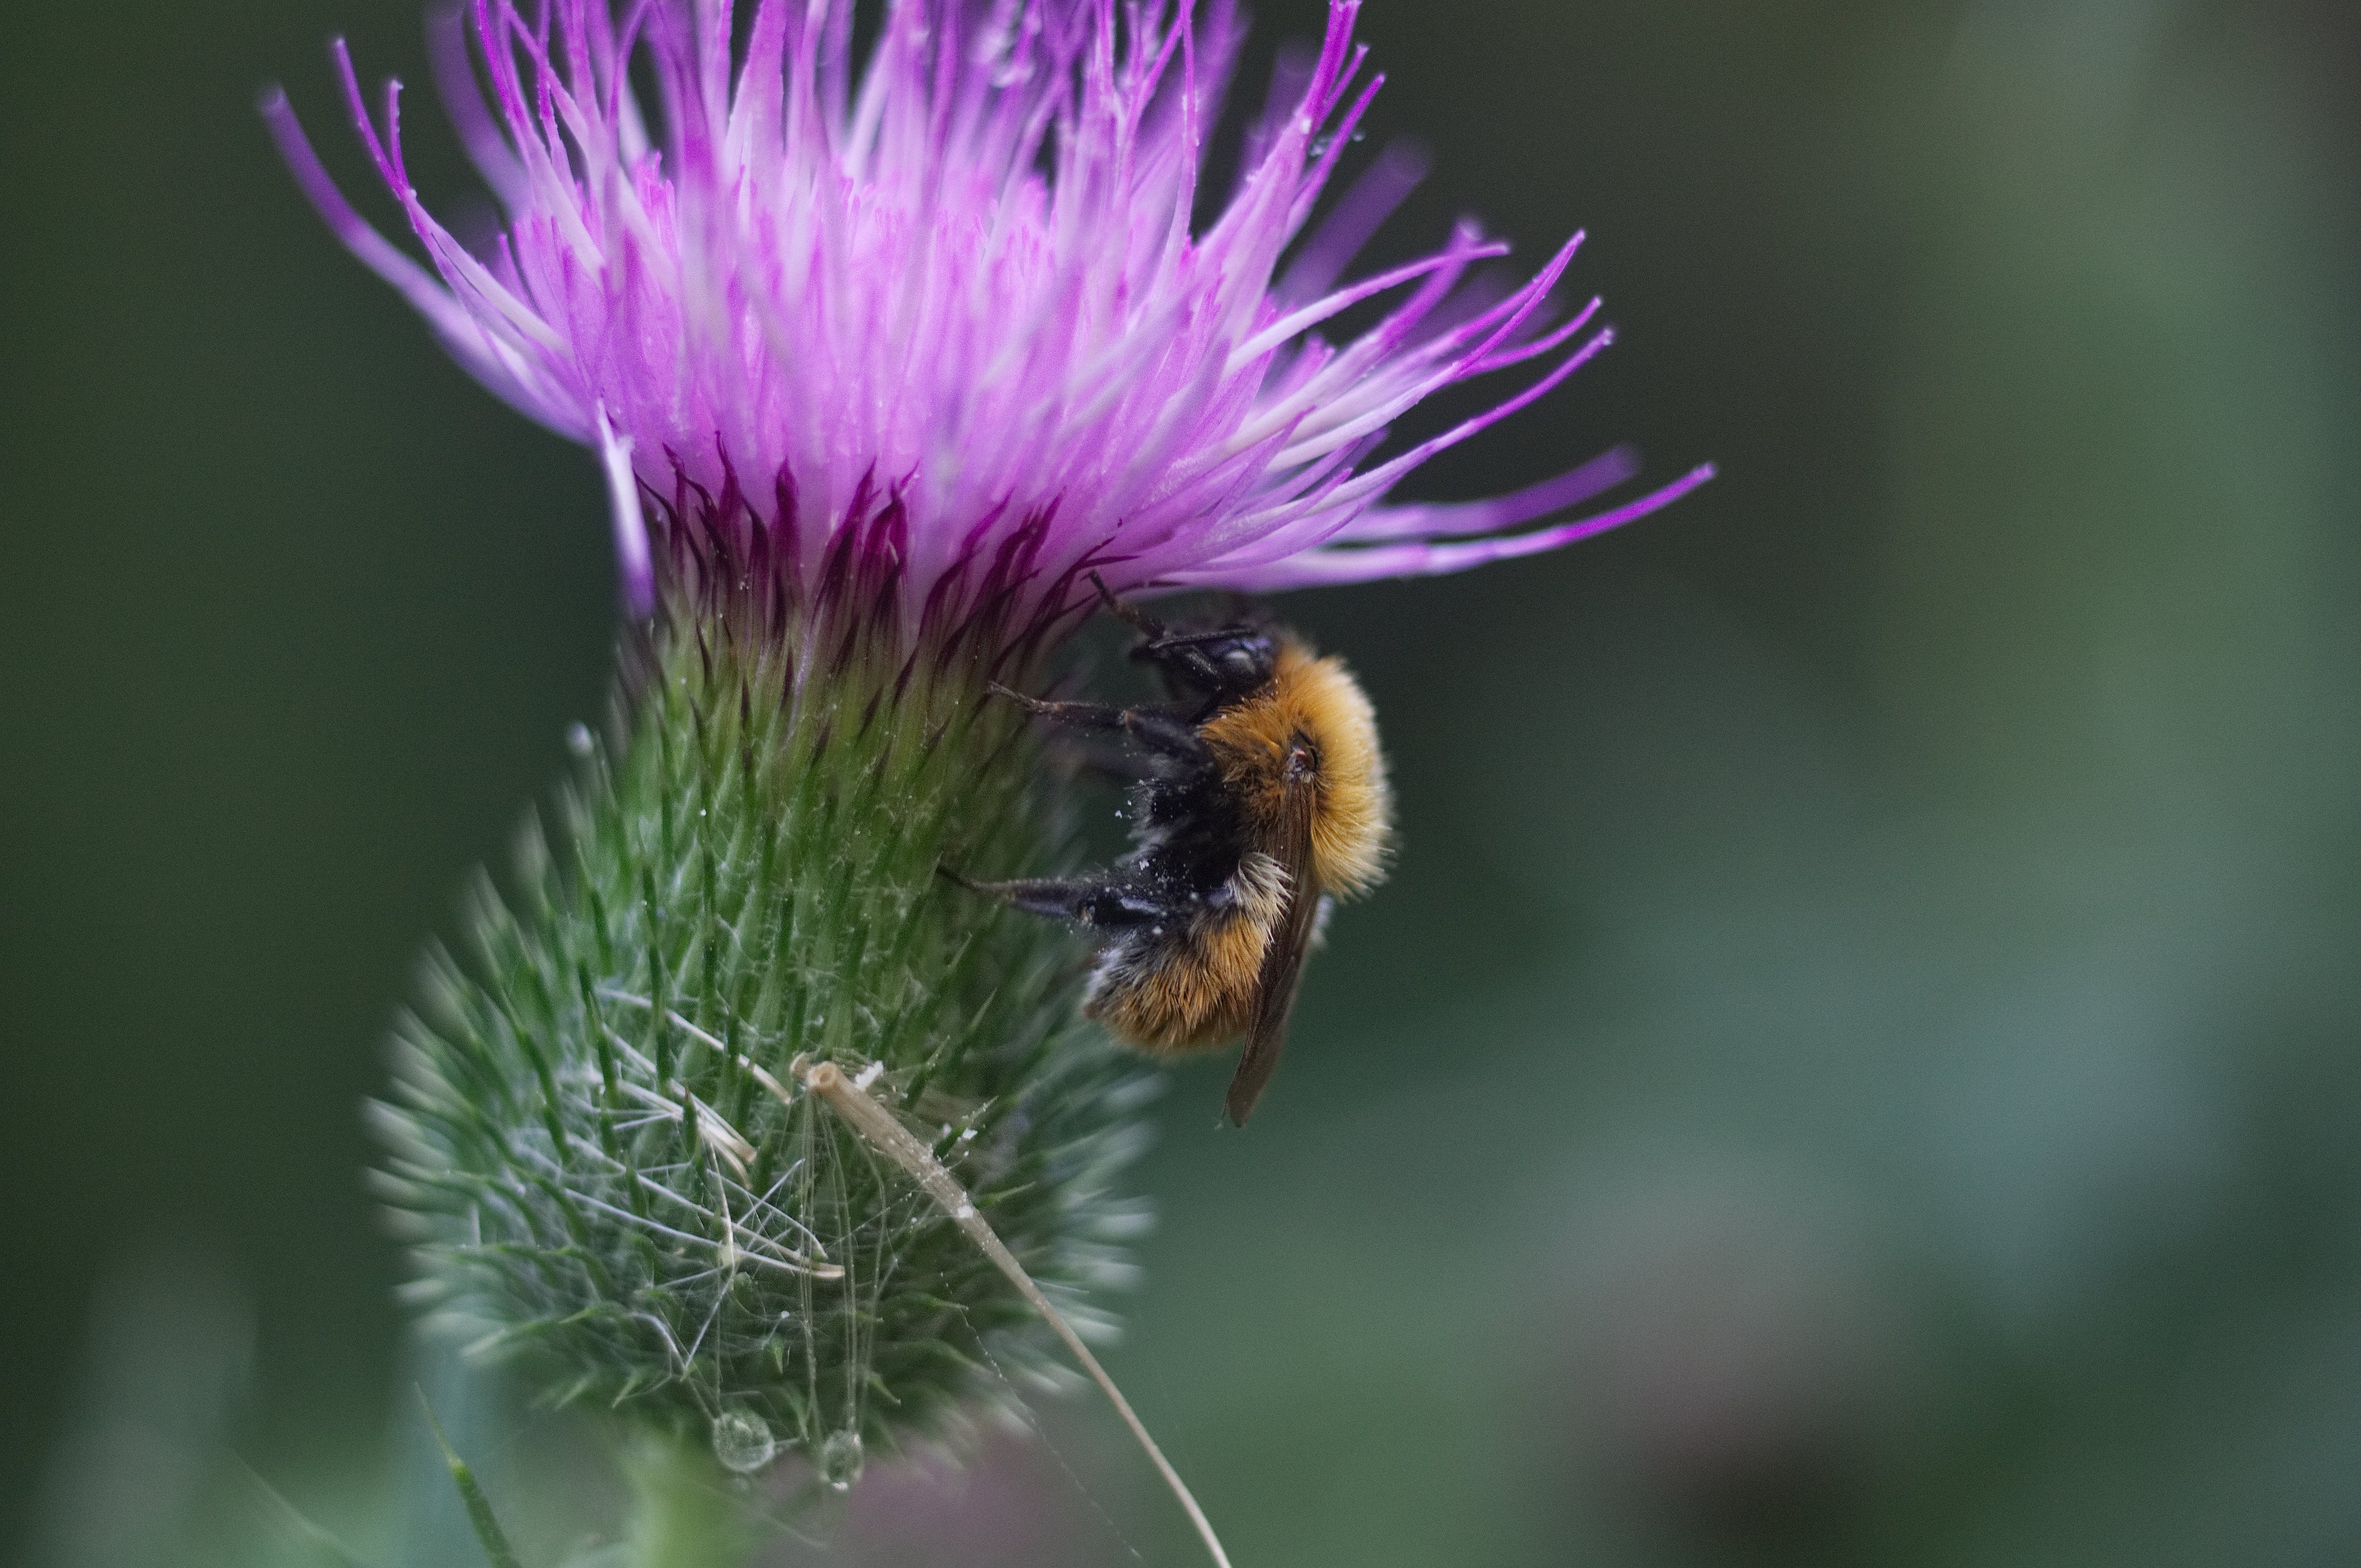
Hi guys I'm an amateur photographer from Italy. I'm 21 years old and I'm beggining my journey with Affinity Photo. I would like to have some impartial Advice about this photo I shot few days ago. I post produced this raising the contrast and using my brush to give a little bit of clarity. I raised the shadows and I used the brush to be more precise raising them only in particular parts of the image. At the end I used a Green Fill Layer (with 4% opacity and soft light fusion mode ) to highlight and "give more importance" to the green part of the image. I shot this photo with a Nikon D3100 with a 55mm Micro-Nikkor f/2.8. f 2.8 / ISO 400/ 1/200 Bee's head was a little bit out of focus (I Even raised the Details, Radius 5% and Amount 100%)
-
 During processing, I wanted to bring out the range of tones in the clouds along with its subtle orange color patches. In RGB color space, the results were not so good. So the complete processing was done in LAB. In the develop persona, tone curve and noise correction was disabled. In shadows and Highilights, Highlights slider was brought to -100%.Then brightness, blackpoint and exposure was slightly changed. Clicked "Develop" and image was brought to Photo persona. Document color space was changed from RGB to LAB. First applied Filters>noise>Dust&Scratches to the A&B channels for removing the color noise.Then denoise applied in L Channel. Now From Adjustment tab, Curves was selected. In panel, LAB was selected. Then Lightness. Adjusted the curve to increase the contrast and bring out the desired effect on the clouds.This made the foreground and buildings very dark but it was ignored(mask will be used later).Then adjust the A channel to bring out the orange and golden shades in the clouds. B channel was not adjusted.Now make a mask which has white color for the clouds and black for the remaining foreground. Initially itself, after denoise, the layer was duplicated. Now the second layer was selected and curves was adjusted in the L channel and A channel giving importance only to the building, road, trees,grass (ignore clouds). The mask selects the clouds from the first layer and rest of image was from second layer. Merge all layers , convert back to RGB color space and export. The file was exported to JPG full size. I used RIOT standalone free software for downsizing to 1800 pixels because AP downsized JPG file looked little blurred. AP shows no quality problem when exported to JPG in full size. Picture shot in Nikon D3100 at 400ISO, 18mm kit lens, 1/80sec and f4.5. Due to the low f number, the sharpness is not so good. LAB color space was able to keep the clouds and other neutral areas grey whereas RGB makes it slightly bluish. The grass also has good green color.
-
That one was all about, well, science. I might have been watching "The Expanse" around that time
- 1 reply
-
- 3
-
-
Editorial Illustration I made for the newspaper I am working at. The topic was "Disruption". In a business context, disruptive forces remain long time unseen, but gain power out of sight and suddenly break loose, tearing apart the established structures. I used Photo for this one.
-
- 7
-
-
- editorial
- illustration
- (and 1 more)
-
AP Focus merge, Using pentax pixel shift jpegs.
-
 I want to know how to delete brush tool selection in affinity photo on windows 10 please I'm suffering to delete I'm using Lenovo g580
 -
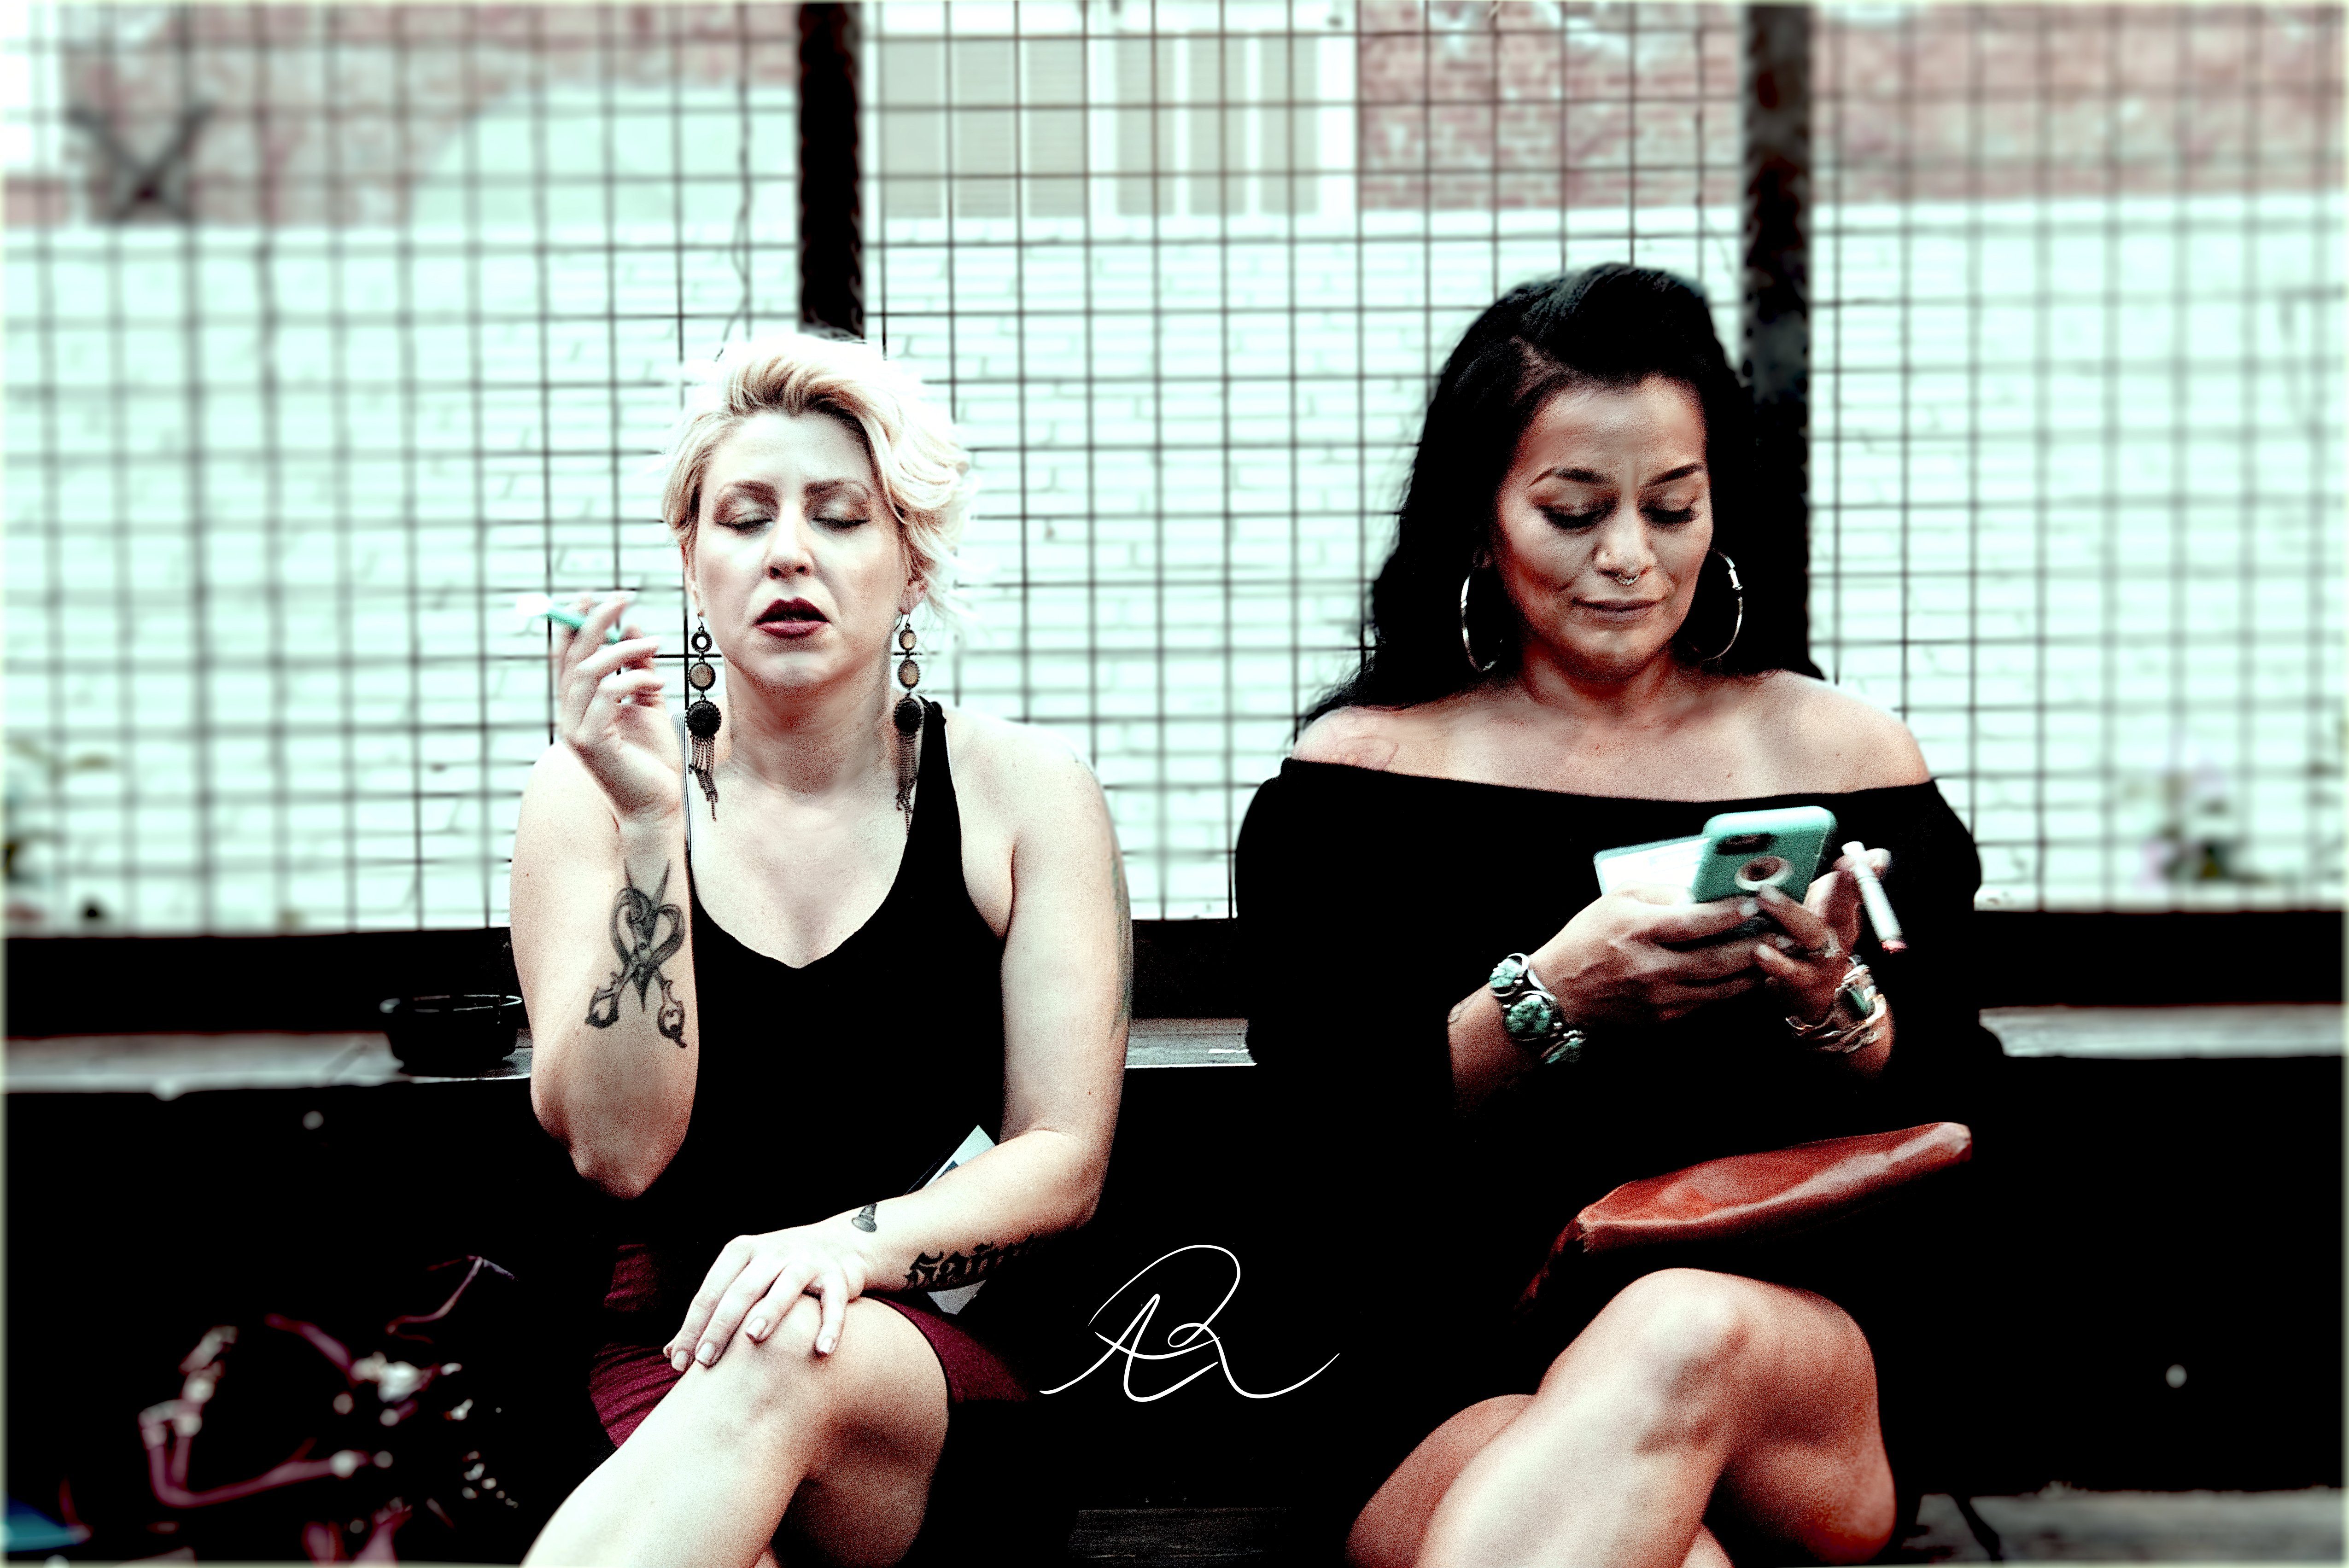
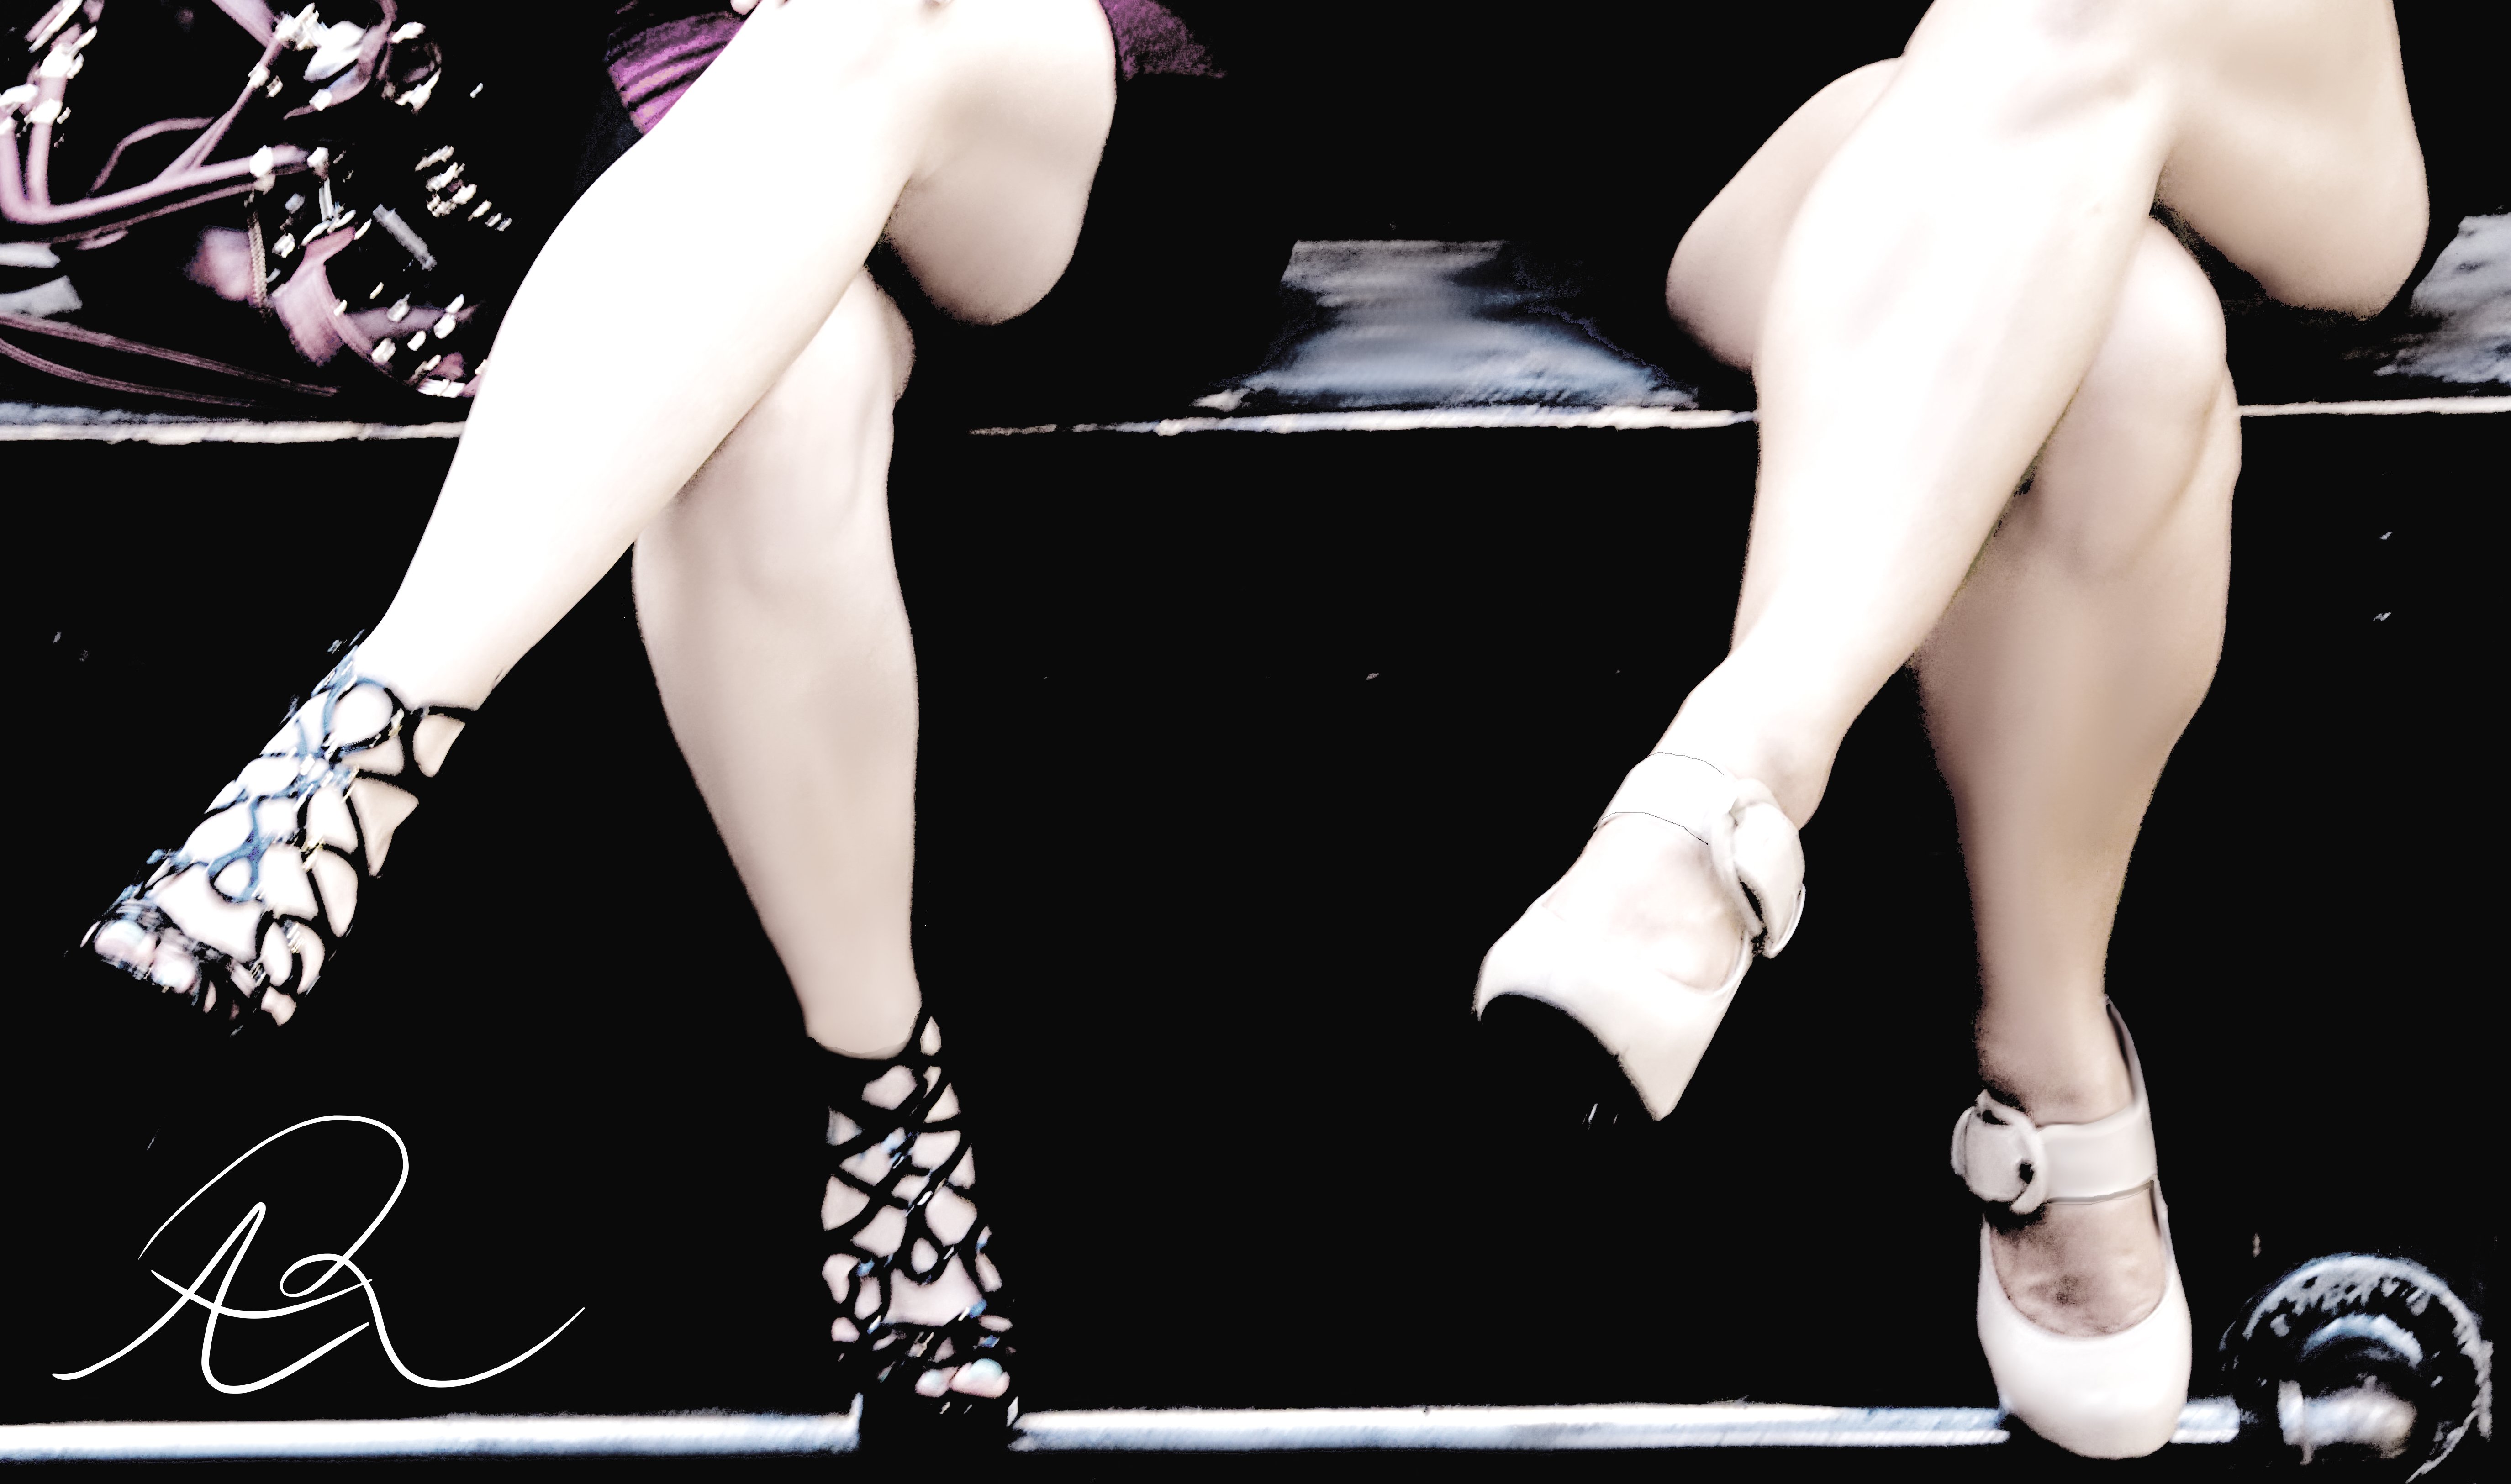
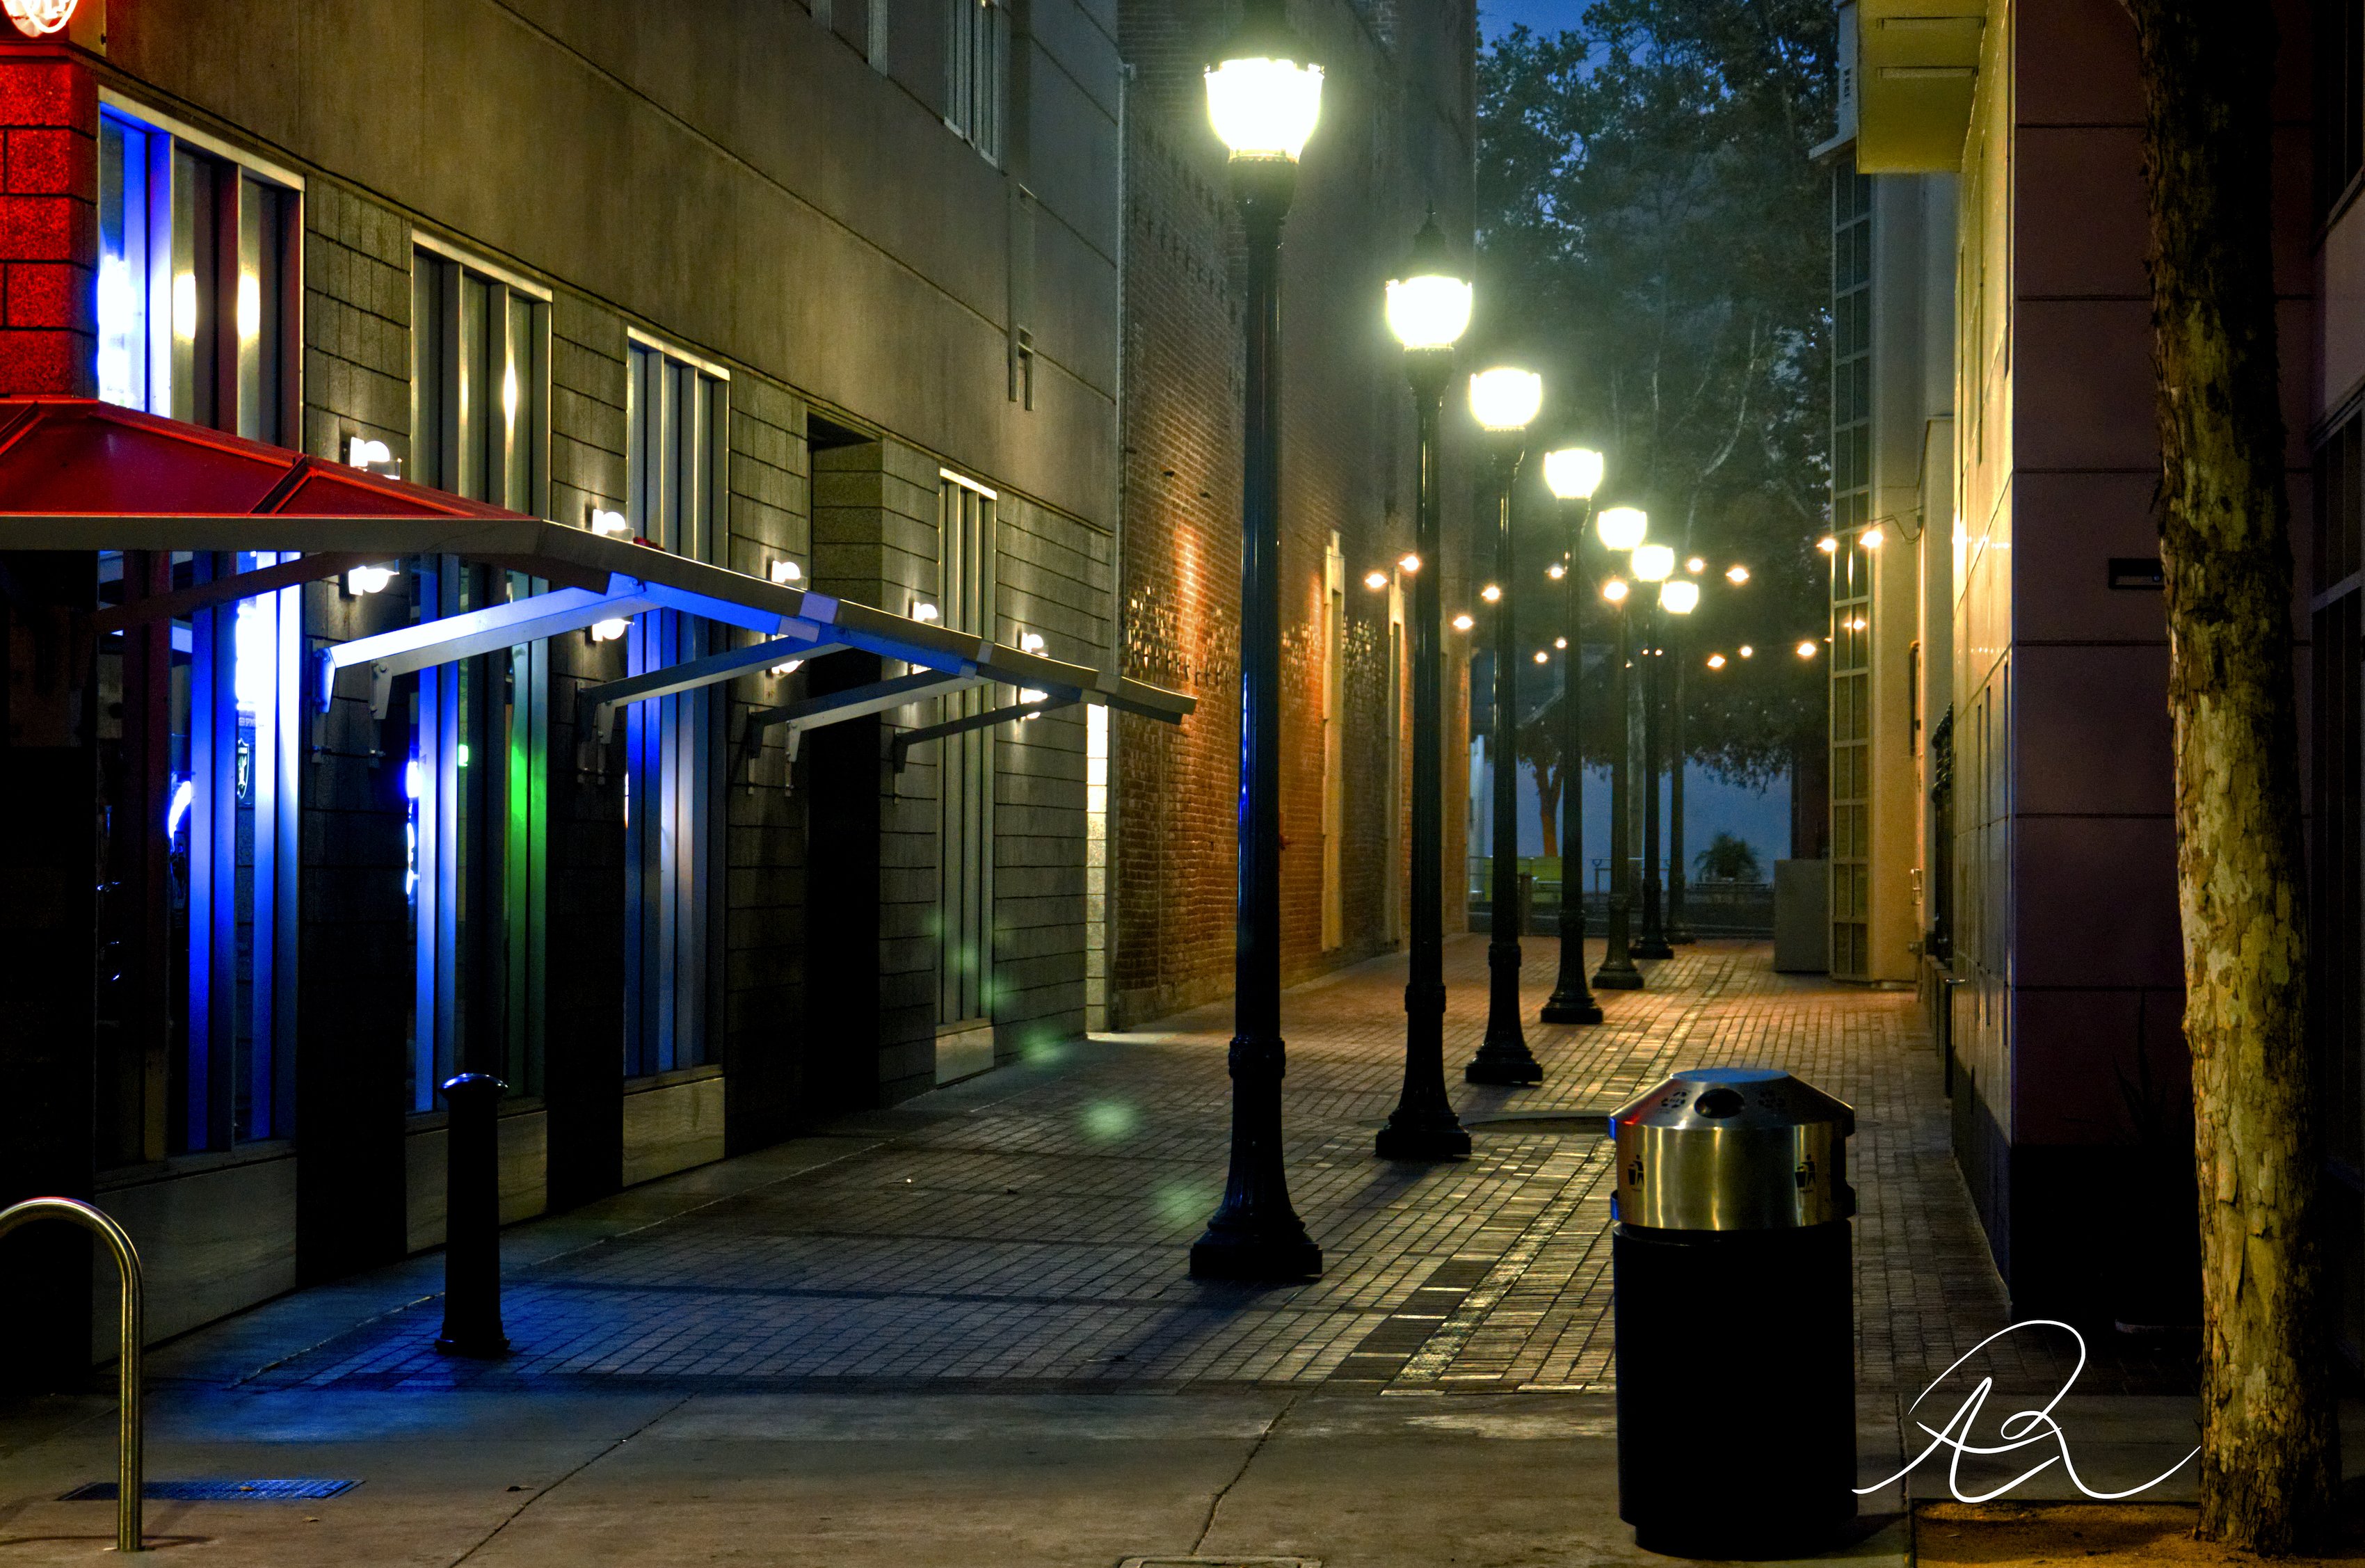
so when it comes to the ladies who have a big impact and influence on my life the two in the photo are it. we just took a seat after an award show. we are at the bar I once was general manager, now I run my own media and design company and on this day both Splash the Bar and myself "Andy Photo" received our award for top 25 Best LGBTQ owned and operated businesses of the Silicon Valley 2018 Presented by The SV Business Journal great time great honor. second photo is their legs crossed , noticed the symmetry. plus they sport some athletic legs hopefully it becomes one of those random iconic photos lol. the final photo is actually one I took in the morning after around 6am after I got off of another part time job I Have in the city. all photos were cropped and edited by . Affinity Photo. Enjoy
-
In this tutorial, I will show you how to easily create a hollow head effect or broken head in Affinity Photo. In this tutorial, I am using especially selection brush tool for selection and clone tool for meshing the background.
-
- 2
-
-
- hollow effect
- photo manipulation
- (and 2 more)
-
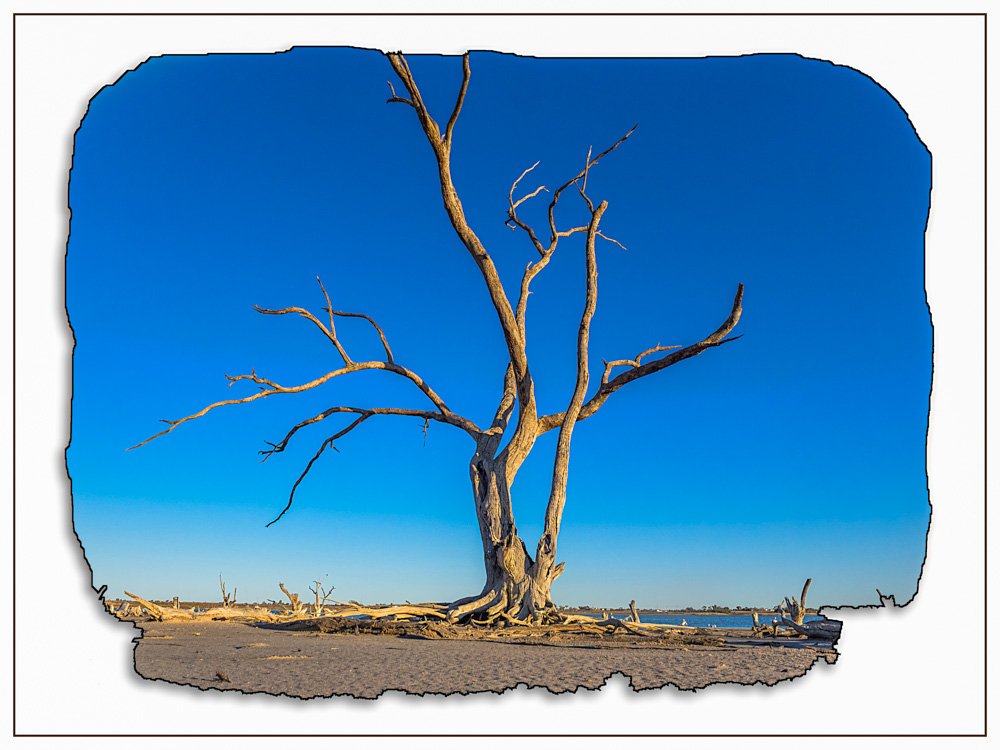
More fiddling with Affinity -- pretty well replaced my old Elements 12 Nothing special here; however this tree is part of another "project" I have in mind --- I just need the mind to sort out the project idea so i can do it; well try to do it honest comments and questions welcome
-
Book cover design for a story in which a brutal psychopath first locks his victims (in the cellar) in a wooden box. Preferably with small poisonous animals ... The basement room I’ve put together from many different images, the framework for the wooden box I’ve created myself and covered with matching textures. Hinges, padlock, dagger, blood, (plastinated) body parts in the bucket - everything is gradually assembled from different images. Altogether 16 pictures were processed here for the Ambiente. The play of light and shadow has been a lot of fun with this affinity photo project. For the book cover, it was interesting that you discovered the man only on the back of the book https://b-bertuleit.de/im-keller/


maringoleminov.jpg.f0a2383266d42b67e4b94d1c532c1022.jpg)