Search the Community
Showing results for tags 'Affinity Photo'.
-
Hola, Quiero compartir este nuevo tutorial Salva tu Foto. En el veremos cómo salvar una foto sobreexpuesta mediante modos de fusión de capas y Asignación Tonal. El cielo quemado lo seleccionaremos con ayuda de una Capa de Umbral y aprenderemos cómo eliminar el molesto halo que se origina al reemplazarlo. Un saludo,
-
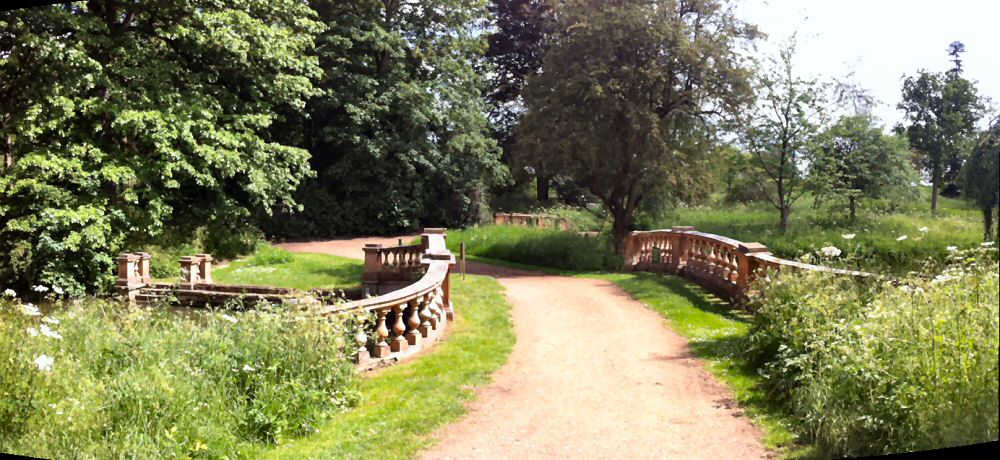
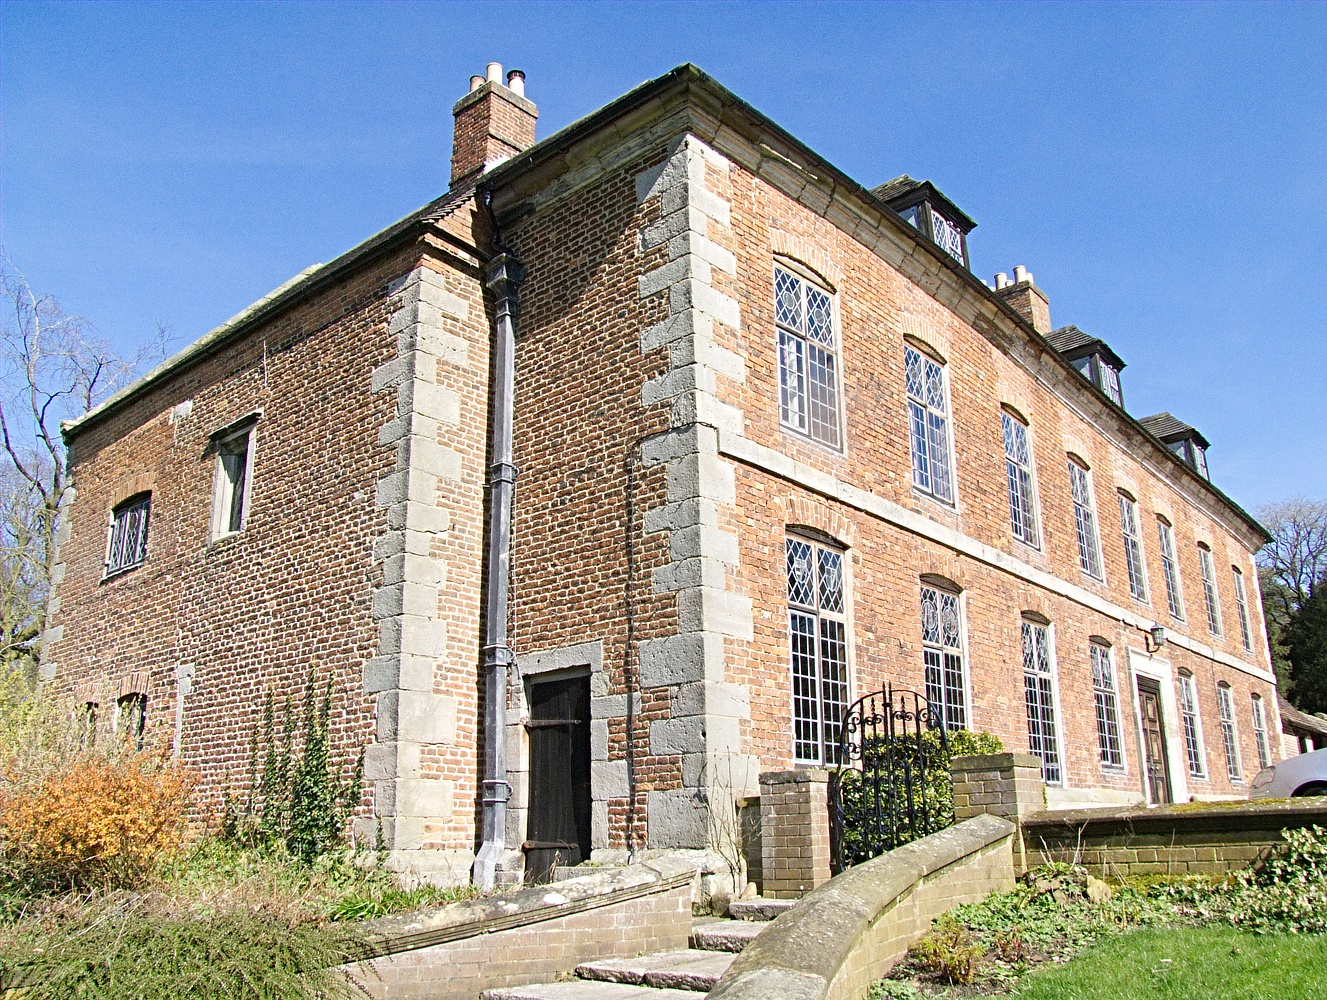
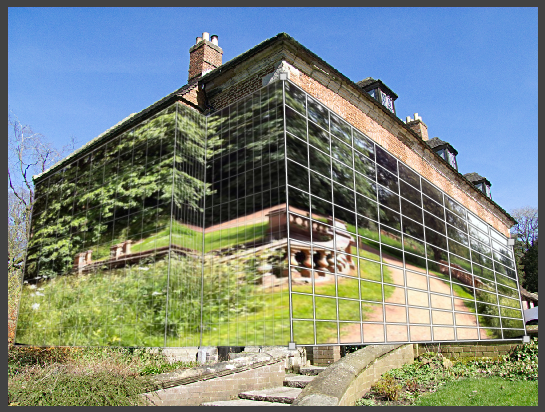
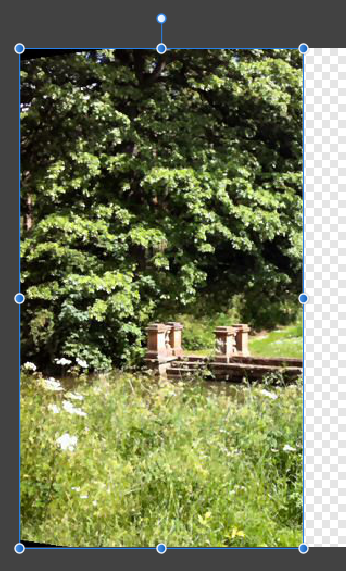
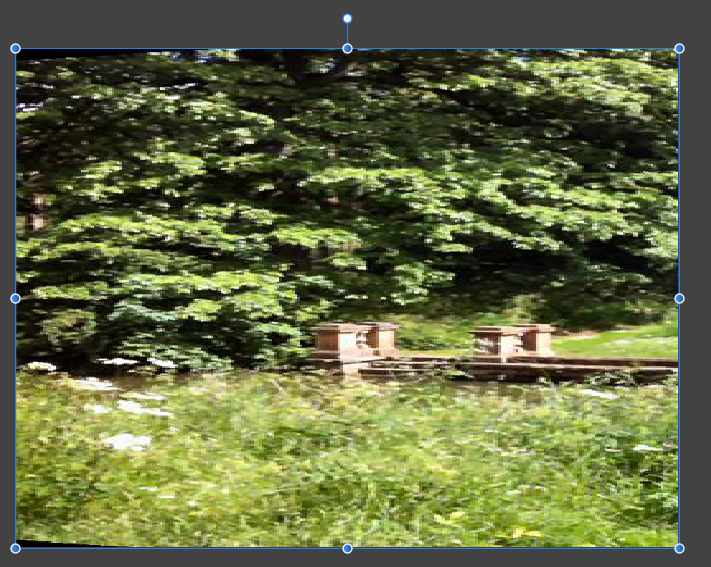
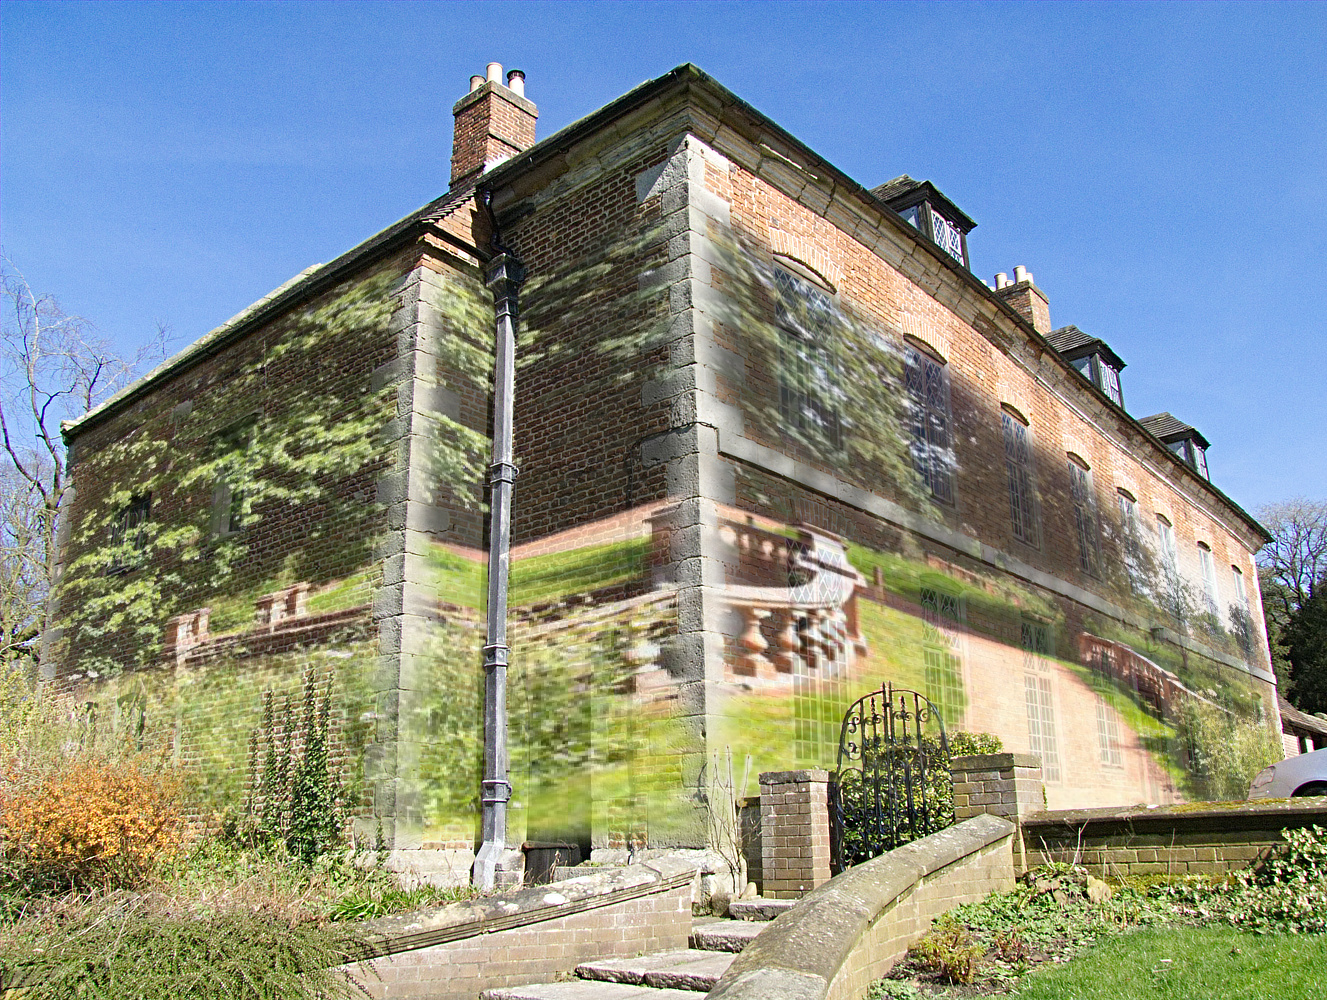
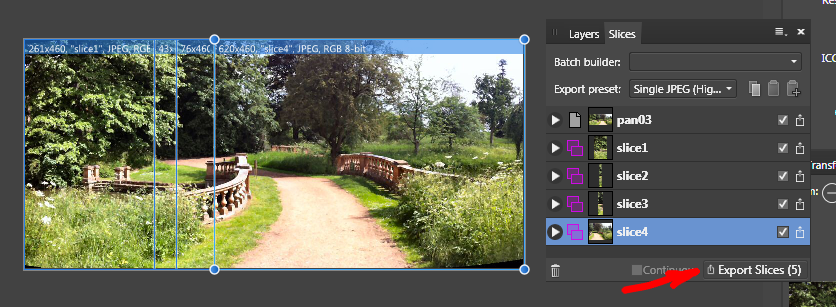
 I’ve been having a lot of fun playing around with the different features of AP and AF. One of these days I’ll stop enjoying myself and do some proper work. But not today ... today I’m going to make use of (i.e. ‘play around with’) perspective projection, which you can find on the menu bar at Layer > Live Projection > Perspective Projection. You’ve seen those outdoor events where they project images or movies onto buildings? I thought I’d have a go myself and paste this first photo onto the second: I’m going to call the overlaid image the source and the laid-on image the target. (If you’re wondering, btw, the first is Norbury Old Manor in Derbyshire, and the second is a big posh garden somewhere in Bedfordshire that I've mislaid the name of.) Putting an image on a flat ‘surface’ is pretty straightforward, so I searched out something a bit more awkward: this one will have to spread over four different walls at an angle to one another. All we have to do is split our source image into four and stick each bit onto the target image one at a time. Easy-peasy? Yes ... and no. we’ll use the Export Persona’s Slice tool ... Now, you cold guesstimate the widths of the slices, but we shall do it the hard way for this one. We’ll have a little excursion from our workflow. If you’re not happy with a bit of arithmetic you can skip this part, but I’ll try and keep it simple. What we really need here is an aerial photo of the house … and thanks to Google Maps, I’ve found one; it’s not very big, but I’ve blown it up and straightened it. The target image photo was taken from the direction of the bottom left-hand corner, so we want to measure those sides of the building. I’ve drawn two rectangles to line up with the edges of the building. Now we can read off their sizes in pixels ... ... as we adjust the corner nodes: you’ll see them displayed next to the cursor. (I couldn’t capture this in a screen shot – but you’ll see when you do it yourself.) Working from the upper left side, the measurements come out as: 141, 23, 41, 335 pixels. (This looks very accurate, but given the rough image I was measuring from, it’s more of an educated guess! Still, nothing ventured…) Quick check: the first side looks roughly half the width of the fourth; the second side looks roughly half the second; and the second & third together look roughly half the first. The numbers agree with that. Roughly. Now for a few Hard Sums. You’ll have spotted that our source image is 1,000 pixels wide. This is a happy coincidence, as it saves us a bit of calculating. What we have to do is work out what fraction of the source’s width each side is. We add up the total pixels we measured just now: 141 + 23 + 41 + 335 = 540. Get your calculator out (Windows has one built-in; I presume Mac OS does too.) Divide each dimension by 540 and we get (after rounding up) 0.261, 0.043, 0.076, and 0.620. Quick check: add these up – they come to 1, so we haven’t made any mistakes. Now, since our source image is 1,000 pixels wide, we can easily work out that the slices will be 261, 43, 76, and 620 pixels wide. (If it hadn’t been a nice round figure, we’d have had to multiply each decimal by the actual width to get the required results. I apologise if (a) you are not very good with numbers or (b) you are very good with numbers, but you feel your intelligence has been insulted.) If you skipped the last bit, carry on from here. OK, back to the Export Persona and Slice. Open the source image file. We’ll turn on snapping to make slicing a bit easier. Starting in the top left-hand corner, click & drag a rectangle down to the bottom edge (it will snap) and then rightwards until the width is 261 pixels (or your guesstimate). The slice will appear in the Slices panel. You can select the export format here, but we’ll leave it as the default as this is just a demo. Now click somewhere on the top or bottom edge to create the next slice; drag the left-hand edge up to the right-hand edge of the first slice and snap them together; now adjust the width to 43 (you may need to zoom in to see the figures). Again, the new slice appears in the Slices panel. Do the same for the third and fourth slices, and click on Export Slices: AP will ask for the name of a folder to save them to. As it stands, it will also export a copy of the source image, unless you clear the tick/check box in the list; we don’t actually need it here. This is what we have in our slices folder: And now we’re ready to set up the perspective projections. Open the target image file, and from the menu bar select Layer > Live Projection > Perspective Projection. (You can do this quicker with the Perspective Tool, but you can only do one plane at a time, and you can’t edit the different planes’ alignment if you do; our method is non-destructive, remember.) First of all, save the target image as a new file so you don’t overwrite the original. Create a new pixel layer above the Background. Now go to Layer > Live Projection > Perspective Projection to apply a perspective plane to the layer. Drag the corner nodes to match the left-hand wall. (I’ve turned off snapping here, because the nodes keep trying to align with one another.) Although one corner of the wall is hidden by bushes, we can use the brickwork to help align the grid correctly. Now click Add Plane and match the new grid to the next bit of wall. It may help to zoom in so we can see more detail in the source image. We need to position the left-hand corners to the right-hand corners of the first plane; if they’re still hard to see, turn off the background layer while you line them up. Warning: do NOT make the background layer active, because it will remove the perspective planes, and you can’t get them back with Edit > Undo. If you need to adjust the other plane, just click on it to make it active. (You’ll have noticed there’s some barrel distortion in my target, giving a slight curvature to the edge of the wall where the two planes meet, but I’ll get round that later with a sneaky trick.) Now we’ll add two more planes and line them up, then we’ll be ready to start adding the source image slices.. You can turn snapping back on now. Open the four slices and copy (Ctrl+C) slice 1, then go to the target image, click on the first (left-hand) plane, then click on the Move tool. (The grids disappear. Don’t panic! The active plane has transformed itself to fill the whole frame.) Paste (Ctrl+V) the slice ... ... and drag the sides until it too fills the whole frame. Now click on Edit Live Projection and click the next plane; and repeat the steps until all the slices are copied. When you’ve finished go to Layer > Live Projection > Remove Projection. It’s probably a good idea to save everything in afphoto format now, if you haven’t done so before. All we have to do now is to clean up the source image layer and find a suitable blend mode. We’ll apply a mask to the source layer and use a big brush with Hardness of zero to soften the edges and uncover the bushes and stonework and stuff that should be “in front” of the source image. And I’ll use my sneaky trick, which is to just let the quoins, the corner stones, show through; I’ll also uncover that drainpipe in the corner to put that in front too. It’s helpful to reduce the transparency of the top layer to see the target layer’s features. As we’re using a mask, we can paint black onto it to show the target, or white to hide it and make corrections. Finally, I’ve just tweaked the source layer’s Blend Options and reduced the layer opacity slightly to let the bricks and other details show through. (I’m not going top talk you through these, as there are some much better video tutorials on these things.) Et voilà!
-
 hello, I just update to ios 11, and some of the functions like drag and drop didn’t work. So I removed A.Photo and downloaded againt. Now I can’t export to camera roll. Here’s the screen recording:
 -
Hi Folks & Friends, a new work with aphoto, do you like this? Looking forward to any feedback Best regards http://b-bertuleit.de/water-lilies/
-
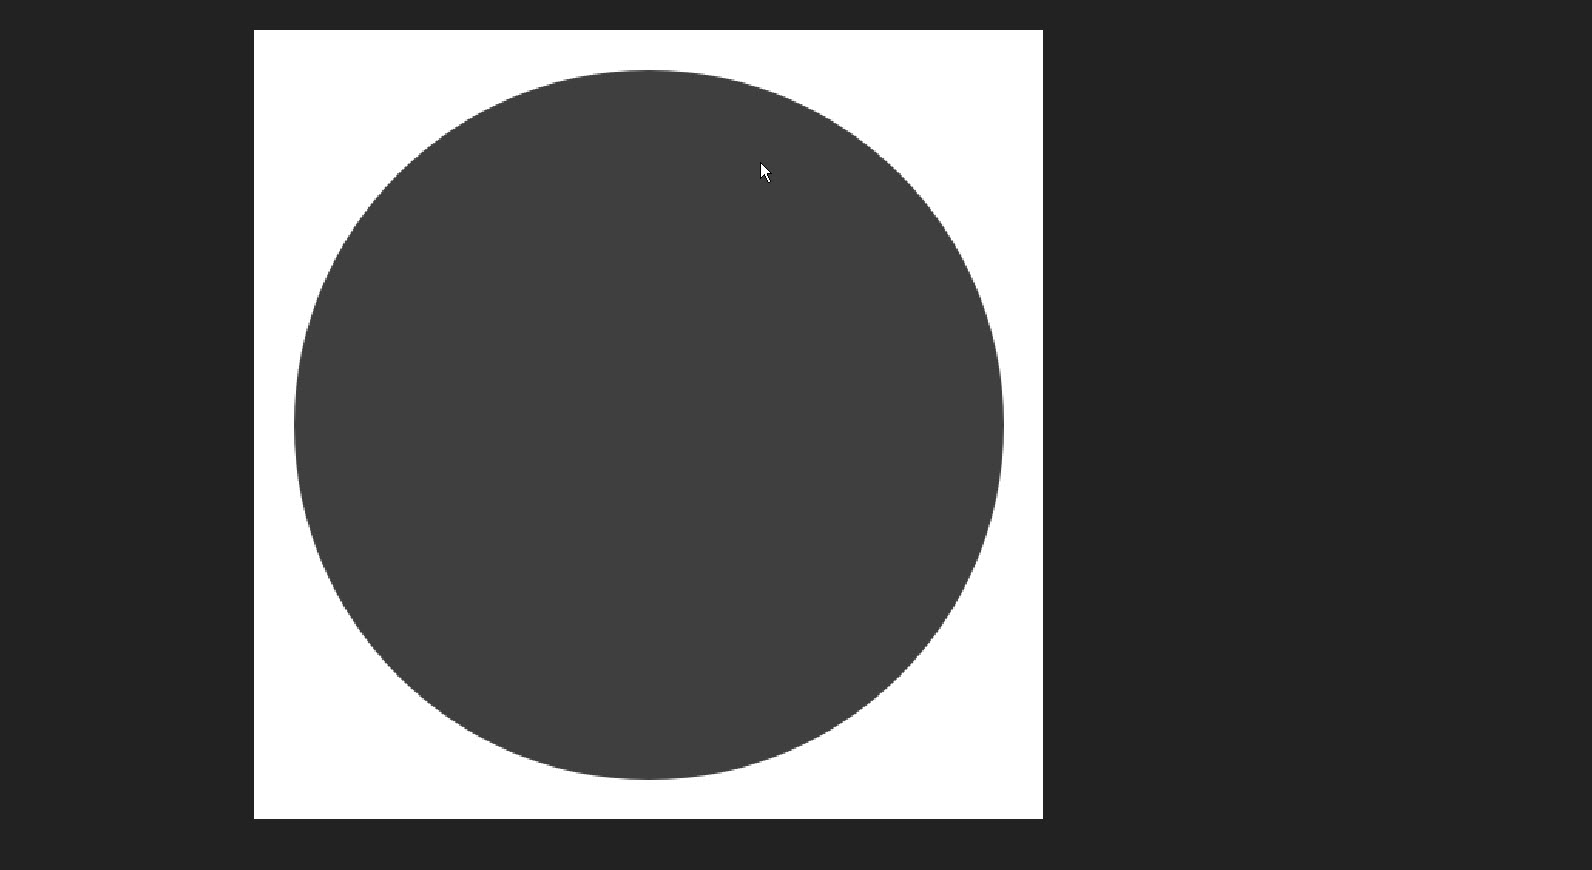
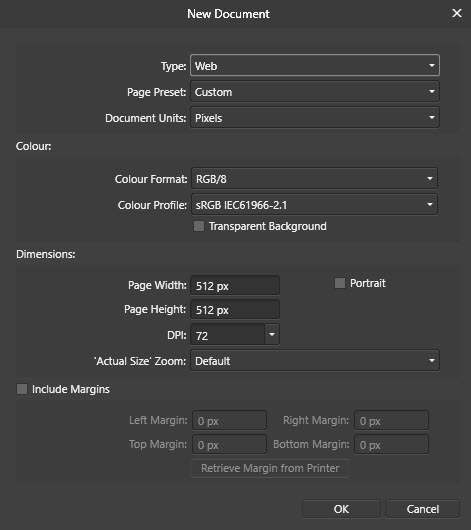
 hey, for some reason when i make a document below 1000 ish px the quality doesn't seem that good (im a complete noob, sorry if this is a dumb question) This is a 512 x 512 px document and when i make a shape and fill it, it looks fuzzy around the edges (this happens when i add a picture too but the whole picture is fuzzy instead of just the edges) These are the settings i used, did i do something wrong? or is it supposed to be like that Sorry again if its a dumb question, thanks
-
 Hi, I'm using AP from time to time so I'm pretty new user. Before, I could use all the personas, Now I can't click any of them - the're inactive. I wonder if it's a bug or maybe, there must be some conditions to be made in order to use them? I googled some and couldn't find nothing. Thanks in advice.
 -
 After ios 11 update on ipad pro AFFINITY PHOTO wont import cloud files, no mater the type of file I choose.
- 5 replies
-
- 3
-

-
- ipad
- affinity photo
- (and 5 more)
-
 Perhaps, some kind soul might be able to help. I have been uploading much up my work to 2 cloud services, Dropbox and pCloud. This afternoon I attempted to download several photos RAW and Jpg, only to see them download into the ether, never showing up on Affinty. What few images that I have on iCloud, no issues, but these two other sites don’t seem to plat well with Affinity. Am I missing something or screwing something up? Any help would be most appreciated.
 -
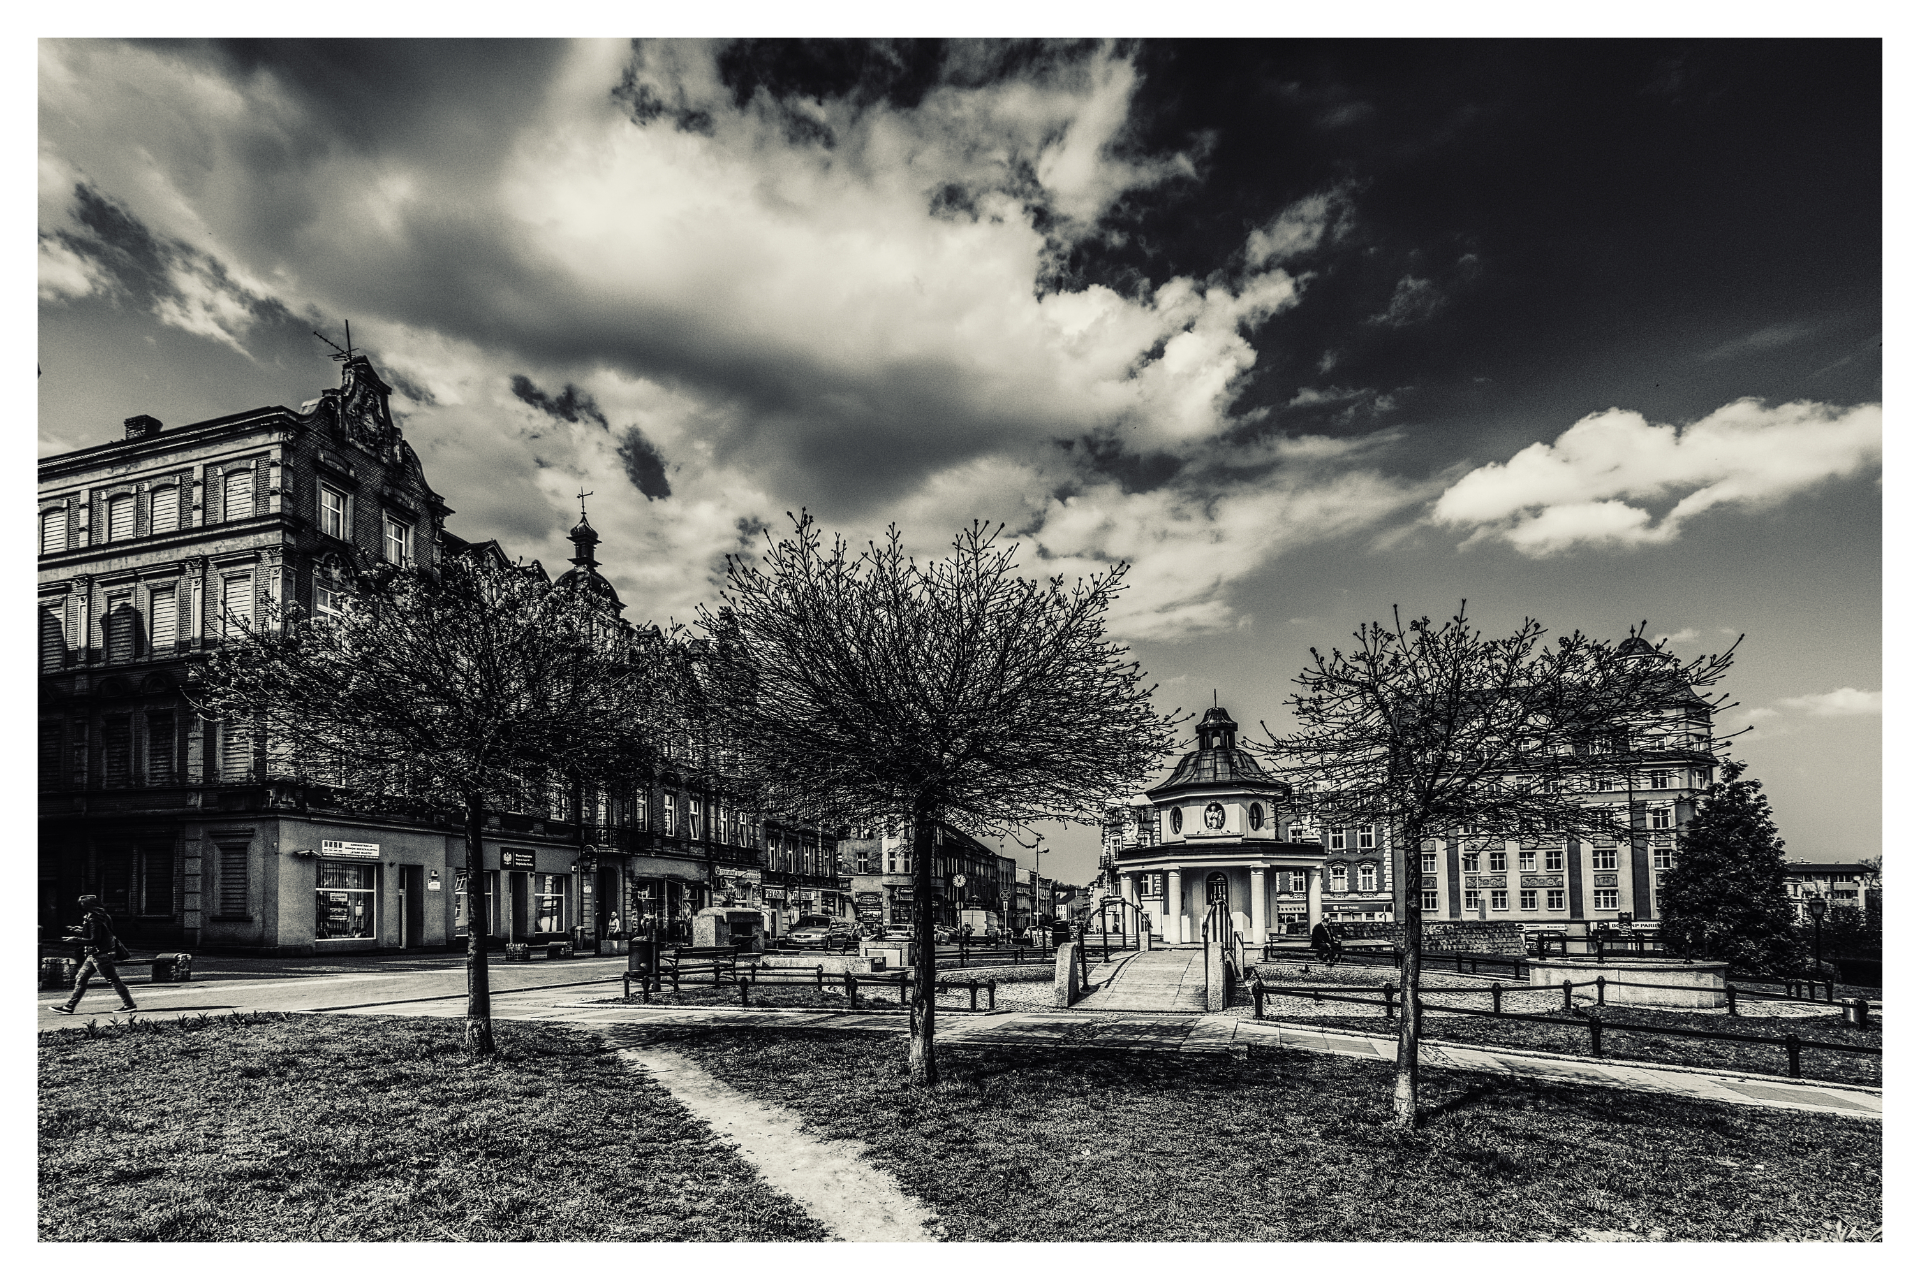
Mysłowice - city in Poland.
-
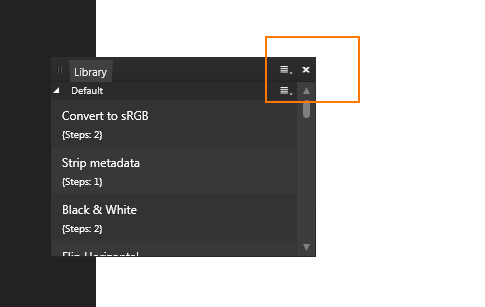
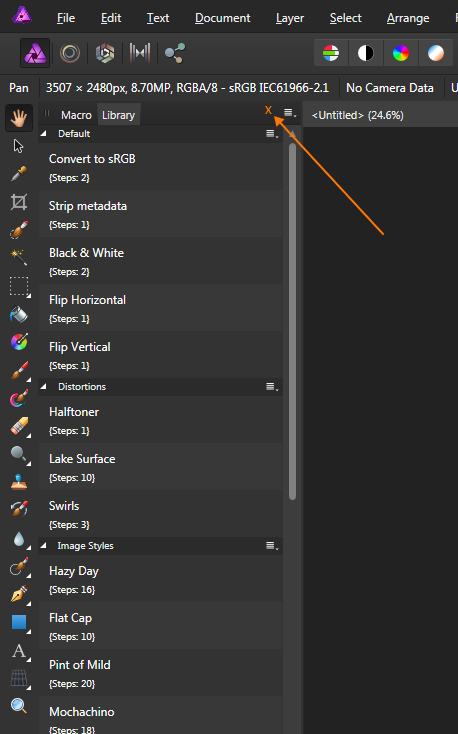
why there are no close button. instead i go to View- Studio and unclick but if i detach window it have it makes no sense to me
-
After ios 11 update on ipad pro AFFINITY PHOTO wont import cloud files, no mater the type of file I choose.
-
 Hi, is it possible to add noise (destructively or non-destructively) to a layer mask? (this can be helpful to reduce banding when using smooth gradients inside a layer mask, in an 8 bit document). I did try it by selecting the mask and adding a Noise Live Filter Layer (and also adding Filters-Noise-Add Noise) but it didn't seem to work. Thanks!
 -
I know that you can attach Curves and Levels adjustments to masks and set their target channel to Alpha instead of Master. This is great feature that allows us to change a mask non-destructively, but we should be able to attach all adjustments and filters to a mask as if the mask was a regular grayscale pixel layer. Also currently in order to attach Curves or Level adjustments to a mask you have to create it and attach it manually to the mask. Would be nice to be able to select the the mask - add the adjustment layer (or live filter) and have it link automatically to the mask. Hope all this makes sense. Cheers!
-
- 1
-
-
- adjustments
- filters
- (and 1 more)
-
 Hallo! Is it possible to buy and download a version off Affinity Photo that I can install on a off-line computer? And also download future important up-dates to install on the off-line computer?
 -
I create t-shirts and prints in my spare time from doing web design. Here are a few samples of my work. My typical workflow would be: 1) Sketch my idea up or bring in photo elements into Affinity Photo to create a mock-up. 2) Refine the mock-up in Affinity Designer, since I will need to scale the design for different sizes. 3) If I need to create a halftone, unfortunately I do this in a different program, but I will bring it back into Photo to create the mask I need. If I need convert a bitmap to a vector, I just use an online converter at http://www.autotracer.org (no affiliation) and I'll bring an SVG into Designer. There are still a few things I wish the programs had, but all-in-all I love the programs. The fur on the Panda was done completely in Designer and I think that's awesome!
- 4 replies
-
- 3
-
-
- affinity photo
- shirts
- (and 2 more)
-
 Is there a brush stabiliser in Affinity Photo? Tried finding this answer online but couldn't find a convincing answer....
 -
 When you're in the Liquify Persona, it would be very cool (pardon the pun) if you could keep the freezing tool within the bounds of your current selection. See attached.
-
I've been experimenting (playing around, mucking about) with a concept called 2.5D --"two and a half dimensions". I've seen it on TV programmes and historical presentation videos, and finally I've got around to trying it myself. I've had one or two false starts with images that are too complex (mainly for my patience, although my cutting-out skills have been challenged), but here are a few that work pretty well, I think. The first one is actually the first one I made, and was a bit ambitious. The last two are from a photo that allows for a drone's-eye-view approach. The photos were split into layers in AP, with the in-painting brush and the clone stamp used to remove things and add stuff around the edges where I needed to fill in gaps between layers. Each layer was saved as a separate png (to preserve transparency), and I used Serif MoviePlus X6 to put the whole thing back together and add motion. (I'm going to miss MP! I shall have a long search to find anything as versatile for a reasonable price.) This is Stowe Gardens in Buckinghamshire, if you're wondering. Capability Brown's finest. The poet Tennyson & his family at their home on the Isle of Wight. (Just down the road from my home!) If pioneer photographer Oscar Rejlander had had a zoom lens ... Walsall, 1900. Early drone footage! Same photo, different treatment. This photo was ideal, having so many layers of rooftops -- five in all, although I could have stretched it to six or seven.
- 7 replies
-
- 5
-
-
- old photograph
- drone
- (and 1 more)
-
Discovery You discover something that is very important to you. Sometimes it's like out of the blue, and you don't know much about it (Because you got used to something else, maybe). Later, you don't want to miss it anymore. Meine Inspiration zu dieser Arbeit war das Album Cover „Discovery“ von ELO. http://b-bertuleit.de/discovery/ I'm looking forward to feedbacks, thank you friends
- 7 replies
-
- 1
-
-
- affinity designer
- vector
- (and 1 more)
-
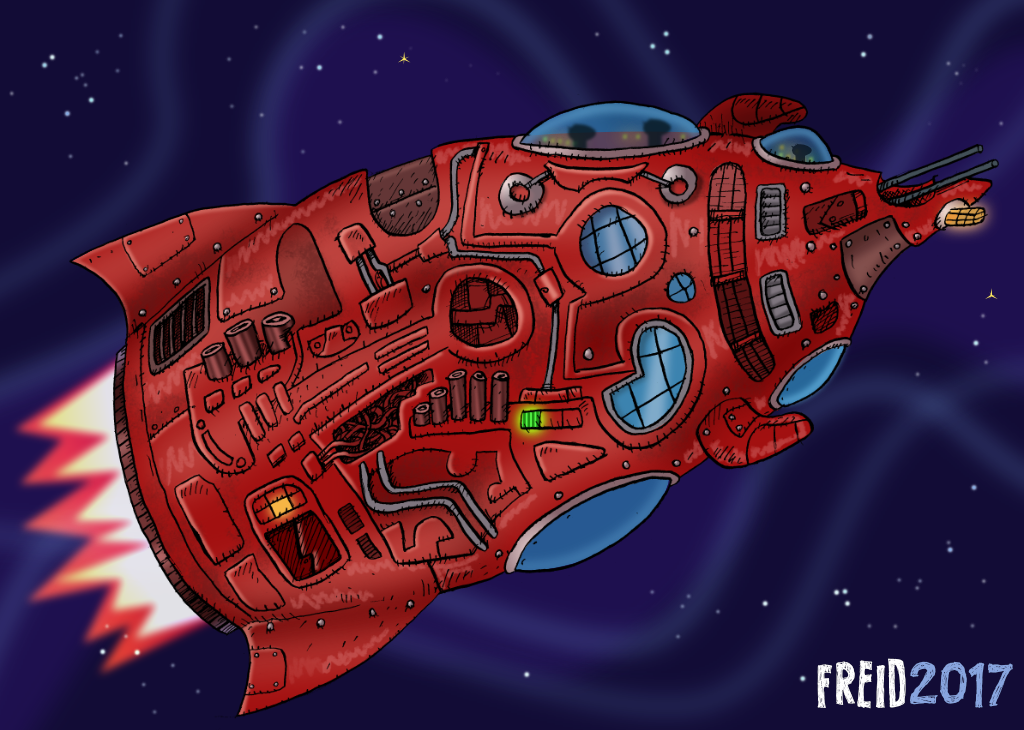
Hi guys, First time that i try AP only to colorise a pic. I used it before only as an image editor. I gotta try it on iPad soon Maybe i'll post a timelapse if i find the time.
-
All elements sourced from the same photograph. Ermm...ok. How does one get a picture posted here? I uploaded the image using the upload feature in here - so what's happened that I'm not understanding? Ethereal Woodland Sprite.tif
-
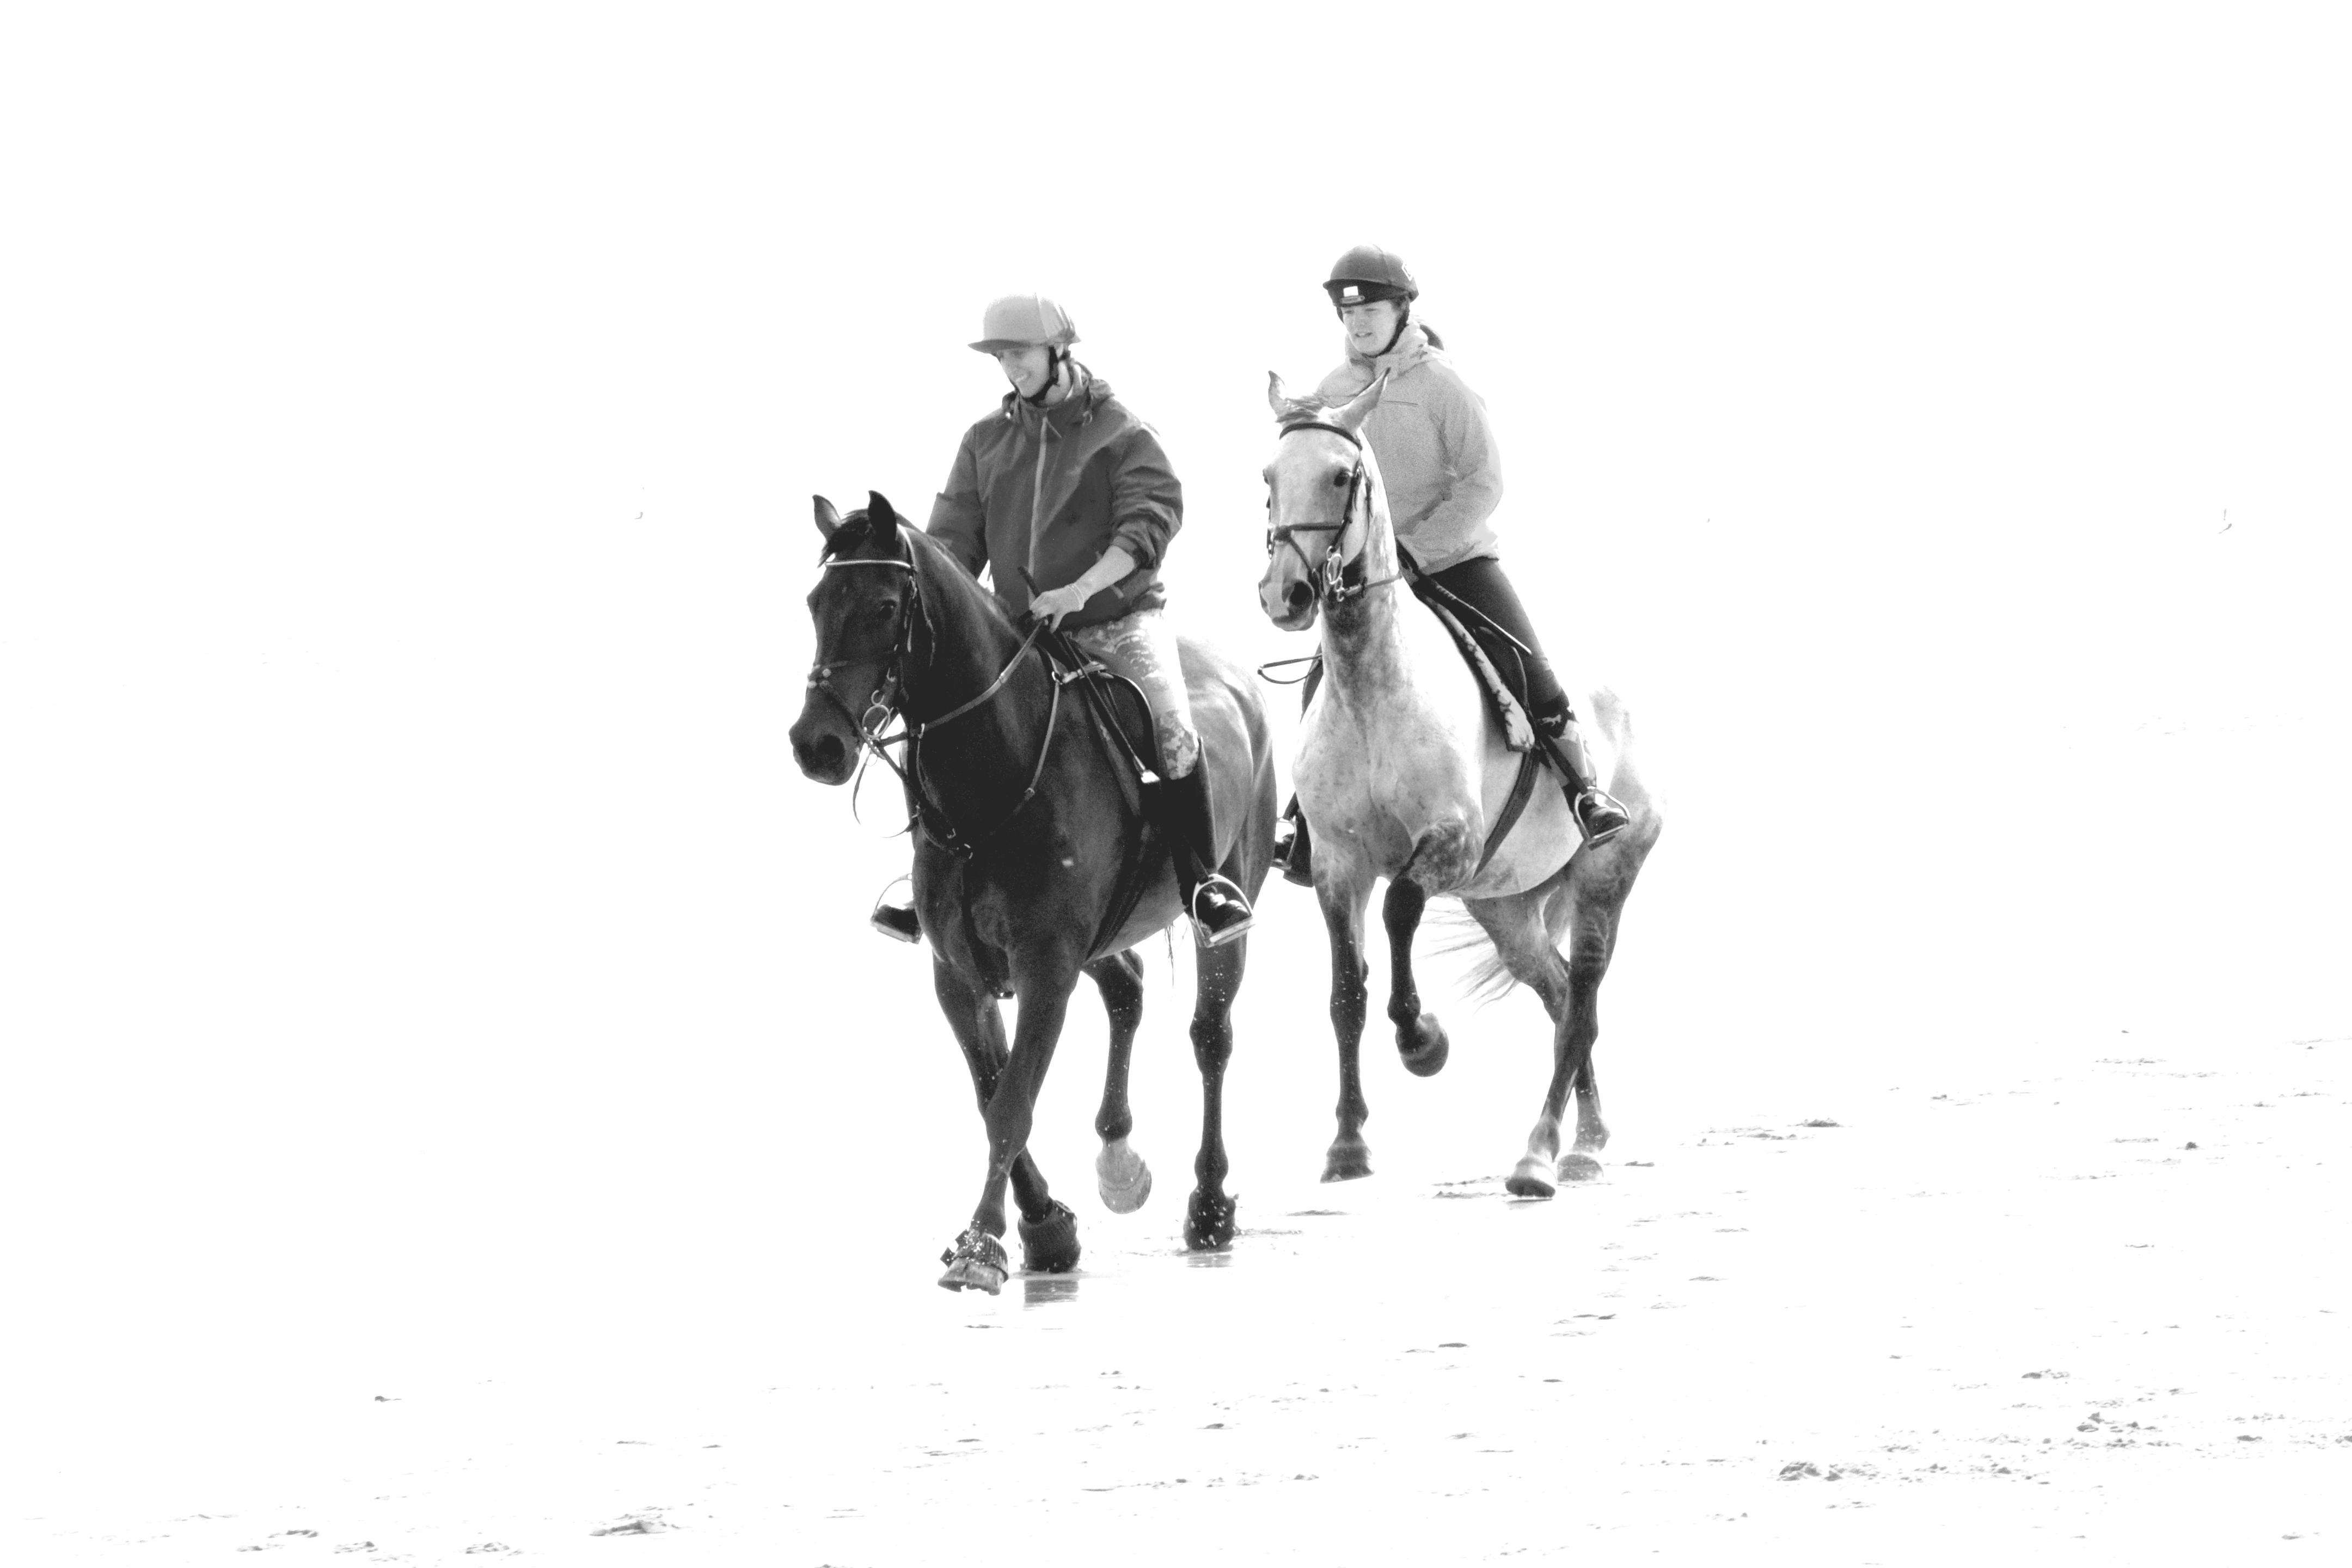
This was an image taken on Fraishthorphe Beach on the east coast of England. Processed in Affinity Photo on the iPad I was able to create a hi-key finish thus isolating the riders from the otherwise fairly boring background. The hint of the beach still exists in the foreground from the ridges and shadows farmed by the sand. The final step was to de-saturate and adjust the contrast.
-
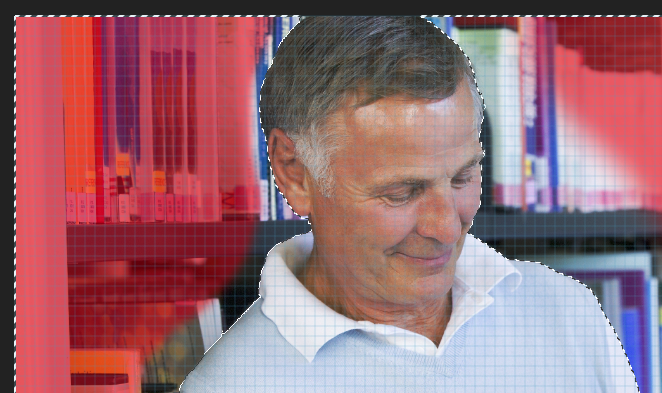
Hey there! I want to access templates I can save in affinity photo (for example HSL). When I'm in the RAW menu I know how I can access my saved settings, but when I'm working on adjustment layers I can save my settings as well. In the end I'm a little confused, because I do not know how to access the saved settings Already now thanks for your help!
-
Hello Some new features for affinity photo 1. Possibility to open an infinite number of layers. Because right now from 15 16 I can no longer have access to background layers 2. Have the ability to make a quick selection on a layer mask. 3. Copy paste a layer mask onto other images simply by dragging it onto a layer. 4. Integrate multiple images on a project so you can crop an image without having to do it on other projects, save and add an image. Simply have in a document several separate images to cut or retouch separately to then add to the single image slide over each other. 5. Make an affinity photo interface closer to the computer interface 6. Make a more simplified interface with the interface selection directly in the interface the basic interface of retouching 7. And move the retouching filters to a search bar at the top with search by name. Because at the moment it is difficult to find a filter quickly by spanking all. 8. Add more fonts to the text. Or the possibility to download via internet 9. Decrease or move the adjustment filter 10. Have the ability to modify and move each interface, icon and search bar as we wish in the interface 11. Have a closer interface than Photoshop CC if possible .. with all the features, retouch, filter at the same places instead of looking right to left
-
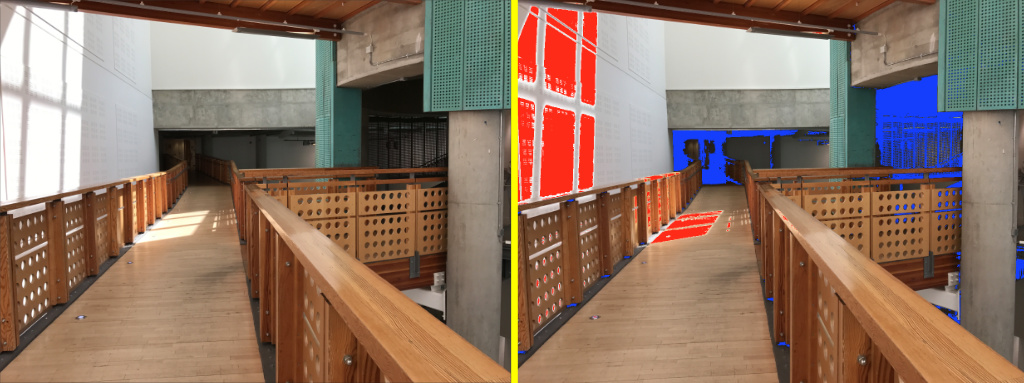
 Hello All. Long time lurker, now trying to get a bit more serious with the current production version of Affinity Photo on my Mac. Apple's Aperture has a "Show hot and cold areas in your photos" viewing mode. It's a convenient way to highlight areas at the extremes of exposure, allowing you to pull back adjustments just enough, for example. Is there a similar viewing mode available in Affinity Photo? I've had a look and I don't think there is anything close to this - but I'd love to be proven wrong! Here's a quick with/without example. On the right, the red indicates areas which are blown out and the blue shows areas of near total darkness. Cheers, Gary