GaryLearnTech
-
Posts
339 -
Joined
-
Last visited
1 Follower

Recent Profile Visitors
4,695 profile views


.thumb.jpg.2ac1b0424a6896c349d3d16eea40c7f3.jpg)

-

V1 tutorial?
GaryLearnTech replied to FeltedFeather's topic in Desktop Questions (macOS and Windows)
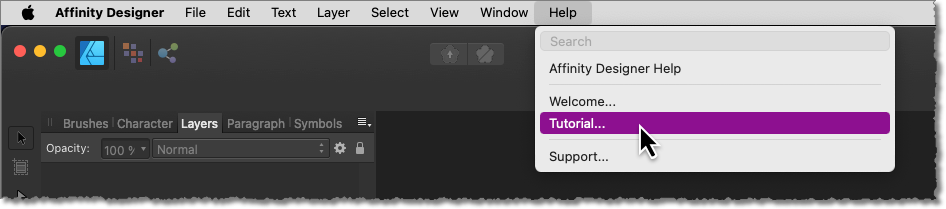
For v1, the official collection on YouTube is easily accessible directly from within the app: I presume the Windows version has a similar option. (Designer v2 has a slightly more comprehensive selection of options under the Help menu, and names have changed slightly, but you can still access the Tutorials from within the app in a similar manner.)
-
VIDEO EDITING SOFTWARE
GaryLearnTech replied to Shelly's topic in Desktop Questions (macOS and Windows)
Another possibility - depending on the job requirements and your own experience/skills - could be to use either PowerPoint or Keynote to produce the presentations. (Optionally, produce some of your graphics using either Affinity Photo or Affinity Designer.) Then, using the timings set in the presentation - along with any fancy transitions between slides - export to movie/video… -
Converting or exporting to DOCX format
GaryLearnTech replied to TBA's topic in Desktop Questions (macOS and Windows)
Another possibility would be to export your document as a PDF open the PDF in Word then save it as a native .docx file The success of this will depend to some extent on the complexity of your original design – some sophisticated design aspects might be simply impossible to replicate in Word. But give it a try – you might be pleasantly surprised at how much comes through. -
Hi @Pmartel Thanks for clarifying what you're doing. Yes, that definitely looks like the official download. Note that macOS is saying that the file is damaged. It's not saying that it's malware. I might be thinking of another forum/context where I've heard this in the dim and distant past, but what happens if you try the same download in another browser, such as Firefox instead of Safari? Finally, just double-checking to at least hopefully rule it out - how much free disk space do you have left? You mentioned that you had 1TB of storage, but not how much free space remained. According to your screenshot, the AP2 DMG file is almost 800MB. The app itself, when you copy it to the Applications folder is going to want another 2.8GB. If you've anything less than, say, about 5GB free, then you're running pretty low on space and that might be related to this problem. If you're not in a habit of shutting down overnight (or at least occasionally rebooting your Mac), then you could potentially free up some space by doing a reboot. If that makes a notable difference to the free space, try the download again.
-
Hi @Pmartel and welcome to the forums! Was this the official download from Serif themselves? It certainly shouldn't behave like that (obviously) and, importantly, I don't recall seeing other similar reports. If it was from a site you got from a Google search, please try either of the links below. (Two different starting points, though they both end up in the same place…) https://affinity.serif.com/en-gb/trial/ https://store.serif.com/get/universal-licence-2/trial/ If there is a problem with the official download, then hopefully one of Serif's own support staff will pick up on this in the next day or two.
-
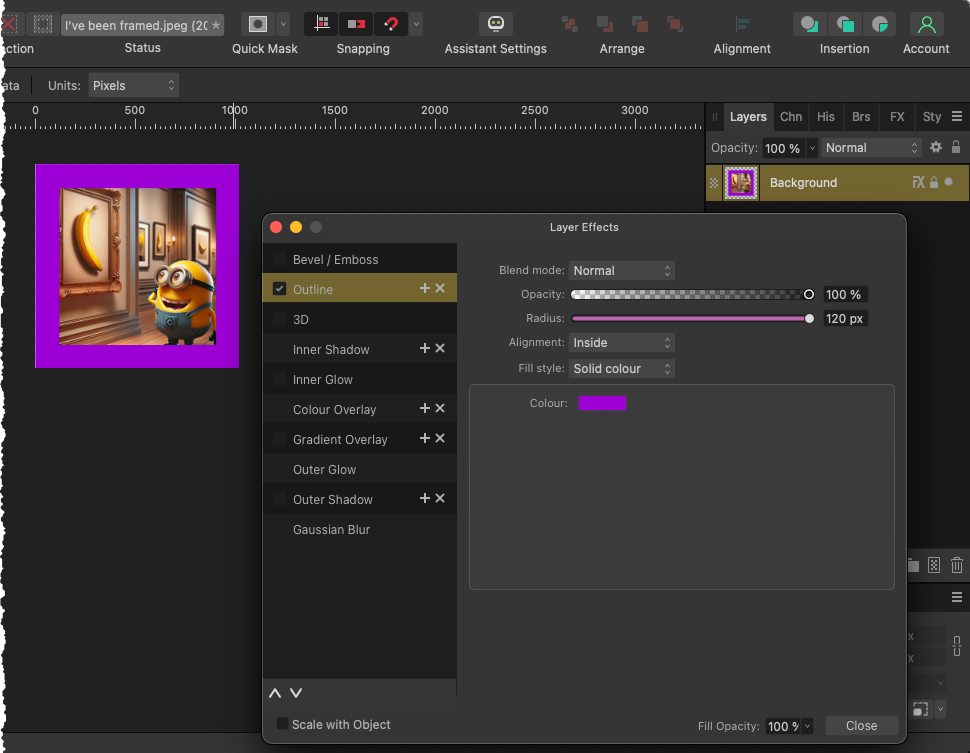
Hi @DianeF I think it maybe depends on what you mean by frame. A simple frame can be added easily by adding an Outline from the Layer Effects collection. In the example below, I've added a single purple frame to the background layer. You can create multiple nested outlines with different radii to create more complex effects. You might also experiment with the Bevel/Emboss or 3D effects. NB if you try this and it doesn't initially seem to work, check that you've set it to be displayed inside the image (Alignment: Inside) instead of outside the boundary of your image. Check also that the radius is large enough. If you mean something more ornate, such as a physical frame, then you may have to search further afield for downloadable frame kits. For example https://www.google.com/search?newwindow=1&rls=en&q=free+picture+frames+PNG&biw=1440&bih=2032 You'd find something you liked and open it as a layer above your own photo.
-
 michie reacted to a post in a topic:
Upsizing program that works with Affinity photo?
michie reacted to a post in a topic:
Upsizing program that works with Affinity photo?
-
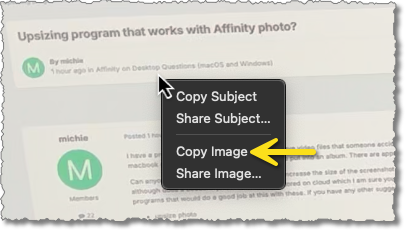
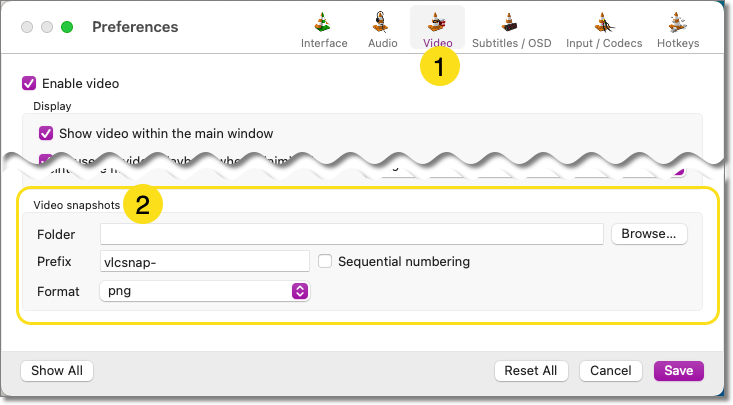
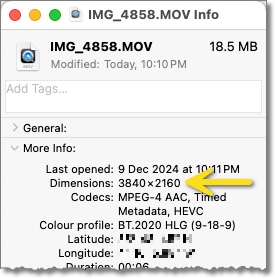
It may well be that your video is already sufficiently hig-res for your requirements. It may, in actual fact, be getting scaled down to be displayed on your MBP display so you can take your screenshots, which you now want to scale back up! Open your video in QuickTime Player - probably the default if you simply double-click on the file - and select Window > Show Movie Inspector. Or just press command-I. The file's resolution can be found in the General section. Or, in the Finder, simply select the file and choose File > Get Info and look under More Info > Dimensions. Assuming the resolution is large enough in its raw state, try this… Open the file in QuickTime Player and size your playback window to suit - it does not have to be viewed at 100% for this to work locate your first position and pause playback right-click anywhere on the video and select Copy Image (not Copy Subject - that will attempt to do background removal first, though this might be worth exploring for some of the images?). Even if the video is only displayed at, say, 33% of its full size, the Copy will grab the frame at 100%. Jump over to Affinity Photo and select File > New from Clipboard - or just press option-shift-command-N Process as required - or simply save for now as you work through the video's timeline. Repeat… Alternatively, you could use the free and open source cross-platform multimedia player "VLC media player" instead of QuickTime Player. If you don't already have it, it can be grabbed from the official site here: https://www.videolan.org. It appears to have a dedicated snapshot mode. Go into the Settings > Video screen and set a default location for the VLC screenshots to be saved to. Then, in a slightly different workflow to the QuickTime Player suggestion, work through the video timeline and harvest all your snapshots in one pass. Pause when you want a frame and either right-click anywhere on the frame and select Snapshot or select Video > Snapshot. Or just use the keyboard shortcut option-command-S. Then resume playback until you're at the next location and repeat. Once you have your collection of PNG files, you can then process them at your leisure in Affinity Photo 2.
-
@jimh12345 I was looking at the Help pages for details about some of the different Blur filters a few days ago for something I've been tinkering with. I wonder if careful area selection and then application of either the Bilateral Blur or the Maximum Blur might help with your individual night photos?
-
GaryLearnTech reacted to a post in a topic:
V2.6 News
-
Ovi - PixelInd.com reacted to a post in a topic:
Affinity Publisher Table of Contents not listing some headings that are styled appropriately
-
Welcome to the Forums, @Ovi - PixelInd.com ! Good to know that post was still of use.
-
 GaryLearnTech reacted to a post in a topic:
Affinity Publisher Table of Contents not listing some headings that are styled appropriately
GaryLearnTech reacted to a post in a topic:
Affinity Publisher Table of Contents not listing some headings that are styled appropriately
-
Ovi - PixelInd.com reacted to a post in a topic:
Affinity Publisher Table of Contents not listing some headings that are styled appropriately
-
jhoandsgnr reacted to a post in a topic:
¿How make a mesh gradient? (Adob3 Illustrator style)
-
Greg deJong reacted to a post in a topic:
Adjusting numerical fields with mouse scrollwheel
-
Hi @Greg deJong I'm not going to comment on possible inconsistencies between the different apps, but I would like to suggest that you try holding down a modifier key while running your scroll wheel up or down. The quick screengrab below shows adjustments of 1px at a time, then 10px and finally then 0.1px at a time. On my Mac, the shift key gives the 10px increments and the option key the fractional changes. 2024-09-15_21-26-18.mp4
- 4 replies
-
- 1
-
-
- affinity designer
- affinity publisher
- (and 3 more)
-
Affinity Photo: Procedural textures
GaryLearnTech replied to jsampson45's topic in Desktop Questions (macOS and Windows)
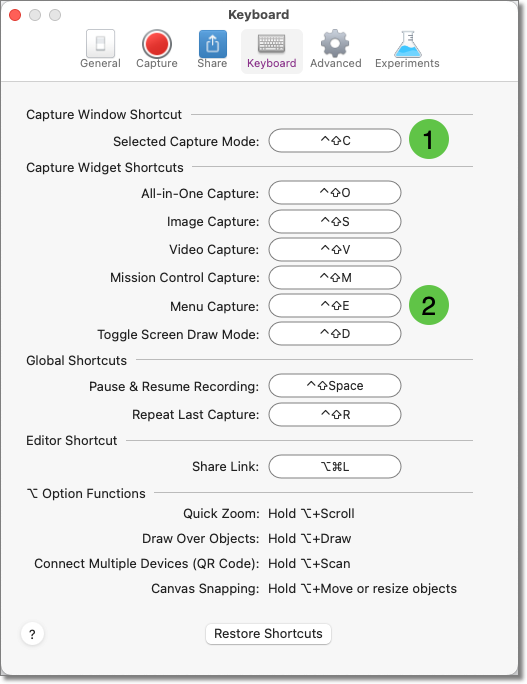
I wonder if you were simply trying to use Snagit's big red button? I use the Mac version "all the time" with the basic keyboard shortcut of ctrl-shift-C (the first one highlighted below). But there's also a menu specific keyboard shortcut that, if it exists on the Windows version, might suit you better for this current requirement?
-
Dr. Alex reacted to a post in a topic:
Affinity designer V1, Apple Pencil pro, M4 IPad
-
kat reacted to a post in a topic:
2.5.5 update features, bug fixes?
-
GaryLearnTech reacted to a post in a topic:
2.5.5 update features, bug fixes?
-
2.5.5 update features, bug fixes?
GaryLearnTech replied to kat's topic in Desktop Questions (macOS and Windows)
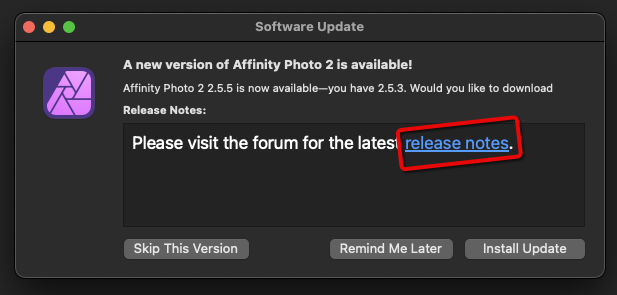
It sounds like you may have already updated, but if you haven't, you can simply click the link that's provided by the apps. That page then offers the same link that @carl123 provided.
-
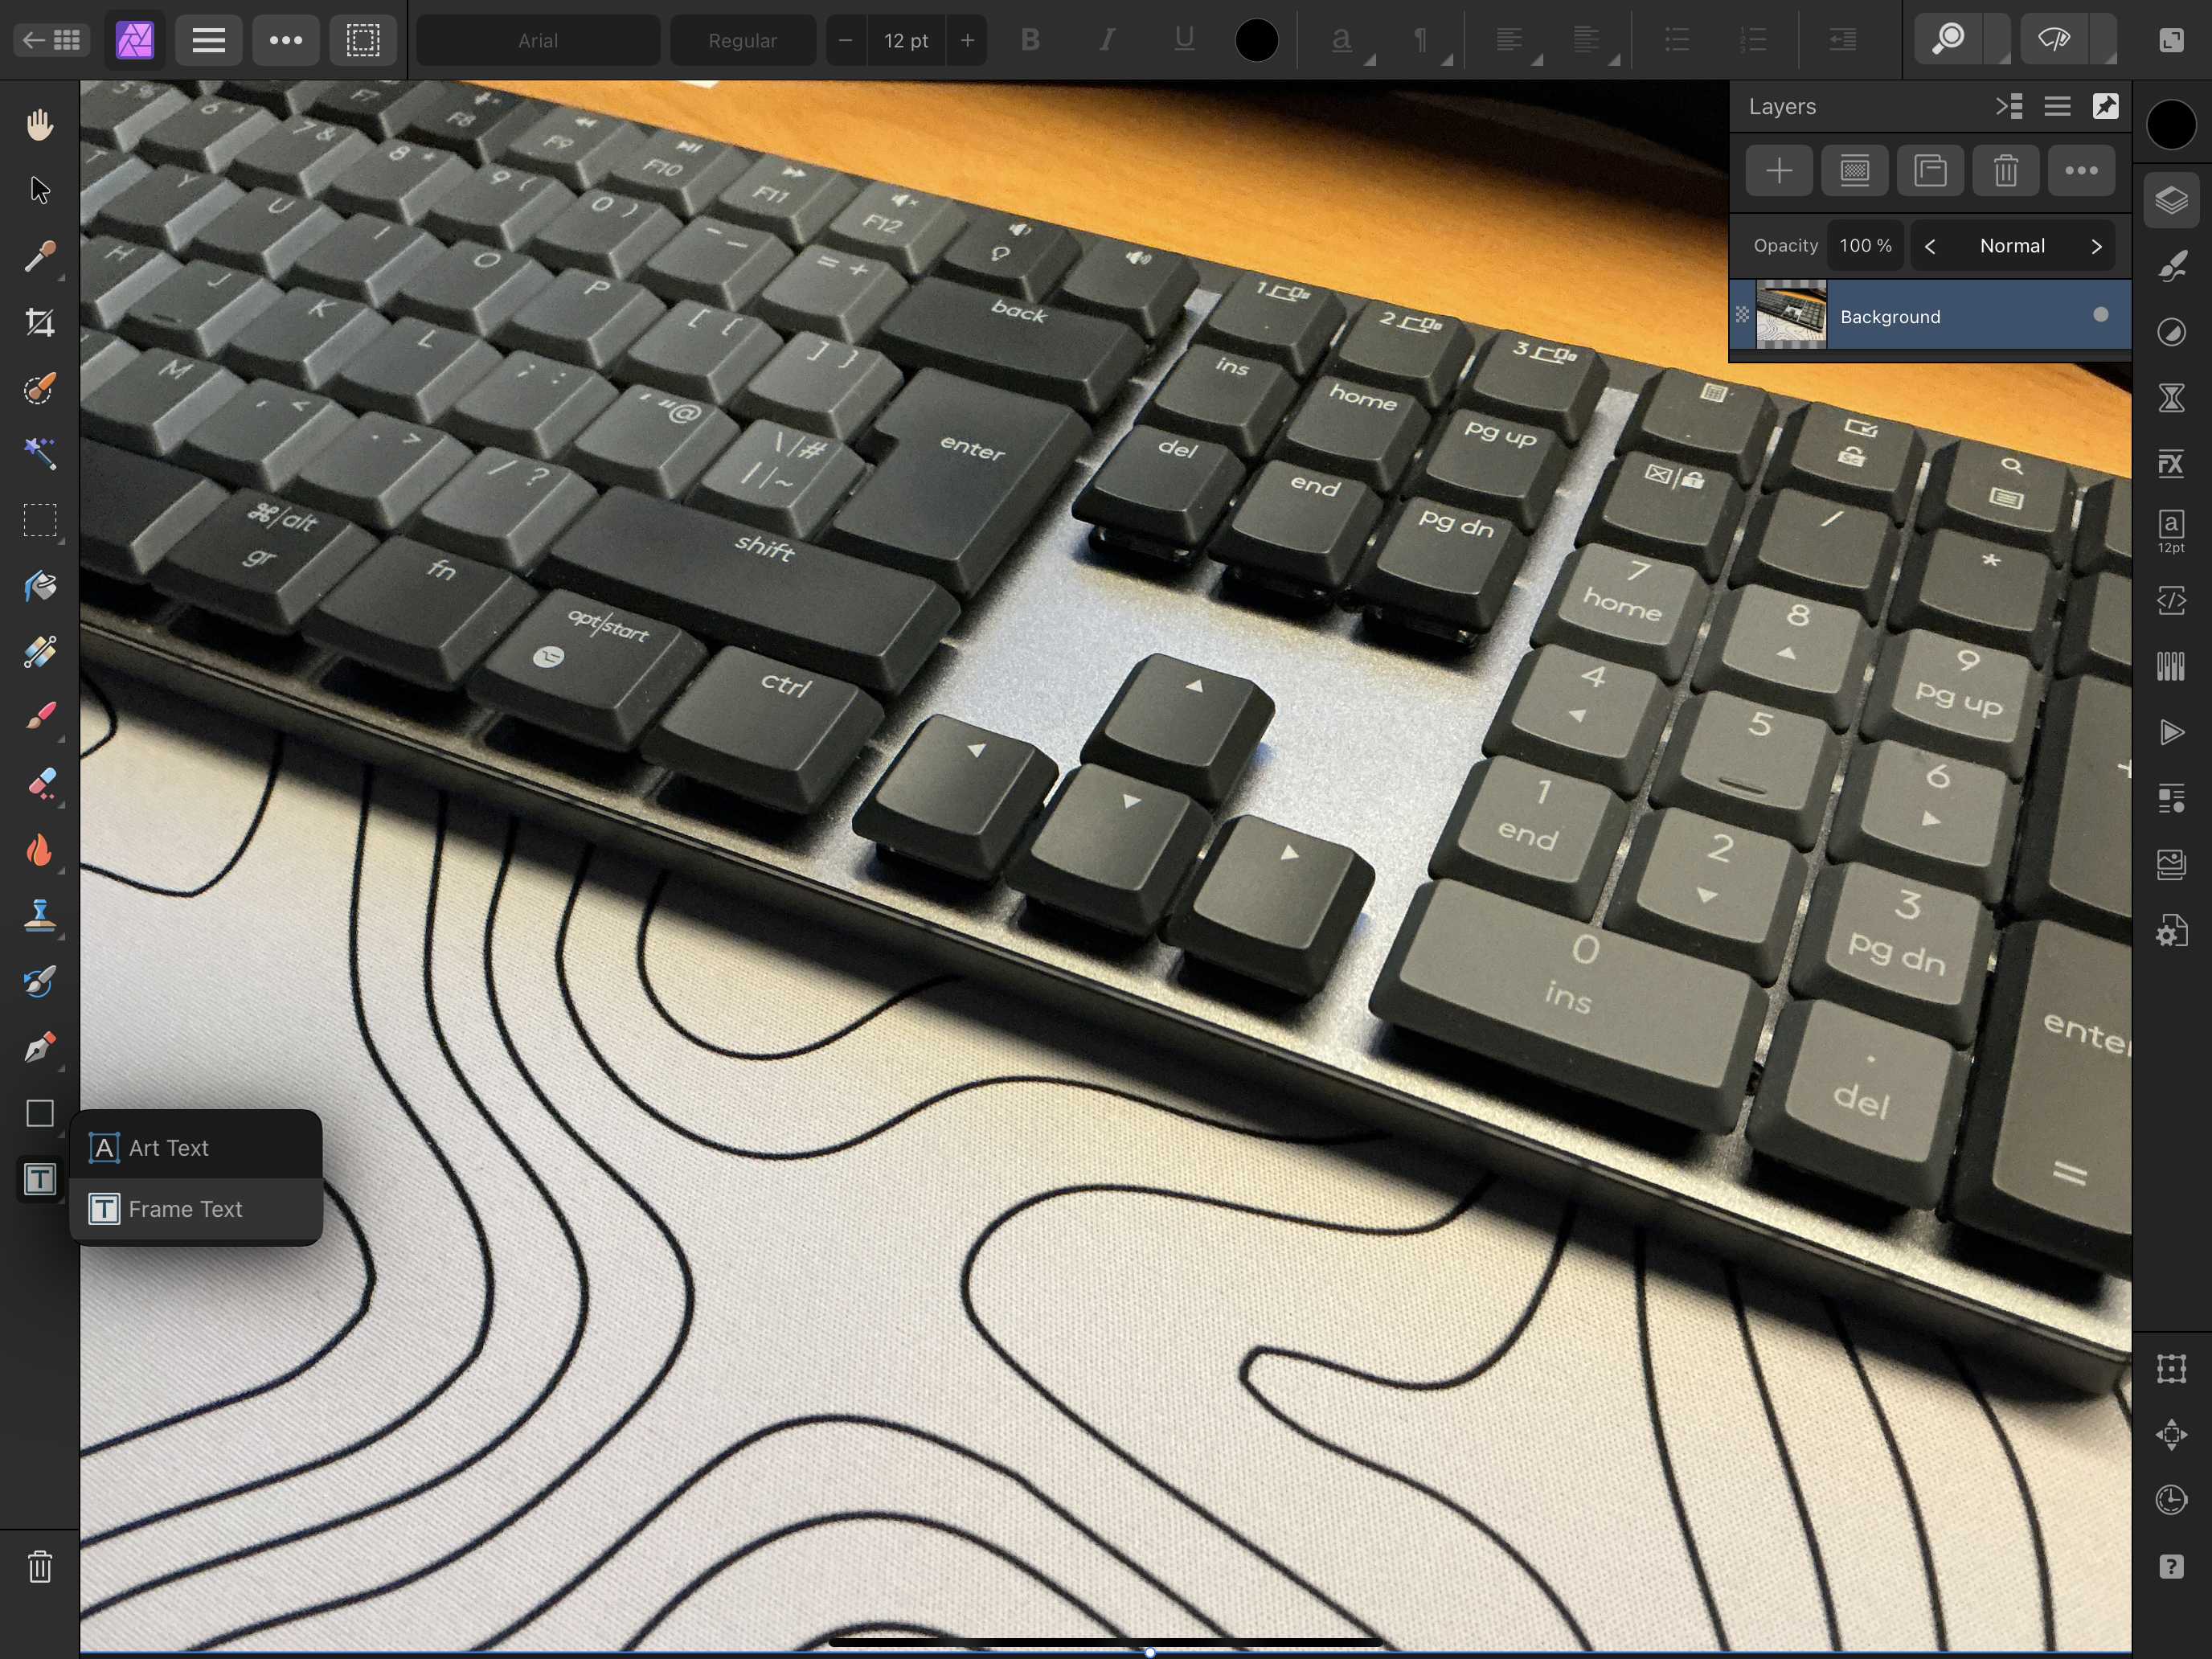
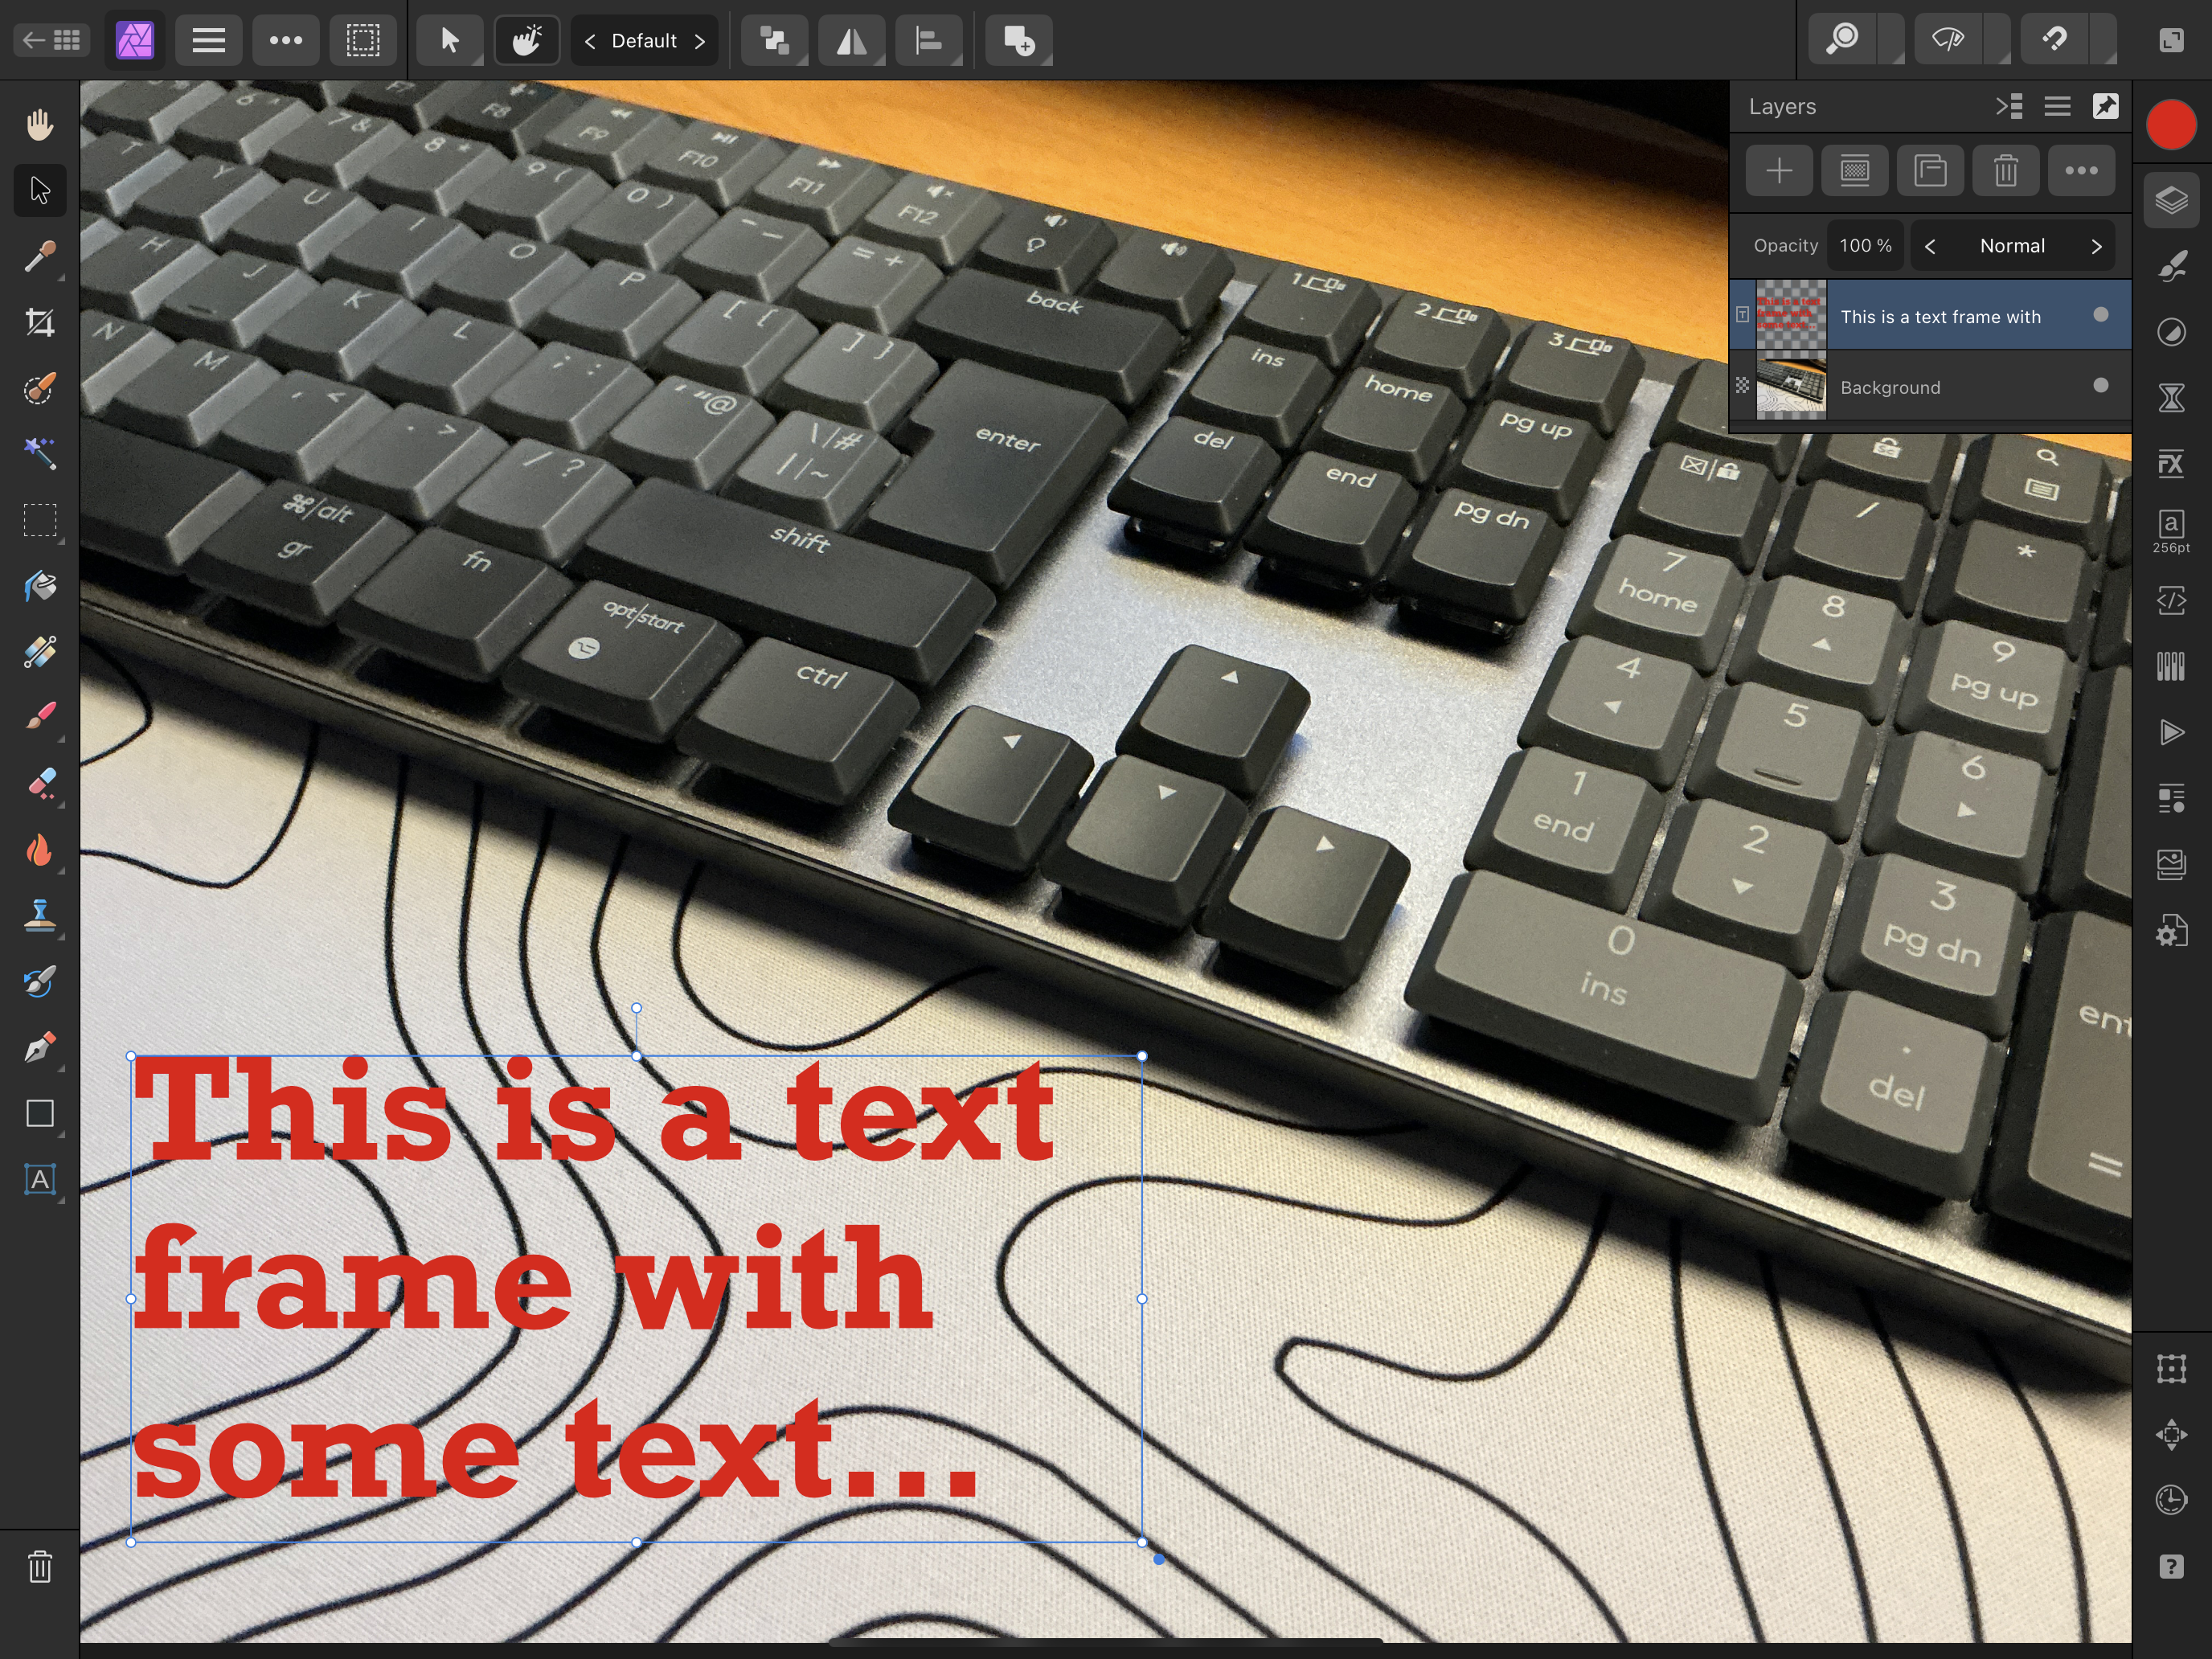
No special font installation is required. Many are available without having to do that (although, of course, you can install specific fonts if required). When you touch and hold the text tool button, you get the choice of two tools: Art Text and Frame Text. You can see the choices at the bottom left of the first screenshot. Once selected (I used the Frame Text option), you can drag out a frame and enter text, which can then be formatted, as shown next. You can see the frame is selected in the Layers panel. Hope this helps?
-
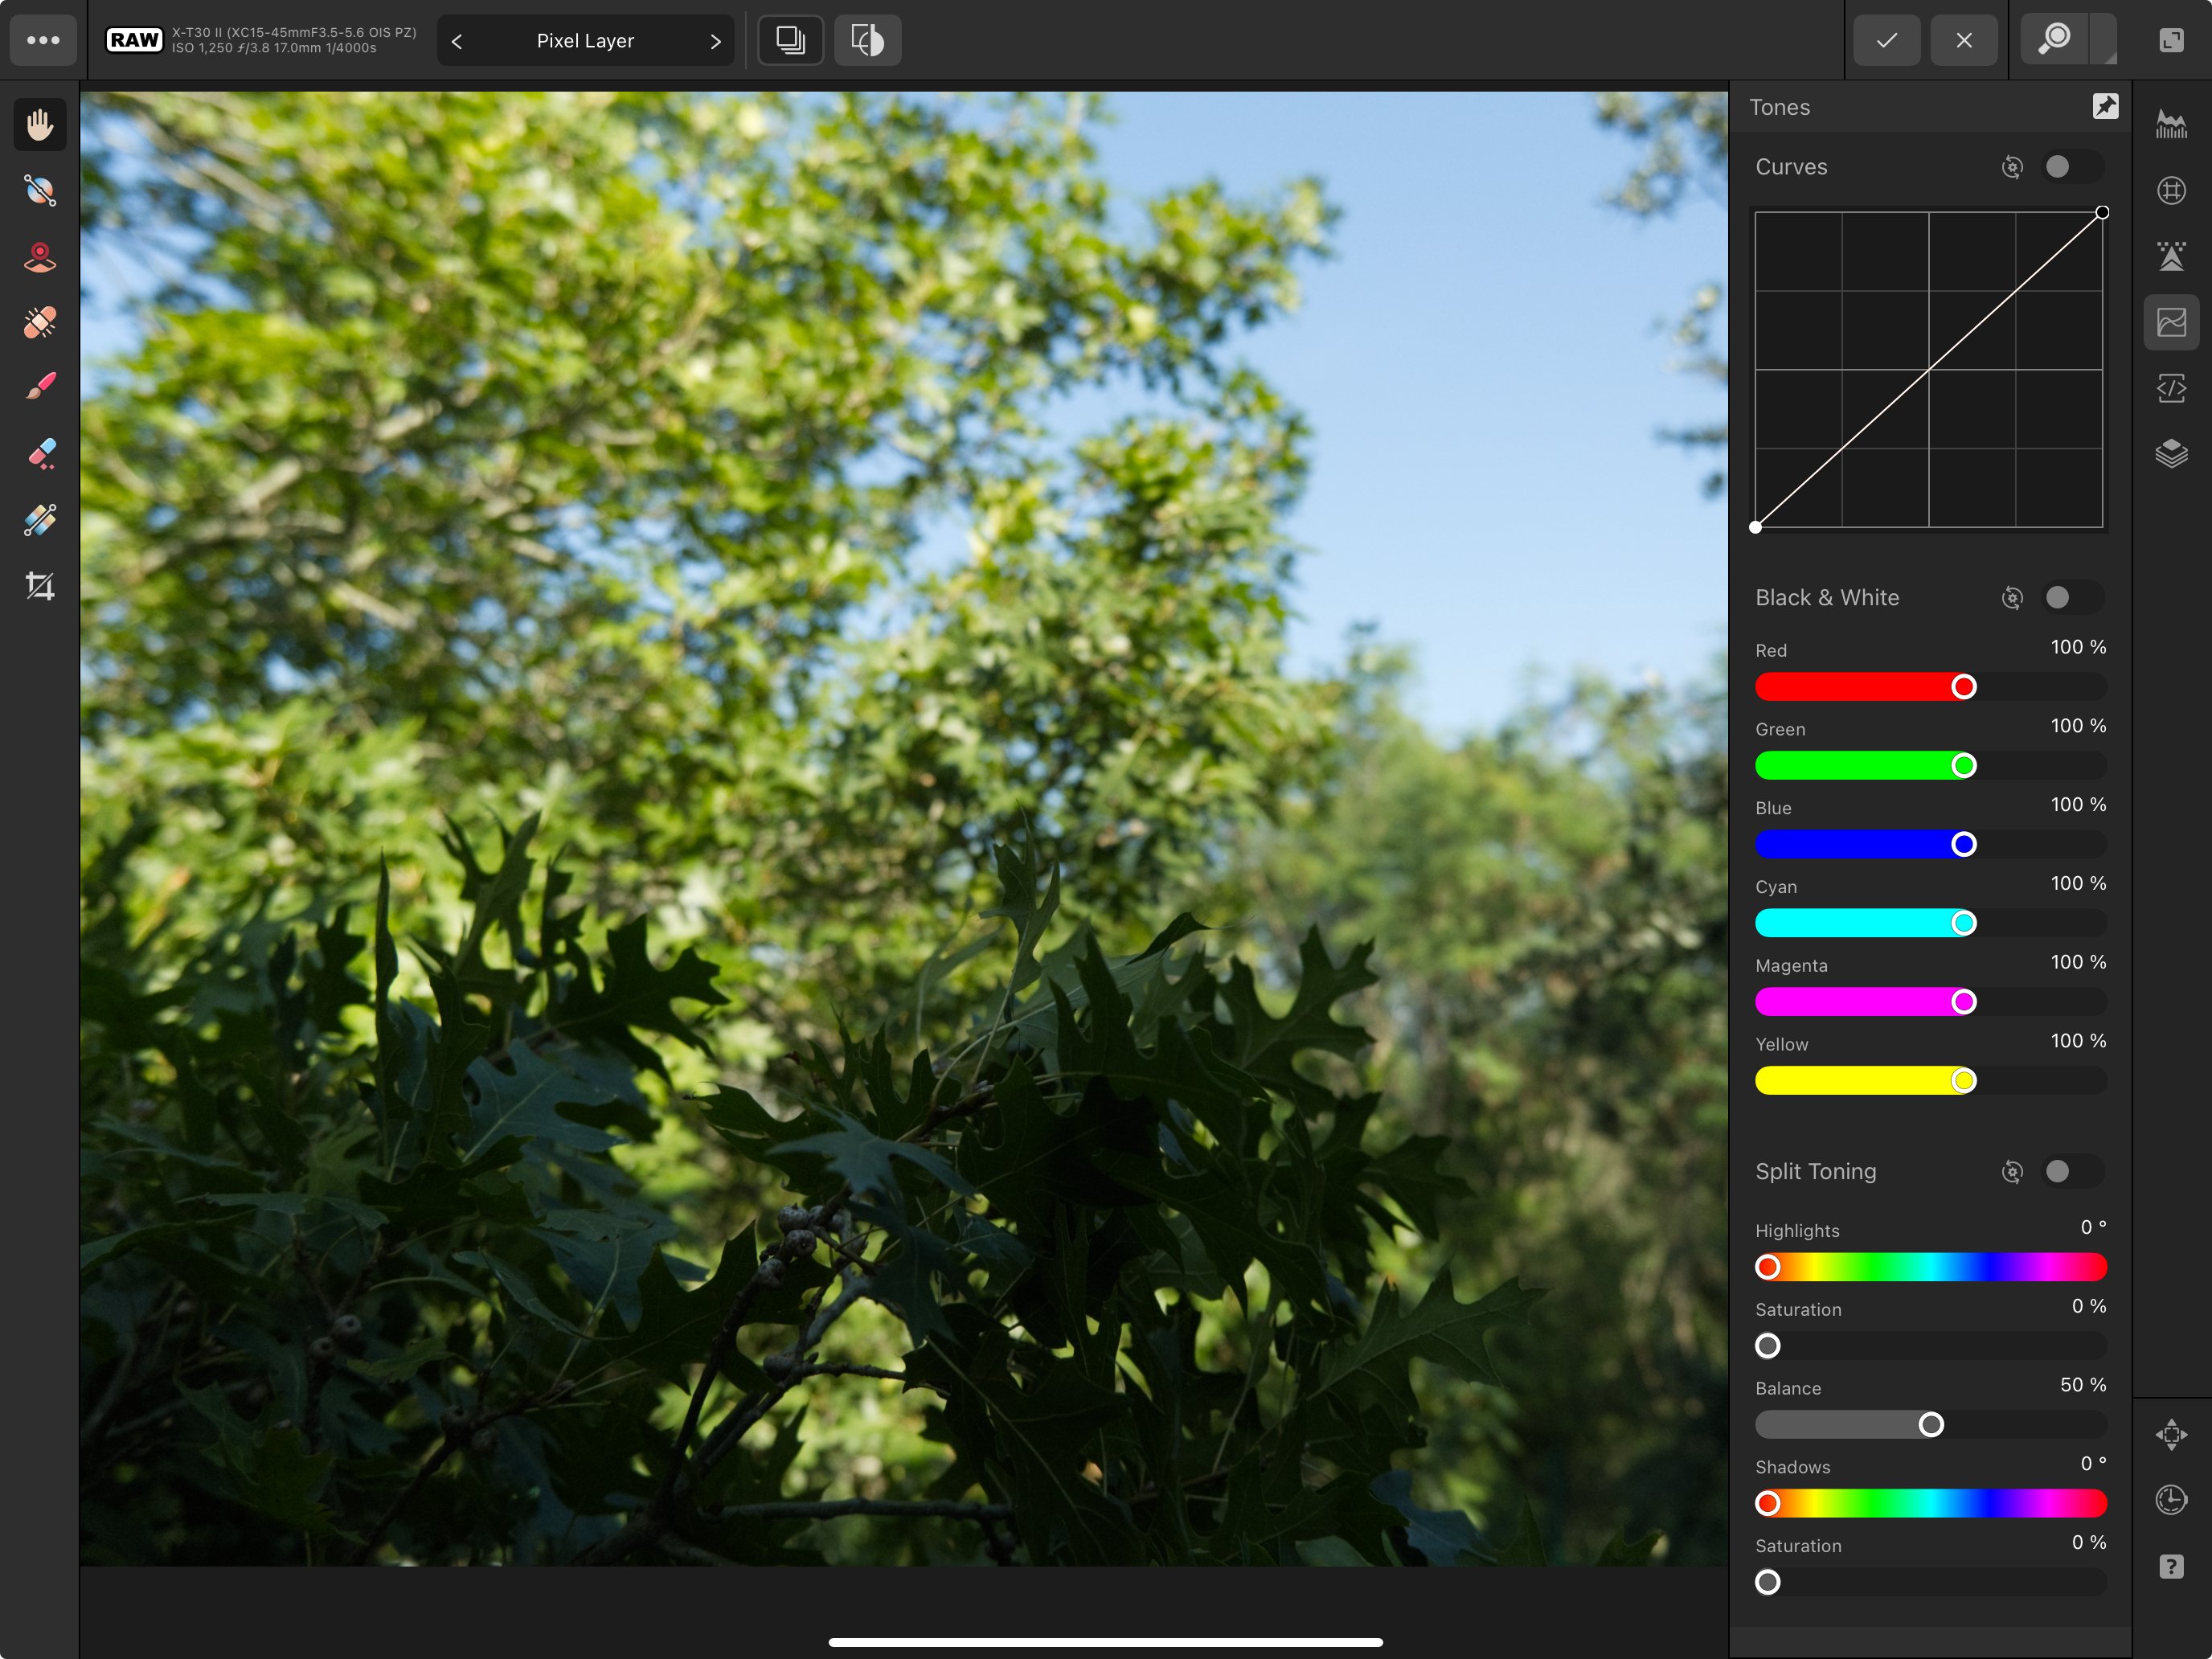
iPad Pro 13" (M4), iPadOS 17.6.1 Bad(?) news - it loaded fine. I've not been a raw shooter for many years, so this was probably the first time I opened a suitable file in Develop mode. 99.99% certain that's the case on the iPad at least, where I have only recently started to explore the mobile Affinity apps (in contrast to experience on the desktop versions that goes back years). In case it's significant, my workflow here was to download the sample file on my Mac, move it into my iCloud drive and open it from there on the iPad from the Open Document option within Affinity Photo.
-
Hi @Furry I've not done much with Publisher recently, but have used inline graphics quite a lot in the past. I would occasionally apply the text wrap to the text frame by accident, rather than to the graphic. I wonder if that's what's happened to you? Easy to check - ensure your graphic is definitely selected and then double-check the text wrap setting again… If that doesn't explain it, sharing your document - or a small extract containing an example of the problem - might be required to get to the bottom of this.