Search the Community
Showing results for tags 'AP'.
-
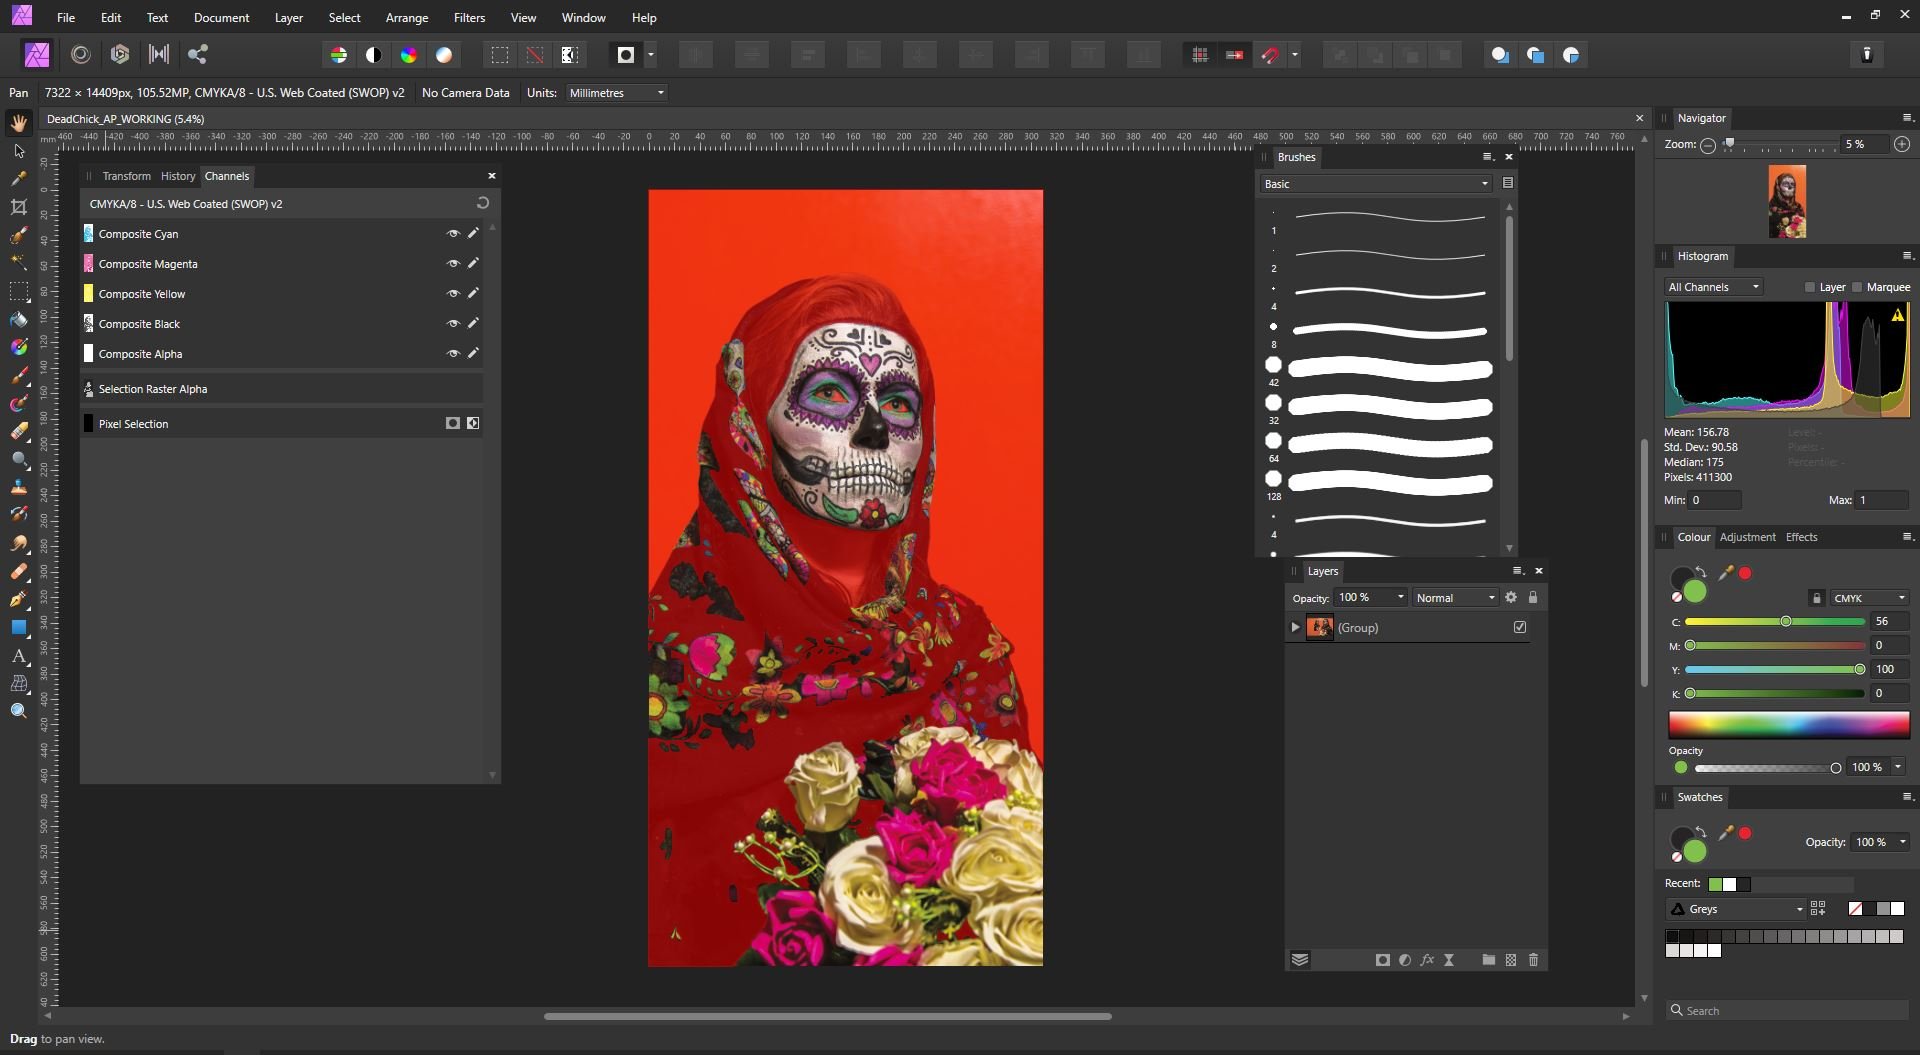
 Hey all, I'm struggling to create and export an Alpha Channel from Affinity Photo (v1.7.1.404) to a CMYK .TIFF image. The image has been masked out and I'm trying to make a named Alpha Channel to be used as a Spot Colour for digital print in an Onyx RIP (To be names 'Spot 1' which refers to a Spot White Ink). Please see the attached screenshot for the masked out area which I'm talking about. I've followed several other posts and YouTube/Vimeo video's and it's just not clicking for me. The image will export as a .TIFF but it won't export an Alpha Channel no matter what I try. Methods I have tried: 1. Mask out areas, on the 'Selection raster Alpha' channel, right click, and 'Create Spare Channel' and name it 'Spot 1' 2. In the layers under Adjustments, create and Channel Mixer and pull up the Alpha slider. What am I doing wrong? Thanks for your help!
-
Hello Affinity team.. i created a poster and all set to export ..but the problem comes when iam exporting as JPEG from AP...some strange glitches are coming in the final export. The only solution i found is to open that file in Affinity Designer and export it ..then everything is fine..i don't know why it is occuring ..may be its a bug ..That's why iam reporting here. Please solve this issue asap..
-
 I'm not using the AP on daily basis, thus using a lot of time to find out how to proceed. AP is very versatile on vast selection of all kind of useful features. All are described only for WHAT but not for HOW. That's why I'm now asking help to probably a very simple task, but HOW: Example tasks 1) Old slide scans with strong change in colour balance which can not be corrected by white balance adjustment, but using histogram level adjustment the correction can be done in most cases perfect. 2) A bunch of photos shooting through coloured window (thermal filtering e.g. in skyscrapers), process is about the same as in case above. How to save the level settings and how to automate the adjustment to the rest of the same batch?
 -
 Is there a way to find out where the one or more focal points are on the pictures you work on in AP?
 -
I’m posting this in iPad Support & Questions as this was my initial requirement; however, I believe answer may apply to AP Desktop. Is it possible to import Procreate .brush sets? If yes, please share your process. Thank you.
-
 Hi There, I have been using Photo for a while now.. Every single time I open a RAW photo and develop it appears to be blurry and unsharp. I am 100% sure that the photo is sharp, when I go to the export screen it appears even more blurry and unsharp. Exported images are sharp tho. But at this point I feel like I cannot be sure that it is indeed sharp inside Affinity Photo. Is this problem familiar and is there a fix for this? Sincerely, Roel
 -
I am wondering if any further improvements are planned for the crop tool? One trick I enjoyed from PS is proportionally cropping by holding the "alt" key, I noticed that as of betas 1.5.x that this is still not possible. Hopefully the gif demonstrates what I am referring to. Thanks
-
 Affinity Photo ver. 1.8.0.585, Dell Inspiron 5770, Windows 10 pro (x64) ver. 10.0.18363 I can no longer get the Macro or Library panels to show in any of the Panel sections. (View>Studio>Macro or >Library) 1. The entries on the Studio list show both Macro and Library with check marks. Keyboard macros Ctrl+Alt+L and Ctrl+Alt+M work as expected in selectiing and deselecting the Macro and Library panels 2. Removing and reselectng Library and/or Macro via View>Studio makes no difference other than adding or removing the check marks. Also View>Studio>Reset Studio does not change the situation. 3. Removing C:\Users\darel\AppData\Roaming\Affinity\Photo\1.0\user\macros.propcol and restarting Affinity Photo does not help. Macros.propcol does get recreated. 4. Adding a user-created macros file by dropping on the workspace does not result in an error but the panels are still not visible. The last time I used the Macro and Library panels was around mid February when they were used together in a floating window separate from the main panels sections. Any help would be appreciated.
 -
 Hi. Retried some image stacking recently, and it is working amazingly well. Bravo. Excited for 2.x. It would be completely usable for me now, for focus and tonal mapping, and panorama. Just wanted to mention that importing any extent (# images) of any kind of stack using X3F (raw format) results in a crash to desktop. However, bringing the files in using a 16-bit (per primary) TIFF works very well. Reading posts here, it mentions that you lose the automatic raw Development persona doing Stack image loads (which makes sense). But it sounds like it is still feasible (though streamlined) using other raw formats. I also know that X3F gets handled a bit differently than other raw formats (it's not using LibRaw). My question was if a Dev could check whether that crash to desktop occurs because AP is treating X3F like other raw formats (maybe there's another existing group that wouldn't use LibRaw, and so would work better with X3F). If so, it would certainly be extremely convenient and appreciated if that could be fixed. If it would be all custom Dev work, then its not high priority, as it is still functional using TIFFs, and its just a bit more prep work. Thanks very much.
 -
 It doesn't matter which file/document I choose, it keeps crashing every time I select Soft Proof. Affinity Photo 1.9.2 Affinity Photo 1.10.0 Affinity Photo 1.10.1 Screen-recording: ap crash.mp4 Attached 3 crash dumps. Let me know if you need anything else. 3e7acde3-1a54-416d-9e0a-970249c96bae.dmp ff9a4068-c6ca-4fd9-92f4-4ff9b80c86e8.dmp 8a4ecb5c-6c97-4035-bde8-0223e82a069e.dmp
 -
 All of a sudden text is behaving weird in AP. Closing and reopening AP, reformatting, and assigning "No Style" to the text to repeat the following doesn't make a difference. I want to manually tab the first line of a sentence (one word only as a closing of a letter) to indent it. When I hit the tab button a second time the next line below (my name) automatically indents every time I hit the tab button. This also happens in regular paragraphs, any ideas?
 -
 I'm recording a macro in AP windows to create a new fill layer and change the fill color. Macro recorder dies when I change the fill color. Error is "can't record set fill". Anybody know a way around this?
 -
The text cursor in AP 1.9.1 is wonky. I created a text block. When I insert the text cursor at the beginning of the last line to add a space, the whole working area shifts to the left and the cursor shifts off the "artboard". I quit AP, restart, and it still behaves the same way . . .
-
Disappointed, not surprised, cannot Edit In Apple Photo and Save 1.8.4. Five Stars for longevity award.
- 4 replies
-
- 1
-

-
- ap
- apple photos
- (and 1 more)
-
 Hi Folks, I'm after some help again.... So I really admire two very very good automotive photographers... Amy Shore and Laurent Nivalle. Both have a similar(ish) style and this extends to their editing process. I have read numerous interviews with both of them and they both mainly use Photoshop (Sorry to swear!) rather than lightroom and I am very keen to try and re-caprture their respective styles but by using Affinity Photo. I have attached two files which are photos from both Laurent and Amy respectively. Can anyone out there point me in the right direction to try and obtain the same style? Obviously I don't want to be copying their styles out right as that is not what photography is all about but I am very curious as to how to achieve this. Thanks folks, hope you can help. Regards Mark All credit for the attached two images go to Amy and Laurent.
-
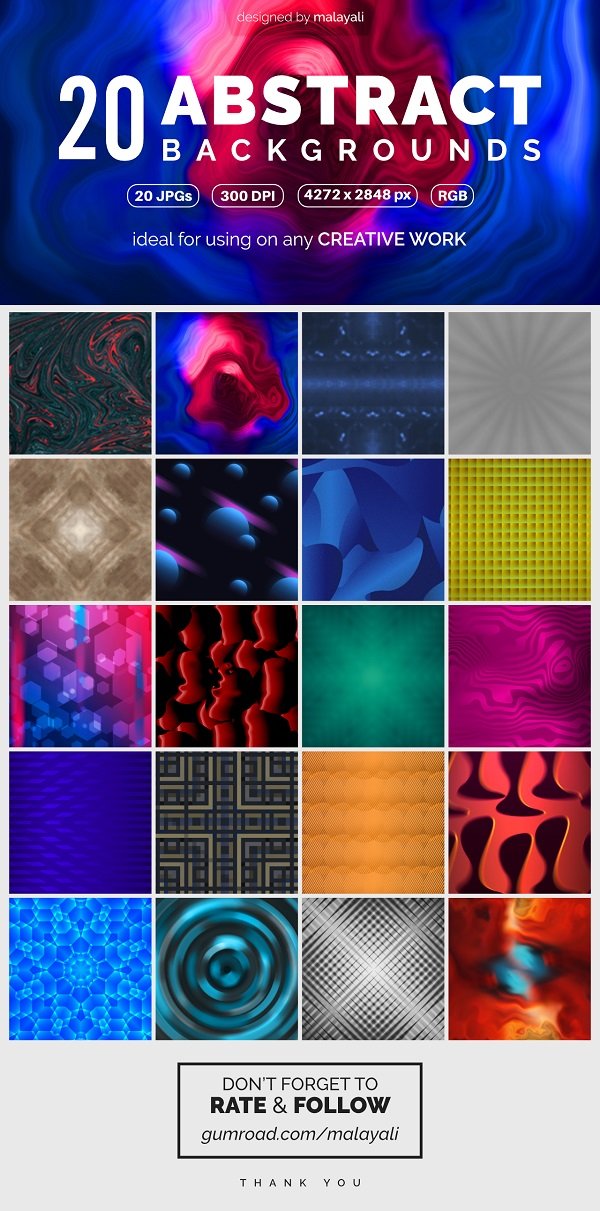
Hello everyone! I've created a pack of 20 Abstract Backgrounds using the Affinity Photo, that can be used for any creative purpose, and made it available for purchase from Gumroad. Feel free to check it out. You can use the code affinity for getting a 10% DISCOUNT! Thank you.
-
 Hi, Sometimes, and it's just happened again now, for some unknown reason, Affinity stops registering my Intuos pro pressure sensitivity. I've tried other programs and the pressure sensitivity is still working for those programs. I have just updated AP to 1.8.3.641, restarted the PC, but it's not working ... I have no idea and this wastes so much time for me trying to figure out what happens... randomly, eventually it starts working again ... but in the meantime I lose hours out of my working day trying to **** about trying to get it to respond again. Does anyone have any pointers? I haven't had an Intuos driver upgrade recently so I know it's not that. I just despair sometimes...
 -
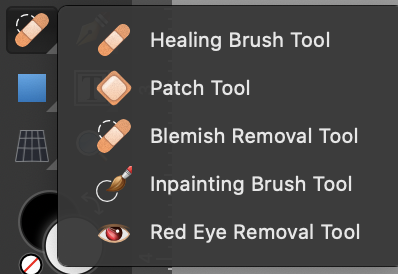
As I read AP Help and watched several tutorials, entering the J keyboard key repeatedly is programed to scroll through the Healing Brush and all brushes hidden within that group. My problem is I can enter J and it will scroll to next brush; however, if I enter J again, no scrolling, my macOS chimes as invalid command or no option and a new brush will not be selected from the group. Attaching info to clarify my problem and brush group.
-
I think someone should reopen this thread for AP 1.8 and Apple Photos round trip Edit In/With and Save. Yes I realize it was not listed in the announced release notes: however, update of projected fix would be appreciated. Thank you. Please don't shoot the messenger.
-
Hello I cannot add a selection in a subcategory of the studio content. the selection never show up on the list of contents. Any idea ? Thks
-
 With CTRL+left click on a layer icon it is possible to create a selection from the contents of this layer. In PS (I know, AP is not PS...) you can use SHIFT or ALT as modifiers for adding to, subtracting from or intersecting with an existing selection. I would like to see this in AP, too. For adding two or more layers to a single selection there is at least a workaround: make a group from the layers you want the selection from and CTRL+left click the group layer icon to get a selection made of the "summed up" content of each of the grouped layers. However I haven't either figured out a way to realize the other operations or how to modify an existing selection with "selection from layer".
 -
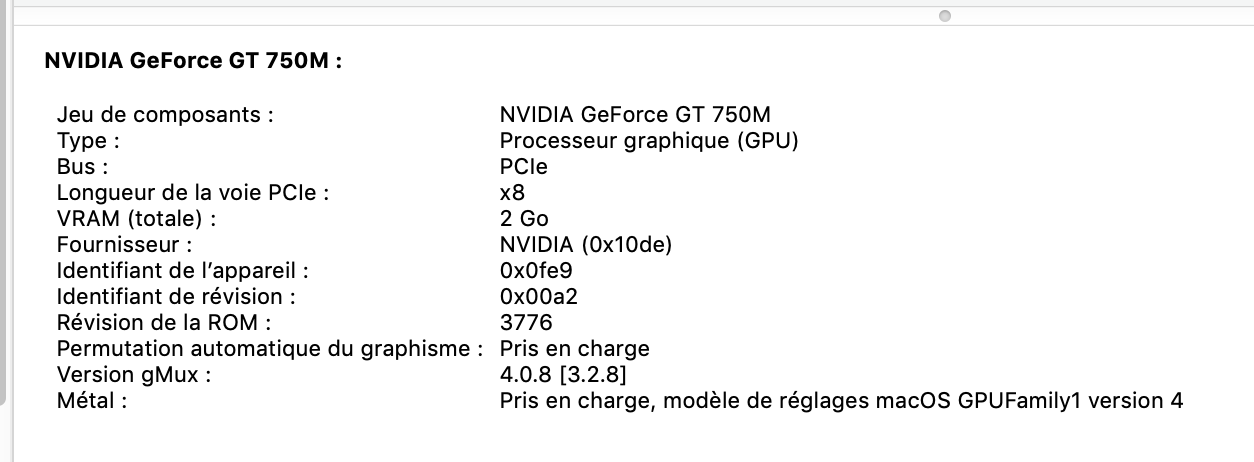
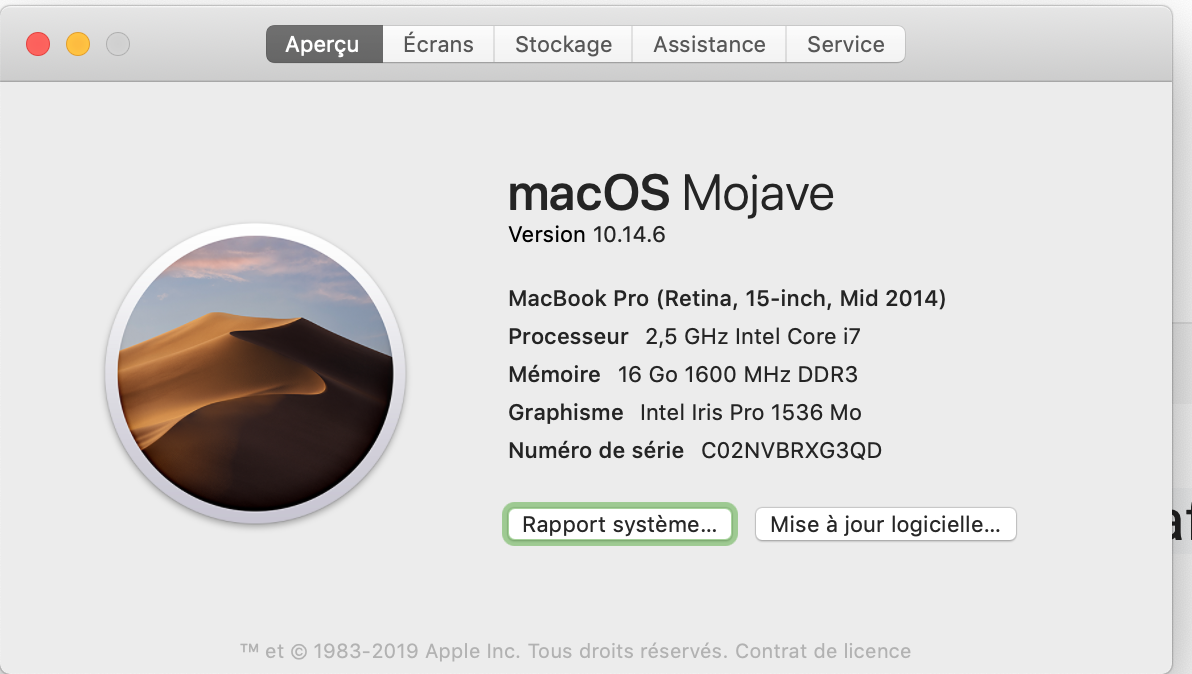
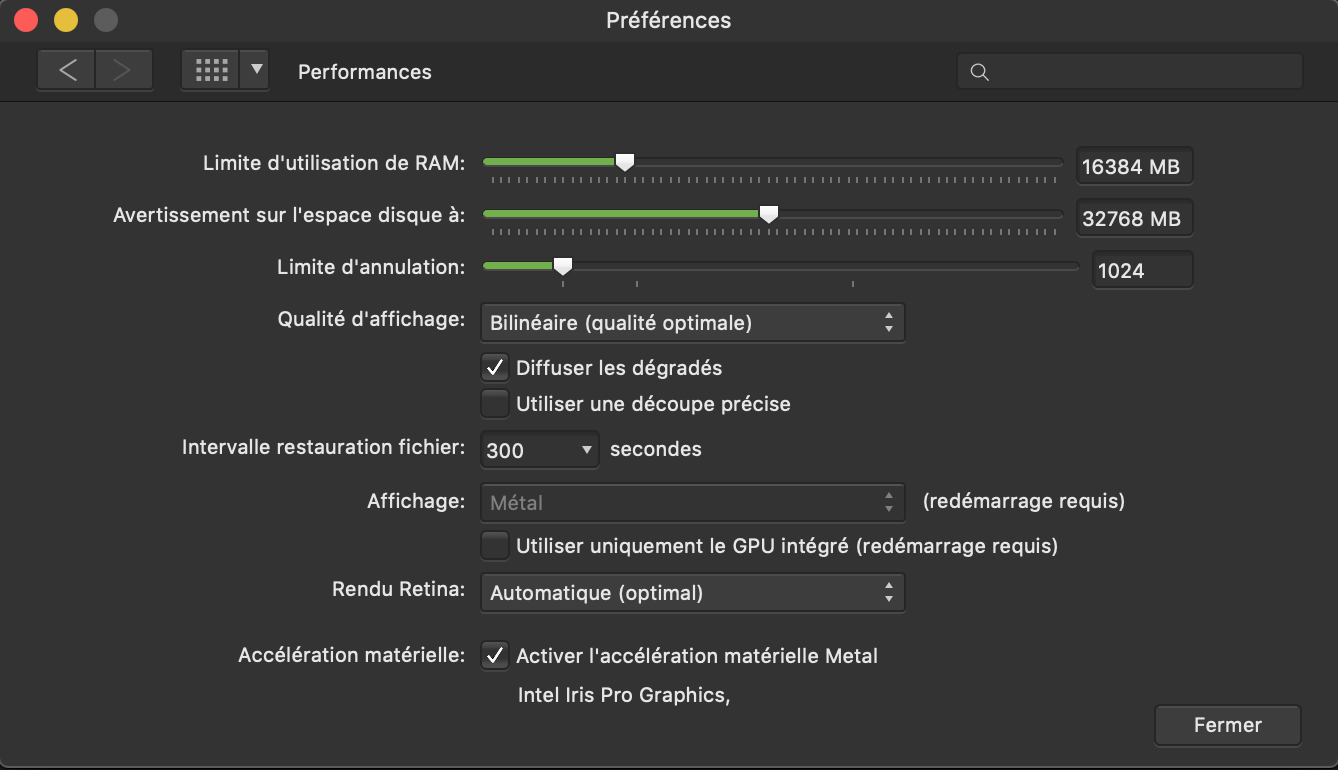
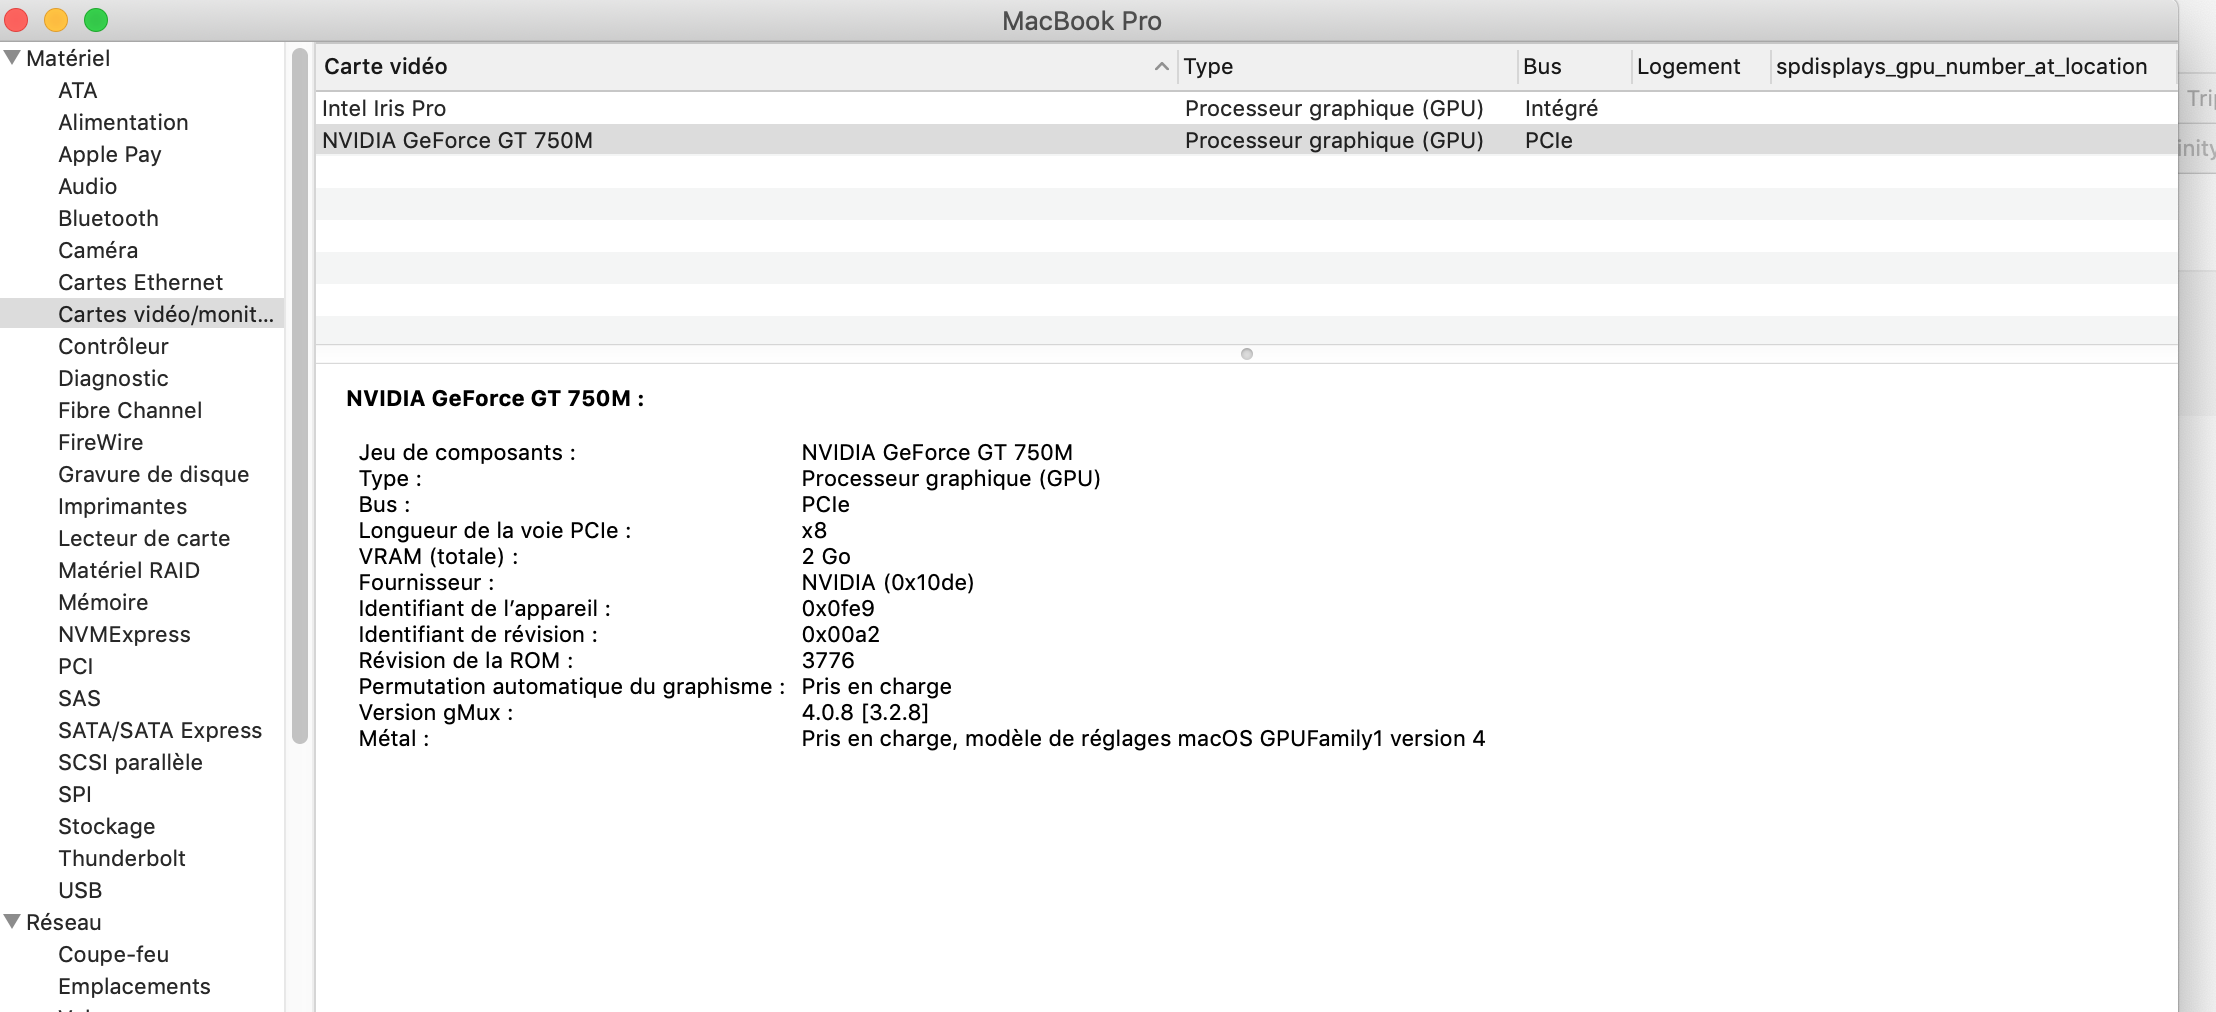
 Hello I have a problem I do not know why metal does not use the Nvidia graphics card, just intel, Thanks
-
 Will DXO Nik collwction 2 work in AP 1.7?
 -
 I've just made the move from Photoshop to Affinity and have had some odd difficulties. One was just resolved thanks to this forum and a new one has popped up. I'm learning to work with raw photos and in develop persona the basic panel is stuck in the middle of the window. When I open a new file to develop that's where the panel is and cannot be moved. Any clues?
-
 This is long time bug. I think it affect only users that are using extra monitor time to time. I guess Affinity softwares think second monitor is still available and missing tools and toolbars are parked right there, behind the MPB monitor space. Resetting corrects the problem but it is nonetheless not good solution if you have to do it daily.