

BeccaT
-
Posts
20 -
Joined
-
Last visited
Posts posted by BeccaT
-
-
19 minutes ago, iconoclast said:
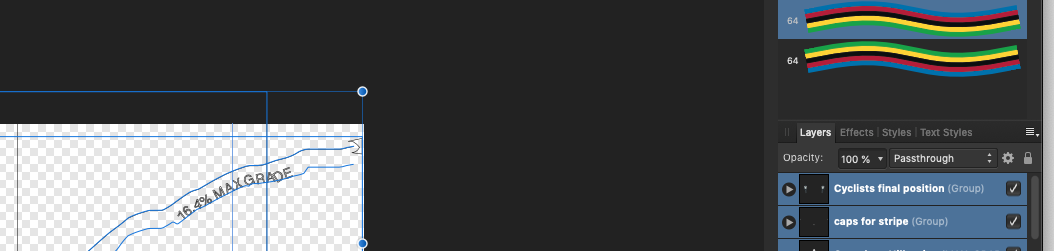
With "ESP", I think, You mean EPS (encapsulated postscript), right? My suggestion is, that those strokes that are visible on your second screenshot, are drawn in Illustrator with brushes that Designer doesn't support. But I'm not really sure. Anyway, the vector data of those strokes must be there, I think. So there must be layers with invisible content. If you test the single layers just by clicking on each after another, you should see that there are those vectors without strokes. In that case you should be able to give each vector a stroke. Not sure if this will work, but would be worth a try, I think.
19 minutes ago, Joachim_L said:Perhaps there is something brought from AI to those files the Affinities are not able to understand. Have you tried to open the PDF to see if the result is better? Could you upload the AI / EPS / PDF?
Hi, I have tried opening the PDF and it displays in the same way as the AI / EPS files when I open it in designer or publisher, even though I can see from the PDF itself that all the strokes are there.
Here are the files, thanks so much for offering to look at them!
-
Hello,
I have been given 2 files with the same information in - one is an ESP and the other is an AI. When I open them (in Publisher and Designer) I can see some of their content, but not all of it. I know there is more content than I can see because when I export the files as a PDF I can see more information. Please advise what I should check so that I can see all the content.
I have attached two screen shots so you can see how the file displays when I open it in Affinity, and the PDF file that I have exported
I hope you can help!

-
Hi, I've been able to automatically generate a TOC, which I understood would also create a PDF outline in the exported document. For the set-up, I have ticked 'include as PDF bookmark' and exported it as a high quality digital pdf. Is there something else I should check? The TOC is interactive which I'm really pleased about, but the left hand view on the pdf is of each page, and I understood that the outline would be a list of the table of contents.
I hope you can help, thank you!
-
-
I have placed an image inside an object made of curves, and it only shows inside one of the curves. Could you point me in the right direction please?
I achieved this after many attempts using the 'insert inside selection' tool in both Designer and Photo, and this is the first time it shows inside one of the elements, but I would like it inside all elements!
Thank you!
-
thanks so much for your help with this @R C-R and @walt.farrell I now have correctly sized images and I know the things to check going forward
")
-
Brilliant. This works for me too
I keep having problems with file sizes so now I know what to look out for. Thanks so much for your help!
-
Thanks @walt.farrellfor offering to look at this for me!
-
-
On 7/28/2016 at 5:59 PM, MEB said:
Hi Hugo,
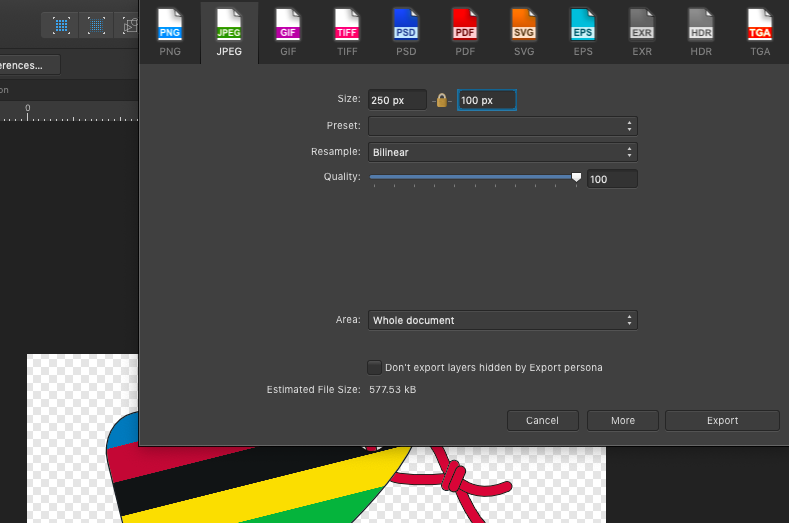
In the JPG export dialog, click the More button and uncheck Embed metadata.
Hello,
I'm trying to save a file so it's under 150kb, and I must be doing something wrong when I try to reduce the size.
When I save my Affinity Designer document as a JPG with embed metadata unchecked, it's 577.53kb compared with the document with metadata checked which is 580.56kb. The best I can get, with quality set at 0, is 546.64kb. Could you advise me what I should do to get the image under 150kb please?
thank you!
BeccaT
.
-
Perfect. Simple solution now that I know where to find it. Thanks so much @Joachim_L :)
-
Hello,
I can't see the content in a document I'm working on - it shows as outline only. The layers panel shows that the content is still there. I must have clicked something and I can't find what I've done. When I go back through 'history' the outlines on the document change, but I can't find a way to see the content itself. I hope the screen snip below shows what I'm trying to explain as I haven't found the right words to articulate my problem for a search on the forum page.
thanks in advance!
-
thank you so much @John Rostron @haakoo @gdenby @v_kyr for the different options which are so helpful. For info, I used the vector with gradient fill, adding 0.1px gaussian blur/alpha protected which achieved exactly the result I was looking for
- John Rostron and v_kyr
-
 2
2
-
Hello
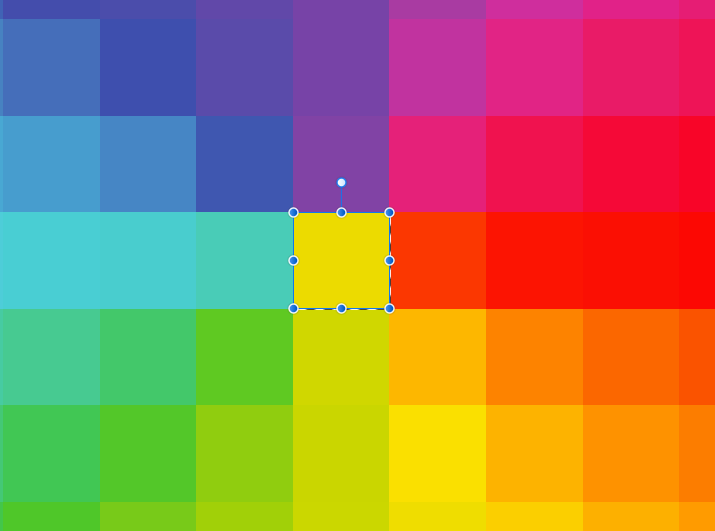
I have used the 'rainbow' default style, which is wonderful, but I don't wan't the bright yellow pinpoint in the centre. I've tried various different ways to replace the pixel at the centre (10 9 100 0) with the adjacent pixel (21 7 100 0), but am getting nowhere. I have AfD and AfP and haven't found the right search terms to express my problem to find the solution, so have started a new thread. I hope you can help?
Thank you!
-
-
On 3/7/2019 at 9:38 AM, reglico said:
Hello BeccaT,
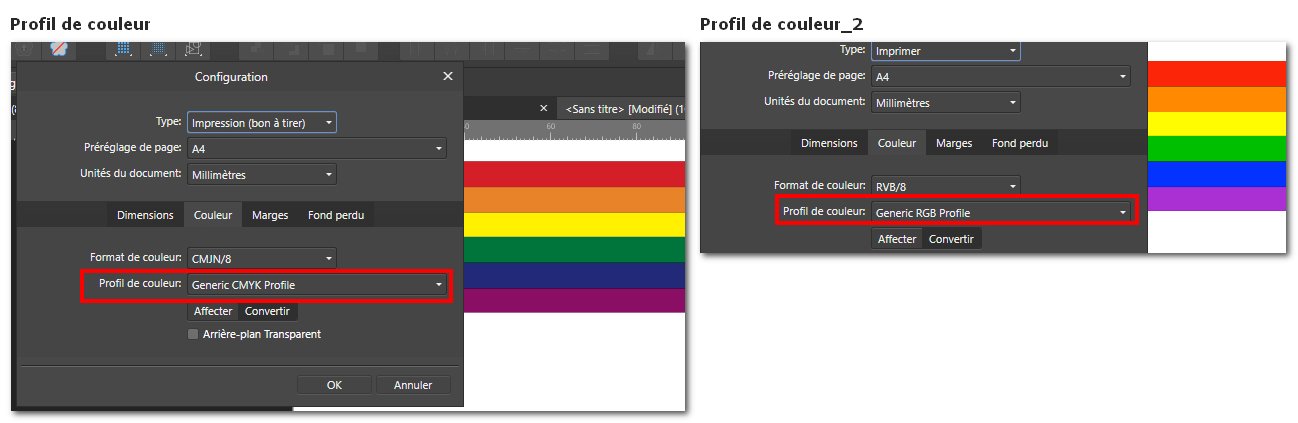
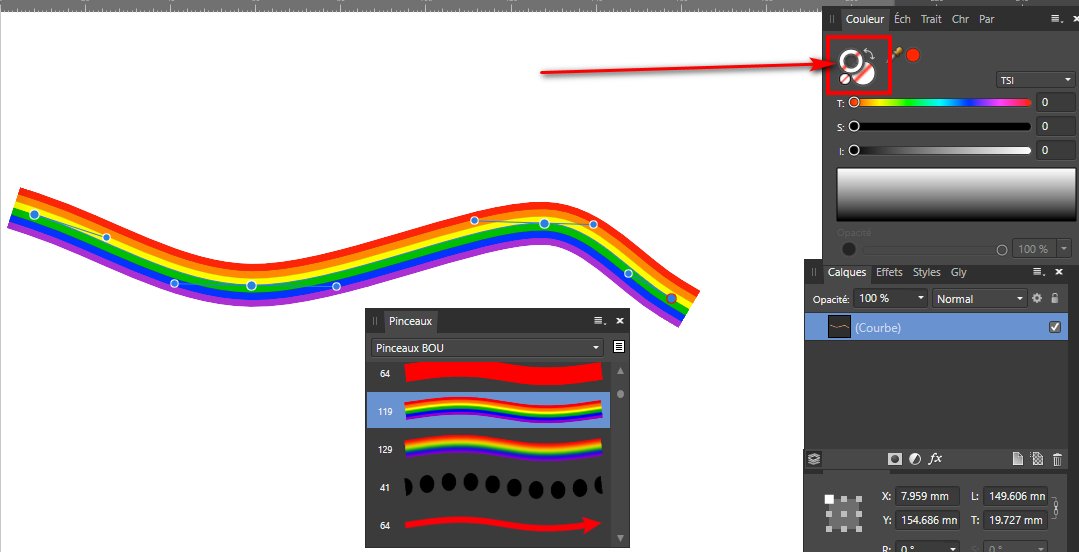
This could be due to a difference in the colorimetric profile between the documents (the one in which the brush was created and the one in which you apply it).
Try changing the profile of your document to find the colors you originally chose (Files, Settings, Color). On my screenshot the same brush is applied with two different profiles.I hope this will help you.
Hello
Sorry to come back with another question. I have checked my document settings - thanks for the suggestion @reglico - I had thought they were the same but in fact the original file was 'print' and the file with the strip was 'print (press-ready)'. So I changed them both to 'print (press-ready)' . I seem to be having some problem between these two file settings though. Either way, I still have the same colour change problem: the stripe document used to create the png is a different CMYK colour when it is used as a brush. Is this something like the logo thread your shared @summersara? If you have any ideas about what else to check, that would be great. Thank you!
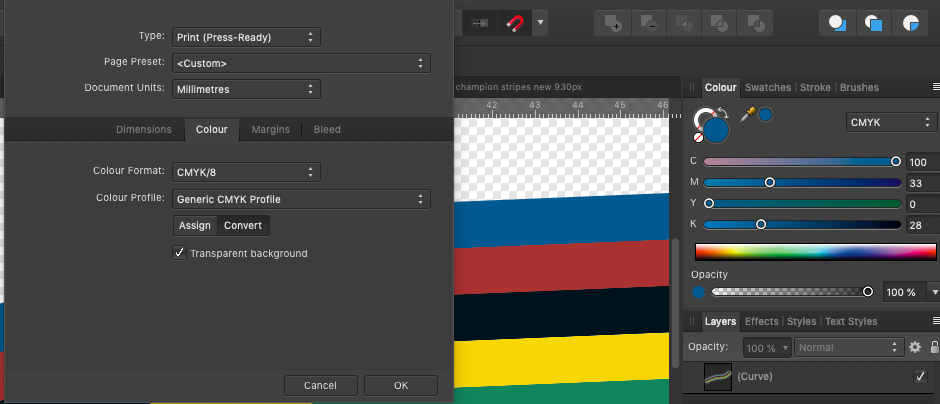
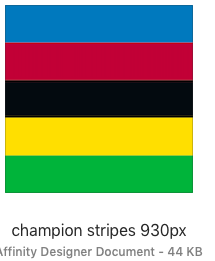
This is the file used to create the stripes, showing document set up and CMYK number
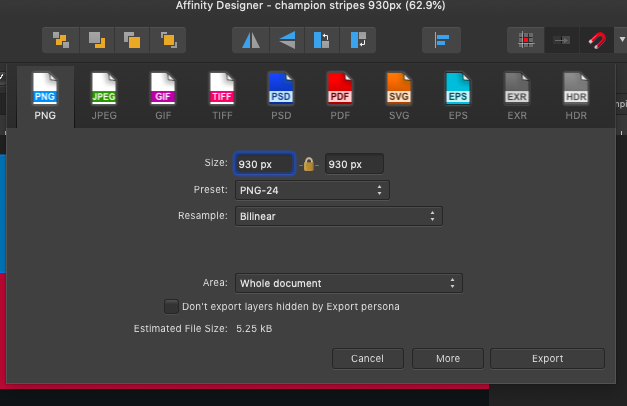
This is the document setup for the png file that is imported to create the stripe image brush
This is the document setup for the file where I've used the stripe brush, and the colour picker shows the change in CMYK colour.
-
On 2/25/2019 at 10:51 AM, summersara said:
Hi, Becca T
If your creating a new textured image brush (which should be coloured) and it paints grey scale, just make sure the colour box on the context toolbar is set to transparent, should have a red line through it, now try painting with your stripe brush.
On 2/25/2019 at 10:52 AM, reglico said:Hello BeccaT,
You must set the color of the stroke to none so that it appears in color on the drawing.
Hello
Thanks to your help previously I have a lovely coloured stripe stroke
I must still be doing something wrong though: the stroke drawing does not create the same CMYK colours that are in the original affinity designer and png files. Do you have recommendations? Perhaps document settings that I've missed or something else? I hope you can help. Thank you!
-
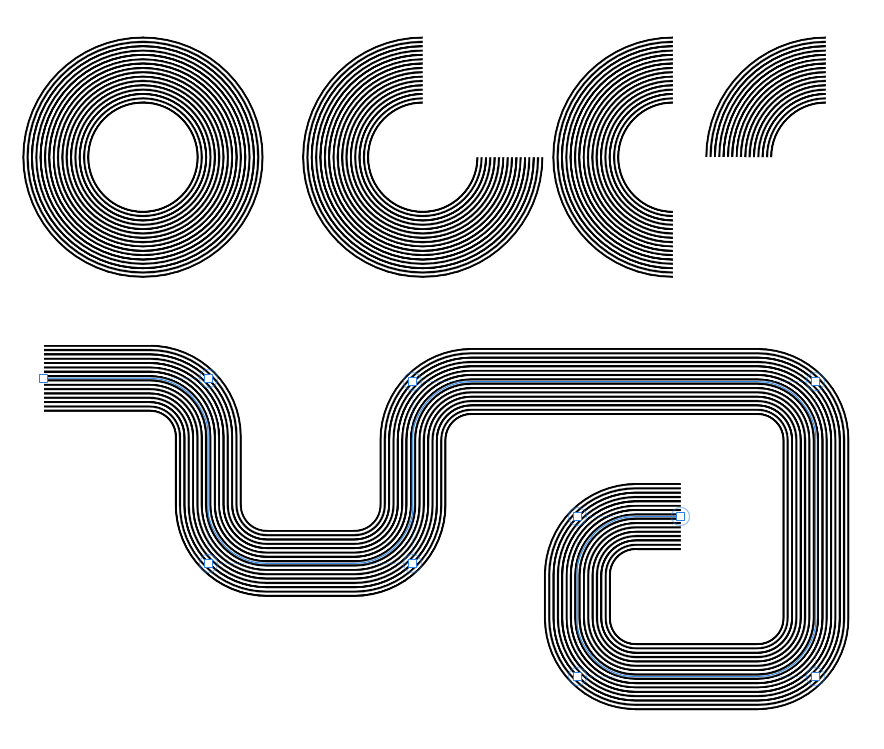
On 12/24/2016 at 1:54 PM, PixelPest said:
I´d put it this way:
Make a new document 930x930px.
Draw a white square of this exact size.
Above draw a black rectangle 930x30px
Hold alt+shift key down to duplicate and move down 60px
Hit cmd+J to power-duplicate until one last rectangle reaches the bottom of the document size.
Export whole document to PNG
Go Brushes->New Textured Image Brush and load you image.
Now you can apply this stripes to any kind of paths.
Cheers
P.
Hello @PixelPest does the approach for creating a stripe brush work for coloured stripes? I substituted a 6 colour stripe for the black and white stripes in your instructions. This created a greyscale stripe when I used the png image for the stroke (screen snip attached). The png image displays as colour when I use it with the fill tool as a bitmap, but unfortunately this approach doesn't follow the cues of my stroke. I'm guessing the problem will be something to do with a setup that I've got wrong, as the standard png images like 100 scarf and 128 rope are also greyscale when I use them. My document is set up as CMYK and I have changed this to the other options to see if that solved the problem and it doesn't. Hoping you can help? Thank you!
Thank you so much @summersara and @reglico . What a wonderful simple solution. It's easy when you know how
-
On 12/24/2016 at 1:54 PM, PixelPest said:
I´d put it this way:
Make a new document 930x930px.
Draw a white square of this exact size.
Above draw a black rectangle 930x30px
Hold alt+shift key down to duplicate and move down 60px
Hit cmd+J to power-duplicate until one last rectangle reaches the bottom of the document size.
Export whole document to PNG
Go Brushes->New Textured Image Brush and load you image.
Now you can apply this stripes to any kind of paths.
Cheers
P.
Hello @PixelPest does the approach for creating a stripe brush work for coloured stripes? I substituted a 6 colour stripe for the black and white stripes in your instructions. This created a greyscale stripe when I used the png image for the stroke (screen snip attached). The png image displays as colour when I use it with the fill tool as a bitmap, but unfortunately this approach doesn't follow the cues of my stroke. I'm guessing the problem will be something to do with a setup that I've got wrong, as the standard png images like 100 scarf and 128 rope are also greyscale when I use them. My document is set up as CMYK and I have changed this to the other options to see if that solved the problem and it doesn't. Hoping you can help? Thank you!


ESP and AI file import not displaying all their content
in Pre-V2 Archive of Affinity on Desktop Questions (macOS and Windows)
Posted
this is absolutely brilliant, thanks so very much for your help! I can open the file fine :)