toltec
-
Posts
3,560 -
Joined
-
Last visited


-
 influxx reacted to a post in a topic:
Why does Dodge and Burn tools don't work on masks?
influxx reacted to a post in a topic:
Why does Dodge and Burn tools don't work on masks?
-
 influxx reacted to a post in a topic:
Why does Dodge and Burn tools don't work on masks?
influxx reacted to a post in a topic:
Why does Dodge and Burn tools don't work on masks?
-
influxx reacted to a post in a topic:
Why does Dodge and Burn tools don't work on masks?
-
 keiichi77 reacted to a post in a topic:
Clearing contents of a layer, not deleting the layer
keiichi77 reacted to a post in a topic:
Clearing contents of a layer, not deleting the layer
-
Walton Vinícius reacted to a post in a topic:
file size information (megabytes) tab anywhere?
-
lukasivanovic reacted to a post in a topic:
Removing white background from photos
-
jAffinitySerif reacted to a post in a topic:
Affinity Photo and bleed settings?
-
devalias reacted to a post in a topic:
Editing a mask?
-
 Lamoen reacted to a post in a topic:
Rule of thirds grid overlay
Lamoen reacted to a post in a topic:
Rule of thirds grid overlay
-
xMaxrayx reacted to a post in a topic:
Creating a white border around the image?
-
toltec reacted to a post in a topic:
UI Appearance in Affinity Photo - Are there only 2 choices?
-
 toltec reacted to a post in a topic:
UI Appearance in Affinity Photo - Are there only 2 choices?
toltec reacted to a post in a topic:
UI Appearance in Affinity Photo - Are there only 2 choices?
-
toltec reacted to a post in a topic:
UI Appearance in Affinity Photo - Are there only 2 choices?
-
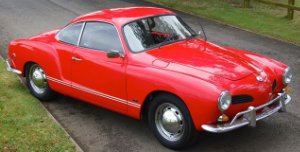
 Karmann Ghia One if my all time favourite cars
-
18 months ago I bought Photo. Never seen it before. I had lots of help at the beginning and now I am considered a bit more knowledgeable, I pass that knowledge on. A 'circle of life' type thing.
-
toltec reacted to a post in a topic:
UI Appearance in Affinity Photo - Are there only 2 choices?
-
Quite right, always ask. Never struggle. Warning ! You might get silly answers sometimes. We like a bit of humour on here (most of us) anyway
-
There are three choices. Black, Grey or Off (blacker)
-
More info please. P.s. How do you stop the cream from melting
-
Plus it’s cheaper tha ReMask and comes with a free RAW editing program. Never used it myself but I’ve heard it does a reasonabl job
-
toltec reacted to a post in a topic:
Affinity Masking vs Topaz Remask 5 Windows 10
-
How feasible would it be for a user (a somewhat thick one like me) to design my own icons/interface? I work for a disabled charity and lots of our visually impaired customers have seen me doing stuff on my iPad and absolutely love it, but think the black interface is shit (a trade term ). I could have sold four last week. I have contacts in the Government and Charity organisations and would like to see these things handed out, with Photo or Designer along with special training videos, which we would create, Not just to do with Affinity stuff. Any thoughts please?
-
toltec reacted to a post in a topic:
AF - Very confused about cutting and pasting selections
-
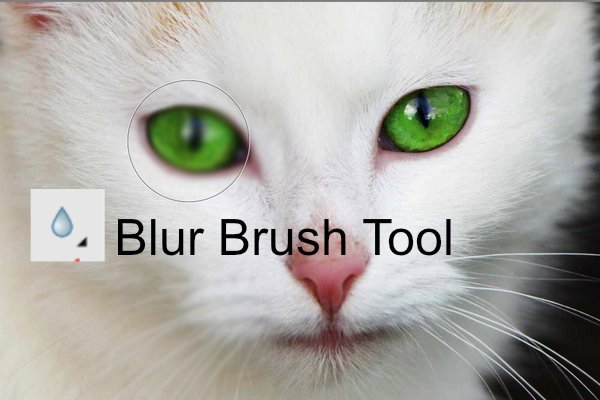
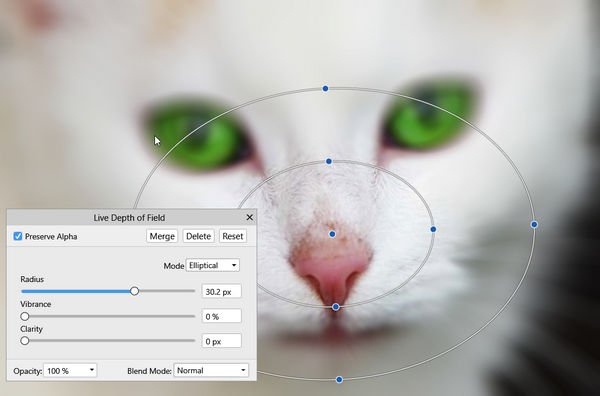
Blur and Sharpen tool
toltec replied to evtonic3's topic in Pre-V2 Archive of Desktop Questions (macOS and Windows)
A brushy type tool used on the eye. . A filter layer over the image. Lots of different types of filter layers.
-
Attach Text to Curve in Photo?
toltec replied to jefferis's topic in Pre-V2 Archive of Desktop Questions (macOS and Windows)
Text on a path Path text is a variation of Artistic text which follows a line, curve or outline of a shape Applying text to a path allows you to explore a whole range of diverse typographical designs. The path can be created from any line, curve or shape drawn using any of the line or shape tools. These include, but are not limited to, the Pen Tool, Pencil Tool, and Ellipse Tool. The only criterion is that a line, curve or shape must exist on the page before path text can be implemented. When a line, curve or shape is converted to a path to accommodate text, the original object is discarded. If you wish to retain the original object, we recommend duplicating it first. To achieve natural looking text while working on your design, from the Text menu, select Insert Filler Text. Modifying path text Once the path has been created, you can modify the end points of the path to expand or restrict the section on which text will flow. The end points of the path section are indicated by orange triangles. If text extends beyond the end points of a section, it will flow onto a second path (if one is available) or wrap around to follow the path in the opposite direction. If this occurs, additional path end points will become available so this new section can be adjusted separately. A second path may be available if you have created your path using a shape which has an enclosed space, such as a Donut. Furthermore, you can also control the distance between the text and the path (i.e., the Baseline) and the direction in which the text flows along the path. Each path section can have a different Baseline value. Reshaping the path object You can reshape the path object at any point using the Node Tool. If your text path object originated from one of the Shape tools, you can modify it as if it was still the original geometric shape. Text already present on the path will reflow along the changing path when the object is reshaped. For more information on reshaping a path object, see the Edit curves and shapes and Draw and edit shapes topics. To create path text: Select a previously drawn line, curve or shape. From the Tools panel, select Artistic Text Tool. Position the cursor close to the line, curve or shape's outline. The cursor will change to indicate path text will be created. Click or drag on the page for a default or custom 'sized' text size, respectively. The line, curve or shape is converted to a path ready for accommodating text. Do one of the following: Type your text Paste previously copied text. From the Text menu, select Insert Text from File. In the pop-up dialog, navigate to and select a file, and click Open. Alternatively, select a previously drawn line, curve or shape and then, from the Layer menu, select Convert to Text Path. To modify the flow of path text: With the path text selected, do one of the following: Drag one or more path end points. On the context toolbar, set the Baseline option. On the context toolbar, click Reverse Text Path. Modifier keys When positioning path end points, the following modifier keys can be used: The constrains the distance between the end points, moving the entire path (and text) position. The ignores snapping points along the path. The moves end points symmetrically. Text Tools and the The uses the following logic when a Text Tool is active: If the is used when glyphs (characters) are selected, the glyphs are deselected but the caret (cursor) remains inside the text object. (You can then continue editing the text within the text object.) If the caret is inside the text object and no glyphs are selected, the will remove the caret and select the text object. (You can then press V to switch to the Move Tool to reposition the text object.) With the text object selected, pressing the will deselect the text object. Resizing path object When resizing a path object you can control whether: Text remains at its set size and reflows across the path. Text scales as the path is resized. To reflow text: With the path object selected, do one of the following: To resize height and width simultaneously, drag the object's corner handles. To resize height and width independently, drag the object's side handles. To scale text: With the path object selected, drag the object's scale handle (extends from the bottom-right corner of the selection). Using placeholder text If you're designing before full copy has been written, you can use placeholder (filler) text to help you progress with your project. To add filler text: With the path text object selected, from the Text select Insert Filler Text. SEE ALSO: Working with text Artistic Text Tool Frame text -
Blur and Sharpen tool
toltec replied to evtonic3's topic in Pre-V2 Archive of Desktop Questions (macOS and Windows)
Yes, but then it's not really a Tool, it's a Filter
-
Blur and Sharpen tool
toltec replied to evtonic3's topic in Pre-V2 Archive of Desktop Questions (macOS and Windows)
These strength sliders?
-
toltec reacted to a post in a topic:
Paint Brush tool
-
toltec reacted to a post in a topic:
Symmetry with Cloning
-
Symmetry with Cloning
toltec replied to Elida's topic in Pre-V2 Archive of Desktop Questions (macOS and Windows)
I’m waiting for @carl123 to carpet the whole floor -
toltec reacted to a post in a topic:
Official Affinity Photo (Desktop) Video Tutorials
-
Who ?
-
Adobe RGB
toltec replied to simoncooper118's topic in Pre-V2 Archive of Desktop Questions (macOS and Windows)
Adobe RGB is 8 bit Colour Format (RGB/8) only. -
I used to do that a lot (so certainly not intelligently ) in Photoshop for commercial T-shirt printing. Sometimes 12 or more spot colours. To be honest, that’s the one job I would certainly not fancy tackling in Affinity Photo (and definitely not iPad) due to lack of decent channel support. I could do if necessary, but it would be hard work