NotMyFault Posted January 5, 2022 Posted January 5, 2022 Hi, There are many posts complaining about "thin lines" becoming visible under certain circumstances, in Photo, Designer, and Publisher. vector shapes touching each other at their edges patterns of pixel layers (tiles) The principle cause is anti-aliasing, which is active by default. All pixels at edges of layers will get anti-aliased. The function changes both the color and the transparency (alpha) of edge pixels. This will lead to partially transparent edge pixels. Depending on background layers, this often creates a line of of pixel width in light colors shining through. This can be very distracting in case of seamless patterns. To remove the thin line, there are multiple options. Unfortunately, most recommended options do additional collateral damage: Deactivating anti-aliasing, or modifying the coverage map, is global per layer and could lead to rough edges. Adding back-fill layers manually is very tedious There is a new simplified method, suitable when your document is pixel art, or will / can be rasterized at export. Steps: add a levels adjustment select the alpha channel set the white level to 75% (depending on blend gamma of the pattern layers, you may need to use 50% in case of blend gamma 1.0). In Photo, you can save this as preset for later re-use in other documents. Whow does this work? assuming you patterns / layer are fully opaque, and using default blend gamma of 2.2 Anti-aliasing will create edge pixels with a known range of alpha values: 75% to 100%. Values from 0% to 75% will only occur at edges where pattern do not face each other. The curves adjustments ensures all alpha values above 75% will reach 100%, thus effectively removing the thin line, and replacing it by the blend of the colors of neighboring pixels There is a minor collateral damage. These alpha values (75%-100%) may occur in other places. But the visual difference is small, and will be far less disturbing compared to a white line inside a seamless pattern. Example of distracting thin lines / background shining through: harsh edges when deactivating AA: Thin lines removed, while keeping AA active (with limited effect to alpha channel): AA on edges stays intact in general (reduced alpha) Requires settings in levels adjustment: Komatös, Rudolphus, Aammppaa and 6 others 5 4 Quote Mac mini M1 A2348 | MBP M3 Windows 11 - AMD Ryzen 9 5900x - 32 GB RAM - Nvidia GTX 1080 LG34WK950U-W, calibrated to DCI-P3 with LG Calibration Studio / Spider 5 | Dell 27“ 4K iPad Air Gen 5 (2022) A2589 Special interest into procedural texture filter, edit alpha channel, RGB/16 and RGB/32 color formats, stacking, finding root causes for misbehaving files, finding creative solutions for unsolvable tasks, finding bugs in Apps. I use iPad screenshots and videos even in the Desktop section of the forum when I expect no relevant difference.
John Rostron Posted January 5, 2022 Posted January 5, 2022 Thanks @NotMyFault. It is good to see a straightforward tutorial using words and pictures without recourse to using video. John NotMyFault 1 Quote Windows 11, Affinity Photo 2.4.2 Designer 2.4.2 and Publisher 2.4.2 (mainly Photo). CPU: Intel Core i5 8500 @ 3.00GHz. RAM: 32.0GB DDR4 @ 1063MHz, Graphics: 2047MB NVIDIA GeForce GTX 1050
Lorox Posted January 17, 2022 Posted January 17, 2022 I have this very problem with my Affinity Designer artwork (AD v. 1.9.3 on Mac OS Mojave) . Even if shapes (i.e. simple rectangles which are not rotated) are positioned abslutely pixel perfect flush to each other I'll get those thin lighter lines when exporting my artwork to pixel formats (say JPG). This actually has been some kind of a problem right from the start in AD years ago. It's even visible pre-export in most zoom values while still in Designer. As I'm in Designer I unfortunately don't have Adjustment Layers to try the method described here... Any ideas about what might be done to get proper exports? Quote
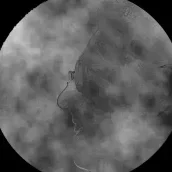
Lorox Posted January 17, 2022 Posted January 17, 2022 I'm adding two screenshots here: one from inside Designer at 800% zoom which actually doesn't show those fine lines (and the grain/noise looks finer) and another from the exported JPG (full resolution of a 300dpi AD file), also viewed at 800% zoom. Quote
NotMyFault Posted January 17, 2022 Author Posted January 17, 2022 @Lorox Could you please open a separate thread under questions, to keep this tutorial thread focused? i‘m happy to investigate deeper if you are able to upload the afdesign file there. As i see you are probably use a noise filter, which might causer the issue. Some filters cause „fluctuations“ on alpha channel interfering with the issue. There are other causes of thin lines independent from alpha. Curious to find out 😉 Quote Mac mini M1 A2348 | MBP M3 Windows 11 - AMD Ryzen 9 5900x - 32 GB RAM - Nvidia GTX 1080 LG34WK950U-W, calibrated to DCI-P3 with LG Calibration Studio / Spider 5 | Dell 27“ 4K iPad Air Gen 5 (2022) A2589 Special interest into procedural texture filter, edit alpha channel, RGB/16 and RGB/32 color formats, stacking, finding root causes for misbehaving files, finding creative solutions for unsolvable tasks, finding bugs in Apps. I use iPad screenshots and videos even in the Desktop section of the forum when I expect no relevant difference.
Lorox Posted January 17, 2022 Posted January 17, 2022 @NotMyFault I've done according to your suggestion: As to the noise filter (it's actually just „Noise“ added to the fill in the Colour Studio/Palette): as it happens it really doesn't make any difference if it’s a fill with or without noise – the lines will appear all the same... NotMyFault 1 Quote
Alex Smith Cape Town Posted January 10, 2024 Posted January 10, 2024 Hi Affinity user base This solve is a sticky prob, I've been using Coreldraw since 1999 and they still don't seem to have solved the problem themselves. All that's needed is a toggle for contiguous outline visibility. But for now, Affinity users can simply duplicate the objects twice and the lines go away. The toggle idea is easy peasy but revolutionary. Why haven't software giants caught on? Westerwälder and Mt. 1 1 Quote
Darner Posted January 6 Posted January 6 Experiencing the same issue today with Antialiasing, as reading in this post from originally 2022. And similar post from 2020 with Antialiasing issues. https://forum.affinity.serif.com/index.php?/topic/114272-how-does-anti-aliasing-work-on-affinity-designer/ As mentioned here before: Forcing Antialiasing on creates smooth curves, but shows gaps between aligned objects. Forcing Antialiasing off creates jagged curves but removes gaps between aligned objects. Tried workarounds with Channel Mixer and Levels with Alpha Settings mentioned from @NotMyFault (appreciate the detailed feedback). Unfortunately not solving the issue. Still gaps in between snapped simple objects. As mentioned similar from others here like @JazzTwitJohn in related post. Affinity, have you managed to solve issues around this which is so basic and relevant? Any recent similar experiences who found an actual solution to this issue? All newest updates on Mac OS and Affinity Software. But experienced this on previous versions as well, as most others. Thanks. Quote
fredboyuk Posted May 9 Posted May 9 I believe I've sorted it. Select your picture that you have dragged in. Select snapping on. Drag your picture to the top left corner of the document. Make sure that it is snapping by setting the screen tolerance to its maximum 50 in the snapping settings and snapping to on . Once you are sure that it is selected and snapped hard into the corner then go to layer menu then new pattern layer from selection. Voilla a seamless pattern layer with no spaces(white lines). Then obviously you can move the selection, rotate it etc. Hope it works for you. Quote
breenorth Posted May 18 Posted May 18 This works for me for duplicating my seamless patterns Duplicate ypur pattern to fill your canvas, select all and group, then duplicate it as a whole you will see the lines start to fade out I usually duplicate it around 3 times and the the lines disappear :) Its the only thing that's worked for me Quote
Recommended Posts
Join the conversation
You can post now and register later. If you have an account, sign in now to post with your account.
Note: Your post will require moderator approval before it will be visible.