Search the Community
Showing results for tags 'macros'.
-

Affinity Photo Macro Problem
wgb posted a topic in Affinity on Desktop Questions (macOS and Windows)
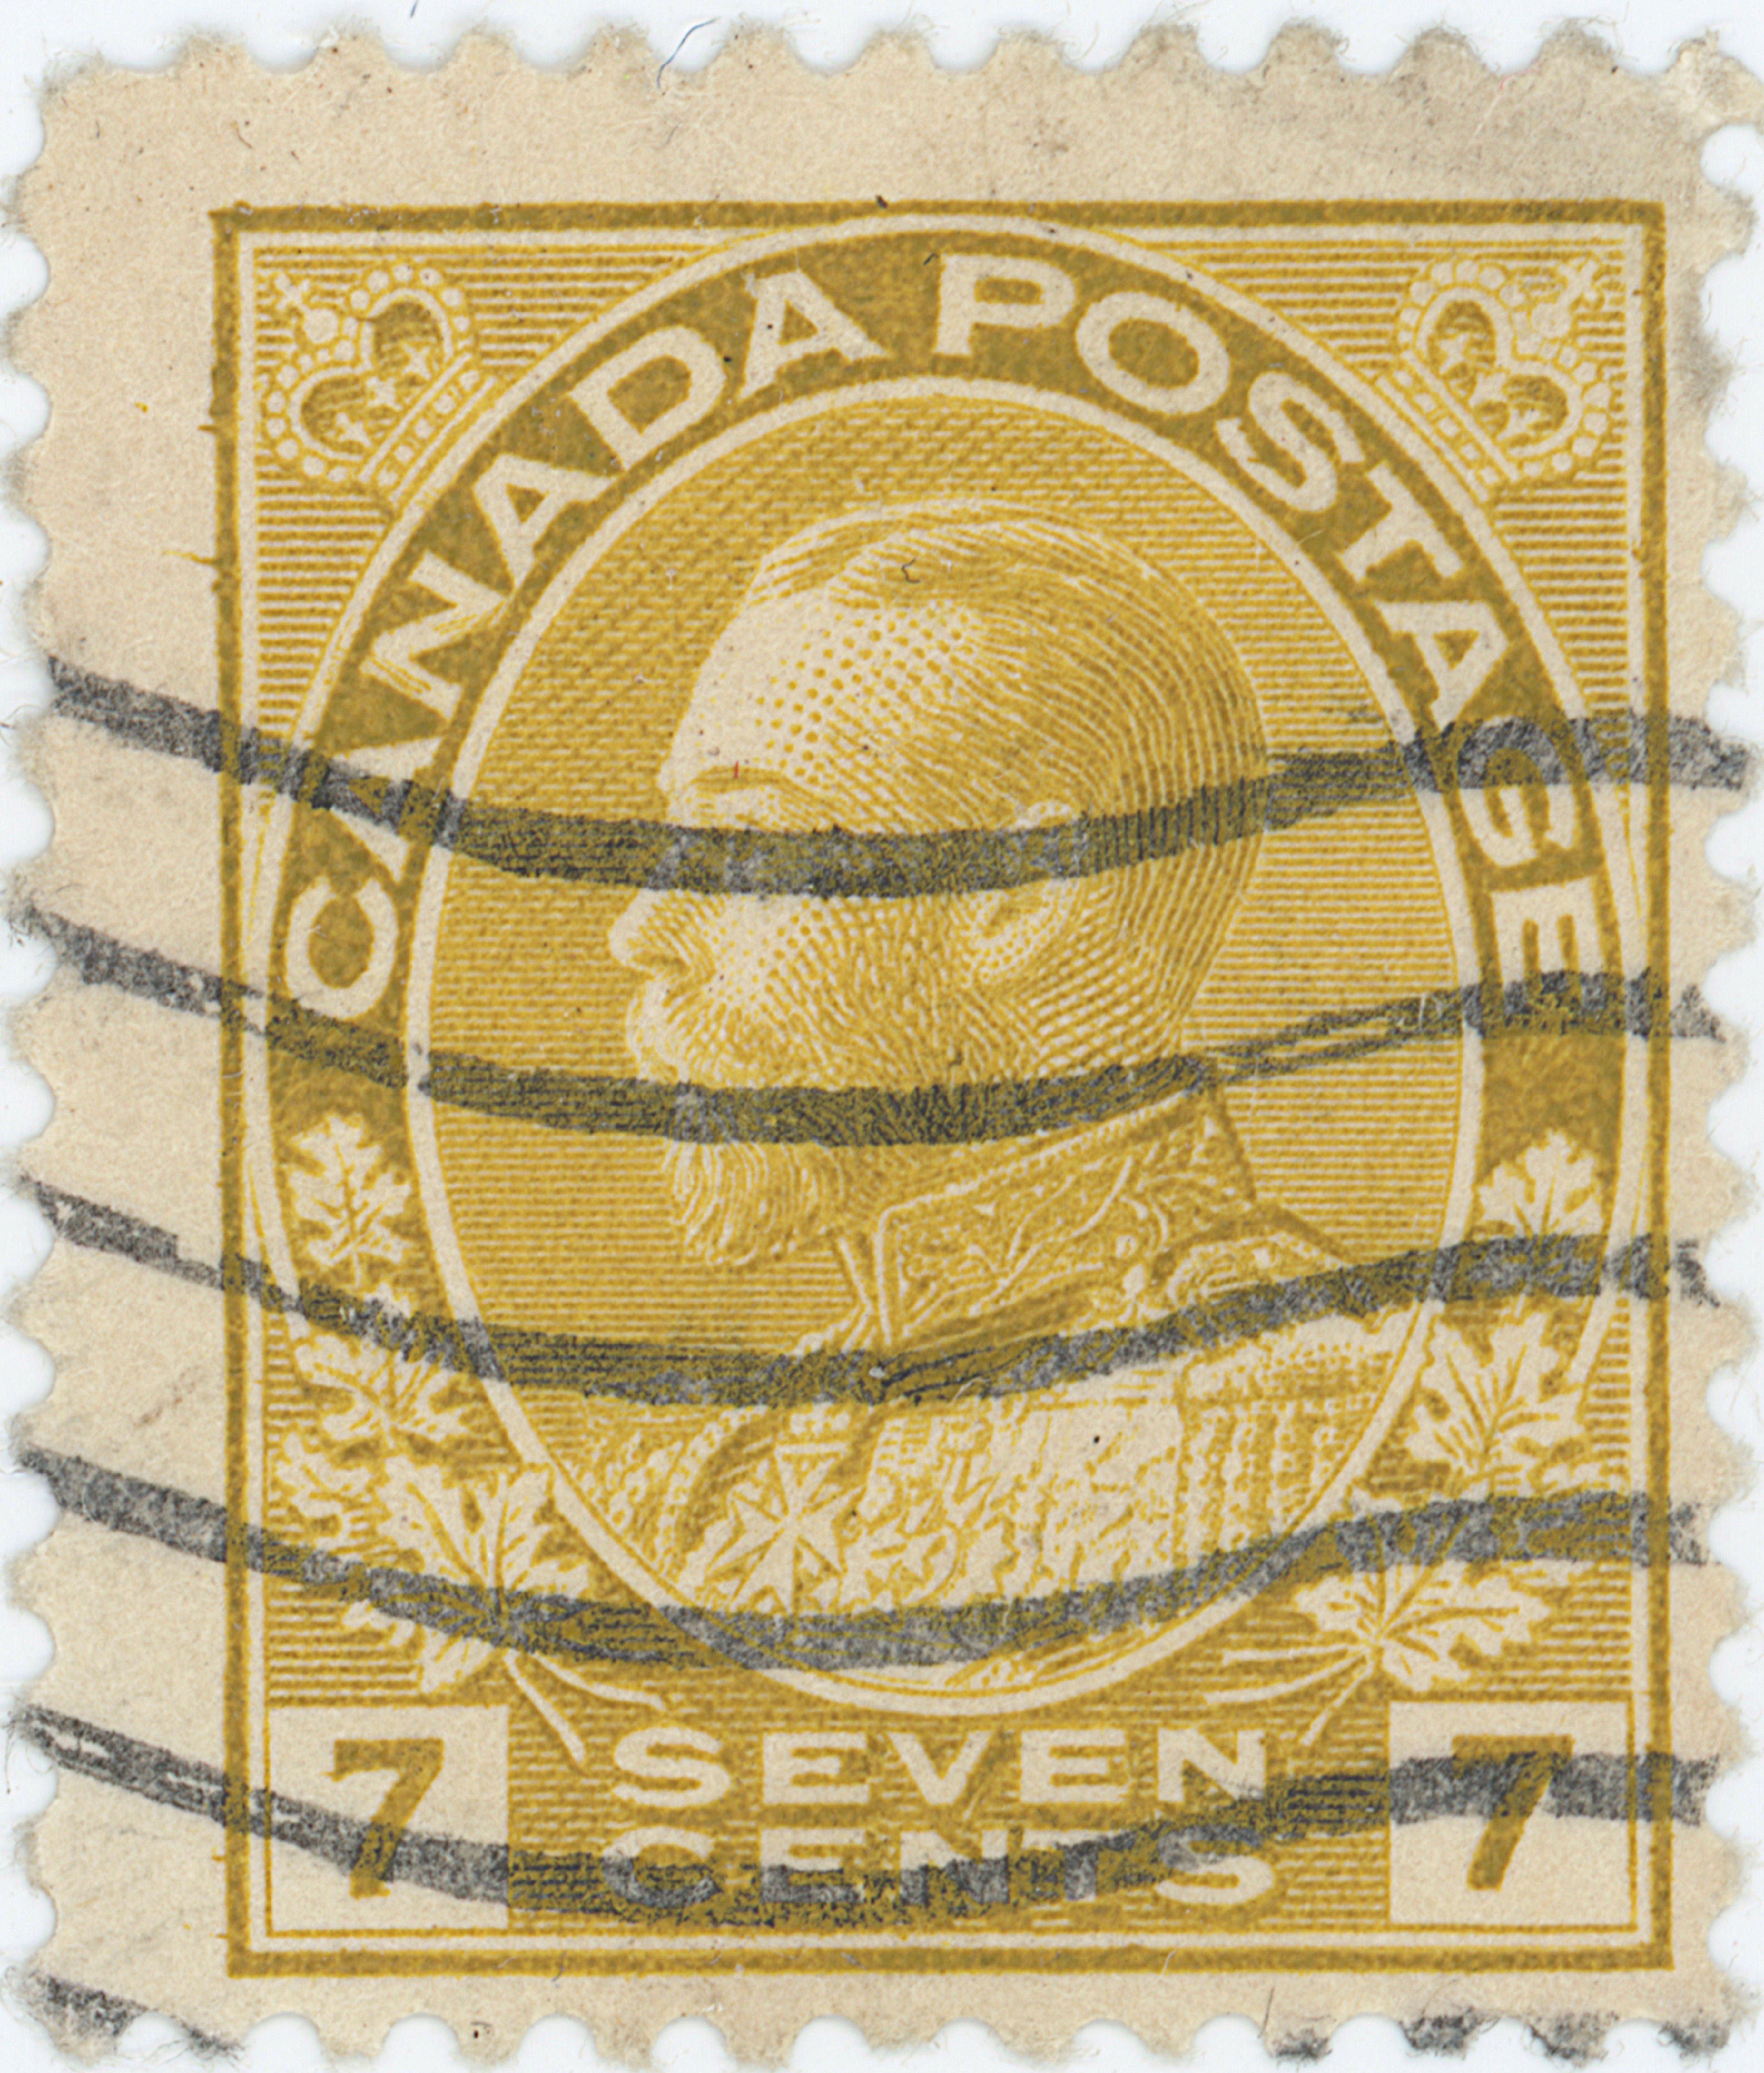
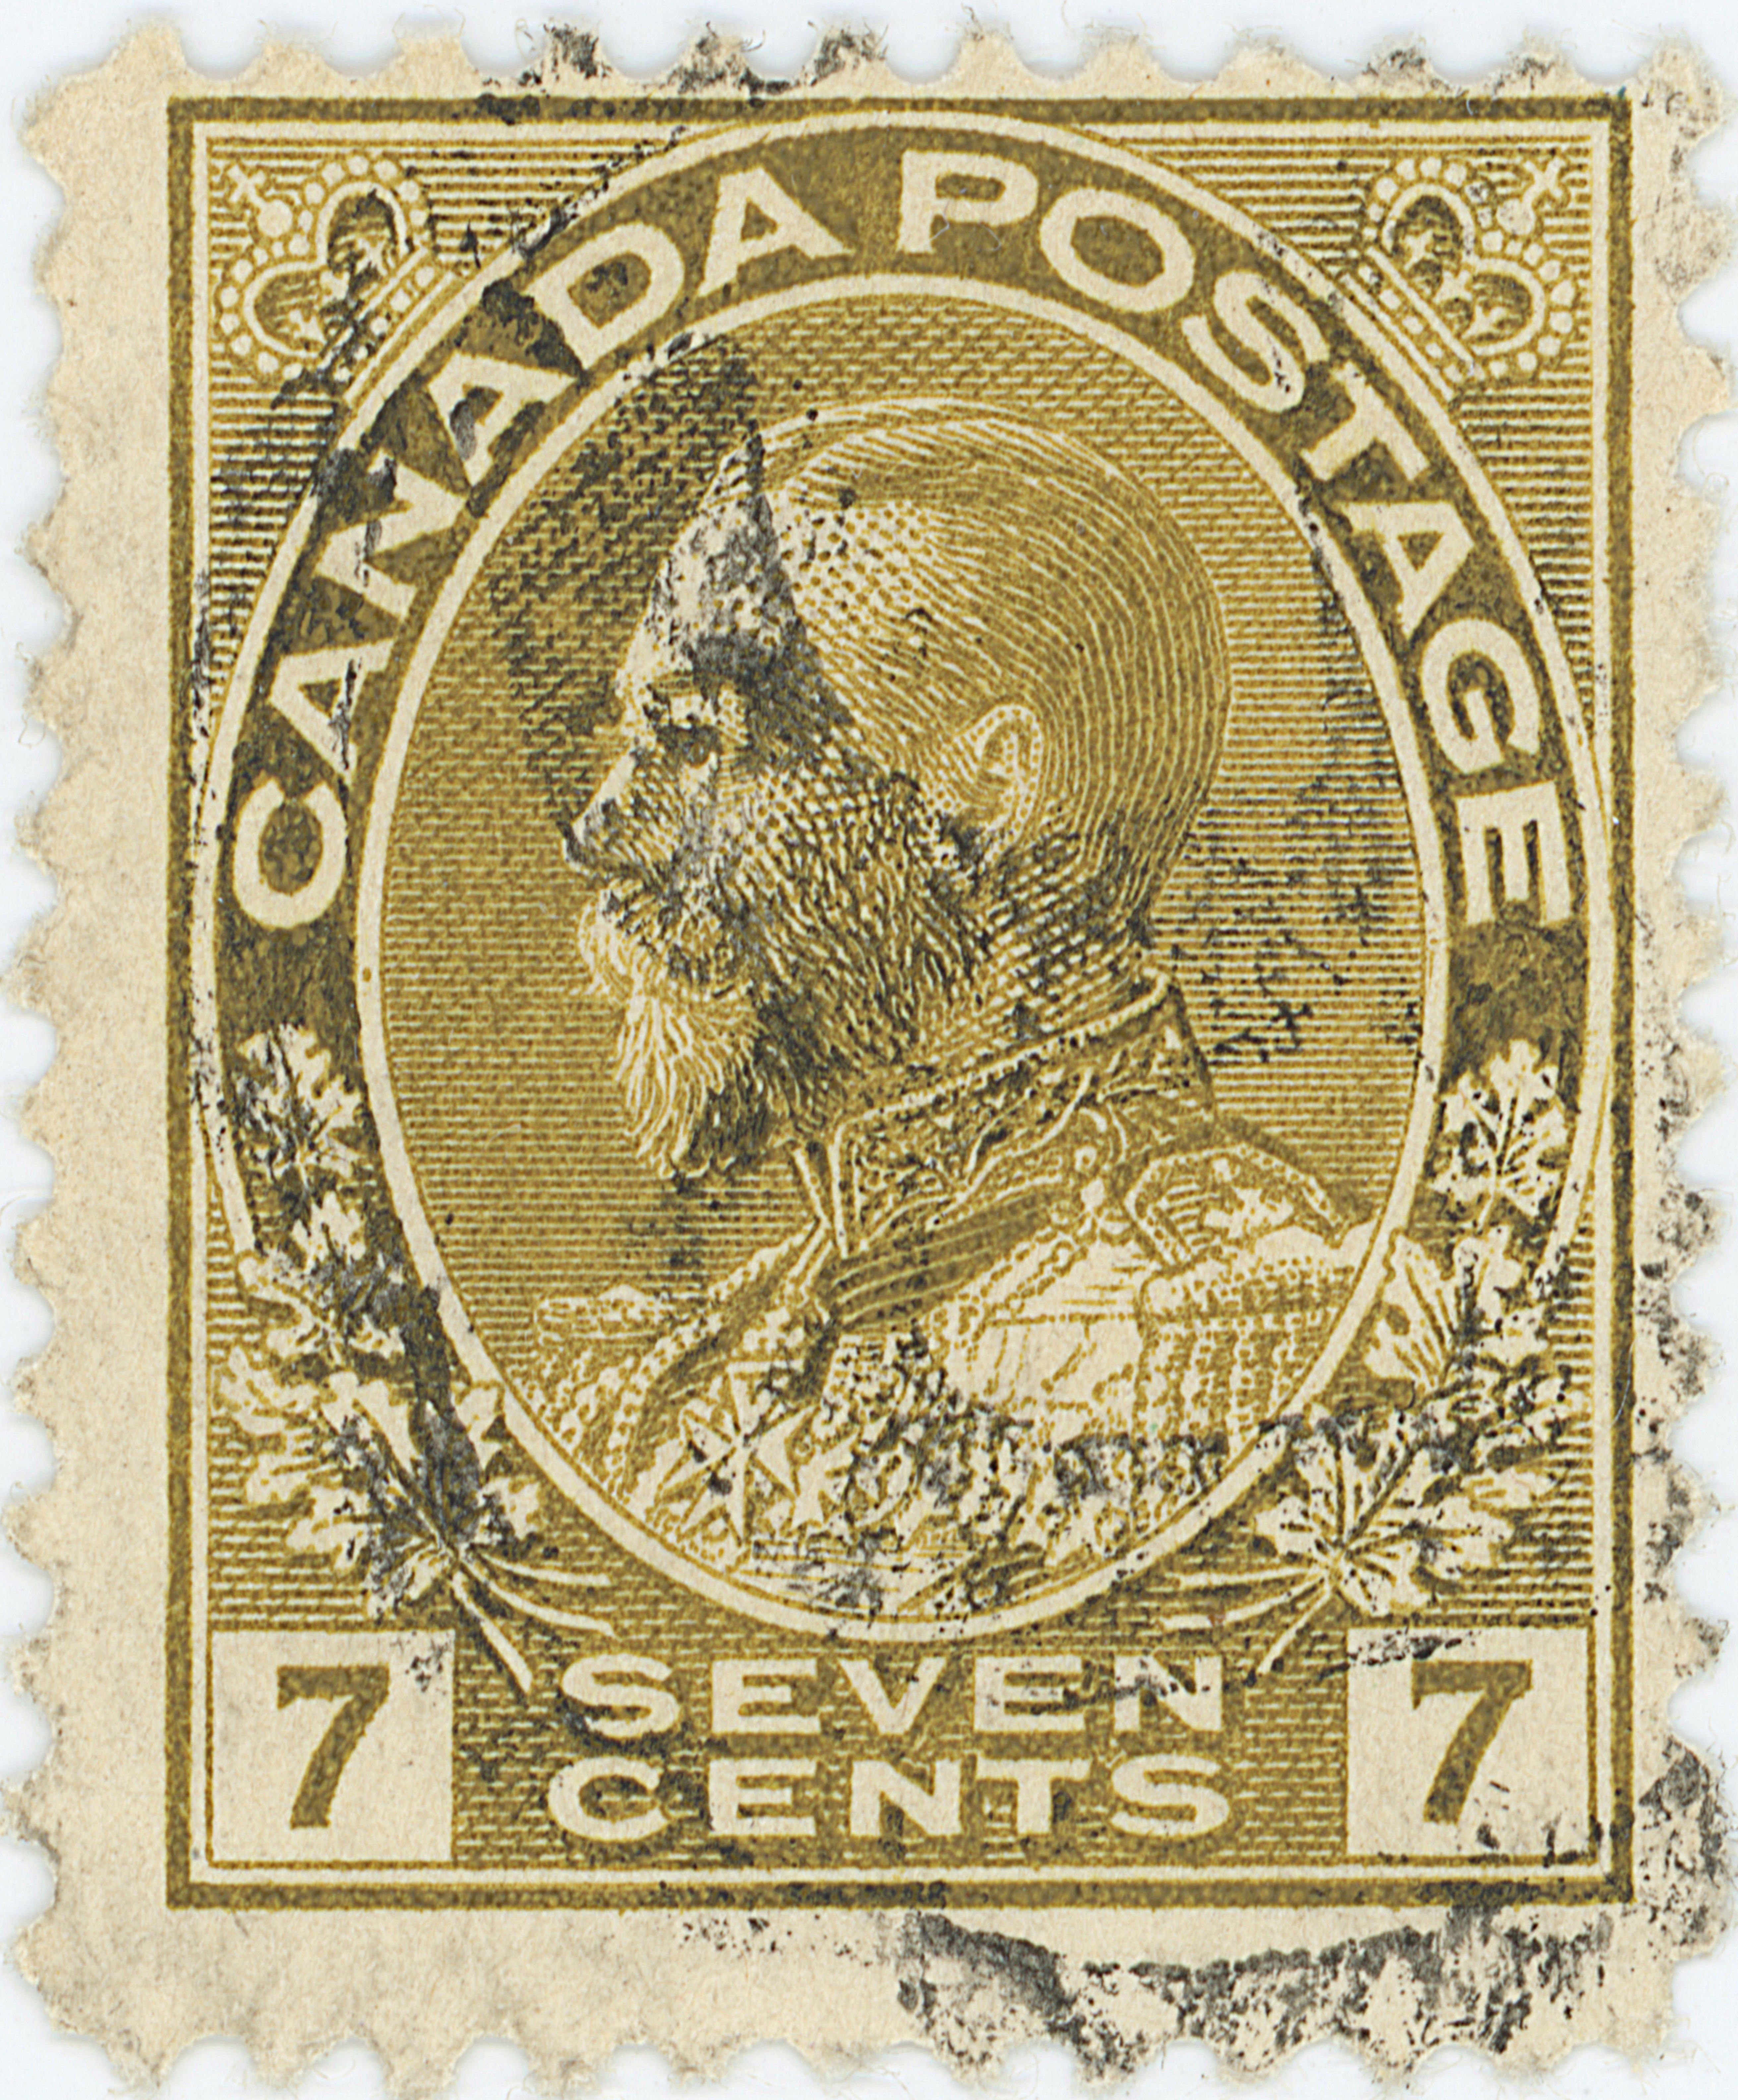
I am not a 'power' user, so I may well be missing something obvious to those who are, but what I am trying to do seems quite simple. I do one, 2 step, repetitive task a lot. After straightening a scan (6400dpi), I have tried to implement a macro to a) resize from 6400->300 dpi (using document -> resize with no resampling) and then b) sharpen (Filters -> Sharpen -> Unsharp Mask) (settings are 'fixed' at (30, 1.8 and 0)). My problem is the height to width ratio changes using the macro process but is stable when using the steps manually. I have had this issue for some time, and did not 'improve' during Beta 2.5 testing. (I had not reported it earlier.) The only variable that might be a consideration is the slightly different original scan dimensions. Is it possible that the original dimensions are somehow still being considered during the macro's execution ( which happens after the cropping process but before any saving of the file)? As I said earlier, it might be something I am doing incorrectly... suggestions appreciated. Two images attached. The design (the area of yellow, or the frame and contents - not the full image, which might vary slightly) of each image should overlap perfectly...they do not. Edge to edge of the image could be a bid different, but the impressions should be perfect match. Thanks for your time (and patience?)
-
A few years ago a ton of macros/scripts existed for CorelDraw; now a puny few. Many of these were extremely helpful, for example, manipulating nodes, fine rotation of objects, color swapping. Does anyone know of plans in the Serif family for such tools? I would be happy to pay reasonable fees to private developers. Thanks.
-
I create a macro when a tiff file was opened, saved it in the library, exported the macro to a external disk,. I used the macro (duplicate layer) and closed the tiff file. Macro disappeared in the macro tool box. the only way to use the macro again was to select it from the library. Cutiously, all previous macros from the macro tool box have disappeared too.
-
 🇬🇧 Hi, the interface of the three software programs in the Affinity suite seems very well done and quite productive. But everyone also has their own specificities in their workflow and the addition of a utility like Keyboard Maestro can fill certain gaps or innovate with advanced functions. In addition, KM knows how to perfectly replace many other utilities for macOS… 😉 As I am working on a document alternating between RGB mode and CMYK mode, I was wondering about the opportunity to be able to visually know, and without action on my part, the current color mode and the possibility of quickly changing it. to change. Unfortunately, AD does not indicate the current color mode and the procedure to switch from one mode to another requires a lot of clicks on the part of the user (from memory, on other graphics software [?], there is a simple and direct submenu within a menu, associated with keyboard shortcuts…). I haven't found a keyboard command for this function in AD!… The Keyboard Maestro utility has solid arguments for performing macros. This software is a marvel of efficiency and provides very valuable services, whatever the software used or the context. Below is a screencast of the KM interface in AD. Sorry if the action is rapid, but that is also the goal, to make it as transparent as possible. macros live.mp4 Attached is a set of two macros KM for AD. Affinity Designer Format de couleur RVB CMYK Macros.kmmacros.zip In detail, this set includes a first macro for the conversion to RGB and a second macro for the conversion to CMYK. The macros simulate the call to display the “Document Setup” dialog box (Command + Shift + P), a first click on the “Color” Tab, a second click on the “Color Format” Menu and a third click in this Menu on the desired profile. And a final press of the “Escape” key to close the dialog box. The initial position of the mouse is maintained during the macro. The two macros are displayed in a palette, in the form of a button, alternately, one replacing the other with the help of a simple toggle. When opening AD and a document, the last state of the button is displayed, the toggle being managed by KM (with a system variable). It is therefore up to the user to make their choice by clicking on the mode they want. In KM, everything is almost configurable. So, pallets have several options. Their positions are defined by the user, using the mouse while pressing the Command key. For the two icons which symbolize here the RGB mode and the CMYK mode are simple copy and paste of two small illustrations created with AD, inserted in the KM interface, on each of the two macros. There you go, I hope this post will give you ideas to perhaps further improve your workflow… NB: we can also add a function (clicks) to the macro to modify the profile of the “Color” Palette at the same time. Finally, porting this set of macros for AP and for AP is possible, you just need to modify the call up of the dialog box because the menus are different... 🇫🇷 Bonjour, l'interface des trois logiciels de la suite Affinity me semble très bien faite et assez productive. Mais, chacun a aussi ses propres spécificités dans son flux de travail et l'apport d'un utilitaire comme Keyboard Maestro peut combler certains manques ou innover avec des fonctions évoluées. De plus, KM sait parfaitement remplacer bon nombre d'autres utilitaires pour macOS… 😉 Étant en train de travailler sur un document en alternance entre le mode RVB et le mode CMYK, je m'interrogeais sur l'opportunité de pouvoir visuellement connaître, et sans action de ma part, le mode de couleur courant et la possibilité de rapidement le changer. Malheureusement, AD n'indique pas le mode de couleur en cours et la procédure pour passer d'un mode à l'autre demande beaucoup de clicks de la part de l'utilisateur (de mémoire, sur d'autres logiciels graphiques (?), il y a un simple et direct sous-menu dans un menu, associé à un raccourcis clavier…). Je n'ai d'ailleurs pas trouvé de commande clavier pour cette fonction dans AD !… L'utilitaire Keyboard Maestro possède de solides arguments pour effectuer des macros. Ce logiciel est une merveille d'efficacité et rend de très précieux services, quelque soit le logiciel utilisé ou le contexte. Plus haut, un screencast de l'interface de KM dans AD. Désolé si l'action est rapide, mais c'est aussi le but, qu'elle soit la plus transparente possible? Joint aussi le set de deux macros KM pour AD. En détail, ce set inclus une première macro pour la conversion en RVB et une seconde macro pour la conversion en CMYK. Les macros simulent l'appel de l'affichage de la boîte de dialogue “Configuration du document” (Commande + Majuscule + P), un premier click sur l'Onglet “Couleur”, un deuxième click sur le Menu “Format de couleur” et un troisième click dans ce Menu sur le profil souhaité. Et un dernier appel de la touche “Escape” pour fermer la boîte de dialogue. La position initiale de la souris est maintenue durant la macro. Les deux macros sont affichées dans une palette, sous forme de bouton, en alternance, l'un remplaçant l'autre avec l'aide d'une simple bascule. À l'ouverture d'AD et d'un document, c'est le dernier état du bouton qui est affiché, la bascule étant gérée par KM (avec une variable système). C'est donc à l'utilisateur de faire son choix en cliquant sur le mode qu'il désire. Dans KM, tout est presque paramètrable. Ainsi, les palettes disposent de plusieurs options. Leurs positions est définies par l'utilisateur, à la souris tout en appuyant sur la touche Commande. Pour les deux icônes qui symbolisent ici le mode RVB et le mode CMYK sont de simples copier-coller de deux petites illustration réalisées avec AD, insérées dans l'interface de KM, sur chacune des deux macros. Voilà, j'espère que ce post vous donnera des idées afin de peut-être améliorer encore votre flux de travail… NB : on peut aussi ajouté une fonction (des clicks) à la macro pour modifier en même temps le profil de la Palette “Couleur”. Enfin, le portage de ce set de macros pour AP et pour AP est possible, il faut juste modifier l'appel de la boîte de dialogue car les menus sont différents…
- 4 replies
-
- 1
-

-
- affinity designer
- macros
- (and 2 more)
-
Hi all! I have bought and use both v1 and v2 Affinity Photo for iPad. I would like to buy and use James Ritson’s (jamesritson.co.uk/resources.html) macros for astrophotography, but seems, I would need a desktop version as well because of macro scripts format differences between iPad and Desktop software. Q1: is there any way to convert .afmacro to .afmacros w/o installing desktop software (my company’s software policies rules doesn’t allow me to install any additional software)? Q2: seems, not all macros for desktop Affinity Photo/Photo2 will run on iPad software version - any way to dermine, what will run, and what - not? What are the limitations of iPad version (comparing with desktop)
-
I often do forget and also have a hard time to find again resources that others or I have contributed over time here in the forum. In former times I've often oriented on MEB's Affinity resources page, which sadly nowadays isn't up to date any longer (probably it's too much work and too time consuming to keep that up to date). - Here are some links to my own resources section contributions, so I have and keep myself sort of an overview for these. Assets: A few Paper Effect Assets AI chip logo icon assets Cat-Silhouette assets Common callout assets Hairstyle Assets Halloween I + II Assets Fall assets & styles set I'am Groot - Vector assets Numbering assets OS X El Capitan UI Kit assets Protractors back to school assets new Ruler back to school assets Some BW arrow assets Some Easter Assets Some Firework assets Some Fruit Assets Some Nicholas/Santa Claus assets Some plain + vintage Badge Assets Some Snowmen vector assets Star Wars - Mandalorian assets Washi Tape assets Xmas cutout assets & sample Xmas silhouettes Xmas cookies/gingerbread Xmas trees vector assets Macros: B&W play macros Matte Color Macro Rusty Boost Macro Styles: Div Metal Styles Fabric styles Fall assets & styles set Fire Styles Fur styles 1+2 Knock on Wood Styles Rust Styles Some Metal Styles Valentine texture styles Wild animal texture styles Xmas texture styles 1+2 Tools: A few Forum Helper Tools (various Python3 scripts) updated afthumbs - Extracting PNG Thumbnails from .afphoto and .afdesign files Affinity Designer Shortcut Mapper Affinity OpenCL Disabler (Windows tool) A visual shortcuts explorer for Affinity Tools Delineate - A Raster/Bitmap to SVG Converter Thinning multi architecture Affinity apps under MacOS via Python to reclaim disk space whatFileType - Detects file signatures and tells what sort of file it is Various: 2024 Months Calendar Template & Assets in EN new Calendar day as Affinity template/assets & a daily showup SVG file new Christmas Photo Storyboard Chalk brushes Daily Planner DE/EN localized - Letter (ANSI A) print template Daily Log DE/EN localized - Letter (ANSI A) print template Desk Calendar for 2019 Desk Calendar DE/EN/GR for 2022 Desk Calendar DE/EN/GR for 2023 Prism Desk Calendar 2024 DE/EN/GR new Fall Photo Storyboard Halloween Polaroid Photo Storyboard OS X El Capitan UI Kit Pocketcalendar 2019 Reusing filmstrips as photo borders updated Round Calendar Reminder Stickers Xmas Card & Envelope Xmas cutout assets & sample Xmas FB Cover Xmas mug mockup Xmas Trees And most importantly ... Quick Tips: for finding Affinity content with Google Search List of some third party calendar generator tools new List of some third party vectorization & tracing tools
- 42 replies
-
- 28
-
-

-
 Hi, In order to reduce file size (24Mb each) of ca 350 pics , I'd hoped to be able to create a macro; select file and export. But that does not work. - Then I tried an alternative method; Take one pic in portrait, start macro; -documents - resize doc- reduce DPI (eg 150) - resample Bilinear- Enter. stop macro and put it in the library. This works fine. Now open new batch job, Add some pics - save as JPG - unclick AFPhoto- click 3 dots and set quality on 85 - and apply the resized macro - OK. Result: Lanscape pics are squeezed into portraits, (portraits are ok). In figures: Originallandscape are 6016x4016px after resize 2008x3008. Tried this with a landscape then the portraits are blown up to double the width. What is it I'm doing wrong?? Regards, Tom
-
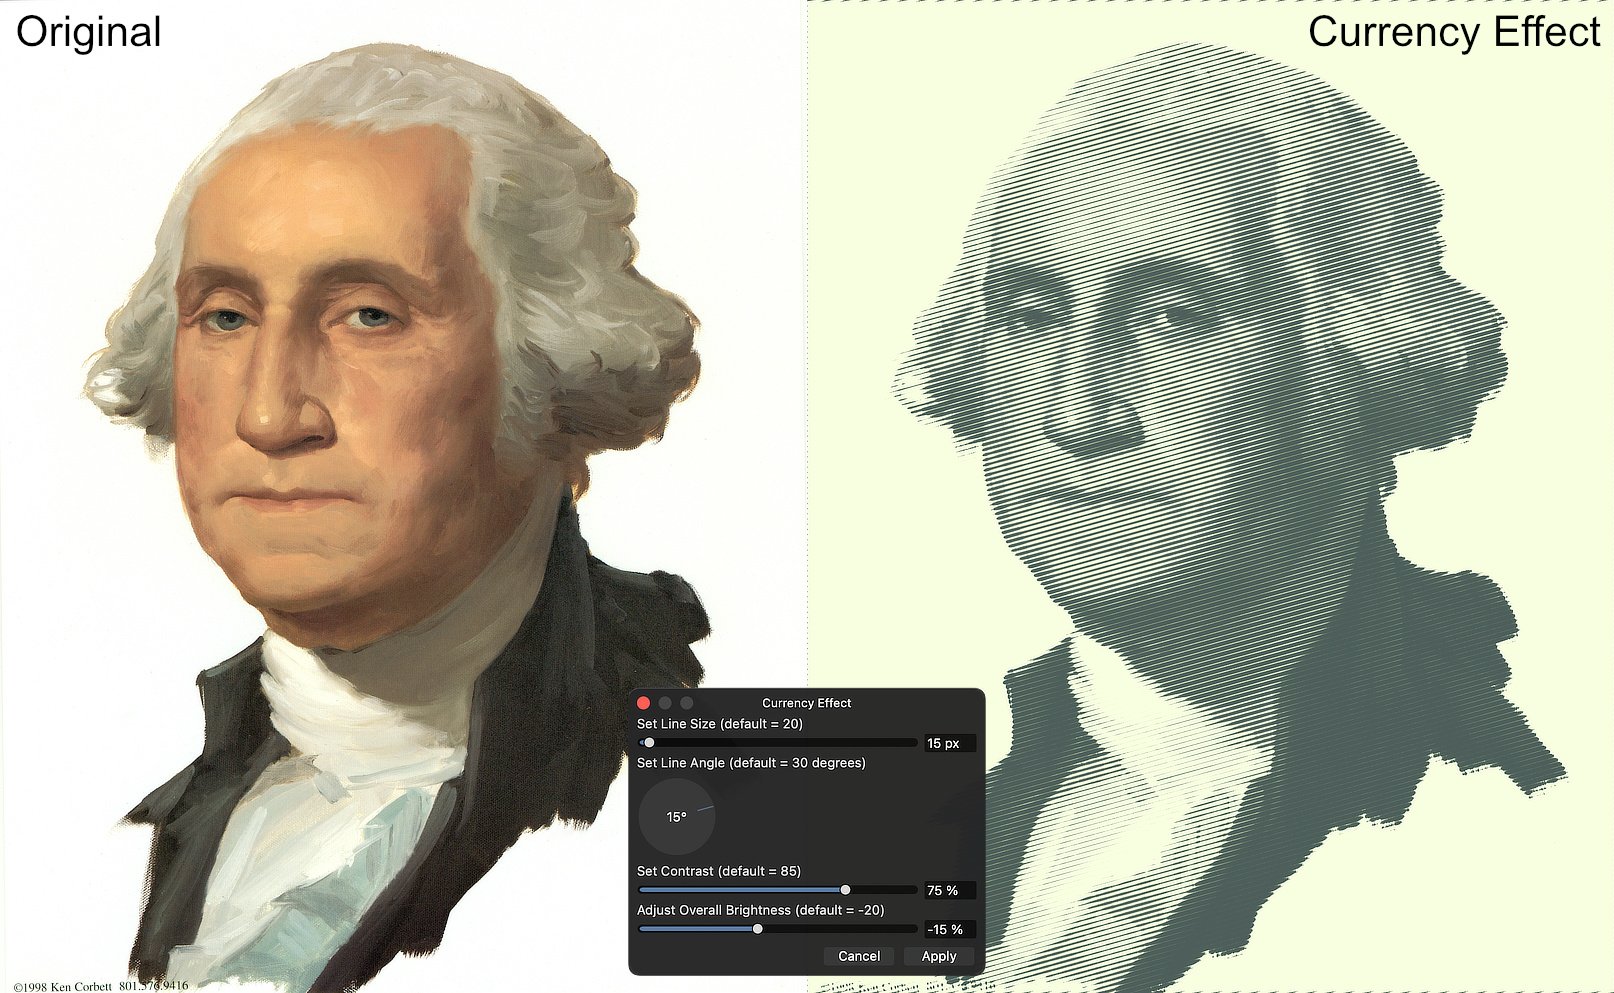
Updated Version Available (December 2023) Recently, @christerdk posted in the "Desktop Questions" forum about trying to achieve the engraved look of U.S. currency. He was given a variety of suggestions (including one or two commercial products). Because of this, I am attaching a macro that I created several years ago and have refined a bit more recently. It is meant to approximate the look of engraved currency. The macro uses a number of adjustments and filters, all enclosed within a Group. Because of this, the effect can be turned on and off by simply using the Hide/Show checkbox on the group itself. The attached .afmacros file is a Macro Category and therefore should be imported from the Library panel. It contains a single macro (called "Currency Effect"). Once imported, the macro can be moved to a different category, if desired. The macro was created in Affinity Photo version 2.2 which probably means that it will not be compatible with AP version 1. However, since it is provided as a category, it can be imported into Affinity Photo 2 for iPad. * * * * * * * * * * * * * * * * * * * * * * * * * * * * * * * * * * * Clicking on the macro will bring up a user dialog in which you can set certain parameters: 1) Set Line Size (default = 20) The macro uses a live Halftone filter, and this will vary the width of the lines used. In general, use larger lines for larger images. 2) Set Line Angle (default = 30 degrees) This affects the angle at which the lines are drawn. Try various settings to achieve subtle but important differences in output. 3) Set Contrast (default = 85) This setting also affects the embedded Halftone filter, and can change the contrast between the dark lines and the background. 4) Adjust Overall Brightness (default = -20) This affects a Brightness and Contrast adjustment, and will lighten or darken the final image, to your taste. When you hit the Apply button, the effect is added to your image at the top of the layer stack. Note that the effect contains only adjustments and filters; because of that, it is completely non-destructive. You can make changes to the underlying image and this will not adversely affect the result. Also, you can open the individual adjustment and filter layers to make changes even after you have hit the Apply button. Here is an example of a Before and After image, with the User Dialog showing the settings used to create this particular variant. * * * * * * * * * * * * * * * * * * * * * * * * * * * * * * * * * * * As always, I am one person using one computer and a single iPad. I have tested this macro on both of my devices, but cannot claim that this testing has examined every possible scenario. Nevertheless, I believe that it will work as suggested. Try it and, if you like it, keep it and enjoy it. It is free for you to use in any project you would like – personal or commercial. I ask only 2 things. If you've used the macro, please let me know by posting your impressions. Perhaps, even provide a before and after screenshot. Second, please remember that this forum is a wonderful way to learn, and an even better way to share that learning. Pay it forward. December 2023 Update The .afmacros file attached below is now an updated category. It can still be imported into the Affinity Photo Library panel (or into the iPad version) but it now contains 3 macros. (1) The original version of the Currency Effect is included. (2) An updated version 2 of the macro is also provided. This update adds a live Ripple filter which makes the engraved lines a bit wavy, better simulating true engraving. (3) There is an Instructions macro, which will place on-screen instructions into your Layers panel. Please feel free to download the new file, and to replace the previous Currency Effect category with the new one. Have fun! Currency Effects (v2).afmacros
- 10 replies
-
- 16
-
-
-
 Is it possible for a macro to edit text in a text layer, getting custom text from a file name? I'm guessing this is not possible, but you never know 🤷🏽♂️
 -
Windows 11 Pro 22H2, Ryzen 7 3700X with NVIDIA GeForce RTX 2060 Super New issues 2.2: Project file sometimes silently fails to save latest session changes (do not know how to reproduce). Other people now reporting same problem on Facebook. Project file can be missing hours of work when re-opened. Running a macro instantly crashes the application (crash report uploaded, 100% reproducible). Application does not crash when applying macro actions manually. Macros created in 2.1. Blemish Removal tool when used to dab away dust spots slows down with each successive use, until eventually the application becomes unresponsive for long periods of time. Application does not crash (so far), eventually recovers, but I have always given up when the unresponsive periods become intolerable (30s to 1 min), never pushed it further (frequently reproduceable). Merge Visible sometimes produces a result that has somewhat shifted levels/color (not easily reproduceable). Workaround is to break up merge into batches of fewer layers and then merge the results. Issues 2.2 (carried over from 2.0/2.1): Blur Brush region of influence does not preview blur effect, it previews like an erase tool (reveals layer underneath or transparency grey squares) (100% reproducible). Blur Brush tool is often reluctant to make any changes or makes some small amount of change and then becomes unable to make any more changes (even at 100%) (frequently reproducible). Grid cannot be turned on (100% reproducible). Makes it difficult to snap objects. Amending a TIFF file and saving it directly (without export) severely corrupts metadata (Subject, Tags, Comments). Comments and Subject are completely replaced by seemingly random bursts of Chinese characters, long hierarchical tags and large lists of tags are truncated even though they have not exceeded any limits imposed by File Explorer or dedicated tagging applications (100% reproducible). Application repeatedly displays a reminder dialog to turn on crash reporting when launched. Apart from settings choices being repeatedly questioned, the reminder dialog frequently interrupts train of thought. If it only comes up after a failure, then this suggests there are frequent silent failures happening in the background going unnoticed.
-
 Dear friends, I need your advice on how to achieve the following: I have a folder, X, containing 100 images, and I also have a single photo, Y, as a background. I want to batch overlay the images from folder X onto photo Y using BLEND OPTIONS -> Underlying Composition Ranges in a specific location. How can I create a macro to open image Y and then layer the images from folder X on top of it? The macro does not support the function of recording the opening of a specific image. I'm having trouble understanding the logic. If I already have an open image, I don't have any issues overlaying it manually, but I need to automate this process. How can I accomplish this? Does Affinity Photo support command-line operations? Affinity photo v2.1.1 macOS 13.5.1
 -
I noticed that lots of people use Macros in Affinity Photo. I don't see a Macro Tab anywhere in Affinity Photo. Do I have download them from somewhere?
-
 Affinity Photo 2.1.1 When recording a macro (using image 1): Select > Select All Edit > Copy Edit > Paste When I apply this macro to image 2, step 3 of the macro appears to paste the copy taken from image 1, rather than the copy that should be taken in step 2 from image 2. Step 2 does not actually appear to be recorded in the Macro studio window. It appears that rather than recording the Copy command, it is recording adding a specific selection to the clipboard.
 -
 Hi, I can't seem to figure out something really simple: how to execute a macro stored in the library. I have my image open along with the library window but clicking, double-clicking or dragging a macro onto the image has no effect. Tried it with self-made ones and with some that came with the software. Only way I can apply macros seems to be to right click it in the library and choose 'Edit', then press play in the macro panel. This is on a Mac, running version 1.6.11
 -
 Hello all Affinity forum users! I have come today (first time) having a slight issue. You see, I downloaded the assets that were given out to users who upgraded from Affinity 1 to Affinity 2, but I did so manually (old habits die hard). Then, after realizing that Affinity 2 has an "Account" page, I decided to download the rest of the assets from there, since it is easier. In doing this, I also re-downloaded all of the previous assets I had downloaded before, because I thought that Affinity would recognize that they were the same, and prompt an either "replace or don't copy" prompt for these downloads. This did not happen, and it just downloaded them... again. Now I have 2 sets of brushes, 2 sets of assets, and 2 sets of macros. How would I go about removing these? I can see the ones that I have downloaded from the "Account" section have locks, and the ones manually have this sort of "chain-link" icon. Would I have to delete them all manually? (Psst. It would be really cool if Affinity had (has?) a feature to where it knows if you have the assets/brushes already, and prompted you with a replace/duplicate/not do prompt, for idiots like me)
 -
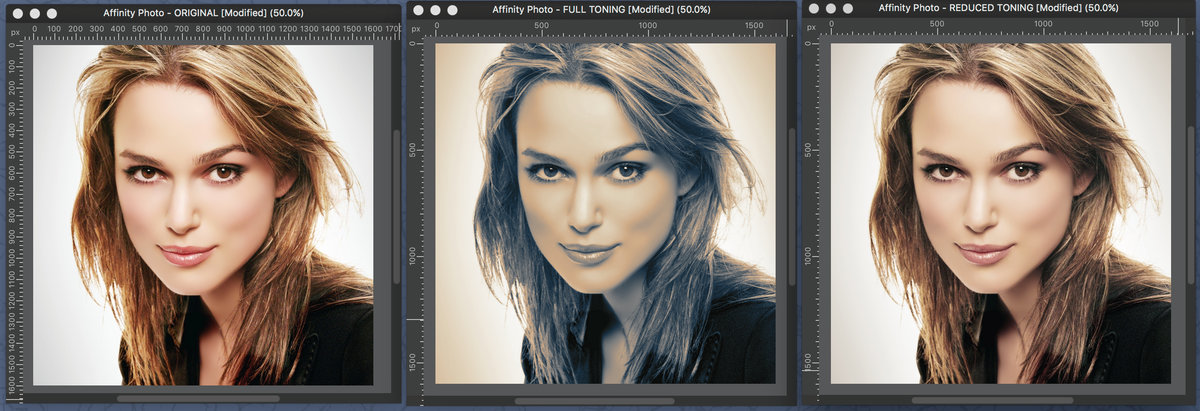
Today, let’s have fun with Gradient Maps… Gradient Maps are a great way to color grade photos, since they map dark, light, and midtone values according to a pre-defined gradient. This can easily define a “look” for photos that might otherwise be hard to accomplish. Although I am not a user of Photoshop, our “arch rival” has a wonderful group of gradient maps called “Photographic Toning” that are specifically designed to color grade photos. Although you have to drill down through a few panels and dialog boxes to find them (and you sort of have to know they’re there in the first place) they are a truly nice addition. Also, they are easily obtained by anyone. But, as they say, there’s the rub. Affinity Photo cannot import Photoshop gradient maps. Affinity Photo can store pre-defined gradients in the Swatches studio, but for some unknown reason the stored gradients are not available from the Gradient Map studio panel. Gradient Maps can be stored as presets, and can be chosen from the Adjustments panel, but I don’t believe they can be easily exported from one computer and brought into a different one. So… after a long couple of days of transcription, I have created a set of Macros that apply each of the 38 Photographic Toning gradient maps. Since macros are easy to store, and to share, I am making them available for anyone who wants them. There are actually 2 sets of Macros included - each as an easy-to-import Category from the Library panel. The first group of Macros is called “Photographic Toning Gradients” and these are named according to the gradient map they apply. Each macro creates a Gradient Map layer, applies the appropriate color values, and names the layer according to the gradient map it applied. The second set of macros is called “Photographic Toning Gradients - reduced.” This category also applies the gradient maps in a similar fashion, but then reduces the opacity of the layer to 30%. This reduces the effect of the Gradient Map, and produces a much subtler effect. Here is an image that shows the full-strength versions of all 38 gradient maps. And here is a photo to which I’ve applied a full-strength gradient map, and also a reduced-strength gradient map. These macro categories are included in the ZIP file attached to this post, along with a Letter sized JPG that includes samples of the gradient maps. Also included in the ZIP file is another macro category that includes one more macro. It’s called “Obama Hope Poster” and, as you might have guessed, it turns any photo into an Obama Hope-style poster. Just because… Please enjoy them! Photographic Toning Gradient Maps.zip
-
 Hi Everyone, I have been on a mission to fill the void in the Macro environment by the lack of gradient support. To this end I was introduced to Procedural Texture and saw some possibilities and started tinkering. The manifestation of this can be found in several working groupings of R,G,B Vignettes and Linear gradient macros uploaded in the Resource section that I will update as interesting developments occur. In this, I will attempt to break down some of the math and show you how I am attempting to work around my limited knowledge of geometry(has been a while since trig) to make this accessible to the beginner who wants to implement some control over the basic examples and give some direction over how to navigate this powerful tool. If you would like some immediate video immersion of outstanding examples, that I may start from or point to, see Graphicxtras.com on youtube. If anyone has anything to add/correct/questions, comments, etc. please jump in...this is only meant as a supplement to the Affinity Photo Procedural Texture help section that can leave the beginner a little overwhelmed. So, here is the first installment of my experiences. And certainly, if anyone wants to use these explanations in video format please feel free...just post a link for everyone to see it. Procedural Texture 101 https://en.wikipedia.org/wiki/Procedural_texture These are some common definitions of elements of an equation w = width of document h = height of document x = horizontal axis y = vertical axis rx = relative x(position) to upper left hand corner expressed as (0,0) horizontal axis (rx,0) ry = relative y(position) to upper left hand corner expressed as (0,0) vertical axis (0,ry) R = red channel G = green channel B = blue channel A = alpha channel Relative x and y (rx,ry) x and y coordinates can also be specified as values relative to any starting point on the screen or any subset of the screen such as an image. On the Web, each clickable area of an image map is specified as a pair of x and y coordinates relative to the upper left-hand corner of the image. https://en.wikipedia.org/wiki/Cartesian_coordinate_system osc(input, parameter) The following syntax follows the typical convention of function(input, parameter) where the function( = osc ) https://en.wikipedia.org/wiki/Wave_function https://en.wikipedia.org/wiki/Wave_equation https://en.wikipedia.org/wiki/Oscillation_(mathematics) osci(input, parameter) This function example represents the oscillation over the set (in this case an interval) of the function( = osci ) https://en.wikipedia.org/wiki/Interval_(mathematics) This example is formula from the Checkered preset osci(rx*c/w,ry*c/w) variable c(Z) produces squares + addition of variable a(Z) to control vertical axis osci(rx*c/w,ry*a/w) c(Z) produces horizontal rows a(Z) produces vertical rows example. c=0 (no horizontal rows) c=1 (1 horizontal row) c=25 (25 horizontal rows) c=5, a=5 (square with the size of 5 rows horiz and 5 rows vert)(effectively enlarging 5x larger than (1x1) c=5, a=1 (rectangle with the size of 5 rows horiz and 1 row vert) etc. See video example of procedural texture squares at Graphicxtras.com I will update with macros of these examples as I go along, or if you want to get started go to procedural texture and find the checkered preset and start experimenting. orig softlight 50 checkered R,G,B enhanced* * enhanced with Dave's Shifter Macros(slight tweeks with all 3) looks like candy. (These are free macros available thru his InAffinity channel on youtube. This one came out today...) Enjoy and Experiment - T V
-
 When is a API/SDK for Affinity Designer happening so I can automate scripts to draw? Adobe Illustrator has one to create macros. Why doesn't Affinity have for the vector graphics drawing programming for macros? https://www.adobe.com/content/dam/acom/en/devnet/illustrator/pdf/sdk/programmers-guide-2017.pdf
 -
I have put together a set of macros to change the dpi of an image without changing the pixel dimensions. The set comprises macros to change the dpi to 72, 96, 144, 150, 180, 192, 300 and 400dpi. These macros were recorded in Photo 1.6 because there were reports that similar macros recorded in 1.7 would always resample, even if the Resample box was unticked. I have checked that these macros work in 1.8, which they do. I also note that in 1.8 the Resize function will change the dpi without resampling. Here is the Library file: Change DPI 1.6.afmacros Thanks to @carl123 for setting the ball rolling with his macro here. EDIT: This macro library has been recreated (in 1.6) and re-imported into this message. EDIT: I have now re-recorded them in Photo 1.10, but they still do not work! John
-
B&W images can have many different facets and moods for a given motive, so it always also depends on the intended expression that they should convey. Here are a few (six) different B&W conversion macros for tryouts and to play with. - You may have to customize their settings to your individual needs, since not all input images are the same. BEFORE & AFTER MACROS OVERVIEW THE LIBRARY MACROS FILE B&W Plays.afmacros
-
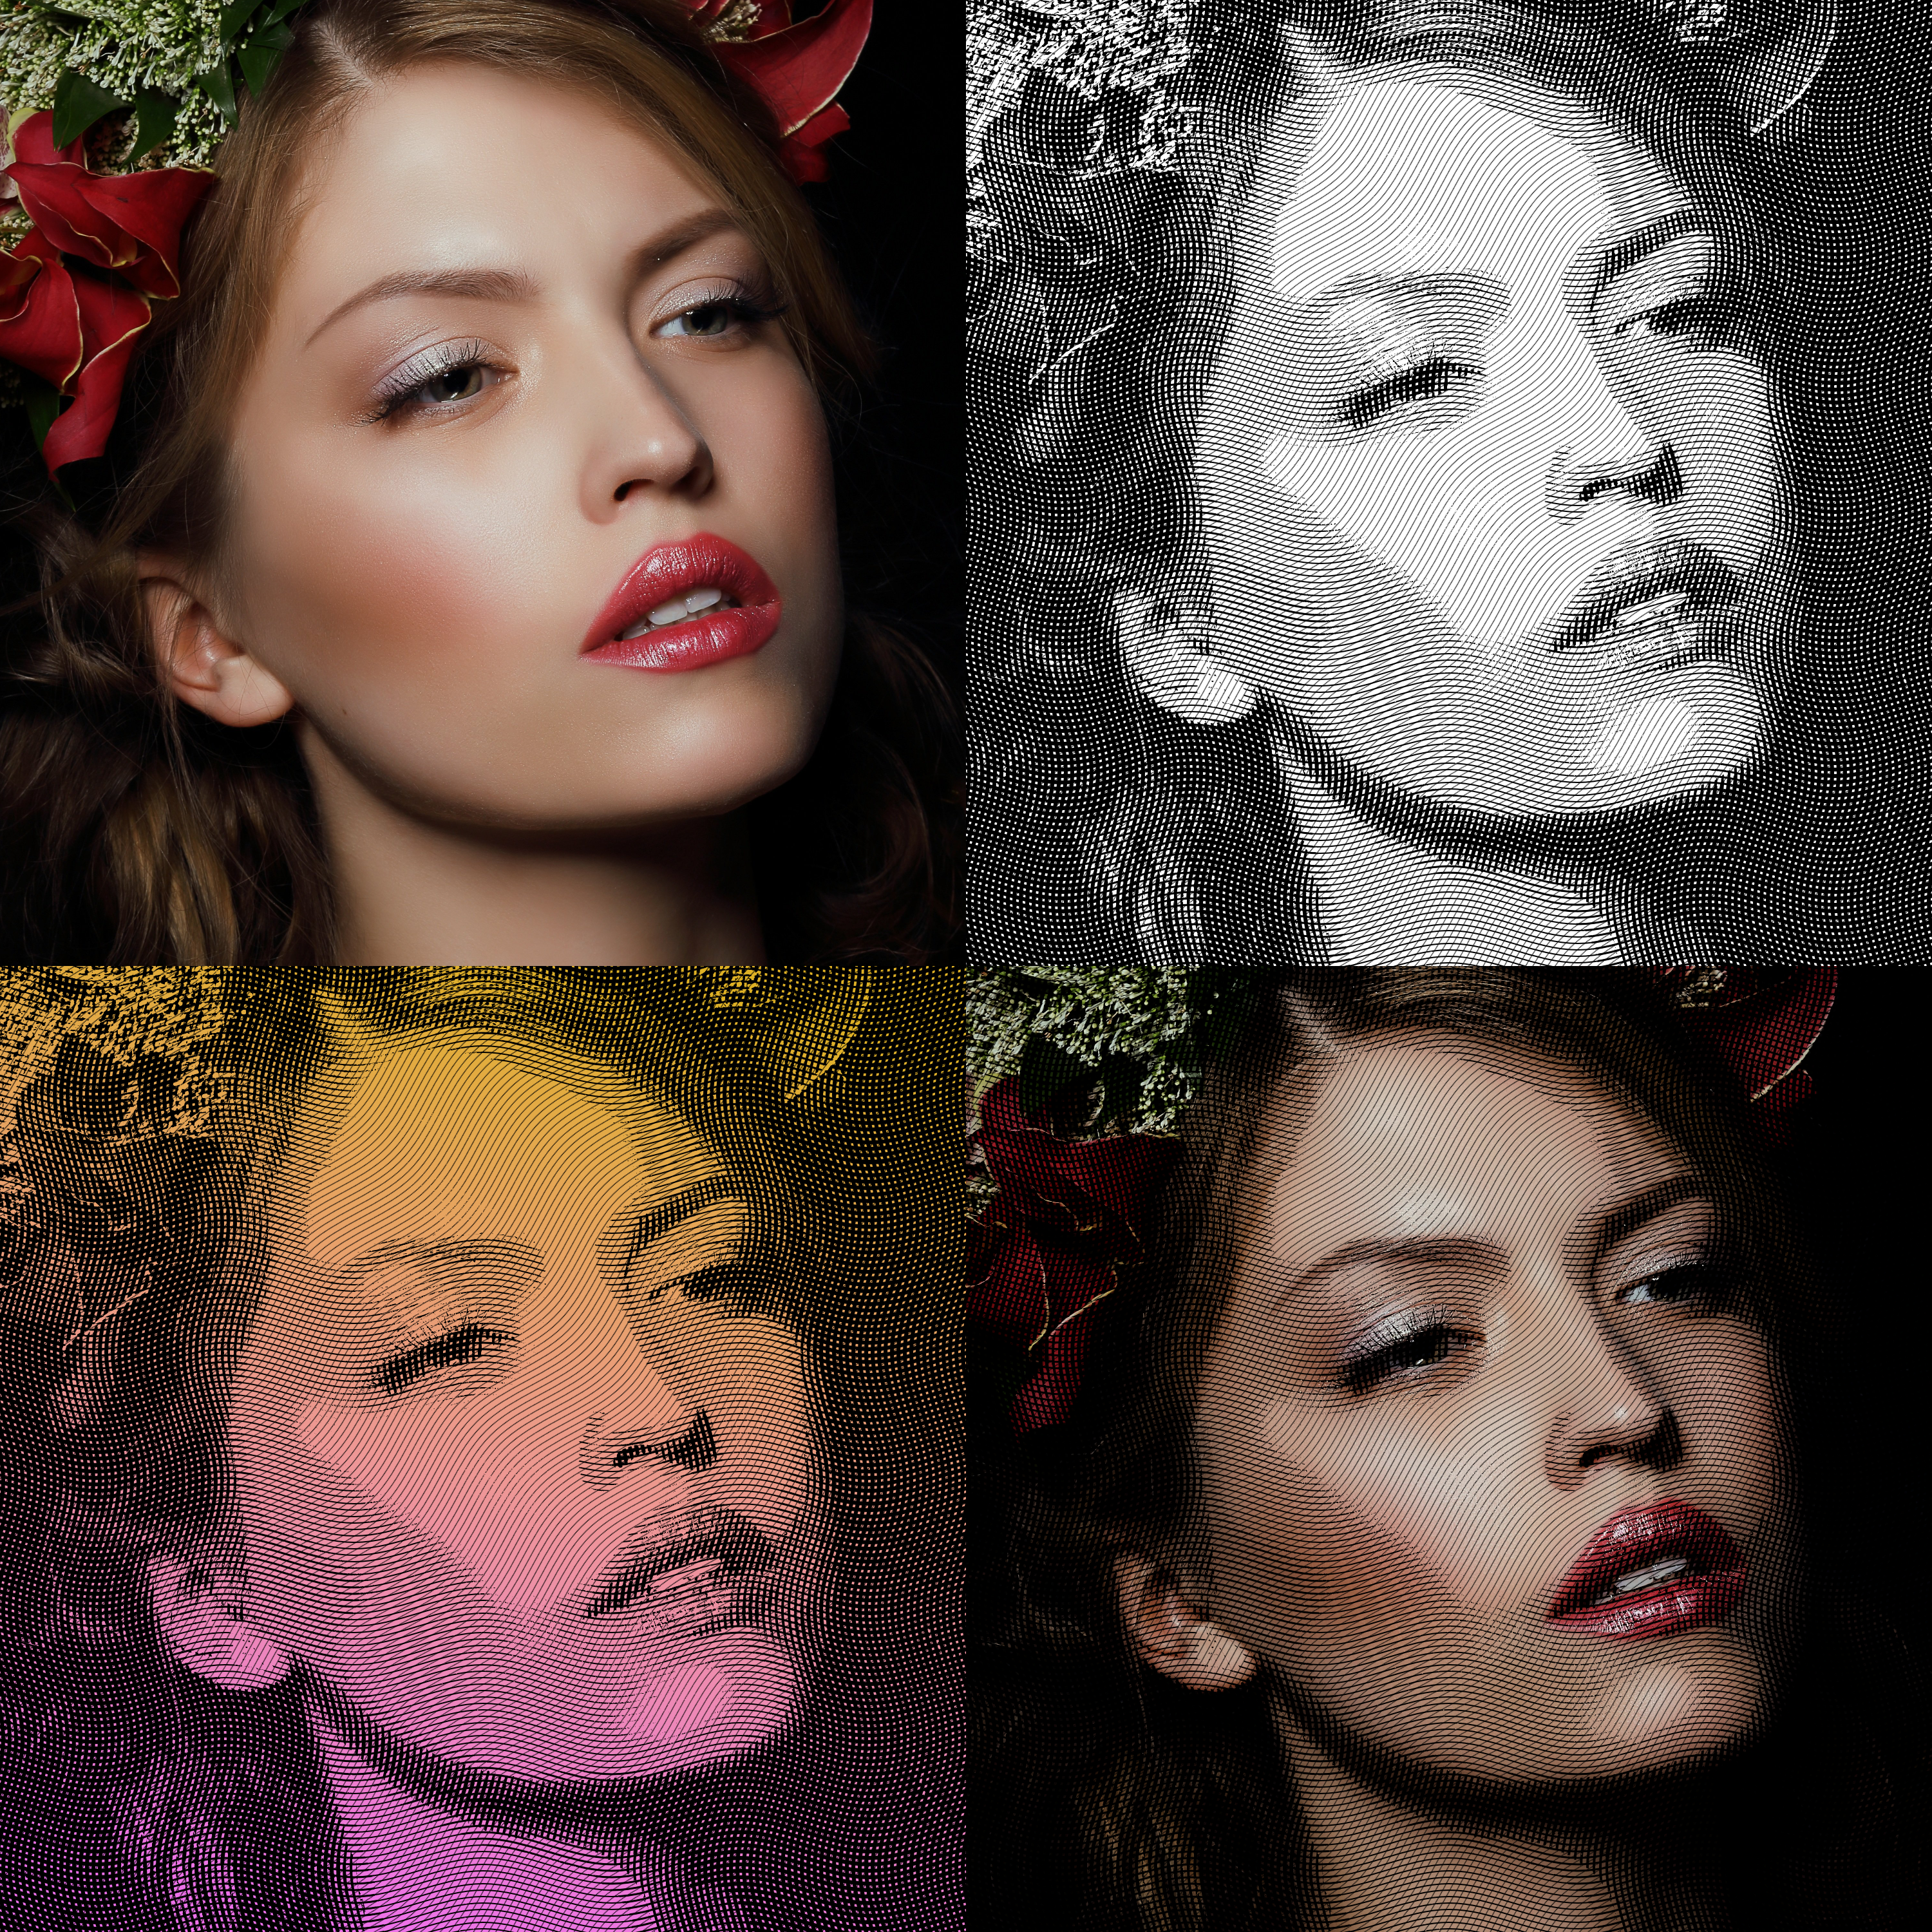
 I had to edit some images for a client, who wanted to embed them into some kind of bank notes. The motives on them used to be classic copperplate engravings. So I created some macros for AP, some of which I want to share with the community. Requirements: The image needs to be square format (it will get resized to 3000 x 3000 px) The image needs to be flat (only 1 layer) The styles provided in this post need to be added prior to starting the macro I got an error message when trying to upload the files (probably due to their size, hence some google cloud links: Engraving Styles (2.2 MB) - https://drive.google.com/file/d/1aHP4golVVLoidsw_aLs_EcMltfsM3oIu/view?usp=sharing Engraving Macros (1.8 MB) - https://drive.google.com/file/d/1mMbZFTd-fLDuACyRCa7bne7cd0wksYUu/view?usp=sharing The macros and assets have been moved to Gumroad. (https://thargoran.gumroad.com/l/engraving_effect) t's still for free—just enter the code APforum2023 (I'd appreciate some stars rating nonetheless). Sorry, but the free period expired.
- 14 replies
-
- 23
-
-
-
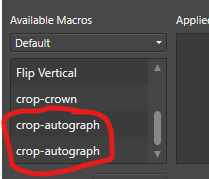
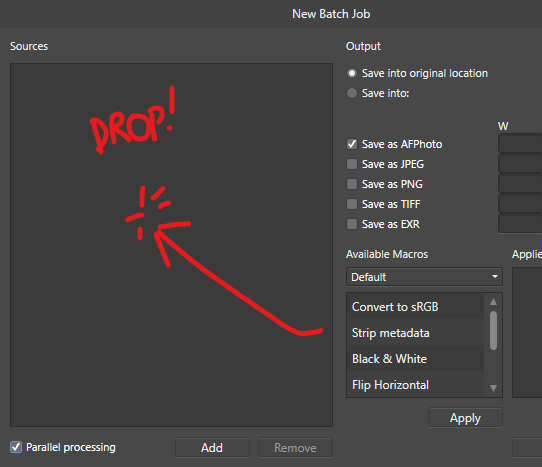
 Using macro's now to batch process images I just found out that - It seems to only work to use a macro for batch processing when it's added to the macro libarary. Even if we only want to use a macro once for a single batch. - It doesn't seem to be possible to overwrite an existing macro - When writing a macro to the library with a same name as an existing one, it's not overwriting the macro, but adds the macro with the same name to the list, so now there are two macro's with the exact same name in the library. Which obviously is confusing. - we seem to only be able to export a macro to file when we'd just recorded? not if it's already in the macro library? So it would be appreacted if we could: - Get a way to use the current macro which is currently open in the Macro panel in a batch job without us needing to add the macro to a library first to get it in the macros list of the batch job dialog. - Get a way to overwrite an existing macro, OR if using the same name as an existing macro giving us the choice to either overwrite it or let Affinity add a postfix number to the name so it's recognizable as a different, and later saved, macro - Get an 'Export macro to file' menu item in the context menu when rightclicking on an item in the macro libaray list: - Get checkboxes in front of the macro items in the macro libary and a button on top to do a remove macro's on selected items (it's taking forever to remove 50 macro's now, that we didn't want to add to the libary in the first place, but had to just to use it in the batch processor) - Could drag'n'drop our files from outside of Affinity (on Windows: Windows Explorer) into the Sources-list on the 'New Batch Job' dialog. That would be a great timesaver as we now need to browse to the same root folder every time when clicking on 'Add', while that folder is already open in a window next to affinity to drag'n'drop files from Affinity Photo 1.10.5
-
 Hi, I have affinity photo beta for windows and i wanted to know, how can i add keyboard shortcuts in Macros? Thanks in advance.
 -
It would really help speed up my workflow if it was possible to record macros on the iPad version of Affinity Photo. I'm really hoping to see this feature in the next updates.
-
Does Designer have the ability to record macros? I know Photo does, but I use Designer more and it would save me so much time! Likewise with Publisher!


.jpg.915faa15b2df1616862b416d66f8ce58.jpg)