Search the Community
Showing results for tags 'digital painting'.
-
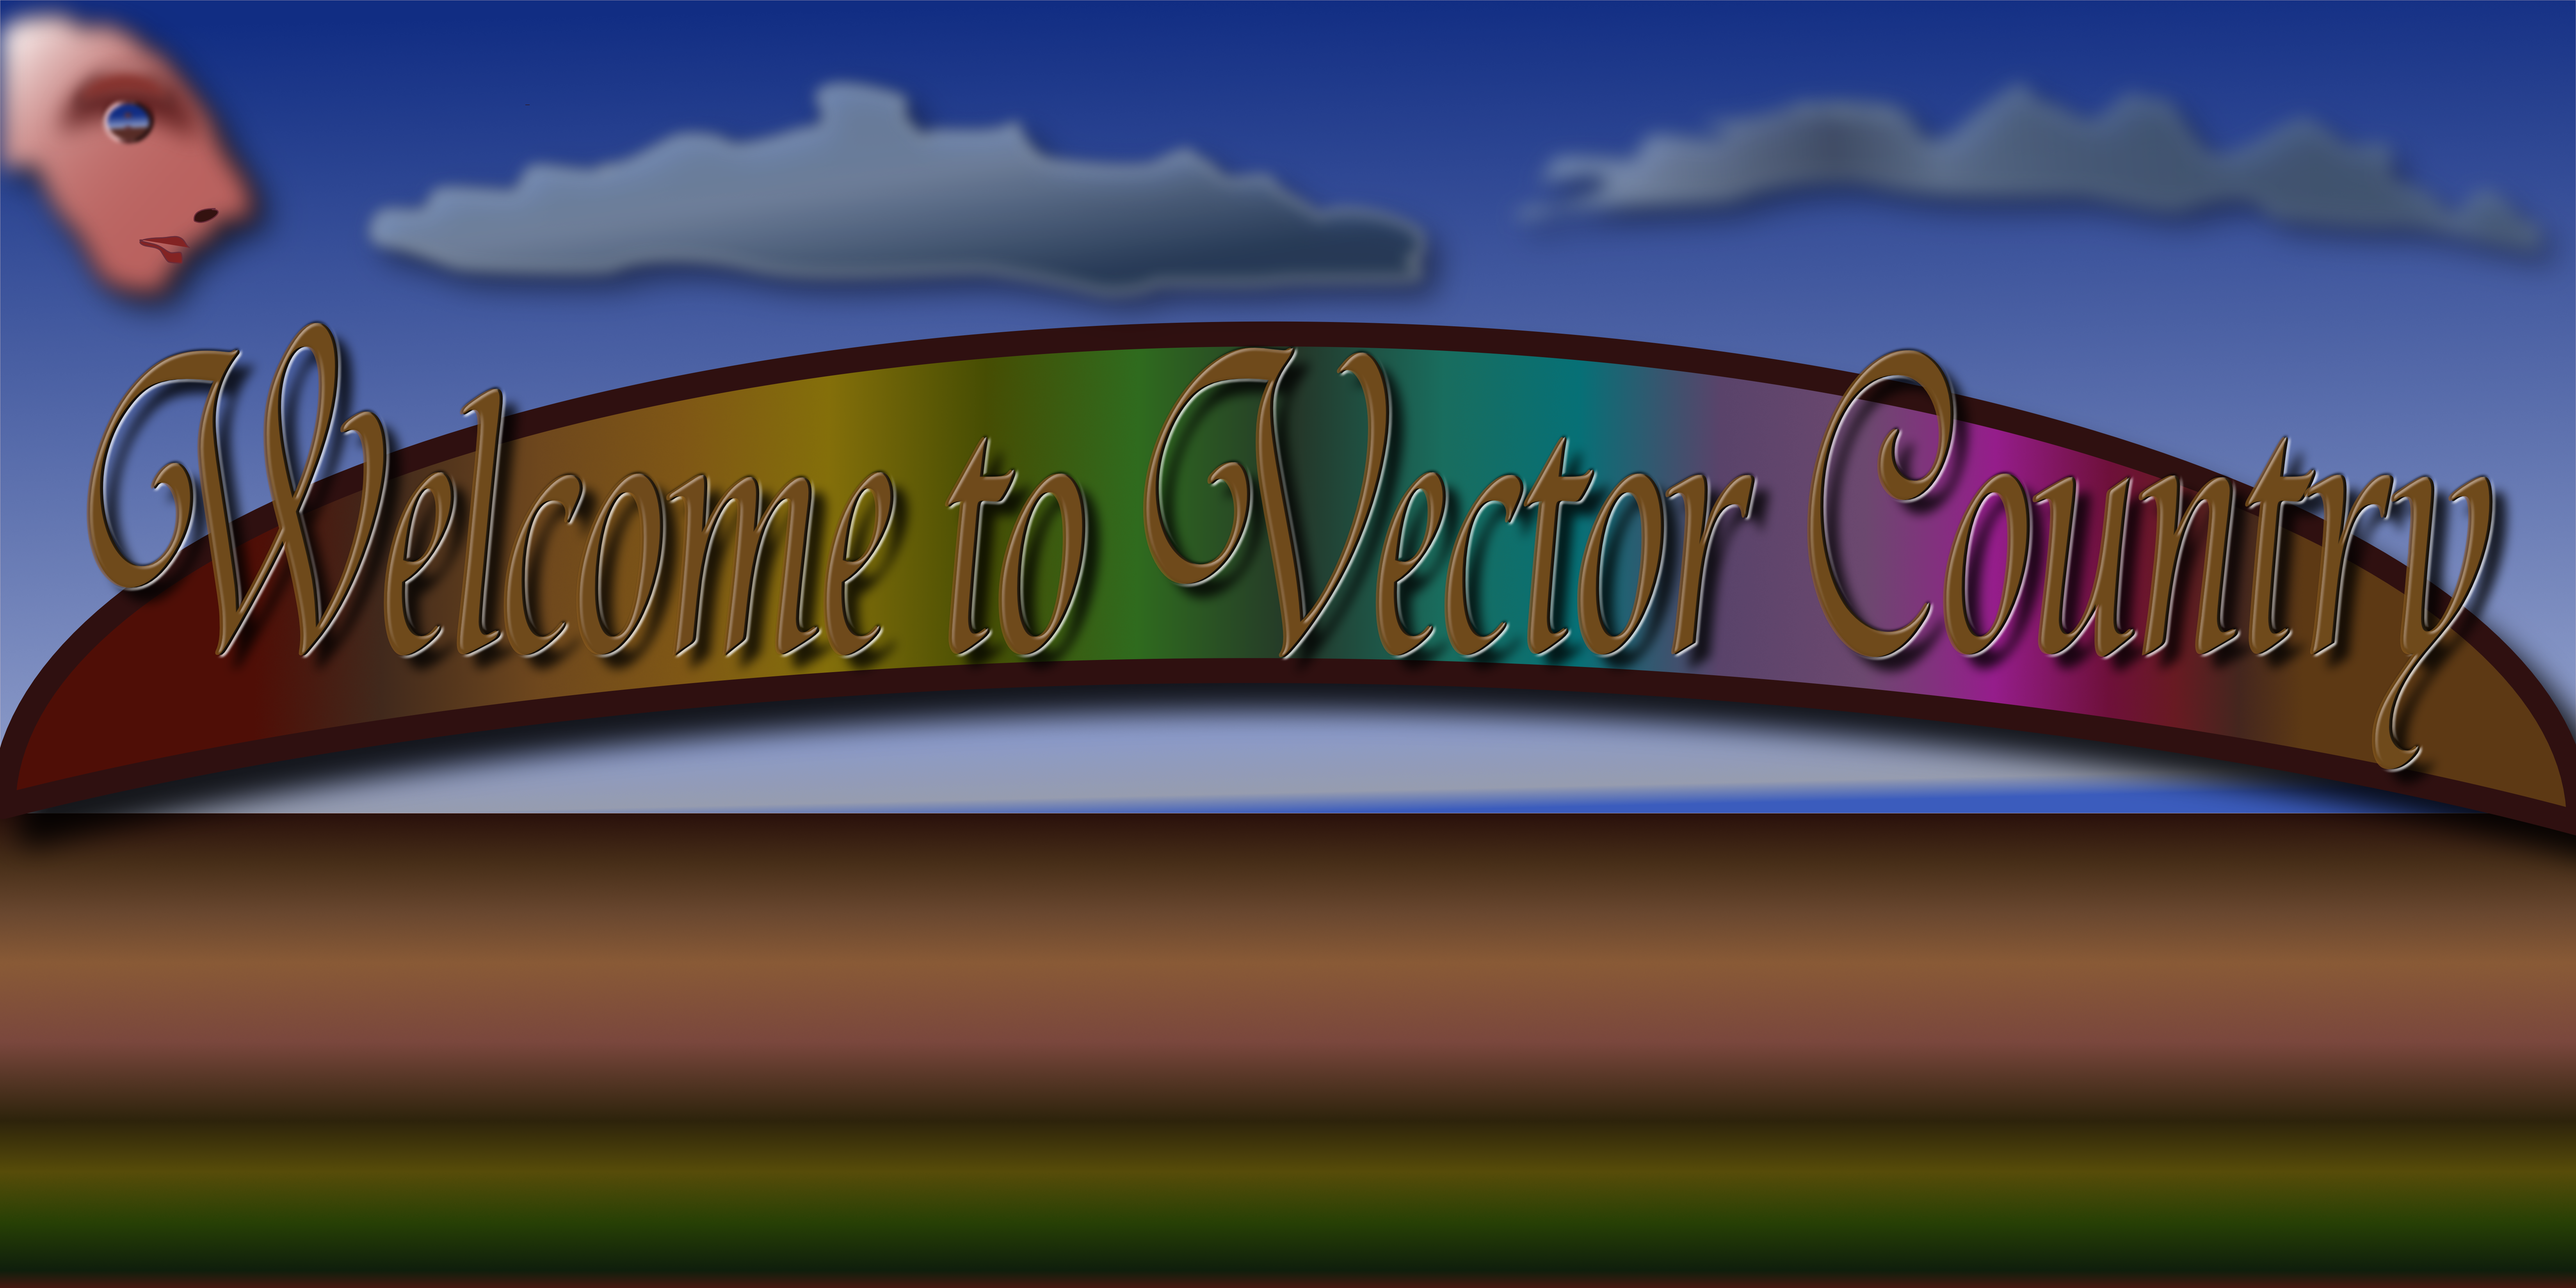
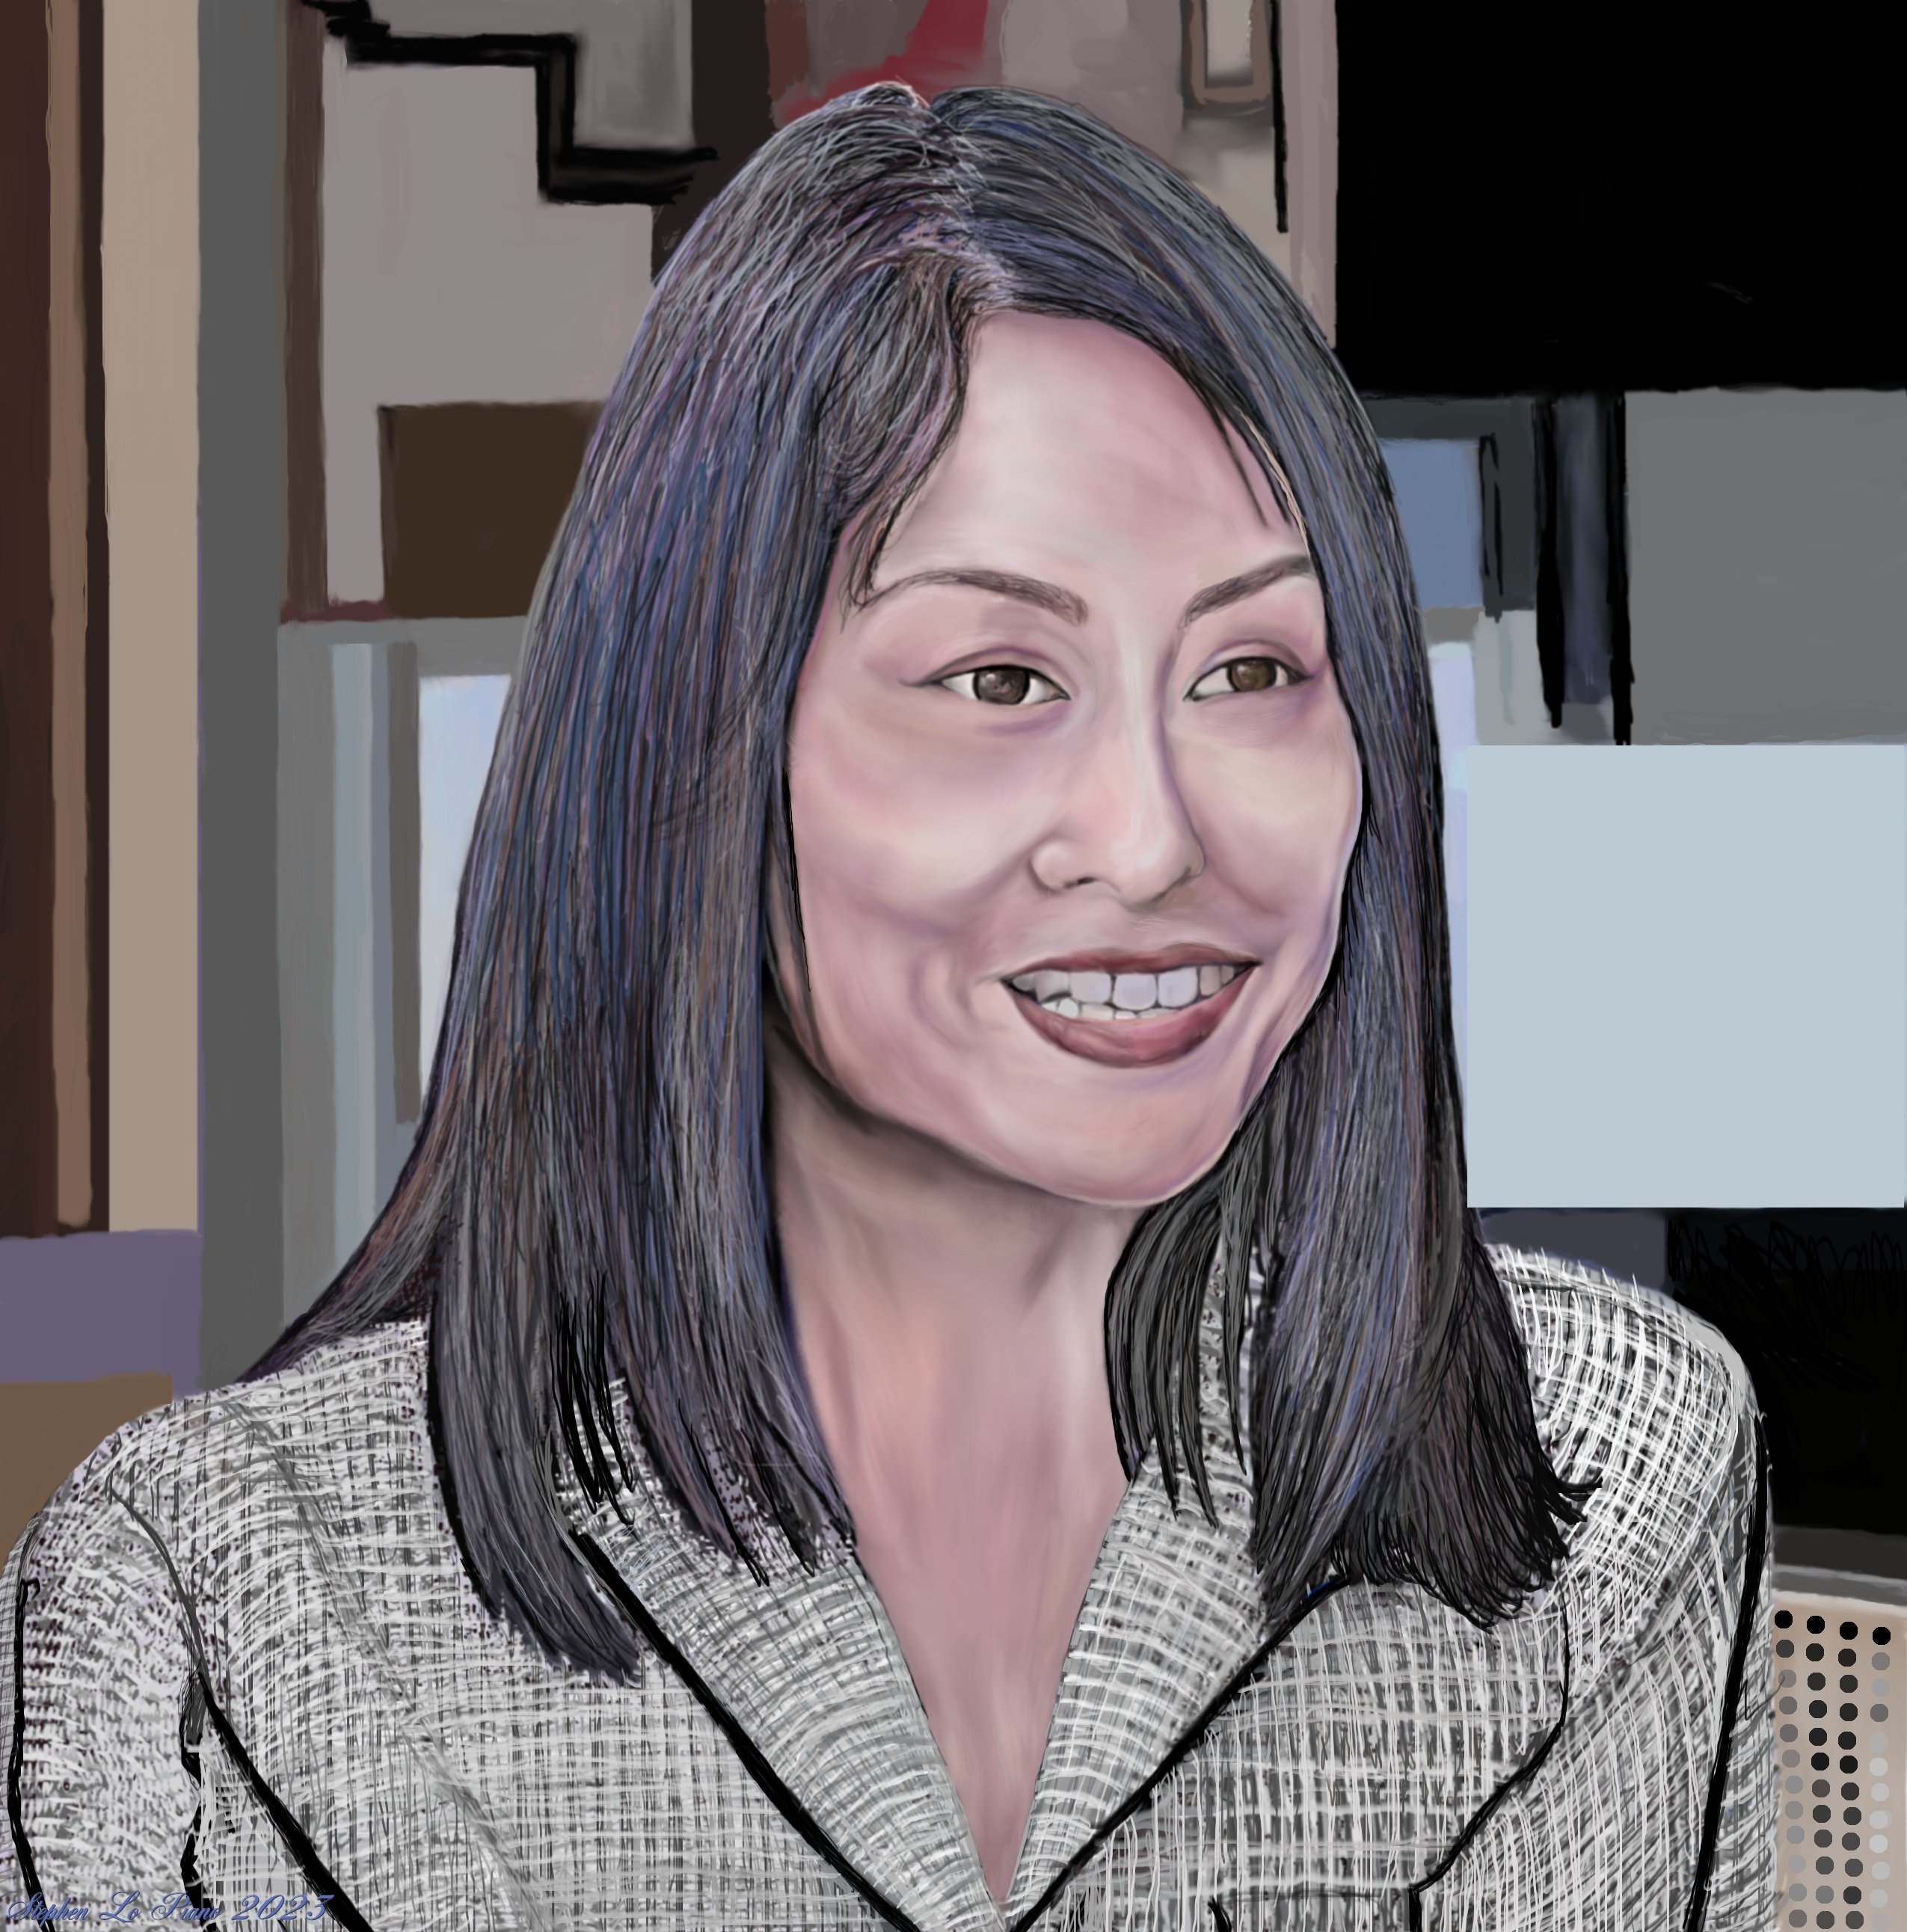
 This is my first image using brushes digitally painting in Affinity Photo 2. Portrait of a Chinese Economist Keyu Jin, froze an image of her appearing on an internet found video program called "The Agenda". This would be my attempt to use that reference for this image. The second image here "Welcome to Vector Country" was a simple thing testing Affinity Designer.
-
- 3
-

-
- portrait
- vector design
- (and 1 more)
-
Title: When the rocks hide us III (series) Media: Digital (Affinity Designer 2) Sharing a painting series I've done in my spare time.
-

affinity photo Digital oil painting with Affinity Photo
Gregory-CJ posted a topic in Share your work
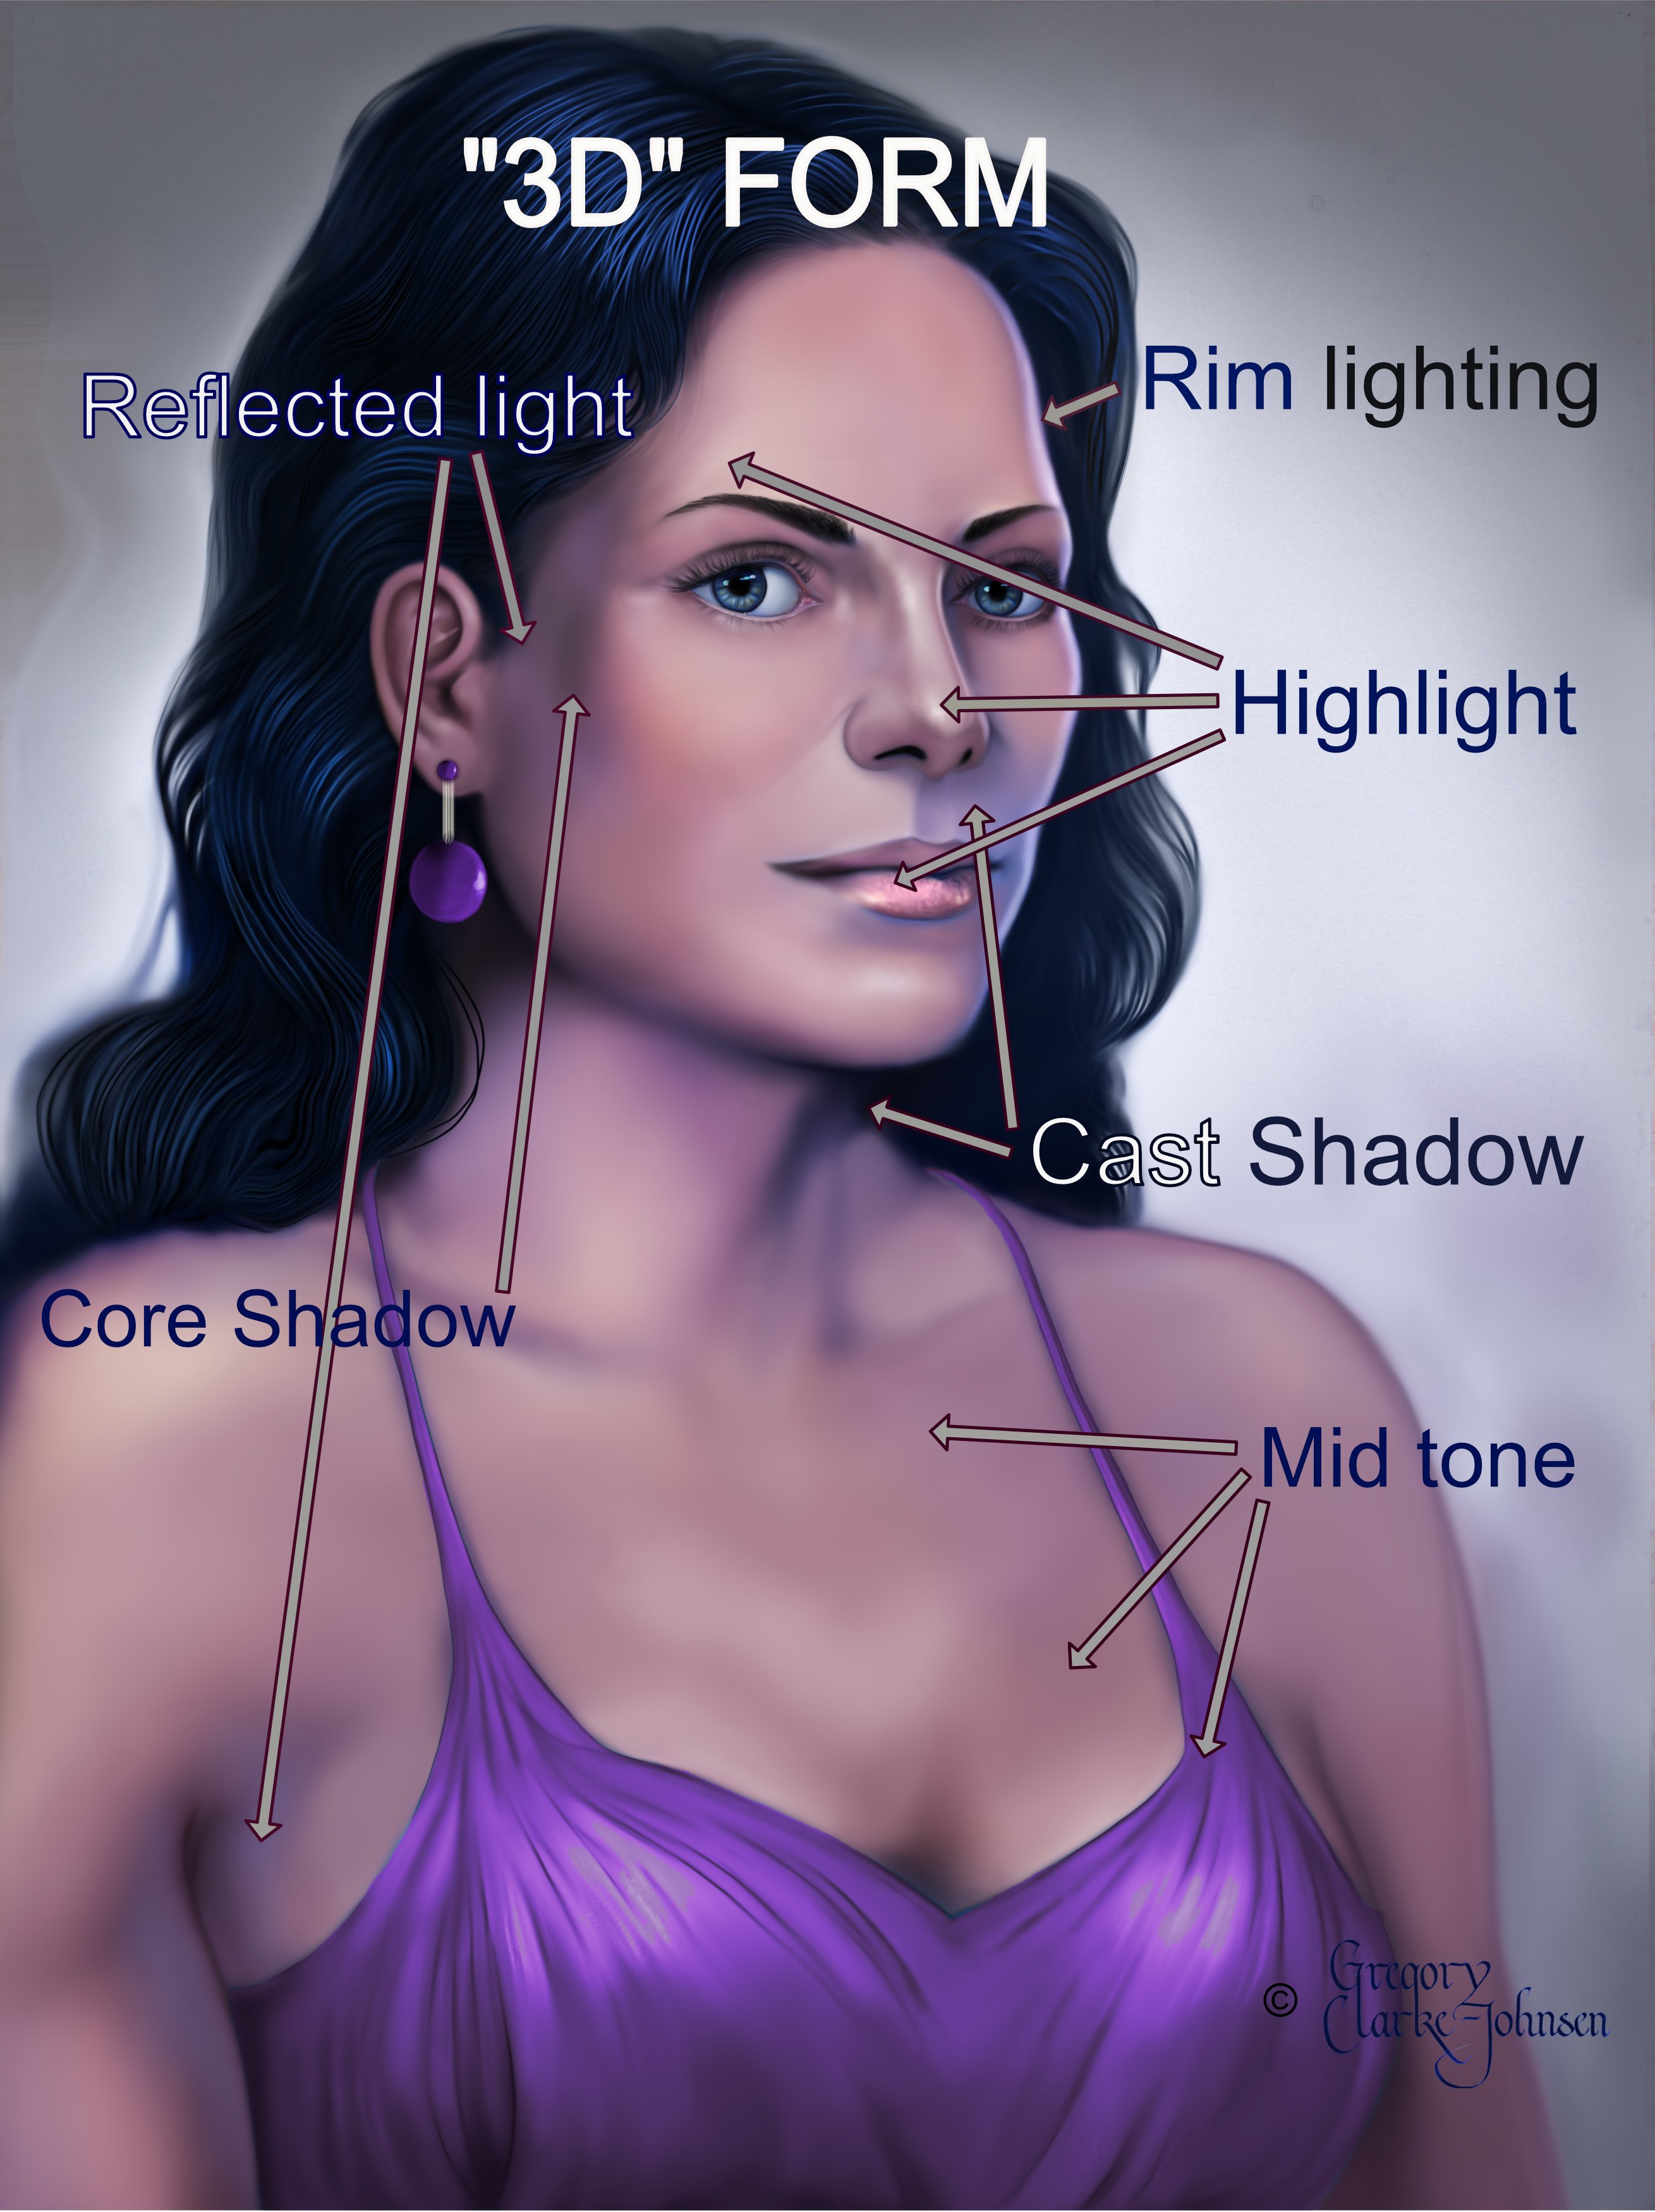
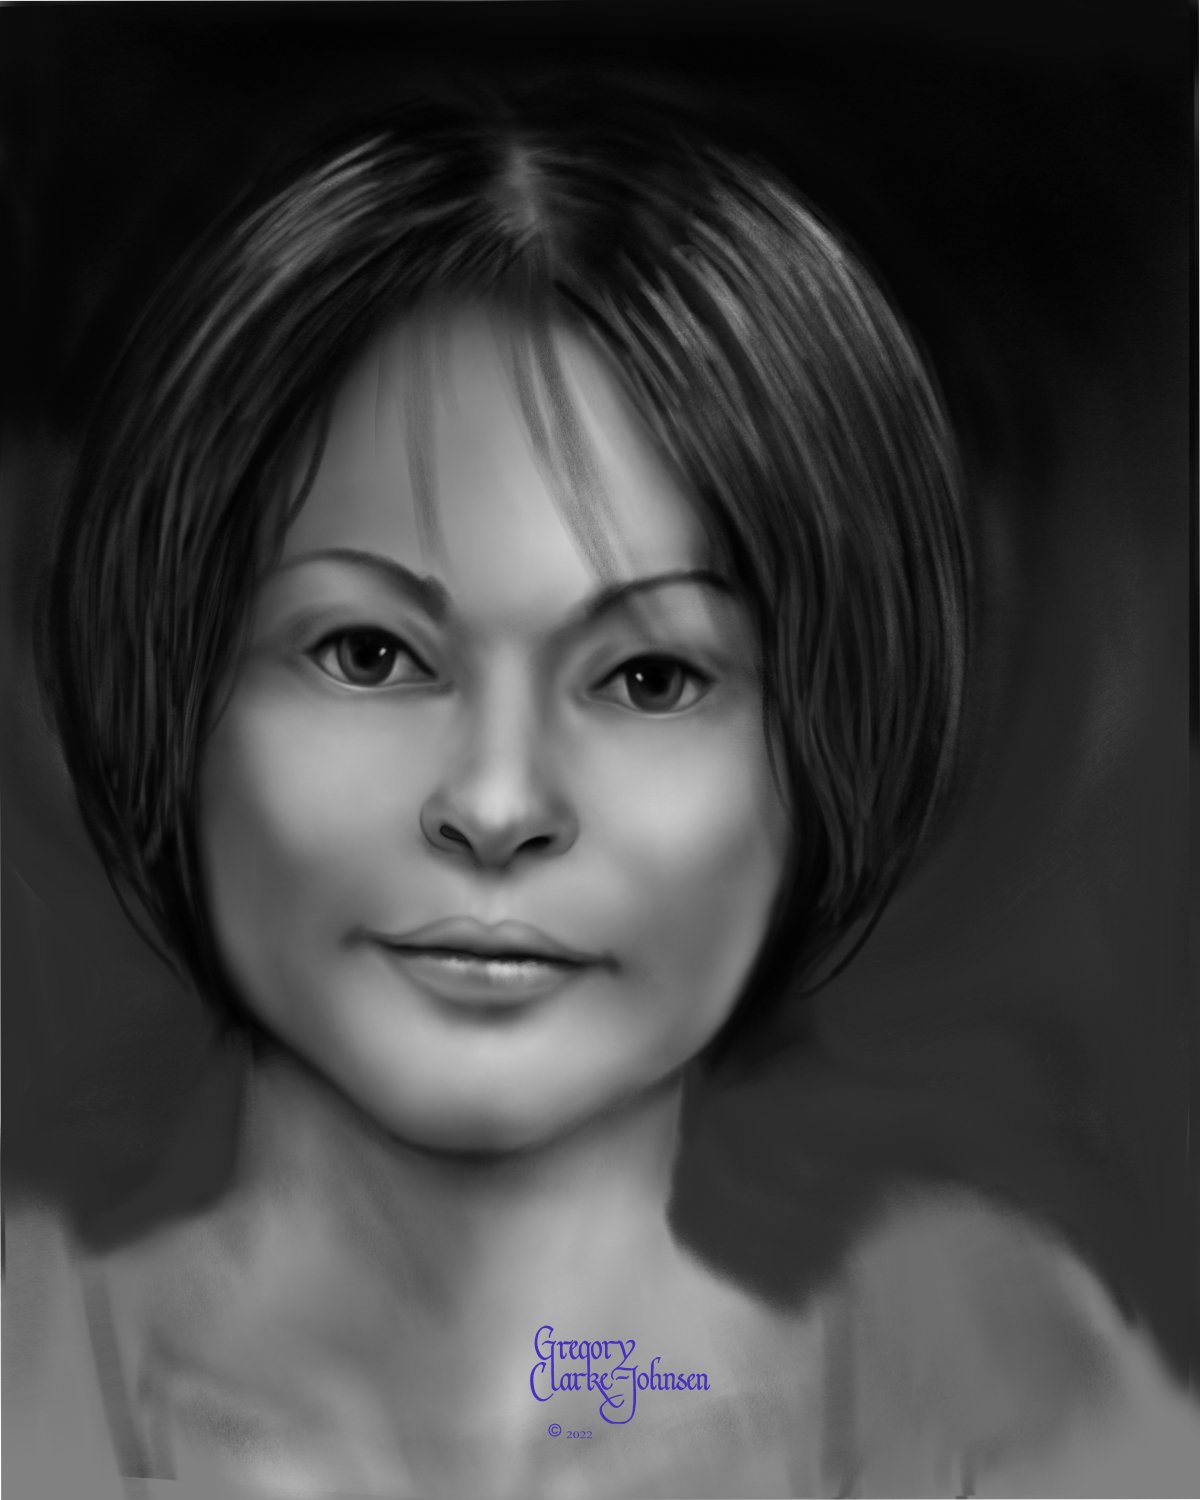
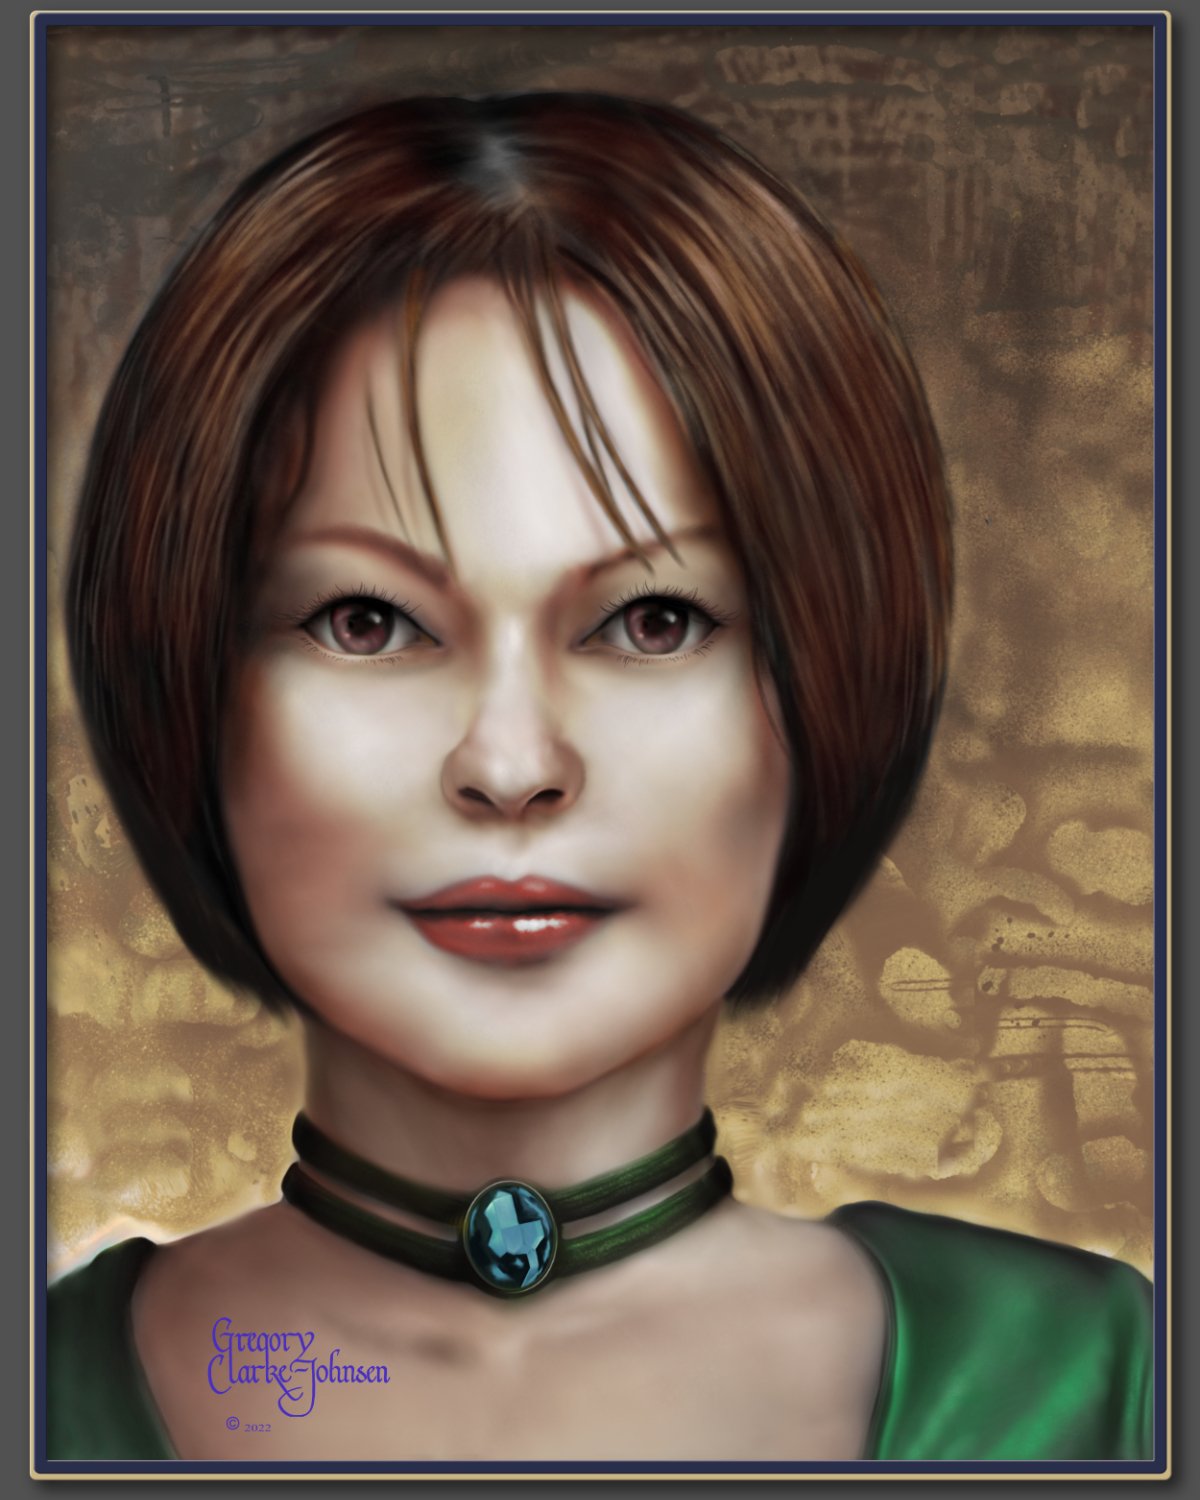
Hi Digital Painters!, I have been using Affinity photo for the last ~ 7 years and have tried a variety of approaches to digital painting with this software. My latest approach which I find successful, involves three main steps. 1. Define the flat shape of the head ( in this example) using grayscale and the default digital pencils... I especially like the 4B natural pencil and the Carpenter's pencil and a few blending brushes I created by reducing the strength of the default painting brush. 2 Create the form of the head by introducing light and dark to create volume and light and shade to create the lighting/luminosity across the surface of face, again using grayscale. 3. Add color- use gradient maps as a non destructive approach to adding colour. 3b. final tweaks. Hope you find this helpful. All the best Gregory Follow me on instagram @clarkejohnsen
-
- 5
-
-
- digital oil painting
- digital painting
- (and 1 more)
-
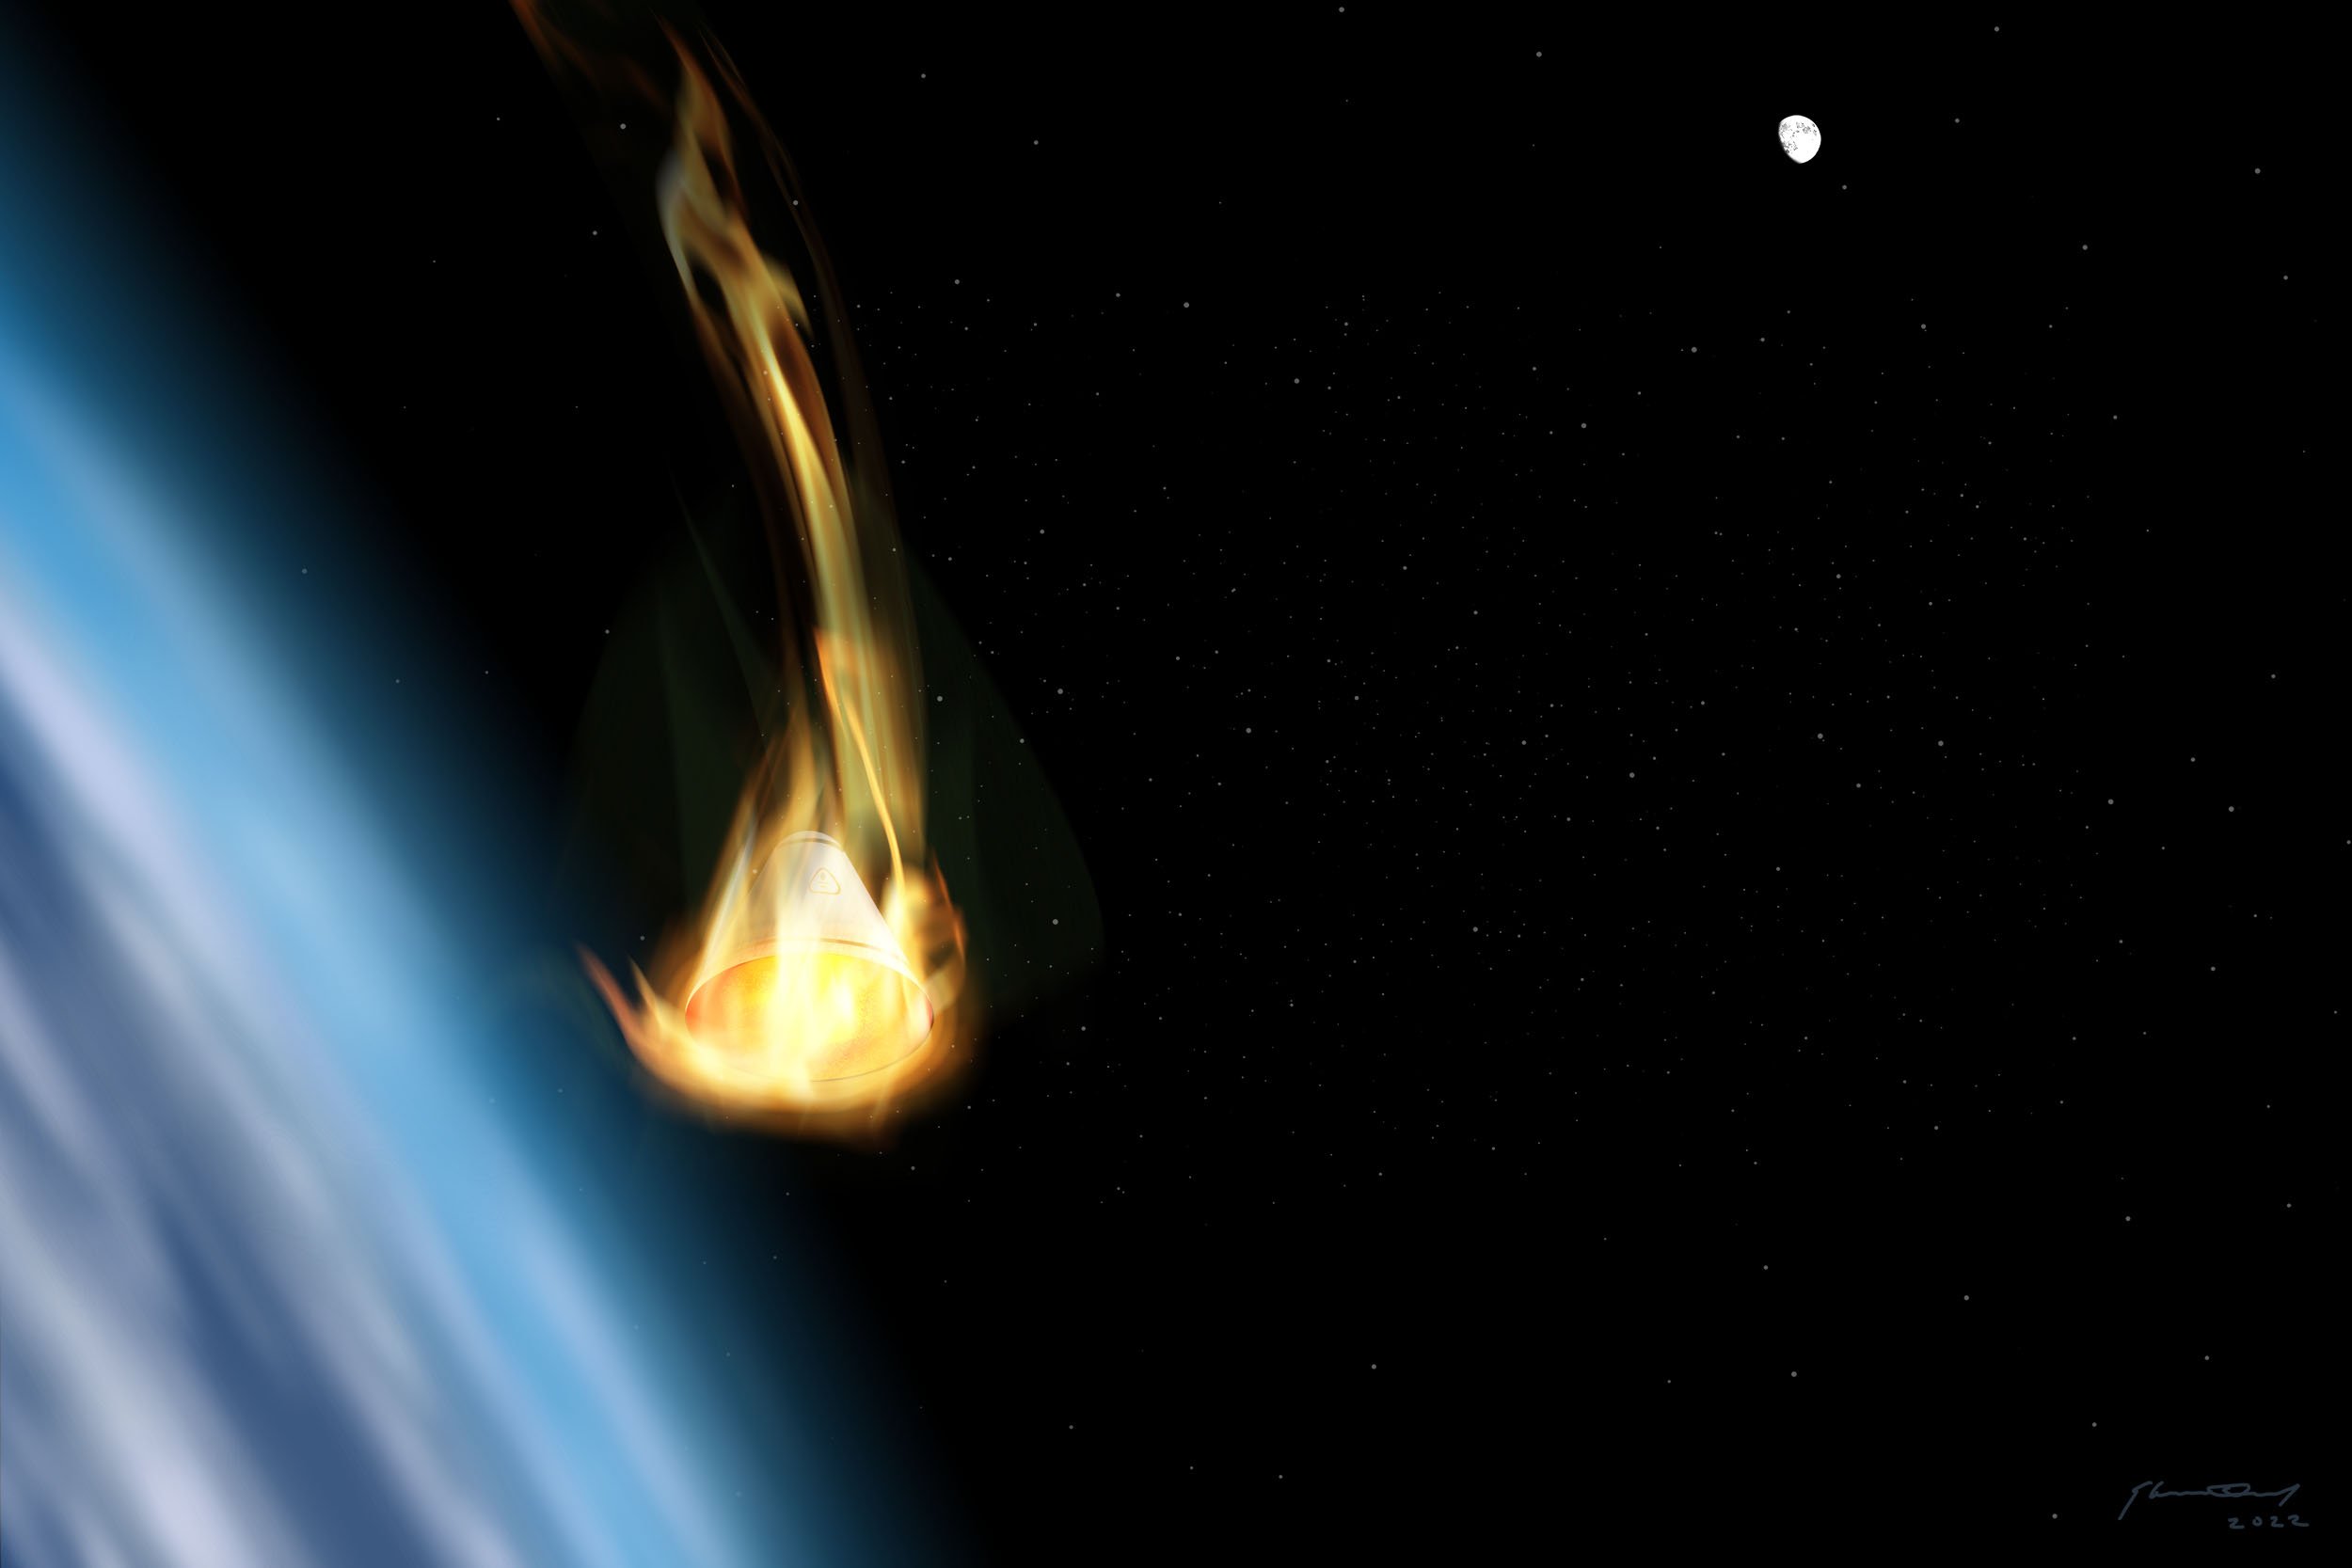
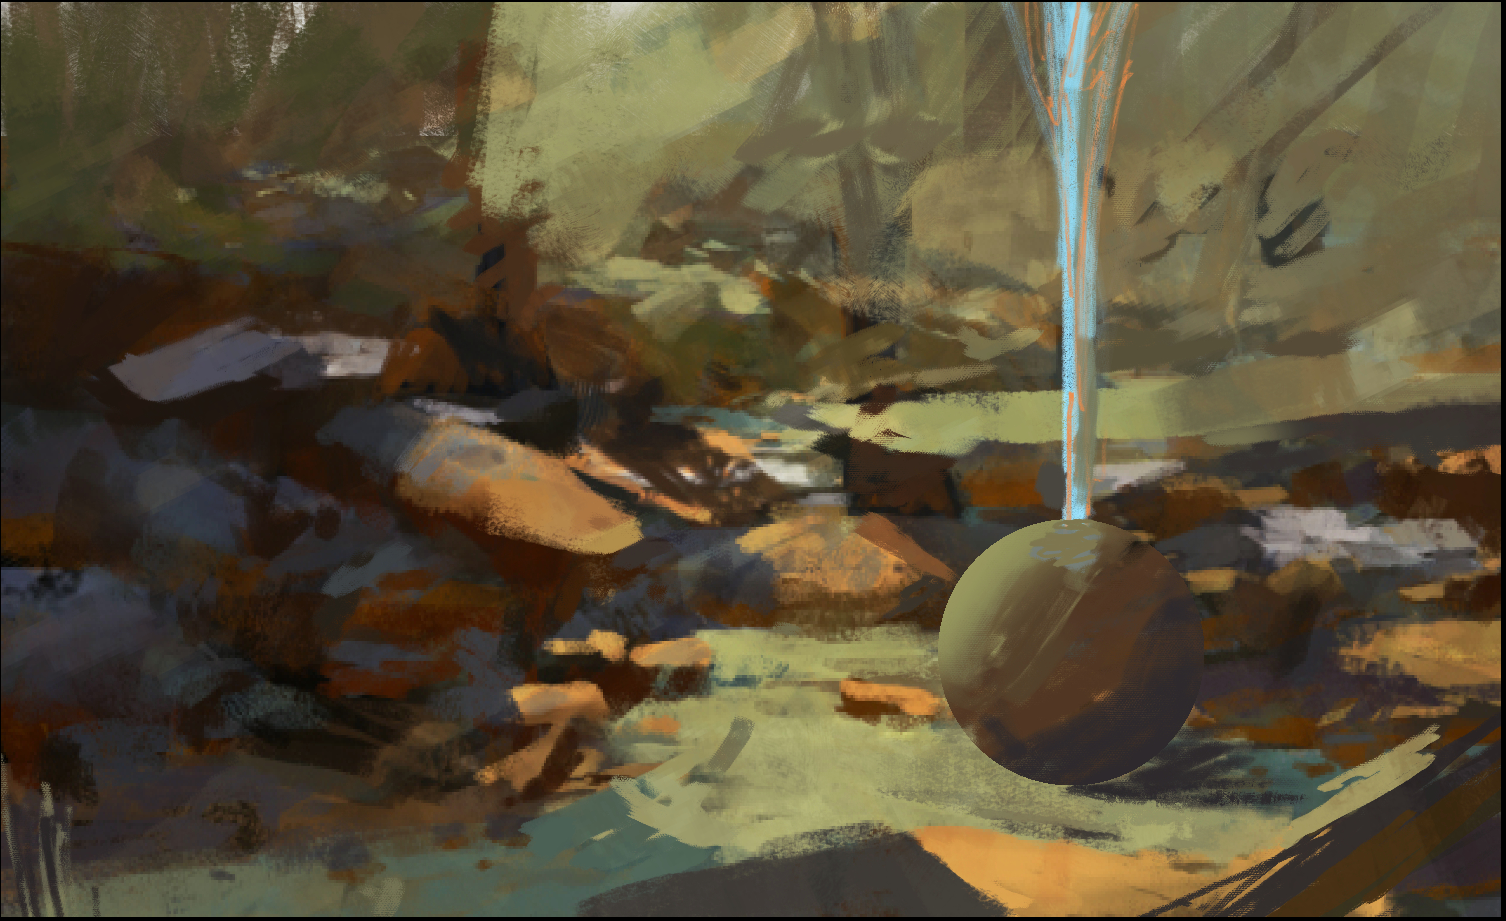
Hopefully I have this right (first time posting in this forum) I was half thinking back to the Apollo days while anticipating the launch of the Artemis 1 vehicle and that inspired me to create this. Space travel is hazardous from start to finish, and none of it is more risky than those last few kilometres in the journey back home. This scene depicts a re-entry vehicle just starting to hit the upper atmosphere, causing the extreme heating that is producing the plasma stream coming off the heat shield. This is my first "viewable" painting/composite (the only item composited in was the flames, which I reworked to look like plasma) done in Affinity Photo since switching to it from "the other program" (not mentioning the name - the last beating I took was scary 🤕😂) and was triggered by a tutorial in making gradients in Photo. Hope you like it . PS - I looked for guidelines as to the proper format and sizing for posting here but didn't find anything. If there is anything illegal or improper here, please do let me know so I won't keep repeating the mistake. Thanks.
-
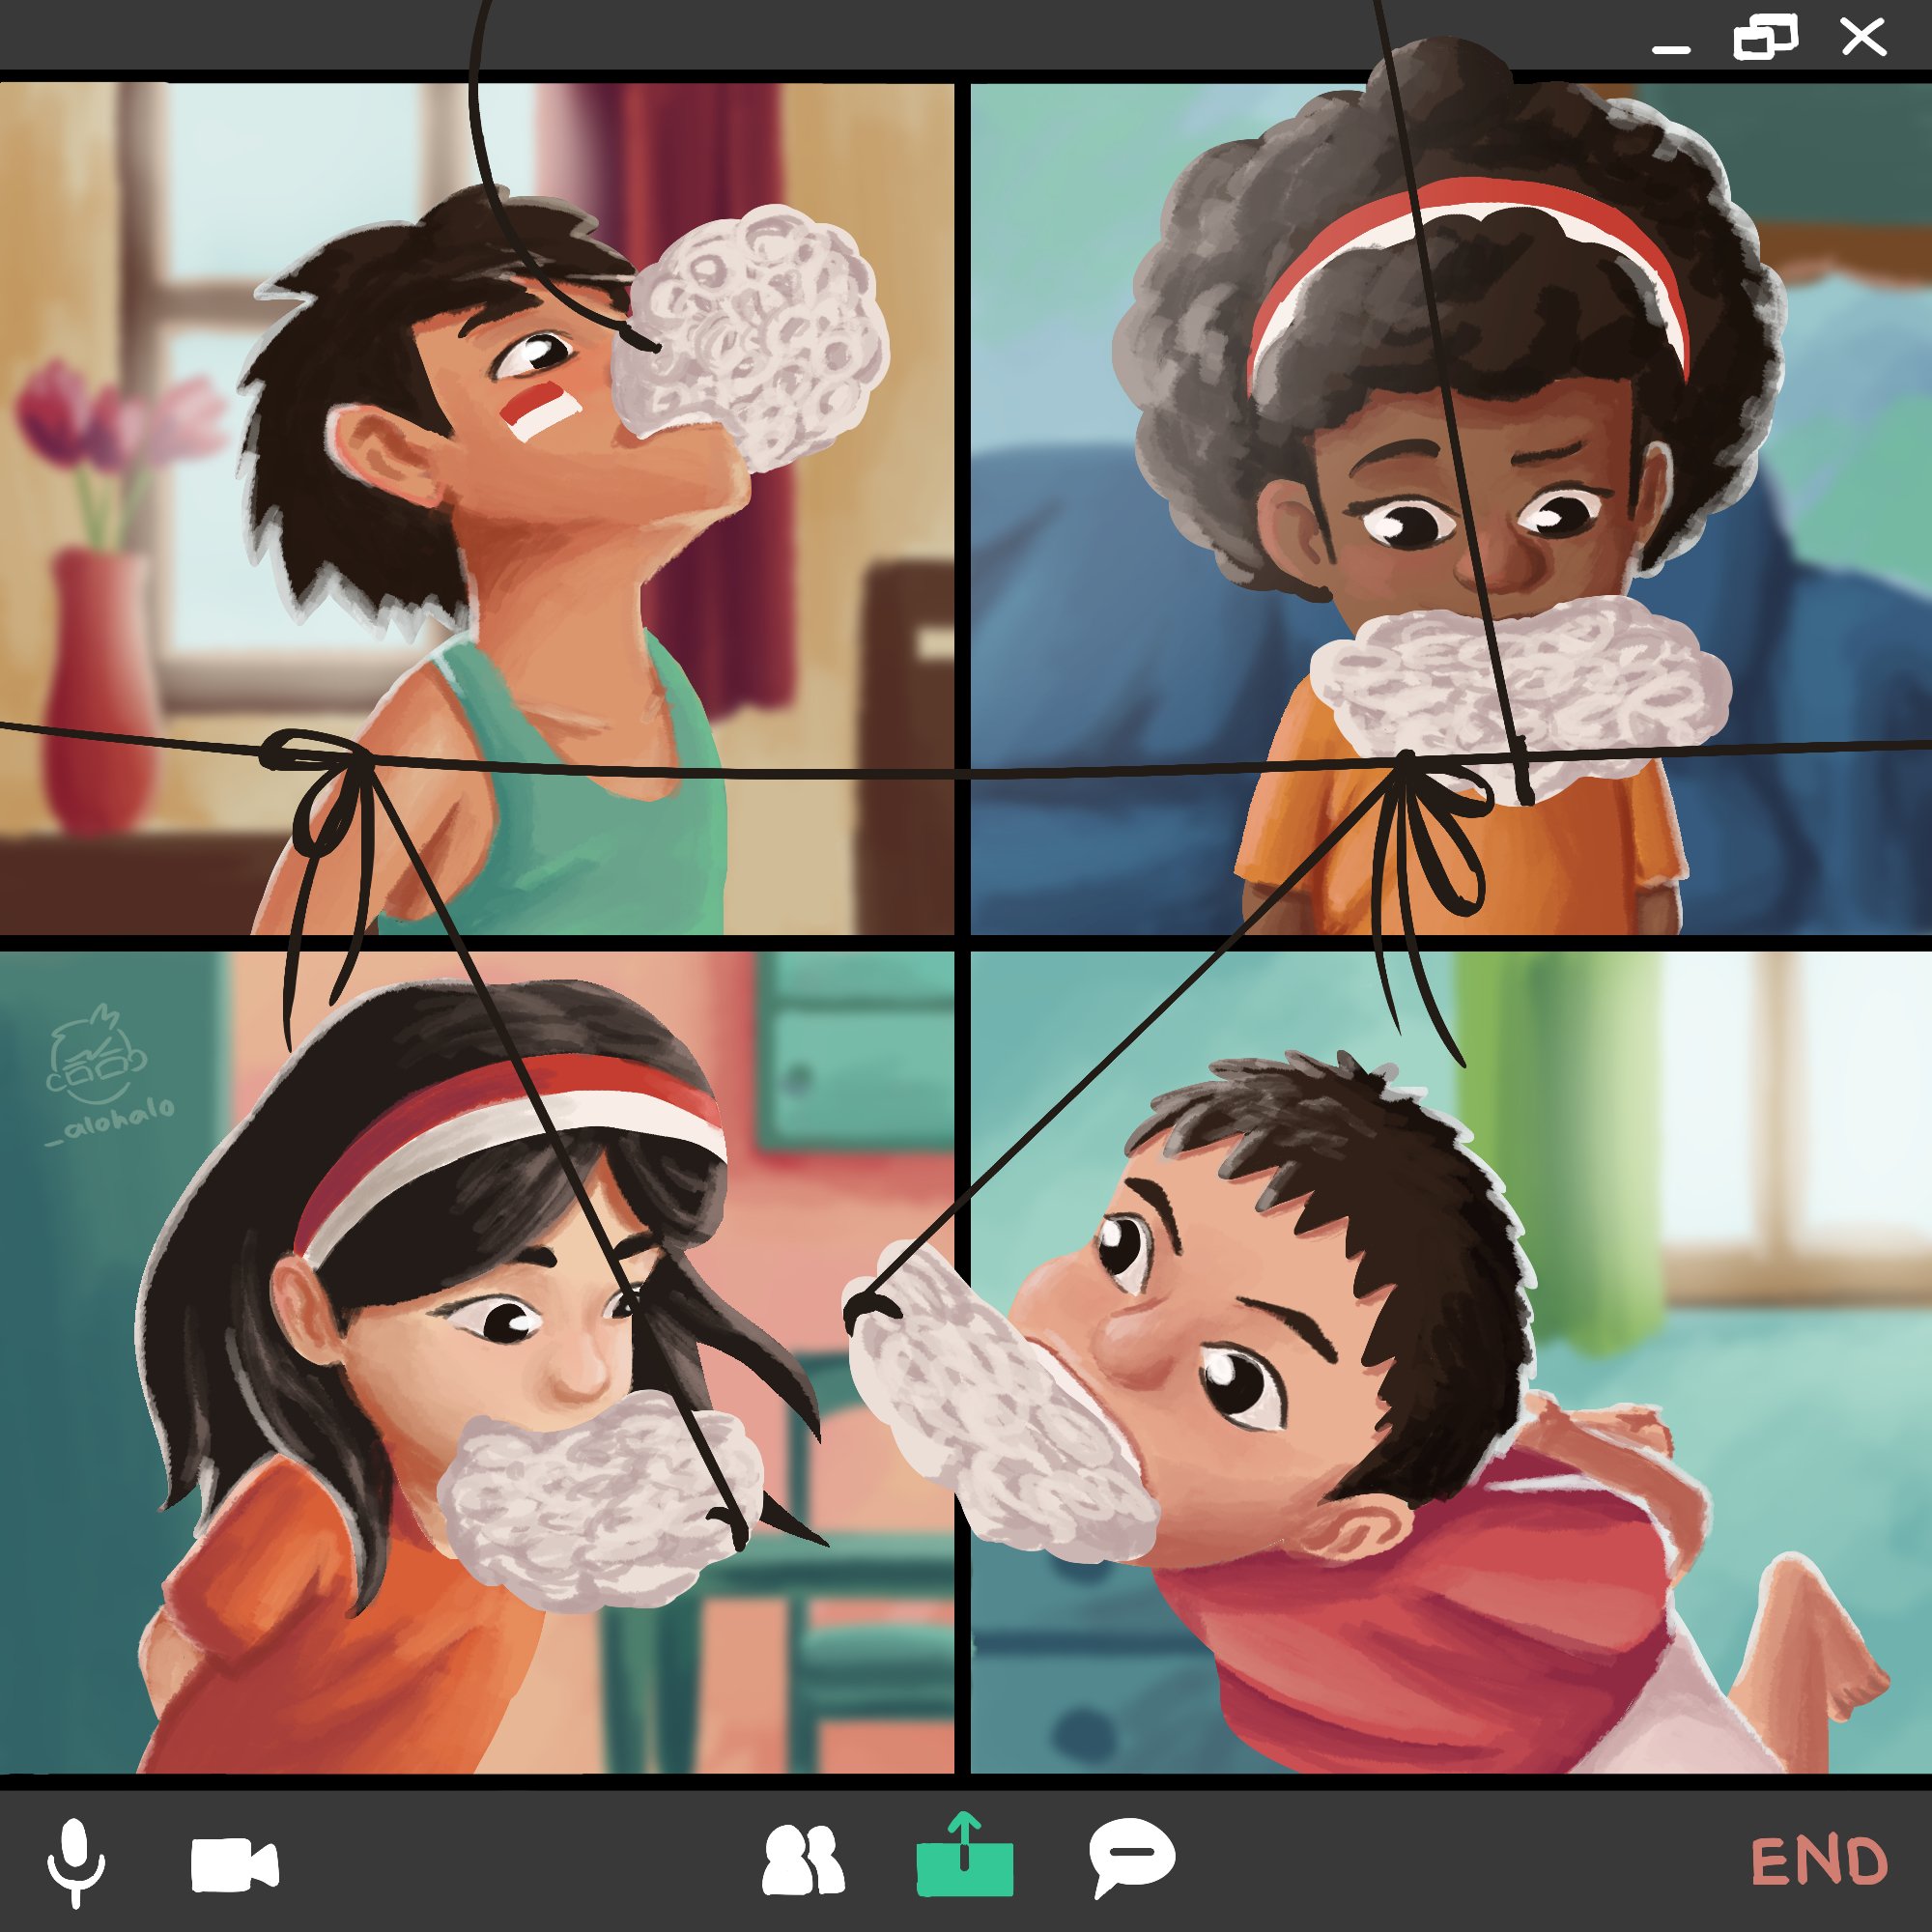
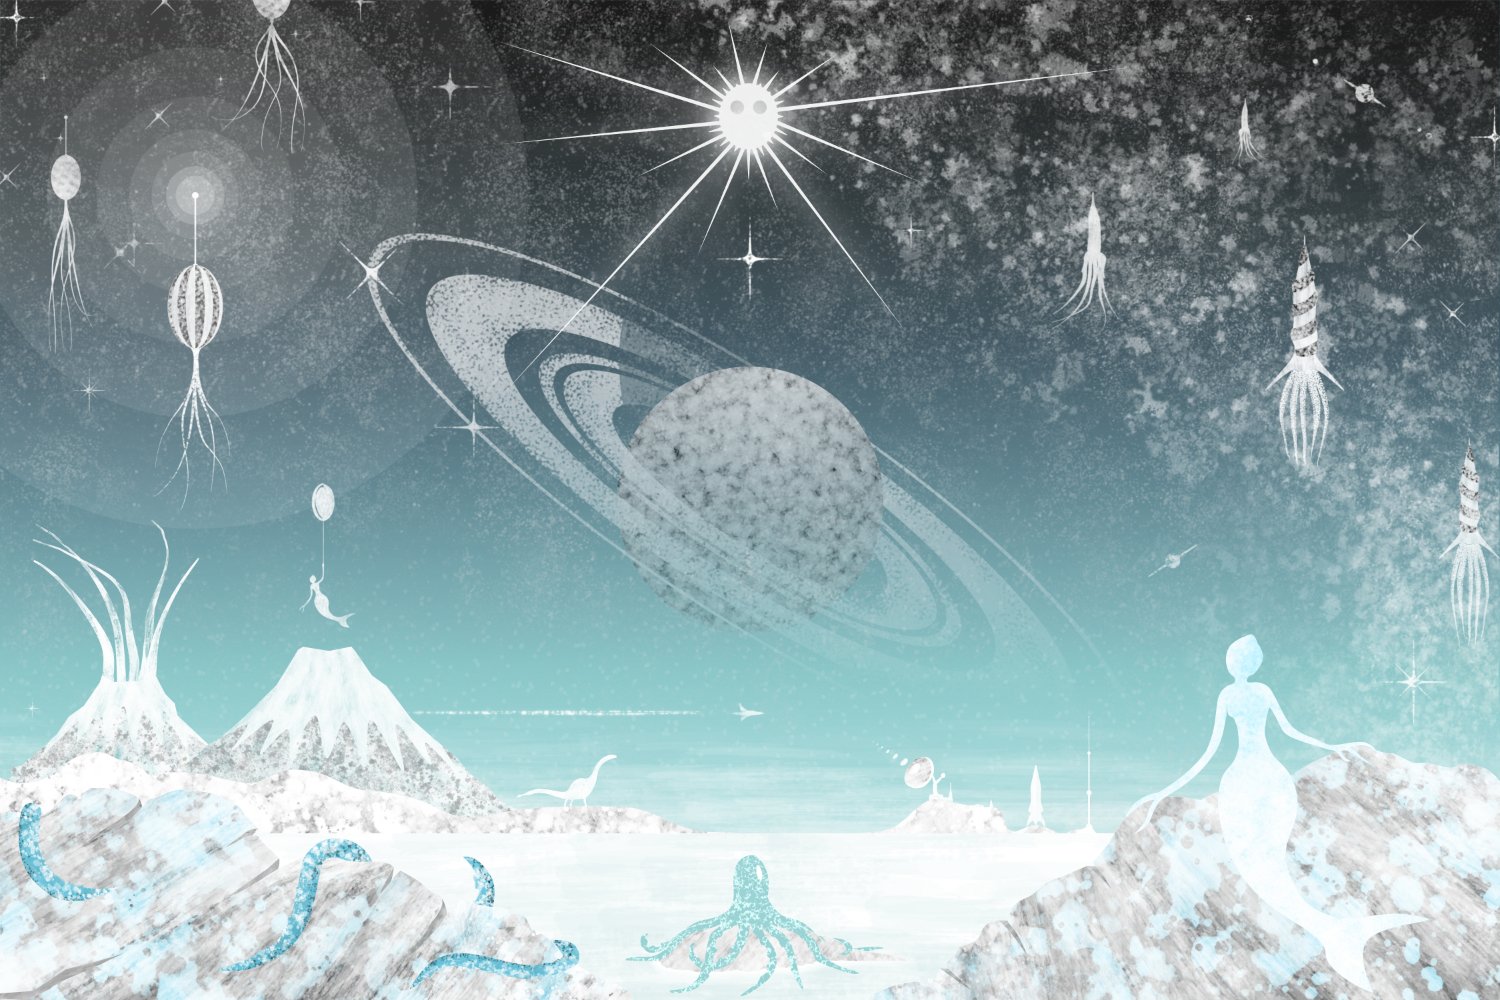
My latest digital painting effort. A strange world on the edge of the milky way, featuring mermaids, nonapuses and lollipop spaceships. Nonaptych versions can been visualised at @minimowlism and @MNMWLSM on Instagram. Figured out how to draw rocks and mermaids now 👍 Also discovered a use for Inner Glow - I found that by adding a 0.1px effect (white) to some of the rocks layers helped them blend together better and smoothed some of the edges.
- 4 replies
-
- 9
-
-
- affinity designer
- affinity photo
- (and 1 more)
-
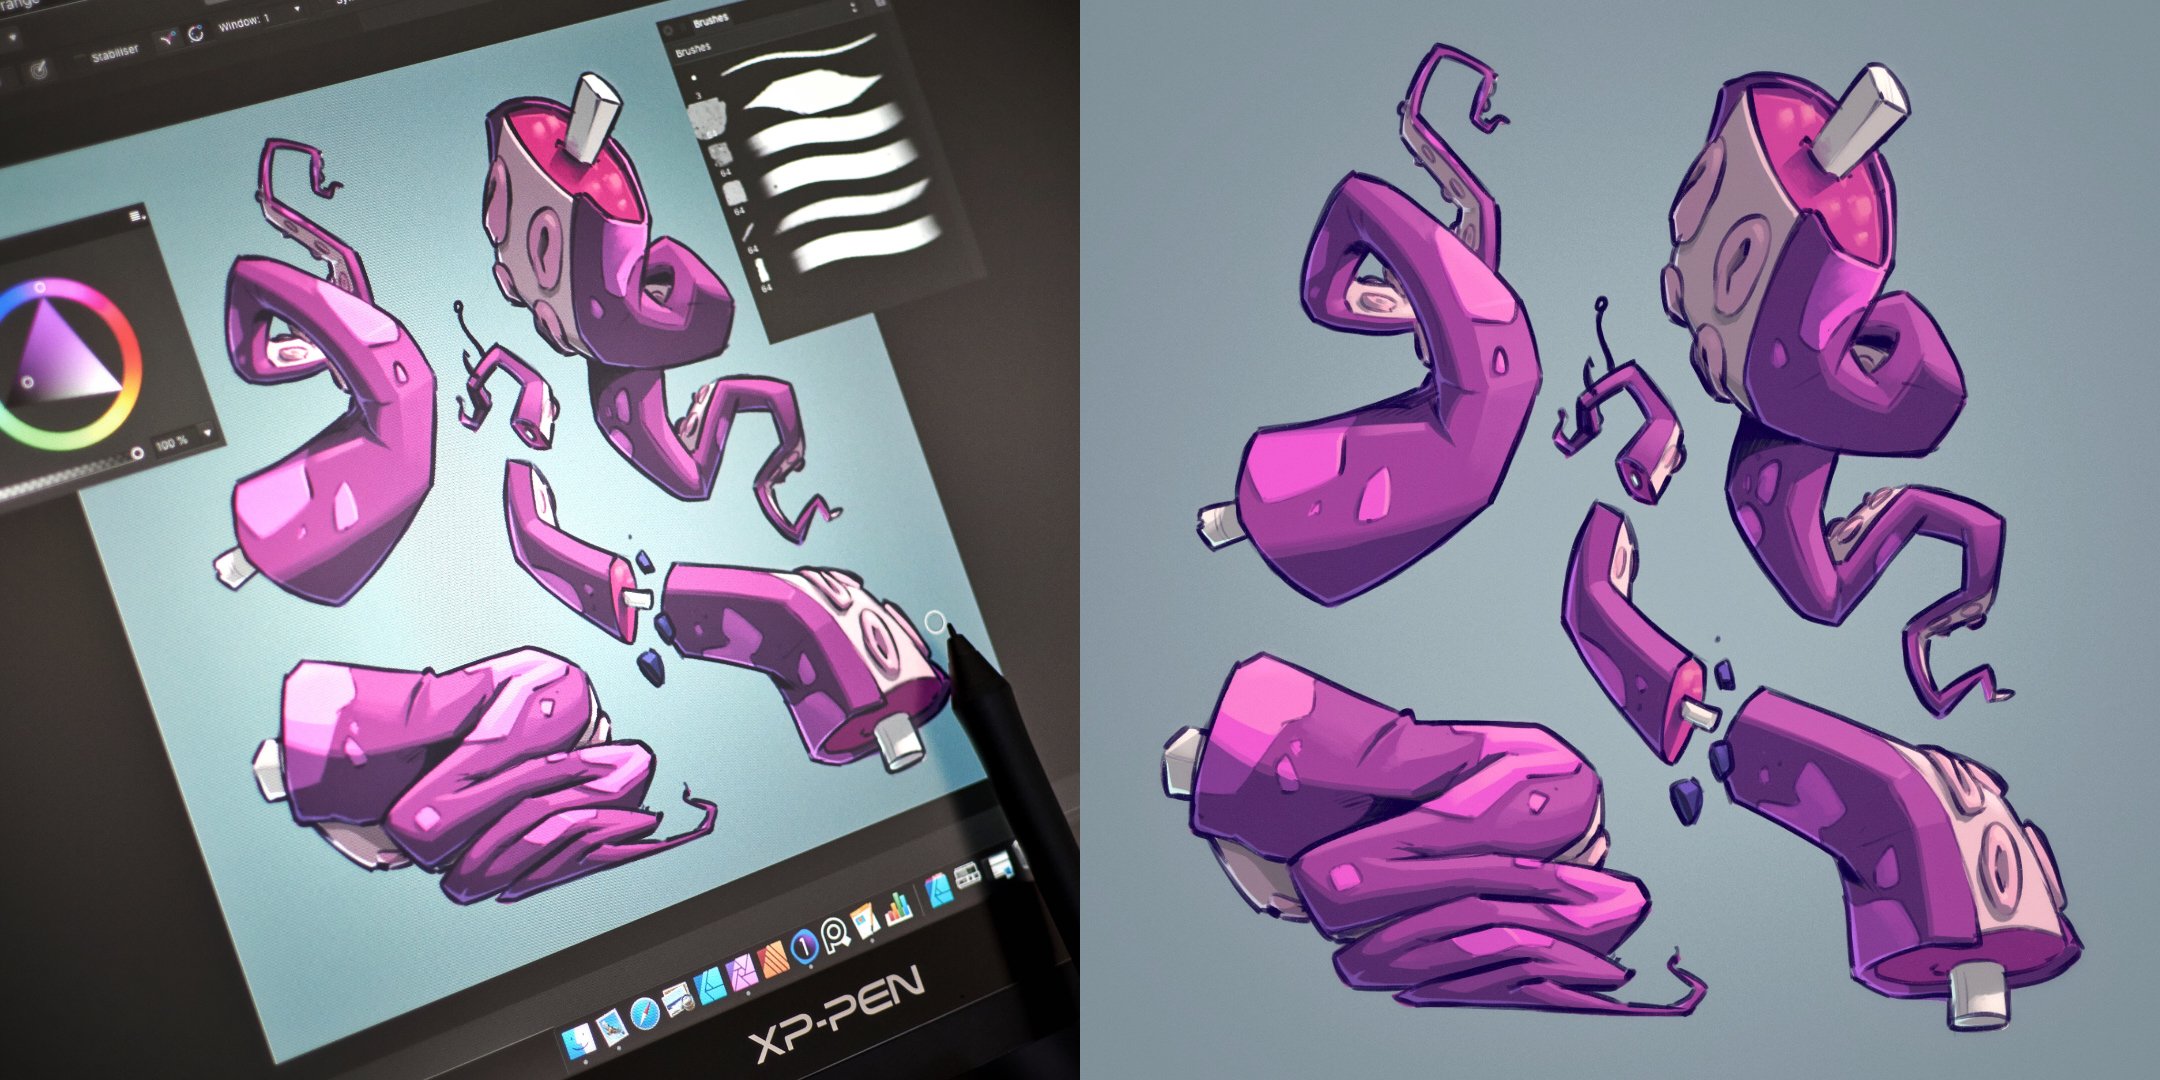
Hey folks, I have painted an item card for a trading card game we are developing in class - entirely in Affinity Photo! Constructive criticism is always highly appreciated!
-
Brush link gumroad.com/l/nsCEh
-
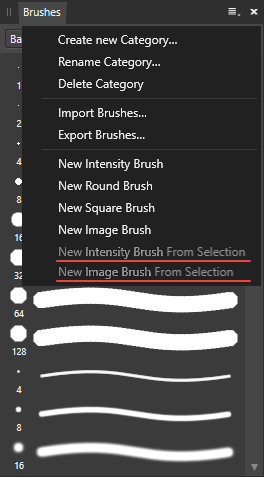
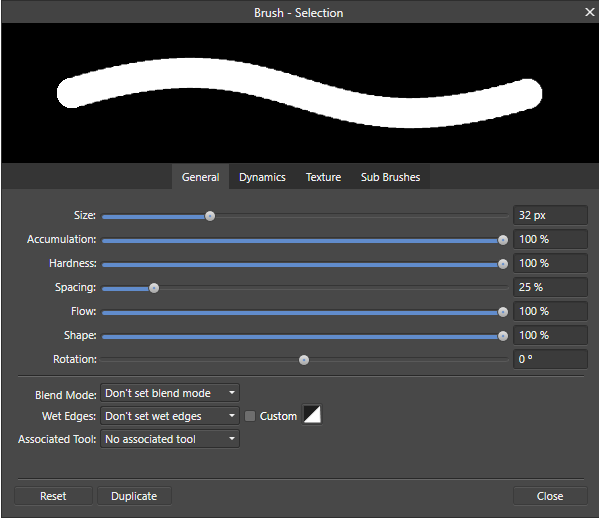
 Hi Affinity team. This post is a cry from the heart. I have been using your programs for a long time and I really like them. They are great for designers and photographers, but not for artists. Below I will share my vision of how Affinity Photo can be improved for digital painting. <<I immediately apologize for the quality of the text, I used google translator for translation >> Brush Tool Update Creating brushes from selection Instead of one New Brush from Selection item, it's much more convenient to add two items for each type of brush. No need to worry about using a layer and mask to create a new brush from a selection like in Affinity Photo 1.9. Updating brush settings The brush settings in Affinity Photo are sorely lacking in some features, and also brought in some cosmitic tweaks. I changed the view of the slider for the rotation parameter. It shows the rotation of the brush in degrees. In addition, the pivot point on the slider is in the middle. Important changes are needed in the Texture tab: 1. Add the "Add from Selection" item to add new Brush Nozzles from the selection. This will undoubtedly make it easier to create and customize brushes. 2. Add Brighthess and Contrast settings for the texture. For these parameters, a slider with a zero position in the middle and a range of values from -100% to 100% will also be used. This way you can adjust the strength of the texture on the brush without using Wet edges. Context toolbar Instead of using force pressure for brushes without dynamic settings, it's better to add a pen sensitivity on / off mode. I very often need to draw a line with a pen without dynamics (like when drawing with a mouse), but this is impossible in Affinity Photo. So I have to choose a different brush or turn off the sensitivity in the brush settings. This is very annoying and time consuming. Paint Mixer Brush Update The Paint Mixer Brush needs to be heavily transformed. Now it is only suitable for processing the finished image and is extremely poorly suited for drawing. Therefore, I want to suggest the following changes: 1. Add a pen sensitivity on / off button instead of forced dynamics. 2. Add mode "paint at max pressure". If this mode is enabled, then at maximum pressure with the pen, the brush will paint with the selected color, and with light pressure, the brush will mix colors. This brush behavior is typical of the mixing brushes in Paint tool SAI. If this option is disabled, the brush will have a paint limit as it does now. 3. Add mode "Take Under Layers Color". When this option is enabled, the tool will take into account the layers below, and will mix colors with their color. This will increase the non-destructive editing capabilities of Affinity Photo. 4. Add mode "Blend transparency". Now, if you draw on an empty layer without filling, then the accumulation of color is taking place on the transparent layer, and with the Blend transparency option on, the color will sort of dilute and become translucent. In this case, the options Take Under Layers Color and Blend transparency are mutually exclusive if either of them is activated, the other will be unavailable. All of these changes should significantly improve drawing in Affinity Photo.
- 3 replies
-
- 2
-
-
- digital painting
- brushes
- (and 1 more)
-
 The Protect Alpha option is hidden on small screens. It is very counterproductive to have to click the arrow each time in order to reach it (My screen is a Wacom Cintiq 13 HD touch). Sometimes I also forget that it is selected since it is hidden. Please make more space so that it isn't hidden or convert some of the options to icons (eg lock, mirror, symmetry). I ignored this for months but it really disrupts my process. The padding on some of the percentage selectors could be less to make space. Eg Opacity, flow, hardness all have pace to the right of the percentage. Thanks.
-
 Here is my issue. I've been starting to learn digital art, as a random hobby, so don't worry if there is a lot of fine detail involved in solving my question or if "just find what works for you" is the proper way to go, please just try and give me an answer to the following question, as I'm sure others have struggled with this before and the solution probably isn't that hard, I just can't find it. I included the settings for the most important brush at the end of this post, both for PS and Affinity. Problem: I downloaded some Photoshop brushes for digital painting and they feel great in photoshop but nothing like that in Affinity Photo. I know I have to tweak settings, but I'm feeling lost. I don't necessarily want to keep these brushes, if anyone can show me what Affinity brushes would help me do the same thing, I would consider that a solution. (Technically, I may be able to do the same thing with the regular hard brush but I also can't figure out the right settings for it to feel the most natural way possible) Basic actions I want to carry out: Digitally sketching on my ipad, digitally shading a greyscale base for painting over, digitally painting + blending + refining the art. These are the brushes I downloaded. This is what the brushes feel like in photoshop: https://imgur.com/a/5SHKv2U - It feels natural, pressure sensitivity makes sense and the "paint" builds up over time, both from pressing harder and from lifting up and going back down (aka. opacity). Overall this feels like what you see any artists on youtube using, be it a regular hard brush or a super custom brush, the general "feel" seems to be what im getting in this video. However, this is what they look like in Affinity Photo: https://imgur.com/a/kh4bfAH BRUSH SETTINGS Photoshop https://imgur.com/a/VkzHfpH Affinity Photo https://imgur.com/a/ANDVhLX Thanks everyone!
 -
Been experimenting with using Affinity Photo for digital painting recently and it's been loads of fun - even made some new painterly brushes in the process! Here are a few tentacles I illustrated to start the week off on the right foot. http://www.instagram.com/christidutoit
- 1 reply
-
- 11
-
-
- art
- illustration
- (and 3 more)
-
 Here's an illustration I made with Affinity Photo
-
 I am trying to make it were the opacity of my brush is controlled by the pressure I'm putting on my tablet. I looked around and found this https://forum.affinity.serif.com/index.php?/topic/70576-opacity-pressure-control/&_fromLogin=1 But I tried what was said and shown and still doesn't work.
 -
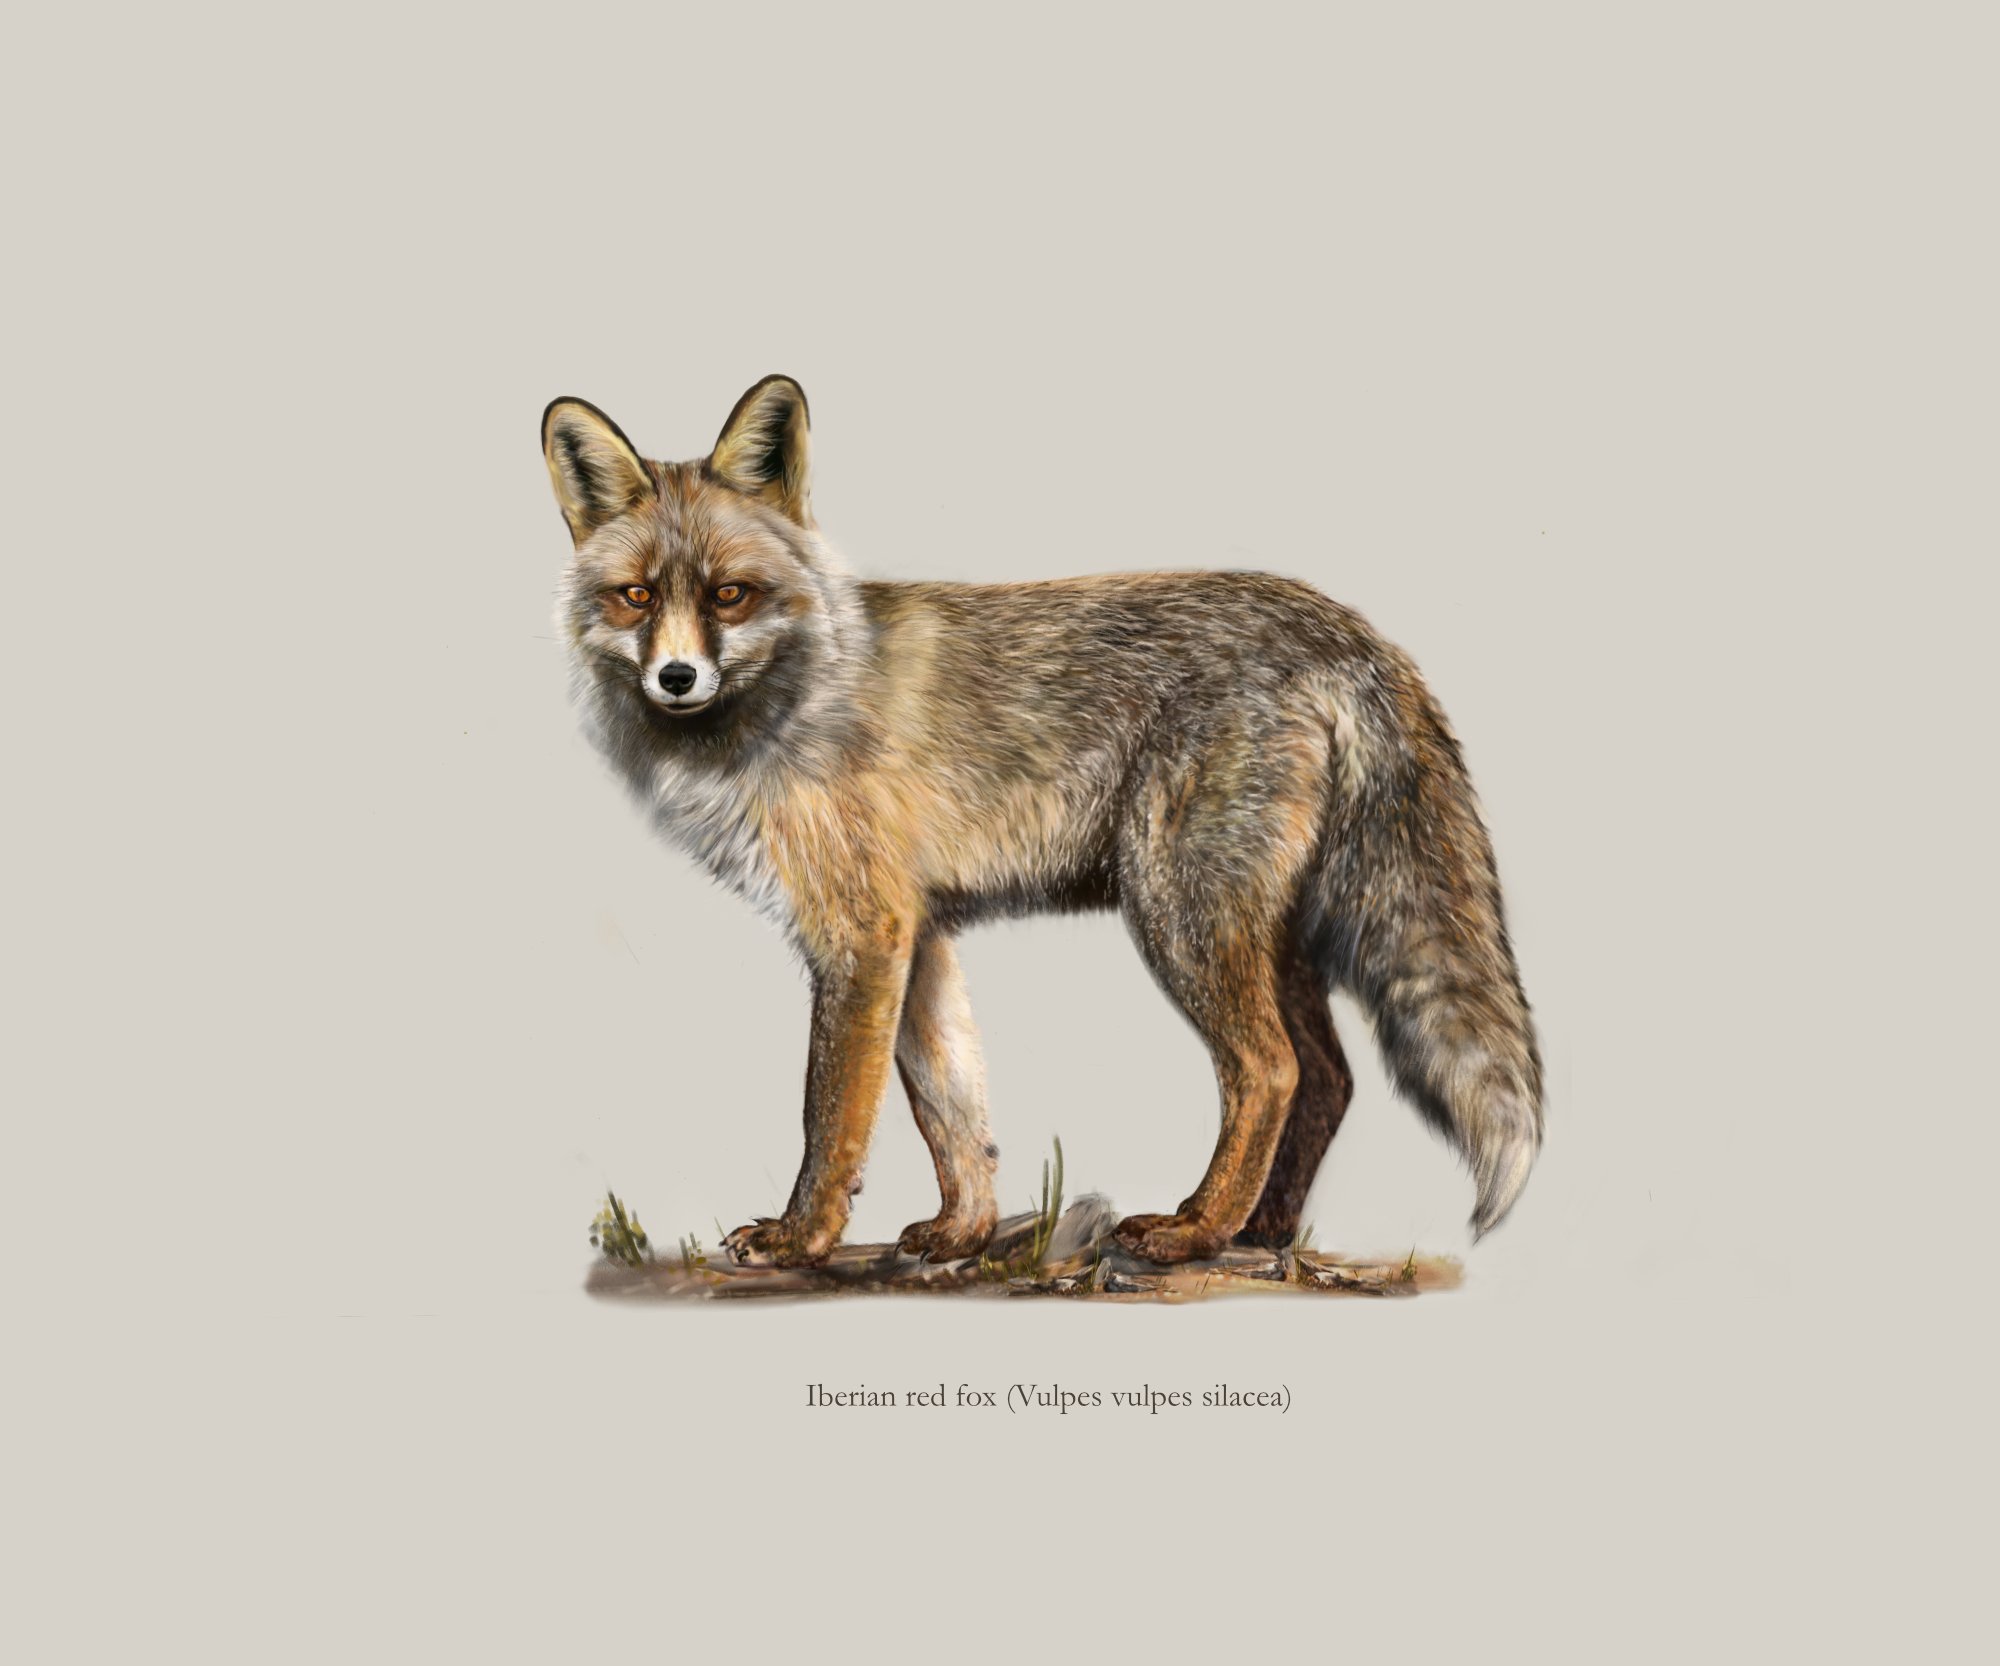
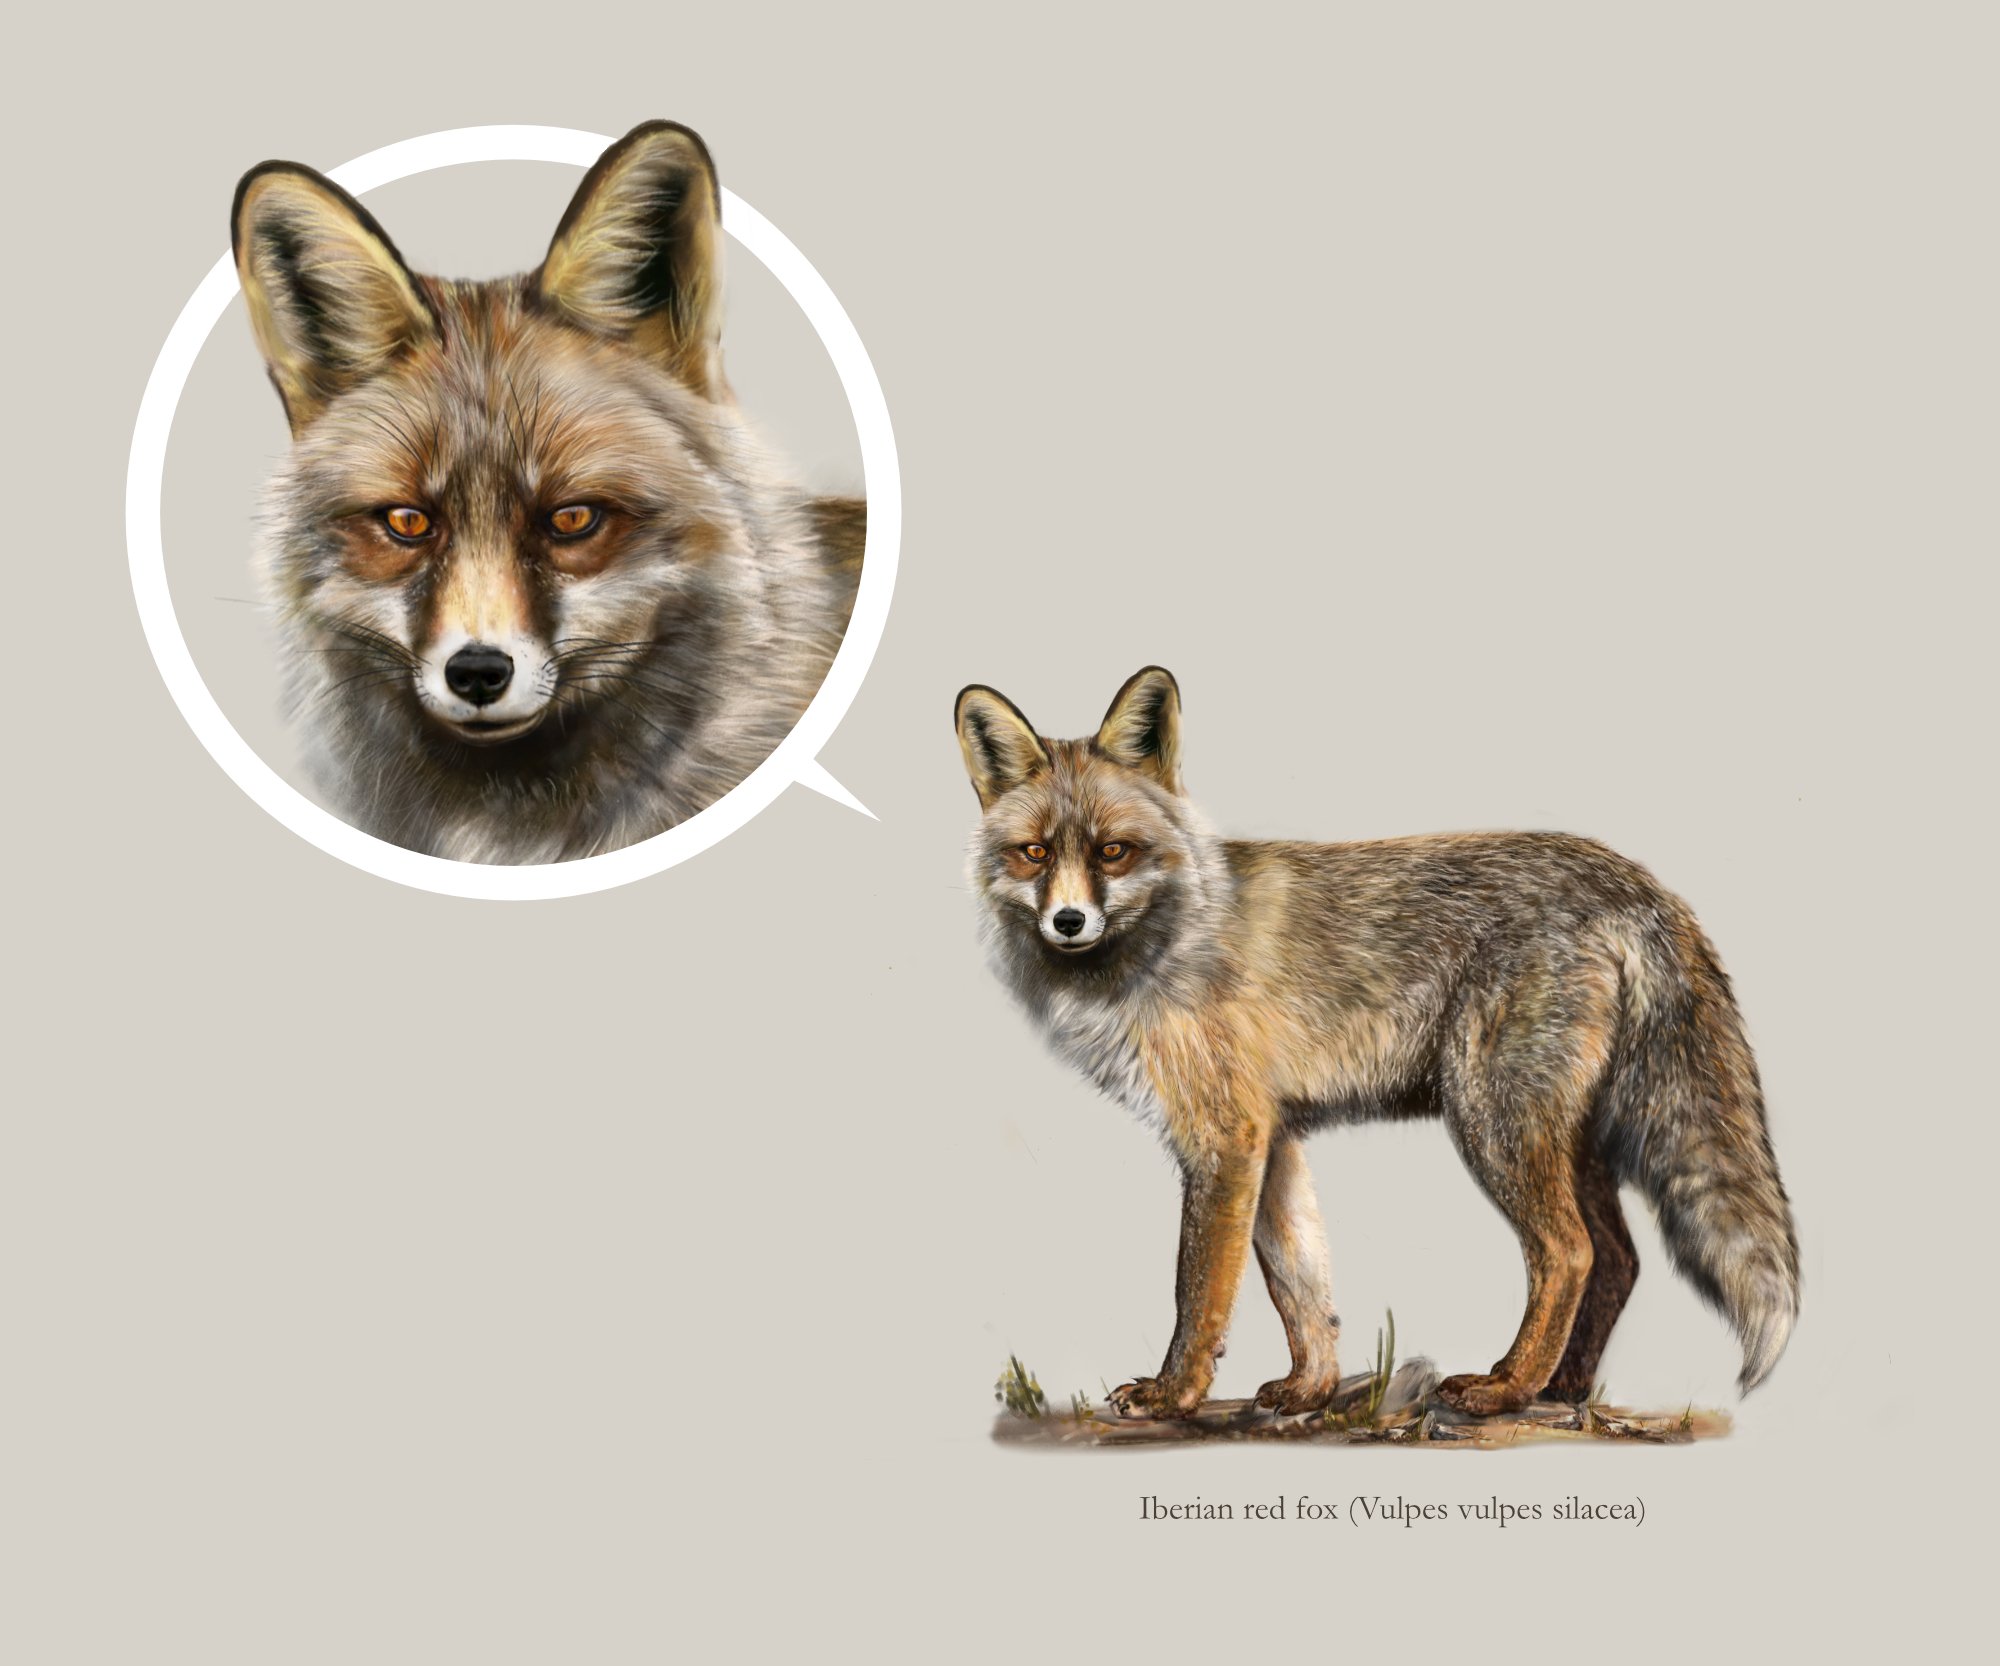
 If anyone had asked me short time ago what would I go for if ditching Photoshop for digital painting, my normal answer would have been "Affinity Photo". But then one day I found myself painting in Designer's pixel persona and loving it too! I'm faster every time and understand a bit better the brushes, which for whatever the reason have always been a bit of a hard to handle and tame subject matter for me in Serif products. I am currently researching on different species for better and more effective workflows when it comes to science communication and illustration. This is an attempt to improve painting fur... More to come! Full project including time-lapse here: : https://www.behance.net/gallery/93107969/Scientif-illustration-Mammals UPDATE ON RESEARCH> So, now I am trying to replicate this craziness with the so called vector brushes in the Designer persona. I reckon the guy on the left needs a comb! hahaaha!! Anyways.. one step at a time, I'll get him one. The one on the right is for comparing both versions side by side. Brushes galore!!
- 19 replies
-
- 34
-
-
- scientific illustration
- fox
- (and 3 more)
-
affinity designer Superfurry animals - Squirrel monkey
IsabelAracama posted a topic in Share your work
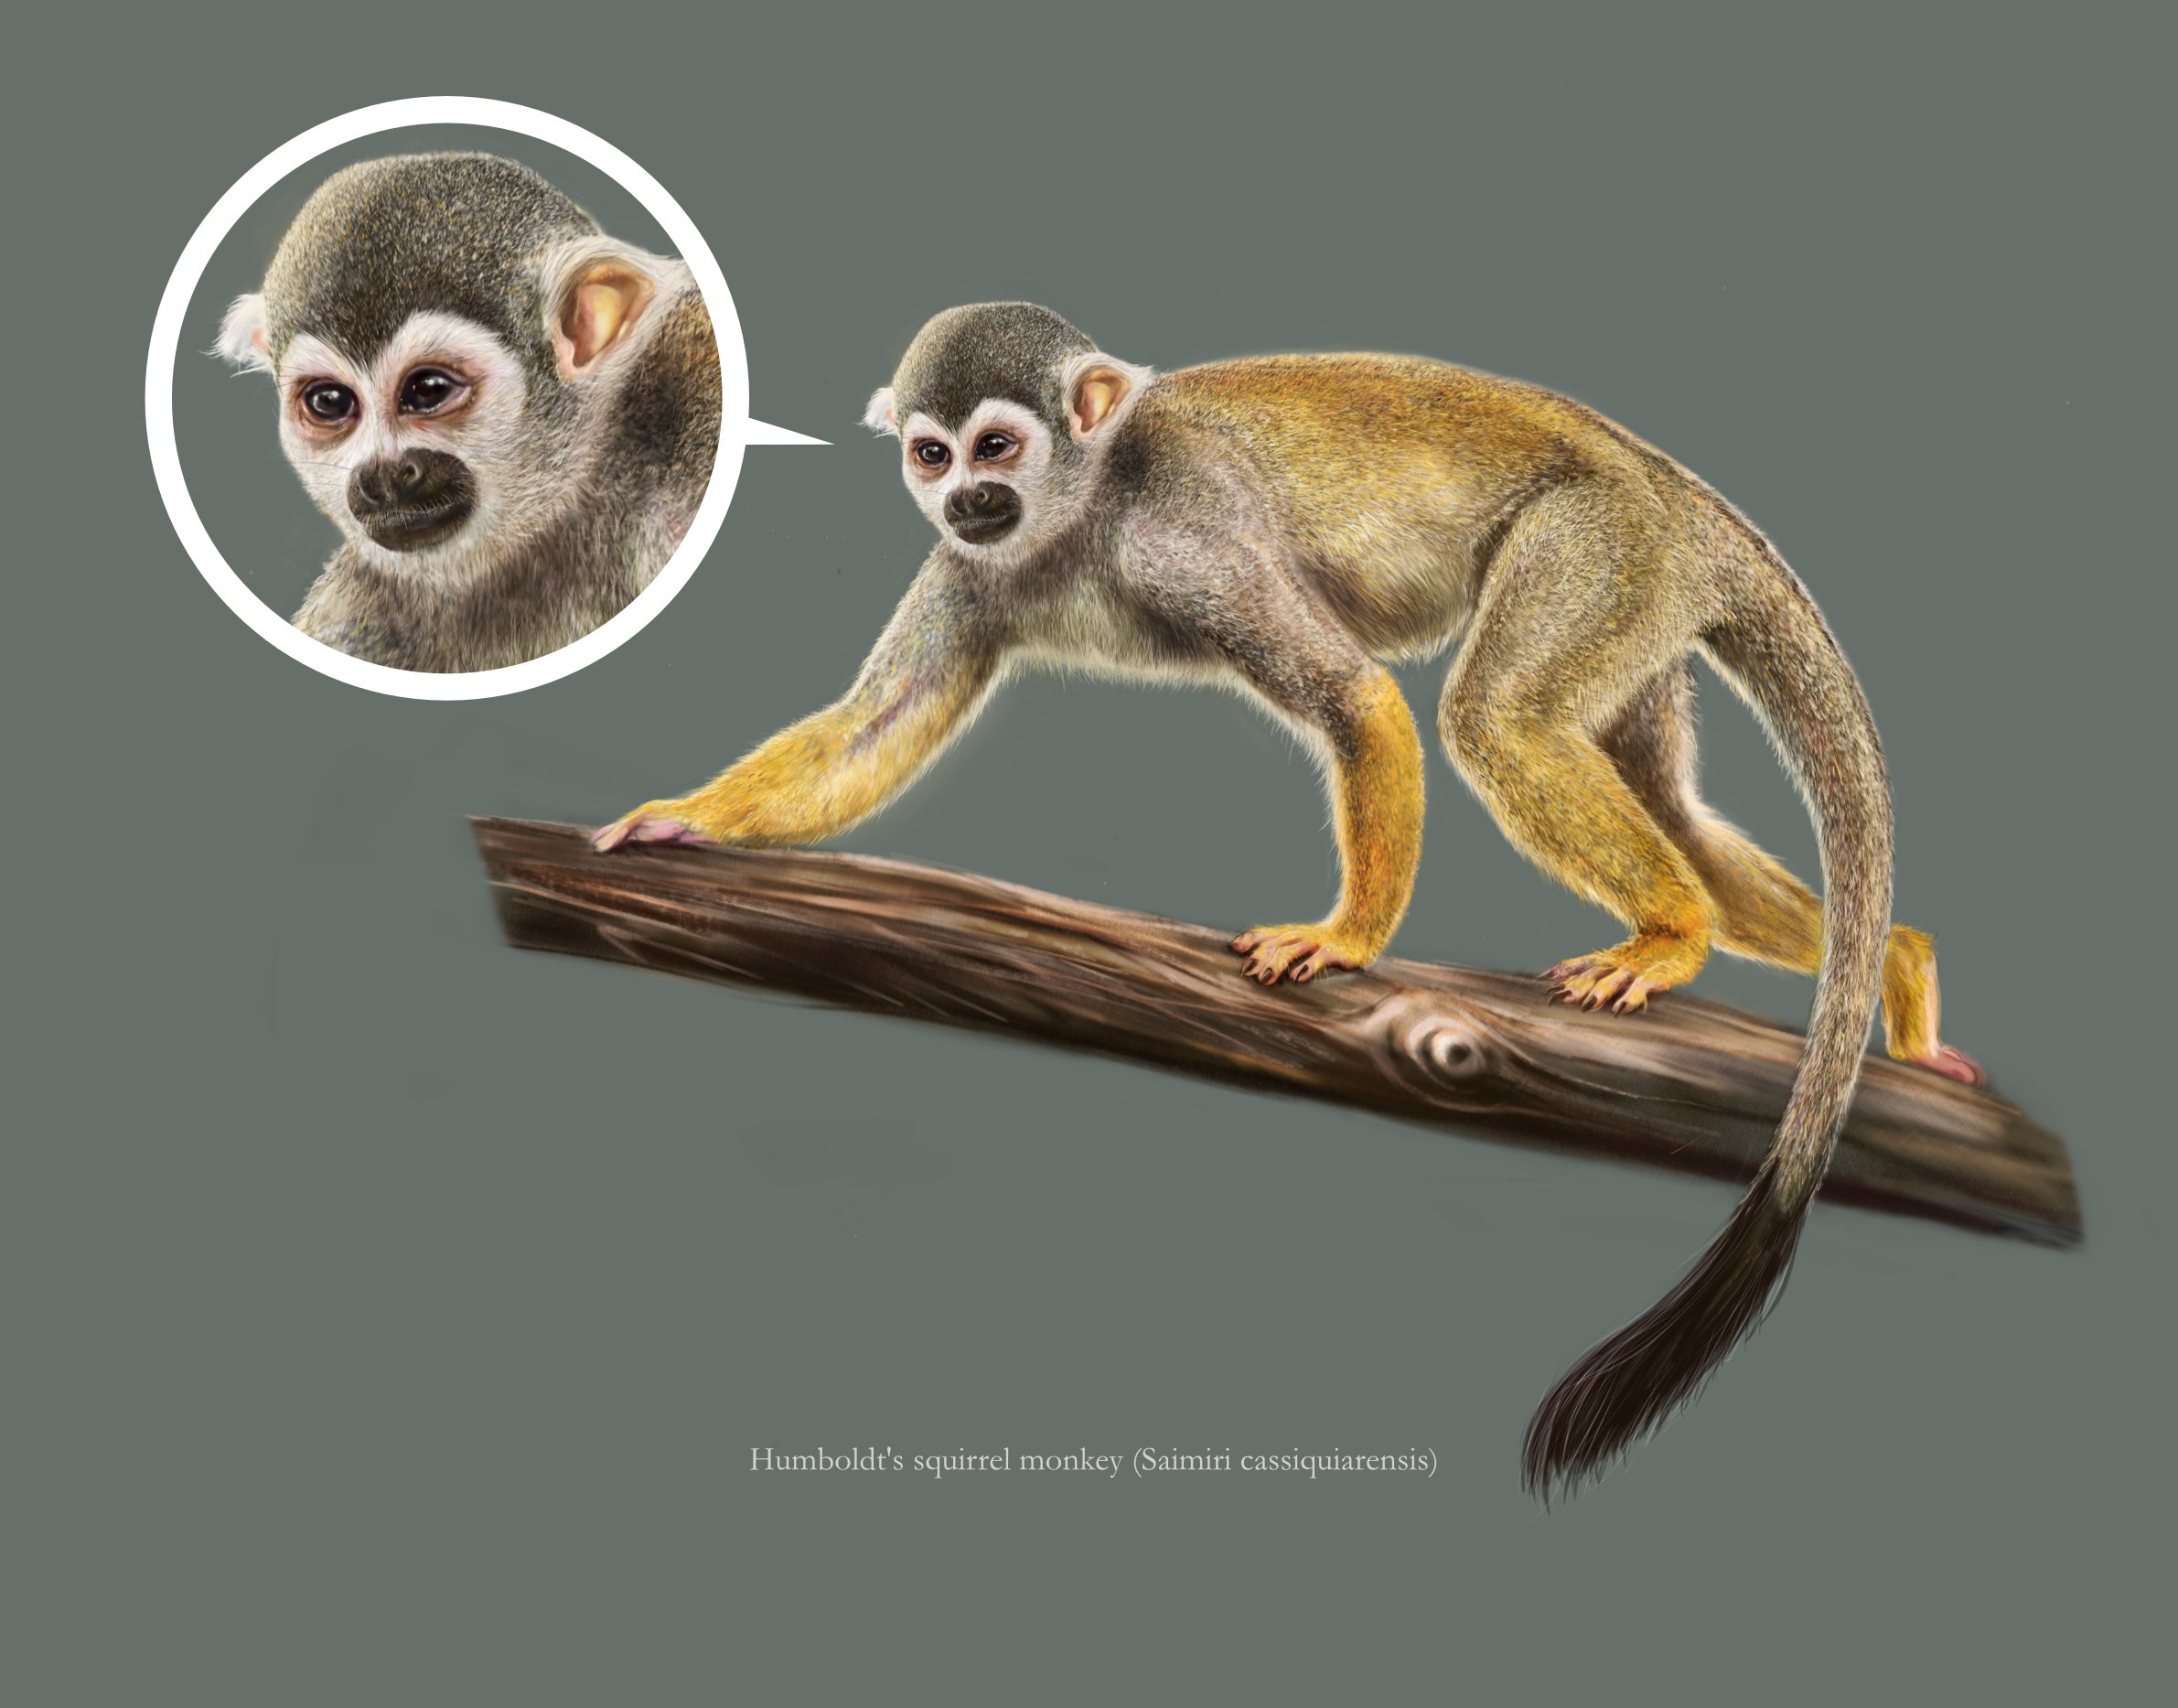
This time a Humboldt's squirrel monkey from the Saimiri genus. Affinity Designer pixel persona 100% - Roughly one single brush pressure on, pressure off.Challenging to get the colours always right as I try to pick form the wheel and not using the colour picker. It helps to train better the artist's eye. I also leave here this time-lapse I have created. I explain a bit some differences I find when painting in Designer vs Photo.
- 8 replies
-
- 14
-
-
- fur
- scientific illustration
- (and 3 more)
-
 Hey guys, First of all I'd like to say that I think what you are doing is great for the industry! You're really shaking things up and becoming actual competition for Adobe. I became interested in your products during the recent Affinity Live 2019 event. One thing that I've noticed as a strength of yours is that you value your customers opinions and are always trying to innovate and improve your products (I'm blown by Studio Link for example--Adobe should be worried). As a long time Adobe user (specifically Photoshop) I ran into a few roadblocks that have made my transition frustrating or difficult. I wanted to note that so far I've only downloaded and experimented with the trial version of Affinity Photo because I didn't want to spend the money if I couldn't use the program in the way I needed to. I'm a professional Retoucher and Digital Artist, though I'll be focusing on Digital Art for this... Again I do have limited experience with AP so I apologize if I've overlooked something. 1. I saw on your website that one of the perks of Affinity Photo is that it supports the ABR brush format. From what I've experienced through testing is that this is only vaguely true. I imported one of my unreleased brush sets (I'm going to be selling Photoshop brushes soon and would LOVE to also support AP) and almost none of the brushes worked at all. Literally almost none of the properties transferred over. As far as I can tell you don't have a dual brush feature either so some brushes can just never work. Are there any plans to better support the ABR format? A ton more Digital Artists would more easily migrate if this was the case. I think it's perfectly fine if AP offers additional brush features over PS, but I think it's incredibly important to have 1:1 brush performance from existing Photoshop brushes because it would make people like me excited to use your program. Heck, I'd be excited to make advanced brushes on your platform that make use of the sub brush features (that stuff looks amazing). I can't stress enough how much this will stand in the way of a lot of people adopting AP for digital drawing. Photoshop is one of the main industry standards for digital drawing tools and if PS's brushes aren't fully supported it makes it hard for people to reasonably consider sticking with AP. 2. I also vastly prefer Photoshop's newer brush organization system to yours for a few reasons. The brush name can be visible along with stroke preview, brush size, and tool type. It's really important to me that the names be visible. I wasn't able to find a way to make them visible in AP. Additionally the way the folder structures works in Photoshop is better because you can have better organization. For example, you can have a parent folder with whatever name, and different named and sorted subfolders within the parent. You can even have addition subfolders in the children folders. From what I can tell with AP you can only make the parent category and no sub folders. This doesn't work well for me as I sell brushes in organized sets and this kind of ruins a lot of that organization. When I imported one of my organized sets it consolidated hundreds of brushes into a single chaotic folder which isn't usable. 3. Clip studio paint has a toggle-able keyboard shortcut to make any brush an eraser. Photoshop also has a feature that can be used similar to this although it's more obscure-- you have to set the brush blend mode to "clear" and then it becomes an eraser. The downside is that you can't make it a toggle-able shortcut which makes it cumbersome to use (you have to change from your current blend mode to clear to erase and back to your previous blend mode-- which is annoying). I was hoping there was a way/or that you would implement a toggle to have any brush act as an eraser. Obviously it'd be best if this was something you could assign a keyboard shortcut to. 4. I'm struggling with your zooming system and oddly enough panning. This is probably just something I've over-looked. But when one of your challenges is to make people reconsider their allegiance to Adobe things like this make it difficult. It's cool that you can zoom in to 1,000,000%, but why do you need to on a pixel only layer? Wouldn't that only be necessary if there were vectors present? I think that if there's only rasters on a given layer or on the screen it should only zoom in as far as the individual pixels turn into big blocks like photoshop. Another issue I'm having is that I'm so use to Photoshops amazing zoom in/and out feature with holding spacebar+alt and just dragging my stylus left or right. It's swift, responsive, and intuitive. However it didn't work this way in your program and I couldn't figure this out. Additionally once I was zoomed in a bit I tried panning the screen by holding spacebar and dragging and wasn't able to pan at all. Why? 5. Another important brush feature is blend modes for the texture itself and more controls over the texture. Photoshop has implemented this the right way. I mean look at the features here as an example, you can control the contrast/brightness of the base texture, texture each tip on/off, the blend mode of the texture, the depth %, min depth %, depth jitter %, and obviously the control of the brush. By comparison AP handles brush base textures in a far less featured way which is really disappointing and is without question another reason that Photoshop's ABR format doesn't transfer well. Again Dual Brush would be amazing too and with a similar set of features including blend mode. It is these features that make photoshop brushes arguably the most dynamic of any program. I'd love to see these features in AP!! 6. Are there plans to make a stand alone fully featured Digital Drawing program? This is a problem Adobe has long made with Photoshop too (they are finally doing something about it i.e Project Gemini aka Adobe Fresco). It has spent most of it's program life catering more towards the retouching/Photoshopping side of things and less to the digital painter. Heck in like 25+ years of Photoshop they only added the ability to sort and categorize brushes a few years ago... and the mixes brush a few years before that. They are also very slow to respond to feature requests and don't communicate much or at all with their user base/community. 7. Smaller question but is there a hotkey or way to set one to show/hide the current layer (basically to toggle current layer visibility)? I use this all the time when I'm retouching in PS to see the changes I'm making before and after. Thanks guys! Dan
-
- 2
-
-
- digital painting
- digital drawing
- (and 5 more)
-
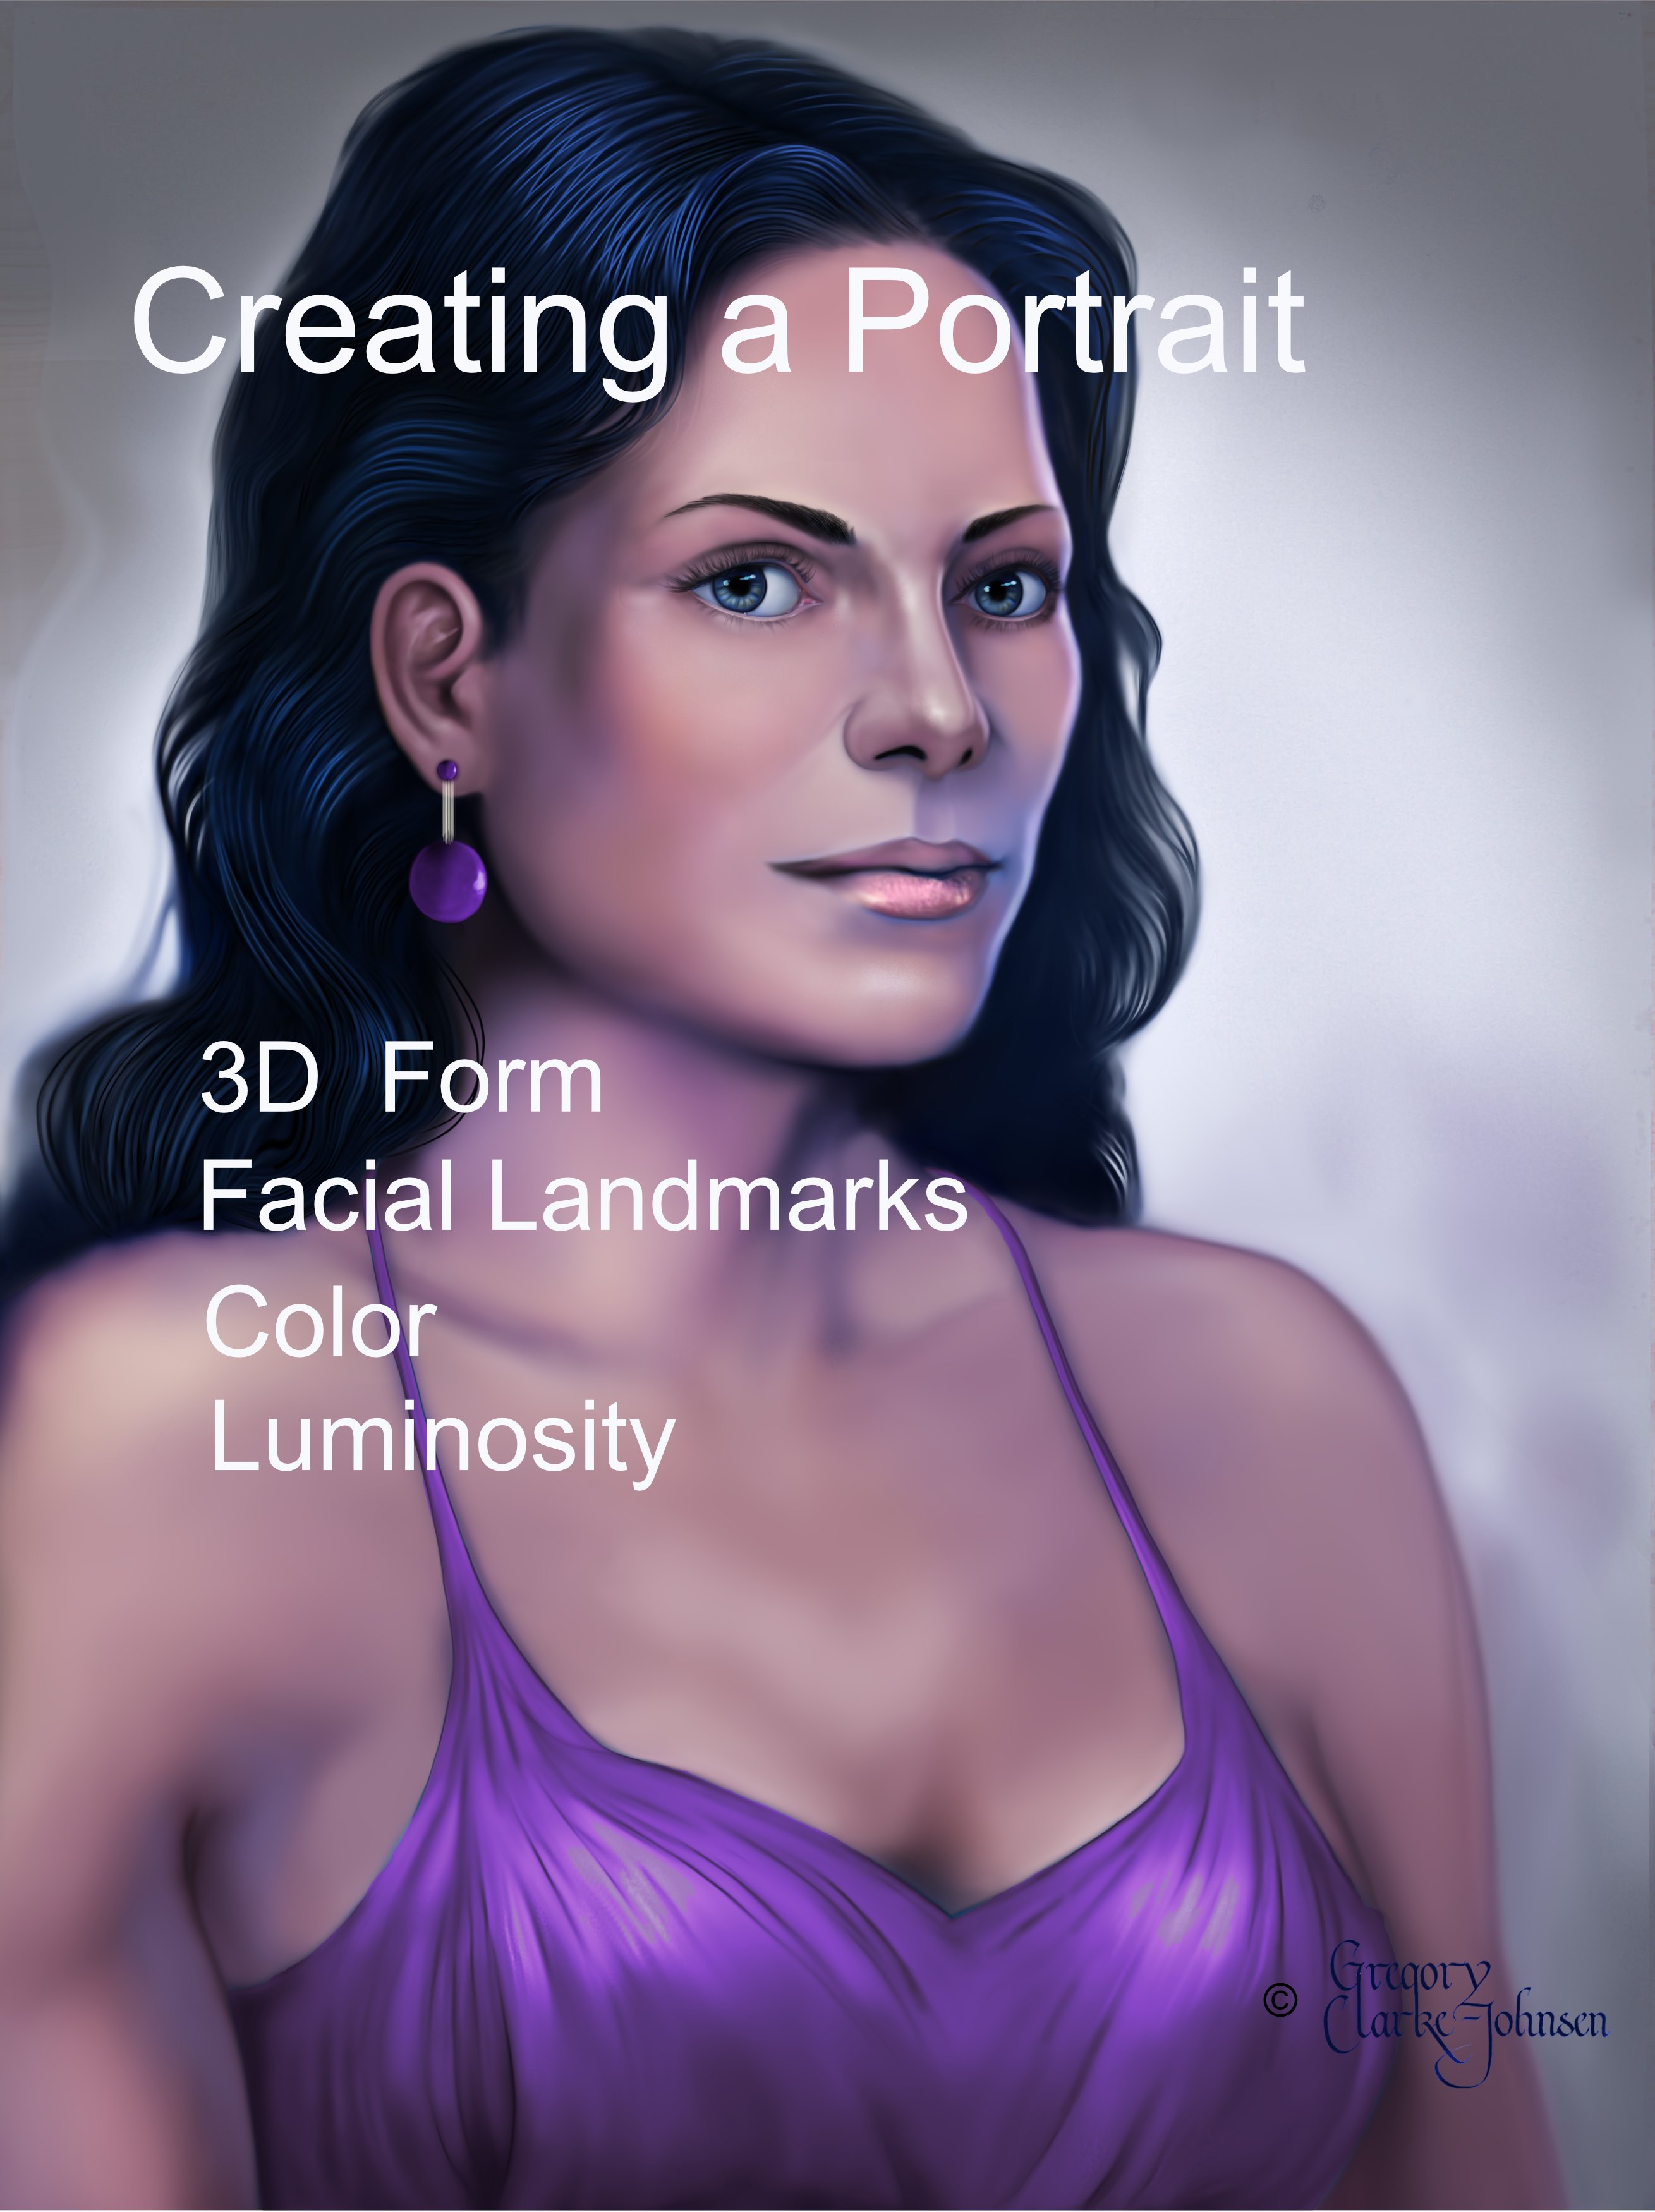
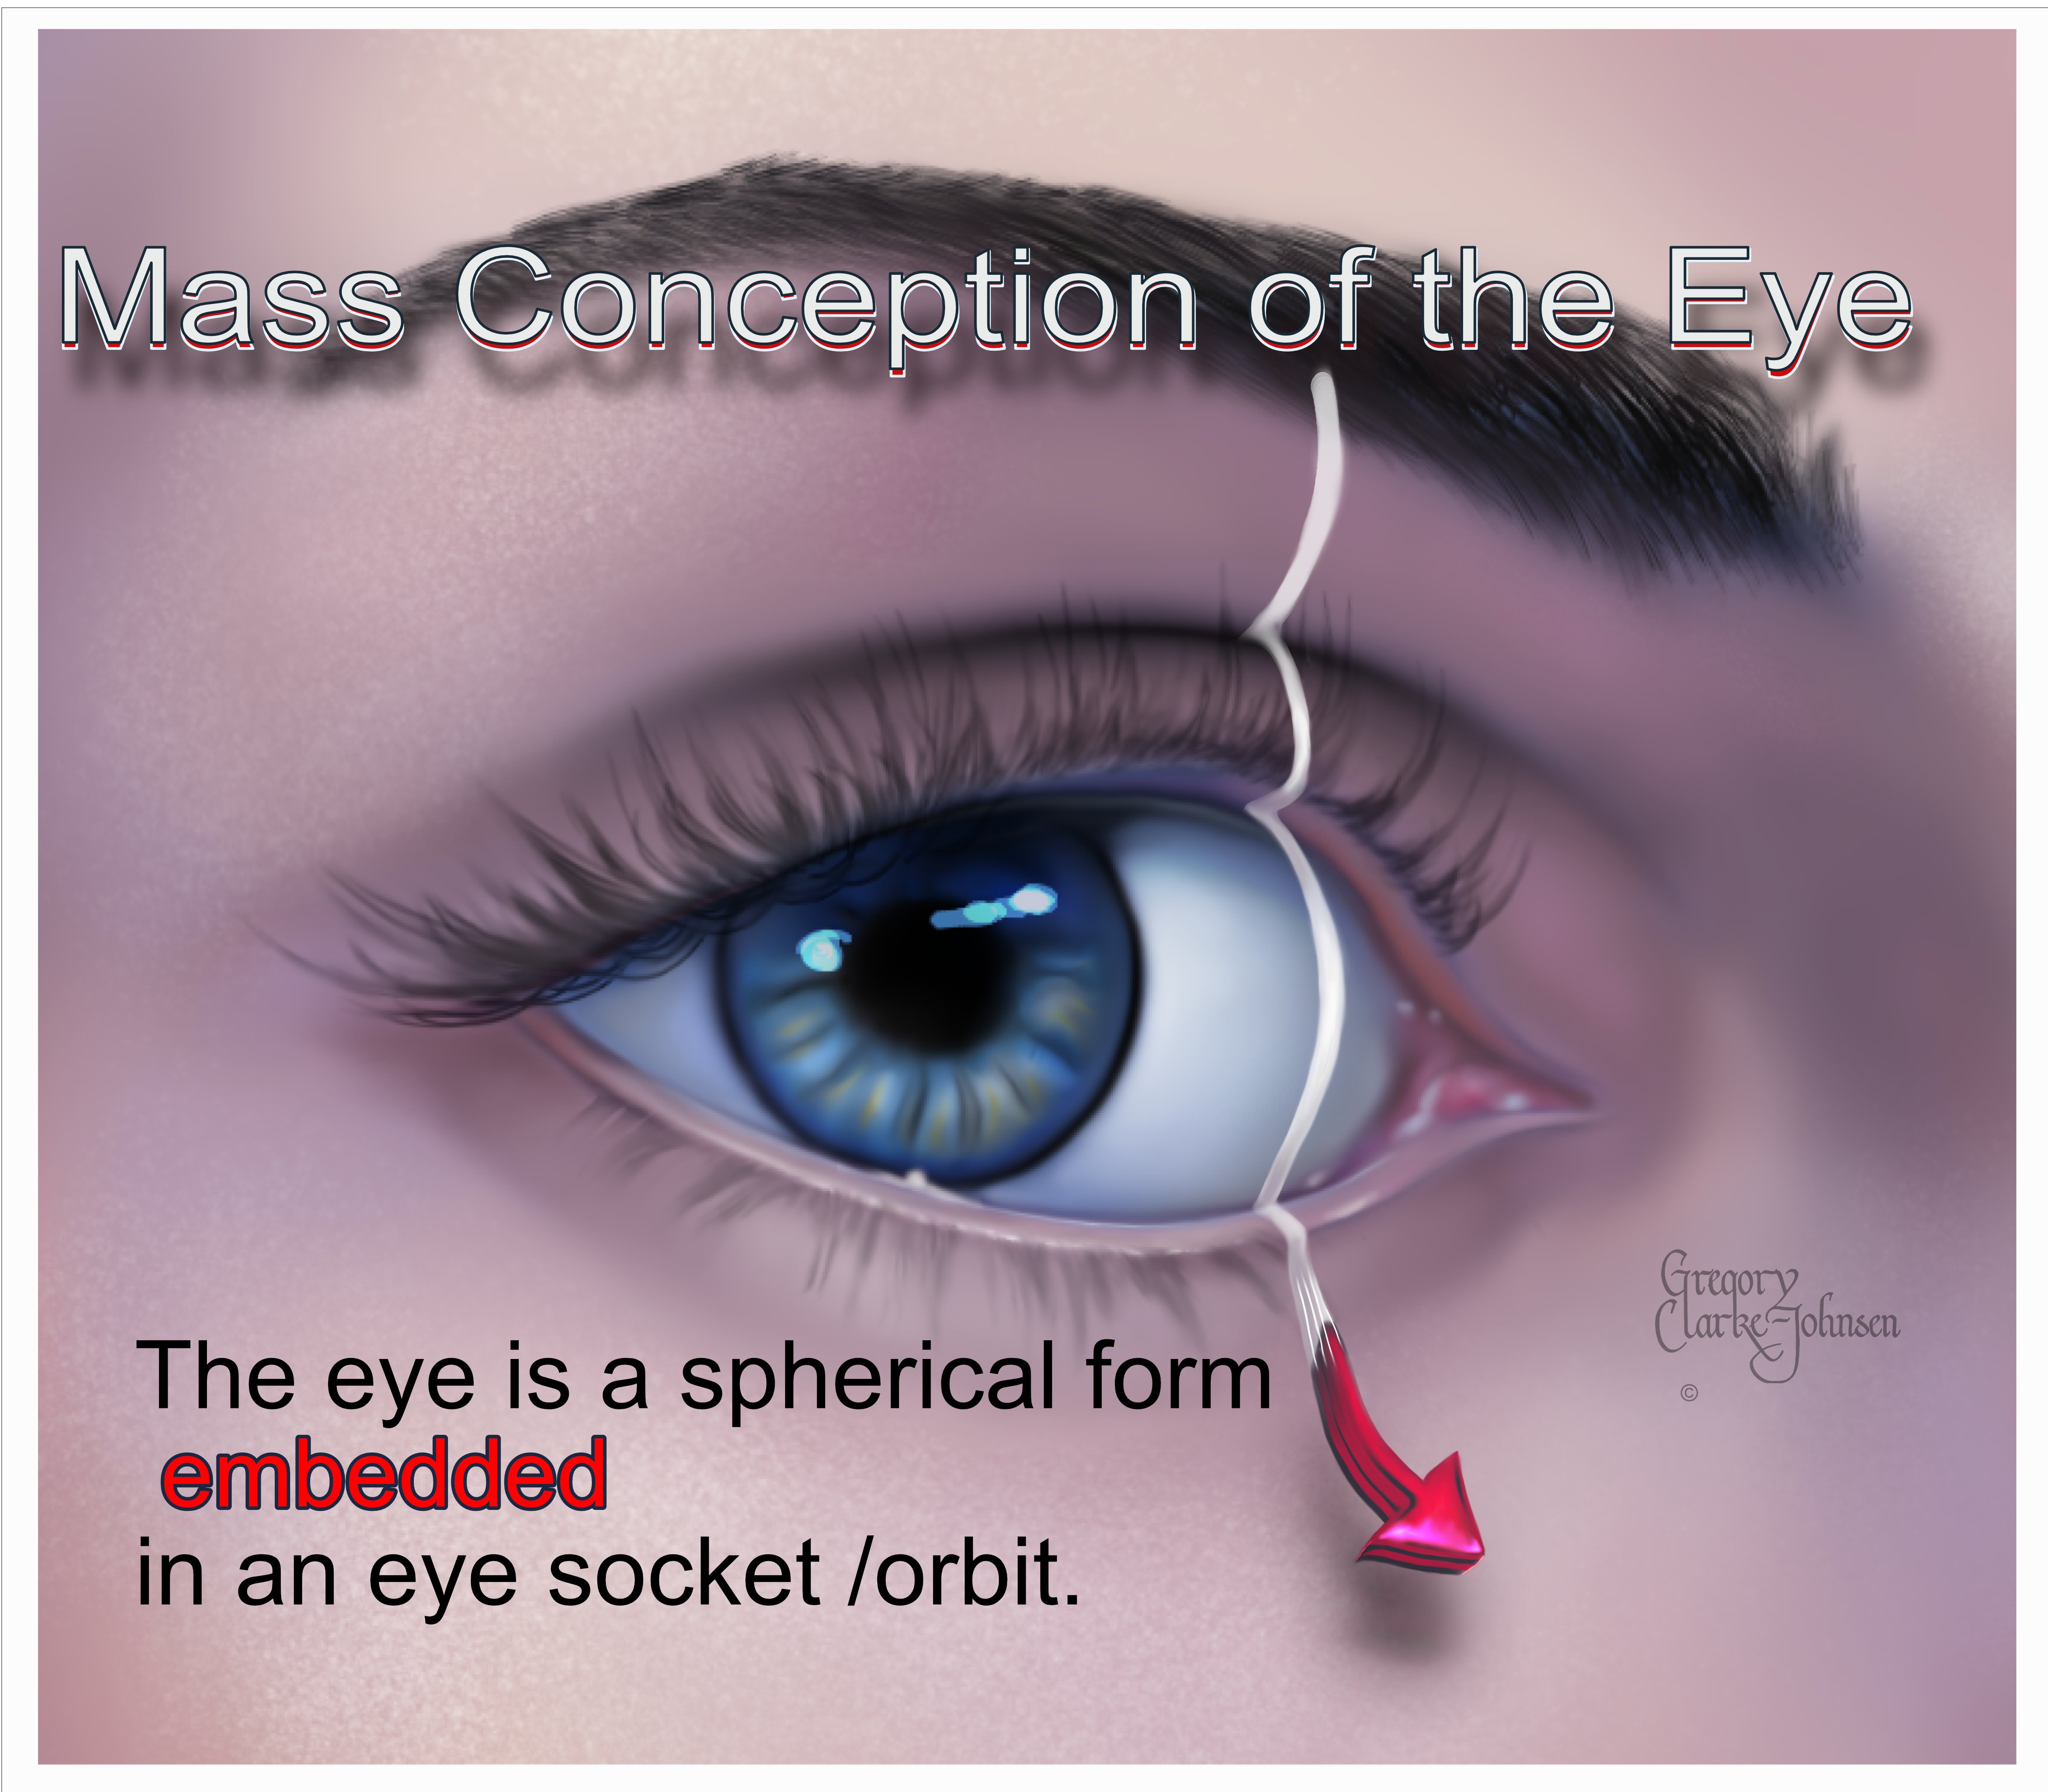
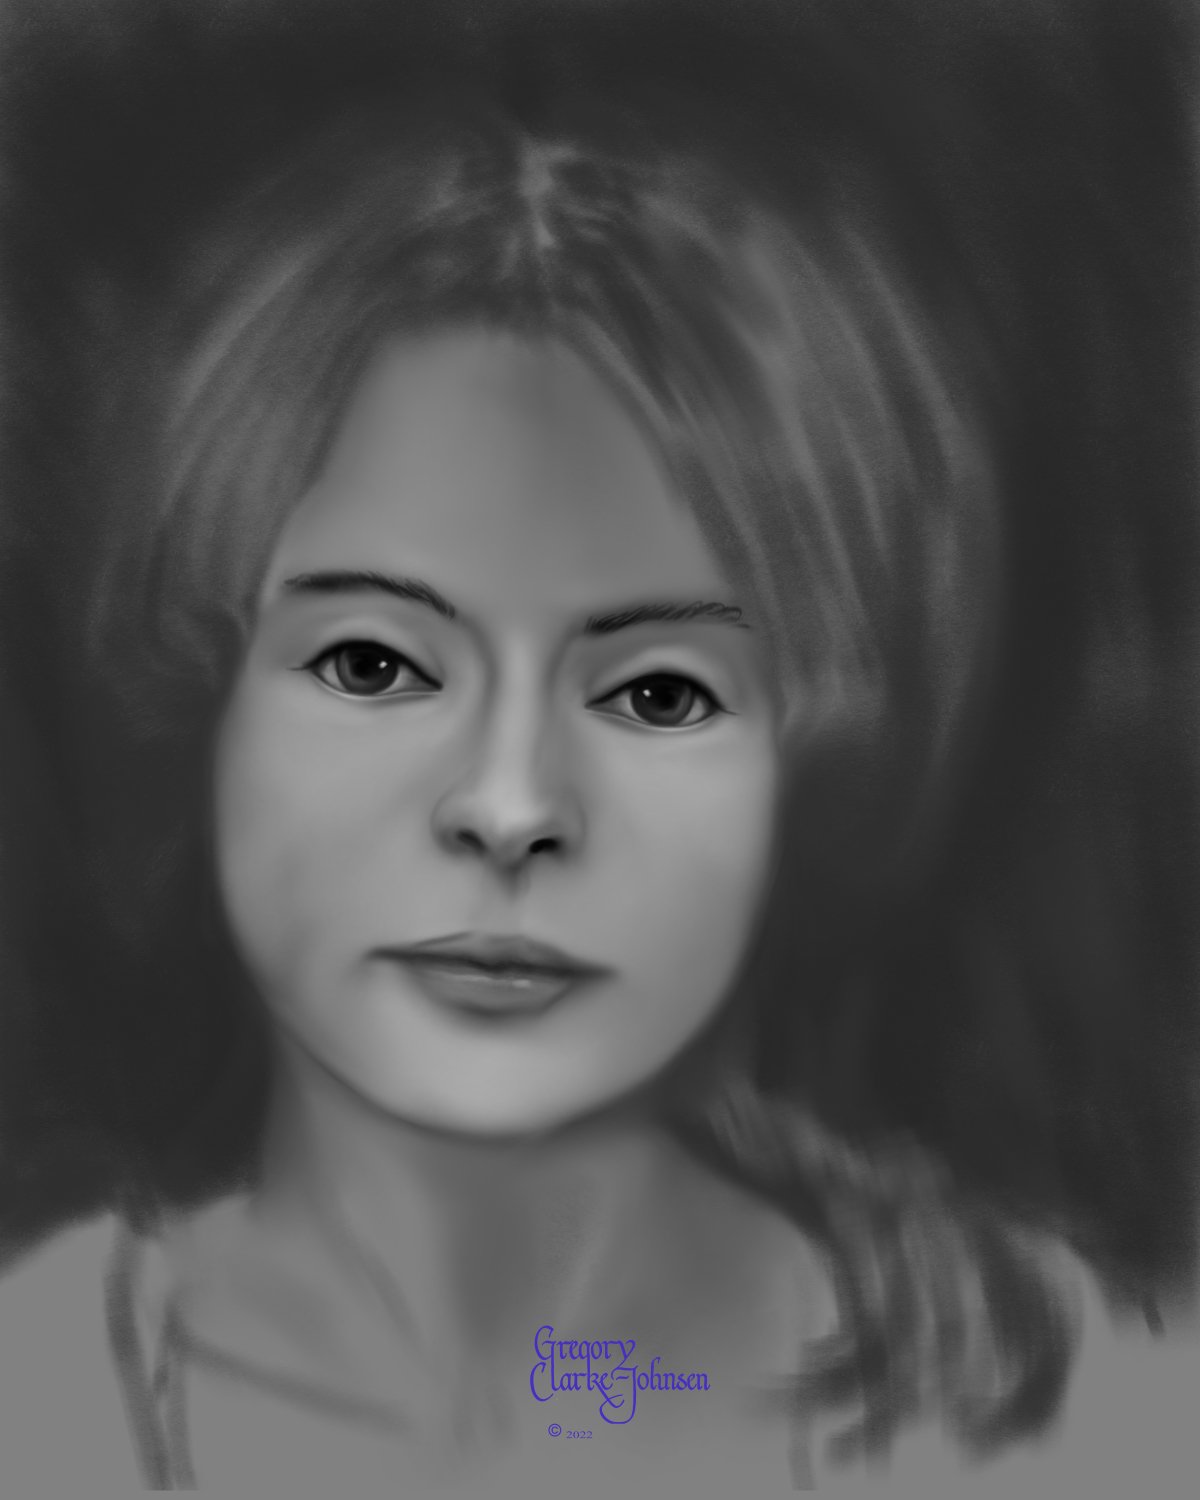
Here I demonstrate 4 principle elements that make up a successful digital portrait. These include: How 3D form is structured, Facial landmarks, Colour Luminosity Comments welcomed . Instagram> @clarkejohnsen
-
- 1
-

-
- ap- 3d form
- affinity facial color
- (and 3 more)
-
Here’s a look at my Affinity Photo setup, using two views of the same painting that I am working on gives me the flexibility of zooming in on one image to work the details while being able to see the immediate impact on the whole image. This approach really works well given I am using a 5K iMac monitor. Comments welcomed. joined_video_d523871d91bc4ffea3bd7f8bf2663e61.MP4
-
 One of the features that would make the iPad version of Affinity Photo much nicer to work on is the ability to quickly flip the canvas horizontally using a gesture. I feel that this is a very important feature and I use it a lot in other apps. I use the horizontal flip when I'm drawing because it helps me see mistakes and makes inking/painting much easier since it gives me different angles to work on. I can imagine that this feature would also be helpful for photo editing because it makes it easier to check the work for any mistakes or areas needing improvement. So, please give us a gesture to flip the canvas horizontally. It would make a big difference! Thank you Affinity Photo team!
- 8 replies
-
- 5
-
-
- flip canvas
- flip canvas horizontally
- (and 3 more)
-
Here is my latest digital painting , hand painted in AP. Comments welcomed.
-
affinity photo GODDESS SERIES- HAND PAINTED PORTRAITS IN A P
Gregory-CJ posted a topic in Share your work
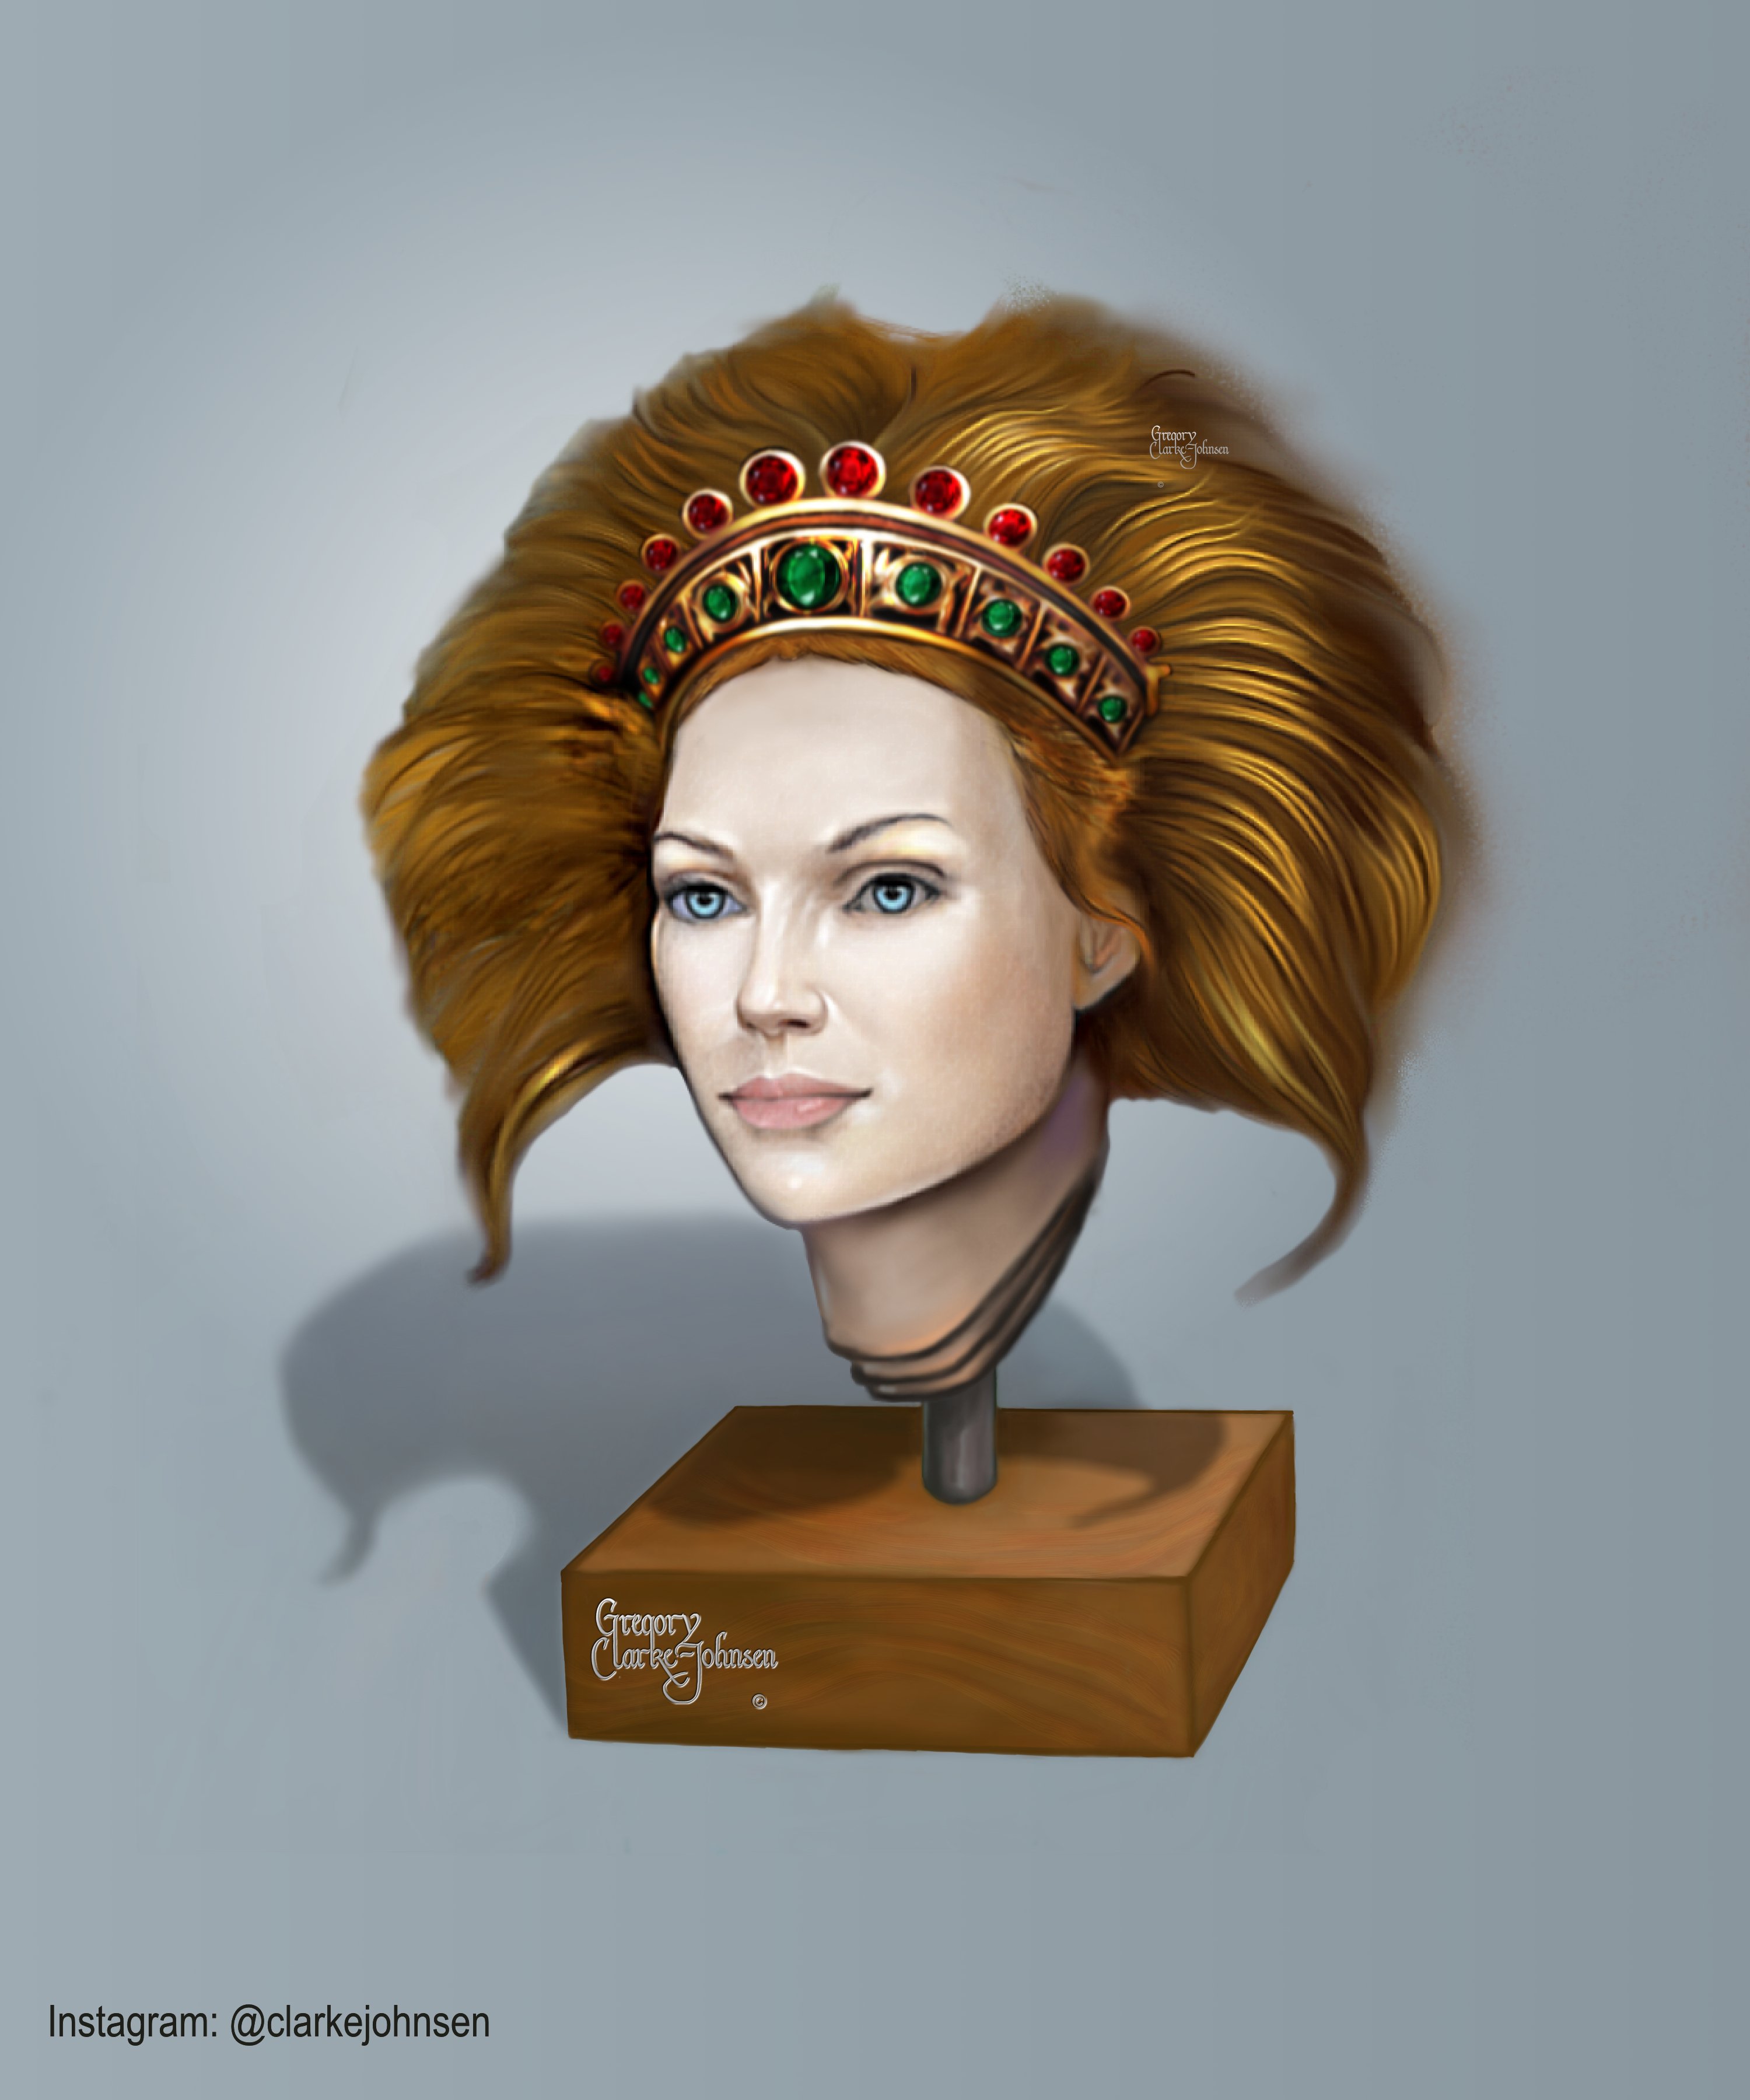
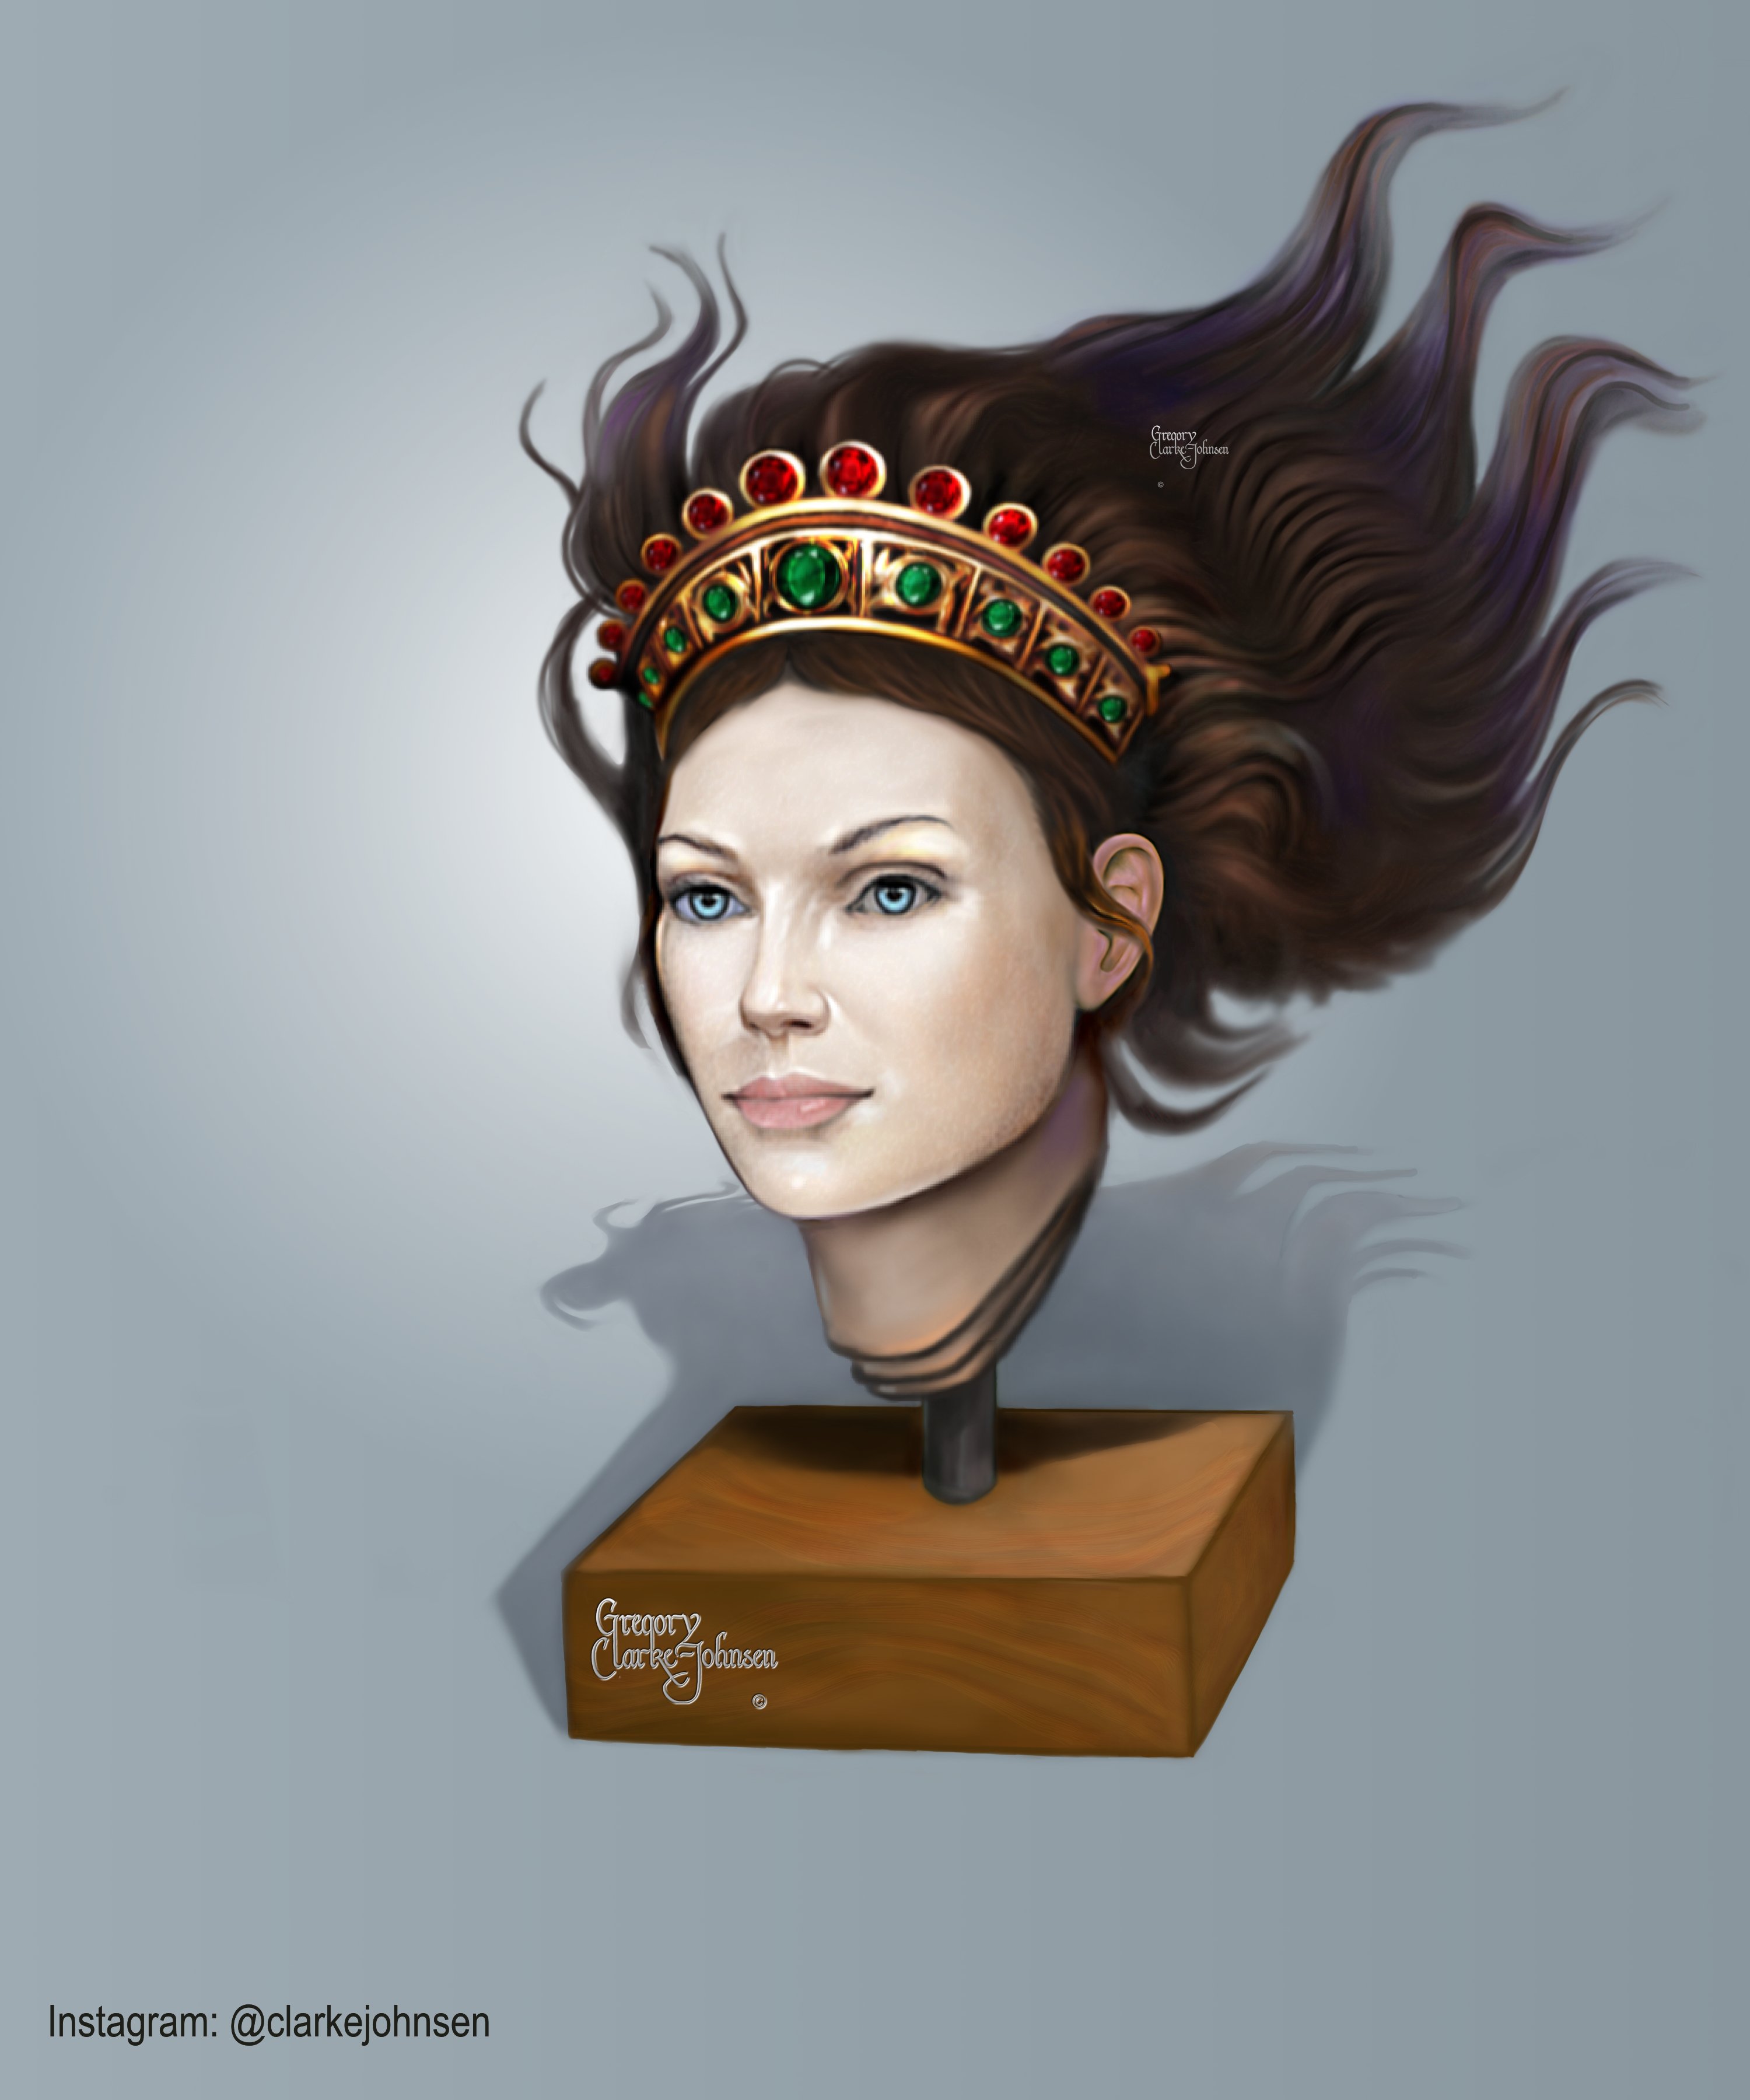
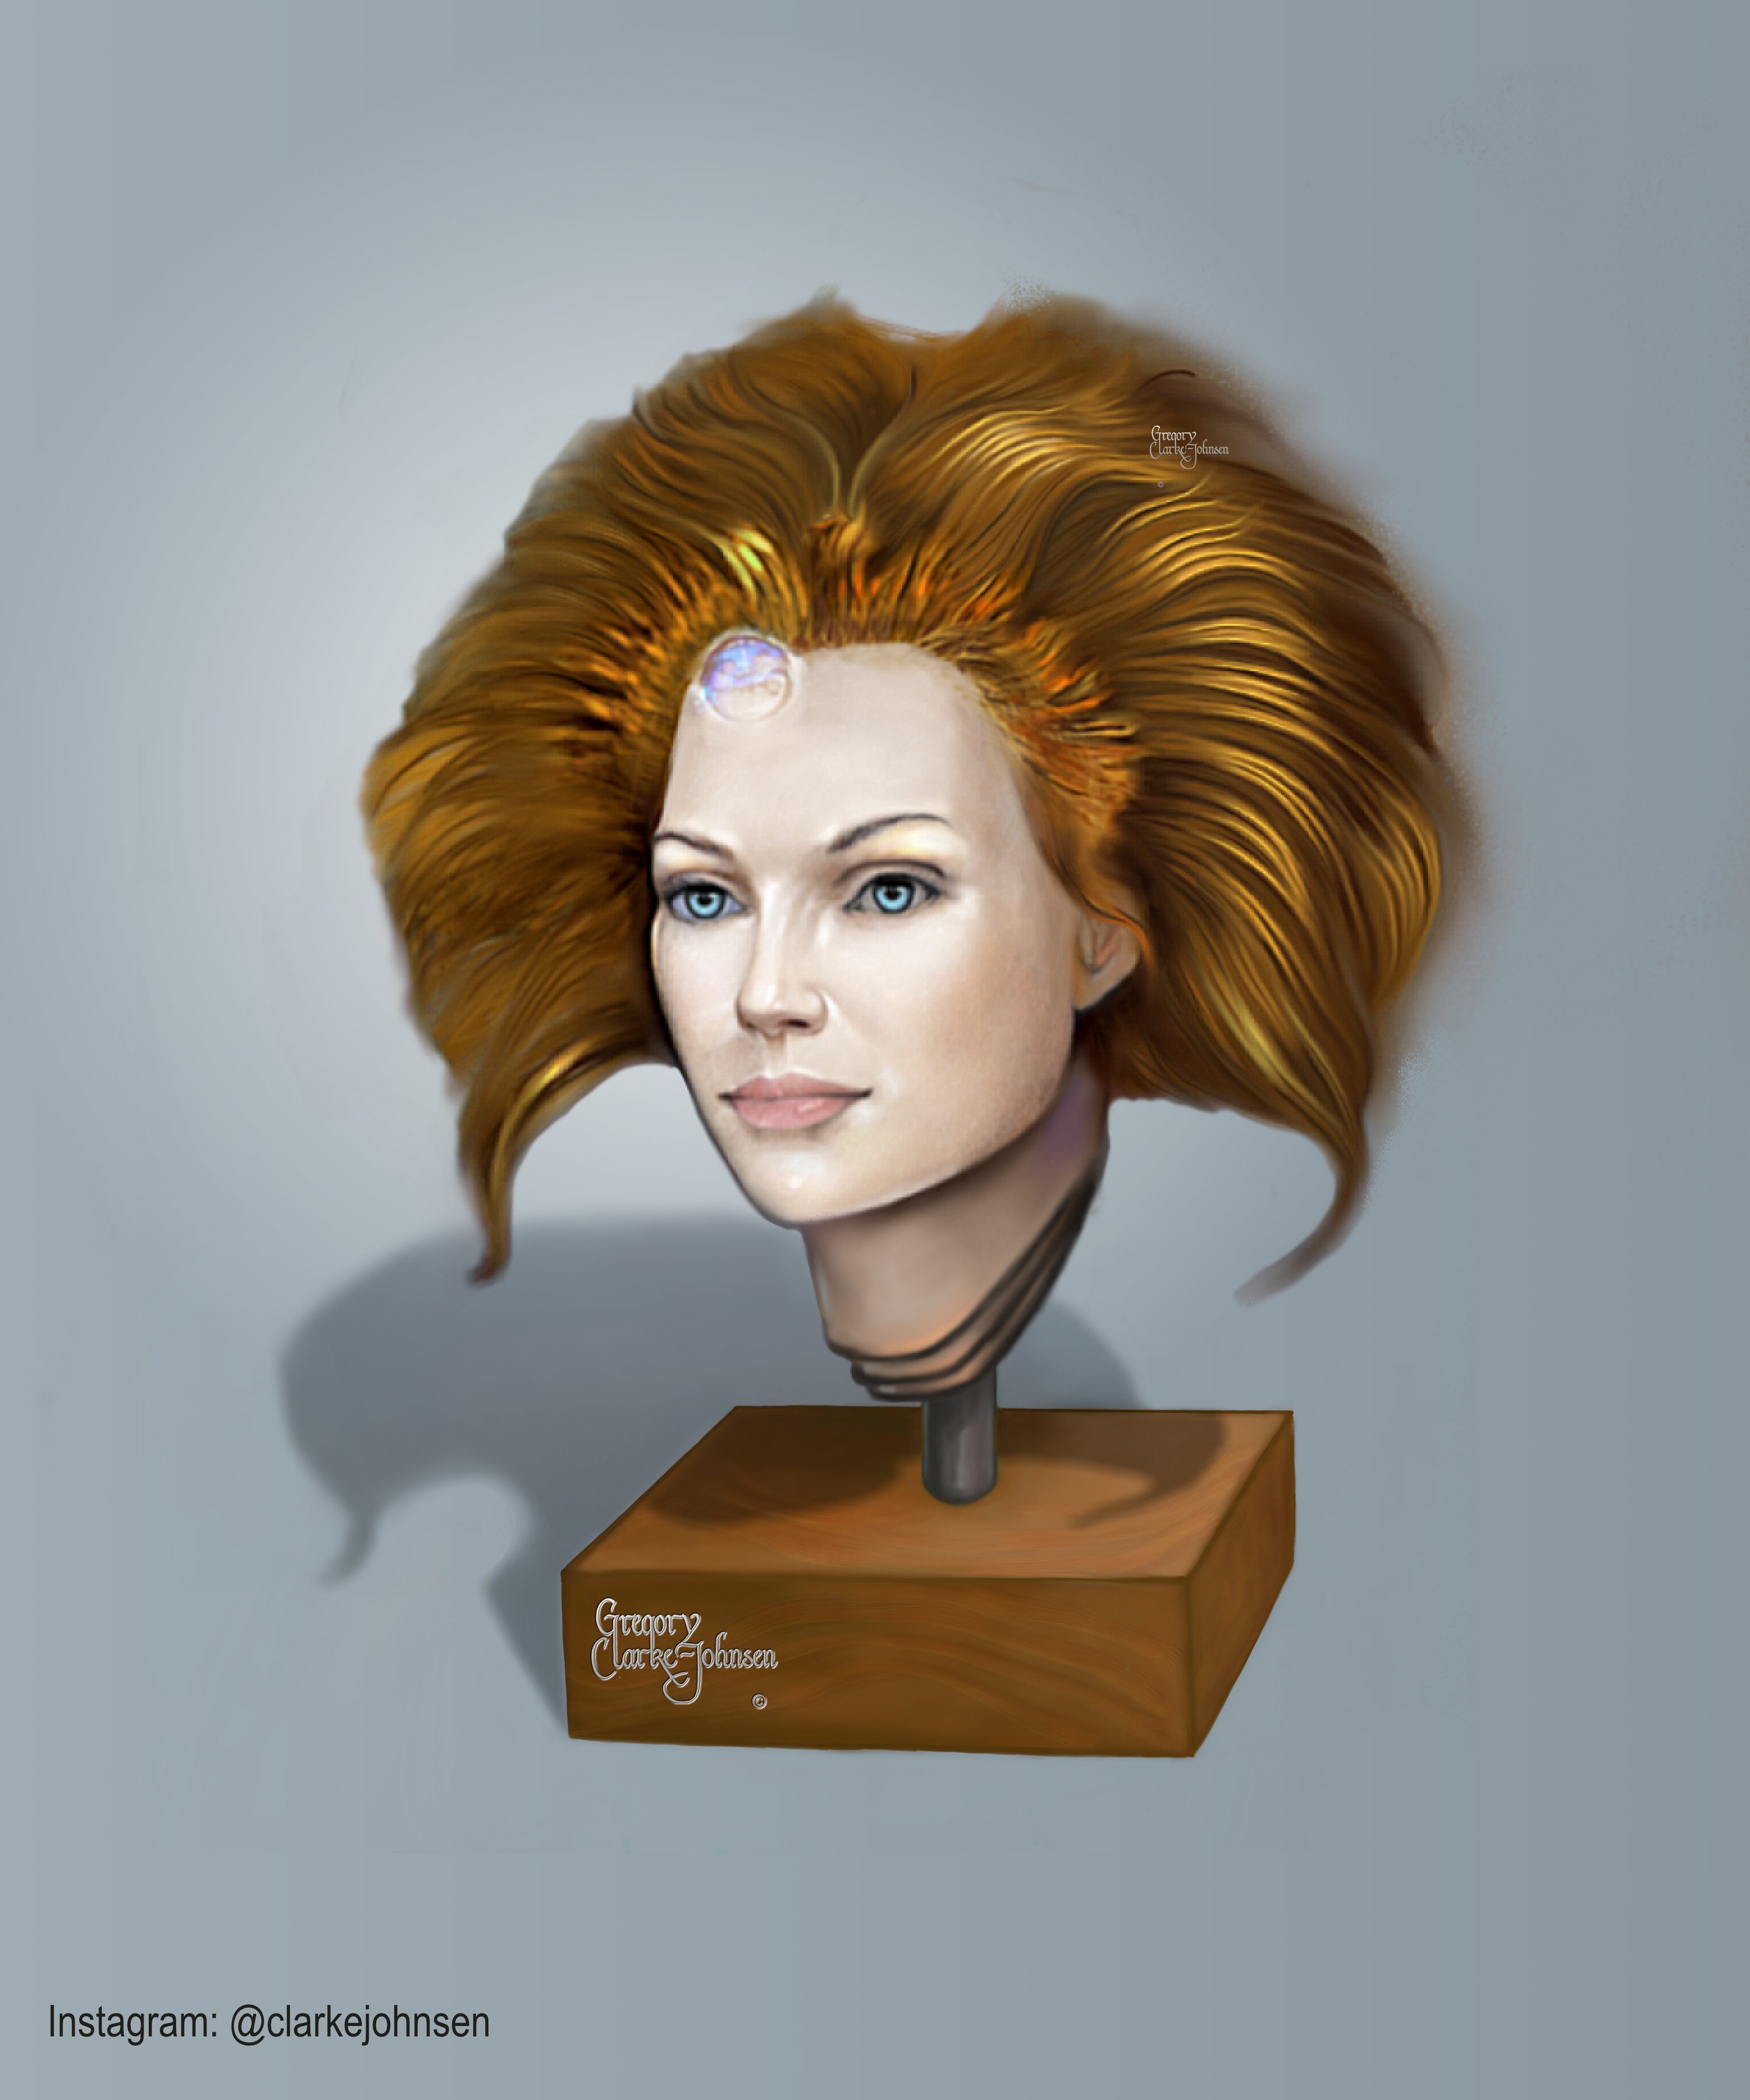
HI everyone. Here are a few images from my digital design goddess theme . These images were hand painted in Affinity Photo. Let me know what you think. Gregory CJ
- 5 replies
-
- 7
-
-
- digital painting
- goddess painting
- (and 2 more)
-
affinity photo GODDESS SERIES -FINAL PAINTING & DRAGON -AP
Gregory-CJ posted a topic in Share your work
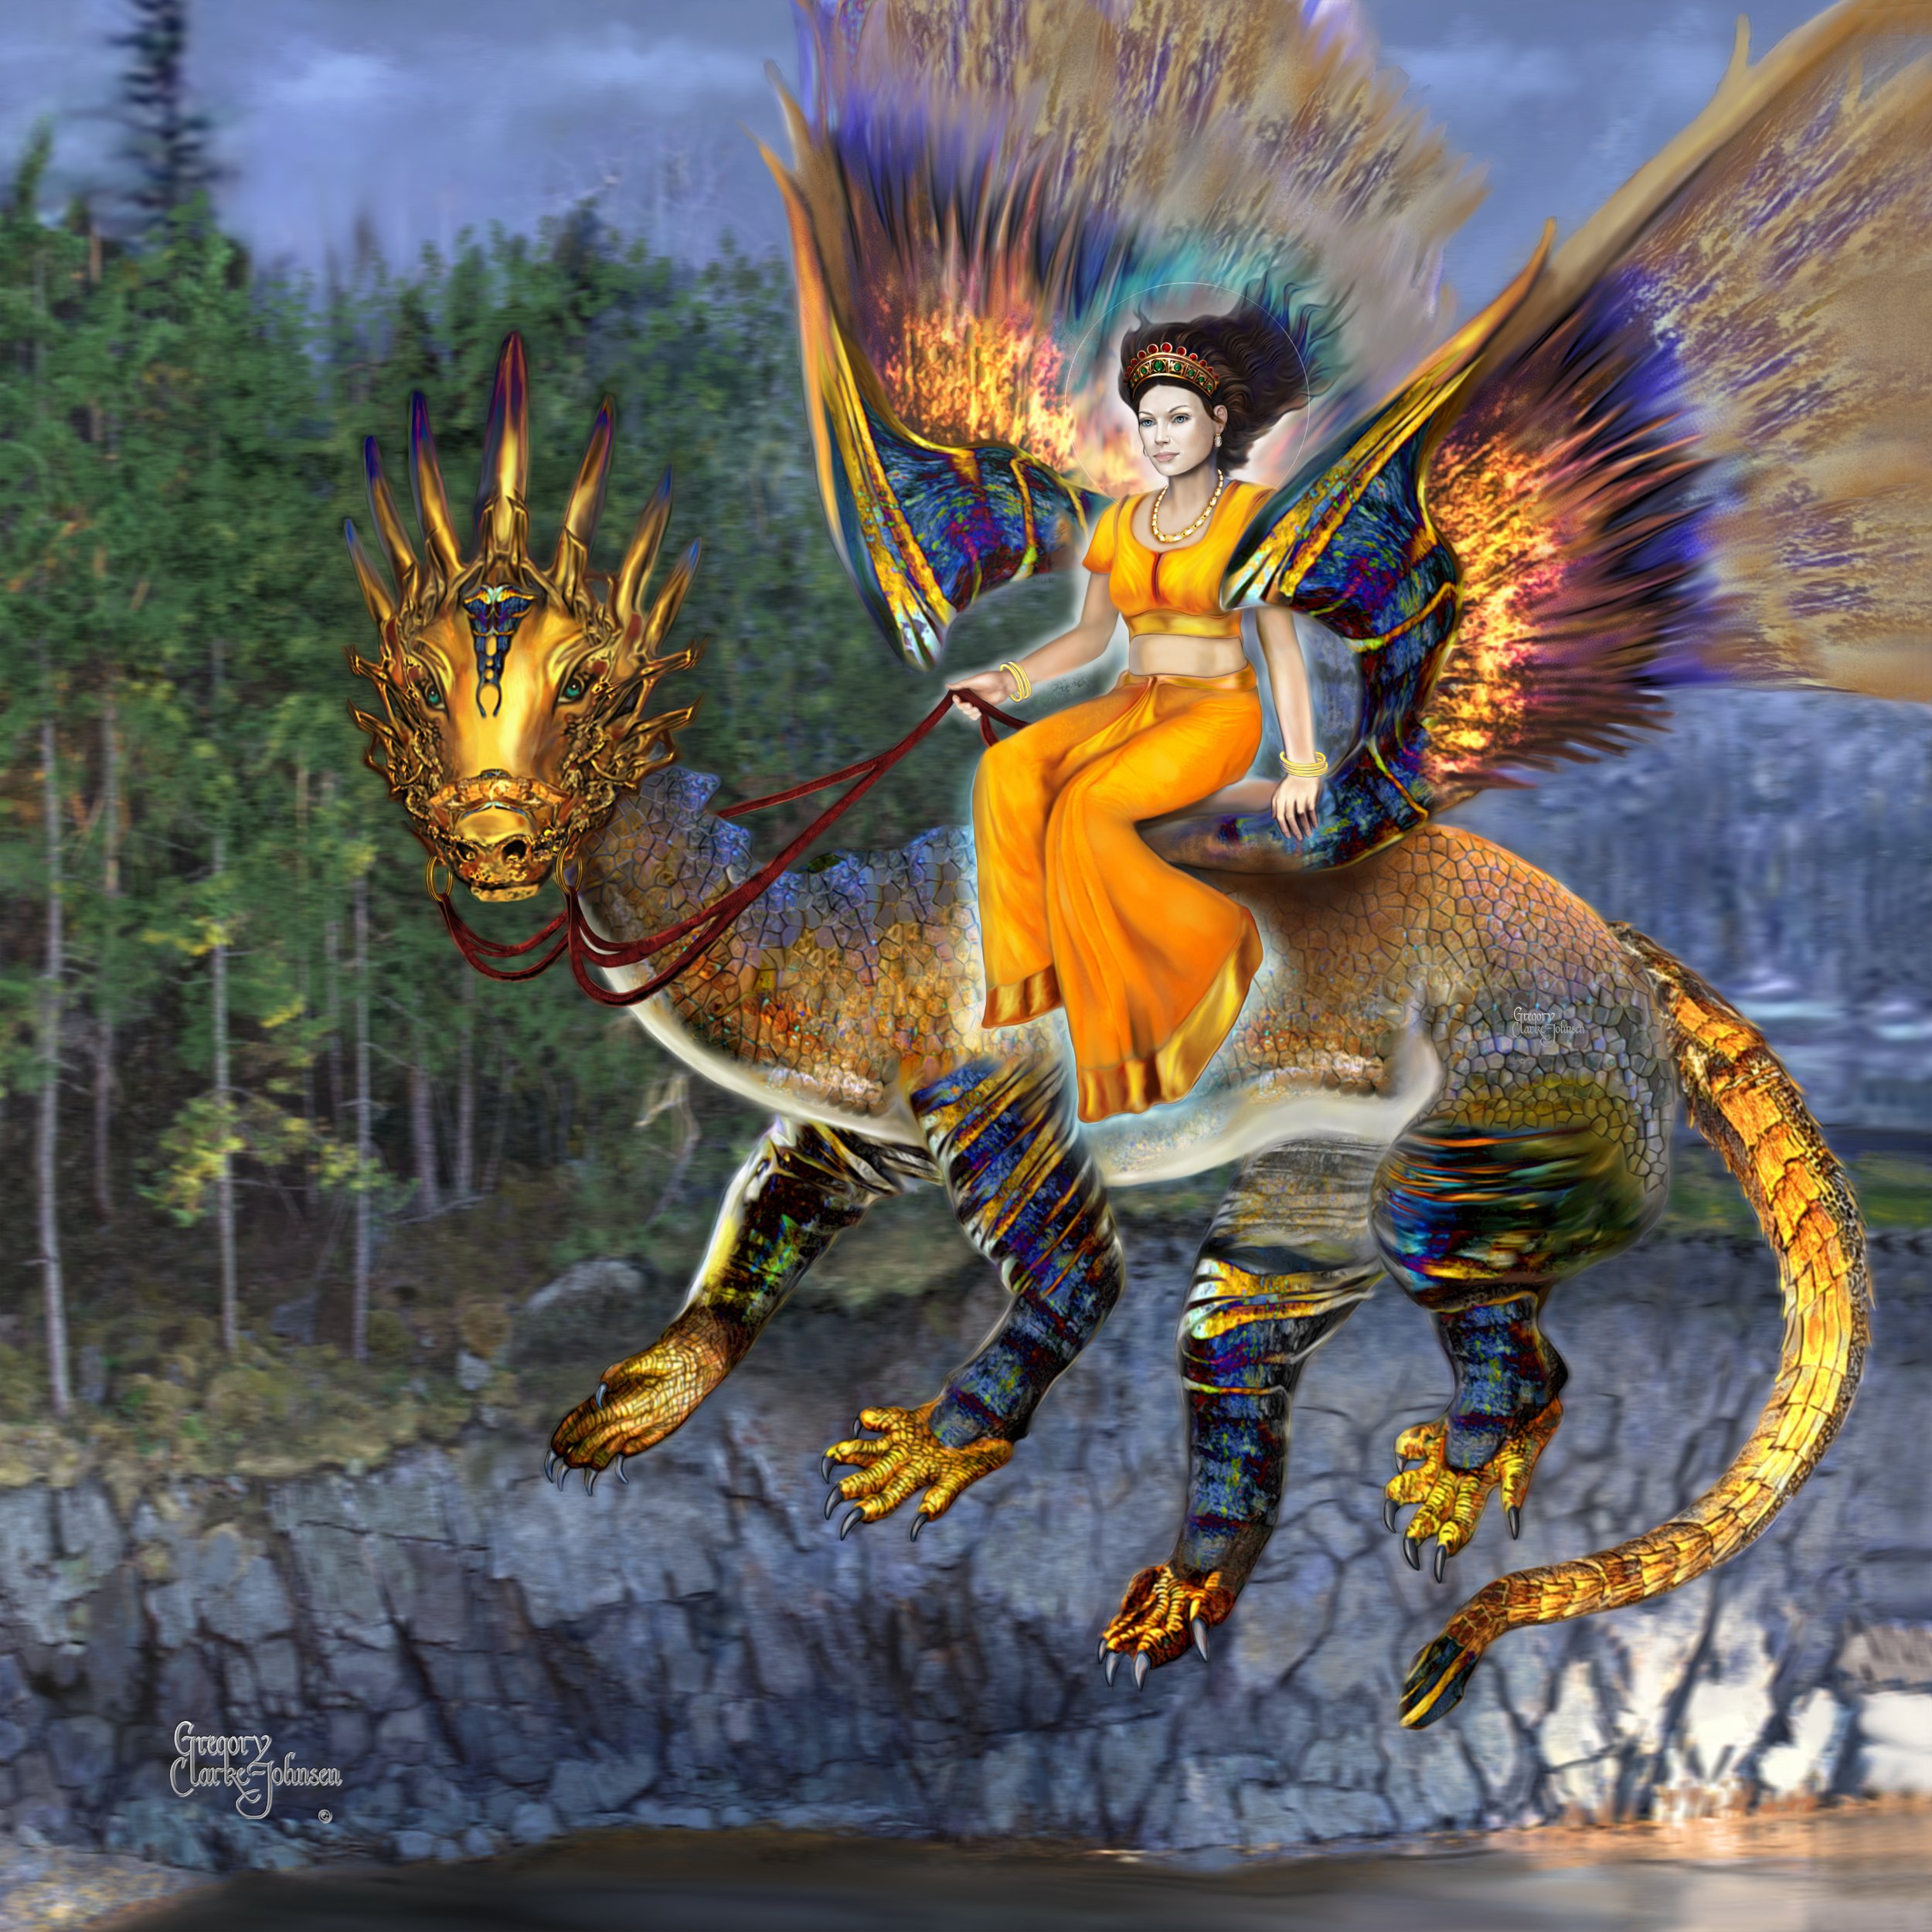
Here is the final painting that I have been working on for some time. It's entitled " Goddess of Light" The entire piece was painted using Affinity Photo. Comments are welcomed. Enjoy!
-
- 2
-
-
- dragon
- digital painting
- (and 2 more)
-
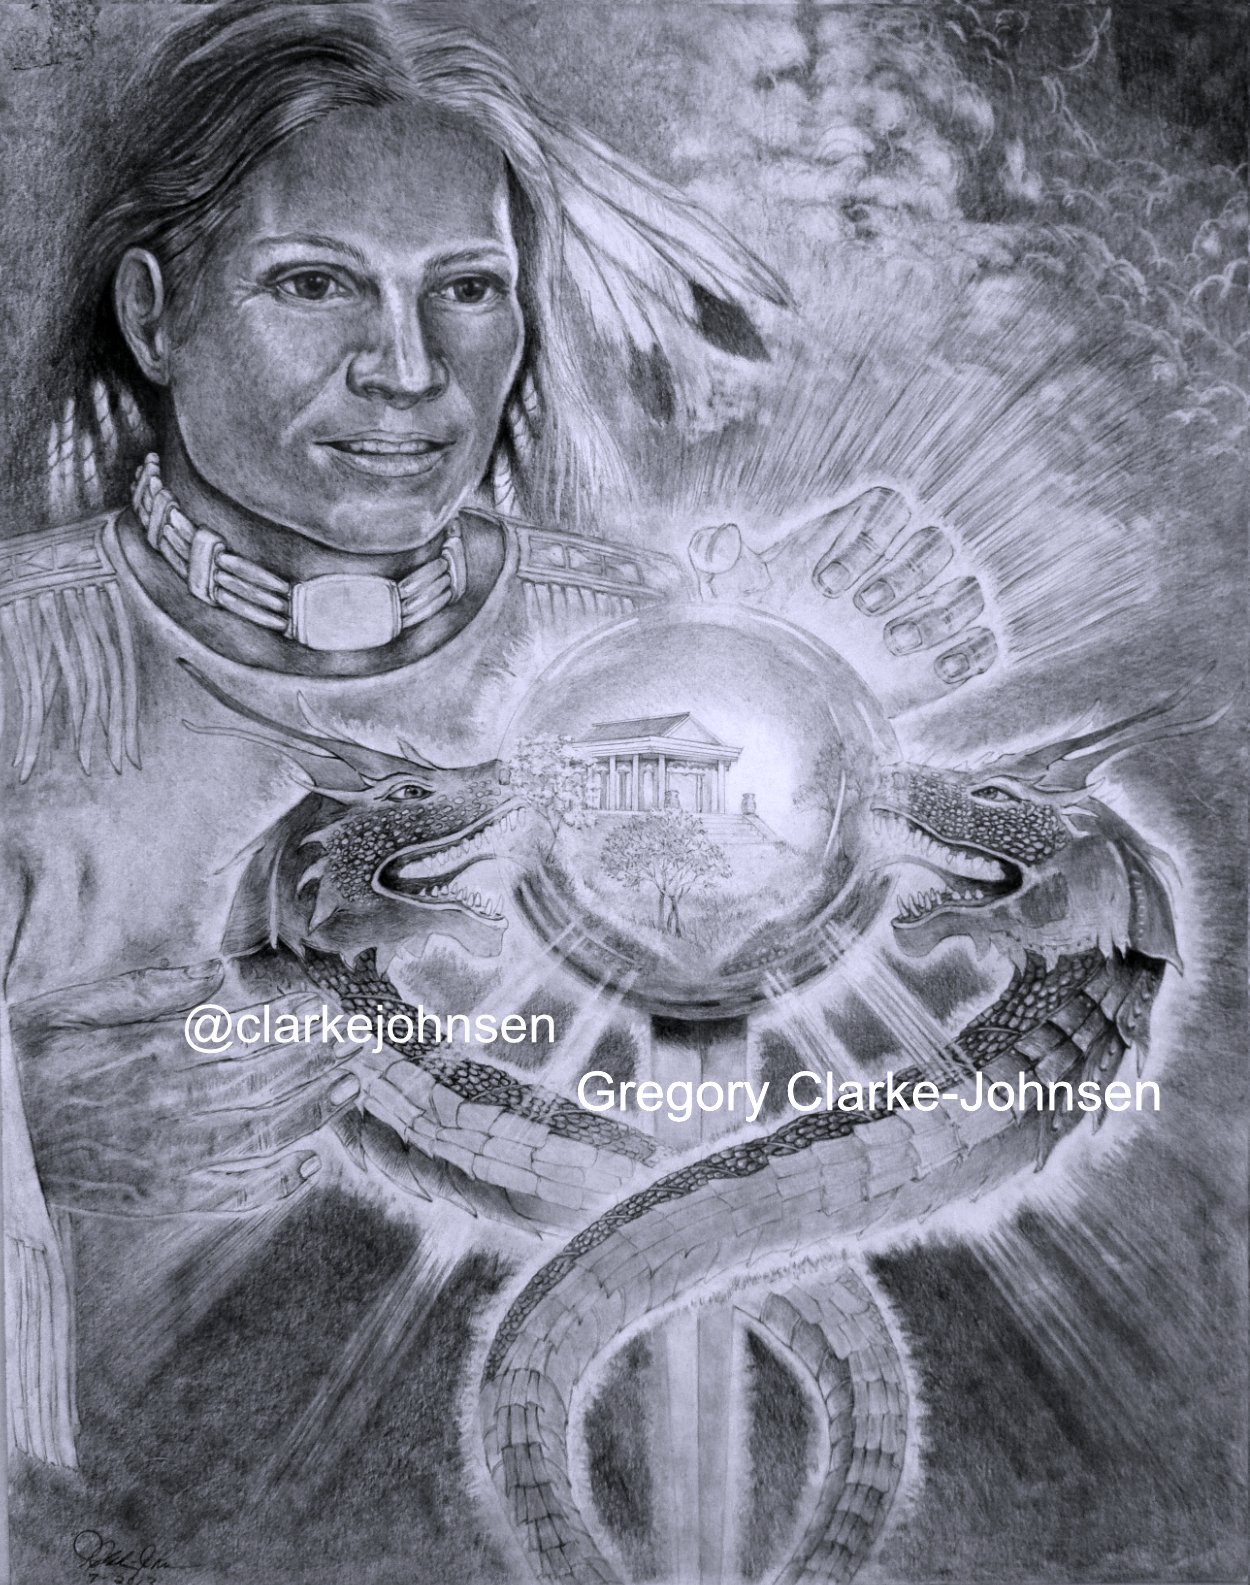
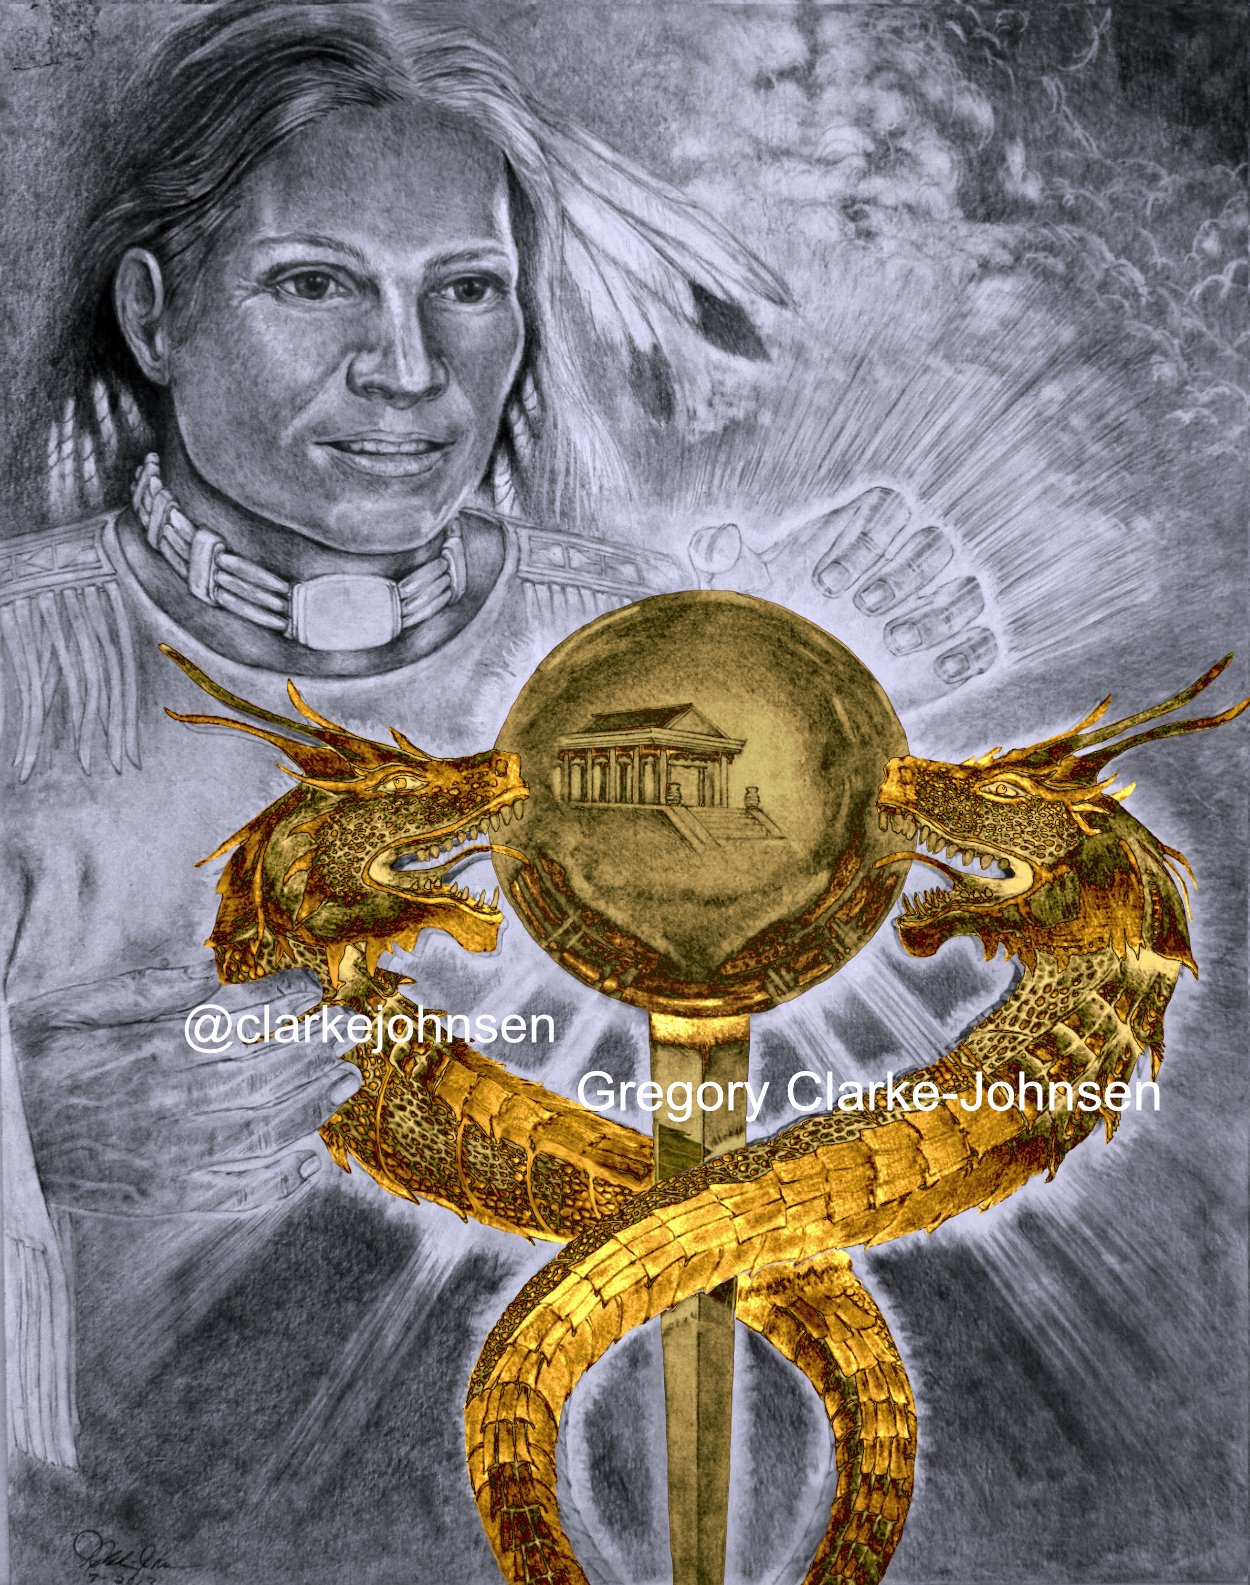
Here is my latest digital painting, entitled "The Caduceus" inspired by a Gandharvan rain raga I witnessed. I have included the original drawing and an intermediary step in the creative process. I started the digital painting in Photoshop and completed the final digital painting in Affinity Photo which has now replaced Photohop as one of my favorite painting software.
-
- 2
-
-
- digital painting
- caduceus
- (and 3 more)
-
 Hi I was trying affinity photo for drawing and digital painting. I'm currently using photoshop. but affinity seems really better. i was thinking of switching to AP. but the drawing & painting need some works. I had a few suggestions as well. a few days ago blender updated the grease pencil with nice brushes and tools that would be nice if AF could have them too. please take a look at this part of the video . you can smooth a brushed line with a tool just dragging on it. you can make it thin or thick while keeping smoothness as well. drawing a curved line with some brush would automatically smooth it.
- 1 reply
-
- 1
-
-
- affinity photo
- drawing
- (and 3 more)
-
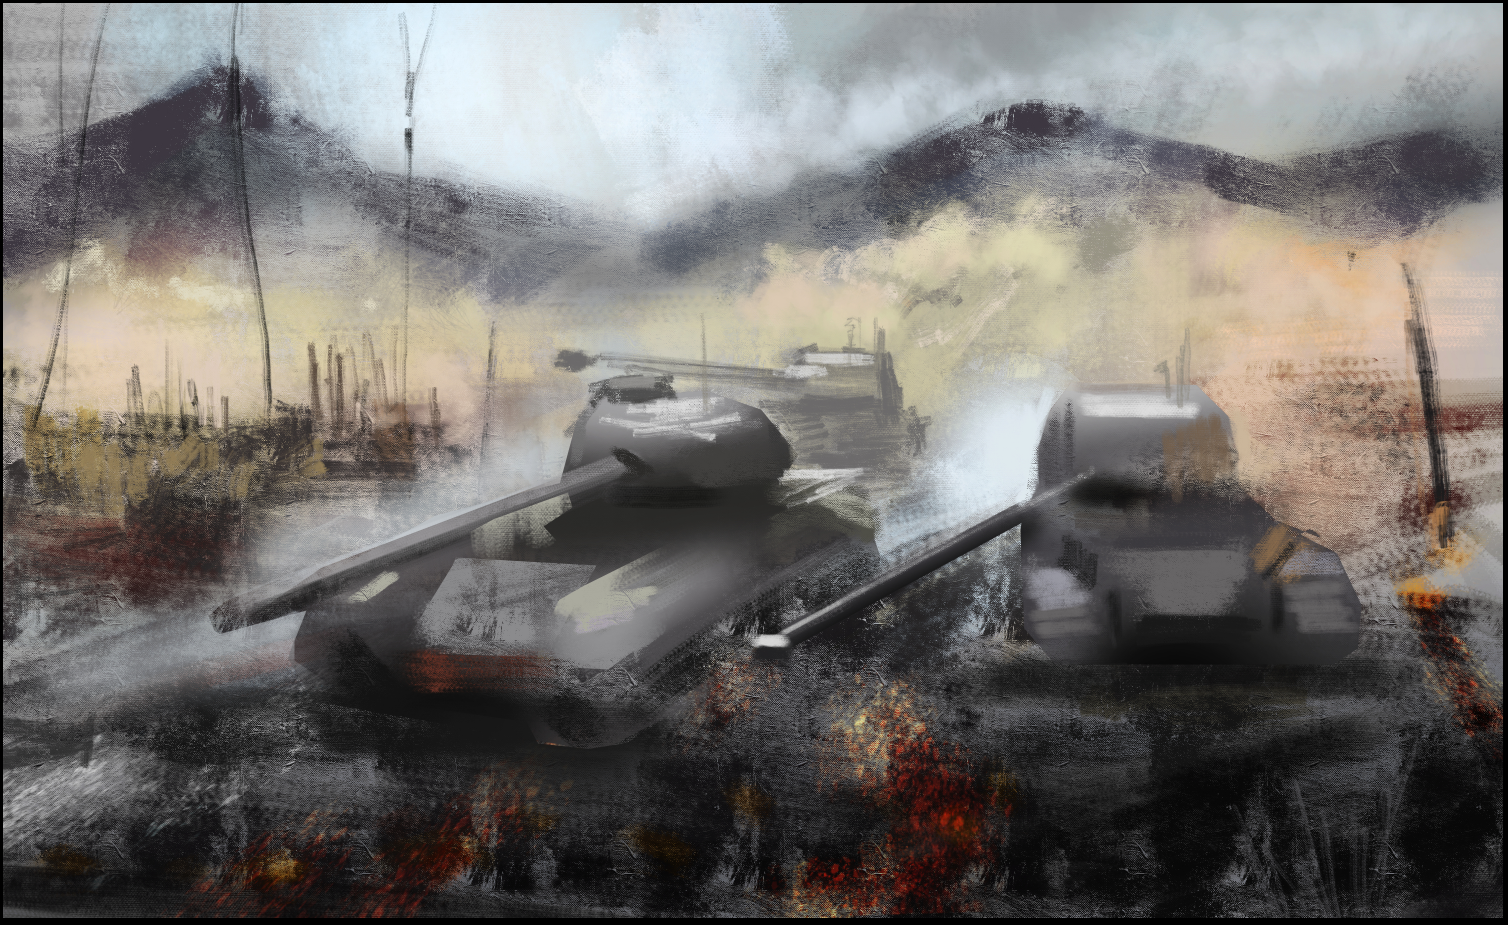
A couple of weird giraffes...
- 24 replies
-
- 37
-
-
- daub brushes
- digital painting
- (and 1 more)


.png.f27e9089da5b1c821114fe70c8107195.png)