Search the Community
Showing results for tags 'masks'.
-
 I started off writing this as a question because I couldn't work it out, but a few times I accidentally got it to work although I couldn't work out how I had done it. (Affinity Designer Desktop v1.8.5, Windows 10). After much fiddling around I have worked out how to make it repeatable. (Admins: please feel free to move this to a better place in the forum if there is one). This is useful if you use a tablet and want to draw vector brush strokes in a mask in pressure mode, see the effect as you draw them and be able to edit them afterwards. Here is the explanation - there are three important steps which are not obvious but omitting them will leave you without editable vectors in the mask: Select the layer or group you want to add the mask to. I'll call this layer A. Click the Layer Mask button to add a pixel mask (even though we are in Designer Persona). This serves no actual purpose except that if it doesn't exist, this method doesn't work. Draw a vector brush or pen stroke (this creates its own layer above layer A). Create a group with this single curve (or more if you want to); the point is, it must be a group. Lets call this M (for mask) Make sure the group is open (i.e. click the triangle so that it points down and you can see the vector curve(s) in the group). Drag the Group M into the mask position of layer A. The vectors in group M are now a mask and the curves are individually visible and editable. A black 100% density stoke reveals anything below Layer A. Select the vector brush (or pen or pencil) tool and click on a curve in group M (select a curve in the group, not the group itself) in the layers window. No points in that vector curve should be selected because this will just extend that curve, unless that is what you want to do. Draw a new vector curve and it will be added to the curves in group M; i.e new brush strokes add vector masks in real-time. You can delete the pixel mask layer created in step 2. I have tried to record a video of the process (the context menu for the layers window doesn't show up in the recording but the actions were creating a group and later, deleting some of the vectors). Affinity Designer 2020-12-02 11-43-09.mp4 Note: if you don't create the pixel mask (step 2), group the brush stroke (step 4) or have the mask group open (step 5) when you drag it to the mask position (in step 6), you get the vector curves as a mask but you can't edit the individual curves or add any others. You can only do that if you drag the mask back out so that they become an editable group again and then re-drag to the mask position.
 -
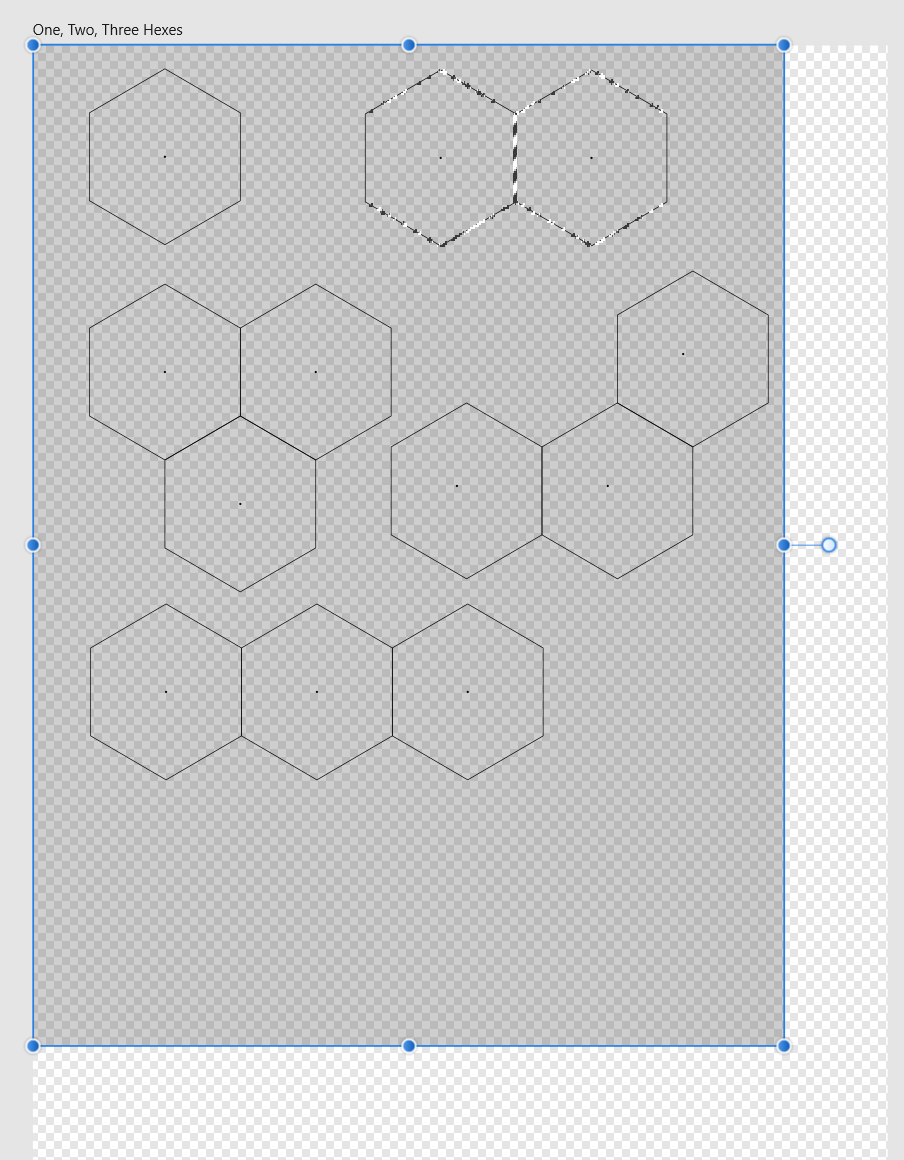
 Despite thinking I had a pretty good handle on selections and masks, I find myself unable to figure out what I am sure is the simplest way to do something.... In the picture below, I have a bunch of shapes (as Groups, consisting of Curves), and an image which I want to drag across all the shapes and appear only within the hexes. Essentially, turn all the individual hex groups into a mask that reveals the image layer, while the rest of the board remains transparent. I can select an individual group and choose Selection from Layer, and I guess I could save that selection, and the one by one add each group to a new saved selection until I have a selection consisting of all the groups, and then turn it into a layer mask, but seems like there is probably a simpler technique.
-
 I’ve spent two hours trying to find this function on the iPad version of a Affinity Photo. Where the heck is it?
 -
 How do you limited the selection tools to a pre-selected area? Literally 100% of the time, if I have a pixel selection and then use selection tools, it's because I only want to select colors in that area. I do this a lot, but at times am forced to go into photoshop to make a mask there, because I can't figure out how to do it in Affinity Photo.
 -
 Hi, can I let the alpha channel of the fill color of 2 paths (each on an own layer) be operated with by a selected mask operation such as subtract? How? Thanks, u&i
 -
 Hi, I'm new to Affinity Photo - but I really like what I see. I'm a Mac user converting from iPhoto and Aperture - so I'm not familiar with layers, masks, etc. Your current tutorials are great from the viewpoint of showing me what can be done with Affinity Photo and how to do specific tasks - and I really like the professional and clear style of presentation. However, I'm struggling to understand the concepts layers and masks. I can understand that layers are like a stack of photos / transparencies and that masks may allow me to see through layers - but what are the differences between pixel layers, adjustment layers, filter layers, etc that are mentioned in the tutorials or listed under the LAYER menu? When do I use each type? Why would I use them rather than filters and brushes? For the benefit of converts (or stupid people) like me, maybe it would be worthwhile for someone to do a tutorial on the concepts / basics of layers and masks - and how they differ from brushes, filters? Pending that, can anyone point me in the direction of some simple explanations? Thanks :-)
 -
 Hi all Is it somehow possible to extract masks from adjustment layers after they have been painted? It is somehow not possible to stack adjustment layers, is that a correct assumption? Please let me explain in video. I appreciate all replies 😘
 -
 Hey Guys, Is there a way to create masks in Photo Persona that behave like the ones in the Develop Persona. I mean I create a layer in Photo Persona that acts as a kind of mask. A number of filters are then applied to this mask. The resulting filter effects now apply to all the layers below. Like when I create a new gradient or brush layer in Develop Persona and apply contrast, exposure, etc. to it. So far I could not find a solution for this in any tutorial. Therefore the question arises, if this is possible at all? I would be very happy about help.
 -
On Affinity Photo 1.8 for Win, empty mask is not working, and if you try to check/uncheck the box on the right of the mask layer, it stays stuck selected on every combination you try...
-
 Can you please post a beginning-to-end video of the various processes for developing/editing a RAW photo of the milky way? There are many photoshop instructional tutorials for this process, but I can find none for Affinity Photo. I much prefer to use Affinity, and I'm still somewhat inexperienced with photo editing in general. I want to invest my time in learning Affinity directly, rather than learning photoshop and then translating that experience to Affinity. Thank you for your help. I am attaching a amazon cloud link (the file is too large to upload here, 27MB) to a RAW file for you to use in a tutorial, should you agree to help. I voluntarily relinquish all rights to the linked photo. It is now public domain. https://www.amazon.com/clouddrive/share/ELVNzIxUzNWFk1twdvVOaHCkD0xWV24wuMhGgUGldRR?ref_=cd_ph_share_link_copy Thank you James
- 11 replies
-
- 1
-

-
- noise reduction
- picker
- (and 4 more)
-
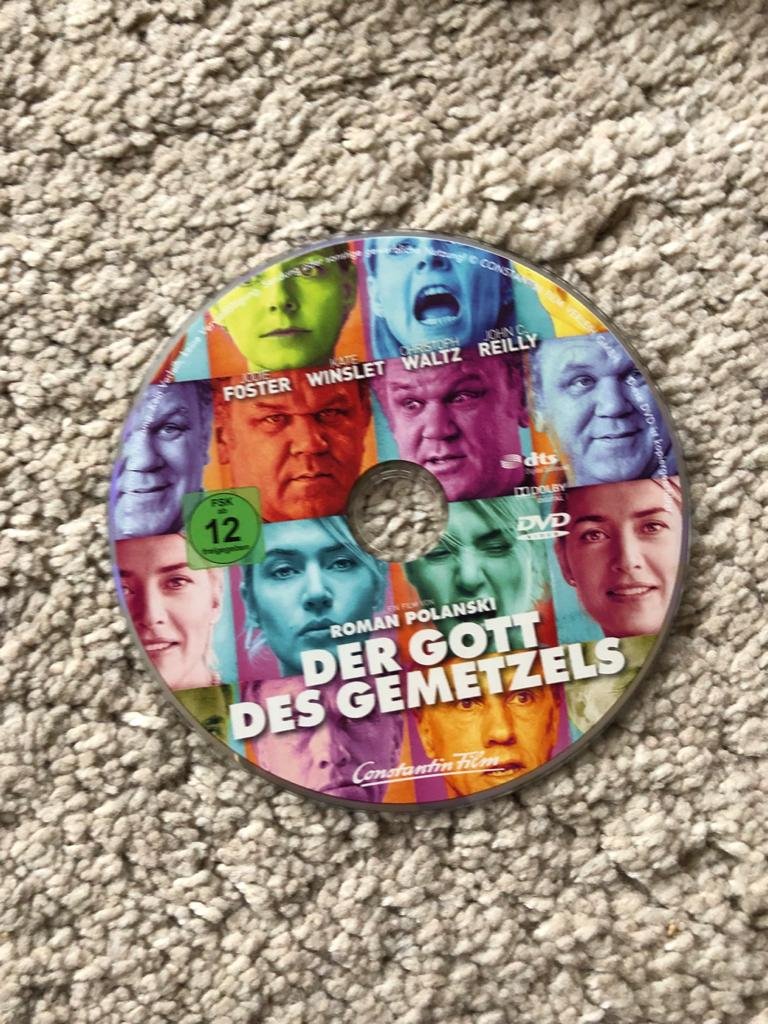
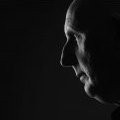
 What’s the best way to create this effect (in designer, publisher or photo)? The face and background of each photo have different color overlays. Thanks in advance!
-
 To celebrate the end of 2019 and the start of a new decade, I decided to create a pre-2020 gift for all of you! I've just launched my first ever FREE mini course on how to select anything in Affinity Photo (for your compositions). Since it's my first ever course I'm not sure if everything works like it should. If you find any flaw or if you have any question, don't hesitate contact me! Now enjoy the FREE course ! -> Make sure to read the video description.
 -
 For someone that has only used LightRoom... I find the concept of Layers and the sequence of ordering them daunting (maybe PS users find it more natural) Having watched a YouTube tutorial by Inaffinity, it was pointed out that there are fiddly little manouveres you have to do based on tiny vertical or longer horizontal blue bars.. i.e dragging either up, down, left or right. Or even going into a seperate help menu and changing the order to child layers for masks etc. In future versions could you consider making this process more user friendly/intuitive please. Thanks in advance.
 -
 Hi. Is it in Affinity photo possible to change the density the black parts of a layer mask? I know the opacity slider, but it affect only the white parts. Any hints are welcome.
 -
 Is it possible to create a layer mask with the pen tool? I have a very difficult subject that needs to be removed from a photo and the pen tool will allow for precise cutting. Photoshop can do this with tremendous ease... I would need this to be possible in Photo. Any advice? Thanks!
 -
 Here's a common operation I've done in the past with Photoshop: 1. Create a mask for a layer 2. Extract the mask as a regular pixel layer by copying the mask channel contents to a new pixel layer 3. Use filters and adjustments to refine the pixel layer (I find that Levels does a great job of uniformly hardening edges, for example) 4. Select all and copy the refined pixel layer 5. Paste the clipboard contents back into the mask channel, thereby applying the refined mask I'm trying to adapt this workflow to Affinity Photo, and I've noticed that adjustment layers can supposedly be applied to pixel mask layers by making the adjustment layer a "child" layer to the mask. However, I'm not seeing the adjustment affect the mask. This leads me to two questions: 1. Can adjustments, filters, and adjustment layers be applied to pixel mask layers, as if they were a non-mask pixel layer? 2. If not, would you consider a feature request to have adjustments, filters, and adjustment layers (when dragged onto a pixel mask layer, thereby appearing as a child layer to the pixel mask) operate on pixel masks in this way? 3. Is there some other way I may be able to accomplish this workflow already? My one requirement is that it doesn't involve re-selecting and filling the selection on a pixel layer; while this is possible, it's far too error-prone in my opinion. Thanks, Joe P.S. For clarity, I've attached a screenshot of what I mean by making an adjustment layer a "child layer" of a pixel mask layer. Unfortunately I'm not sure what the correct terminology is for this is.
-
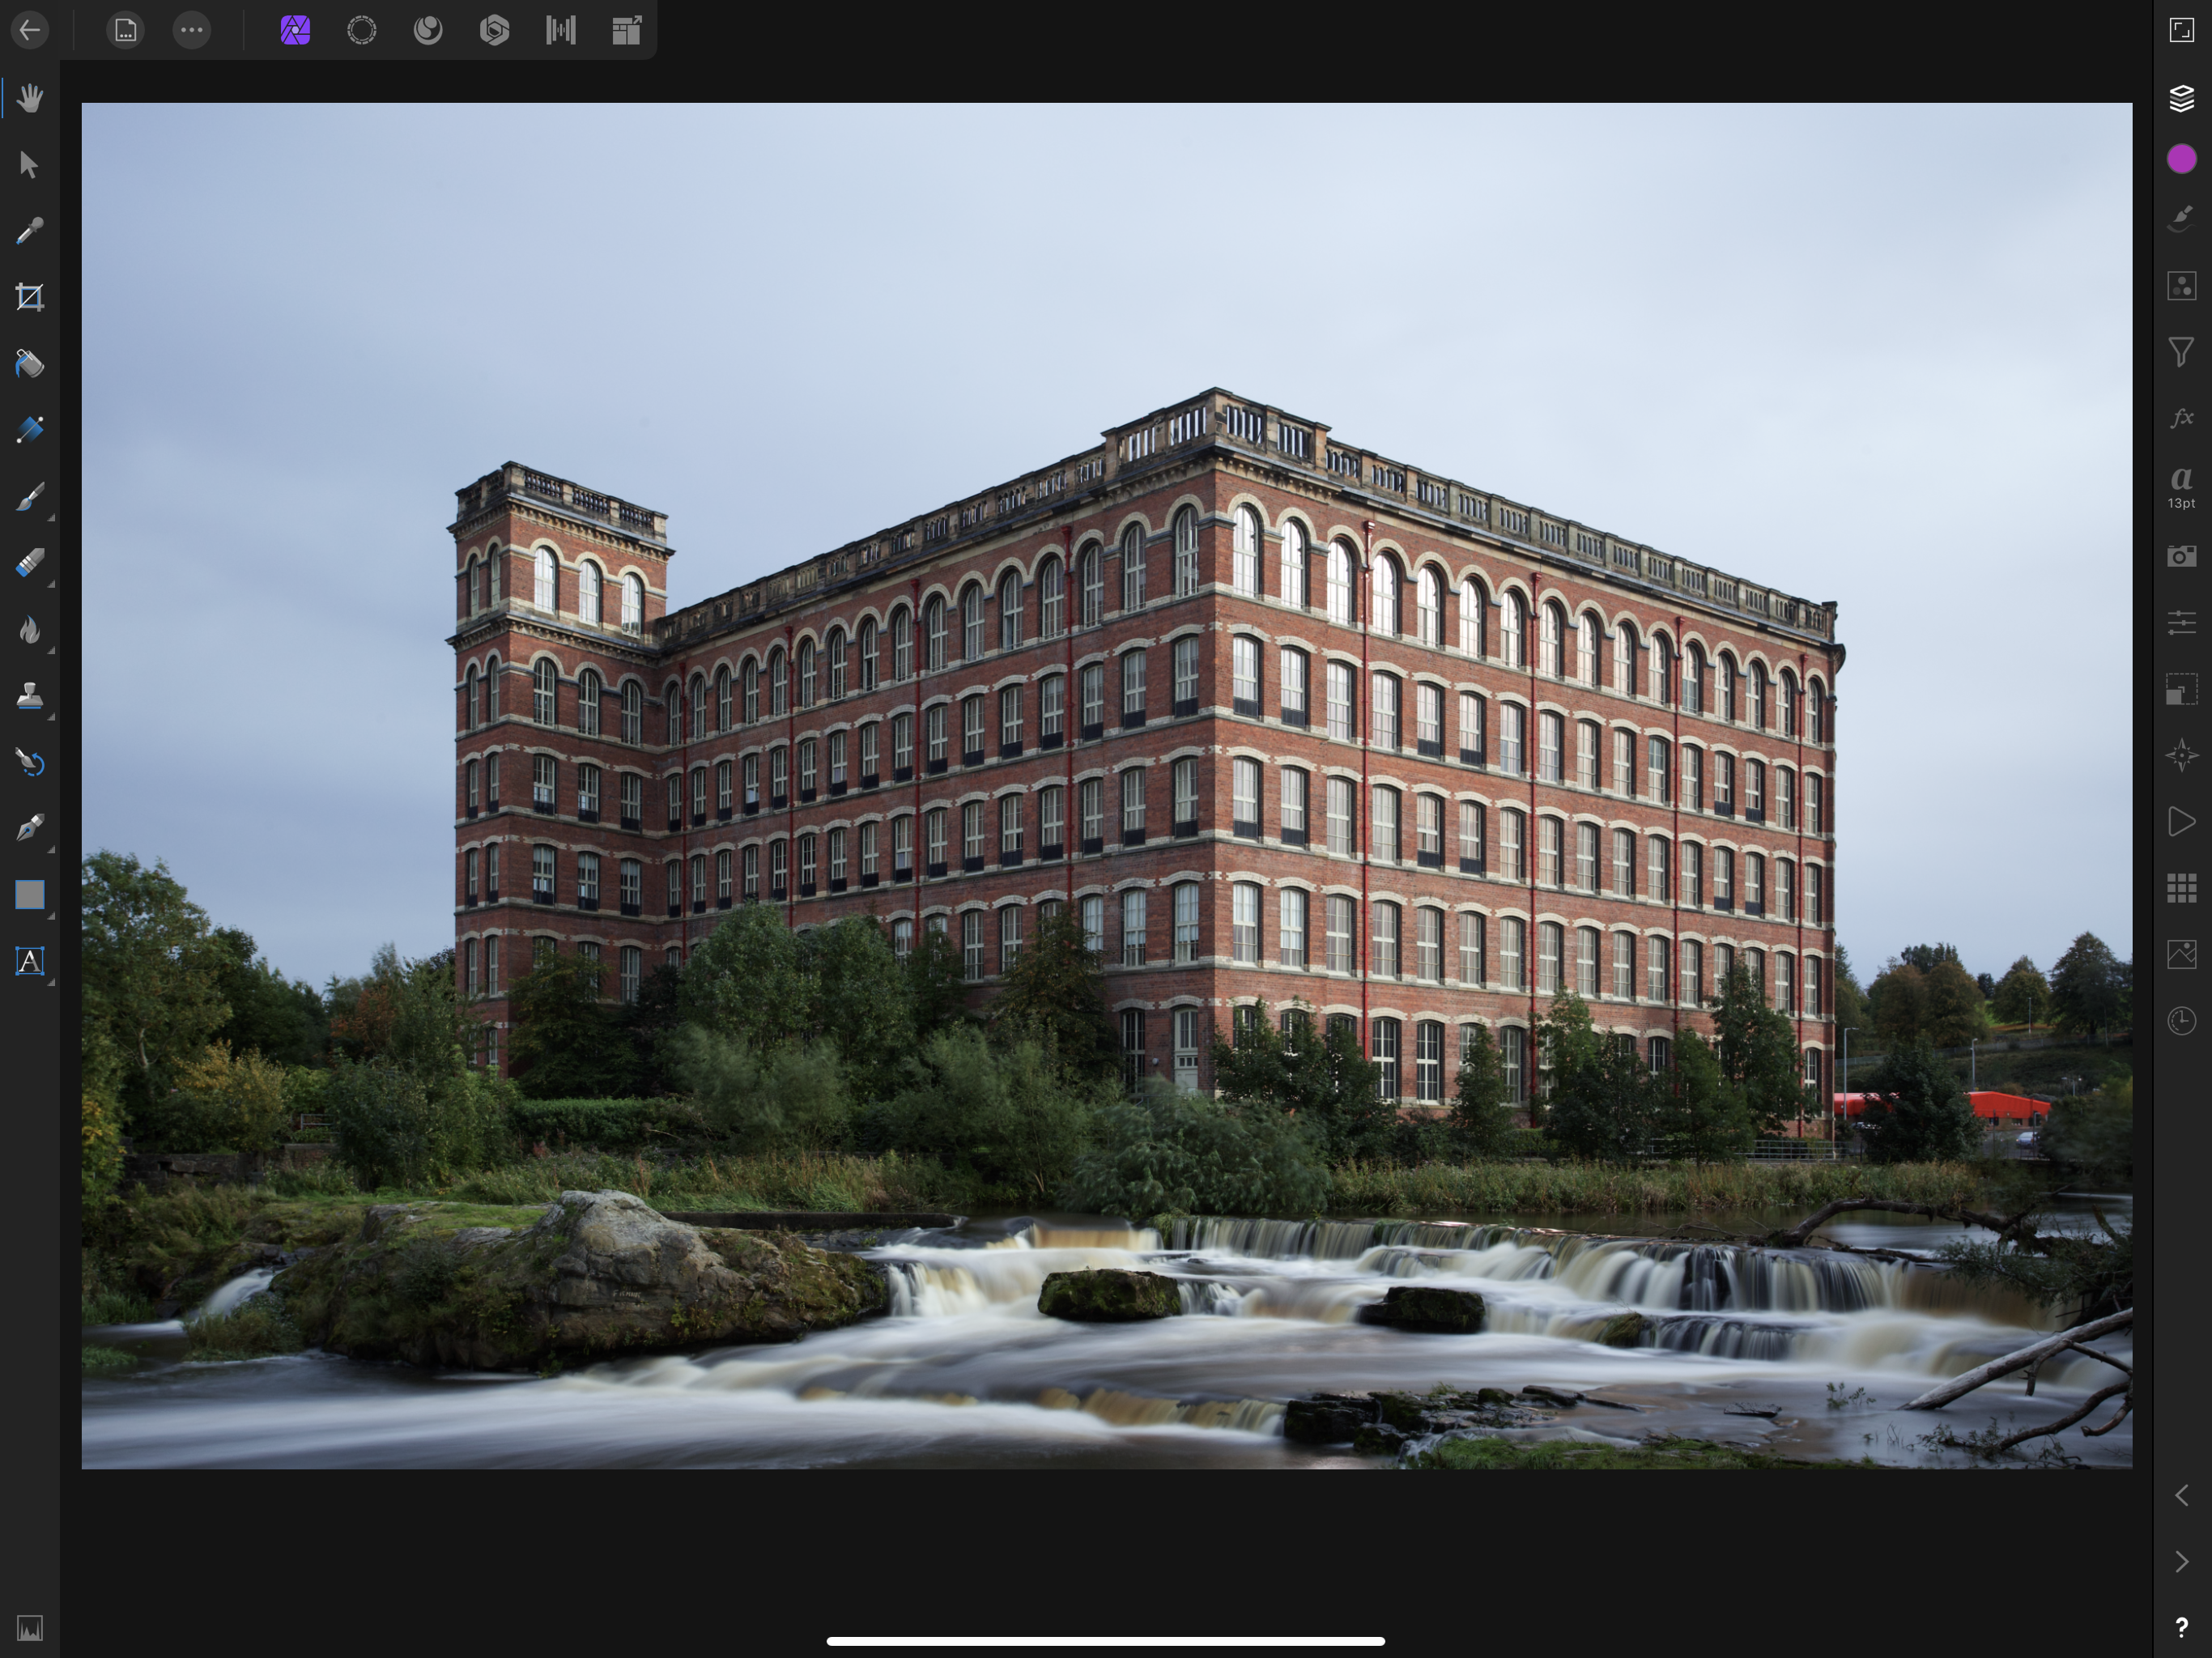
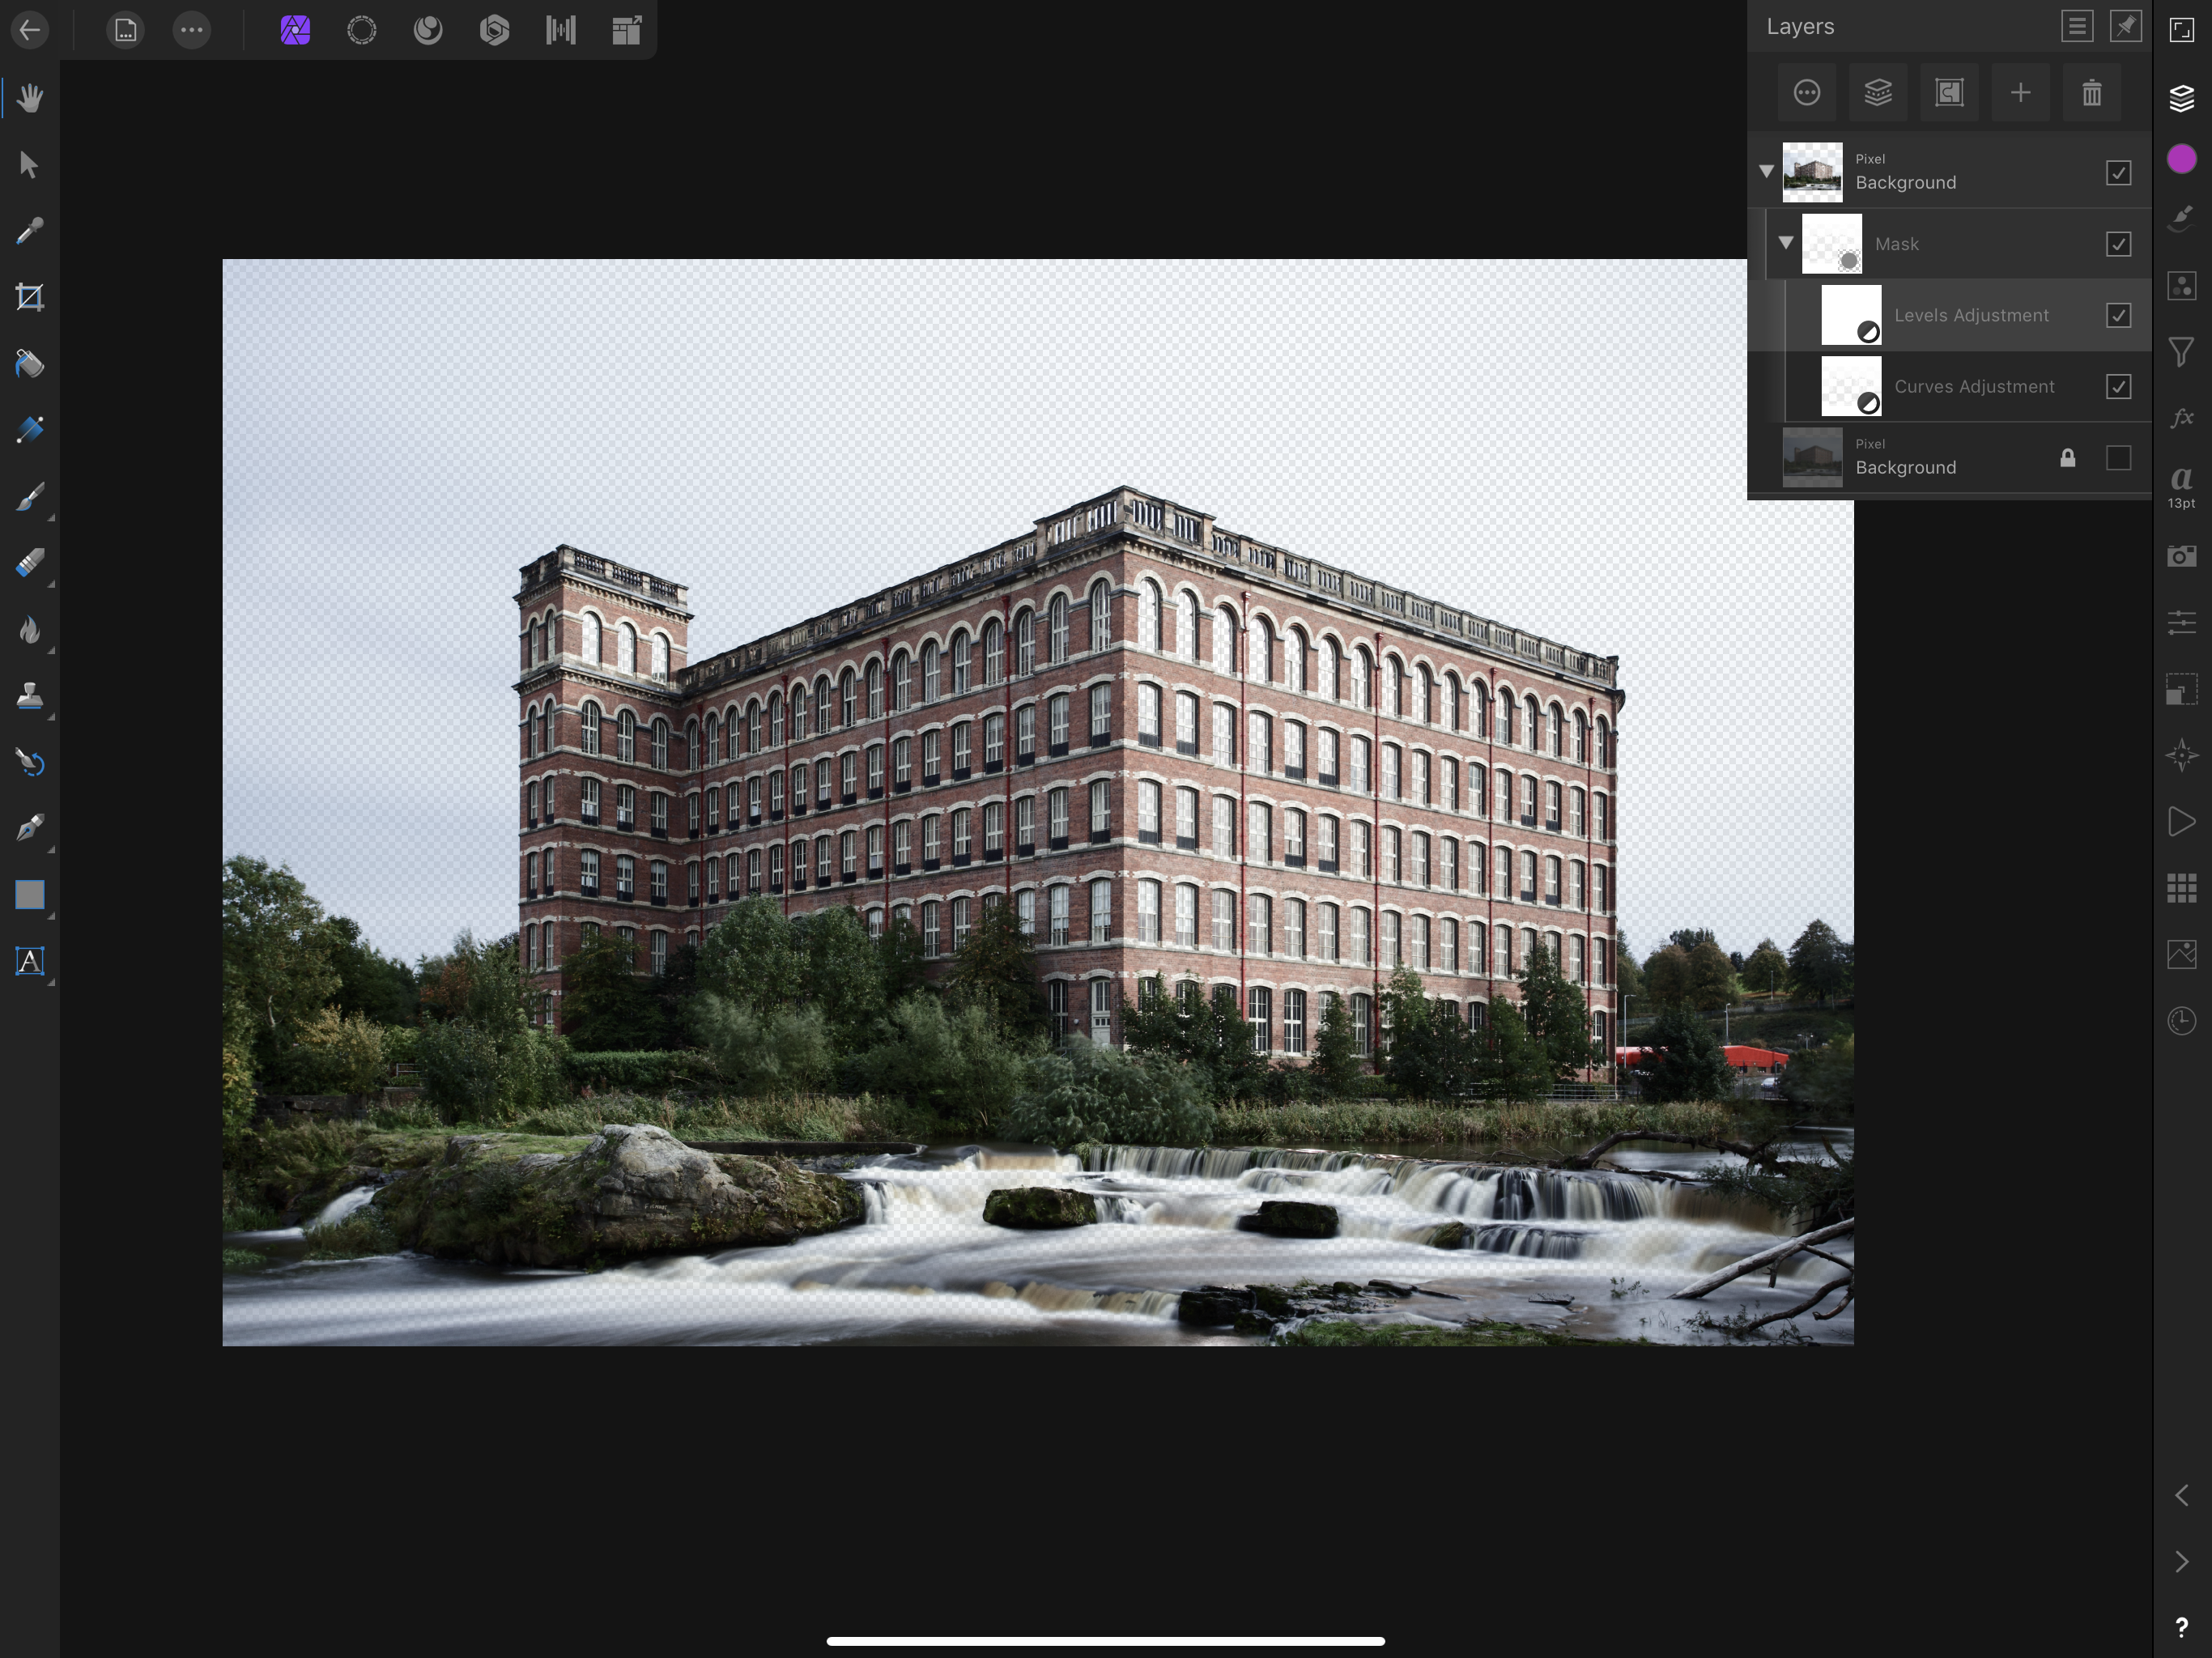
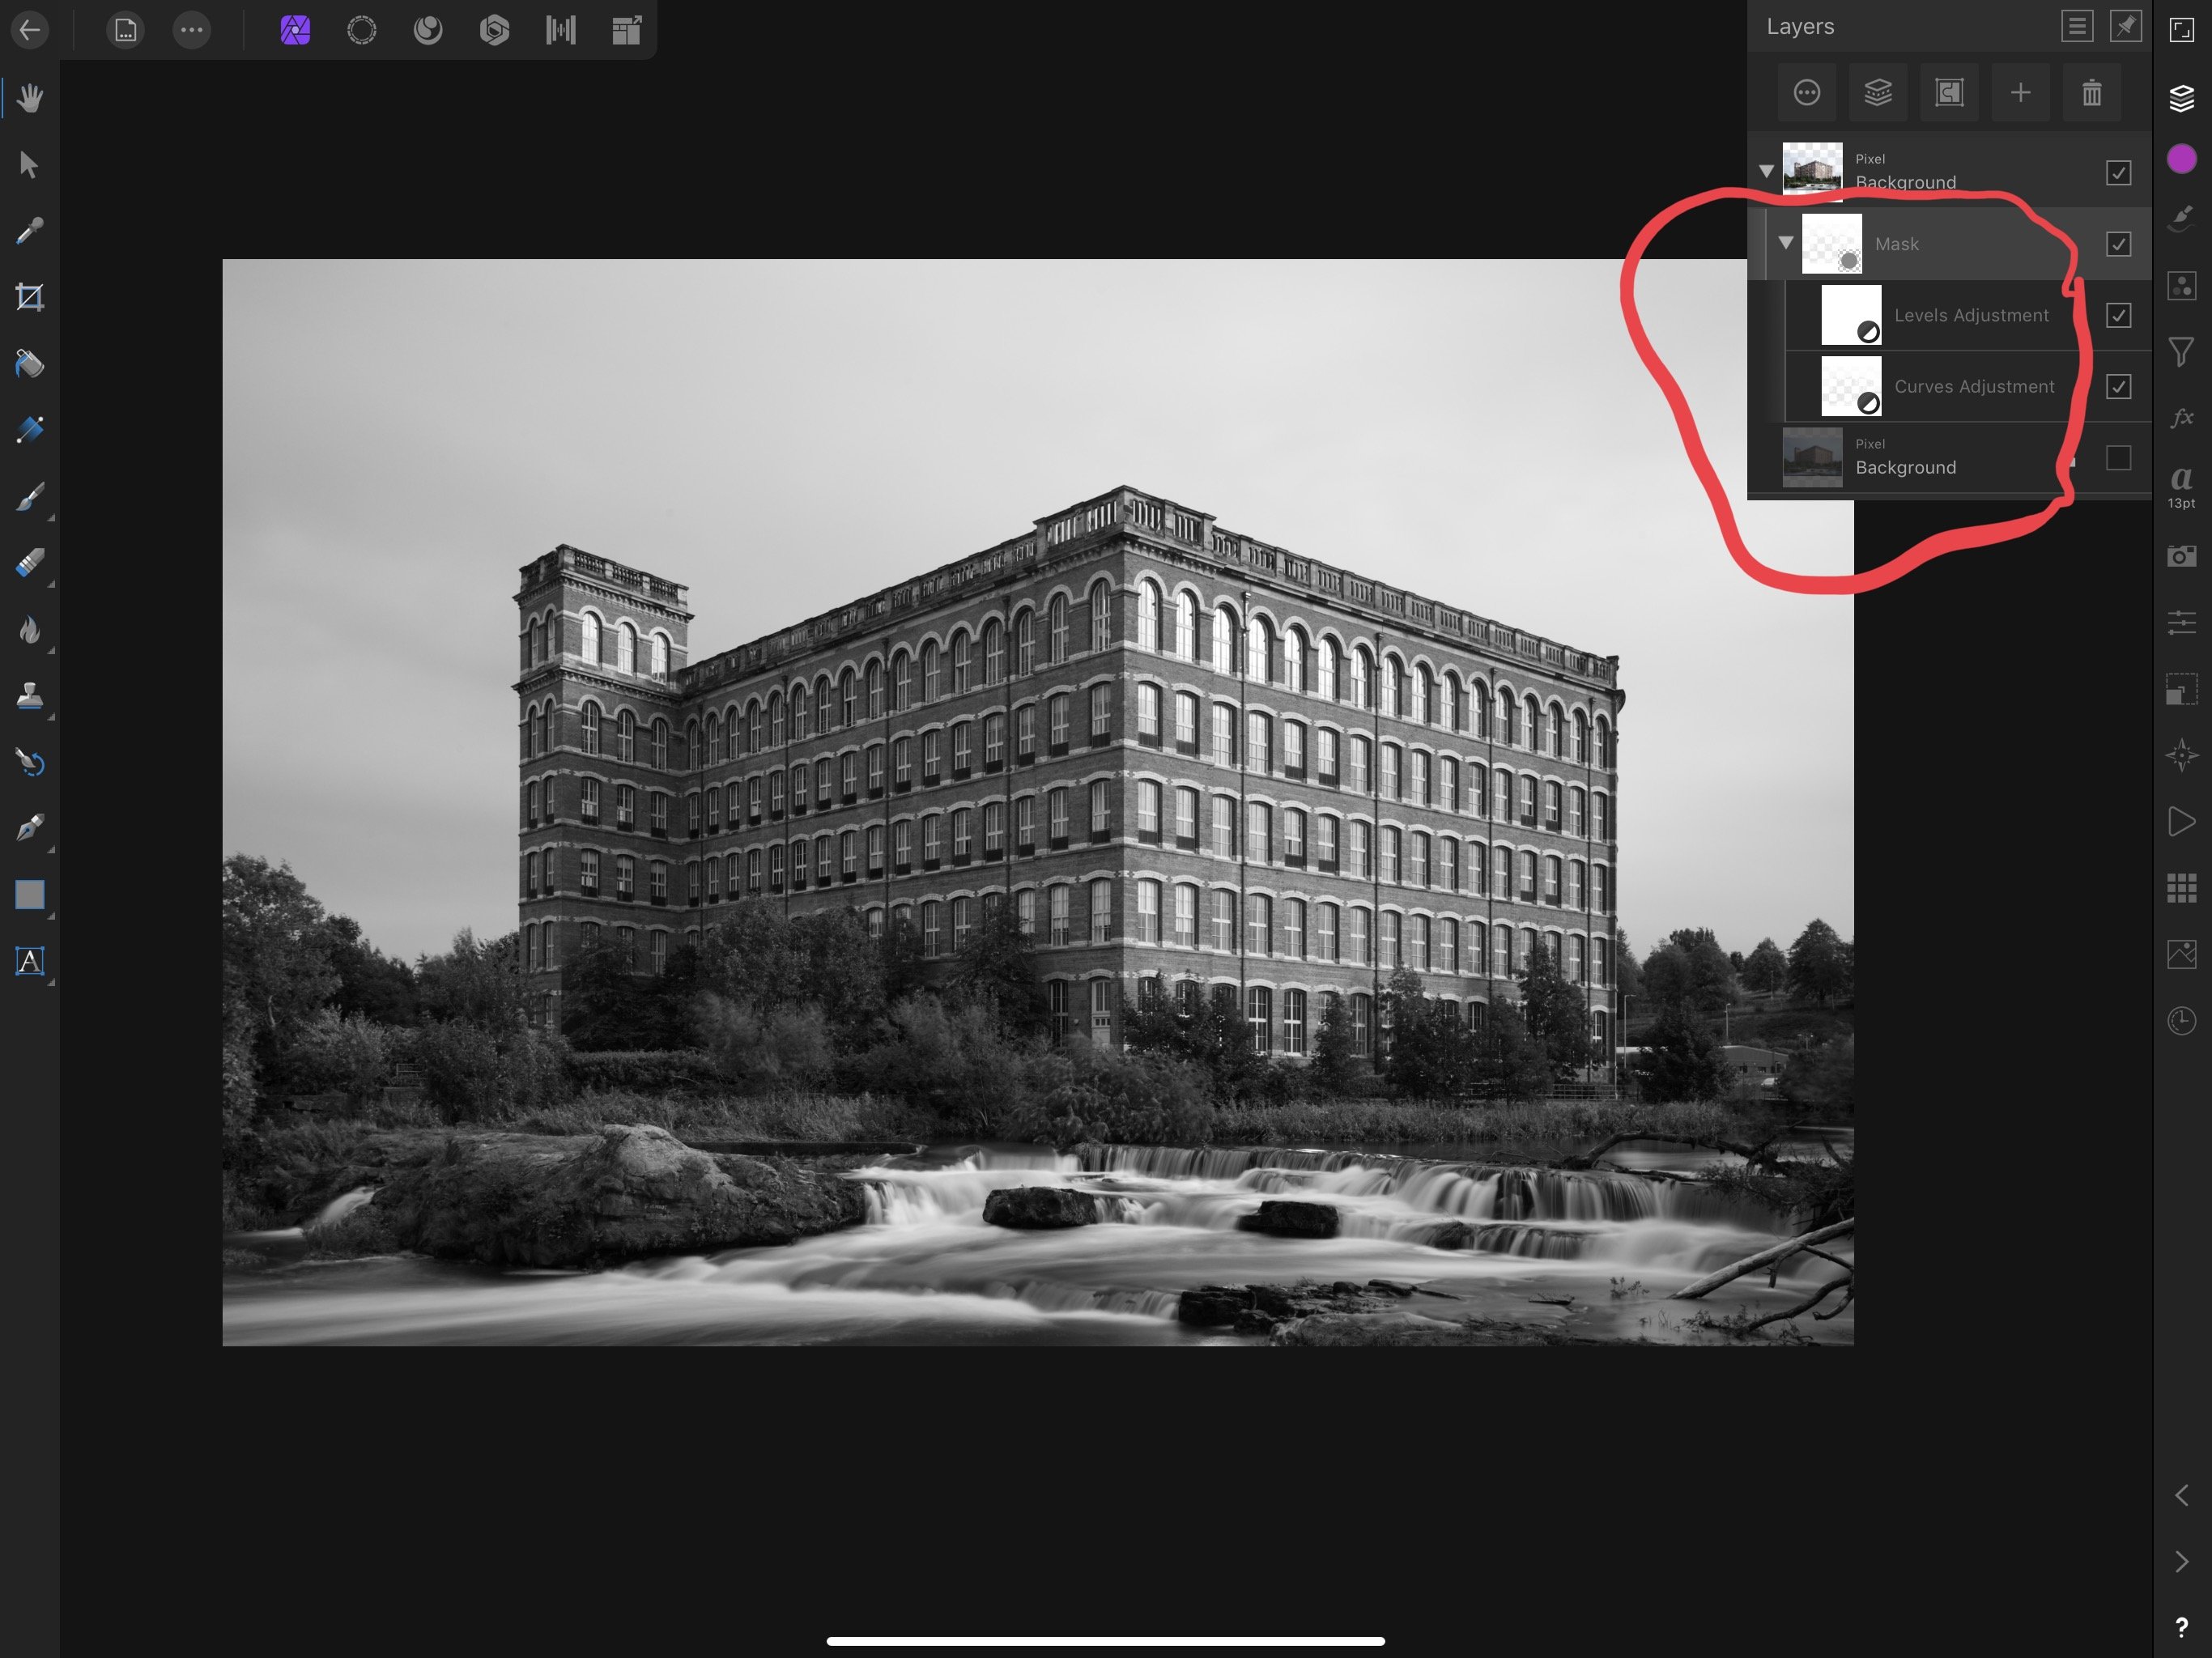
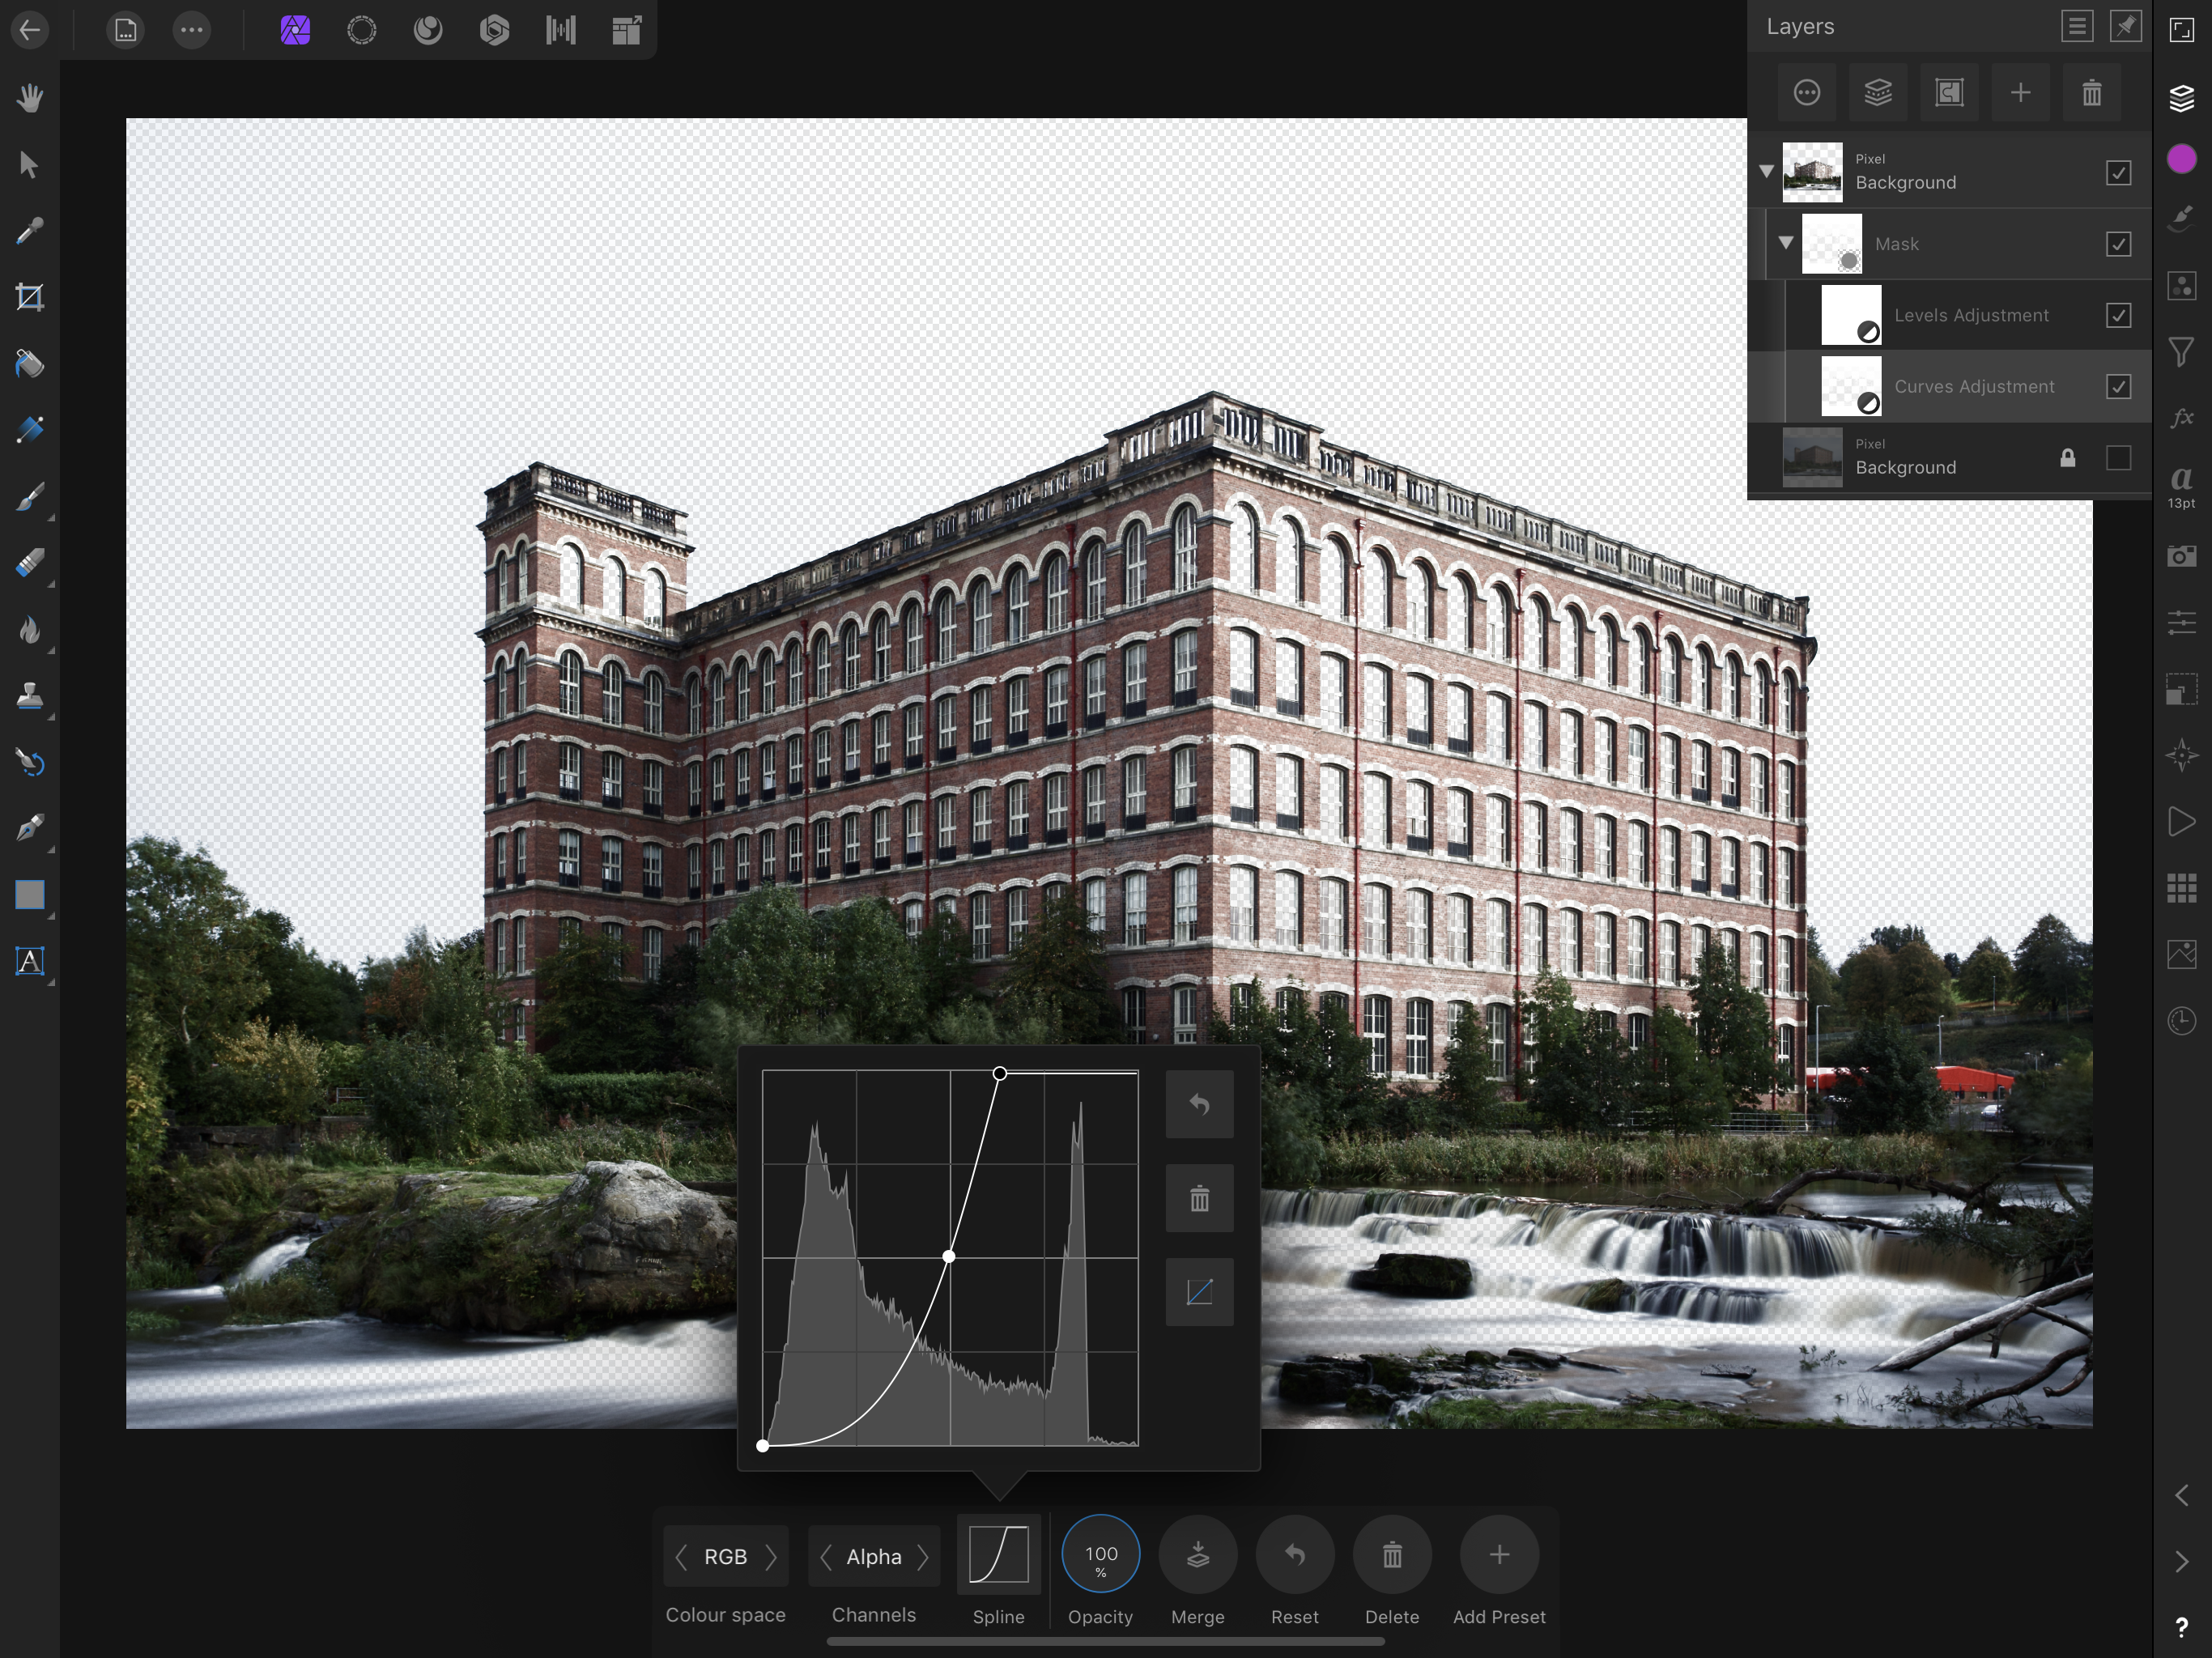
 Hi, I’m Relatively new to Affinity Photo (both on iPad & Mac), and have the same problem on both platforms. I hope i’m posting this question in the right place. I’m trying to make a mask that targets the sky in the attached image (including the small areas in the roof parapet and the gaps in the trees). I have: Created a luminosity mask (see image 2), that I now want to adjust from being grey scale (see image 3) to pure black & white l’ve created two child layers to the mask (curves and levels) and set them both to target the Alpha channels - see image 4 (I know I can paint on these masks to further target the areas they are applied to) The problem that I have is that I can’t find a way to visualise purely the mask when I’m adjusting the curves / levels layer. When I put the mask layer into ‘Solo’ mode - I can only see the original luminosity mask, and can’t see the impact of any changes to the mask that are caused by the curves / levels adjustments. Is there a way to do this, or am I missing something? Is there a problem with the workflow I’m using? Any advise, hints, tips or pointers will be much appreciated. Thanks..... Bernie
-
 As already reported under the PC version of Affinity Photo, there is a bug concerning the masking of groups of adjustments. The mask which should normally apply to the group of adjustments actually applies to pixel layers below. For details, I refer to posts reporting the bug in the PC version since it apparently behaves the same way on a PC and on an iPad.
 -
 In my job I work with PS retouching old book covers. In many case I work with channels and calculations (to mix channels I created). I wanna to make the same things with AP but I can't: In PS I do: 1) I copy a channel (example: red and rename it to "red copy"). 2) I select the recently created channel, double click and can work on it in grayscale (it appears on the viewport) and I just leave a black and white version. 3) When I finish I copy another channel (example blue channel and rename it to "blue copy"). 4) The same process. 5) After finishing the blue copy modifications I open the calculations dialog box. 6) I mix the "red copy" and "blue copy" and I get a new alpha channel 7) I use it to mask a zone in the original image. How can i do the same thing with AP? I bought the three Affinity apps and I very happy with them. I'm using the 1.7.1 version.
 -
 Please point me to the answer to this question if it exists. I have not been able to find it. In Photoshop I am able to edit a mask by using a selection. If I have a layer mask and then (as an example) use Select>Colour Range to make a selection, with that selection active I can click on the layer mask then using white/black brush tool I can paint to refine the mask. The selection acting to 'mask' for where white/black is applied. Is this possible and how would you achieve it? This question is born from me trying to understand the Select Sampled Colour as compared to PS Select>Colour range. For example, if I want to select a red rose, the red sampled in PS Colour range select just the red of the flower. It behaves like an edge detection tool (unless I push fuzzieness way up). AP Select Sampled Colours doesn't select colour in the same image the same way. If I make the selection in PS with CR, create a new layer and then paint the selection I get the rose. If I do the same if AP it paints the rose but also the background. It's almost like AP SSC is selecting luminosity too. I hope I'm explaining that clearly. So I need a way to edit the mask using a selection. Thanks
 -
So I'm overall loving the way Affinity handles masking but one thing slightly puzzles me. We can make a compound path but when we use that as a Layer mask you can no longer edit the nodes. Am I doing something wrong here or is this currently a limitation? Ideally I'd prefer not to combine my shapes for ultimate control but it seems it might be necessary. p.s. to the Devs, Designer is a beautiful piece of software and is a joy to use, even with these kind of limitations. Looking forward to 1.7
-
I have a file I made in Affinity Photo on my Mac and it has a layers mask where I drop an image under some text and the image is masked into the text. When I use the same file on the iPad the mask does not work. I drop the image under the text layer and nothing happens. Are layer masks supported on the iPad? What am I doing wrong? Thanks.
-
Can't delete masks assigned to adjustments or live filters
-
The invert filter does not seem to effect masks. How does one invert a mask in affinity photo for the iPad?
-
 Hello, I'm wondering how to convert a mask to a pixel layer? Thanks! --Joshua