

CylonRaven
-
Posts
33 -
Joined
-
Last visited
-
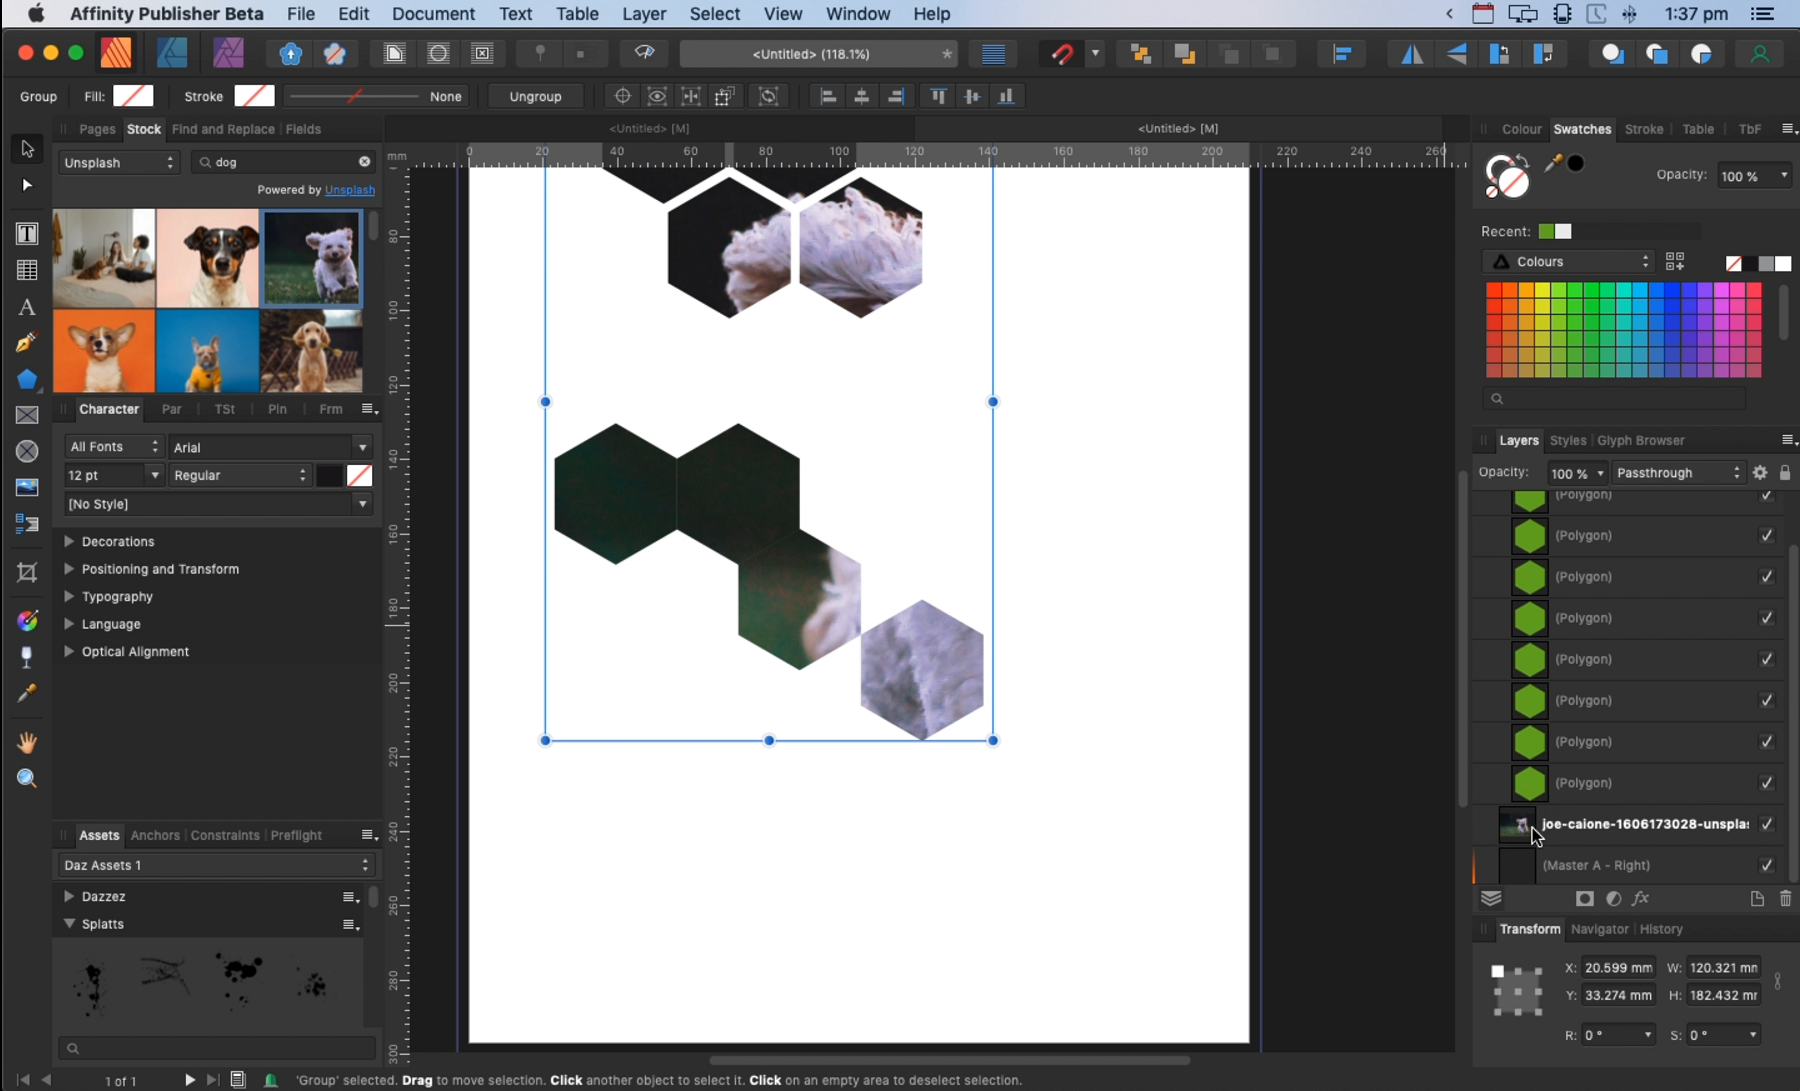
This is helpful, especially Dazmondo77's videos. But I got stuck right here: How did you get the transparent hexes as a mask over the dog image? Here are my layers after I dragged a filled rectangle under my groups like you did and "punched" through them with Subtract. One problem I seem to have is that my hexes are not merely polygons. Each one is actually a group consisting of two polygons (an inner and outer hex outline) and an ellipse (a center dot). So I can't highlight the groups and subtract from the blue rectangle mask, I had to open each one and select just the outer hex polygon from each (using Ctrl+Click to multiselect). Is my only real option to use only single-polygon hexes for this? I notice you are working in Publisher but switching to Designer to do the layer editing. Not sure if that made the difference.

-
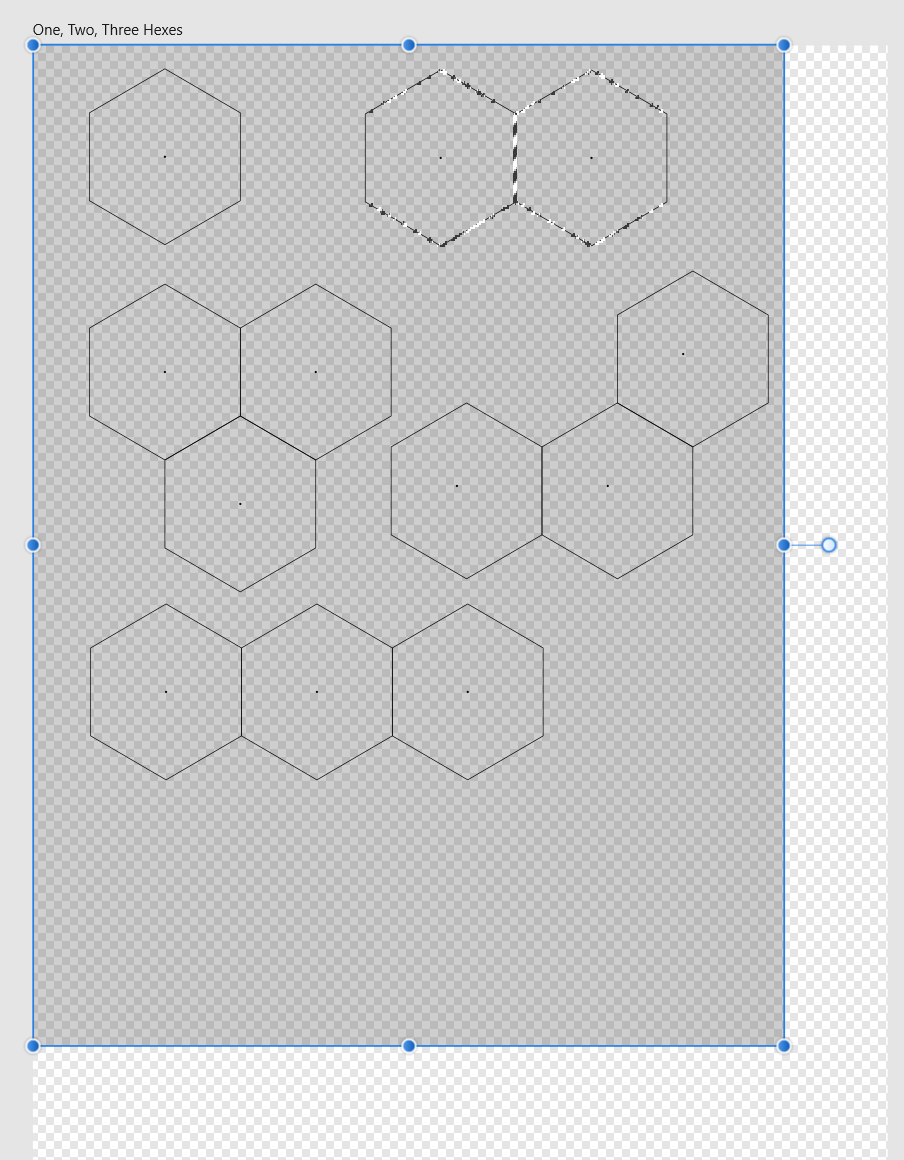
Despite thinking I had a pretty good handle on selections and masks, I find myself unable to figure out what I am sure is the simplest way to do something.... In the picture below, I have a bunch of shapes (as Groups, consisting of Curves), and an image which I want to drag across all the shapes and appear only within the hexes. Essentially, turn all the individual hex groups into a mask that reveals the image layer, while the rest of the board remains transparent. I can select an individual group and choose Selection from Layer, and I guess I could save that selection, and the one by one add each group to a new saved selection until I have a selection consisting of all the groups, and then turn it into a layer mask, but seems like there is probably a simpler technique.
-
Genius, and very obvious in retrospect. Thank you!
-
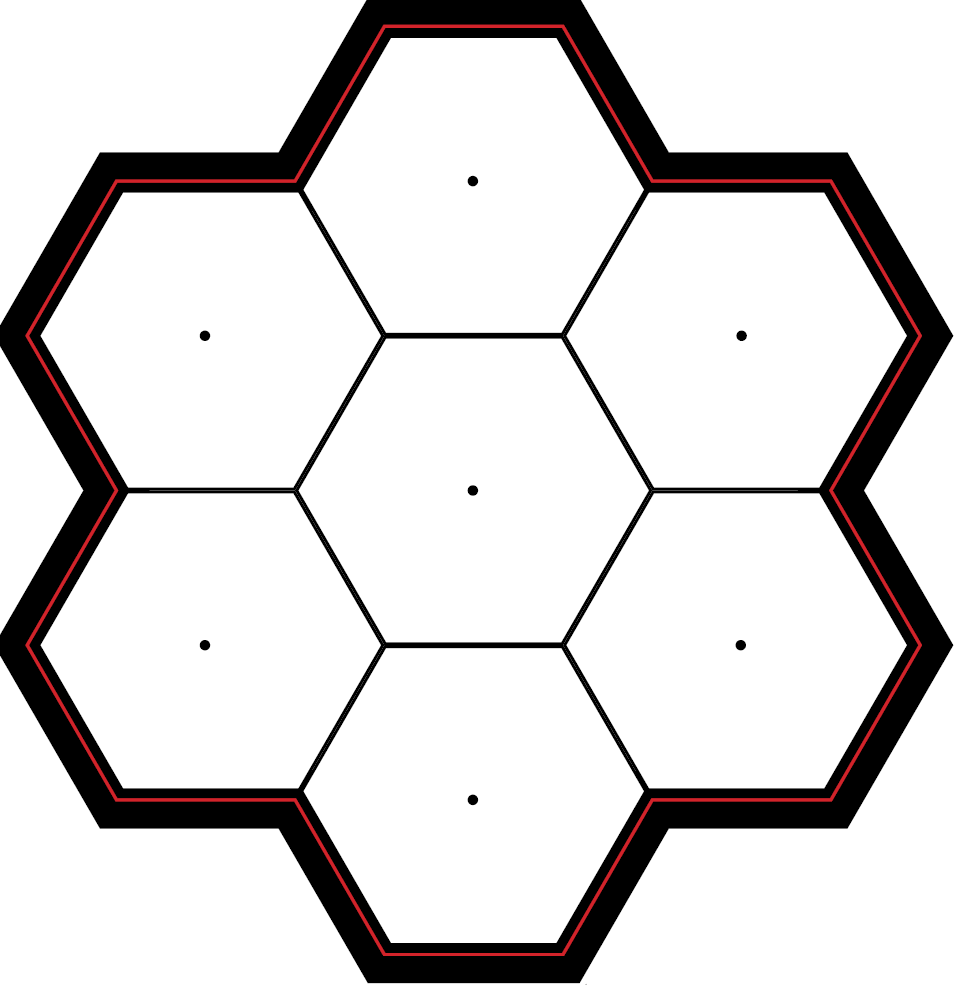
I am assuming there is no way to vary the stroke width on different sides of a polygon (created using the Polygon Tool) - I would have to draw each line individually with a pen. However, let's say I have created a composite, such as below. Each hex is a separate polygon (Grouped with the ellipse in the center), and I aligned them and grouped them to create this "megahex." Is there an easy way to put a thicker border along the outer edges, like below? Or will that require constructing the entire megahex manually so that the outer edge is a separate curve?
-
 Old Bruce reacted to a post in a topic:
Drop caps in a different font
Old Bruce reacted to a post in a topic:
Drop caps in a different font
-
What worked for me was creating a Drop Caps character style, and then a Chapter First Paragraph paragraph style in which the first character is the Drop Caps style.
-
Thanks, that helped a bit - it looks like I still have to create a rectangle or something stretching between my guides and use that to align other objects to, but it's a little easier now.
-
I created two vertical guides in my document (a front+back cover). I want to align a text box between the two guides representing the front cover margins. I cannot find a way to center it between these guides. I can center between the document's margins (which would center it on the spine), but not between two vertical guides. Is there a way to do this, other than just doing the math to calculate the midpoint?
-
Sorry, I think I was not clear. I am talking about paragraphs where some words are italicized. Suppose I have a sentence like this with a mixture of character formatting. If I paste it into publisher as-is, all the formatting is retained. I want a way to apply a style that includes some other character formatting (e.g., Optical Alignment), but will not erase the preexisting formatting.
-
I am copying text from a word processor into a Publisher document. I want to apply my main paragraph style to this text, which includes optical alignment. Problem: Sometimes the text I am copying includes local formatting, e.g., italicized text. Applying my style and clearing character formatting will unitalicize the italics. Apply Style and Preserve Character Formatting will keep the italics, but then it will not apply optical alignment. Is there a way to do this, short of manually reapplying italics?
-
walt.farrell reacted to a post in a topic:
TOC - formatting two-line TOC entries, and the space between title and page #
-
Can you create a paragraph style that specifies a drop cap in a different font from the main paragraph text? Right now, I have to manually change the font of the drop cap letter. And then it doesn't line up correctly. See below - in Microsoft Word, the drop cap looks nice and even, but in Publisher, not so much.
-
Okay, thanks for the layering tip. That worked. For some reason, starting fresh with my template seems to have corrected the other problem.
- 9 replies
-
- 1
-
-
- affinity publisher
- table of contents
- (and 2 more)
-
Okay, progress, but still puzzlement. I created two text boxes on my chapter title pages. One is just the chapter number. The other is the Section Name field. I can make the chapter number invisible by making the layer invisible on the master. Now, look at my TOC. First of all, the chapter numbers appear UNDER the chapter titles. Why? Second, I unchecked page numbering for the style associated with the chapter numbers, but "ONE" still got the page number (and yet, not "TWO") - I can't figure out why.
-
Well, I do (see this thread). But I actually want the "CHAPTER ONE" in the header, which apparently has to be done manually and can't be used as a field.
-
That would require I have a Heading One that says "ONE" in the chapter, right? I suppose I could make it invisible.
-
I cannot find any way to paste a Line Break character into the Section Name field. No matter where I copy it from, it does not appear when I try pasting in the field.
.png.d89800ac7930047857fe98f6da39effb.png)

.png.e0b28c5404a26b6e873d9b15edb41818.png)
.png.61872762dd01da012b82863ab96d8d1a.png)
.png.75ebeed6a9c6eb75140d0fba72589374.png)
.png.c1a8409505bdc8a38fc8d1655fc6ca85.png)