Search the Community
Showing results for tags 'affinity publisher'.
-
 EDIT: It's officially been solved! Thanks to everyone who downloaded the project to try and help and special thanks to Stokerg for finding the data merge layout I had left in the wrong spot. I'll leave the fixed version of the project here for anyone who might find it useful. I will also probably put it in "Share Your Work" with a guide. Thanks again! Hello friends from the Internet. I have been working on a calendar-generating tool in Affinity Publisher that has the following pages: A front cover page to be adjusted in post A page set up for data merge with a picture and text for the month, a grid of days with holidays setup to merge A back cover page with a data merge layout that shows each month's picture on the back Right now, if I go into the data merge manager and step through each record on the included excel sheet, everything appears to look normal, but when I click the merge button, I get the font cover page, a single month page for January, and a back cover page with the image for every month on it. I can't seem to get the data merge to give me calendar pages for each month. I've already checked the excel sheet for blank cells and can't find ones that should matter. I would love it if someone could help me figure this out. Thanks friends! Calendar Project FIXED.zip
 -
 I'm making a catalog in Publisher and I think it would be done quite fast if some Flexbox functionalities were implemented, many things from the web can be applied to the print world as well, to name the two best ones: flexible buttons and self-adjusting layouts. I take this space to ask if there is any plug-in to use Flexbox in Publisher.
- 4 replies
-
- 1
-

-
- affinity publisher
- flexbox
- (and 1 more)
-
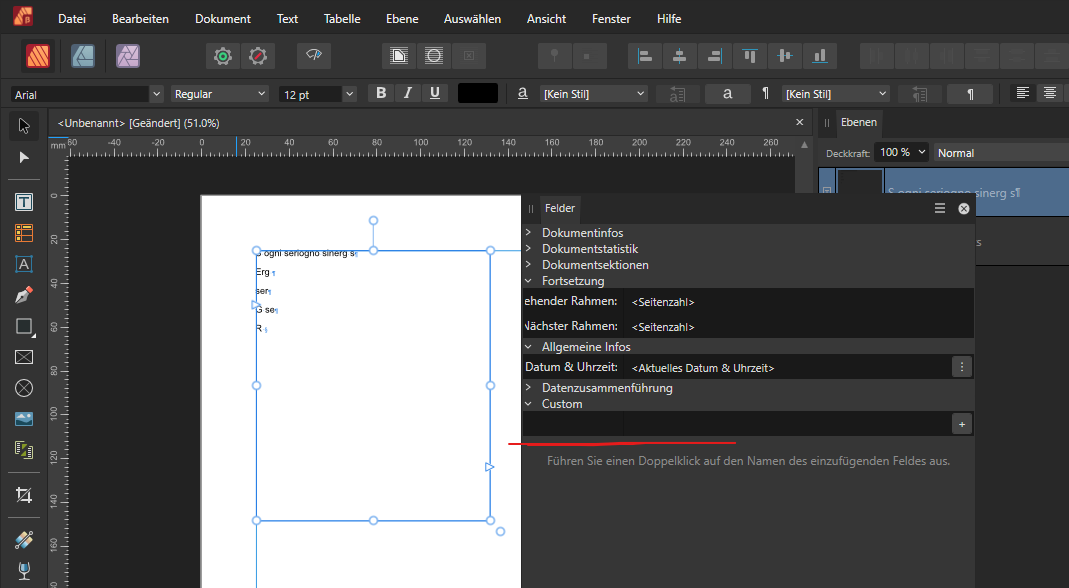
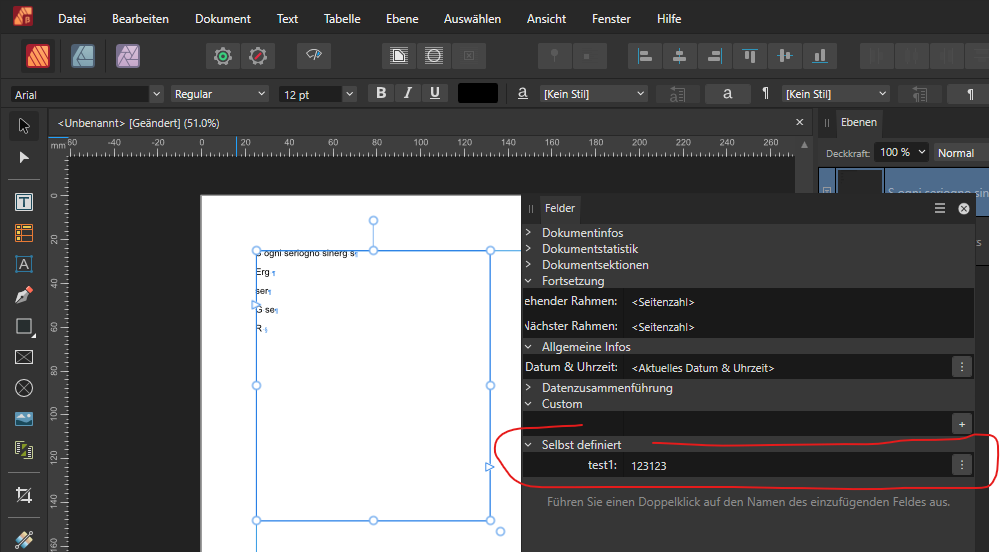
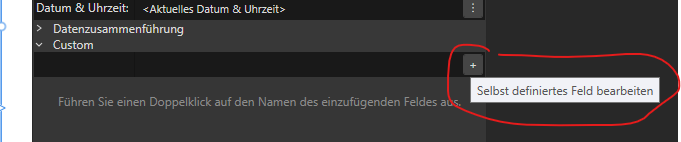
 Now there are two form groups. One with "Custom", one with "Selbst definiert". The latter appears after creating the first custom field: Furthermore the two groups flip panel position after deleting at least one custom fields: 2023-09-04_2.2.0.1986-beta_fields-panel-double-group.mp4 After deleting all custom fields the "german" group disappears and now the tooltip for the plus-button has a wrong label:
-
Color selection bug when selecting a color using controls with numeric text fields on Color Chooser. Turning OpenCl on and off has no effect. Win10 / Publisher/Designer/Photo V2 color chooser bug.mp4
- 8 replies
-
- 2
-
-
- affinity publisher
- affinity designer
- (and 4 more)
-
 I don't know if this has already been reported. At least, I could not find an entry on this particular issue. If this is already known, I apologize for the double entry. My observation is about color settings in the Paragraph Style, Character Style and Group Style dialogs. There, the dialogs with the sliders do not accept any keyboard input. It is only possible to make settings with the sliders. I can reproduce this behavior * in Affinity Publisher 1.9.2 * inAffinity Designer 1.9.2 * with the RGB color sliders * with the CMYK color sliders * in each case in the color settings for paragraph styles, character styles, group styles * on my MacMini 2020 on macOS 11 Big Sur * on my very old MacBook Pro 2008 on macOS 10.11 El Capitan. For clarity, I've included a short screen video that also shows my keyboard input. Color_Sliders.m4v
 -
Designer and Publisher 1.9.0.932 In the keyboard shortcuts page, I set Q as View>...>Studio Preset 1 and save it as an afshort file. It works as long as the programme is running but when I close the programme and restart it, the shortcut has gone. I had the same in the beta version but assumed it was because it was beta. Is it me?
-
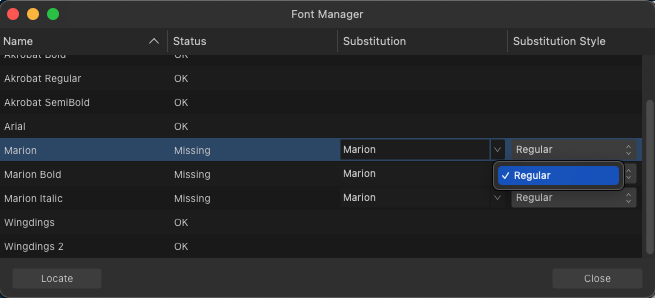
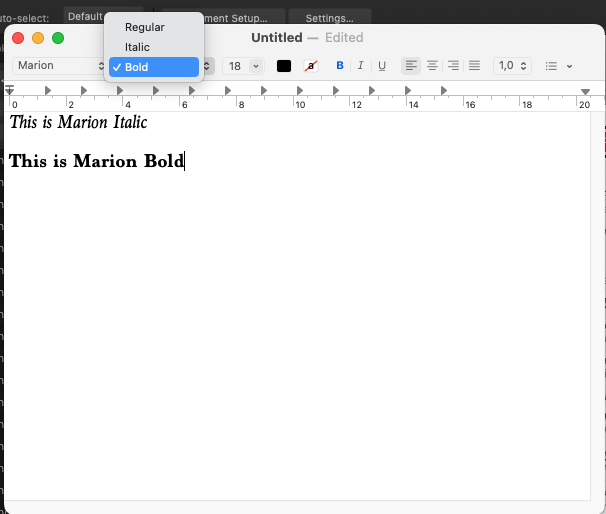
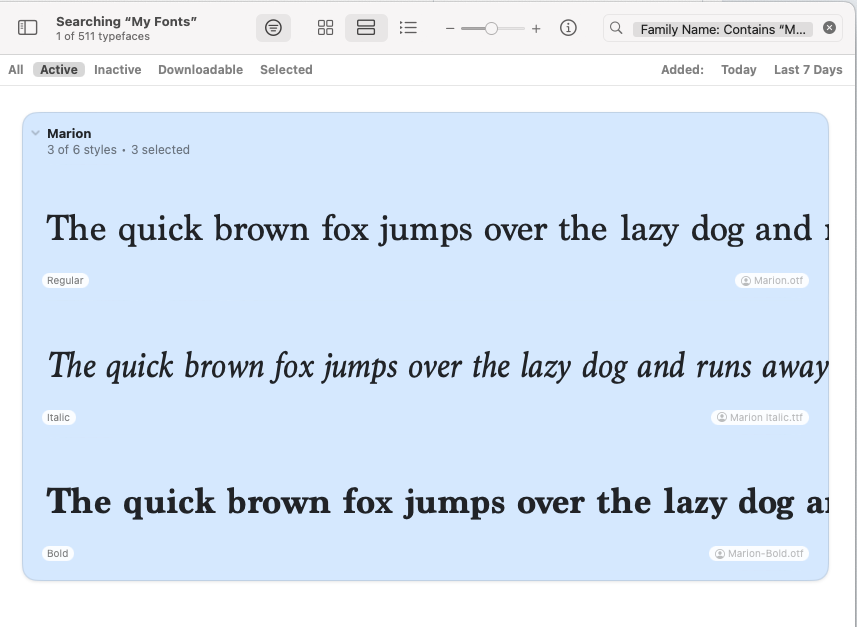
 I recently opened up a Publisher file to create a new version and noticed one of the fonts (Marion) was broken. I eventually got the regular version to work (I moved my fonts to my User folder instead of the main Library folder) however, it still does not recognize the italic or bold versions of this font. I tried deleting and downloading the files again, but nothing changed. I thought it was a Publisher problem, but Designer does not recognize the alternate versions either. I thought it might be a TTF vs OTF problem, so I downloaded OTF versions, but neither Affinity app sees anything but Marion Regular. I tested in TextEdit, and it sees all variations of the font. This makes me think it's an Affinity problem, not a font file problem. I'm running Publisher 2.2.0 on Mac OS 13.6. I need these alternates to work. Help!
-
 Hello, If I need to make table with fixed cell size, but not fixed row and colum amount, are there exist any solution for it? E.g. I need grid with 1x1cm cells, and I want to resize it not by changing cell size, but by changing row/column amount. I understand that it can be done manually, but it would be really tedious work every time for every small change.
 -
 Is there a way to show/hide layers of a placed Designer dokument in Publisher (without the original being changed)? -thx Dave
 -
 Hello. I'm using windows and affinity publisher. Attempting to print some business card artwork and when I use file/print it results in a "fax" window popping up asking me for details of what I want to say in my fax. Am a bit baffled.
 -
 I have been using the Affinity suite for a couple of years now, and the last holdover for me was switching from InDesign to Publisher. With V2 I finally gave it a go, and it has seemed great so far, with relatively no issues in finding similar features. Often, I find that Publisher has better features or just looks/works better overall. Switching between all three apps within Publisher is certainly my favorite part. That being said, I know there are a lot of things missing that others have requested here, and I'm not even entirely sure this hasn't been requested (though I couldn't find it via search). One thing InDesign (and probably other publishing software) can do that Publisher cannot is make two separate sized pages in a spread. Say you are making a book that is A4 and you want to have a tip-in that is A6, you would really only want the right side of the spread to be A6, and the left side of the following spread, but the other pages should remain A4. Currently, Publisher will only allow you to change both pages in a spread to the same size. Adding the ability to change the size of a single page in a spread would be immensely helpful. Thanks for making such great apps. I hope that this is a simple fix, because it would make Publisher that much better.
 -
 In other Mac desktop apps, moving colors around is a simple matter of drag and drop. When I want to use a color in Publisher that I've defined in another application (for example in Color Slurp), I expected to be able to drag the color swatch (a macOS term) from Color Slurp into the Color palette and just drop it on the circle showing the foregound color of the selected object. Unfortunately, this doesn't work. I also have not had success dragging into the Swatches palette, or into the "Fill" and "Stroke" color wells in the toolbar. None of the color picker options in the popup button of the Color tab of the popover which opens when you click these color wells accept drags either. The only way I've found to reliably import a color is to copy its RGB hex value, open the popover from the color well, select "RGB Hex Sliders" and paste the 6-character hex code into the # box. This is super cumbersome. 😞 Is there a way to drag and drop colors from other apps that I'm missing? If not, is there some simpler way to import a color from a color well elsewhere in macOS?
-
 I see many users asking for the feature of importing Markdown templates into their documents. It's normal, with ChatGPT we have an incredible tool to create content for the internet. Having a document with Markdown codes is not the same as having a finished Markdown document. Until Affinity Serif implements that feature, we can do a simple process to get that done. The steps to follow would be: 1. Create a blank document and create the styles H1(#), H2 (##), H3 (###) and Body. 2. Only the (###) (##) and (#) will appear in the template next to the plain text. Now we will do a search and replace (at least in version V2 we can do it like this). Applies the "body" style to the entire document. Replace with this order from greatest to least number of #: "###" without style for "qqq" with style H3. "##" without style for "www" with style H2. "#" without style to "eee" with style H1. Now replace the "qqq", "www" and "eee" by applying "Reset Format" with "" (nothing). You will now have your document laid out in Markdown, clean and with the styles applied. Markdown for Affinity Publisher.mov
 -
 I have the following suggestions for improvement to make working with placing and editing images easier and more efficient: When doing layout, you actually always work with images that are in frames. Until now it is always unfortunately the case that images placed by drag-and-drop are always inserted as a pure image without frames. Therefore, it is always necessary to convert them awkwardly via context menu as picture frames. This is somehow very cumbersome. Couldn't a user preset be included that makes the image placement similar to e.g. InDesign or QuarkXPress (images are automatically in frames)? Also, unlike InDesign and QuarkXPress, determining the image section in a frame is still far too cumbersome in Affinity Publisher, unfortunately. I know there is an image fit feature that is somewhat similar, but you still have to select the correct frame point position in the image options each time so that when you draw the frame closed, you don't accidentally move the inside image inside the frame. There better be an option that you really can close or open the frame from any side without moving the position of the image inside. It also wouldn't be bad if you could preset the different image fitting functions in the preferences as well (how you prefer to work). The manual switching between the different modes could still be left as it is (so that you can still change the mode in between). I hope that some of these things can be implemented in newer versions.
 -
I have the following suggestions for improvement to make working with the Colors palette easier and more efficient: When working professionally, it is usually necessary to use the document color palette, because you usually need a clear color list with the colors that are specifically needed in the document as is the case, for example in most layout programs (such as InDesign and QuarkXPress). Therefore, it would not be bad to be able to set in the preferences that when creating a new document, the document color palette is always automatically selected and displayed as default. In the preferences you could also set the color palette view (e.g. color swatches or list of colors). Furthermore, it would not be bad if this document color palette already contained a few important colors, as in InDesign and QuarkXPress: The three CMYK basic colors, a black which is already set to overprint and a color for registration marks. Until now, unfortunately, you have to create these special colors manually each time. This is very annoying, especially with the black, because you usually need it for the text, which always has to be professionally overprinted. It would also be generally better with the color palettes if you could change some color options, such as color names directly in the color list. Up to now, you always have to open the color dialog window of the respective color first. This could be done like in InDesign, where you click in the list name and move the mouse cursor out a bit. On the other hand, it would not be bad to be able to set some color settings in the color options dialog window, which until now can only be changed via the context menu of the selected color (e.g. spot color/color spot or overprint). In the document color palette you could also add that when you create a new color, you can take one from another palette in the program (e.g. insert a Pantone color into the document palette). I hope that some of these things can be implemented in newer versions. The preset options alone would be a great help when working.
-
 Hi, I just learned about column guides, and realized that they would be useful for the magazine layouts that I'm doing. However, when I tested the column guides, the column shading worked fine, but I was surprised to see that I couldn't snap anything to the edges of the shaded columns or to the center of the gutters between the columns. I checked the snapping options for my document, and "Snap to guides" is enabled. Is snapping to column guides supported in version 1.8.4, and if so, what do I need to do in order to enable this? Thanks, Ken
 -
 In the previous update we have the ability to use formula is it to add dates in Publisher. I'm thrilled to see this feature but I would like to add a little bit more. If there was a way to do a formula for the year to come and designate certain dates. That would be very helpful. As an example, I design a planner from March 2024 to February 2025. I manually and put all those dates. If there was a way that I can have a formula that does that it would make this project go a lot faster. If you have any questions please let me know I will try to keep up with this form.
 -
I started a document in Publisher 2.2 on MacOS Sonama (14.0.0) on a 2020 MacBook Pro (Intel). I continued the working on a 4th gen. iPad Pro 11" running iPadOS 17.0.2. On the iPad, I got a warning about granting permission to access a folder for a placed graphic. When I granted permission, the app crashed. Could not keep it open on iPad. On the Mac, same behavior. The file opens but as soon as an action is taken with the Resource Manager, the first thing that pops up, the app crashes. I can open Publisher using another file and it stays open so far. So I believe the file that crashed the app was corrupted. I'm uploading a .zip with both the file and a text doc containing the diagnostic report sent to Apple when the app crashes. Cartagram-CrashReport.zip
-
 I would see only advantages in a function, that would allow me to swap the position of 2 objects. They don't even need to be the same dimensions. They don't even need to be the same type (image, group, font...). For a flyer I am arranging lots of objects. In my case images, that all have the same size. And I have to arrange them in a grid layout. Now I really "waste" a massive amount of time by moving them into the correct positions. Checking how the images look, if I swap 2 images - e.g. one pic from 5th row/2nd column to 1st row/ 6th column and the other pcitures vice versa. It would genius, to just select two objects and hit a command key and they will be swapped. It would save soo much time instead of dragging and hoping that snapping works fine. And that Publisher orientates on the adjacents objects correctly. Be For me: the fastes way (because of using shortcuts) is: cmd+c object1 - I wanna move from A-to-B cmd+v and move the duplicate of object1 to B - it's correct position (above object2), then cmd+x the duplicate, to see object2 again select and move object2 to the position of the old object1 cmd+v to get get the duplicate of object1 and do the same cmd+x, delete,cmd+v stuff for getting rid of the old object1 and having object 2 only I miss this option since years, when I started working with Affinity Designer. Thanks in advance!!! Schubi
- 18 replies
-
- 1
-
-
- affinity publisher
- positioning
- (and 1 more)
-
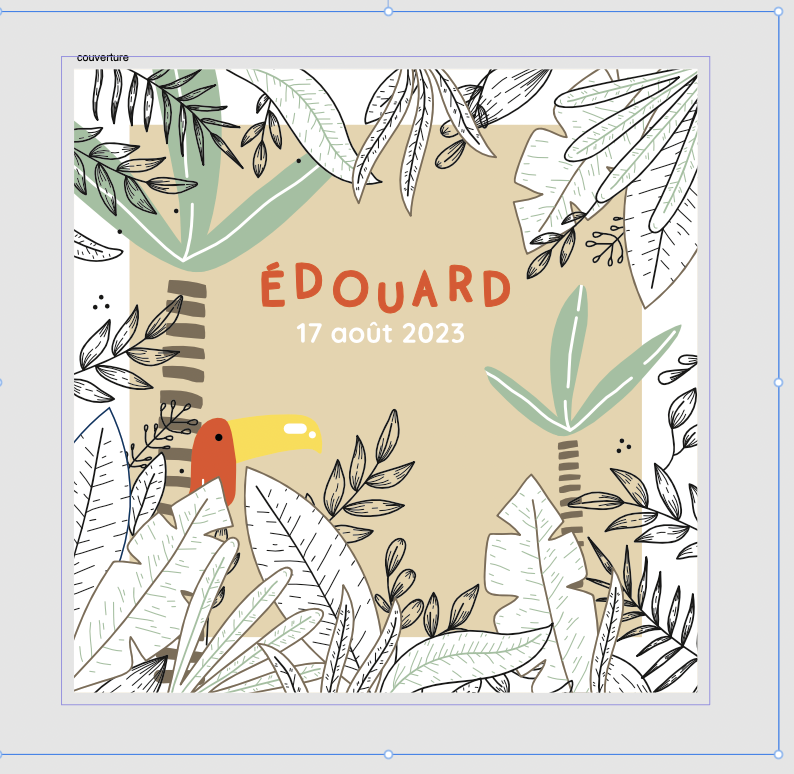
 My question is simple, is publisher supporting import of designer artboards (plan de travail in french) with 5mm full-bleed (fonds perdus in french) ? I was hoping a solution of this problem with 2.2 but the result is still completely uncontrollable (see pictures below) I founded a solution with no artboard in affinity but it is not convenient to make a good design. Did I missed something ? Sorry for my english, i'm french. Emmanuel
-
 Hi, I want to create text inside a shape and was wondering if Affinity offers tools to automatically resize the shape to the length of the text? I have created a rectangle and changed its corners to have a 5mm radius, this radius cannot be changed after adding text to the shape. Are there any alternatives? 2023-10-03 13-45-57.mp4
 -
 Hey community, I'm having issues getting files to stay linked in Affinity Publisher on my iPadOS, using Dropbox. When I link an Affinity Designer file on Dropbox with the Linked Services feature enabled and set up, the files don't stay linked at all. Plus, I'm unable to select other artboards within that particular Affinity Designer file. To provide more context: I was able to succesfully link other file types on Dropbox. iCloud isn't an option for me in this scenario, and I haven't explored it. I have tested the recent 2.2 update, no difference in behaviour, files are immediately marked as missing in the resource tab. This issue hasn't surfaced on either MacOS or Windows. There, linking works fine, and I can also select different artboards after I linked an Affinity Designer file on Dropbox. A speculation I have is that maybe when linking a file within Affinity Publisher on iPadOS, it loads the file just for placement and then deletes it right post-placement, causing the link to break. Given this, has anyone encountered something similar or can offer advice on what might be the culprit? It completely breaks my workflow over different devices. Many thanks for any guidance! Dennis
 -
 Hello, Serif team! Here are some feature requests for Affinity apps: Affinity Photo: Add the capability of seeing missing fonts with Font Manager. It’s a feature in Publisher but not Photo. (Window>Font Manager) All apps: Add the ability to sync saved Studio Presets (and perhaps other global settings) with my affinity account, the cloud, or iCloud; or at least make it easier to understand how to export and import those to other devices I use. Affinity Photo and Publisher: Please add a “rotate 90º right” and “rotate 90º left” button to the View menu bar. It would be faster than clicking rotate left 6 times just to get to 90º. It’s something I’d use every day. Forgive me if some were already posted, I searched and didn’t see anyone mention those. Thank you so much for all the great work you’ve been doing. Have a great day.
 -
 Affinity Publisher, v2.2.0, Windows 10 Home While text wrapping works correctly/as expected with masked objects, only wrapping around the visible part, when the masked object is part of a group, text wrapping applied to the group does not work correctly. The expected behavior would be to have the text wrap the masked portion only, the same as before. Instead, when you apply text wrapping to a group with a masked object in it, the text wraps around the original size of the masked image, as if it were unmasked. This bug is reproducible and occurs with new documents. I have attached a screen capture of the problem. The "Group (Text Wrap)" has the text wrap on. Nothing else has text wrap applied to it. (I couldn't get the xbox game bar to capture the Text Wrap panel.) Affinity Publisher Example.mp4 Example.afpub
 -
Changes in nesting groups between 1.10.6 and 2.X?
Intuos5 posted a topic in V2 Bugs found on Windows
There has been a change to grouping masterpage content in Publisher 2.X that wasn't there in 1.10.6. I didn't find anything in the release notes for 2.0 releases on the forum, so I am not sure this change and behaviour is intentional. Anyways, in 2.2.0, I cannot use the group command to group a masterpage layer with another object. I also cannot drag a masterpage layer in an existing group. I can however use hotkeys and move a masterpage layer inside an existing group. This is 2.2.0: 2023-09-26 19-30-44.mp4 This is 1.10.6: I can group a masterpage layer with other objects, I cannot drag a masterpage layer inside an existing group, but I can use hotkeys to move a masterpage layer inside an existing group. 2023-09-26 19-33-49.mp4 Steps to reproduce 1. Create a new document 2. Create a masterpage with some objects 3. Create another page, master or document page (doesn't matter which) 4. Apply the masterpage to the new page from step 3. 5. Create a new object on the page from step 4. 6. Select the masterpage layer and the new object(s) and create a group (with Ctrl + G) * Notice how the masterpage layer remains ungrouped 7. Try to drag and drop the masterpage layer inside the group * Notice that this is not possible 8. Move the masterpage layer to the top of the document and use Layer > Arrange > Move inside * Notice how the masterpage layer is now inside the group - Compare these steps with 1.10.6 and notice how 1.10.6 allows you to select objects on the page and the masterpage layer and group them with Ctrl+G (step 6.), which 2.2.0 does not. This is on Windows 10.0.19045. Expectation My expectation is that I should be able to organise masterpage content in a left page group and right page group. That way, I can easily detach a master and delete the invisible page items (to prevent the shenanigans from topic below) In case I apply a masterpage to another masterpage, I should be able to nest it inside a group — or Affinity should automatically group masterpage content for facing spreads on a left and right page basis. For the latter case, that would be a new feature and I wouldn't need to be able to group masterpages myself.