Search the Community
Showing results for tags 'affinity photo'.
-

multi Metal work [experiments with primitives and brushes]
StuartRc posted a topic in Share your work
Just another long experiment in AD and AP to share I was really inspired by the tutorials uploaded to the Forum by (Frankentoon) and links to a fantastic website. Character Design Tutorial Brainstorming with primitives and other tutorials produced by Yulia Sokolova So I thought I would play around with ‘primitives’ and some of the new texture brushes recently created. 65 layers and 2 and an embedded Affinity Photo file with another 5 layers mixed with coffee and a couple of late nights ….and this is the crazy result…
-
Apply image and color ranges from ps in ap macros Hi everyone I've been working in a way for making apply image and color ranges from photoshop in affinity photo and finally I've done a macro with a function like that. Affinity photo doesn't have an option for making selections of CMY, but photoshop in color ranges has these options and rgb and highlights, midtones and shadows which ap has. I've done a macro with similar functions for apply image and three macros for making selections of CMY. How to use 1.Import macros 2.Select your current image in which you are working (obviosly) 3.Apply the macro apply image and it'll pop up a sliders for adjusting settings like midtones (gamma) shadows and highlights. These settings are for showing or hidding parts of the mask. 4.Apply and adjustment layer like curves and drag the generated mask into the curves as a child layer. 5.Now you will see the mask in black and white and you can alt + clic to see the mask. 6.adjust the parameters of curves 7. See magic For the CMY macros you can select your image and apply the macro for see the CMY selections for fine tunning and after selection you can add an adjustment layer like curves and i'll mask automatically the CMY selections. I hope this be useful for you. Selections CMY and apply image.zip
-
 I recently downloaded an .abr brush pack created by Andrea Koroveshi (http://andikoroveshi.blogspot.al/). However, I do not use PS (I don't want to sell my soul when there are good, and potentially better options, such as Affinity Photo & Designer). Based on my limited understanding, PS brushes imported into AP do not fully transfer textures. Rather, you only get the brush "tip" or "nozzle." I was curious as to whether anyone has a work-around for this issue. I have pretty much all the AP & AD brushes created by Paolo Limoncelli (which are excellent, btw), but I really want to make use of the many wonderful brushes available from other sources (such as Andrea Koroveshi & Kyle's Brushes). I've discovered that the PS brushes I import act more like "stamps" as opposed to brushes. While I'm sure tinkering with the settings will help- I'm not sure where to really begin, so any advice I can get would be great. Thanks!
 -
Well, these are not designs per se but just a sample of photos I took a couple of weeks ago I've done editing using the develop persona in affinity photo and nothing else. Are they good enough or what else can I do that to improve them? One of the persons in the photo said she wants softer photos - but she's thinking of those cartoonish filters from some mobile app.
-
 Many time in graphic design we have question which color use. So I think very usefull will be add sugesting color feature. Working example of this is Adobe Kuler website. Why? It is a automatication process of choosing new color. Some people do it by intuition, by other by math. For beginner and I think many professional it can improve workflow create for example few version of web layout or for photographers what background choose to complete picture. More explenation (with great free ebook on using colors with curves) is on Wacom page Wacom Color Master here - ebook titled "Color Theory: Understanding and Mastering Curves" (I'm recommed this lecture) and in basic of colors in video Natalia Taffarel on YouTube. Simply this feature is help to choose colors well working together. What? Type of sugesting colors: Complementary Split Complementary Triad Tetrad (Double Complementary) Analog Accented Analog Custom Options change from sugested colors saturation and brightness to still get harmony of colors. How? 1. Choosing color It's simply choose color and get colors matching to type fx. Triad - that is as Adobe Kuler does on webpage. After that we can add colors as pallete to document / application with option setting global color to better changing them in te future. 2. Finding pallete Detecting pallete used in document. Based on that sugesting which color match to selected type (fx. complementary) or not. On photo is finding which colors you can use to background / text descibes etc. 3. Sets of color in pallete First you create pallete to use in document and make them as set color with global colors. After that you make new using option 1 or option 2 and after that you create new set. Then you can change set using in document. In Affinity Designer for example you can create duplicate project linking to base (when you choose source copy change too) on Artboard. Only difference is that you for Artboard 1 choose set 1, and for Artboard 2 you choose set 2 of colors. On Artboard 1 you have typical version on website layout and on Artboard 2 you have version for morning (news websites use this when some very important person died like president, pope etc.). In Affinity Photo it can be classic set of color for older people more toned and more dynamic for young people. For example photographer makes elegant frame for photo with two version of background fx. making avatars with photo. Sets color in my vision are variation of colors within document pallete. So we have all sets colors in document pallete, but by choosing set we choose which global color are used in document now. For example I create frame and set one set of global colors named "boy" and second set named "girl". By clicking which set I use I get variation using in label design now for boys (set "boys") or girls (set "girls"). Summary I don't know why many application is not doing this on the standard. Choosing right color is a base of graphics and photo editing. It is not look like a very complicated make color wheel and sugesting color on them. For me it could be very usefull option for many of users. If someone feel well choosing color how Affinity application do now then in can simply uncheck / select option "not sugesting". For others sugesting color is automatication color theory without getting a long lecture with math calculation for it.
 -
Affinity photo picture is not loaded ICC open after forcibly loaded into configuration files that can change the picture color like PS can not load allows users to open their own choices after conversion to the desired pattern or better model
-
I've been thinking of spending a summer in Cuba and I drew this. Sometimes you go to places before actually being there
-
 I know folks are excited about the new Light theme in the Affinity 1.6 release, but I'm wondering what new features we can expect to see in Affinity Photo 1.6? I've seen the very long road maps lists, but is there a definitive list somewhere of which will be included with 1.6? Thanks in advance!
 -
 Hello, I'm trying to do something very simple: I'd like to precisely crop an image, and hence I use custom ratio and position my crop gizmo over the image. I then switch to zoom (Z) and zoom in, pan, etc. I select the crop tool again (C, or by toggling Z again) to position precisely, but I realize all of my positioning and the custom ratio settings are now gone, and the tool is back to its default settings. They never persist. Is this intentional? I can't see how that can be useful. Of course, I can use the trackpad on my MacBook to zoom without ever switching from the Crop tool, but that's not optimal. One misstep and I lose all the settings again. This is unfortunately not the only place where settings don't persist in Affinity. Everything should always persist, because users need to go back and forth to do certain operations. If there's a way to do this, please let me know. Thanks.
 -
 A bit of Fun and practice using Affinity to make an album cover. :) Album Covers: Here are the rules: 1 - Go to Wikipedia. Hit “random” or click http://en.wikipedia.org/wiki/Special:Random The first random Wikipedia article you get is the name of your band. 2 - Go to Quotations Page and select "random quotations" or click http://www.quotationspage.com/random.php3 The last four or five words of the very last quote on the page are the title of your album. 3 - Go to Rgbstock and click on “RANDOM” or click http://www.rgbstock.com/random The third picture, no matter what it is, will be your album cover. 4 - Use Affinity Designer/Photo to put it all together and share your results. I look forward to seeing your pictures. :) Unbelievably my random wiki article was actually a music page :o hence the band name "Ocean (B's song)" and my picture was a fisherman! Not so sure about the title though :)
-

affinity photo Retro style poster illustration [AP]
Frankentoon Studio posted a topic in Share your work
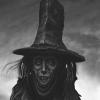
Hello there! Just wanted to share a recent commission I finished a couple of days ago using Affinity Photo and a couple of custom brushes. The Ad agency wanted to have something in the 80's horror movies fashion, with a couple kids fighting against each other during a roadtrip from hell. I really don't know what will be the final use for this, but I had lots of fun making this type of illustration. Any comment good or bad, will be welcome as always! And here are some previous layout sketches. The original title was a little bit weird haha...- 19 replies
-
- 12
-

-
- concept art
- graphic design
- (and 2 more)
-
 Hello There are pictures that recorded jpeg and raw at the same time in Apple Photos. Do not you know how to open Apple Photos raw files from Affinity Photo? Thank you.
 -
 Hello, I have a problem with the separated mode on Affinity Photo. I use it on a Macbook Pro and most of the time I use an external monitor. I think what I'm experiencing might be the result of switching between monitors, as I've noticed Affinity Photo and Designer don't always like it when I have an external display connected. My problem is that I've somehow lost my top toolbars (normal and context) completely on separated mode. They are definitely on, and visible on normal mode, but on separated mode they move somewhere out of the screen. They aren't visible on any of my desktops. I can get them to the dock if I click minimize from the Window menu, but when I click them open they move out of my screen edges again. Is there a way to restore all the toolbars to their normal position on the separated more? Or some method to gather them to one desktop? This is pretty frustrating and I haven't found any way make separated mode usable again.
 -
From five (badly messed up images turned into this mashed up digital mayhem. Regards. Sharkey
-
Hi there, it is not possible for me to export PDF´s out of Designer and Photo. I´ve tried several settings but is not possible to export a PDF file. Everytime i get the message that "The file could not be created"! Is there any idea about that? Thanx a lot!!
-
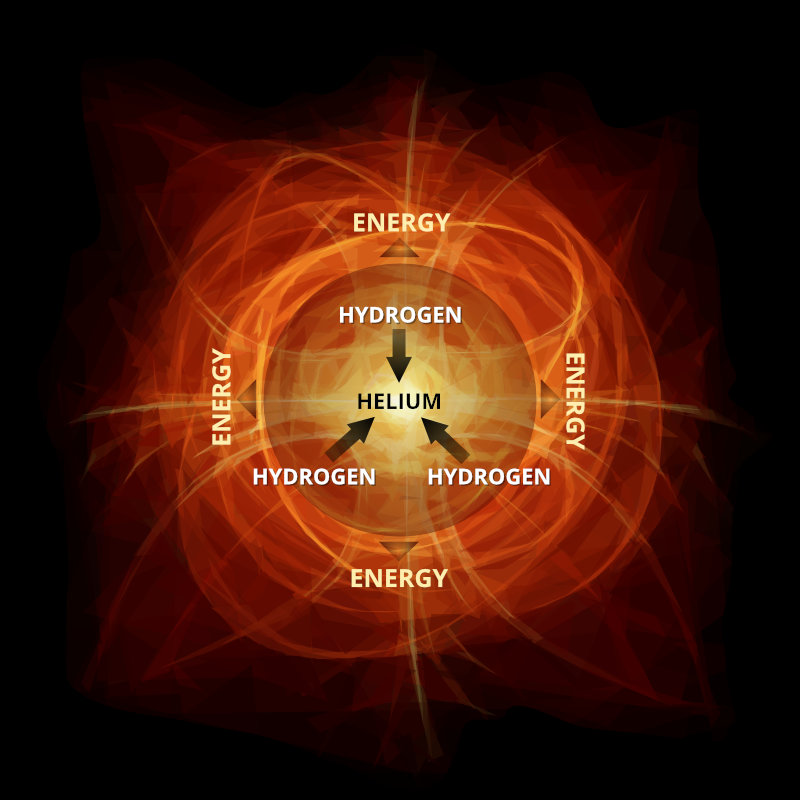
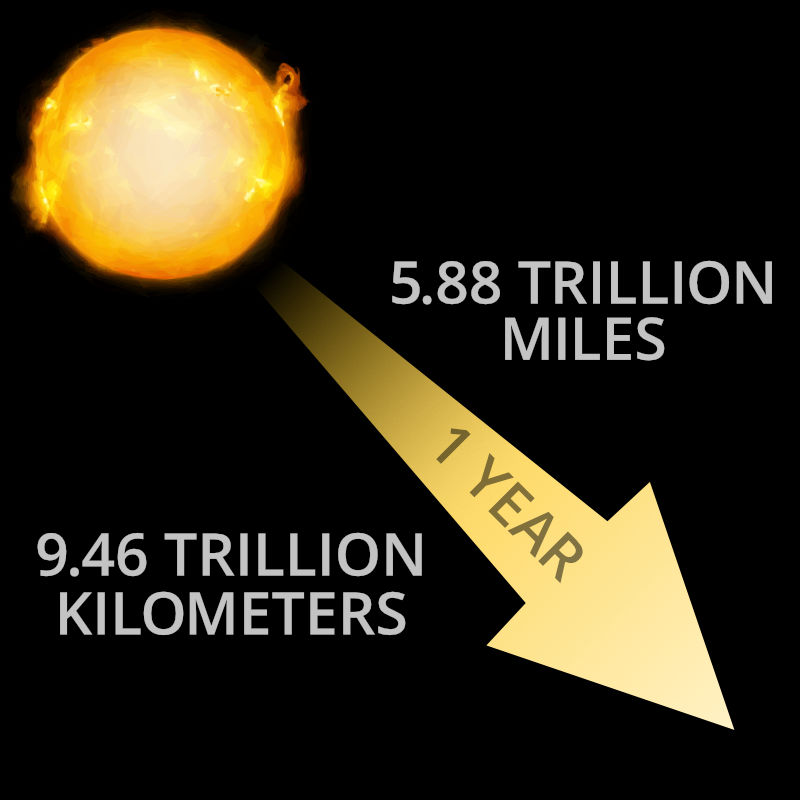
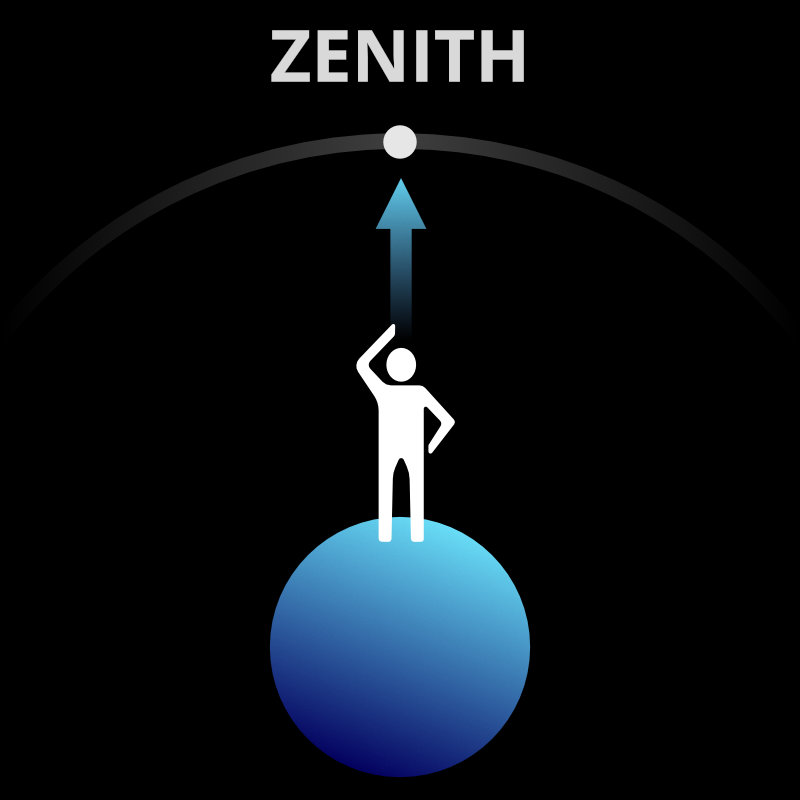
Here are a few of the illustration that I created for a site I just finished working on. All the final images were SVG files but many of them started with a photo reference or with original art created in Photo. There are a few that were all done in Designer as well. For some of the images (such as the quasar and the fusion image) I also used Flame Painter which is a fractal paint application and would then bring those elements into Photo to composite and adjust them to get the final art. I can go into more of the process if anyone is interested. Cheers! Jeff The Universe from A to Z
-
- 2
-
-
- affinity designer
- space
- (and 4 more)
-
 Hello friends :) Can anyone help me with centring text vertically in Affinity Photo? Can find horizontal no problem, but vertical alignment feels elusive. I've done some searches and found a few people asking for this back in 2015, but nothing conclusive about whether the feature exists or will ever exist. Why I want it in case you can help me find a better way :) I'm doing cover design for a book and want to align the text on the spine (currently rotated 90 degrees) so that it is centred. "Roughly right" with the Mark 1 eyeball is how I'm doing it at the moment, but I suspect the Mark 1 eyeball has a bit of an error rate. Thanks in advance. Affinity feels like the best software purchase I've made this year.
-
 When you load pictures (File|Open|select all of the pictures in a folder), the pictures are not loaded in any kind of sequence. They should load in file name sequence, and the picture that appears in your workspace should be the FIRST one. I tried the operation three different times, and all three times, a different picture appeared in the window. I am taking the time to report this bug because I really care abouy seeing this program become mainstream.
 -
 I would like to know how to move a layer by one pixel at a time, every time I move it I find it snaps to moving by more than one pixel. In order to do this with the mouse I need to zoom out more than I want to. Is there a key command that will nudge the layer vertically or horizontally by one pixel? Thanks
 -
Bit of painting practice here on the laptop while cooking.
- 5 replies
-
- 7
-
-
- painting concept art
- painting
- (and 2 more)
-
Hello everyone, I am from China affinity users These are photos using affiityphoto retouching Works published inBehance:https://www.behance.net/gallery/51524127/forthputting-Affinityphoto-Exercise
-
Produced from NEF file in AP.
- 1 reply
-
- 2
-
-
This my Border Terrier waiting for my wife and myself to let him out. You can just make out the new puppy laying in its cage 'bottom right'.
-
- 1
-
-
- dog
- reflection
- (and 1 more)
-
I made some curves adjustments for AD and AP which I'd like to share with you. the attached Affinity file features embedded documents so that you can easily preview the effect of all curves on a single photo and then choose a curve that fits best/ gives you a good starting point/ idea. You can add them to your AP though opening the document, selecting each group, selecting the "curves" adj, so that it's panel opens up, click "add preset". (I've made a feature request to make that easier) You can then access them by the "view > studio > adjustments" panel which is active by default (only available in AP) please don't overdo it blend modes, opacity and blend ranges can, and should be adjusted upon your needs for more information about such techniques you can have a look over here https://affinity.ser...er-amateur-pro/ cheers PS: similar presets for the "channel mixer" are available here PS: similar presets for "LUT" adj. are available here PS: here is a great resource to really understand curves EDIT: just added some Black and White adjustments too FWIW >> curves mix.afdesign << >> BW mix.afdesign <<
-
(super)Quick intro: I've been using a.Photo and a.Designer for about 2 years and I'm in love with the apps. I am a web designer who can't draw a thing. I bought iPad Pro, Pencil, and (ordinary) paper, pencil and fine-liners (am I calling it right?) I've been fascinated by artists all around the world and I am diving into the process of learning and practicing my drawing skills. I call it.. (wait for it).. The Incredible Drawing Adventure Here's a quick video where I talk about software (with a timestamp for Affinity Photo), and yeah, if you feel like it — let's do it! https://youtu.be/h0kEFL5Ccps?t=1m20s